1
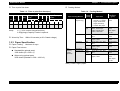
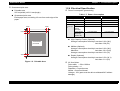
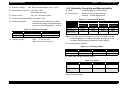
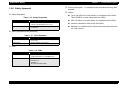
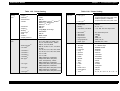
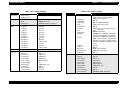
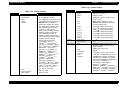
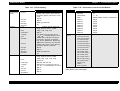
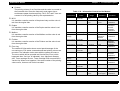
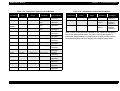
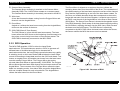
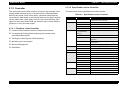
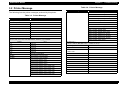
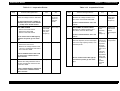
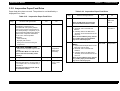
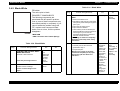
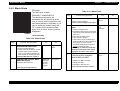
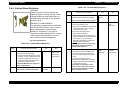
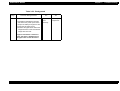
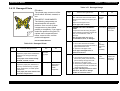
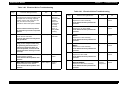
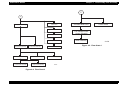
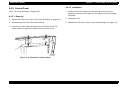
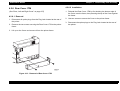
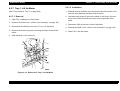
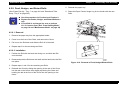
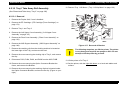
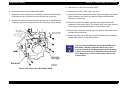
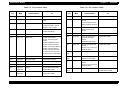
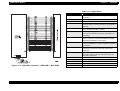
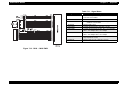
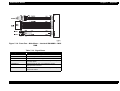
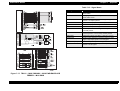
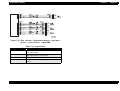
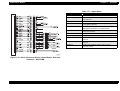
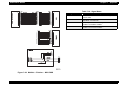
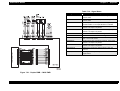
EPSON EPL-N4000 Chapter 3 Troubleshooting 3.4.3 Black Prints Problem The entire print is black. Table 3-33. Black Prints SUSPECT COMPONENTS The following components are associated with this specific problem. One or more of these components may have failed partially or completely. If you cannot isolate the problem using this FIP, replace each component listed below, one at a time, until the problem disappears. Step 3 4 1 ROS WINDOW INSPECTION Yes Go to step 2 1. Remove the EP Cartridge. 2. Inspect the ROS Window for a sheet of paper that may have lodged in front of it and could be blocking the laser beam from reaching the Drum. Is the ROS Window free of paper? 2 CONTROLLER OR HOST SOFTWARE ISOLATION Generate a Grid Test Print. Is the test print image normal? Rev. A No Remove the paper 5 Replace the ESS PWB or reload the Host Software IMAGE DEVELOPMENT INSPECTION 1. Remove the Rear Cover 2. Generate a Grid Test Print and switch OFF printer power halfway through the print cycle. 3. Open the Left Upper Cover. 4. Open the Drum Shutter. 5. Hand rotate (counter clockwise) the Main Drive Motor to advance the Drum far enough so you can see the developed image area on the Drum before it reached Transfer. Is the image on the drum completely developed; with sharp, black, easily read areas and clear, white areas? Table 3-32. Black Prints Actions and Questions EP CARTRIDGE REPLACEMENT Install a new EP Cartridge Is there a normal image on the paper? •LVPS Assembly Step Actions and Questions MAIN CONTROLLER(C262MAIN) BOARD REPLACEMET Yes No Problem solved Go to step 4 Replace the BTR Assembly. Go to step 5 Problem solved Go to step 6 Go to step 3 1. Replace the Main Controller Board(C262 Main). 2. Generate a Grid Test Print. Is the printed Test Pattern normal? 96