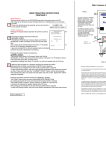
1
Storm Controls Ltd. 1, Tennant Avenue, College Milton South, East Kilbride G74 5NA SCOTLAND Tel: ( 44 ) ( 0 ) 1355 571781 Printman 2 e-mail: [email protected] web site: stormcontrols.co.uk In-Cab Temperature Recorder QUALITY ACCREDITATION TO ISO 9001:2008 ALL RIGHTS RESERVED Storm Controls Ltd. Reg. Office 1, Tennant Avenue, College Milton South. East Kilbride G74 5NA SCOTLAND User & Installation Manual Storm Controls Ltd. reserve the right to make improvements in the product described in this manual at any time without notice. Storm Controls Ltd. cannot accept liability for any damages or loss of information resulting from the use of information in this document. QUALITY ACCREDITATION TO ISO 9001:2008 Approved CAD REF = PRINTMAN 2 MANUAL.PUB VERSION 5 14/01/2014 © SCL 2009-2014 Notes: ALARM CIRCUIT IF FITTED Note: A standard Printman 2 unit does not have an alarm function fitted. The alarm circuit is only fitted at the request of the Client during the ordering and manufacturing process. PRINTMAN 2 USER REFERENCE MANUAL CONTENTS 1. If fitted a two metre long cable is provided to allow output of the Alarm switching circuit for Client use. 2. In an Alarm condition the “ Alarm -ve ” cable output ( Blue Wire ) switches to – ve Battery Volts whilst the “ Alarm +ve ” cable output ( R ed Wire ) is held at just below +ve Battery Volts. The Alarm output is suitable for driving loads of up to 1 amp direct, however switching Page Section 1. User Information 3 2. First Power on 4 of car type incandescent bulbs with this circuit is not advisable since these bulbs can have large inrush currents at start up which could damage the recorder alarm output circuitry. It is advisable to use an external relay in these circumstances, with the coil switched by the alarm circuit and the relay contacts switching the lamp. If an Alarm Relay is required, use a relay with Coil Operating Volts = Volts on the battery input terminals. **For polarised relay coils connect the positive end to “ Alarm+ve ” The Red output wire. 3. Setting Default Options (User Parameters) 4 4. Operating Instructions 5/6 5. Menu Module Information 6 6. Features & User Access 7/8 7. Installation Guide 8/9 8. Read Me 10 ** For polarised buzzers connect the positive end to “ Alarm+ve ” The Red output wire. Maximum Permissible Alarm Terminal Load Current = 1A dc max Alarm O/P Cable Alarm+ve = Battery Volts – 0.6v + Alarm-ve switches to 0 v when the Alarm activates. Relay + Buzzer Coil MAKE SURE THAT THE RED & BLUE WIRES DO NOT TOUCH WHEN THE ALARM IS ACTIVATED SINCE THIS COULD DAMAGE THE ALARM CIRCUIT COMPONENTS. Page 2 Page 11 8. Read Me 1. USER INFORMATION THE PRINTMAN 2 STORES THE CONFIGURATION OF SENSORS AND EVENTS WHICH WHERE CONNECTED AND OPERATIONAL DURING ITS LAST POWER BOOT UP. IF FOR ANY REASON THE NUMBER OF FITTED SENSORS NEEDS TO BE ALTERED. ONCE THE NEW CONFIGURATION HAS BEEN WIRED AND CONNECTED TO THE PRINTMAN 2 UNIT YOU MUST: UNPLUG THE BATTERY POWER SOURCE, WAIT 20 SECONDS AND THEN PLUG THE POWER SOURCE BACK INTO THE PRINTMAN RECORDER. ALLOW A FURTHER 20 SECONDS FOR THE UNIT TO GO THROUGH ITS BOOT UP ROUTINE AND FOR THE SOFTWARE TO INITIALISE TO THE NEW CONFIGURATION BEFORE PRINTING. UNLESS THIS SIMPLE PROCEDURE IS FOLLOWED THE NEW SENSOR CONFIGURATION WILL NOT BE RECOGNISED AND THE UNIT WILL NOT STORE OR PRINT OUT THE NEW SENSOR CONFIGURATION. If only 1 temperature probe is fitted always use Sensor position T1. 9. USING ALARM OUTPUT IF FITTED Note: The Alarm output will only be fitted if specified at the time of ordering. Default Alarm Values: Alarm Ranges: Frozen Chilled -18 Celsius to – 25 Celsius. 0 to +8 Celsius. Alarm Settings: Alarm Delay: Select: Frozen, Chilled or Off Select: 0-60 mins. Off 15 mins. Since a Printman 2 Recorder has no Display fitted, in order to access these parameters to change them, the user needs one of the following tools: 1. A Storm Menu Module or 2. Storm Cdata software running on your PC or Laptop. Page 10 Congratulations on buying a Storm Printman 2 In-cab Vehicle Recorder we are sure that it will give you a long and trouble free service. Your Recorder has been Designed & Manufactured under stringent BSI ISO 9001:2008 accredited procedures and processes using the latest automatic assembly techniques and technology. Standard Printman 2 Recorders accept between 1 and 2 temperature sensor inputs, plus a magnetic door switch input. 3 inputs in total. If specified at the time of ordering a further 2 temperature inputs, 1 defrost input and 1 alarm output can be fitted. Important Information PRINTMAN2 INTERNAL RECORDER PRINTMAN 2 TYPE SCL SM2 The following advice must be followed at all times. Failure to do so may invalidate the recorder warranty: Make sure you disconnect the vehicle battery before starting any wiring alterations. The unit warranty does not allow for users tampering with the unit or gaining access to the internal printed circuit board or components of the unit. Remember to seal any cable entries made through the vehicle body with a suitable water proof sealant in order to ensure that water does not get into the vehicle or recorder interior. Only qualified and Storm approved personnel should attempt to carry out repairs or alterations to the unit or its software. See warranty card for details of warranty returns procedure. Page 3 2. FIRST POWER ON 2.1 2.2 2.3 2.4 2.5 After the installation wiring is complete and the sensors and door switch or defrost connection installed, switch on the unit by plugging the power plug into the Printman unit. Once the Green LED lights WAIT 30 SECONDS for the unit to configure itself, and check how many sensors are fitted. After 30 seconds the unit is ready for operation . At this stage the Printman 2 is fully operational and can be left to record information obtained from the attached sensors, door switch or defrost if any. Providing that the default settings supplied within the unit are acceptable, then the unit is fully operational. Certain parameters are preset at the factory for your convenience these are called the default values. The default values set within the Printman’s memory on delivery are listed below: Company Name: Vehicle Registration: Recording Sample rate: Time Date 2.6 2.7 Storm Controls (See section 3) Pxxxxx (See section 3) 15 minutes (fixed) Current date in your Region Current time in your Region These default values will be operational at the first switch on and throughout the units life unless changed by the user. Any parameter that require changing, can be Altered later as detailed in section 3 below. Your Printman recorder has an internal battery.The battery is used to keep the internal clock running when the vehicle battery is disconnected or flat. The Printman unit will retain the correct time, for a period in excess of 5 years and automatically compensates for Summer & Winter hour changes and leap years. 3. Setting Default Options ( User Parameters) The default parameters can be customised in a number of ways to give Clients flexibilty in use. 3.1 Factory Set: Parameters can be factory set against specific orders to show your or your Client’s Company name and individual vehicle registration. If you are a regular user you may wish Storm to set some of these parameters as standard to your products at each sale. 3.2 Menu Module Tool This new tool allows setting of Printman 2 user parameters direct from the unit keypad. User settings such as, Clients name, Vehicle reg., time, date, sample rate and alarm settings can be configured. 3..3 Software Set A software disc is available which allows setting of parameters using Windows and a PC or Laptop by connecting the Printman to a PC via its RS232 data input port located under the front cover. In this facility, time and date are automatically down loaded from the host computer so date and time must be correct on this machine to affect a correct outcome. This unit requires a version 2 (D-Type RS232) download cable and cannot be used with a version 1 cable. Page 4 The Printman 2 is designed to operate from an input dc battery supply of either 12 or 24 volts dc. But will operate correctly with input voltages of : Minimum operation input volts = 9 volts dc. Maximum operation input volts = 36 volts dc. The Printman 2 should be fitted to the rear or side of the inside of the driver cabin using suitable screws. NEVER FIT THE PRINTMAN SPP2M2 OUTSIDE OF THE CABIN, AS IT IS NOT WATERTIGHT. The Printman 2 as standard is supplied with 2 sensor probes which connect into the sockets on the bottom face labelled T1 & T2 . There is also a socket for our optional door open sensing switch. An optional additional 2 sensor inputs, 1 alarm output and 1 defrost facility are available at time of ordering. The sensors wire should be protected and routed through the rear cabin on small vans and to the front, via the main wiring and to the rear for box vans with swinging cabins. Sensor T1 should be fitted as near as possible to the freezer sensor at the return air duct. Sensor T2 should be fitted approx. two thirds back towards the rear of the van and secured . The power cable should be connected via the inline fuse direct to the battery (brown = +ve & blue = -ve) before plugging into the Printman 2 unit. The sensors must be fitted before the unit is powered up to ensure all connected sensors are recognised by the unit during its power up routine.. Page 9 4. OPERATING INSTRUCTIONS DESCRIPTION There are three buttons on the PRINTMAN 2 key pad and a green power-on LED. After initial set up the green power LED light will be on, indicating the unit is recording normally. There is no functional set-up required, as the unit is factory set to operate as follows. FIG. 2 TICKET PRINTING Pressing the keypad buttons operates the printer to print as follows:- REMOVE PRINTER RIBBON, BY LIFTING OFF. FIT NEW PAPER ROLL IN PAPER BIN WITH PAPER END AT THE BOTTOM. PUSH FREE END OF PAPER INTO PAPER FEED SLOT ON THE BOTTOM OF PRINTER MECHANISM AND TURN THE RUBBER PAPER FEED ROLLER USING THUMB, TO FEED PAPER ROUND ROLLER AND OUT OF FRONT OF PRINTER THEN PULL TO LEAVE 150 mm APPROX LENGTH OF PAPER. ALTERNATIVELY THE PAPER CAN BE FED THROUGH WITH THE PRINTER RIBBON FITTED AND WHEN THE PAPER IS PUSHED INTO THE PAPER FEED SLOT PRESSING ANY PRINT BUTTON TO TURN ROLLER & FEED PAPER THROUGH PRINTER MECHANISM. REMEMBER TO REFIT INK RIBBON IF IT WAS REMOVED. TENSION THE RIBBON USING THE SMALL TENSION WHEEL ON THE RIBBON PLASTIC COVER PRINTER MECHANISM PAPER PAPER BIN RUBBER PAPER FEED ROLLER PAPER FEED SLOT PAPER Pressing this button starts the printing of a JOURNEY TICKET. The journey ticket shows the Company Name and Vehicle Identification number, date, time and current values of sensors T1 & T2 similar to the delivery ticket then prints the recorded sensor temperature readings back every 15 minutes ( or other set sample rate) for 24 hours. SAMPLE OF DELIVERY TICKET STORM CONTROLS VEHICLE PMP02000 DATE 12/08/10 TIME 14:37 DELIVERY TICKET T1 19.5 CURRENT VALUES T2 -19.9 SIGNED . . . . . . . . . . . . . . . . PAPER ROLL 7. INSTALLATION GUIDE FOR THE PRINTMAN SPP2M2 PLEASE CHECK THE CONTENTS OF YOUR CARTON AS FOLLOWS CARTON CONTENTS:1 2 1 1 1 1 1 1 1 Pressing this button starts the printing of a DELIVERY TICKET. The Delivery Ticket shows Company Name and Vehicle identification number (if loaded on initial set-up) then date, time and current values of temperature for sensors T1 (normally return air) & T2 (normally compartment air). A space is provided for the drivers signature before handing to customer as proof of temperature at delivery. x PRINTMAN 2 UNIT x 15 METRE SENSORS (or lengths as specified at time of order) x POWER CABLE x SPARE PAPER ROLL x FUSE x INLINE FUSE HOLDER x BLACK CABLE TIE x USER MANUAL x DRIVER REFERENCE CARD A space is also provided for a signature verifying the results have been checked before the Daily Journey ticket is filed for future reference. The printing can be stopped at any time if only a partial ticket is required. To stop the printing function, wait until a few Sensor temperature lines have been printed out then, Press and hold down the “JOURNEY TICKET” button until the printing stops. Then release the button, the printer will start again and print out the “Signed line” before stopping completely. Pressing this button starts the printing of a PRINTALL TICKET. The Printall Ticket shows the same information as the Journey Ticket but continues beyond 24 hours and will print all the data stored in memory. The Printall Ticket is used if a Journey Ticket is not taken on a journey but a record is still required for greater duration than 24 hours. The printing can be stopped at any time if only a partial ticket is required. To stop the Printing function, wait until a few Sensor temperature lines have been printed out then, Press and hold down the “PRINTALL” button until the printing stops, then release the button, the printer will start again and print out the “Signed line” before stopping completely. Page 8 Page 5 6. Main Features and User Access There is no limit to the quantity of Delivery tickets printed during each journey period. Similarly any number of repeat Journey or Printall tickets can be printed out as required using the procedures as detailed above. The Temperature information printed by the Delivery ticket is a direct reading of the temperature pertaining at the time the “Delivery Ticket” button was pressed. FIG. 1 The Temperature information printed by the Journey & Printall buttons is taken from readings previously stored in memory and may not be the same as the temperature pertaining at the time of button press due to fluctuations of temperature in the compartment with time. Print Back From Feature The Printman 2 recorder has a facility that allows it to Print Back from a previously stored date. This saves a lot of time and paper if a specific date in memory needs accessing without printing out a large quantity of data not of interest. A Menu Module Tool, available as an accessory from Storm Controls, is needed to access this function and full instruction are supplied with the module. 5. Menu Module Tool Information The new module allows other Printman 2 features to be accessed and is used as a simple tool to plug into the RS232 port connector of any Printman 2 recorder and using the front mounted keypads to: 5.1 Set User Parameters such as Client Name, Vehicle Reg. Time, Date, Sample Rate, Alarm Settings, etc.. Thereby eliminating the need to connect to a control PC or laptop for user setting. 5.2 Access the Print Back from feature. 5.3 Temporarily monitor the operation of the unit and ascertain the measured temperatures on each sensor and show alarm and defrost status 5.4 Enter the menu to allow access to user settings. 5.5 See the Menu Module user manual for full operating instructions. STORM PAPER FEED SLOT. TO GAIN ACCESS TO PRINTER RIBBON, PAPER ROLL , AND RS232 COMMS. PORT , TURN BLACK LATCH 1/4 TURN ANTICLOCKWISE USING A COIN THEN REMOVE PRINTER COVER, BY LIFTING FROM THE BOTTOM. Printman 2 RS232 COMMS. PORT & MENU MODULE CONNECTION (Under Cover) TO REPLACE COVER, LOCATE SLOT AT TOP THEN PUSH SHUT AT BOTTOM THEN TURN LATCH 1/4 TURN TO SECURE. ENSURE PAPER IS FED THROUGH SLOT AND IS FREE TO BE PULLED OUT. KEYPAD GREEN POWER ON LED SUPPLIED CABLE TIE MUST BE FITTED TO SECURE SENSOR CABLES TO THE POWER CABLE TO SUPPORT THE WEIGHT OF THE SENSOR CABLES. When the setting/monitoring task is complete, the Menu Module is simply unplugged and used to access other Printman 2 units or stored away until required in the future. Page 6 Page 7