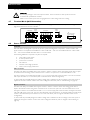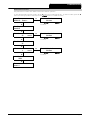
1
USER MANUAL
CONTENTS
Contents
Section 1
Section 2
2.1
2.2
2.3
2.4
Section 3
3.1
3.2
3.3
Section 4
4.1
4.2
4.3
4.4
4.5
4.6
4.7
4.8
Section 5
5.1
5.2
Section 6
6.1
6.2
6.3
6.4
Section 7
7.1
7.2
Section 8
8.1
8.2
8.3
8.4
8.5
8.6
8.7
Section 9
Caution Statements ................................................................................................................................................................3
General Description ...............................................................................................................................................................5
Overview .......................................................................................................................................................................................................................... 5
Feature List ...................................................................................................................................................................................................................... 5
Key Features.................................................................................................................................................................................................................... 6
Model Codes.................................................................................................................................................................................................................. 7
Specifications...............................................................................................................................................................................8
Current Ratings ............................................................................................................................................................................................................. 8
Key Components ...................................................................................................................................................................................................... 11
General Technical Data......................................................................................................................................................................................... 12
Installation..................................................................................................................................................................................14
Mounting Instructions - Power Assembly................................................................................................................................................... 14
Mounting Instructions - MVS Controller ..................................................................................................................................................... 16
Power Terminations................................................................................................................................................................................................ 17
Earth Terminations................................................................................................................................................................................................... 19
Control Terminations............................................................................................................................................................................................. 19
Control Wiring........................................................................................................................................................................................................... 19
Terminal Block (MVS Controller).................................................................................................................................................................... 20
Power Circuits ............................................................................................................................................................................................................ 20
Internal Wiring........................................................................................................................................................................26
Internal Wiring (models V02 ~ V07)............................................................................................................................................................ 26
Internal Wiring (models V11 and V13)........................................................................................................................................................ 27
Keypad and Feedback.........................................................................................................................................................28
LEDs ................................................................................................................................................................................................................................. 28
Menus .............................................................................................................................................................................................................................. 28
Security ........................................................................................................................................................................................................................... 29
Displays........................................................................................................................................................................................................................... 30
Programming Menu .............................................................................................................................................................33
Programming Menu ................................................................................................................................................................................................. 33
Parameter Descriptions......................................................................................................................................................................................... 35
Commissioning .......................................................................................................................................................................53
Commissioning Menu............................................................................................................................................................................................. 53
Commissioning Menu............................................................................................................................................................................................. 53
Simulation Tools........................................................................................................................................................................................................ 53
Low Voltage Test Mode....................................................................................................................................................................................... 57
Thermal Model Reset............................................................................................................................................................................................. 58
Parameter Archive ................................................................................................................................................................................................... 58
Logs Menu..................................................................................................................................................................................................................... 58
Operation..................................................................................................................................................................................62
9.1
9.2
9.3
Using the MVS to Control a Motor............................................................................................................................................................... 62
Operating States........................................................................................................................................................................................................ 62
Motor Protection...................................................................................................................................................................................................... 63
Section 10
Troubleshooting.....................................................................................................................................................................69
10.1
10.2
710-03971-00C
Protection Responses............................................................................................................................................................................................. 69
Diagnosing Problems .............................................................................................................................................................................................. 69
MVS
Page 1
CONTENTS
Section 11
11.1
11.2
11.3
11.4
11.5
11.6
11.7
Section 12
12.1
12.2
Page 2
Maintenance.............................................................................................................................................................................76
Maintenance Schedule ........................................................................................................................................................................................... 76
Tools required ............................................................................................................................................................................................................ 76
Thermal Image............................................................................................................................................................................................................ 76
Contactor Maintenance ........................................................................................................................................................................................ 76
Isolation Switch Maintenance............................................................................................................................................................................. 76
Phase Arm Assembly Alignment (models V11 and V13) ................................................................................................................. 77
Removing Phase Arms (models V11 and V13)....................................................................................................................................... 78
Appendix ...................................................................................................................................................................................80
Parameter Record .................................................................................................................................................................................................... 80
Accessories................................................................................................................................................................................................................... 82
MVS
710-03971-00C
CAUTION STATEMENTS
Section 1 Caution Statements
This symbol is used throughout this manual to draw attention to topics of special importance to the
installation and operation of MVS Series soft starters.
Caution Statements cannot cover every potential cause of equipment damage but can highlight common causes of
damage. It is the installer's responsibility to read and understand all instructions in this manual prior to installing,
operating or maintaining the starter, to follow good electrical practice including applying appropriate personal
protective equipment and to seek advice before operating this equipment in a manner other than as described in this
manual.
•
Read and understand the entire manual before installing operating, or maintaining the starter. Follow all
applicable local and national codes.
•
Apply appropriate personal protective equipment (PPE) and follow safe electrical work practices.
•
Use only electrically insulated tools and clothing and insulated protective gear when working around electrical
equipment.
•
Disconnect all power and ensure that the starter is de-energised before servicing the starter.
•
Do not rely on visual indications such as switch position or fuse removal for determining a de-energised
condition. Always assume that a terminal is energised until it is checked with a properly rated meter to
ensure that a terminal is de-energised and grounded.
•
Isolate the soft starter completely from the power supply before attempting any maintenance work.
•
Always use a properly rated voltage sensing device to confirm power is off.
•
Before servicing the starter, ensure that all static charge has been discharged by grounding it with an
appropriate grounding device.
•
Metal swarf in the cabinet can cause equipment failure.
•
Do not apply voltage to the control input terminals. These are active 24 VDC inputs and must be controlled
with potential free contacts.
•
Contacts or switches operating the control inputs must be suitable for low voltage, low current switching (ie
gold flash or similar).
•
Cables to the control inputs must be segregated from mains voltage and motor cabling.
•
Some electronic contactor coils are not suitable for direct switching with PCB mount relays. Consult the
contactor manufacturer/ supplier to confirm suitability.
The examples and diagrams in this manual are included solely for illustrative purposes. The information contained in
this manual is subject to change at any time and without prior notice. In no event will responsibility or liability be
accepted for direct, indirect or consequential damages resulting from the use or application of this equipment.
WARNING - ELECTRICAL SHOCK HAZARD
MVS soft starters contain dangerous voltages when connected to mains voltage. Only a competent
electrician should carry out the electrical installation. Improper installation of the motor or the soft starter
may cause equipment failure, serious injury or death. Follow this manual and local electrical safety codes.
SHORT CIRCUIT
MVS soft starters are not short circuit proof. After severe overload or short circuit, the operation of the soft
starter should be fully tested.
GROUNDING AND BRANCH CIRCUIT PROTECTION
It is the responsibility of the user or person installing the soft starter to provide proper grounding and
branch circuit protection according to local electrical safety codes.
ARC FLASH HAZARD
Soft starters have a potential risk of arc flash. When insulation or isolation between electrified conductors is
breached or can no longer withstand the applied voltage, a short circuit occurs through the air. This may
cause a phase-to-ground and/or a phase-to-phase fault.
AuCom soft starters have been designed to mitigate an arc fault, however it is the responsibility of the site
engineer to ensure that personnel are protected from serious injury that may result from an arc fault.
710-03971-00C
MVS
Page 3
CAUTION STATEMENTS
Although unlikely, arc fault can be caused by:
•
•
•
•
•
•
Contamination in the insulation caused by deterioration over time
Inadequate insulation system on cable terminals
Overvoltage
Incorrect protection coordination settings
Overheating of the contact area, due to incorrect tightening of connections
Introduction of foreign matter, including swarf, vermin, tools or maintenance equipment left in the
starter
© 2007-2008 AuCom Electronics Ltd. All Rights Reserved.
As AuCom is continuously improving its products it reserves the right to modify or change the specification of its products at any
time without notice. The text, diagrams, images and any other literary or artistic works appearing in this document are protected
by copyright. Users may copy some of the material for their personal reference but may not copy or use material for any other
purpose without the prior consent of AuCom Electronics Ltd. AuCom endeavours to ensure that the information contained in
this document including images is correct but does not accept any liability for error, omission or differences with the finished
product.
Page 4
MVS
710-03971-00C
GENERAL DESCRIPTION
Section 2 General Description
2.1
Overview
The MVS provides compact and robust soft start solutions for control of medium voltage motors. MVS soft starters
provide a complete range of motor and system protection features and have been designed for reliable performance in
the most demanding installation situations.
Each MVS soft starter comprises two elements:
• a power assembly
• a controller module
The power assembly and controller module are supplied as a pair and share the same serial number. Care should be
taken during installation to ensure the correct controller and power assembly are used together.
Each MVS is also supplied with two fibre-optic cables, to connect the controller module to the power assembly, and
three non-conduction lead assemblies, allowing the soft starter to be tested with a low-voltage motor (< 500 VAC).
2.2
Feature List
Starting
• Constant current
• Current ramp
Stopping
• Coast to stop
• Soft stop
Protection
• Under/ Overvoltage
• Mains frequency
• Phase sequence
• Shorted SCR
• Motor overload (thermal model)
• Instantaneous overcurrent (two stages)
• Time-overcurrent
• Ground fault
• Undercurrent
• Current Imbalance
• Motor thermistor
• Excess start time
• Power circuit
• Auxiliary trip
Interface
• Remote control inputs
(3 x fixed, 2 x programmable)
• Relay outputs
(3 x fixed, 3 x programmable)
• Analog output
(1 x programmable)
• Serial port (with module)
710-03971-00C
Human Interface
• Starter status LEDs
• Event log (99 positions, date and time stamped)
• Trip log (8 positions, date and time stamped)
• Counters (starts, hours-run, kWh)
• Metering (current, voltage, power factor, kWh)
• User-programmable metering screen
• Multi-level password protection
• Emergency stop push button
Power Connection
• 50 A to 390 A, nominal
• 2300 VAC to 13800 VAC
Accessories (optional)
• Modbus RTU Interface
• Profibus Interface
• DeviceNet Interface
• Synchronous motor control
• PC Software
• Overvoltage protection
• Control supply transformer
• MV/LV Control transformer
MVS
Page 5
GENERAL DESCRIPTION
2.3
Key Features
MVS soft starters offer several special functions to ensure ease of use and to provide optimal motor control in all
environments and applications.
•
Customisable Protection
The MVS offers comprehensive protection to ensure safe operation of the motor and soft starter. The protection
characteristics can be customised extensively to match the exact requirements of the installation.
Use parameter group 3 to set the conditions in which each protection mechanism will activate.
Example: use parameter 3-A Undercurrent Level to set the level for an undercurrent trip and parameter 3-B
Undercurrent Trip Delay to set a delay on the trip.
Use parameter group 21 to select the soft starter's response when a protection mechanism activates. Each protection
can be set to trip the starter, activate a warning flag, or be ignored. All protection activations are recorded in the event
log, regardless of the protection class setting.
Example: Use parameter 21-B Undercurrent to select the response for an undercurrent trip (trip, warn or
write to log). The default response is trip.
NOTE
MVS soft starters have built-in trip points to ensure operation remains within the soft starter's
capability. These internal trips cannot be overridden. Certain faults within the MVS will also prevent
the soft starter from operating. Refer to Troubleshooting on page 62 for details.
•
Advanced Thermal Modelling
Intelligent thermal modelling allows the soft starter to predict whether the motor can successfully complete a start.
The MVS uses information from previous starts to calculate the motor's available thermal capacity, and will only permit
a start which is predicted to succeed.
This feature can be enabled or disabled using parameter 3-L Restart Temperature Check.
•
Comprehensive Event and Trip Logging
The MVS has a 99-place event log to record information on soft starter operation. A separate trip log stores detailed
information about the last eight trips.
•
Informative Feedback Screens
A large-format screen allows the MVS to display important information clearly. Comprehensive metering information,
details of starter status and last start performance allow easy monitoring of the starter's performance at all times.
•
Dual Parameter Set
The MVS can be programmed with two separate sets of operating parameters. This allows the soft starter to control
the motor in two different starting and stopping configurations.
The secondary motor settings (parameter groups 12 and 13) are ideal for slip-ring motors, dual speed motors, or
conventional (squirrel-cage) motors which may start in two different conditions (such as loaded and unloaded
conveyors).
NOTE
MVS soft starters are not suitable for controlling two separate motors. The secondary parameter set
should only be used for a secondary configuration of the primary motor.
The MVS will use the secondary motor settings to control a start when instructed via a programmable input (refer to
parameters 4-C and 4-D Input A or B Functionality).
•
Fibre Optics
The MVS uses two-line fibre optic connections between the low voltage control module and the high voltage power
assembly for electrical isolation. This fibre optic link simplifies installation of chassis mount MVS starters into custom
panels.
Page 6
MVS
710-03971-00C
GENERAL DESCRIPTION
2.4
Model Codes
MVS
-
-
Control Supply Voltage
C12 = 110 VAC & 220 ~ 230 VAC (< V07)
C12 = 110 ~ 240 VAC (V11 & V13)
Supply Voltage
V02 = 2300
V03 = 3300
V04 = 4160
V06 = 6600
V07 = 7200
V11 = 11000
V13 = 13800
VAC
VAC
VAC
VAC
VAC
VAC
VAC
50
50
50
50
50
50
50
/
/
/
/
/
/
/
60
60
60
60
60
60
60
Hz
Hz
Hz
Hz
Hz
Hz
Hz
Current Rating
0080 = 80 A
0159 = 159 A
0230 = 230 A
0321 = 321 A
710-03971-00C
@ AC53b 4-20 : 1780
@ AC53b 4-20 : 1780
@ AC53b 4-20 : 1780
@ AC53b 4-20 : 1780
MVS
Page 7
SPECIFICATIONS
Section 3 Specifications
3.1
Current Ratings
(At 1000 m.)
Two starts per hour
3.5-15 : 1785
40 °C 50 °C
MVS0080
MVS0159
MVS0230
MVS0321
96
91
190
177
282
261
393
363
Three starts per hour
4.0-20 : 1180
40 °C
50 °C
MVS0080
MVS0159
MVS0230
MVS0321
73
146
207
288
Four starts per hour
MVS0080
MVS0159
MVS0230
MVS0321
4.0-20 : 1780
40 °C
50 °C
4.0-30 : 1770
40 °C
50 °C
5.0-30 : 1770
40 °C
50 °C
5.0-60 : 1740
40 °C
50 °C
80
159
230
321
72
143
201
279
59
117
165
229
46
91
121
168
74
147
213
296
66
132
185
257
55
109
152
211
42
84
111
154
4.0-30 : 1170
40 °C
50 °C
5.0-30 : 1170
40 °C
50 °C
5.0-60 : 1140
40 °C
50 °C
65
129
175
244
53
106
144
200
40
79
101
141
68
135
190
265
60
119
162
225
49
98
132
184
37
73
93
129
4.0-20 : 880
40 °C
50 °C
4.0-30 : 870
40 °C
50 °C
5.0-30 : 870
40 °C
50 °C
5.0-60 : 840
40 °C
50 °C
68
136
188
262
59
117
157
218
48
96
129
179
35
70
88
122
63
125
173
241
54
108
144
200
45
89
118
164
33
65
81
112
AC53b Utilisation Category Format
80 A: AC-53b 4-20 : 1780
Off Time (seconds)
Start Time (seconds)
Start Current (multiple of FLC)
Starter Current Rating (amperes)
Starter Current Rating: The full load current rating of the soft starter given the parameters detailed in the remaining
sections of the utilisation code.
Start Current: The maximum available start current.
Start Time: The maximum allowable start time.
Off Time: The minimum allowable time between the end of one start and the beginning of the next start.
Contact your local supplier for ratings under operating conditions not covered by these ratings charts.
Page 8
MVS
710-03971-00C
SPECIFICATIONS
Dimensions and Weights
•
Models V02 ~ V07 (Power Assembly)
A
a
e
b
B
c
C
Front view
MVSxxxx-V02
MVSxxxx-V03
MVSxxxx-V04
MVSxxxx-V06
MVSxxxx-V07
•
Side view
Phase arm extended
A
B
C
a
b
c
d
e
Weight
mm
(inch)
mm
(inch)
mm
(inch)
mm
(inch)
mm
(inch)
mm
(inch)
mm
(inch)
mm
(inch)
kg (lb)
772
(30.4)
669
(26.3)
667
(26.3)
750
(29.5)
658
(25.9)
650
(25.6)
1302
(51.3)
531
(20.9)
165
(363.8)
832
(32.8)
875
(34.5)
817
(32.2)
810
(31.9)
864
(34.0)
800
(31.5)
1559
(61.4)
551
(21.7)
217
(478.4)
Models V11 and V13 (Power Assembly)
Front view
MVSxxxx-V11
MVSxxxx-V13
710-03971-00C
d
Side view
Phase arm extended
A
B
C
a
b
c
d
e
Weight
mm
(inch)
mm
(inch)
mm
(inch)
mm
(inch)
mm
(inch)
mm
(inch)
mm
(inch)
mm
(inch)
kg (lb)
2210
(87.0)
1170
(46.0)
1170
(46.0)
2220
( 87.4)
1150
(45.3)
1150
(45.3)
1785
(70.3)
510
(20.1)
720
(1587)
MVS
Page 9
SPECIFICATIONS
Low Voltage Section
•
Models V02 ~ V07
1
2
3
4
5
6
7
8
Access holes for LV control supply
Control connection terminal block
Gate firing fibre optic connectors
Access hole for CT cables
Fibre connections to controller
LEDs
Non-conduction readback fibre optic connectors
Ground current CT
•
Models V11 and V13
1
2
3
4
5
6
7
8
9
10
Page 10
Access holes for LV control supply
Control connection terminal block
Gate firing fibre optic connectors
Access hole for CT cables
Fibre connections to controller
LEDs
Non-conduction readback fibre optic connectors
Ground current CT
Access hole for MVS Controller fibre optic cable
Switch mode power supply (SMPS)
MVS
710-03971-00C
SPECIFICATIONS
Controller
The MVS Controller is suitable for use with all MVS soft starters.
Starter
Status
START STOP RESET
F1
LOGS
UNDO
Control
Inputs
Relay
Outputs
LCL/
RMT
Start
Start
RLA
Run
Stop
RLB
F2
SETUP
TOOLS
STORE
Trip
Reset
RLC
Warning
Input A
Remote
Input B
Fn
S e r i e s
340.0
(13.39)
54.0
(2.13)
Dimensions are shown in mm (inch)
Weight: 2.1 kg (4.63 lb)
3.2
Key Components
Key Components (models V02 ~ V07)
Power assembly
Control voltage
terminal block
Power interface PCB
Phase arms (x 3)
Key Components (models V11 and V13)
1
1
2
3
4
5
6
07235.A
2
Phase arm
Control voltage terminal block
Power interface PCB
Phase arm
MVS Controller
Phase arm
710-03971-00C
MVS
Page 11
SPECIFICATIONS
3.3
General Technical Data
Supply
Mains Voltage
MVSxxxx-V02 ......................................................................................................................................................................... 2.3 kV Phase-phase
MVSxxxx-V03 ......................................................................................................................................................................... 3.3 kV Phase-phase
MVSxxxx-V04 ......................................................................................................................................................................... 4.2 kV Phase-phase
MVSxxxx-V06 ......................................................................................................................................................................... 6.6 kV Phase-phase
MVSxxxx-V07 ......................................................................................................................................................................... 7.2 kV Phase-phase
MVSxxxx-V11 ...................................................................................................................................................................... 11.0 kV Phase-phase
MVSxxxx-V13 ...................................................................................................................................................................... 13.8 kV Phase-phase
Rated Frequency (fr) ........................................................................................................................................................................................... 50/60 Hz
Rated lightning impulse withstand voltage (Up)
MVSxxxx-V02 ~ 04 .......................................................................................................................................................................................... 45 kV
MVSxxxx-V06 ~ V07 ....................................................................................................................................................................................... 45 kV
MVSxxxx-V11 ....................................................................................................................................................................................................... 85 kV
MVSxxxx-V13 ....................................................................................................................................................................................................... 85 kV
Rated power frequency withstand voltage (Ud)
MVSxxxx-V02 ~ V04 ................................................................................................................................................................................... 11.5 kV
MVSxxxx-V06 ~ V07 ....................................................................................................................................................................................... 20 kV
MVSxxxx-V11 ~ V13 ....................................................................................................................................................................................... 35 kV
Rated normal current (lr)
MVS0080-Vxx ..................................................................................................................................................................................................... 80 A 1
MVS0159-Vxx .................................................................................................................................................................................................. 159 A 1
MVS0230-Vxx .................................................................................................................................................................................................. 230 A 1
MVS0321-Vxx .................................................................................................................................................................................................. 321 A 1
Rated short-time withstand current (asymmetrical RMS peak) (lk)
MVSxxxx-V02 ~ V07 ...................................................................................................................................................................................... 48 kA 2
MVSxxxx-V11 ~ V13 ...................................................................................................................................................................................... 75 kA 3
Form Designation ................................................................................................................... Bypassed semiconductor motor starter form 1
Control Inputs
Start (Terminals C23, C24) ............................................................................................................................................... 24 VDC, 8 mA approx
Stop (Terminals C31, C32) ............................................................................................................................................... 24 VDC, 8 mA approx
Reset (Terminals C41, C42) ............................................................................................................................................. 24 VDC, 8 mA approx
Input A (Terminals C53, C54) ......................................................................................................................................... 24 VDC, 8 mA approx
Input B (Terminals C63, C64) ......................................................................................................................................... 24 VDC, 8 mA approx
Motor Thermistor (Terminals B4, B5) .................................................................................................................................. Trip point > 2.3 kΩ
NOTE
All control inputs are potential free. Do not apply external voltage to these inputs.
Low Voltage Supply
Rated Voltage
MVSxxxx-V02 ~ 07 .......................................................................................................................................................... 110 or 220 ~ 240 V
MVSxxxx-V11 ~ 13 ........................................................................................................................................................ 110 ~ 240 V (±10%)
Rated Frequency .................................................................................................................................................................................................... 50/60 Hz
Typical power consumption
MVSxxxx-V02 ~ 07 ............................................................................................................................................................. 70 W 4 continuous
MVSxxxx-V11 ~ 13 .......................................................................................................................................................... 100 W 4 continuous
Outputs
Relay Outputs ...................................................................................................................................................................... 8 A @ 250 VAC resistive
........................................................................................................................................................................................ 10 A @ 250 VAC 15 p.f. 0.3
8 A @ 30 VDC resistive
Main Contactor (Terminals 13, 14) .............................................................................................................................................. Normally Open
Bypass Contactor (Terminals 23, 24) .......................................................................................................................................... Normally Open
Run Output/ PFC (Terminals 33, 34) .......................................................................................................................................... Normally Open
Output Relay A (Terminals 43, 44) .............................................................................................................................................. Normally Open
Output Relay B (Terminals 51, 52, 54) ............................................................................................................................................. Changeover
Output Relay C (Terminals 61, 62, 64) ............................................................................................................................................. Changeover
Analog Output (Terminals B10, B11) ............................................................................................................................ 0-20 mA or 4-20 mA
Environmental
Degree of Protection
Power Assembly .................................................................................................................................................................................................... IP00
Page 12
MVS
710-03971-00C
SPECIFICATIONS
Controller .......................................................................................................................................................................................... IP54/ NEMA 12
Operating Temperature ............................................................................................................................................................... - 10 ˚C to + 60 ˚C
Storage Temperature .................................................................................................................................................................... - 25 ˚C to + 55 ˚C
- 25 ˚C to + 70 ˚C (< 24 hours)
Humidity ........................................................................................................................................................................ 5% to 95% Relative Humidity
Pollution Degree ............................................................................................................................................................................... Pollution Degree 3
Vibration ...................................................................................................................................................................................... Designed to IEC 60068
EMC Emission
Equipment Class (EMC) ......................................................................................................................................................................................... Class A
Conducted Radio Frequency Emission ..................................................................................... 10 kHz to 150 kHz: < 120 - 69 dB µV
0.15 MHz to 0.5 MHz: < 79 dB µV
0.5 MHz to 30 MHz: < 73 dB µV
Radiated Radio Frequency Emission ...................................................................................... 0.15 MHz to 30 MHz: < 80-50 dB µV/m
30 MHz to 100 MHz: < 60-54 dB µV/m
100 MHz to 2000 MHz: < 54 dB µV/m
This product has been designed for Class A equipment. Use of the product in domestic environments may cause
radio interference, in which case the user may be required to employ additional mitigation methods.
EMC Immunity
Electrostatic Discharge ................................................................................................................ 6 kV contact discharge, 8 kV air discharge
Radio Frequency Electromagnetic Field .................................................................................................... 80 MHz to 1000 MHz: 10 V/m
Fast Transients 5/50 ns (main and control circuits) ....................................................................... 2 kV line to earth, 1 kV line to line
Surges 1.2/50 µs (main and control circuits) .................................................................................. 2 kV line to earth, 1 kV line to line
Voltage dip and short time interruption .............................................................................................. 5000 ms (at 0% nominal voltage)
(safe shutdown)
Average Heat Dissipation of Power Circuit 1
Voltage Rating
MVS0080
MVS0159
MVS0230
MVS0321
310 W
270 W
290 W
240 W
V02
410 W
330 W
365 W
265 W
V03
420 W
340 W
370 W
270 W
V04
530 W
410 W
460 W
305 W
V06
530 W
410 W
465 W
310 W
V07
740 W
550 W
630 W
375 W
V11
850 W
620 W
720 W
415 W
V13
Standards Approvals
C9
....................................................................................................................................................................................................... EMC requirements
CE .......................................................................................................................................................................................................... EMC EU Directive
Rated at AC53b 4-20:1780. Refer to Current Ratings.
Short circuit current, with appropriate R rated fuses fitted.
3 It is critical that the circuit breaker and associated protection relay are set to trip <150 ms. Failure to do so could
result in SCR rupture and subsequent arc fault.
4 Excludes contactors and/or circuit breakers.
1
2
710-03971-00C
MVS
Page 13
INSTALLATION
Section 4 Installation
NOTE
The MVS soft starter should only be installed in a restricted access location suitable for electrical equipment.
4.1
Mounting Instructions - Power Assembly
All MVS models are rated IP00 and must be installed inside an enclosure.
No clearance is required below or at the sides. For models V02 ~ V07, the power assembly should be installed with
100 mm clearance above for isolation. Models V11 and V13 require no additional clearance beyond the external
frame.
min 100 mm (3.93 inch)
Page 14
MVS
710-03971-00C
INSTALLATION
Mounting Points (models V02 ~ V07)
The power assembly is mounted in place using four M12 bolts. One bolt is required through each corner at the base
of the unit, tightened to a torque of 40 Nm. Individual phase arms are secured within the frame using one M10 nut
and two M10 high tensile grade 8.8 bolts complete with Belleville washers, all tightened to a torque of 28 ~ 30 Nm.
Mounting Points (models V11 and V13)
For V11 and V13 models, the power assembly is mounted in place using eight M12 bolts (two bolts per side at
944 mm centres). Individual phase arms are secured within the frame using two locking rods and two lock nuts,
tightened to a torque of 10 Nm.
MVS models V11 and V13 come with a travel plinth. For installation the frame should be bolted into a panel with eight
M12 bolts, tightened to a torque of 28 ~ 30 Nm.
Plan view
Front of unit
MVSxxxx-V02
MVSxxxx-V03
MVSxxxx-V04
MVSxxxx-V06
MVSxxxx-V07
MVSxxxx-V11
MVSxxxx-V13
710-03971-00C
A
mm (inch)
636
(25.04)
B
mm (inch)
513
(20.20)
C
mm (inch)
68.5
(2.70)
842
(33.15)
1150
(45.28)
663
(26.10)
944
(37.17)
68.5
(2.70)
103
(4.06)
MVS
Page 15
INSTALLATION
4.2
Mounting Instructions - MVS Controller
The MVS Controller can be secured in place with ten M4 nuts, affixed to the studs on the back of the controller.
54.0 (2.13)
112 (4.41)
300 (11.81)
310 (12.20)
340 (13.39)
To mount the controller, make a 186 mm x 300 mm cutout at the desired mounting location. Ensure adequate
clearance (54 mm) is available behind the mounting location.
Drill 5 mm holes to accommodate the studs on the controller. Fit the controller through the cutout and tighten the
nuts onto the studs.
NOTE
Before installation, always ensure that you are using the correct controller for the soft starter. This
can be checked by comparing the serial number on the back of the controller with the serial
number on the front of the power assembly.
1
Serial number
1
MVS 0321-V04-C12
O/C: MVS 0321-411 S/N: 989898-0
INPUT RATING:
OUTPUT RATING:
4160 VAC 50/60 Hz
321 A : AC53b 4-20 1780
AUXILIARY CONTACTS:
8A, 30 VDC resistive / 10 A, 250 VAC 360 VA
WITHSTAND CURRENT:
20 kA
WITHSTAND VOLTAGE:
45000 VAC Cat III
AUXILIARY CONTACTS:
#24-#14 AWG, 0.2-2.5 mm2 (0.5 NM, 4.4 lb-in)
AUCOM
Z79
Page 16
IND. CONT. EQ.
32 AN
MAIN CONTROL MODULE
MVS-0321-V04-C12
S/N: 989898-0
Z79
MVS
IND. CONT. EQ.
32 AN
710-03971-00C
INSTALLATION
4.3
Power Terminations
Models V02 ~ V07
T1B
T1
L1
T2B, T2, L2
25
(0.98)
T3B, T3, L3
6
(0.24)
13
(0.51)
Use only M10 high tensile grade 8.8 threaded fasteners for all terminations. Use a pre-load torque setting between 28
~ 30 Nm. Use only Belleville washers.
a
Rear of Unit
b
b
a
c
T1B L1
T1
d
e
MVSxxxx-V02
MVSxxxx-V03
MVSxxxx-V04
MVSxxxx-V06
MVSxxxx-V07
710-03971-00C
f
T2B L2
T3B L3
T3
T2
g
h
g
i
h
i
a
b
c
d
e
f
g
h
i
mm
(inch)
mm
(inch)
mm
(inch)
mm
(inch)
mm
(inch)
mm
(inch)
mm
(inch)
mm
(inch)
mm
(inch)
228
(8.98)
79
(3.11)
744
(29.29)
79
(3.11)
129
(5.08)
179
(7.05)
200
(7.87)
200
(7.87)
200
(7.87)
228
(8.98)
79
(3.11)
804
(31.65)
107
(4.19)
164
(6.46)
222
(8.72)
268
268
268
(10.55) (10.55) (10.55)
MVS
Page 17
INSTALLATION
Models V11 and V13
T1B
M10 x 30 mm thread depth.
Ensure at least 25 mm minimum thread
engagement.
T1
T1B
T1
L1
T2B
T2
L1
L2
07237.A
T3B
T3
L3
Bus bar termination detail
f
g
h
a
Use only M10 high tensile grade 8.8
threaded fasteners for all terminations.
Use a pre-load torque setting between
28 ~ 30 Nm. Use only Belleville
washers.
i
b
j
0.0
k
c
l
d
e
m
n
07238.A
o
0.0
a
MVSxxxx-V11
MVSxxxx-V13
b
Page 18
d
e
mm
(inch)
mm
(inch)
mm
(inch)
mm
(inch)
127.8
(5.03)
19.8
(0.78)
203.5
(8.01)
228.0
(8.98)
355.0
(13.98)
i
j
f
MVSxxxx-V11
MVSxxxx-V13
c
mm
(inch)
g
h
k
l
m
n
o
mm
(inch)
mm
(inch)
mm
(inch)
mm
(inch)
mm
(inch)
mm
(inch)
mm
(inch)
mm
(inch)
mm
(inch)
mm
(inch)
2200
(86.6)
1965.5
(77.4)
1936.5
(76.2)
1686.5
(66.4)
1274.8
(50.2)
1245.8
(49.0)
995.8
(39.2)
584.1
(23.0)
555.1
(21.9)
305.1
(12.0)
MVS
710-03971-00C
INSTALLATION
4.4
Earth Terminations
A 10 mm earth stud is located on each side of the power assembly, at the rear of the unit. Use only M10 high tensile
grade 8.8 threaded fasteners for all terminations. Use a pre-load torque setting between 28 ~ 30 Nm. Use only
Belleville washers.
4.5
Control Terminations
On the control voltage terminal block, control wiring is secured in place by 3 mm spring terminals. Use a screwdriver
to open the terminal clamp, then insert the wire into the terminal cage. Release the clamp by removing the
screwdriver.
Cable: 2.5 mm2 max
3 mm
4.6
3
mm
Control Wiring
The soft starter can be controlled in three ways:
• using the buttons on the MVS Controller
• via remote inputs
• via a serial communication link
The LCL/RMT button controls whether the MVS will respond to local control (via the MVS Controller) or remote
control (via the remote inputs). The Local LED on the MVS Controller is on when the soft starter is in local control
mode and off when the soft starter is in remote control mode. The remote LED on the MVS is on when the soft
starter is in Remote mode and off when in Local mode.
Serial communication is always enabled in local control mode, and can be enabled or disabled in remote control mode
(refer to parameter 4-B).
The STOP button on the MVS Controller is always enabled.
The MVS has three fixed inputs for remote control. These inputs should be controlled by contacts rated for low
voltage, low current operation (gold flash or similar).
1
2
3
710-03971-00C
MVS
Two-wire control
Three-wire control
Four-wire control
Page 19
INSTALLATION
The reset input is normally closed.
CAUTION
Do not apply voltage to the control input terminals. These are active 24 VDC inputs and must be
controlled with potential free contacts.
Cables to the control inputs must be segregated from mains voltage and motor cabling.
4.7
Terminal Block (MVS Controller)
Terminations on the MVS Controller use plug-in terminals. Unplug the terminal blocks, complete the wiring, then replug the terminal blocks into the controller.
Relay Outputs
Control
Supply
Control Inputs
Analog
Output
Fibre Optic Connection
To Power Assembly
RX
TX
24 VAC
4.8
Power Circuits
Overview
MVS soft starters are designed to operate as part of a system including other components. A main contactor and
bypass contactor are required in all installations. MVS models V02 ~ V07 must be installed with fuses. MVS models
V11 ~ V13 must be installed with either fuses or a circuit breaker.
The following additional components may also be required:
•
•
•
•
•
•
main isolator/ earth switch
R rated protection fuses
power factor correction
line inductors
transient/ overvoltage protection
MV/LV control supply transformer
Main Contactor
The MVS must always be installed with a main contactor. Select a contactor with an AC3 rating greater than or equal
to the full load current rating of the connected motor or there is an option for a circuit breaker above 7.2 kV.
The main contactor is associated with terminals L1, L2, L3 on the supply side of the soft starter. The coil is associated
with output terminals 13, 14 of the MVS (refer to Standard Power Circuit Configuration).
To ensure that the potentially dangerous medium voltage area is isolated from the low voltage control area, power is
supplied to the main contactor coil from the control voltage terminal block (refer to Internal Wiring on page 26).
Bypass Contactor
The MVS must always be installed with a bypass contactor. Select a contactor with an AC1 rating greater than or
equal to the full load current rating of the connected motor or there is an option for a circuit breaker above 7.2 kV.
The bypass contactor is associated with terminals L1, L2, L3 on the supply side of the soft starter, and bypass terminals
T1B, T2B, T3B on the motor side. The coil is associated with output terminals 23, 24, and the auxiliary Normally Open
contact is associated with input terminals C73, C74 of the soft starter (refer to Diagram: Standard Power Circuit
Configuration).
To ensure that the potentially dangerous medium voltage area is isolated from the low voltage control area, power is
supplied to the bypass contactor coil from the control voltage terminal block (refer to Diagram: Internal Wiring on
page 26).
Page 20
MVS
710-03971-00C
INSTALLATION
Complete Power Circuit Configuration (models V02 ~ V07)
MVS power circuit with main contactor, bypass contactor, main isolator/ earth switch, R Rated fuses and control supply.
Configured for two-wire start/ stop control. Models V02 to V07 must be installed with backup/R-rated fuses (refer to
R-Rated Protection Fuses)
1
2
A2
A3
C73
A1
110-130VAC
+10
-15
A2
220-240VAC
+10
-15
A3
C74
3
KM2
13
14
23
24
33
34
A11
A12
A11
A12
TX
(Wh)
RX
(Bk)
(Bk)
RX
(Wh)
TX
C23
43
C24
44
C31
54
C32
52
C41
C42
51
5
64
62
C53
61
C54
C63
C64
B4
B10
B5
B11
+
-
A5
A1
1
Q1
F1
KM1
KM2
2
A2
3
A3
4
C73-74
13-14
23-24
33-34
710-03971-00C
Power assembly
3 Phase 50/60 Hz Supply
Main isolator
R-Rated protection fuses
Main contactor
Bypass contactor
To motor
Control voltage terminals
Control supply
Control connection terminals
Relay outputs
Bypass contactor feedback signal
Main contactor KM1 or feedback signal
Bypass contactor KM2
or Bypass circuit breaker Q2
Run output (PFC)
(refer to Diagram: Internal Wiring on
page 26).
A4
5
C23-24
C31-32
C41-42
C53-54
C63-64
6
43-44
51, 52, 54
61, 62, 64
7
8
A5
MVS
03223.D
A4
Controller
Remote control inputs
Start
Stop
Reset
Programmable input A
Programmable input B
Programmable outputs
Programmable output A
Programmable output B
Programmable output C
Thermistor input
Analog output
Communications module (optional)
Page 21
INSTALLATION
Complete Power Circuit Configuration (models V11 and V13)
MVS power circuit with main contactor/circuit breaker and bypass contactor/circuit breaker. Configured for two-wire
start/ stop control with optional MV/LV potential transformer.
KM2/Q2
A1
KM1/Q1
T1
L1
L1B
M
T2
L2
1
3
L2B
T3
L3
2
L3B
E
+10
-15
110-220VAC
KM2/Q2
KM1/Q1
07458.A
KM2/Q2
A5
A1
1
KM1/Q1
KM2/Q2
2
A2
3
A3
4
C73-74
13-14
23-24
33-34
Page 22
Power assembly
3 Phase 50/60 Hz Supply
Main contactor or circuit breaker
Bypass contactor or circuit breaker
To motor
Control voltage terminals
Control supply
Control connection terminals
Relay outputs
Bypass contactor or circuit breaker
feedback signal
Main contactor KM1 or circuit breaker
Q1
Bypass contactor KM2
or Bypass circuit breaker Q2
Run output (PFC)
(refer to Diagram: Internal Wiring on
page 26).
A4
5
C23-24
C31-32
C41-42
C53-54
C63-64
6
43-44
51, 52, 54
Controller
Remote control inputs
Start
Stop
Reset
Programmable input A
Programmable input B
Programmable outputs
Programmable output A
Programmable output B
61, 62, 64
Programmable output C
7
8
A5
MVS
Thermistor input
Analog output
Communications module (optional)
710-03971-00C
INSTALLATION
Enclosures (models V02 ~ V07)
MVS soft starters can be installed easily into standard enclosures to provide a complete motor control cabinet. The
compact size of the power assembly leaves room for auxiliary equipment to be installed.
The power assembly should be mounted at the bottom of the enclosure, and the MVS Controller can be mounted on
the front panel. The diagrams below illustrate a possible configuration for installation.
7
1
2
3
4
8
5
6
Side view
1
2
3
4
Front view
Main isolator/earth switch
Fuses
Main contactor
Bypass contactor
5
6
7
8
Rear view
Power assembly
Rear cabling compartment
Input terminals, M18 (tighten to 20 Nm)
Output terminals, M18 (tighten to 20 Nm)
Emergency Stop Button
In the event of an emergency, press the emergency stop button located on the front of the panel.
Emergency stop
pushbutton
710-03971-00C
MVS
Page 23
INSTALLATION
Main Isolator/ Earth Switch (models V02 ~ V07)
A main isolator/ earth switch can be connected on the supply side of the main contactor (refer to Complete Power
Circuit Configuration on page 21)
CAUTION
The main isolator/ earth switch should only be operated when the motor is not running.
To open the isolator, pull out the pin and switch off. If the starter is operating, removing the pin will open the main
contactor.
R Rated Protection Fuses
If specified, R Rated protection fuses can be installed on the supply side of the soft starter to provide Type 2
coordination and short circuit protection for the motor branch circuit. The appropriate fuse should be selected from
the table below, based on the motor's rated full load current. MVS models V02 ~ V07 must be installed with fuses.
Fuse ratings:
Starter Rated FLC
80 A
159 A
230 A
321 A
Fuse type code formats:
Fuse
6R
12R
18R
24R
System Voltage
2.3 kV
A240Rrr
JCK-x-rr
System Voltage
3.3 ~ 4.2 kV
A480Rrr-1
JCL-x-rr
Ferraz
Bussmann
rr = R rating of the fuse
x = physical format of the fuse (select according to installation requirements)
System Voltage
6 ~ 7.2 kV
A072xxDxRO-rr
JCR-x-rr
Examples:
6R fuse for 2.3 kV: A240R6R or JCK-A-6R
12R fuse for 3.3 kV: A480R12R-1 or JCL-B-12R
18R fuse for 6.6 kV: A072B1DARO-18R or JCR-B-18R
Power Factor Correction
NOTE
Do not connect power factor correction capacitors to the output of MVS soft starters. If static power
factor correction is employed, it must be connected to the supply side of the soft starter.
Power factor correction capacitors should be selected based on the motor data and the required final power factor.
If power factor correction capacitors are being used, select a contactor according to the required kVAr. The contactor
must be connected on the supply side of the soft starter. The power factor correction capacitor contactor coil is
associated with output terminals 33, 34 of the soft starter's power interface PCB.
Page 24
MVS
710-03971-00C
INSTALLATION
To ensure that the potentially dangerous medium voltage area is isolated from the low voltage control area, power is
supplied to the power factor correction capacitor contactor coil from the control voltage terminal block (refer to
Internal Wiring diagram on page 26).
NOTE
The capacitor bank must be fed from the supply side of the soft starter.
Line Inductors
Line inductors are required if the cable run between the soft starter and the motor is greater than 200 m. Line
inductors should be installed outside the panel, between the soft starter output (terminals T1, T2, T3) and the motor.
Contact your local supplier for selection details.
Transient/ Overvoltage Protection
Overvoltage protection should be installed if there is a risk of high voltage transients at the installation. If required, use
the optional Overvoltage Protection Kit. Contact your local supplier for details.
Control Supply Transformer (PT/VT)
The MVS requires a low voltage control supply. If low voltage is not available, a transformer is required. Use a
transformer with primary voltage matching the MV mains voltage, and secondary voltage to suit the MVS starter. Use a
single phase 500 VA transformer with protection fuses on both the primary and secondary sides (refer to Complete
Power Circuit Configuration on page 22).
710-03971-00C
MVS
Page 25
INTERNAL WIRING
Section 5 Internal Wiring
5.1
Page 26
Internal Wiring (models V02 ~ V07)
MVS
710-03971-00C
INTERNAL WIRING
Internal Wiring (models V11 and V13)
07461.A
5.2
A1
Control supply
Q1-1
A2
A3
A4
A5
SMPS
Control voltage terminal block
Power Interface PCB
Controller
Gate Drive PCBs
Switch mode power supply
(control)
Main contactor or circuit breaker
Bypass contactor
Fibre optic cables
R
C73, C74
13, 14
23-24
33, 34
Main isolator/earth switch
(early break, late make contact)
Resistor
Bypass feedback
Main contactor/output
Bypass contactor/breaker output
Run output for PFC contactor
A21, A22
Electronics power supply
KM1
KM2
Tx, Rx
NOTE
A resistor is not required for 110 V control supply.
If using circuit breakers instead of contactors, contact AuCom for more information.
710-03971-00C
MVS
Page 27
KEYPAD AND FEEDBACK
Section 6 Keypad and Feedback
6.1
LEDs
The MVS Controller has 13 LEDs for at-a-glance monitoring of starter status.
Starter status LEDs
Control
Inputs
Starter
Status
START STOP RESET
F1
LOGS
UNDO
Fn
Relay
Outputs
LCL/
RMT
Start
Start
RLA
Run
Stop
RLB
F2
SETUP
TOOLS
STORE
Trip
Reset
RLC
Warning
Input A
Remote
Input B
Relay output LEDs
S e r i e s
Control input LEDs
The Starter Status LEDs report the operating status of the soft starter:
• The Start LED is on while the starter is starting, running or stopping.
• The Run LED is on while the starter is running.
• The Trip LED is on when a trip has occurred.
• The Warning LED is on while a warning is active.
• The Remote LED is on when remote mode is selected.
The Control Input LEDs activate when a signal is present at the corresponding control terminals.
The Relay Output LEDs activate when the corresponding output relay is active.
6.2
Menus
Configuration and control of the soft starter is managed via the MVS Controller. Information is arranged in three
menus:
•
•
•
The Programming Menu provides access to all programmable parameters. The Programming Menu is
accessed by pressing the ► button.
The Commissioning Menu provides access to tools which assist setup when the soft starter is deployed. The
Commissioning Menu is accessed by pressing the SETUP TOOLS button.
The Logs Menu provides viewing access to the Event and Trip Logs and the soft starter's performance
counters. The Logs Menu is accessed by pressing the LOGS button.
Navigation
NOTE
The menus can only be accessed from the metering screens. You cannot open a menu from inside
another menu.
Use the ▲ and ▼ buttons to scroll through the items in a menu.
To view the items in a sub-menu, press the ► button. To close the sub-menu and return to the previous level, press
◄.
Page 28
MVS
710-03971-00C
KEYPAD AND FEEDBACK
Menu Shortcuts
The MVS Controller offers keyboard shortcuts for fast access to commonly used parameters. Use parameters 11-B
and 11-C (F1 and F2 Pushbutton Function) to select the shortcut target.
To use the shortcuts, press the FN button and either the F1 (LOGS) or F2 (SETUP TOOLS) button at the same time.
Altering Parameter Values
To change a parameter value:
•
•
•
•
•
scroll to the appropriate parameter in the Programming Menu and press ► to enter edit mode.
to alter the parameter setting, use the ▲ and ▼ buttons. Pressing ▲ or ▼ once will increase or decrease
the value by one (1). If the button is held for longer than five seconds, the value will increase or decrease at
a faster rate.
to save changes, press STORE. The setting shown on the display will be saved and the MVS Controller will
return to the parameter list.
to cancel changes, press UNDO. The MVS Controller will ask for confirmation, then return to the parameter
list without saving changes.
to end edit mode, press UNDO. The MVS Controller will return to the parameter list and any unsaved
changes will be lost.
You can access the Programming Menu at any time, including while the soft starter is running. Any changes to the start
profile take effect after the next start. All other changes take effect immediately.
6.3
Security
Adjustment Lock
You can lock the Programming Menu to prevent users from altering parameter settings. The adjustment lock can be
turned on and off using parameter 20-B.
If a user attempts to change a parameter value or access the Commissioning Menu when the adjustment lock is active,
an error message is displayed:
Access Denied
Adj Lock is On
Access Code
Critical parameters (parameter group 20 and higher) are protected by a four-digit security access code, preventing
unauthorised users from viewing or modifying parameter settings.
When a user attempts to enter a restricted parameter group, the MVS Controller prompts for an access code. The
access code is requested once for the programming session, and authorisation continues until the user closes the menu.
To enter the access code, use the ◄ and ► buttons to select a digit, and the ▲ and ▼ buttons to change the value.
When all four digits match your access code, press STORE. The MVS Controller will display an acknowledgement
message before continuing.
Enter Access Code
####
STORE
Access Allowed
Supervisor
To change the access code, use parameter 20-A.
710-03971-00C
MVS
Page 29
KEYPAD AND FEEDBACK
6.4
Displays
The MVS Controller displays a wide range of performance information about the soft starter. The top half of the
screen shows real-time information on current or motor power (as selected in parameter 9-L). Use the ▲ and ▼
buttons to select the information shown on the bottom half of the screen.
•
•
•
•
•
•
•
Starter status
Motor temperature
Current
Motor power
Voltage
Last start information
Date and time
Metering Screens
The MVS uses metering screens to display information on the soft starter's performance. Use the ▲ and ▼ buttons
to move between metering screens.
RUNNING STOP IN 14:02
260A
M1
* 100%
Starter status
STARTING
11540
Programmable
screen
DATE/TIME
2004NOV28
Date/time
L1 260 A
L3 261 A
1040 A
1080
L2 258 A
GC 260 A
Current
6600 V 6610 V 6605 V
260 A
258 A
261 A
Voltage and current
11:20:36
LAST START
12 S
400% FLC
T-RISE 40%
Last start
information
2515 KW
2970 KVA
3372 HP
0.92 PF
Power metering
Pressing the ► button while viewing the Date/Time screen lets the user set the date and time on the MVS Controller.
Pressing the ► button at any other screen opens the Programming Menu.
Starter Status
The starter status screen shows real-time details of the starter's status, including current and temperature:
Status
Auto-stop information
Running Stop in 14:02
260A
M1
88%
Motor current
Motor temperature
Parameter set
The information on the screen is arranged as follows:
• top left: status information (Ready, Starting, Running, Stopping or Tripped).
• top right: auto-stop information.
• bottom left: motor current (mean average of three phases).
• bottom centre: parameter set currently in use (primary (M1) or secondary (M2)).
• bottom right: motor temperature (based on the thermal model).
When the motor temperature approaches the trip level, the temperature will flash.
When the motor's thermal capacity will not permit a restart, an asterisk appears in front of the temperature.
Page 30
MVS
710-03971-00C
KEYPAD AND FEEDBACK
When a warning occurs, the top line of the status screen alternates with the warning type. The lower line continues to
display current and temperature information:
Current Imbalance
260 A
M1
88%
RUNNING
260 A
M1
stop in 14:02
88%
When a trip occurs, the status screen is replaced by details of the trip type:
Tripped
Current Imbalance
When operating in Emergency Mode, the screen shows "Emergency Operation":
Emergency Operation
260 A
M1
88%
Current
The current screen shows real-time details of the ground current and the line current on each phase:
L1 260A
L3 261A
L2 258A
GC 1A
When current is not being measured, the display will show 0.
Voltage and Current
The voltage and current screen shows real-time line voltage and line current on each phase:
6600V
260A
L1
6610V
258A
L2
6605V
261A
L3
When the motor is not running, the display will show –– in place of voltage and 0 A current.
Power Metering
The power metering screen shows details of total motor power, motor horsepower, motor active power and power
factor.
2515 kW
2970 kVA
3372 hp
0.92 pf
Last Start Information
The last start information screen shows details of the most recent successful start:
•
•
•
start duration (seconds)
maximum start current drawn (as a percentage of motor full load current)
calculated rise in motor temperature
Last start 12 Sec
400 %
40% T-rise
If data is not available from the last start, the display will show 0 for each field.
Date/Time
The date/time screen shows the current system date and time (24 hour format):
Date/Time
2004Nov22 11:20:36
To adjust the current date and time, press the ► button while viewing the Date/Time metering screen. Use the ◄
and ► buttons to select which part of the date or time to edit, and use the ▲ and ▼ buttons to change the value.
Pressing STORE from the seconds element stores the current value and returns to the metering screens. To return to
the metering screens without saving changes, press the ◄ button repeatedly.
710-03971-00C
MVS
Page 31
KEYPAD AND FEEDBACK
Programmable Screen
The programmable screen shows the information selected in parameters 11-D to 11-G.
Starting
11540
1040A
1080
The default settings are starter state, motor current, kWh and hours run.
Page 32
MVS
710-03971-00C
PROGRAMMING MENU
Section 7 Programming Menu
The Programming Menu provides access to programmable parameters.
To open the Programming Menu, press the ► button while viewing the metering screens.
Items in the Programming Menu are grouped into sets of related parameters. Use the ▲ and ▼ buttons to move
between parameters groups and between the parameters in each group.
The security access code must be entered to access parameters in parameter group 20 or higher.
7.1
Programming Menu
Primary Motor Settings
Protection Classes
Restricted Parameters
20-A.
20-B.
20-C.
20-D.
20-E.
20-F.
20-G.
Security Access Code
Adjustment Lock
Emergency Mode
Motor Current Calibration
Voltage Calibration
Main Contactor Time
Bypass Contactor Time
21-A.
21-B.
21-C.
21-D.
21-E.
21-F.
21-G.
21-H.
21-I.
21-J.
21-K.
21-L.
21-M.
21-N.
21-O.
21-P.
21-Q.
21-R.
21-S.
Overload
Undercurrent
Instantaneous Overcurrent
Current Imbalance
Frequency
Auxiliary Trip A
Auxiliary Trip B
Motor Thermistor
Excess Start Time
Starter Communication Failure
Battery/Clock Failure
SCR Temperature
Network Communication Failure
Ground Fault
Overvoltage
Undervoltage
Reserved
Reserved
Time-Overcurrent
Time-Overcurrent
16-A.
16-B.
16-C.
16-D.
Start/Stop Modes
2-A.
2-B.
2-C.
2-D.
2-E.
2-F.
2-G.
2-H.
2-I.
Start Mode
Current Limit
Current Ramp - Initial Current Level
Current Ramp - Start Ramp Time
Kickstart Level
Kickstart Duration
Excess Start Time
Stop Mode
Soft Stop Ramp Time
Parameter Groups
Time-Overcurrent Level
Time-Overcurrent Curve
Time-Overcurrent Reset Time
Reserved
1. Primary Motor Settings
2. Start/Stop Modes
3. Protection Settings
4. Inputs
5. Outputs
6. Auto-Stop
9. Slip-Ring Motor Setup
11. HMI Settings
12. Secondary Motor Settings
13. Start/Stop Settings-2
16. Time-Overcurrent Protection
20. Restricted Parameters
21. Protection Classes
Start/Stop Modes-2
13-A.
13-B.
13-C.
13-D.
13-E.
13-F.
13-G.
13-H.
13-I.
1-A. Motor Full Load Current
1-B. Motor Maximum Start Time
1-C. Motor Locked Rotor Current
1-D. Motor Service Factor
Start Mode
Current Limit
Current Ramp - Initial Start Current
Current Ramp - Start Ramp Time
Kickstart Level
Kickstart Duration
Excess Start Time
Stop Mode
Soft Stop Ramp Time
Undercurrent Level
Undercurrent Trip Delay
Inst. Overcurrent Stage 1
Inst. Overcurrent Delay Stage 1
Current Imbalance Level
Current Imbalance Trip Delay
Phase Sequence
Mains Frequency Trip Mode
Mains Frequency Trip Range
Mains Frequency Trip Delay
Restart Delay
Restart Temperature Check
Auxiliary Trip A - Mode
Auxiliary Trip A - Delay
Auxiliary Trip A - Enable Delay
Auxiliary Trip B - Mode
Auxiliary Trip B - Delay
Auxiliary Trip B - Enable Delay
Ground Fault Level
Ground Fault Trip Delay
Overvoltage Level
Overvoltage Trip Delay
Undervoltage Level
Undervoltage Trip Delay
Instantaneous Overcurrent Stage 2
Inst. Overcurrent Delay Stage 2
4-A. Local/Remote Control
4-B. Serial Control - Remote Mode
4-C. Input A Functionality
4-D. Input B Functionality
Outputs
5-A.
5-B.
5-C.
5-D.
5-E.
5-F.
5-G.
5-H.
5-I.
5-J.
5-K.
5-L.
5-M.
5-N.
5-O.
5-P.
5-Q.
12-A. Motor Full Load Current
HMI Settings
Language
F1 Pushbutton Function
F2 Pushbutton Function
Programmable Screen - Top Left
Programmable Screen - Top Right
Programmable Screen - Bottom Left
Programmable Screen - Bottom Right
3-A.
3-B.
3-C.
3-D.
3-E.
3-F.
3-G.
3-H.
3-I.
3-J.
3-K.
3-L.
3-M.
3-N.
3-O.
3-P.
3-Q.
3-R.
3-S.
3-T.
3-U.
3-V.
3-W.
3-X.
3-Y
3-Z
Inputs
Secondary Motor Settings
11-A.
11-B.
11-C.
11-D.
11-E.
11-F.
11-G.
Protection Settings
Low Current Flag
High Current Flag
Motor Temperature Flag
Output Relay A Functionality
Output Relay A On Delay
Output Relay A Off Delay
Output Relay B Functionality
Output Relay B On Delay
Output Relay B Off Delay
Output Relay C Functionality
Output Relay C On Delay
Output Relay C Off Delay
Analog Output A Functionality
Analog Output A Range
Analog Output A Adjustment - maximum
Analog Output A Adjustment - minimum
Mains Reference Voltage
Auto-Stop
6-A. Auto-Stop Mode
6-B. Auto-Stop Time
Slip-Ring Motor Setup
9-A.
9-B.
9-C.
9-D.
Primary Motor Ramp Configuration
Secondary Motor Ramp Configuration
Slip-Ring Rotor Resistance Contactor Time
Slip-Ring Conduction Retard
You can access the Programming Menu at any time, including while the soft starter is running. Any changes to the start
profile take effect after the next start.
Parameter Group
Primary Motor Settings
Start/Stop Modes-1
710-03971-00C
Parameters
1-A Motor Full Load Current
1-B Motor Locked Rotor Current Time
1-C Motor Locked Rotor Current
1-D Motor Service Factor
2-A Start Mode
2-B Current Limit
2-C Current Ramp – Initial Start Current
2-D Current Ramp – Start Ramp Time
2-E Kickstart Current Level
2-F Kickstart Duration
2-G Excess Start Time
2-H Stop Mode
2-I
Soft Stop Ramp Time
MVS
Page 33
PROGRAMMING MENU
Protection Settings
Inputs
Outputs
Auto-Stop
Slip-Ring Motor Setup
HMI Settings
Secondary Motor Settings
Start/Stop Modes-2
Page 34
3-A
3-B
3-C
3-D
3-E
3-F
3-G
3-H
3-I
3-J
3-K
3-L
3-M
3-N
3-O
3-P
3-Q
3-R
3-S
3-T
3-U
3-V
3-W
3-X
3-Y
3-Z
4-A
4-B
4-C
4-D
5-A
5-B
5-C
5-D
5-E
5-F
5-G
5-H
5-I
5-J
5-K
5-L
5-M
5-N
5-O
5-P
5-Q
6-A
6-B
9-A
9-B
9-C
9-D
11-A
11-B
11-C
11-D
11-E
11-F
11-G
12-A
13-A
13-B
Undercurrent Level
Undercurrent Trip Delay
Instantaneous Overcurrent Stage 1
Instantaneous Overcurrent Delay Stage 1
Current Imbalance Level
Current Imbalance Trip Delay
Phase Sequence
Mains Frequency Trip Mode
Mains Frequency Trip Range
Mains Frequency Trip Delay
Restart Delay
Restart Temperature Check
Auxiliary Trip A – Mode
Auxiliary Trip A – Delay
Auxiliary Trip A – Enable Delay
Auxiliary Trip B – Mode
Auxiliary Trip B – Delay
Auxiliary Trip B – Enable Delay
Ground Fault Level
Ground Fault Trip Delay
Overvoltage Level
Overvoltage Trip Delay
Undervoltage Level
Undervoltage Trip Delay
Instantaneous Overcurrent Stage 2
Instantaneous Overcurrent Delay Stage 2
Local/Remote Control
Serial Control – Remote Mode
Input A Functionality
Input B Functionality
Low Current Flag
High Current Flag
Motor Temperature Flag
Output Relay A – Functionality
Output Relay A – On Delay
Output Relay A – Off Delay
Output Relay B – Functionality
Output Relay B – On Delay
Output Relay B – Off Delay
Output Relay C – Functionality
Output Relay C – On Delay
Output Relay C – Off Delay
Analog Output A – Functionality
Analog Output A – Range
Analog Output A – Adjustment (maximum)
Analog Output A – Adjustment (minimum)
Mains Reference Voltage
Auto-Stop Mode
Auto-Stop Time
Primary Motor Ramp Configuration
Secondary Motor Ramp Configuration
Slip-Ring Rotor Resistance Contactor Time
Slip-Ring Conduction Retardation
Language
F1 Pushbutton Function
F2 Pushbutton Function
Programmable Screen – Top Left
Programmable Screen – Top Right
Programmable Screen – Bottom Left
Programmable Screen – Bottom Right
Motor Full Load Current
Start Mode
Current Limit
MVS
710-03971-00C
PROGRAMMING MENU
Time-Overcurrent Protection
Restricted Parameters
Protection Classes
7.2
13-C
13-D
13-E
13-F
13-G
13-H
13-I
16-A
16-B
16-C
16-D
20-A
20-B
20-C
20-D
20-E
20-F
20-G
21-A
21-B
21-C
21-D
21-E
21-F
21-G
21-H
21-I
21-J
21-K
21-L
21-M
21-N
21-O
21-P
21-Q
21-R
21-S
Current Ramp – Initial Start Current
Current Ramp – Start Ramp Time
Kickstart Current Level
Kickstart Duration
Excess Start Time
Stop Mode
Stop Ramp Time
Time-Overcurrent Level
Time-Overcurrent Curve
Time-Overcurrent Reset Time
Reserved
Security Access Code
Parameter Lock
Emergency Mode
Motor Current Calibration
Voltage Calibration
Main Contactor Time
Bypass Contactor Time
Overload
Undercurrent
Instantaneous Overcurrent
Current Imbalance
Mains Frequency
Auxiliary Trip A
Auxiliary Trip B
Motor Thermistor
Excess Start Time
Starter Communications Timeout
Battery/Clock Fail
SCR Temperature Model
Network Communications Timeout
Ground Fault
Overvoltage
Undervoltage
Reserved
Reserved
Time-Overcurrent
Parameter Descriptions
1 Primary Motor Settings
The Primary Motor Settings parameters configure the soft starter to suit the primary motor profile.
The motor thermal model, which governs motor overload protection and motor temperature calculations, is based on
parameters 1-A to 1-D.
1-A Motor Full Load Current
Range:
Description:
Default: 100 A
Matches the starter to the connected motor's full load current (amperes). Set to the full
load current (FLC) rating shown on the motor nameplate.
5 – 550 A
1-B Motor Locked Rotor Current Time
Range:
Description:
710-03971-00C
0:01 – 2:00 (minutes:seconds)
Default: 0M:10S
Sets the maximum length of time the motor can run at locked rotor current before
reaching its maximum temperature. This setting is used by the thermal model to calculate
the motor's thermal capacity.
A motor’s thermal capacity is the maximum time the motor can maintain locked rotor
current conditions from cold. This information is available from the motor datasheet or
direct from the motor supplier.
The diagram below shows typical maximum start time curves for a motor with locked
rotor current of 600% full load current, when starting from cold.
MVS
Page 35
PROGRAMMING MENU
10000
1000
100
30 sec
20 sec
10 sec
5 sec
10
1
100
300
500
700
Current (% FLC)
Set to the maximum allowable start time at locked rotor current, according to the motor
datasheet.
1-C Motor Locked Rotor Current
Range:
Description:
Default: 600% FLC
Sets the locked rotor current of the connected motor, as a percentage of full load current.
Set according to the motor datasheet.
400% – 1200% FLC
1-D Motor Service Factor
Range:
Description:
Default: 105% FLC
Sets the motor service factor used by the thermal model, as a percentage of motor full
load current. Set according to the motor datasheet.
100% – 160% FLC
2 Start/Stop Modes-1
2-A Start Mode
Options:
Description:
Default: CONSTANT CURRENT
Selects the start mode.
Constant current mode can be used to provide either a current limit or current ramp start,
depending on the settings of parameters 2-B, 2-C and 2-D.
CONSTANT CURRENT
2-B Current Limit
Range:
Description:
•
Current (%motor full load current)
•
•
700%
Default: 400% FLC
Sets the current limit for constant current starting, as a percentage of motor full load
current. Set so that:
The motor is supplied with sufficient start current to enable it to produce torque adequate to easily
accelerate the connected load.
The desired start performance is obtained.
The soft starter ratings are not exceeded.
100% – 600% FLC
3
600%
500%
400%
300%
1: Initial current (parameter 2-C)
2: Current limit (parameter 2-B)
3: Full voltage current
2
1
200%
100%
10% 20% 30% 40% 50% 60% 70% 80% 90% 100%
Rotor speed (% full speed)
2-C Current Ramp - Initial Start Current
Range:
Description:
Page 36
Default: 400% FLC
Sets the initial start current level for current ramp start mode, as a percentage of motor full
load current.
100% – 600% FLC
MVS
710-03971-00C
PROGRAMMING MENU
•
•
•
Parameters 2-C and 2-D are used together to control current ramp start mode. If current
ramp starting is not required, set the initial start current (parameter 2-C) equal to the
current limit (parameter 2-B).
Use current ramp starting in applications where:
Required start torque can vary between starts, for example a conveyor which may start loaded or
unloaded. Set the initial start current (parameter 2-C) to a level that will start the motor in a light load
condition, and the current limit (parameter 2-B) to a level that will let the motor reach full speed in the
high load condition.
Starting time of an easily broken away load needs to be extended, for example a centrifugal pump where
pipeline pressure needs to build up slowly.
The motor is running from a limited generator set supply, and a slower application of load will allow
greater time for the supply to respond.
Set the initial start current so that the motor begins to accelerate immediately after a start
is initiated.
2-D Current Ramp - Start Ramp Time
Current (%motor full load current)
Range:
Description:
700%
1 – 60 seconds
Default: 1 second
Sets the ramp time (in seconds) for current ramp starting. Set the ramp time to optimise
start performance.
4
600%
500%
2
400%
3
1: Initial current (parameter 2-C)
2: Start ramp time (parameter 2-D)
3: Current limit (parameter 2-B)
4: Full voltage current
300%
200%
100%
1
Time
2-E Kickstart Current Level
Range:
Description:
Default: 500% FLC
Sets the kickstart current level, as a percentage of motor full load current.
Kickstart provides extra torque at the beginning of a start, for the period specified in
parameter 2-F. This can be useful for starting loads that require high breakaway torque but
then accelerate easily (for example flywheel loads such as presses). Set as required.
100% – 700% FLC
NOTE
Kickstart subjects the mechanical equipment to increased torque levels. Ensure the motor, load and
couplings can handle the additional torque before using this feature.
2-F Kickstart Duration
Range:
Description:
0 – 2000 milliseconds
Default: 0 (off)
Sets the duration for the kickstart function in milliseconds. Set as required.
NOTE
Kickstart subjects the mechanical equipment to increased torque levels. Ensure the motor, load and
couplings can handle the additional torque before using this feature.
2-G Excess Start Time
Range:
Description:
710-03971-00C
0:00 – 4:00 minutes:seconds
Default: 0M:20S
Sets the maximum time allowed for the motor to reach full speed.
Set for a period slightly longer than required for a normal healthy start. The starter will trip
if the start extends beyond the programmed limit, indicating that the load has stalled or
start torque requirements have increased substantially since the previous start.
A setting of 0 disables this protection.
MVS
Page 37
PROGRAMMING MENU
NOTE
Ensure the excess start time setting is within the starter rated capability. This ensures the starter is also
protected from abnormal overload conditions.
2-H Stop Mode
Options:
COAST TO STOP
TIMED VOLTAGE RAMP
Default:
Description:
Selects the active stop mode.
Coast to Stop: When a stop command is given, the soft starter removes all voltage from
the motor and the motor slows according to the inertia of the load. This stop mode is
suitable for high inertia loads.
Timed Voltage Ramp: The soft starter reduces the voltage supplied to the motor in a linear
manner, reaching zero voltage at the end of the ramp time (parameter 2-I). Timed voltage
ramp stopping is suitable for high friction loads such as pumping or conveyor applications.
Select the most appropriate stop mode for the application.
COAST TO STOP
2-I Soft Stop Ramp Time
Range:
Description:
0:00 – 1:40 minutes:seconds
Default: 0M:00S (off)
Sets the ramp time for soft stopping the motor using timed voltage ramp soft stop. If using
a main contactor, the contactor must remain closed until the end of the stop ramp time.
Use the Main Contactor output relay (terminals 13, 14) to control the main contactor.
3 Protection Settings
These parameters determine when the soft starter's protection mechanisms will activate. The activation point for each
protection mechanism can be set to suit the installation.
The soft starter responds to protection events by tripping, warning, or writing the event to the event log. The
response is determined by the Protection Classes settings (parameter group 21). The default response is a trip.
NOTE
The protection settings are vital for safe operation of the soft starter and motor. Defeating the protection
may compromise the installation and should only be done in the case of emergency.
3-A Undercurrent Level
Range:
Description:
Default: 20% FLC
Sets the trip point for undercurrent protection, as a percentage of motor full load current.
Set to a level below the motor’s normal working range and above the motor’s magnetising
(no load) current (typically 25% to 35% of rated full load current).
A setting of 0% disables undercurrent protection.
0% – 100% FLC
NOTE
Undercurrent protection is only active during run.
3-B Undercurrent Trip Delay
Range:
0:00 – 4:00 minutes:seconds
Default: 0M:05S
Description: Sets the duration required for an undercurrent state to continue before a trip occurs. Set as
required.
3-C Instantaneous Overcurrent Stage 1
Range:
Description:
Default: 400% FLC
Sets the trip point for instantaneous overcurrent protection, as a percentage of motor full
load current. Set as required.
80% – 600% FLC
NOTE
Instantaneous overcurrent protection is only active during run.
This setting must be set to coordinate with parameter 3-Y.
Page 38
MVS
710-03971-00C
PROGRAMMING MENU
3-D Instantaneous Overcurrent Delay Stage 1
Range:
Description:
0:00 – 1:00 minutes:seconds
Default: 0M:00S
Sets the duration required for current to exceed the level set in parameter 3-C before a
trip occurs. Set as required.
3-E Current Imbalance Level
Range:
Description:
Default: 20%
Sets the maximum allowable imbalance between the highest and lowest currents on all
three phases, calculated as a percentage of the highest current. The factory setting is
suitable for most applications. The level can be adjusted if required to suit site-specific
conditions.
10% – 50%
NOTE
Current imbalance detection is desensitised by 50% during starting and soft stopping.
3-F Current Imbalance Trip Delay
Range:
Description:
0:00 – 4:00 minutes:seconds
Default: 0M:03S
Sets the duration required for a current imbalance state to continue before a trip occurs.
Set as required.
3-G Phase Sequence
Options:
ANY SEQUENCE
POSITIVE ONLY
NEGATIVE ONLY
Default:
Description:
Selects which phase sequences the soft starter will allow at a start. The starter examines
the sequence of the phases at its input terminals and trips if the actual sequence does not
match the selected option. Set as required.
ANY SEQUENCE
NOTE
Phase sequence protection is only active during the pre-start checks.
3-H Mains Frequency Trip Mode
Options:
OFF
START ONLY
START/RUN
RUN ONLY
Default:
Description:
Selects the operating states during which the starter will monitor for a mains frequency trip.
Set as required.
START/RUN
3-I Mains Frequency Trip Range
Options:
± 2 HZ
± 5 HZ
± 10 HZ
± 15 HZ
Default:
Description:
Selects the tolerance for variations in mains frequency before the soft starter trips. Set as
required.
± 5 HZ
NOTE
Selecting a higher tolerance for variation may compromise motor life. Only select a higher tolerance after
due consideration of effects on the motor and driven equipment.
3-J Mains Frequency Trip Delay
Range:
Description:
710-03971-00C
0:00 – 4:00 minutes:seconds
Default: 0m:00s
Sets the duration required for a mains frequency disturbance to continue outside the range
selected in parameter 3-I, before a trip occurs. Set if required to allow continued motor
operation during extreme but temporary under- and over-frequency conditions that can
endanger motor life.
MVS
Page 39
PROGRAMMING MENU
NOTE
If the mains frequency drops below 35 Hz or rises above 75 Hz, the starter will trip immediately.
3-K Restart Delay
Range:
Description:
00:01 – 60:00 minutes:seconds
Default: 00M:10S
Sets the minimum time between the end of a stop and the beginning of the next start.
During the restart delay period, the display shows the time remaining before another start
can be attempted. Set as required.
NOTE
The restart delay is measured from the end of each stop. Changes to the restart delay setting take effect
after the next stop.
3-L Restart Temperature Check
Options:
OFF
ON
Default:
Description:
Selects whether the soft starter will check whether sufficient thermal capacity is available to
complete a start successfully, before attempting to start. The check compares the
temperature rise from the last motor start with the available thermal capacity. Set as
required.
OFF
3-M Auxiliary Trip A - Mode
Options:
ALWAYS ACTIVE
OPERATING ONLY
RUN ONLY
Default:
Description:
Selects when the starter will monitor Input A for an auxiliary trip condition.
Always Active: An auxiliary trip can occur at any time when the MVS Controller is receiving
power.
Operating Only: An auxiliary trip can occur while the soft starter is running, stopping or
starting (including pre-start checks).
Run Only: An auxiliary trip can only occur after the soft starter has successfully completed a
start and entered running state.
ALWAYS ACTIVE
Start Signal
Current
120%
FLC
Output Voltage
Main Contactor
= Operating
Run
= Run
Pre-Start Tests
3-N Auxiliary Trip A - Delay
Range:
Description:
0:00 – 4:00 minutes:seconds
Default: 0M:00S
Sets a delay between activation of Input A and a trip. Set as required.
3-O Auxiliary Trip A - Enable Delay
Range:
Description:
00:00 – 30:00 minutes:seconds
Default: 00M:00S
Sets a delay before an auxiliary trip can occur on Input A, after the soft starter has entered
the state selected in parameter 3-M. Set as required.
3-P Auxiliary Trip B - Mode
Page 40
Options:
ALWAYS ACTIVE
OPERATING ONLY
RUN ONLY
Default:
Description:
Selects when the starter will monitor Input B for an auxiliary trip condition. Refer to
parameter 3-M Auxiliary A Trip - Mode for further details.
MVS
ALWAYS ACTIVE
710-03971-00C
PROGRAMMING MENU
3-Q Auxiliary Trip B - Delay
Range:
Description:
0:00 – 4:00 minutes:seconds
Default: 0M:00S
Sets a delay between activation of Input B and a trip. Set as required.
3-R Auxiliary Trip B - Enable Delay
Range:
Description:
00:00 – 30:00 minutes:seconds
Default: 00M:00S
Sets a delay before an auxiliary trip can occur on Input B, after the soft starter has entered
the state selected in parameter 3-P. Set as required.
3-S Ground Fault Level
Range:
Description:
Default: 10 A
Sets the trip point for ground fault protection, in amperes. Ground fault is a dynamic trip
based on phase current measurements every half-cycle. Ground fault current is the vector
summation of the individual phase currents. Set as required.
1 – 40 A
NOTE
Ground fault protection is only active during run.
3-T Ground Fault Trip Delay
Range:
Description:
0:01 – 4:00 minutes:seconds
Default: 0M:03S
Sets the duration required for the ground current to exceed the level specified in
parameter 3-S before a trip occurs. Set as required.
3-U Overvoltage Level
Range:
Description:
Default: 7200 V
Sets the trip point for overvoltage protection. Set as required.
100 – 14000 V
3-V Overvoltage Trip Delay
Range:
Description:
0:00 – 4:00 minutes:seconds
Default: 0M:05S
Sets the duration required for an overvoltage state to continue before a trip occurs. Set as
required.
3-W Undervoltage Level
Range:
Description:
Default: 100 V
Sets the trip point for undervoltage protection. Set as required.
100 – 14000 V
3-X Undervoltage Trip Delay
Range:
Description:
0:00 – 4:00 minutes:seconds
Default: 0M:05S
Sets the duration required for an undervoltage state to continue before a trip occurs. Set
as required.
3-Y Instantaneous Overcurrent Stage 2
Range:
Description:
710-03971-00C
Default: 4400 AMPS
Sets the trip point for instantaneous overcurrent – Stage 2 - protection, as a percentage of
motor full load current. Set as required.
This threshold time level depends on the soft starter configuration. This protection function
uses the main switching element.
If the main switching element is a contactor (protected by a fuse), then this function must
be coordinated with the fuse to ensure that the contactor does NOT open if the current
level is higher than the maximum break current.
If the main switching element is a breaker, then this delay must be minimised to provide the
best possible protection to the SCR.
There are two instantaneous trip functions, stage 1 and 2. These protection functions are
configured to be complementary. It is recommended that stage 1 be set such that is
triggers at lower current/higher time values than Stage 2.
When Stage 1 triggers, a controlled stop is performed whereby the SCRs conduct current
for some time, whereas stage 2 only opens the main switching device.
Stage 1 must be configured to protect the SCR. Furthermore, stage 2 must be configured
to protect the main switching device.
30 – 4400 AMPS
MVS
Page 41
PROGRAMMING MENU
Time
Example: Contactor and Fuse
1
2
9
10
11
3
4
5
6
7
8
07248.A
Current
1
2
3
4
5
6
Instantaneous Overcurrent Stage 1 (3D)
20 seconds
Instantaneous Overcurrent Delay (3Z)
FLC
4 x FLC
Instantaneous Overcurrent Stage 1 (3C)
7
Instantaneous Overcurrent Stage 2 (3Y)
8
Unprotected region
9
SCR
10 Fuse
11 Overload curve
Shaded area indicates motor operation
Time
Example: Circuit Breaker
Current
1
2
3
4
5
6
Page 42
Instantaneous Overcurrent Delay Stage1 (3D)
20 seconds
Instantaneous Overcurrent Delay (3Z)
FLC
4 x FLC
Instantaneous Overcurrent (3C)
7
Instantaneous Overcurrent Stage 2 (3Y)
8
Stage 1
9
Stage 2
10
SCR
11
Time-current
Shaded area indicates motor operation
MVS
710-03971-00C
PROGRAMMING MENU
3-Z Instantaneous Overcurrent Delay Stage 2
Range:
Description:
Default: 10 MS
Sets the duration required for current to exceed the level set in parameter 3-Y before a
trip occurs. Set as required.
This threshold time level depends on the soft starter configuration. This protection function
uses the main switching element.
If the main switching element is a contactor (protected by a fuse), then this function must
be coordinated with the fuse to ensure that the contactor does NOT open if the current
level is higher than the maximum break current.
If the main switching element is a breaker, then this delay must be minimised to provide the
best possible protection to the SCR.
10 – 1000MS
4 Inputs
4-A Local/Remote Control
Options:
BUTTON ALWAYS ACTIVE
BUTTON ACTIVE WHEN OFF
LOCAL CONTROL ONLY
REMOTE CONTROL ONLY
Default:
Description:
Enables and disables the local control buttons and remote control inputs. Also determines
when and if the LCL/RMT button can be used to switch between local and remote control.
The STOP button on the MVS Controller is always enabled.
Button always active: LCL/RMT button is always enabled.
Button active when off: LCL/RMT button is enabled when the starter is off (not starting,
stopping or running).
Local control only: All remote inputs are disabled.
Remote control only: Local control buttons (START, RESET, LCL/RMT) are disabled.
BUTTON ALWAYS ACTIVE
CAUTION
When using two-wire remote control, the soft starter will restart immediately if the remote start input
is still active.
4-B Serial Control - Remote Mode
Options:
DISABLE IN REMOTE
ENABLE IN REMOTE
Default:
Description:
Selects whether the starter will accept Start, Stop and Reset commands from the serial
network when in Remote mode. The Force Comms Trip, Local/Remote Control and Test
Start commands are always enabled.
ENABLE IN REMOTE
4-C Input A Functionality
710-03971-00C
Options:
PARAMETER SET SELECTION Default: AUXILIARY TRIP (N/O)
AUXILIARY TRIP (N/O)
AUXILIARY TRIP (N/C)
LOCAL/REMOTE SELECT
EMERGENCY MODE OPERATION
EMERGENCY STOP (N/C)
Description:
Determines the functionality of Input A.
Parameter Set Selection: The MVS can be programmed with two separate sets of motor
and starting data. The primary parameter set is programmed using parameters 1-A to 2-I.
The secondary parameter set is programmed using parameters 12-A to 13-I. To activate
the secondary parameter set, parameter 4-C must be set to Parameter Set Selection and
there must be a closed circuit across C53-C54 when a start command is given.
Auxiliary Trip (Normally Open): The MVS can be tripped by a remote circuit connected to
Input A. When parameter 4-C is set to Auxiliary Trip (N/O), a closed circuit across C53C54 trips the soft starter. Functionality of the auxiliary trip feature can be adjusted using
parameters 3-M Auxiliary Trip A - Mode, 3-N Auxiliary Trip A - Delay, 3-O Auxiliary Trip
A - Enable Delay.
Auxiliary Trip (Normally Closed): The MVS can be tripped by a remote circuit connected
to Input A. When parameter 4-C is set to Auxiliary Trip (N/C), an open circuit across
C53-C54 trips the soft starter. Functionality of the auxiliary trip feature can be adjusted
using parameters 3-M Auxiliary Trip A - Mode, 3-N Auxiliary Trip A - Delay, 3-O Auxiliary
Trip A - Enable Delay.
MVS
Page 43
PROGRAMMING MENU
Local/Remote Select: Input A can be used to select between local and remote control,
instead of using the LCL/RMT button on the MVS Controller. Selecting this option disables
the LCL/RMT button, and the soft starter will ignore any Local/Remote select command
from the serial communications network. An open circuit across the input selects local
control and a closed circuit selects remote control.
NOTE
To use Input A to select between local and remote control, parameter 4-A must be set to Button Always
Active or Button Active When Off.
Emergency Mode Operation: In emergency mode the soft starter continues to run until
stopped, ignoring all trips and warnings. When parameter 4-C is set to Emergency Mode
Operation, closing the circuit across C53-C54 activates emergency mode operation as
described in parameter 20-C Emergency Mode. Opening the circuit ends emergency
mode and returns control to the normal control circuits. The MVS stops the motor using
the stop mode selected in parameter 2-H or 13-H Stop Mode.
Emergency Stop (Normally Closed): The MVS can be commanded to perform an
emergency stop, ignoring the soft stop mode set in parameter 2-H Stop Mode. When
parameter 4-C is set to Emergency Stop and the circuit across C53-C54 is opened, SCR
firing stops, the main and bypass contactors open, and the motor coasts to stop.
4-D Input B Functionality
Options:
Description:
Refer to parameter 4-C
Default: AUXILIARY TRIP (N/O)
Determines the functionality of Input B. Refer to parameter 4-C for details. Use
parameters 3-P Auxiliary Trip B - Mode, 3-Q Auxiliary Trip B - Delay, 3-R Auxiliary Trip B Enable Delay to adjust functionality if required.
NOTE
If Input A and Input B are both configured for Parameter Set Selection or Local/Remote Select, the state of
Input A will take priority.
5 Outputs
5-A Low Current Flag
Range:
Description:
Default: 50% FLC
Sets the current level at which the low current flag operates, as a percentage of motor full
load current. Hysteresis is built in.
The low current flag can be assigned to one of the programmable output relays for
indication of motor current lower than the programmed value. The flag is cleared when
the current rises above the activation level by 10% of the programmed motor full load
current (parameter 1-A).
1% – 100% FLC
5-B High Current Flag
Range:
Description:
Default: 100% FLC
Sets the current level at which the high current flag operates, as a percentage of motor full
load current. Hysteresis is built in.
The high current flag can be assigned to one of the programmable output relays for
indication of motor current in excess of the programmed value. The flag is cleared when
the current falls below the activation level by 10% of the programmed motor full load
current (parameter 1-A).
50% – 600% FLC
5-C Motor Temperature Flag
Range:
Description:
Default: 80%
Sets the temperature at which the motor temperature flag operates, as a percentage of the
motor's thermal capacity.
The motor temperature flag can be assigned to one of the programmable output relays for
indication that the motor temperature (as calculated by the motor thermal model) exceeds
the programmed value. A trip occurs when motor temperature (calculated by the thermal
model) reaches the value set in parameter 1-D Motor Service Factor.
0% – 160%
5-D Output Relay A Functionality
Options:
Page 44
OFF (not used)
MAIN CONTACTOR
RUN
Default:
MVS
MAIN CONTACTOR
710-03971-00C
PROGRAMMING MENU
TRIP
WARNING
LOW CURRENT FLAG
HIGH CURRENT FLAG
MOTOR TEMPERATURE FLAG
AUXILIARY TRIP A
AUXILIARY TRIP B
ROTOR RESISTANCE CHANGEOVER
Description:
Determines the functionality of Output Relay A. Output Relay A is normally open.
Main Contactor: The relay will close when starter receives a start command. The relay
remains closed as long as the motor is receiving voltage.
Run: The relay will close when the motor is running at full voltage, after the start has
finished.
Trip: The relay will close when the starter trips.
Warning: The relay will close when a protection mechanism activates and the starter issues
a warning.
Low Current Flag: The relay will close when the low current flag activates, as specified in
parameter 5-A Low Current Flag.
High Current Flag: The relay will close when the high current flag activates, as specified in
parameter 5-B High Current Flag.
Motor Temperature Flag: The relay will close when the motor temperature flag activates, as
specified in parameter 5-C Motor Temperature Flag.
Auxiliary Trip A: The relay will close when a trip occurs on Input A, as specified in
parameter 3-M Auxiliary Trip A - Mode.
Auxiliary Trip B: The relay will close when a trip occurs on Input B, as specified in
parameter 3-P Auxiliary Trip B - Mode.
Rotor Resistance Changeover: The relay will close when the high rotor resistance current
ramp has reached full voltage, allowing use with a slip-ring motor (refer to Using the MVS
to Control a Slip-Ring Motor on page 67).
NOTE
In all cases, there can be a delay between the condition and the relay closing, as specified in parameter
5-E Output Relay A On Delay.
5-E Output Relay A On Delay
Range:
Description:
0:00 – 5:00 minutes:seconds
Default: 0M:00S
Determines the delay before Output Relay A closes, after being commanded to do so.
5-F Output Relay A Off Delay
Range:
Description:
0:00 – 5:00 minutes:seconds
Default: 0M:00S
Determines the delay before Output Relay A opens, after being commanded to do so.
5-G Output Relay B Functionality
Options:
Description:
Refer to parameter 5-D
Default: RUN
Determines the functionality of Output Relay B. Output Relay B is a changeover relay.
Refer to parameter 5-D Output Relay A Functionality for details.
5-H Output Relay B On Delay
Range:
Description:
0:00 – 5:00 minutes:seconds
Default: 0M:00S
Determines the delay before Output Relay B switches over, after being commanded to do
so.
5-I Output Relay B Off Delay
Range:
Description:
0:00 – 5:00 minutes:seconds
Default: 0M:00S
Determines the delay before Output Relay B switches over, after being commanded to do
so.
5-J Output Relay C Functionality
Options:
Description:
710-03971-00C
Refer to parameter 5-D
Default: TRIP
Determines the functionality of Output Relay C. Output Relay C is a changeover relay.
Refer to parameter 5-D Output Relay A Functionality for details.
MVS
Page 45
PROGRAMMING MENU
5-K Output Relay C On Delay
Range:
Description:
0:00 – 5:00 minutes:seconds
Default: 0M:00S
Determines the delay before Output Relay C switches over, after being commanded to do
so.
5-L Output Relay C Off Delay
Range:
Description:
0:00 – 5:00 minutes:seconds
Default: 0M:00S
Determines the delay before Output Relay C switches over, after being commanded to do
so.
5-M Analog Output A Functionality
Options:
CURRENT (% FLC)
Default:
VOLTAGE (% MAINS)
MOTOR TEMPERATURE (% MOTOR SERVICE FACTOR)
MOTOR KW (%)
MOTOR KVA (%)
POWER FACTOR
Description:
Sets the functionality of Analog Output A. Performance of the analog output signal can be
adjusted using parameters 5-N, 5-O and 5-P.
CURRENT (% FLC)
5-N Analog Output A Range
Options:
0-20 MA
4-20 MA
Default:
Description:
Selects the range for Analog Output A.
4-20 MA
5-O Analog Output A Adjustment - maximum
Range:
Description:
Default: 100%
Calibrates the upper limit of Analog Output A to match the signal read on an external
current measuring device. Set so that the current measured on the analog output
simulation is 20 mA at 100%.
0% – 600%
5-P Analog Output A Adjustment - minimum
Range:
Description:
Default: 0%
Calibrates the lower limit of Analog Output A to match the signal read on an external
current measuring device. Set so that the current measured on the analog output
simulation at 0% is 0 mA or 4 mA, as determined by parameter 5-N.
0% – 600%
5-Q Mains Reference Voltage
Options:
Description:
Default:
Provides the reference voltage for the analog output.
100 – 14000 V
400 V
6 Auto-Stop
These parameters define how the auto-stop parameters will control the soft starter.
6-A Auto-Stop Mode
Options:
OFF
TIMER
CLOCK
Default:
Description:
Sets the mode for the auto-stop function. Parameter 6-A is used in conjunction with
parameter 6-B to determine auto-stop operation.
Off: The soft starter ignores any auto-stop time setting in parameter 6-B and runs until a
stop command is received.
Timer: The soft starter auto-stops after the interval specified in parameter 6-B, measured
from the start command.
Clock: The soft starter auto-stops at the time specified in parameter 6-B.
OFF
6-B Auto-Stop Time
Range:
Description:
Page 46
0:01 – 24:00 hours:minutes
Default: 0H:01M (off)
Sets the time for the auto-stop function. Parameter 6-B is used in conjunction with
parameter 6-A to determine auto-stop operation as follows:
MVS
710-03971-00C
PROGRAMMING MENU
6-A
Auto-Stop
Mode
Off
Soft Starter Action
6-B Auto-Stop
Time
3:34
Timer
3:34
Clock
3:34
The soft starter ignores the time setting and
continues to run.
The soft starter will perform a stop 3 hours 34
minutes after start command.
The soft starter will perform a stop at 3:34 am
(24-hour clock).
9 Slip-Ring Motor Setup
These parameters allow the soft starter to be configured for use with a slip-ring motor.
9-A Primary Motor Ramp Configuration
Options:
Default:
SINGLE RAMP
SINGLE RAMP
DUAL RAMP
Description:
Selects whether to use a single or dual current ramp profile for soft starting, when using the
primary motor set. Set to single ramp for squirrel cage induction motors, or dual ramp for
slip-ring induction motors.
9-B Secondary Motor Ramp Configuration
Options:
SINGLE RAMP
DUAL RAMP
Default:
Description:
Selects whether to use a single or dual current ramp profile for soft starting, when using the
secondary motor set. Refer to parameter 9-A for details.
SINGLE RAMP
9-C Slip-Ring Rotor Resistance Contactor Time
Range:
Description:
100 – 500 milliseconds
Default: 150 milliseconds
Sets the delay between the rotor resistance relay closing and the low resistance current
ramp starting.
Slip-ring motors can be started using a rotor resistance method. This approach requires an
output relay to be programmed to Rotor Resistance Changeover (parameters 5-D, 5-G or
5-J) and wired to reduce rotor resistance to provide suitable torque for the application.
The motor is started by providing a current limit ramp to full conduction under high rotor
resistance, then the relay is used to lower rotor resistance and a second current limit ramp
is provided. Running state commences when full conduction is reached.
This parameter only applies if parameter 9-A or 9-B Motor Ramp Configuration is set to
dual ramp.
Set so that the contactor has enough time to close, but the motor does not slow down.
9-D Slip-Ring Conduction Retard
Range:
Description:
Default: 50%
Sets the level of conduction at the start of the second current limit ramp, as a percentage
of full conduction (refer to parameter 9-C Slip-Ring Rotor Resistance Contactor Time for
details). Set so that no current pulse occurs, but the motor retains enough speed to start
correctly.
10 – 90%
11 HMI Settings
These parameters allow the operation of the MVS Controller's interface to be tailored to individual users'
requirements.
11-A Language
Options:
Description:
ENGLISH
Default:
ENGLISH
Default:
AUTO-START/STOP MENU
Selects the language for message display.
11-B F1 Pushbutton Function
710-03971-00C
Options:
NONE
AUTO-START/STOP MENU
Description:
Selects the menu shortcut for button F1 on the MVS Controller.
None: Pressing F1 has no effect.
MVS
Page 47
PROGRAMMING MENU
Auto-Start/Stop: Pressing F1 together with FN accesses the Auto-Stop settings in the
Programming Menu.
11-C F2 Pushbutton Function
Options:
Description:
Refer to parameter 11-B
Default: NONE
Selects the menu shortcut for button F2 on the MVS Controller. Refer to parameter 11-B
F1 Pushbutton Function for details.
11-D Programmable Screen - Top Left
Options:
Default:
STARTER STATE
MOTOR CURRENT
MAINS VOLTAGE
MOTOR POWER FACTOR
MAINS FREQUENCY
RUNNING POWER (kW)
RUNNING POWER (HP)
MOTOR TEMPERATURE
MOTOR KWH
HOURS RUN
STARTER STATE
Description:
•
•
The programmable screen allows the user to select four variables to display on-screen, for
at-a-glance monitoring of starter status. Parameter 11-D selects which variable to display at
the top left of the screen.
Motor current and mains voltage values are the mean average of all three phases.
Motor power factor and motor temperature values are calculated by the soft starter.
11-E Programmable Screen - Top Right
Options:
Description:
Refer to parameter 11-D
Default: MOTOR CURRENT
Parameter 11-E selects which parameter to display at the top right of the programmable
screen. Refer to parameter 11-D for a list of available variables.
11-F Programmable Screen - Bottom Left
Options:
Description:
Refer to parameter 11-D
Default: MOTOR KWH
Parameter 11-F selects which parameter to display at the bottom left of the programmable
screen. Refer to parameter 11-D for a list of available variables.
11-G Programmable Screen - Bottom Right
Options:
Description:
Refer to parameter 11-D
Default: HOURS RUN
Parameter 11-G selects which parameter to display at the bottom right of the
programmable screen. Refer to parameter 11-D for a list of available variables.
12 Secondary Motor Settings
The Secondary Motor Settings parameters configure the soft starter to suit the secondary motor profile.
12-A Motor Full Load Current
Range:
Description:
Default: 100 A
Sets the starter for the secondary motor's full load current (amperes). Refer to parameter
1-A for details.
5 – 550 A
13 Start/Stop Modes-2
13-A Start Mode
Options:
Description:
Default: CONSTANT CURRENT
Selects the start mode. Refer to parameter 2-A for details.
CONSTANT CURRENT
13-B Current Limit
Range:
Description:
Default: 400% FLC
Sets the current limit for constant current starting, as a percentage of motor full load
current. Refer to parameter 2-B for details.
100% – 600% FLC
13-C Current Ramp - Initial Start Current
Range:
Page 48
Default:
100% – 600% FLC
MVS
400% FLC
710-03971-00C
PROGRAMMING MENU
Description:
Sets the initial start current level for current ramp start mode, as a percentage of motor full
load current. Refer to parameter 2-C for details.
13-D Current Ramp - Start Ramp Time
Range:
Description:
1 – 60 seconds
Default: 1 second
Sets the ramp time (in seconds) for current ramp starting. Refer to parameter 2-D for
details.
13-E Kickstart Current Level
Range:
Description:
Default: 500% FLC
Sets the kickstart current level, as a percentage of motor full load current. Refer to
parameter 2-E for details.
100% – 700% FLC
13-F Kickstart Duration
Range:
Description:
0 – 2000 milliseconds
Default: 0 (off)
Sets the duration for the kickstart function in milliseconds. Refer to parameter 2-F for
details.
13-G Excess Start Time
Range:
Description:
0:00 – 4:00 minutes:seconds
Default: 0M:20S
Sets the maximum time allowed for the motor to reach full speed. Refer to parameter
2-G for details.
13-H Stop Mode
Options:
COAST TO STOP
TIMED VOLTAGE RAMP
Default:
Description:
Selects the active stop mode. Refer to parameter 2-H for details.
COAST TO STOP
13-I Soft Stop Ramp Time
Range:
Description:
0:00 – 1:40 minutes:seconds
Default: 0M:00S
Sets the ramp time for soft stopping the motor. Refer to parameter 2-I for details.
16 Time-Overcurrent Protection
The time-overcurrent protection settings provide overload protection for the motor using a fixed thermal model. The
time-overcurrent protection is based on IEEE standard C37.112-1996.
If required, time-overcurrent protection can be used instead of the motor overload and instantaneous overcurrent
protection mechanisms - refer to Motor Overload Protection on page 63 for information on optimising motor
protection.
16-A Time-Overcurrent Maximum Level
Range:
Description:
Default: 999% FLC
Sets the current level at which the starter will immediately trip on overcurrent, as a
percentage of motor full load current.
100% – 999% FLC
16-B Time-Overcurrent Curve
Range:
Description:
710-03971-00C
Default: 0
Selects the curve used by the starter for time-overcurrent protection.
The time-overcurrent model defines 15 protection curves. The curves define the time that
the starter will allow the motor to continue operating at levels above full load current
before causing a trip. Setting parameter 16-B to 0 disables the time-overcurrent
protection.
0 – 15
MVS
Page 49
PROGRAMMING MENU
10000
1000
100
15
10
10
5
1
0.1
1
100
200
300
400
500
600
700
Current (% motor FLC)
800
900
1000
Select the curve which most closely matches the specifications on the motor datasheet.
Use the motor's locked rotor current figure to select the appropriate column (current
level), then select the curve that best matches the motor's maximum start time at locked
rotor current. If no curve exactly matches the maximum start time, select the next higher
curve.
For example, for a motor with locked rotor current of 600% and maximum start time of 20
seconds, select curve 8. For a motor with locked rotor current of 500% and maximum
start time of 50 seconds, select curve 14.
If the maximum start time is greater than the curves allow, disable the time-overcurrent
protection and use the motor thermal model.
NOTE
It may be necessary to select a higher curve if using soft stop.
Time-Overcurrent curves
The table below shows the time to trip (in seconds) for each curve.
Current Level (% Motor FLC)
Curve
105%
110%
150%
200%
300%
400%
500%
600%
700%
800%
1
2
3
4
5
6
7
8
9
10
11
12
13
14
15
853
1707
2561
3414
4268
5122
5976
6829
7682
8537
9390
10244
11097
11951
12805
416
833
1250
1666
2083
2500
2916
3333
3750
4166
4583
5000
5416
5833
6250
70
140
210
280
350
420
490
560
630
700
770
840
910
980
1050
29
58
87
116
145
175
204
233
262
291
320
350
379
408
437
10
21
32
43
54
65
76
87
98
109
120
131
142
153
164
5
11
17
23
29
35
40
46
52
58
64
70
75
81
87
3
7
10
14
18
21
25
29
32
36
40
43
47
51
54
2
5
7
10
12
15
17
20
22
25
27
30
32
35
37
1
3
5
7
9
10
12
14
16
18
20
21
23
25
27
1
2
4
5
6
8
9
11
12
13
15
16
18
19
20
1000
%
0
1
2
3
4
5
6
7
8
8
9
10
11
12
13
16-C Time-Overcurrent Reset Time
Range:
Description:
Page 50
0:02 – 4:00 minutes:seconds
Default: 0M:20S
When the time-overcurrent model is being used for motor protection, this parameter sets
the time required for the motor to return from 100% to 0% of its time-overcurrent
capacity, when not operating (ie at zero current).
MVS
710-03971-00C
PROGRAMMING MENU
When the time-overcurrent model is being used for fuse style protection, this parameter
sets the time required for the fuse to return from maximum temperature to ambient
temperature when not operating (ie at zero current). Set according to the motor or fuse
datasheet.
16-D Reserved
Description:
This parameter is reserved for future use.
20 Restricted Parameters
20-A Security Access Code
Range:
Description:
Default: 0000
Changes the current security access code. Use the ◄ and ► buttons to select which digit
to alter. Use the ▲ and ▼ buttons to change the displayed value to the desired setting.
0000 – 9999
20-B Adjustment Lock
Options:
OFF
ON
Default:
Description:
Allows the soft starter to be protected from unauthorised parameter changes via the
Programming Menu and prevents unauthorised access to the Commissioning Menu.
Off: Allows full access to the Commissioning Menu and permits an operator to read and
write operating parameter values without explicit authorisation. Explicit authorisation is still
required to access restricted system parameters (parameter group 20 and above).
On: Prevents access to the Commissioning Menu and requires the security access code to
be entered before users can modify operating parameter settings. General settings can be
viewed without authorisation.
OFF
NOTE
Changes to the Adjustment Lock setting take effect after the Programming Menu has been closed.
20-C Emergency Mode
Options:
OFF
ON
Default:
Description:
Selects whether the soft starter will permit emergency mode operation. In emergency
mode, the soft starter will start (if not already running) and continue to operate until
commanded to stop, ignoring all trips.
Emergency mode operation is controlled using a programmable input (parameters 4-C or
4-D), and the soft starter will continue to run as long as the input remains closed.
OFF
20-D Motor Current Calibration
Range:
Description:
Default: 100%
Adjusts the soft starter's current monitoring circuits. The MVS is factory-calibrated with an
accuracy of ± 5%. This parameter can be used to adjust the current readout to match an
external current metering device.
Set as required, using the following formula:
Current shown on MVS display
Calibration (%) =
85% – 115%
Current measured by external device
eg 102% =
66 A
65 A
NOTE
This adjustment affects all current-based functions.
20-E Voltage Calibration
Range:
Description:
710-03971-00C
Default: 100%
Adjusts the soft starter's voltage monitoring circuits. The MVS is factory-calibrated with an
accuracy of ± 5%. This parameter can be used to adjust the voltage readout to match an
external voltage metering device.
Set as required, using the following formula:
85% – 115%
MVS
Page 51
PROGRAMMING MENU
Calibration (%) =
Voltage shown on soft starter display
Voltage measured by external device
e.g. 90%
6000
6600
NOTE
This adjustment affects all voltage-based functions.
20-F Main Contactor Time
Range:
Description:
100 – 500 milliseconds
Default: 500 milliseconds
Sets the delay period between the starter switching the main contactor output (terminals
13, 14) and beginning the pre-start checks (before a start) or entering the not ready state
(after a stop). Set according to the specifications of the main contactor used.
20-G Bypass Contactor Time
Range:
Description:
100 – 500 milliseconds
Default: 500 milliseconds
Sets the delay period before the starter switches the bypass contactor output (terminals
23, 24) and transitions from starting to running, after the motor voltage has reached 100%
in a start; or before the starter commences the stop ramp, after a stop command. Set
according to the specifications of the bypass contactor used.
21 Protection Classes
These parameters determine how the soft starter will react when a protection event occurs.
Each protection event can be set to trip the starter, activate a warning flag, or be ignored. The soft starter writes every
protection event to the event log, regardless of the trip or warning response. The default response is to trip the soft
starter.
NOTE
The protection settings are vital for safe operation of the soft starter and motor. Defeating the protection
may compromise the installation and should only be done in the case of emergency.
The protection activation point for each protection can be set in parameter group 3.
21-A ~ 21-S Protection Classes
Options:
Default:
TRIP STARTER
WARNING AND LOG
LOG ONLY
TRIP STARTER
Description:
Selects the starter's response to each protection.
• 21-A Motor Overload
• 21-B Undercurrent
• 21-C Instantaneous Overcurrent
• 21-D Current imbalance
• 21-E Mains Frequency
• 21-F Auxiliary Trip A
• 21-G Auxiliary Trip B
• 21-H Motor Thermistor
• 21-I Excess Start Time
• 21-J Starter Communications Timeout
• 21-K Battery/Clock Fail
• 21-L SCR Temperature
• 21-M Network Communication Timeout
• 21-N Ground Fault
• 21-O Overvoltage
• 21-P Undervoltage
• 21-Q Reserved
• 21-R Reserved
• 21-S Time-overcurrent
Page 52
MVS
710-03971-00C
COMMISSIONING
Section 8 Commissioning
8.1
Commissioning Menu
The Commissioning Menu provides access to commissioning and testing tools.
To open the Commissioning Menu, press the SETUP TOOLS button while viewing the metering screens.
To navigate through the Commissioning Menu:
•
•
•
•
to scroll to the next or previous item, press the ▲ or ▼ button.
to open an item for viewing, press the ► button.
to return to the previous level, press the ◄ button.
to close the Commissioning Menu, press the SETUP TOOLS button.
NOTE
The Commissioning Menu is only available if the Programming Menu is unlocked (parameter 20-B
Adjustment Lock is set to Off).
8.2
Commissioning Menu
Output Signal Simulation
Reset Thermal Models
Simulate output signalling to confirm
operation of the outputs.
Reset the soft starter thermal model if
required in emergencies.
Analog output
Low current flag
High current flag
Relay A
Relay B
Relay C
Commissioning Menu
Reset Thermal Models
Parameter Archive
Run Simulation
Protection Simulation
Output Signal Simulation
Protection Simulation
Parameter Archive
Simulate trip conditions to confirm the
soft starter responds appropriately (by
tripping, warning or writing to log).
Save the current programmed settings,
reload a previously saved group of
settings, or reset the soft starter to the
factory default values.
Run Simulation
Simulate operation of the soft starter
without a motor connected, to test the
control circuits and associated
components.
8.3
Load defaults
Load user set 1
Load user set 2
Save user set 1
Save user set 2
Simulation Tools
Software simulation functions let you test the soft starter's operation and control circuits without connecting the soft
starter to mains voltage. The MVS has three simulation modes:
•
Run simulation: simulates a motor starting, running and stopping to confirm that the soft starter and
associated equipment have been installed correctly.
• Protection simulation: simulates activation of each protection mechanism to confirm that the soft starter and
associated control circuits are responding correctly.
• Output signal simulation: simulates output signalling to confirm that outputs and associated control circuits are
operating correctly.
The simulation tools are accessed via the Commissioning Menu. The simulations are only available when the soft
starter is in Ready state, control voltage is available and the MVS Controller is active.
NOTE
Access to the simulation tools is protected by the security access code.
The default access code is 0000.
710-03971-00C
MVS
Page 53
COMMISSIONING
Run Simulation
The MVS Controller allows the user to simulate a motor starting, running and stopping, in order to confirm that the
soft starter and any auxiliary switchgear have been installed correctly. Feedback is provided via the display and the
status LEDs.
Starter status LEDs
Starter
Status
START STOP RESET
F1
LOGS
UNDO
Control
Inputs
Relay
Outputs
LCL/
RMT
Start
Start
RLA
Run
Stop
RLB
F2
SETUP
TOOLS
STORE
Trip
Reset
RLC
Warning
Input A
Remote
Input B
Fn
Relay output LEDs
S e r i e s
Control input LEDs
The run simulation provides a safe method of confirming that the installation is operating as expected. The simulation
is particularly useful to confirm the correct configuration of the main and bypass contactors, fibre-optic controls and
programmable outputs.
The simulation can be terminated at any time by pressing the UNDO button. The MVS Controller will return to the
Commissioning Menu.
NOTE
The soft starter must be disconnected from mains voltage, and control voltage must be available for the
MVS Controller. During the simulation, the soft starter checks that mains voltage is not present but
performs no other pre-start checks.
The simulation is only available when the soft starter is in Ready state.
To activate the run simulation:
1.
Open the Commissioning Menu and select Run Simulation.
Simulation Mode
Run sim >
2.
To enter the run simulation, press the ► button.
Ready
Wait for start sig
3.
Press the START button.
Pre-Start Checks
>
The soft starter will perform its pre-start checks. If parameter 5-D (Output Relay A Functionality) is set to Main
Contactor, the Relay A LED on the MVS Controller activates.
4.
Press the ► button to proceed to the next stage of the simulation. The MVS simulates starting.
Starting – Phase 1
>
The Start LED activates on the MVS Controller and the Phase 1 firing LED blinks on the power interface PCB.
5.
Press the ► button to proceed to the next stage of the simulation. The MVS simulates running.
Running – Phase 2
Wait for Stop Signal
The bypass contactor closes and the Run LED activates on the MVS Controller. The Phase 2 firing LED blinks on the
power interface PCB. If parameter 5-G (Output Relay B Functionality) is set to Run, the Relay B LED on the MVS
Controller activates.
6.
Press the STOP button to proceed to the next stage of the simulation. The MVS simulates stopping.
Stopping - Phase 3
>
Page 54
MVS
710-03971-00C
COMMISSIONING
The bypass contactor opens and the Run and Relay B LEDs on the MVS Controller turn off. The Phase 3 firing LED
blinks on the power interface PCB.
7.
Press the ► button to proceed to the next stage of the simulation. The MVS returns to the stopped state.
Stopped
>
The main contactor opens and all LEDs turn off.
8.
Press the ► button to terminate the simulation and return to the Commissioning Menu.
Protection Simulation
The MVS Controller allows the user to simulate activation of each protection mechanism, in order to confirm that the
soft starter is responding to each situation correctly.
NOTE
The soft starter must be disconnected from mains voltage, and control voltage must be available for the
MVS Controller. During the simulation, the soft starter checks that mains voltage is not present but
performs no other pre-start checks.
The simulation is only available when the soft starter is in Ready state.
The protection simulation allows the user to confirm that protection events are being reported correctly on the display
and across the communication network.
To activate the protection simulation:
1.
Open the Commissioning Menu and select Protection Simulation.
Simulation Mode
Protection sim >
2.
Press the ► button to open the protection list. The display will indicate the first simulation in the list.
Current Imbalance
Simulate >
3.
4.
Use the ▲ and ▼ buttons to select a protection to simulate. The following protection conditions are available to
simulate:
Motor overload
Undercurrent
Instantaneous overcurrent
Current imbalance
Mains frequency
Auxiliary trip A
Auxiliary trip B
Motor thermistor
Excess start time
Starter communication failure
Battery/ Clock failure
SCR temperature model
Network communication failure
Ground fault
Overvoltage
Undervoltage
Time-overcurrent
Hold down the ► button to simulate the selected protection. The simulation will continue as long as the button
is held down. The soft starter's response depends on the protection class setting (parameter group 21).
Tripped
Current Imbalance
Release the ► button to end the simulation. Use ▲ or ▼ to select another simulation, or press ◄ to return to the
Commissioning Menu.
710-03971-00C
MVS
Page 55
COMMISSIONING
NOTE
If the protection class is set to Trip, reset the soft starter before simulating another protection. If the
protection class is set to Warning or Log, no reset is required.
Signalling Simulation
The MVS Controller allows the user to simulate output signalling in order to confirm that the outputs are operating
correctly.
NOTE
The soft starter must be disconnected from mains voltage, and control voltage must be available for the
MVS Controller. During the simulation, the soft starter checks that mains voltage is not present but
performs no other pre-start checks.
The simulation is only available when the soft starter is in Ready state.
To activate the signalling simulation:
1.
Open the Commissioning Menu and select Signalling Simulation.
Simulation Mode
Output Signal Sim
2.
>
Press the ► button to open the simulation list. The display will indicate the first simulation in the list.
Analog Output
Simulate >
3.
Use the ▲ and ▼ buttons to select a simulation. The following signals are available to simulate:
Analog output
Low current flag 1
High current flag 1
Motor temperature flag 1
Relay A
Relay B
Relay C
To test the flags, set an output relay (parameters 5-A to 5-C) to the appropriate
function and monitor the relay's behaviour.
Once the required simulation is displayed, press ► to confirm the selection.
1
4.
Low Current Flag
Simulate >
5.
Press the ▲ button to start the simulation. Pressing the ▼ button stops the signal.
Low Current Flag
▲ On ▼ Off
While the signal is being simulated, the display will indicate On. While the signal is not being simulated, the display will
indicate Off.
6. Once the simulation is complete, press ◄ to return to the simulation list.
7. Press ▲ or ▼ to select another simulation, or press ◄ again to return to the Commissioning Menu.
Analog Output Simulation
The analog output simulation uses the ▲ and ▼ buttons to change the analog output current at terminals B10, B11 of
the MVS Controller.
Analog Output
0%
4 mA
Attach an external current measuring device to terminals B10, B11 of the MVS Controller. Use the ▲ or ▼ button to
adjust the percentage value in the lower left hand corner of the display. The current measuring device should indicate
the same level of current as shown at the lower right corner of the display.
Page 56
MVS
710-03971-00C
COMMISSIONING
8.4
Low Voltage Test Mode
The MVS can be connected to a low voltage motor (≤ 500 VAC) for testing. This allows the user to thoroughly test
the soft starter and its associated power and control circuits. The low voltage test mode provides a means of testing
the soft starter's configuration without requiring a full medium voltage test facility.
For models V06 and higher, one non-conduction resistor assembly must be connected to each phase arm (three
assemblies are supplied with the soft starter). The non-conduction resistor assembly is not required for models
V02 ~ V04.
During the low voltage test, the soft starter's input, output and protection settings can be tested. Low voltage mode is
not suitable for testing soft starting or soft stopping performance.
Non-Conduction Resistor Assembly
MVSxxxx-V06, V07
Clip one end of the resistor assembly to the bolt on the
non-conduction PCB. The non-conduction PCB is located
on the side of the phase arm, at the top of the long round
grading resistor (on the right hand side of the phase arm
when viewed from the front). There is a small steel bracket
just in front of the PCB. Pass the other end of the assembly
through the phase arm, in front of the three grading
resistors, and clip it to the steel bracket in front of the
grading resistor on the other side of the phase arm (this
bracket looks the same as the bracket in front of the nonconduction PCB).
MVSxxxx-V11, V13
Clip one end of the resistor assembly to the bolt on the
non-conduction PCB. The non-conduction PCB is located
on the side of the phase arm, at the top of the long round
grading resistor (on the right hand side of the phase arm
when viewed from the front). Pass the other end of the
assembly over the phase arm and clip it to the bus bar at
the other side of the phase arm.
WARNING
After low voltage mode testing, ensure that the non-conduction resistor assembly is removed from
each phase arm before connecting the soft starter to a medium voltage motor. If the non-conduction
resistor assemblies remain on the phase arms, the soft starter may suffer severe damage.
To operate the MVS in low voltage test mode:
1.
2.
3.
4.
5.
6.
7.
710-03971-00C
Isolate the soft starter from the motor and the mains supply.
Connect one non-conduction resistor assembly to each phase arm.
Connect T1, T2, T3 of the soft starter to a three phase motor with full load current of 5 ~ 20 A. Connect L1, L2,
L3 of the soft starter to three phase mains supply with voltage less than 500 VAC (frequency 50 Hz or 60 Hz).
Set parameter 1-A Motor Full Load Current to the value shown on the motor name plate. Set parameters 3-U
Overvoltage Level and 3-W Undervoltage Level to suit the low voltage mains supply.
Switch on control and mains supply, and use the MVS to start the motor. The start command can be sent from
the MVS Controller or via the remote input. Monitor the soft starter's display and verify the line voltage readings.
Stop and restart the motor several times to confirm correct and consistent operation.
When testing is complete, isolate the soft starter from the mains supply. Disconnect the soft starter from the
motor and mains voltage, then remove control voltage. Remove the non-conduction resistor assembly from each
phase arm.
MVS
Page 57
COMMISSIONING
8.5
Thermal Model Reset
The soft starter's advanced thermal modelling software monitors the motor's performance during each start and
throughout the running cycle. This allows the soft starter to calculate the motor's temperature and ability to start
successfully at any time.
The soft starter's thermal model can be reset if required.
Reset Thermal Models
Reset >
In order to reset the thermal model, press the ► button. At the confirmation prompt, press STORE to confirm or
UNDO to cancel the action. Cancelling the action returns to the Commissioning Menu.
When the thermal model has been reset, the screen will briefly display a confirmation message, then return to the
previous screen.
Reset Thermal Models
Reset
8.6
Parameter Archive
The parameter archive menu allows users to:
• restore the MVS to factory default settings
• save the current parameter settings to an internal file
• reload parameter settings from an internal file
The MVS can store two separate user-defined files.
1.
To select a parameter archive function, scroll to the Parameter Archive screen in the Commissioning Menu then
press the ► button.
Parameter Archive
Load/Save >
2.
Use the ▼ button to select the desired function.
Load Defaults
Load >
The options are:
•
•
•
•
•
3.
Load defaults
Load user set 1
Load user set 2
Save user set 1
Save user set 2
When the screen shows the required function, press the ► button. The MVS will prompt for confirmation.
Save User Set 1
Ok/STORE
4. Press STORE to confirm or UNDO to cancel the action. Cancelling the action returns to the previous screen.
When the action has been completed, the display will briefly confirm success then return to the main status screen.
8.7
Logs Menu
The Logs Menu provides information on events, trips and starter performance.
To open the Logs Menu, press the LOGS button while viewing the metering screens.
To navigate through the Logs Menu:
•
•
•
•
•
Page 58
to open a log, press the ► button.
to scroll through the entries in each log, press the ▲ and ▼ buttons.
to view details of a log entry, press the ► button.
to return to the previous level, press the ◄ button.
to close the Logs Menu, press the LOGS button.
MVS
710-03971-00C
COMMISSIONING
Logs Menu
Event Log
Trip Log
Stores key information about the last 99
events involving the soft starter:
Stores complete details of the last eight
trips:
Configuration changes
Starts, stops and resets
Trips
Warnings
Logged protection events
Logs Menu
Event Log
Trip Log
Performance Counters
Protection type
Date and time
Soft starter state
Mains frequency
Current and voltage on each phase
Performance Counters
Stores details of the soft starter's operation
and performance:
Hours run since counter was last reset
Lifetime hours run
Starts since counter was last reset
Lifetime starts
kWh since counter was last reset
Lifetime kWh
Number of times thermal model has
been reset
Event Log
The event log stores time-stamped details of the starter's 99 most recent events (actions, warnings and trips). Event 1
is the most recent and event 99 is the oldest stored event.
To view items in the event log, press the ► button from the main event log screen. Use the ▲ and ▼ buttons to
navigate through the log and view events. To close the log and return to the main display, press ◄.
The event log stores a brief description of each event. When viewed, the top line shows event number, description
and type; the bottom line shows the date and time stamp for the event.
Event number (1~99)
Event type code
Details
1 OP LOAD SET 2
2004NOV25
14:22:34
Date and time
Different details are recorded depending on the nature of the event.
Type Code
Event Type
Protection
CTRL PWR
Control Power
OP
Operation
710-03971-00C
Details
xxxxxxxxxxxxxxx y
xxxxxxxxxxxxxxx = protection name
y = protection type
T – trip
W – warning
L – log only
OFF – power removed
RESTORE – power restored
Load Defaults = restore default settings
Load set 1 = load stored parameter set 1
Load set 2 = load stored parameter set 2
RESET Thermal = reset thermal model
RESET hrs run = reset hours run counter
RESET starts = reset starts counter
RESET kwh = reset kWh counter
Save set 1 = save user parameter set 1
Save set 2 = save user parameter set 2
SET Time = set date/ time clock
MVS
Page 59
COMMISSIONING
PROG
Programming
RESET
Reset
START
Start
STOP
Stop
SIM protect = protection simulation
SIM run = run simulation
SIM signal = signalling simulation
xx-x y zzz
xx-x = parameter number
y = number of adjacent parameters adjusted
zzz = command source
LCL – local pushbuttons
SRL – serial connection
LCL – reset via local pushbuttons
RMT – reset via remote inputs
SRL – reset via serial connection
www xxx y z
www = command source
LCL – local controller
RMT – remote inputs
SRL – serial connection
xxx = start time (seconds)
y = parameter set
1 = primary motor settings
2 = secondary motor settings
z = start type
N = normal
E = emergency
xxx yyy
xxx = command source
LCL – local pushbuttons
RMT – remote inputs
SRL – serial connection
yyy = stop mode
CST – coast to stop
SFT – soft stop
Trip Log
When a protection feature activates to trip the starter, details of the trip cause and starter state are recorded in the
trip log.
The trip log stores details of the eight most recent trip conditions. Trip 1 is the most recent and trip 8 is the oldest
stored trip. The MVS stores information about the current and voltage on each phase when the trip occurred, and you
can access details about each phase by using the ◄ and ► buttons. Details of the next trip are accessed using the ▲
and ▼ buttons. To close the log and return to the main display, press ◄.
1 Undercurrent
2004MAR02
T ► Mains Freq 50 Hz
23:05:14 ◄ State
Running
▲
►
◄
Volts
Amps
▲
▼
▼
►
◄
Volts
Amps
L1
L1
4155
158
…
t ► MAINS Freq 50 Hz
22:03:27 ◄ State
stopping
4160
159
▲
▼
2 Overload Mtr 1
2004MAR02
L1
L1
8 aux 1 trip T
2004Feb26
14:03:28
NOTE
If the soft starter's real time clock fails, events will be recorded with the incorrect time stamp.
Page 60
MVS
710-03971-00C
COMMISSIONING
Performance Counters
The performance counters store details of the starter's lifetime operation.
To view the information in each counter, use the ▼ button to scroll through the list. To reset a counter, press the ►
button from the appropriate screen and press the STORE button to confirm the action.
Hours Run
987654.32
►
◄
Reset >
Reset Hours Run?
OK/store
Press STORE to reset or UNDO
to cancel.
▲
▼
Total Elapsed Time
123456.78
▲
▼
Start Count
reset >
35
►
◄
Reset Start Counter?
OK/Store
Press STORE to reset or UNDO
to cancel.
▲
▼
Total Starts
45
▲
▼
kWh count
reset >
x
▲
▼
►
◄
Reset kWh Counter?
OK/Store
Press STORE to reset or UNDO
to cancel.
Total kWh
75923
▲
▼
Thermal Model Reset
Count = 2
710-03971-00C
MVS
Page 61
OPERATION
Section 9 Operation
CAUTION
We recommend testing the soft starter's setup on a low voltage motor before beginning operation on a medium
voltage motor. This allows the operator to test that the soft starter is correctly connected to the auxiliary
equipment.
9.1
Using the MVS to Control a Motor
To soft start the motor, press the START button on the MVS Controller or activate the Start remote input. The
motor will start using the start mode selected in parameter 2-A.
To stop the motor, press the STOP button on the MVS Controller or activate the Stop remote input. The motor will
stop using the stop mode selected in parameter 2-H.
To emergency stop the motor, press the local STOP and RESET buttons at the same time. Alternatively, one of the
programmable inputs can be configured for emergency stop (parameters 4-C and 4-D). The soft starter will remove
power from the motor and open the main contactor, and the motor will coast to stop.
To reset a trip on the soft starter, press the RESET button on the MVS Controller or activate the Reset remote input.
9.2
Operating States
Start and Run States
The MVS soft starter has six operating states, and performs the following actions in each state:
d
b
1
2
c
3
State
1
Not ready
2
3
Ready
Pre-start checks
4
5
6
Starting
Running
Stopping
4
e
f
5
6
1
2
07717.A
a
Starter actions
Control power is on and the starter performs system checks. The starter may be
waiting for the motor to cool before allowing a start.
The starter is initialised and waiting for a start command.
A start command has been received (a). The main contactor closes (b) and the starter
performs connection checks.
The starter ramps the SCRs up to full conduction and closes the bypass contactor (c).
The motor is running normally.
A stop command has been received (d). The starter opens the bypass contactor (e),
ramps the SCRs down to no conduction, then opens the main contactor (f).
Trip States
The starter's response to a trip depends on the starter's state when the trip occurs.
•
Trip while starting (bypass contactor not yet closed)
State
Not Ready
Ready
Start command received
Pre-start checks
Starting
Trip command
Tripped
Reset command received
Page 62
Starter action
Perform system checks.
Wait for start command.
Main contactor closes.
Perform connection checks.
Ramp up SCR firing angles.
Turn SCRs off then open main contactor.
Wait for reset command.
Trip cleared and starter returns to Ready state.
MVS
710-03971-00C
OPERATION
•
Trip while running (bypass contactor closed)
State
Not Ready
Ready
Start command received
Pre-start checks
Starting
Full conduction
Running
Trip command
Tripped
Reset command received
•
Starter action
Perform system checks.
Wait for start command.
Main contactor closes.
Perform connection checks.
Ramp up SCR firing angles.
SCRs at 100% conduction. Verify current is < 120% FLC then close bypass contactor.
Normal motor run state (bypassed mode).
Open bypass contactor. Turn SCRs off then open main contactor.
Wait for reset command.
Trip cleared and starter returns to Ready state.
Instantaneous Overcurrent Stage 2 trip
The main contactor opens immediately, regardless of the starter's state.
9.3
Motor Protection
Motor, System and Soft Starter Protection Mechanisms
The MVS incorporates extensive protection features to ensure safe operation of the motor, system and soft starter.
Most protection features can be customised to suit the installation. Use parameter group 3 to control the situation
where the protections will activate and parameter group 21 to select the soft starter's response. The default response
is to trip the soft starter.
• Protection Coordination
Check protection settings on the supply side of the starter to ensure correct discrimination with the soft starter.
When using fuse/main contactors, set the breaker current parameter, to coordinate the fuse and contactor. The
contactor must not open if the current is above its maximum value. If motor current is greater than breaker current,
the fuse must act first. The breaker current must be less than the contactor's fault break current level. In this case all
other overcurrent protection parameters must not act.
When using a breaker, set breaker time so that the maximum trip time is < 150 ms.
Voltage must not be continuously maintained on the phase arms while the motor is off. Short circuit protective
equipment must be present in all installations.
• Motor Overload Protection
The MVS offers two forms of motor overload protection:
•
a motor thermal model that monitors the performance of the motor and calculates its status at all times. This
protection is based on the motor information programmed in parameter group 1, and the thermal model
adjusts itself according to the motor's recent operating history (including temperature rise from previous
operation). This model provides finer motor protection than the time-overcurrent model, if the programmed
motor information is accurate.
• a time-overcurrent model that calculates the motor's status according to a predefined performance curve.
This method is based on IEEE standard C37.112-1996 (Inverse-Time Characteristic Equations for
Overcurrent Relays) and provides similar protection to a relay. This model may suit users familiar with timeovercurrent protection models, but provides coarse motor protection.
The two methods offer similar kinds of protection and we recommend using only one of the two methods.
3
1
2
3
4
5
6
4
5
Time
6
1
Motor service factor
Locked rotor current
Motor failure curve
Motor thermal model protection curve
Time-overcurrent protection curve
Typical motor operating current
2
Motor current
710-03971-00C
MVS
Page 63
OPERATION
NOTE
The soft starter can only be protected from short circuits by suitably selected R Rated fuses.
Motor Thermal Model Protection
To enable motor and starter protection using the motor thermal model, the soft starter must be programmed with
accurate information on the motor's characteristics.
1.
2.
3.
Set parameters 1-B Motor Maximum Start Time, 1-C Motor Locked Rotor Current and 1-D Motor Service Factor
according to the motor datasheet.
Use instantaneous overcurrent protection (parameters 3-C, 3-D, 3-Y and 3-Z) to provide protection for locked
rotor situations. Refer to individual parameters for details.
Disable the time-overcurrent protection by setting parameter 16-B Time-Overcurrent Curve to 0.
Time-Overcurrent Motor Protection
To enable motor overload protection using the time-overcurrent model:
1.
2.
3.
4.
Use the motor locked rotor current and maximum start time (locked rotor time) to select the most appropriate
protection curve in parameter 16-B Time-Overcurrent Curve.
Set parameter 16-C Time-Overcurrent Reset Time to the time required for the motor to cool from running
temperature to ambient temperature, when not operating (ie at zero current). If this information is not available,
use a value at least three times as long as the maximum start time.
Set parameter 16-A Time-Overcurrent Maximum Level to a value 10% higher than the motor's locked rotor
current, as a percentage of the motor's full load current.
Disable the motor thermal model by setting parameters 1-B Motor Maximum Start Time to 2:00, 1-C Motor
Locked Rotor Current to 1200%, 1-D Motor Service Factor to 160% and parameter 21-A to Log Only.
NOTE
When the motor thermal model is disabled, the motor temperature information displayed on the
metering screens will not be accurate.
Page 64
MVS
710-03971-00C
OPERATION
Operating Feedback
•
Metering Screens
The MVS uses metering screens to display information on the soft starter's performance. Use the ▲ and ▼ buttons
to move between metering screens.
RUNNING STOP IN 14:02
260A
M1
* 100%
Starter status
STARTING
11540
Programmable
screen
DATE/TIME
2004NOV28
Date/time
L1 260 A
L3 261 A
1040 A
1080
L2 258 A
GC 260 A
Current
6600 V 6610 V 6605 V
260 A
258 A
261 A
Voltage and current
11:20:36
LAST START
12 S
400% FLC
T-RISE 40%
Last start
information
2515 KW
2970 KVA
3372 HP
0.92 PF
Power metering
Pressing the ► button while viewing the Date/Time screen lets the user set the date and time on the MVS Controller.
Pressing the ► button at any other screen opens the Programming Menu.
•
Starter Status
The starter status screen shows real-time details of the starter's status, including current and temperature:
Status
Auto-stop information
Running Stop in 14:02
260A
M1
88%
Motor current
Motor temperature
Parameter set
The information on the screen is arranged as follows:
• top left: status information (Ready, Starting, Running, Stopping or Tripped).
• top right: auto-stop information.
• bottom left: motor current (mean average of three phases).
• bottom centre: parameter set currently in use (primary (M1) or secondary (M2)).
• bottom right: motor temperature (based on the thermal model).
When the motor temperature approaches the trip level, the temperature will flash.
When the motor's thermal capacity will not permit a restart, an asterisk appears in front of the temperature.
When a warning occurs, the top line of the status screen alternates with the warning type. The lower line continues to
display current and temperature information:
Current Imbalance
260 A
M1
88%
RUNNING
260 A
stop in 14:02
M1
88%
When a trip occurs, the status screen is replaced by details of the trip type:
Tripped
Current Imbalance
When operating in Emergency Mode, the screen shows "Emergency Operation":
Emergency Operation
260 A
M1
88%
710-03971-00C
MVS
Page 65
OPERATION
•
Current
The current screen shows real-time details of the ground current and the line current on each phase:
L1 260A
L3 261A
L2 258A
GC 1A
When current is not being measured, the display will show 0.
•
Voltage and Current
The voltage and current screen shows real-time line voltage and line current on each phase:
6600V
260A
L1
6610V
258A
L2
6605V
261A
L3
When the motor is not running, the display will show –– in place of voltage and 0 A current.
•
Power Metering
The power metering screen shows details of total motor power, motor horsepower, motor active power and power
factor.
2515 kW
2970 kVA
•
3372 hp
0.92 pf
Last Start Information
The last start information screen shows details of the most recent successful start:
•
•
•
start duration (seconds)
maximum start current drawn (as a percentage of motor full load current)
calculated rise in motor temperature
Last start 12 Sec
400 %
40% T-rise
If data is not available from the last start, the display will show 0 for each field.
•
Date/Time
The date/time screen shows the current system date and time (24 hour format):
Date/Time
2004Nov22 11:20:36
To adjust the current date and time, press the ► button while viewing the Date/Time metering screen. Use the ◄
and ► buttons to select which part of the date or time to edit, and use the ▲ and ▼ buttons to change the value.
Pressing STORE from the seconds element stores the current value and returns to the metering screens. To return to
the metering screens without saving changes, press the ◄ button repeatedly.
•
Programmable Screen
The programmable screen shows the information selected in parameters 11-D to 11-G.
Starting
11540
1040A
1080
The default settings are starter state, motor current, kWh and hours run.
Page 66
MVS
710-03971-00C
OPERATION
Using the MVS to Control a Slip-Ring Motor
The MVS can be used to control a slip-ring motor, using rotor resistance.
Main contactor
close time
Sub-states
Rotor resistance contactor
close time
Bypass contactor
close time
100% voltage
Voltage at
conduction retard
Output voltage
States
Ready
Pre-start tests
Start
command
Starting
Rotor resistance
current ramp retard
Running
Shorted rotor
current ramp retard
In order to use the MVS with a slip-ring motor, set the following parameters:
•
•
•
•
710-03971-00C
parameter 9-A or 9-B Primary or Secondary Motor Ramp Configuration must be set to dual ramp
an output relay (parameters 5-D to 5-J) must be set to rotor resistance. Wire the relay to reduce the rotor
resistance to provide suitable torque for the application.
parameter 9-C Slip-Ring Rotor Resistance Contactor Time defines the time between the rotor resistance
contactor closing and the start of the shorted rotor current ramp. Set a time which is:
• long enough for the rotor resistance contactor to close
• short enough for the motor to retain speed
parameter 9-D Slip-Ring Conduction Retard defines the level of conduction at the start of the shorted rotor
current ramp. Set a value which is:
• low enough to avoid a current pulse
• high enough for the motor to retain speed
MVS
Page 67
OPERATION
Slip-Ring Motor Connection
Page 68
MVS
710-03971-00C
TROUBLESHOOTING
Section 10
Troubleshooting
The MVS provides extensive information to help the operator diagnose and remedy any operating difficulties.
In addition to the motor and load protection features already described, the MVS reports in detail on the starter's own
state. Any internal failure will cause the soft starter to trip, and full details will be recorded in the trip log and event log.
10.1
Protection Responses
When a protection condition is detected, the MVS will write this to the event log and may also trip or issue a warning.
The soft starter's response to some protections may depend on the Protection Classes settings (parameter group 21).
If the MVS trips you will need to reset the soft starter before restarting. If the MVS has issued a warning, the soft
starter will reset itself once the cause of the warning has been resolved.
Some protections cause a fatal trip. This response is pre-defined and cannot be overridden. These protection
mechanisms are designed to protect the soft starter, or can be caused by a fault within the soft starter.
10.2
Diagnosing Problems
The following tables can help you diagnose the cause of problems with your MVS.
Error Messages
The MVS may trip or issue a warning with the following error messages. The starter's behaviour can be adjusted using
parameter group 3 Protection Settings and parameter group 21 Protection Classes
.Error Message
Aux Trip A
Aux Trip B
Battery/Clock
CRNT imbalance
Description
Input A has activated to trip the soft
starter.
Suggested Solution
Identify and resolve the condition which caused
Input A to activate.
Related parameters: 3-M, 3-N, 3-O, 4-C,
21-F
Input B has activated to trip the soft
starter.
Identify and resolve the condition which caused
Input B to activate.
Related parameters: 3-P, 3-Q, 3-R, 4-D,
21-G
A verification error has occurred on the
real time clock in the MVS Controller.
The battery powering the clock is running low.
Contact your local supplier.
Related parameters: 21-K
The MVS has detected an imbalance in
the line current.
Related parameters: 3-E, 3-F, 21-D
NOTE
Current imbalance detection
is desensitised by 50% during
starting and soft stopping.
Current imbalance can be caused by problems
with the motor or the environment, such as:
• an imbalance in the incoming mains voltage
• a problem with the motor windings
• a light load on the motor
• loss of one or more phases on the input or
output
Check all power connections and cabling. Ensure
the starter is configured appropriately for site
conditions.
Current imbalance can also be caused by
problems within the soft starter, or by incorrect
power cabling.
• If you have recently replaced or repaired a
phase arm, the connector at the back of the
phase arm may not be securely plugged into
the connector on the body of the power
assembly.
Remove the securing bolts and slide the
phase arm out, then slide it back in firmly.
Ensure the connectors on the PCBs meet
properly then retighten the bolts.
710-03971-00C
MVS
Page 69
TROUBLESHOOTING
•
Frequency
The mains frequency has varied from the
nominal frequency.
Related parameters: 3-H, 3-I, 3-J, 21-E
Ground Fault
Inst Overcrnt
Motor Overload
Mtr Thermistor
Ground current (monitored through a
dedicated current transducer) has
exceeded the selected level.
Related parameters: 3-S, 3-T, 21-N
The starter has detected a sharp rise in
motor current.
Related parameters: 3-C, 3-D, 21-C
The motor temperature (calculated by
the soft starter's thermal model) has
reached or exceeded the maximum
allowable temperature.
Related parameters: 1-A, 1-B, 1-C, 1-D,
21-A
The external resistance across the motor
thermistor input (terminals B4-B5) has
exceeded 2k4 Ω.
Related parameters: 21-H
Network Comms
Overvoltage
The network master or serial interface
device has sent a trip command to the
MVS or there may be network
communication problems.
Related parameters: 21-M
Mains voltage has exceeded the selected
level.
Related parameters: 3-U, 3-V, 21-O
SCR Temp Model
The temperature within the soft starter's
enclosure is too high and the
temperature of an SCR junction has
exceeded 120 °C.
Related parameters: 21-L
Page 70
MVS
There may be an open circuit SCR gate lead,
or damage to the SCR gate.
Check the SCR gate connections (check at
the SCRs and at the firing PCB). Consult
your local supplier for details of the SCR gate
testing procedure.
• The cabling between the external bypass
contactor and the soft starter power
terminations may be incorrect.
Ensure the bypass contactor is connected to
L1, L2, L3 and T1B, T2B, T3B of the soft
starter.
The mains frequency may be below the nominal
frequency. Check that the MVS is configured
appropriately for site conditions.
If the MVS is connected to a generator set supply,
the generator may be too small or could have a
speed regulation problem. Check that the
generator set is suitable for the application.
Test the insulation of the output cables and the
motor. Identify and resolve the cause of any
earth fault.
The motor has probably experienced a locked
rotor condition (shearpin), which may indicate a
jammed load. Check the load and resolve the
cause.
Overload can be caused by damaged motor
bearings or excessive throughput.
Resolve the cause of the overload and allow the
motor to cool. If you think the soft starter has
tripped incorrectly, check the parameter settings.
If the starter tripped at power-up, no thermistor
is present at terminals B4-B5. If you are not using
a thermistor, you must attach a link across
terminals B4-B5.
If the starter tripped during operation, the
temperature of the motor winding has increased.
Identify the cause of the overheating (this may
require a complete motor test). Allow the motor
to cool before restarting.
Check the network for causes of inactivity.
There has been a voltage surge on the mains.
Potential causes include problems with a
transformer tap regulator or off-loading of a large
transformer load.
Check that the starter is configured appropriately
for local conditions. Monitor the mains voltage to
determine the cause of the voltage fluctuation,
and resolve the cause.
The MVS may be under-rated for the operating
conditions.
• Check that the soft starter is being used
within its rated capacity in the environment
(appropriate starts per hour in the ambient
temperature).
710-03971-00C
TROUBLESHOOTING
•
Starter Comms
There has been no activity between the
MVS Controller and the serial interface
device for 10 seconds.
Related parameters: 21-J
Time-Overcrnt
The soft starter has experienced a motor
overload or instantaneous overcurrent
condition, causing the time-overcurrent
thermal model to reach its trip threshold.
Related parameters: 16-A, 16-B, 16-C,
21-S
NOTE
The MVS cannot be reset until
the overcurrent reset time has
elapsed.
Undercurrent
The current has fallen below the selected
value.
Undervoltage
Related parameters: 3-A, 3-B, 21-B
Mains voltage has fallen below the
selected level.
Related parameters: 3-W, 3-X, 21-P
XS Start Time
The motor was unable to accelerate to
full speed in the time allowed.
Related parameters: 2-B, 2-C, 2-G, 21-I
Check the temperature inside the enclosure,
and ensure that there is adequate ventilation.
If the temperature inside the enclosure is normal
and the MVS is operating within its specifications,
contact your local supplier for advice.
There is a problem with the connection between
the MVS Controller and the communications
interface, or the communications interface has
failed.
Remove and reinstall the interface. If the
problem persists, contact your local supplier.
Check that the time-overcurrent protection
settings are appropriate and are coordinated with
other current-based protection settings. Check
that the motor and load are healthy.
The motor has lost its load. Potential causes
include broken components (shafts, belts or
couplings), or a pump running dry.
There has been a voltage dip on the mains.
Potential causes include an undersized supply
transformer, or adding a large non-linear load to
the system.
Monitor the mains voltage to determine the
cause of the voltage fluctuation, and resolve the
cause.
Check that the starter is configured appropriately
for local conditions.
The start current was not sufficient to accelerate
the motor to full speed.
The motor may have experienced an abnormal
increase in loading - check for overloading or a
jammed load. If the load is not jammed, check
that the start current is set to an appropriate level
or increase the maximum start time.
Non-Adjustable Protection Classes
The following table describes protection mechanisms which cannot be adjusted using parameter group 3 and
parameter group 21. These protection mechanisms will always trip the soft starter and the cause must be resolved
before the soft starter can be operated again.
Error Message
Bypass Fail
Description
The bypass contactor has welded closed
or is not operating correctly. There may
be a problem with the control circuit or
the contactor coil.
EEPROM Fail
An error occurred loading data from the
EEPROM to RAM when the MVS
Controller powered up.
L1 Shorted SCR L2
The SCR in one or more phase arms has
shorted.
710-03971-00C
MVS
Suggested Solution
Check the condition of the bypass contactor's
main poles. Check the operation of the
contactor control circuitry and contactor coil.
Check that the Bypass Contactor Time setting
(20-G) is appropriate for the application.
NOTE
You can use the Run Simulation to
check the bypass contactor's operation
without mains voltage connected.
There may a fault on the MVS Controller or
power interface PCB. Remove and restore
control voltage. If the problem persists, contact
your local supplier.
Contact your local supplier for recommended
test and replacement procedures.
Page 71
TROUBLESHOOTING
Shorted SCR L3
Shorted SCR
Mtr Connection
There is a problem with the soft starter's
connection to the motor
Phase Sequence
The phase sequence on the soft starter's
input terminals (L1, L2, L3) does not
conform to the sequence permitted in
parameter 3-G.
One or more phases is missing.
Power Loss
NOTE
SCR damage always has an external
cause. This is usually overvoltage,
overcurrent or overtemperature.
The motor is connected incorrectly, or no motor
is connected to the soft starter.
• Ensure the motor is connected to terminals
T1, T2, T3 using in-line (three wire)
connection. The MVS does not support
inside delta (six wire) connection.
• Check each output phase of the soft starter
for power circuit continuity.
Check the phase sequence on L1, L2, L3 and
ensure parameter 3-G is suitable for the
installation.
•
•
•
One or more of the mains supply fuses or
motor protection fuses may have blown.
Check that the mains supply is connected to
L1, L2, L3 and all fuses are healthy.
One or more poles may be missing from the
main contactor. Check the condition of the
main contactor.
Check that the main contactor closes when a
start command is given, and remains closed
until the end of a soft stop. If you have
altered the Main Contactor Time setting
(parameter 20-F), you may need to increase
this value.
Internal Soft Starter Errors
The following error messages report internal soft starter errors. These faults must be resolved before the soft starter
can be operated again.
Error Message
Assy Power Low
Page 72
Description
Control voltage to the power
interface PCB has dropped below
the required level.
Cond 1 Invalid
Cond 2 Invalid
Cond 3 Invalid
There is a problem with the SCR
firing or feedback system.
Control Volts Low
Control voltage to the MVS
Controller has dropped below the
required level.
Current Reading
There is an error in the current
monitoring circuit.
Gate Drive Fail
There is a problem with the SCR
gate drive.
MVS
Suggested Solution
Check that the control voltage transformer and
control circuit fuses are healthy, and that voltage is
present at the terminal block (terminals A1-A2 or
A2-A3) within the specified range.
• Check that the fibre-optic cables between the
power interface PCB and the non-conduction
PCBs are properly connected. Use the run
simulation to check that all three nonconduction LEDs on the power interface PCB
operate correctly. 1
• The value of the grading resistor may not be
suitable for the nominal mains voltage. If you
are using a low voltage motor for testing
purposes, contact your local supplier for advice.
Check that the control voltage transformer and
control circuit fuses are healthy, and that voltage is
present at terminals A11, A12 within the specified
range.
Check the connections between the power
interface PCB and the current transformers. If the
connections are all sound, there may be a fault in
the power interface PCB. Contact your local
supplier for advice.
• Check that the fibre-optic cables between the
power interface PCB and the gate drive firing
PCB are firmly connected. Use the run
simulation to check that the firing LEDs on the
power interface PCB operate correctly. 1
• Check the fuses on each gate drive power
710-03971-00C
TROUBLESHOOTING
Int Comms Fail
Communication has failed between
the MVS Controller and the power
interface PCB.
Motor Conn T1
Motor Conn T2
Motor Conn T3
One of the motor connections is
missing, or the power interface
PCB is not receiving nonconduction signals.
Synch A Missing
Synch B Missing
The voltage detection system has
failed.
supply PCB. 2
• There may be a fault with the power interface
PCB, gate drive firing PCBs or one of the gate
drive power supply PCBs. 2 Contact your local
supplier for advice.
• Check that the MVS Controller is receiving
control voltage within the specified range
(terminals A11, A12).
• Check that the fibre-optic cables between the
MVS Controller and the interface PCB are
firmly connected.
• Check that each fibre-optic cable is emitting
light at the Rx end.
• Ensure the motor is connected to terminals T1,
T2, T3 using in-line (three wire) connection.
The MVS does not support inside delta (six
wire) connection.
• Check that the fibre-optic cables between the
power interface PCB and the non-conduction
PCBs are firmly connected. Use the run
simulation to check that all three nonconduction LEDs on the power interface PCB
operate correctly. 1
The voltage dividing resistors (located between L1,
L2, L3 and the power interface PCB) have failed or
the power interface PCB may be faulty. Contact
your local supplier for advice.
1 The non-conduction and firing LEDs are located on the power interface PCB. The non-conduction LEDs should dim
during starting, and should be off when the bypass contactor closes. The firing LEDs should be on during starting, and
off just before the bypass contactor closes and the soft starter enters run mode.
2 The gate drive firing PCBs, gate drive power supply PCBs and non-conduction PCBs are located on individual phase
arms.
MVS (models V02 ~ V07)
1
2
4
3
1
Firing LEDs (Red)
3
2
Non-conduction LEDs (Green)
4
710-03971-00C
MVS
AuCom Gate drive firing PCB, gate drive power
supply PCB, non-conduction PCB. OR
Enerpro Gate drive firing PCB gate drive power
supply PCB, non-conduction PCB.
Page 73
TROUBLESHOOTING
MVS (models V11 and V13)
3
1
1
4
2
1
1
5
1
07621.A
1
1
2
3
Gate Drive Firing PCB
Power Interface PCB
Power Interface Firing LEDs (Red)
4
5
Non-conduction LEDs (Green)
Gate Drive Firing LEDs
General Faults
This table describes situations where the soft starter does not operate as expected but does not trip or give a warning.
Symptom
Soft starter does not respond to
commands.
Page 74
Probable Cause
• If the soft starter does not respond to the START or RESET button on the
MVS Controller:
• The soft starter may be in Remote control mode. When the soft
starter is in Remote control mode, the Remote LED on the MVS
Controller is active. Press the LCL/RMT button once to change to
Local control (refer to parameter 4-A Local/Remote Control for
details).
• If the soft starter does not respond to commands from the control inputs:
• The soft starter may be in Local control mode. When the soft starter is
in Local control mode, the Remote LED on the MVS Controller is not
active. Press the LCL/RMT button once to change to Remote control
(refer to parameter 4-A Local/Remote Control for details).
• The control wiring may be incorrect. Check that the remote start, stop
and reset inputs are configured correctly (refer to Control Wiring on
page 19 for details).
• The signals to the remote inputs may be incorrect. Test the signalling
by activating each input signal in turn. The appropriate remote control
input LED should activate on the MVS Controller.
• The soft starter will only execute a start command from the remote
inputs if the remote reset input is closed. Check that the remote reset
input is also active (the Reset LED on the starter will be on).
• If the soft starter does not respond to a start command from either the local
or remote controls:
• The soft starter may be waiting for the restart delay to elapse. The
MVS
710-03971-00C
TROUBLESHOOTING
length of the restart delay is controlled by parameter 3-K Restart Delay.
The motor may be too hot to permit a start. If parameter 3-L Restart
Temperature Check is set to Check, the soft starter will only permit a
start when it calculates that the motor has sufficient thermal capacity to
complete the start successfully. Wait for the motor to cool before
attempting another start.
•
The emergency stop function may be active. If parameter 4-C or 4-D is
set to Emergency Stop and there is an open circuit on the
corresponding input, the MVS will not start. If the emergency stop
situation has been resolved, close the circuit on the input.
Start performance may be unstable when using a low Motor Full Load
Current setting parameter 1-A). This can affect use on a small test motor
with full load current between 5 A and 50 A.
Power factor correction (PFC) capacitors must be installed on the supply
side of the soft starter. To control a dedicated PFC capacitor contactor,
connect the contactor to run relay terminals.
If the start current is too low, the motor will not produce enough torque to
accelerate to full speed. The soft starter may trip on excess start time.
•
The soft starter does not control
the motor correctly during
starting.
•
•
Motor does not reach full speed.
•
NOTE
Make sure the motor starting parameters are appropriate for the
application and that you are using the intended motor starting profile.
If parameter 4-C or 4-D is set to Motor Set Select, check that the
corresponding input is in the expected state.
•
Erratic motor operation.
•
Soft stop ends too quickly.
•
A reset does not occur after an
Auto-Reset, when using a
remote 2-wire control.
Remote start/stop command is
overriding Auto Start/Stop
settings when using remote 2wire control.
Parameter settings cannot be
stored.
•
•
•
Auto Start/Stop function should only be used in LOCAL mode or in tandem
with REMOTE mode, 3 and 4-wire control.
•
Make sure you are saving the new value by pressing the STORE button after
adjusting a parameter setting. If you press ◄, the change will not be saved.
Check that the adjustment lock (parameter 20-B) is turned off. If the
adjustment lock is on, settings can be viewed but not changed. You need to
know the security access code to change the adjustment lock setting.
The EEPROM may be faulty on the MVS Controller or the power interface
PCB. A faulty EEPROM will also trip the soft starter, and the MVS
Controller will display the message EEPROM Fail. Contact your local
supplier for advice.
•
•
710-03971-00C
The load may be jammed. Check the load for severe overloading or a
locked rotor situation.
The SCRs in the MVS require at least 5 A of current to latch. If you are
testing the soft starter on a motor with full load current less than 5 A, the
SCRs may not latch correctly.
The soft stop settings may not be appropriate for the motor and load.
Review the settings of parameters 2-H, 2-I, 13-H and 13-I.
If the motor is very lightly loaded, soft stop will have limited effect.
The remote 2-wire start signal must be removed and reapplied for a re-start.
MVS
Page 75
MAINTENANCE
Section 11
11.1
Maintenance
Maintenance Schedule
The table below lists the minimum maintenance requirements. Your maintenance program may include more frequent
maintenance. In certain environmental conditions (such as dusty or humid environments), increase the frequency of
maintenance to every year.
Part
Switch
Contactor – main
Contactor – bypass
Contactor for PFCC
Control terminals
Earthing terminals
Cable lug
General MVS
11.2
Instructions
Check contact condition
Check for wear, torque bolts
Check for wear, torque bolts
Check for wear, torque bolts
Check tightness
Check tightness
Check tightness
Cleanliness
Timing
Every 2 years
Every 2 years
Every 2 years
Every 2 years
Every 2 years
Every 2 years
Every 2 years
Every 2 years
Tools required
MVS starters can be serviced with the following tools:
•
•
•
•
•
•
•
•
11.3
Allen keys (standard metric)
16 mm spanners
16 mm socket
Torque wrench <20 Nm
Torx drive screwdriver #20
Small flat bladed screwdriver 3 mm
Multimeter
Insulation tester
Thermal Image
After completing commissioning of the MVS, take a thermal image of the bus bars and other critical parts.
As part of the annual maintenance program, compare a recent thermal image with the post-commissioning image.
Perform the usual inspection for dust and debris.
11.4
Contactor Maintenance
Refer to your contactor manual for operation and maintenance instructions.
1.
2.
11.5
Isolation Switch Maintenance
1.
2.
3.
4.
5.
6.
7.
Page 76
As part of normal operation, run the withstand voltage test at not less than half the rated test value.
Follow the manufacturer's maintenance instructions and check the torque values on all connections.
WARNING
Do not operate the switch while current is flowing (motor or capacitor).
The isolation switch is designed for use in an AuCom MVS panel and it is not designed for outdoor use.
The isolation switch must be installed with a breaker or similar device on the supply side to limit the
prospective fault energy. Fuses must be used on the motor side of the switch.
Isolate the power supply before beginning any work on
the isolation switch.
Inspect the switch contacts for signs of wear. If there is
evidence of wear, contact your local supplier for
replacement parts.
Check that the microswitch activates when opening the
switch knives slightly.
Check the grub screw is tightened to 6 Nm.
With the switch in the closed position check the contact
resistance for each pole of the switch. Adjust the tension
on all poles to 15 μΩ (± 5 μΩ).
Use a lint-free cloth to clean the isolation switch. Warm
soapy water may be necessary in cleaning.
Wipe the main contacts and main knives with Electrolube
Adjust to 15 μΩ (± 5 μΩ)
(Electrolube part # CG35A) at points of contact.
MVS
710-03971-00C
MAINTENANCE
11.6
Phase Arm Assembly Alignment (models V11 and V13)
The phase arm locates itself at the fully withdrawn state when sliding in and out of the frame.
During the commissioning process, during maintenance and when installing a phase arm check the phase arm
alignment.
WARNING
Do not extend more than one phase arm at any one time.
NOTE
Torque all bolts after alignment.
1.
Loosen both rear bus bar captive bolts and four
(4) domed socket head cap screws on the rear
of the phase arm. The bus bar captive bolts are
loose at the point of resistance.
2.
Loosen the phase block mounting bolts on
both sides of the phase assembly that hold it to
the tray.
Remove the phase arm locking nuts on both
sides.
3.
4.
5.
Slide out the phase arm assembly.
Slide in the phase arm assembly to check
alignment.
6. Align the phase block on left or right as
required.
7. Align and secure the main phase connection
captive bolts.
8. Tighten locking rod on both sides to 10 Nm.
9. Tighten nut and washer on both sides of the
phase arm to 10 Nm.
10. Secure dome head bolts (nip and secure) on
the bus work to 30 Nm.
11. Secure the cap head dome bolts on the phase
blocks. Torque to 12 Nm.
12. Re-adjust if required by repeating steps 3-10
above.
710-03971-00C
MVS
Page 77
MAINTENANCE
11.7
Removing Phase Arms (models V11 and V13)
WARNING
Do not extend more than one phase arm at any one time.
Page 78
1.
Undo the two phase connection bolts at the
rear of the phase arm.
2.
3.
Remove the nut and washer and undo the rod
bolt on both sides.
Unplug the controls on the right hand side.
4.
Withdraw the phase arm.
MVS
710-03971-00C
MAINTENANCE
Removing Phase Arms with a Lifting Frame
To remove a phase arm with a forklift:
1.
2.
3.
4.
Slide the phase arm out from the panel.
Place the lifting frame on the phase arm and tighten bolts.
Position the forks at 210 mm from fork to fork.
Taking care not to touch any other components, slowly slide the forks into the fork guide slot under the lifting
frame.
5. Raise forks slightly to allow frame to clear location holes.
6. Remove the phase arm.
To remove a phase arm using a hoist:
1.
2.
3.
710-03971-00C
Slide the phase arm out from the panel.
Secure a cable from the hoist to the lifting eye
Lift the phase arm slowly, stabilising the phase arm to prevent it spinning.
MVS
Page 79
APPENDIX
Section 12
12.1
Appendix
Parameter Record
If you require assistance from your supplier or a service technician, please note all parameter settings in the table
below.
No.
1
1-A
1-B
1-C
1-D
2
2-A
2-B
2-C
2-D
2-E
2-F
2-G
2-H
2-I
3
3-A
3-B
3-C
3-D
3-E
3-F
3-G
3-H
3-I
3-J
3-K
3-L
3-M
3-N
3-O
3-P
3-Q
3-R
3-S
3-T
3-U
3-V
3-W
3-X
3Y
3Z
4
4-A
4-B
4-C
4-D
5
5-A
5-B
5-C
Page 80
Function
Primary Motor Settings
Motor Full Load Current
Motor Locked Rotor Current Time
Motor Locked Rotor Current
Motor Service Factor
Start/Stop Modes-1
Start Mode
Current Limit
Current Ramp – Initial Start Current
Current Ramp – Start Ramp Time
Kickstart Current Level
Kickstart Duration
Excess Start Time
Stop Mode
Soft Stop Ramp Time
Protection Settings
Undercurrent Level
Undercurrent Trip Delay
Instantaneous Overcurrent Stage 1
Instantaneous Overcurrent Delay Stage 1
Current Imbalance Level
Current Imbalance Trip Delay
Phase Sequence
Mains Frequency Trip Mode
Mains Frequency Trip Range
Mains Frequency Trip Delay
Restart Delay
Restart Temperature Check
Auxiliary Trip A – Mode
Auxiliary Trip A – Delay
Auxiliary Trip A – Enable Delay
Auxiliary Trip B – Mode
Auxiliary Trip B – Delay
Auxiliary Trip B – Enable Delay
Ground Fault Level
Ground Fault Trip Delay
Overvoltage Level
Overvoltage Trip Delay
Undervoltage Level
Undervoltage Trip Delay
Instantaneous Overcurrent Stage 2
Instantaneous Overcurrent Delay Stage 2
Inputs
Local/Remote Control
Serial Control – Remote Mode
Input A Functionality
Input B Functionality
Outputs
Low Current Flag
High Current Flag
Motor Temperature Flag
User Set 1
User Set 2
Default
100 A
0m:10s
600%
105%
constant current
400%
400%
1s
500%
0 ms
0m:20s
coast to stop
0m:00s
20%
0m:05s
400%
0m:00s
20%
0m:03s
any
start/ run
±5 Hz
0m:00s
0m:10s
off
always active
0m:00s
0m:00s
always active
0m:00s
0m:00s
10 A
0m:03s
7200 V
0m:05s
100 V
0m:05s
4400 Amps
10 ms
button always active
enable in remote
auxiliary trip (N/O)
auxiliary trip (N/O)
50%
100%
80%
MVS
710-03971-00C
APPENDIX
5-D
5-E
5-F
5-G
5-H
5-I
5-J
5-K
5-L
5-M
5-N
5-O
5-P
5-Q
6
6-A
6-B
9
9-A
9-B
9-C
9-D
11
11-A
11-B
11-C
11-D
11-E
11-F
11-G
12
12-A
13
13-A
13-B
13-C
13-D
13-E
13-F
13-G
13-H
13-I
16
16-A
16-B
16-C
16-D
20
20-A
20-B
20-C
20-D
20-E
20-F
20-G
21
21-A
21-B
21-C
710-03971-00C
Output Relay A Functionality
Output Relay A On Delay
Output Relay A Off Delay
Output Relay B Functionality
Output Relay B On Delay
Output Relay B Off Delay
Output Relay C Functionality
Output Relay C On Delay
Output Relay C Off Delay
Analog Output A Functionality
Analog Output A Range
Analog Output A Adjustment - maximum
Analog Output A Adjustment - minimum
Mains Reference Voltage
Auto-Stop
Auto-Stop Mode
Auto-Stop Time
Slip-Ring Motor Setup
Primary Motor Ramp Configuration
Secondary Motor Ramp Configuration
Slip-Ring Rotor Resistance Contactor Time
Slip-Ring Conduction Retard
HMI Settings
Language
F1 Pushbutton Function
F2 Pushbutton Function
Programmable Screen – Top Left
Programmable Screen – Top Right
Programmable Screen – Bottom Left
Programmable Screen – Bottom Right
Secondary Motor Settings
Motor Full Load Current
Start/Stop Modes-2
Start Mode
Current Limit
Current Ramp – Initial Start Current
Current Ramp – Start Ramp Time
Kickstart Current Level
Kickstart Duration
Excess Start Time
Stop Mode
Soft Stop Ramp Time
Time-Overcurrent Protection
Time-Overcurrent Level
Time-Overcurrent Curve
Time-Overcurrent Reset Time
Reserved
Restricted Parameters
Security Access Code
Adjustment Lock
Emergency Mode
Motor Current Calibration
Voltage Calibration
Main Contactor Time
Bypass Contactor Time
Protection Classes
Motor Overload
Undercurrent
Instantaneous Overcurrent
main contactor
0m:00s
0m:00s
run
0m:00s
0m:00s
trip
0m:00s
0m:00s
current
4-20 mA
100%
0%
400 V
off
0h:01m
single ramp
single ramp
150 ms
50%
English
auto-stop menu
none
starter state
current
kWh
hours run
100 A
constant current
400%
400%
1s
500%
0 ms
0m:20s
coast to stop
0m:00s
999%
2
0m:20s
0000
off
off
100%
100%
500 ms
500 ms
trip
trip
trip
MVS
Page 81
APPENDIX
21-D
21-E
21-F
21-G
21-H
21-I
21-J
21-K
21-L
21-M
21-N
21-O
21-P
21-Q
21-R
21-S
12.2
Current Imbalance
Mains Frequency
Auxiliary Trip A
Auxiliary Trip B
Motor Thermistor
Excess Start Time
Starter Communication Timeout
Battery/Clock Fail
SCR Temperature
Network Communication Trip
Ground Fault
Overvoltage
Undervoltage
Reserved
Reserved
Time-Overcurrent
trip
trip
trip
trip
trip
trip
trip
trip
trip
trip
trip
trip
trip
trip
Accessories
Communication Interfaces
MVS Series soft starters support network communication using the Profibus, DeviceNet and Modbus RTU protocols,
via an easy-to-install communications module.
•
Installing Communication Interfaces
Communication interfaces attach to the back of the MVS Controller:
•
Modbus Interface
PIM-MB-01
The Modbus Interface enables control and monitoring via a Modbus RTU network.
Refer to the Modbus Interface Instructions for further details.
•
Profibus Interface
PIM-PB-01
The Profibus Interface enables control and monitoring via a Profibus network.
Refer to the Profibus Interface Instructions for further details.
•
DeviceNet Interface
PIM-DN-01
The DeviceNet Interface enables control and monitoring via a DeviceNet network.
Refer to the DeviceNet Interface Instructions for further details.
Page 82
MVS
710-03971-00C
APPENDIX
•
Trip Codes (Serial Communication Network)
Description
Shorted stack (SCR)
Excess start time
Motor overload
Motor thermistor
Current imbalance
Supply frequency
Phase sequence
Instantaneous overcurrent
Power circuit/ Power loss
Undercurrent
Starter overtemperature
Motor connection
Auxiliary trip A
FLC out of range
Incorrect control card
Starter communication failure (between interface and soft starter)
Network communication failure (between interface and network)
Internal error
Overvoltage
Undervoltage
Ground fault
EEPROM failure
Auxiliary trip B
Bypass contactor failure
L1 phase loss
L2 phase loss
L3 phase loss
L1 shorted SCR
L2 shorted SCR
L3 shorted SCR
Motor 2 overload
SCR temperature model
Clock failure
Motor thermistor failure
Analog input trip
Miscellaneous
No trip
Profibus
DP
0
1
2
3
4
5
6
7
8
9
10
11
12
13
14
15
16
17
18
19
20
23
24
25
26
27
28
29
30
31
32
34
35
36
46
n/a
255
Modbus
RTU
0
1
2
3
4
5
6
7
8
9
10
11
12
13
14
15
16
17
18
19
20
23
24
25
26
27
28
29
30
31
32
34
35
36
46
n/a
255
DeviceNet
103
101
20
75
26
55
54
28
50
29
21
102
11
61
60
113
114
104
52
51
27
62
110
105
23
24
25
115
116
117
118
120
121
122
132
70
0
Other MVS Accessories
Other accessories available to enhance your MVS starter include:
•
•
•
•
•
•
•
•
•
•
•
710-03971-00C
RTD protection relays
Power meters
Indication lamps
Start, stop and reset pushbuttons
Local/remote selector switch
Internal panel light for low voltage section
100 watt panel heater
Power supply and contactor for motor heater
Control transformers
Metering VT
Other accessories may be available on request.
MVS
Page 83
APPENDIX
PC Software (AuCom)
WinMaster is a purpose-designed software suite for control and monitoring of up to 99 soft starters. WinMaster is
compatible with all AuCom soft starter ranges.
Feature
Operational Control
(Start, Stop, Reset, Quick Stop)
Starter Status Monitoring
(Ready, Starting, Running, Stopping, Tripped)
Performance Monitoring
(Motor Current, Motor Temperature)
Upload Parameter Settings
Download Parameter Settings
CSX
CSXi
IMS2
EMX3
MVS
To use WinMaster with the MVS, the soft starter must be fitted with a Modbus Interface (PIM-MB-01) or a Remote
Operator (PIM-RO-01).
Refer to the WinMaster User Manual for further details.
Page 84
MVS
710-03971-00C
AuCom Electronics Ltd
123 Wrights Road
PO Box 80208
Christchurch 8440
New Zealand
T +64 3 338 8280
F +64 3 338 8104
E [email protected]
W www.aucom.com