1
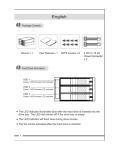
User Instruction
PRODUCT DESCRIPTION
Thank you for purchasing iDMX7.
iDMX7, a simple DMX controller operated by infrared remote, can be used to record and play back DMX
signal. It features four working modes, available in Auto mode, Manual mode, DMX signal recording mode
and DMX playback mode. The EEPROM is used to memorize existing functions and parameters.
Please read this manual carefully before using iDMX7.
DELIVERY PACKAGE
Check for transport damage.
You should be in possession of the following items:
1 iDMX7
1 User Instruction
1 Adapter
1 Remote controller
1 Battery plate
Should you discover transport damage after
unpacking the equipment, inform the hauler
immediately.
Never connect a damaged device. You may also
contact your supplier.
On
/Of
f
A.R
Au
ec/
S
M.
to
Pla
Re c/S
y
Re d
Exi
t
Cy an
Gre
en
Wh
Ma
Blu
gen
ite
ta
e
Yel
low
Bright
nes
s
Patt
Redern
Spe
Gre ed
en
Fad
Blu e
e
Rem DM
ote X AN
Con
trol T
ler
Control Remote
TECHNICAL SPECIFICATION
Power Supply ................................................................................. DC9V 200mA
DC IN / OUT ................................................................................... 2pin Green Terminal Socket
DMX IN / OUT ................................................................................. 3pin Green Terminal Socket
Housing ......................................................................................... Polycarbonate
Listing ........................................................................................... CE certified
Operation Temperature ................................................................... 0 degC to + 55 degC
Storage Temperature ...................................................................... -20 degC to +70 degC
Dimension ..................................................................................... 81.7(L) x 15.1(W) x 13(H)mm
Weight .......................................................................................... 150g
PHYSICAL DIMENSIONS
P/N: 24-004-2475-00
Rev: 1.0
- Page 1 -
OPERATION GUIDE
iDMX7 features four working modes, available in Manual Mode, Auto Mode, DMX Playback Mode and DMX
Signal Recording Mode.
1 . Manual Mode
Red effect is controlled by channel 1, 4, 7 ...
Green effect is controlled by channel 2, 5, 8 ...
Blue effect is controlled by channel 3, 6, 9 ...
There are 510 channels in total. The R.G.B color intensity can be adjusted separately in Manual Mode.
2. Auto Mode
Directly tap the "Auto" key on IR controller to enable Auto mode.
The color intensity changes automatically in this mode.
3. DMX Playback Mode
3.1 Only stored scenes can be played back.
3.2 Directly tap the "Play" key on IR controller to play back the stored scene.
3.3 This mode is not available when there is no recorded DMX signal.
4. DMX Signal Recording Mode
In DMX Signal Recording Mode, there are two working modes: Manual DMX
signal recording mode and Auto DMX signal recording mode. Another DMX
controller (depicted here)_ XB-R1 is required to connect with iDMX7 before
recording.
(In the process of recording DMX signal, if disconnection with XB-R1 happens,
DMX Signal Recording Mode ends automatically and the unit changes to DMX
playback mode.)
XB-R1
(Sold separately)
iDMX7 can record DMX as a maximum speed of 25 frames per second (512 channel). The excess of the
maximum speed will result in the loss of DMX frame. Normally, the time of DMX recording is 400
seconds, the minimum DMX recording time is 200 seconds.
4.1 Manual DMX signal recording mode
4.1.1 Manual DMX signal recording mode enables: press "M.REC/S" button and hold it on for about 5
seconds to enable this mode.
4.1.2 XB-R1 plays the scene that you wish to record.
4.1.3 Press "M.REC/S" button to start to record the scene.
4.1.4 Once you've recorded the scene, press "EXIT" button to exit from existing mode and change to DMX
playback mode.
If you press "EXIT" button before step 4.1.3 in this mode, the unit changes to other modes automatically.
4.2 Auto DMX signal recording mode
4.2.1 Auto DMX signal recording mode enables: press "A.REC/S" button and hold it on for about 5 seconds
to enable this mode.
4.2.2 XB-R1 plays the scene that you wish to record.
4.2.3 Press "A.REC/S" button to start to record the scene.
4.2.4 Once the first and the last DMX frame of the scene have been completely displayed, the Auto DMX
signal recording mode ends automatically and changes to DMX playback mode.
(You can also press "EXIT" button to exit from existing mode and change to DMX playback mode.)
If you press "EXIT" button before step 4.2.3 in this mode, the unit changes to other modes automatically.
NOTICE:
When using Auto DMX signal recording mode, please pay attention to the following rules:
1. For the scene that you wish to record, the first DMX frame and the last DMX frame shall be zero (all
channels are zero) and the other frames shall not be zero.
2. The first and the last DMX frame don't record anything. They are the sign of starting and ending.
- Page 2 -
OPERATION GUIDE
5. Infrared Remote EYE (Sensor) Configuration
Before operating iDMX7, the IR EYE (Sensor) shall be connected properly.
5.1 Before connecting , please isolate the main power.
5.2 Connect IR EYE (Sensor) to iDMX7 correctly.
5.3 Turn the main power on.
5Pin Black Shielded wire
L=60mm+/-5
Female
Red
V+ V-
GDN D- D+
V- V+
Brown
White
Yellow
GDN D- D+
Black
OUT
L=440mm+/-5
Male
GND Black / White
D-
Yellow
VCC Red
Brown
D+
IN
NOTICE: 1. NEVER remove the IR EYE (Sensor) when powering on for preventing from damage.
2. Effective distance from the IR EYE (Sensor) to Infrared Remote Controller shall be limited
within the range of 10 meters. Otherwise, it results out of control.
6. Infrared Remote Controller Configuration
Users must use the Infrared Remote Controller to operate iDMX7. All working modes and relevant
parameters can be set by operating the Infrared Remote Controller.
On/Off
A.Rec/S
M.Rec/S
Auto
Play
Exit
Red
Cyan
White
Green
Magenta
Blue
Yellow
Brightness
Pattern
Red
Speed
Green
Fade
Blue
iDMX7
Remote Controller
Infrared Remote Controller
Operation Instructions
6.1 Before operation, make sure the batteries (3V, CR2025) have been installed properly.
6.2 There are 7 dedicated color brightness keys (marked Red, Green, Blue, Cyan, Magenta, Yellow,
White) on the control interface. The "ON/OFF", "A.Rec/S", "M.Rec/S", "Auto", "Play", "Exit",
Up & Down keys (marked for up and for down) are on the IR Controller as well.
Detailed functions can be found on the next page.
- Page 3 -
KEYs
RED
GREEN
BLUE
FUNCTIONs
100% Red, 100% brightness
100% Green, 100% brightness
100% Blue, 100% brightness
YELLOW
100% Yellow, 100% brightness
CYAN
100% Cyan, 100% brightness
MAGENTA
100% Magenta, 100% brightness
WHITE
100% White ,100% brightness
ON/OFF
DMX output On/Off
AUTO
Automatically cycles through colors at 100% brightness .
PLAY
Play back recorded DMX signal.
PATTERN/RED
Select next pattern / increase red brightness.
Holding the key down will gradually increase the brightness to its maximum value.
PATTERN/RED
Select previous pattern / decrease red brightness.
Holding the key down will gradually decrease the brightness to its minimum value.
SPEED/GREEN
Increase speed/ increase green brightness.
Holding the key down will gradually increase the brightness to its maximum value.
SPEED/GREEN
Decrease speed / decrease green brightness.
Holding the key down will gradually decrease the brightness to its minimum value.
FADE/BLUE
Increase fadetime/ increase blue brightness.
Holding the key down will gradually increase the brightness to its maximum value.
FADE/BLUE
Decrease fadetime / decrease blue brightness.
Holding the key down will gradually decrease the brightness to its minimum value.
BRIGHTNESS
Increase master brightness.
Holding the key down will gradually increase the brightness to its maximum value.
BRIGHTNESS
Decrease master brightness.
Holding the key down will gradually decrease the brightness to its minimum value.
M.REC/S key
Hold the key down for about 5 seconds to enable manual DMX record
mode. Press the key once more to start to record.
A.REC/S key
Hold the key down for about 5 seconds to enable auto DMX record mode.
Press key once more to start to record.
EXIT key
Exit from DMX signal recording mode and change to DMX playback mode.
*Please Note: Improvements and specifications in the design of the unit and the manual are subject to
change without any prior written notice.
- Page 4 -