1
User Manual for glossaries.sty v4.03
Nicola L.C. Talbot
http://www.dickimaw-books.com/
2014-01-20
Abstract
The glossaries package provides a means to define terms or
acronyms or symbols that can be referenced within your document. Sorted lists with collated locations can be generated using a supplementary indexing application.
Documents have various styles when it comes to presenting
glossaries or lists of terms or notation. People have their own
preferences and to a large extent this is determined by the kind of
information that needs to go in the glossary. They may just have
symbols with terse descriptions or they may have long technical
words with complicated descriptions. The glossaries package is
flexible enough to accommodate such varied requirements, but
this flexibility comes at a price: a big manual.
M If you’re freaking out at the size of this manual, start with
glossariesbegin.pdf (“The glossaries package: a guide for
beginnners”). You should find it in the same directory as this
document or try texdoc glossariesbegin.pdf. Once
you’ve got to grips with the basics, then come back to this manual
to find out how to adjust the settings.
The glossaries bundle comes with the following documentation:
glossariesbegin.pdf If you are a complete beginner, start with
“The glossaries package: a guide for beginners”.
glossary2glossaries.pdf If you are moving over from the obsolete glossary package, read “Upgrading from the glossary
package to the glossaries package”.
glossaries-user.pdf This document is the main user guide for the glossaries package.
1
mfirstuc-manual.pdf The commands provided by the mfirstuc
package are briefly described in “mfirstuc.sty: uppercasing first
letter”.
glossaries-code.pdf Advanced users wishing to know more
about the inner workings of all the packages provided in the
glossaries bundle should read “Documented Code for glossaries
v4.03”. This includes the documented code for the mfirstuc package.
INSTALL Installation instructions.
CHANGES Change log.
README Package summary.
If you use hyperref and glossaries, you must load hyperref first.
Similarly the doc package must also be loaded before glossaries. (If
doc is loaded, the file extensions for the default main glossary are
changed to gls2, glo2 and .glg2 to avoid conflict with doc’s
changes glossary.)
If you are using hyperref, it’s best to use pdflatex rather than
latex (DVI format) as pdflatex deals with hyperlinks much
better. If you use the DVI format, you will encounter problems
where you have long hyperlinks or hyperlinks in subscripts or
superscripts. This is an issue with the DVI format not with
glossaries.
Other documents that describe using the glossaries package include:
Using LaTeX to Write a PhD Thesis and Glossaries, Nomenclature,
Lists of Symbols and Acronyms.
2
Contents
Glossary
1
Introduction
1.1
1.2
1.3
2
8
11
Sample Documents . . . . . . . . . . . . . . . . .
Multi-Lingual Support . . . . . . . . . . . . . . .
1.2.1 Changing the Fixed Names . . . . . . . .
Generating the Associated Glossary Files . . . .
1.3.1 Using the makeglossaries Perl Script . . .
1.3.2 Using xindy explicitly . . . . . . . . . . .
1.3.3 Using makeindex explicitly . . . . . . . .
1.3.4 Note to Front-End and Script Developers
.
.
.
.
.
.
.
.
.
.
.
.
.
.
.
.
.
.
.
.
.
.
.
.
.
.
.
.
.
.
.
.
12
23
24
27
30
31
32
33
.
.
.
.
.
.
.
.
.
.
.
.
.
.
.
.
.
.
.
.
.
.
.
.
.
.
.
.
.
.
.
.
35
39
42
45
49
51
53
55
Package Options
2.1
2.2
2.3
2.4
2.5
2.6
2.7
35
General Options . . . . . . . . . . . . . . . . .
Sectioning, Headings and TOC Options . . .
Glossary Appearance Options . . . . . . . . .
Sorting Options . . . . . . . . . . . . . . . . .
Acronym Options . . . . . . . . . . . . . . . .
2.5.1 Deprecated Acronym Style Options .
Other Options . . . . . . . . . . . . . . . . . .
Setting Options After the Package is Loaded
.
.
.
.
.
.
.
.
.
.
.
.
.
.
.
.
3
Setting Up
56
4
Defining Glossary Entries
58
4.1
4.2
4.3
4.4
4.5
4.6
4.7
Plurals . . . . . . . . . . . . . . . . .
Other Grammatical Constructs . . .
Additional Keys . . . . . . . . . . . .
Expansion . . . . . . . . . . . . . . .
Sub-Entries . . . . . . . . . . . . . . .
4.5.1 Hierarchical Categories . . .
4.5.2 Homographs . . . . . . . . .
Loading Entries From a File . . . . .
Moving Entries to Another Glossary
3
.
.
.
.
.
.
.
.
.
.
.
.
.
.
.
.
.
.
.
.
.
.
.
.
.
.
.
.
.
.
.
.
.
.
.
.
.
.
.
.
.
.
.
.
.
.
.
.
.
.
.
.
.
.
.
.
.
.
.
.
.
.
.
.
.
.
.
.
.
.
.
.
.
.
.
.
.
.
.
.
.
.
.
.
.
.
.
.
.
.
.
.
.
.
.
.
.
.
.
62
63
64
66
67
67
68
69
71
Contents
4.8
5
6
7
8
9
Drawbacks With Defining Entries in the Document Environment . . . . . . . . . . . . . . . . . . . . . . . . . .
4.8.1 Technical Issues . . . . . . . . . . . . . . . . . . .
4.8.2 Good Practice Issues . . . . . . . . . . . . . . . .
Number lists
72
72
73
74
Links to Glossary Entries
76
6.1
6.2
87
91
Changing the format of the link text . . . . . . . . . . .
Enabling and disabling hyperlinks to glossary entries .
Adding an Entry to the Glossary Without Generating Text
94
Cross-Referencing Entries
96
8.1
97
Customising Cross-reference Text . . . . . . . . . . . . .
Using Glossary Terms Without Links
100
10 Displaying a glossary
106
11 Xindy
109
11.1 Language and Encodings . . . . . . . . . . . . . . . . . 110
11.2 Locations and Number lists . . . . . . . . . . . . . . . . 111
11.3 Glossary Groups . . . . . . . . . . . . . . . . . . . . . . 115
12 Defining New Glossaries
116
13 Acronyms
118
13.1 Changing the Acronym Style . . . . . . . .
13.1.1 Predefined Acronym Styles . . . . .
13.1.2 Defining A Custom Acronym Style .
13.2 Displaying the List of Acronyms . . . . . .
13.3 Upgrading From the glossary Package . . .
.
.
.
.
.
.
.
.
.
.
.
.
.
.
.
.
.
.
.
.
.
.
.
.
.
.
.
.
.
.
.
.
.
.
.
123
124
128
136
136
14 Unsetting and Resetting Entry Flags
139
15 Glossary Styles
142
15.1 Predefined Styles . . . . . . . . . . . . . . .
15.1.1 List Styles . . . . . . . . . . . . . . .
15.1.2 Longtable Styles . . . . . . . . . . .
15.1.3 Longtable Styles (Ragged Right) . .
15.1.4 Supertabular Styles . . . . . . . . . .
15.1.5 Supertabular Styles (Ragged Right)
15.1.6 Tree-Like Styles . . . . . . . . . . . .
15.1.7 Multicols Style . . . . . . . . . . . .
4
.
.
.
.
.
.
.
.
.
.
.
.
.
.
.
.
.
.
.
.
.
.
.
.
.
.
.
.
.
.
.
.
.
.
.
.
.
.
.
.
.
.
.
.
.
.
.
.
.
.
.
.
.
.
.
.
142
144
146
148
149
151
153
154
Contents
15.1.8 In-Line Style . . . . . . . . . . . . . . . . . . . . . 155
15.2 Defining your own glossary style . . . . . . . . . . . . . 156
16 Utilities
163
17 Prefixes or Determiners
166
18 Accessibility Support
171
19 Troubleshooting
173
Index
178
5
List of Examples
1
2
3
4
5
6
7
8
9
10
11
12
13
14
15
16
17
18
19
20
21
22
23
24
25
Mixing Alphabetical and Order of Definition Sorting .
Customizing Standard Sort . . . . . . . . . . . . . . . .
Defining Custom Keys . . . . . . . . . . . . . . . . . . .
Hierarchical Categories—Greek and Roman Mathematical Symbols . . . . . . . . . . . . . . . . . . . . . . .
Loading Entries from Another File . . . . . . . . . . . .
Custom Entry Display in Text . . . . . . . . . . . . . . .
Custom Format for Particular Glossary . . . . . . . . .
First Use With Hyperlinked Footnote Description . . .
Suppressing Hyperlinks on First Use Just For Acronyms
Only Hyperlink in Text Mode Not Math Mode . . . . .
Dual Entries . . . . . . . . . . . . . . . . . . . . . . . . .
Switch to Two Column Mode for Glossary . . . . . . . .
Changing the Font Used to Display Entry Names in the
Glossary . . . . . . . . . . . . . . . . . . . . . . . . . . .
Custom Font for Displaying a Location . . . . . . . . .
Custom Numbering System for Locations . . . . . . . .
Locations as Words not Digits . . . . . . . . . . . . . . .
Defining an Acronym . . . . . . . . . . . . . . . . . . . .
Adapting a Predefined Acronym Style . . . . . . . . . .
Defining a Custom Acronym Style . . . . . . . . . . . .
Creating a completely new style . . . . . . . . . . . . . .
Creating a new glossary style based on an existing style
Example: creating a glossary style that uses the user1,
. . . , user6 keys . . . . . . . . . . . . . . . . . . . . . . . .
Defining Determiners . . . . . . . . . . . . . . . . . . . .
Using Prefixes . . . . . . . . . . . . . . . . . . . . . . . .
Adding Determiner to Glossary Style . . . . . . . . . .
6
46
47
65
67
70
89
90
91
92
92
95
108
108
111
112
113
119
127
130
160
161
162
166
168
170
List of Tables
1.1
1.2
1.3
Supported Languages . . . . . . . . . . . . . . . . . . .
Customised Text . . . . . . . . . . . . . . . . . . . . . . .
Commands and package options that have no effect
when using xindy or makeindex explicitly . . . . . .
25
26
30
4.1
Key to Field Mappings . . . . . . . . . . . . . . . . . . .
66
6.1
Predefined Hyperlinked Location Formats . . . . . . .
80
13.1 Synonyms provided by the package option shortcuts . 122
13.2 The effect of using xspace . . . . . . . . . . . . . . . . . 138
15.1 Glossary Styles . . . . . . . . . . . . . . . . . . . . . . . 143
15.2 Multicolumn Styles . . . . . . . . . . . . . . . . . . . . . 155
7
Glossary
This glossary style was setup using:
\usepackage[xindy,
nonumberlist,
seeautonumberlist,
toc,
style=altlist,
nogroupskip]{glossaries}
\glsnoexpandfields
\renewcommand*{\glsseeformat}[3][\seename]{%
(\xmakefirstuc{#1} \glsseelist{#2}.)}
Command Line Interface (CLI)
An application that doesn’t have a graphical user interface.
That is, an application that doesn’t have any windows, buttons
or menus and can be run in a command prompt or terminal.
Entry location
The location of the entry in the document. This defaults to the
page number on which the entry appears. An entry may have
multiple locations.
First use
The first time a glossary entry is used (from the start of the document or after a reset) with one of the following commands:
\gls, \Gls, \GLS, \glspl, \Glspl, \GLSpl or \glsdisp.
(See first use flag & first use text.)
First use flag
A conditional that determines whether or not the entry has been
used according to the rules of first use. Commands to unset or
reset this conditional are described in Section 14.
First use text
The text that is displayed on first use, which is governed by
the first and firstplural keys of \newglossaryentry. (May be
overridden by \glsdisp.)
8
Glossary
Indexing application
An application (piece of software) separate from TEX/LATEX that
collates and sorts information that has an associated page reference. Generally the information is an index entry but in this
case the information is a glossary entry. There are two main
indexing applications that are used with TEX: makeindex and
xindy. These are both command line interface (CLI) applications.
Link text
The text produced by commands such as \gls. It may or may
not be a hyperlink to the glossary.
Location list
A list of entry locations. (See number list.)
makeglossaries
A custom designed Perl script interface to xindy and makeindex
provided with the glossaries package.
makeglossariesgui
A Java GUI alternative to makeglossaries that also provides
diagnostic tools. Available separately on CTAN.
makeindex
An indexing application.
Number list
A list of entry locations (also called a location list). The number
list can be suppressed using the nonumberlist package option.
Sanitize
Converts command names into character sequences. That is, a
command called, say, \foo, is converted into the sequence of
characters: \, f, o, o. Depending on the font, the backslash
character may appear as a dash when used in the main document text, so \foo will appear as: —foo.
Earlier versions of glossaries used this technique to write information to the files used by the indexing applications to prevent
problems caused by fragile commands. Now, this is only used
for the sort key.
9
Glossary
xindy
A flexible indexing application with multilingual support written in Perl.
10
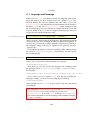
1 Introduction
The glossaries package is provided to assist generating glossaries. It
has a certain amount of flexibility, allowing the user to customize the
format of the glossary and define multiple glossaries. It also supports acronyms and glossary styles that include symbols (in addition
to a name and description) for glossary entries. There is provision for
loading a database of glossary terms. Only those terms used1 in the
document will be added to the glossary.
This package replaces the glossary package which is now obsolete. Please see the document “Upgrading from the glossary package
to the glossaries package” (glossary2glossaries.pdf) for assistance in
upgrading.
One of the strengths of this package is its flexibility, however the
drawback of this is the necessity of having a large manual that can
cover all the various settings. If you are daunted by the size of the
manual, try starting off with the much shorter guide for beginners
(glossariesbegin.pdf).
The glossaries package comes with a Perl script called
makeglossaries. This provides a convenient interface to the
indexing applications makeindex or xindy. It is strongly
recommended that you use this script, but it is not essential. If you
are reluctant to install Perl, or for any other reason you don’t
want to use makeglossaries, you can call makeindex or
xindy explicitly. See Section 1.3 for further details.
This document uses the glossaries package. For example, when viewing the PDF version of this document in a hyperlinked-enabled PDF
viewer (such as Adobe Reader or Okular) if you click on the word
“xindy” you’ll be taken to the entry in the glossary where there’s a
brief description of what “xindy” is.
The remainder of this introductory section covers the following:
• Section 1.1 lists the sample documents provided with this package.
1 That
is, if the term has been referenced using any of the commands described in
Section 6 and Section 7 or via \glssee (or the see key) or commands such as
\acrshort.
11
1 Introduction
• Section 1.2 provides information for users who wish to write in
a language other than English.
• Section 1.3 describes how to use a post-processor to create the
sorted glossaries for your document.
1.1 Sample Documents
The glossaries package is provided with some sample documents
that illustrate the various functions. These should be located in the
samples subdirectory (folder) of the glossaries documentation directory. This location varies according to your operating system and TEX
distribution. You can use texdoc to locate the main glossaries documentation. For example, in a terminal or command prompt, type:
texdoc -l glossaries
This should display a list of all the files in the glossaries documentation directory with their full pathnames.
If you can’t find the sample files on your computer, they are
also available from your nearest CTAN mirror at http://mirror.
ctan.org/macros/latex/contrib/glossaries/samples/.
The sample documents are as follows2 :
minimalgls.tex This document is a minimal working example.
You can test your installation using this file. To create the complete document you will need to do the following steps:
1. Run minimalgls.tex through LATEX either by typing
latex minimalgls
in a terminal or by using the relevant button or menu item
in your text editor or front-end. This will create the required associated files but you will not see the glossary. If
you use PDFLATEX you will also get warnings about nonexistent references that look something like:
pdfTeX warning (dest): name{glo:aca} has been
referenced but does not exist,
replaced by a fixed one
2 Note
that although I’ve written latex in this section, it’s better to use pdflatex,
where possible, for the reasons given earlier.
12
1 Introduction
These warnings may be ignored on the first run.
If you get a Missing \begin{document} error, then
it’s most likely that your version of xkeyval is out of date.
Check the log file for a warning of that nature. If this is the
case, you will need to update the xkeyval package.
2. Run makeglossaries on the document (Section 1.3).
This can be done on a terminal either by typing
makeglossaries minimalgls
or by typing
perl makeglossaries minimalgls
If your system doesn’t recognise the command perl then
it’s likely you don’t have Perl installed. In which case you
will need to use makeindex directly. You can do this in a
terminal by typing (all on one line):
makeindex -s minimalgls.ist -t minimalgls.glg
-o minimalgls.gls minimalgls.glo
(See Section 1.3.3 for further details on using makeindex
explicitly.)
Note that if you need to specify the full path and the path
contains spaces, you will need to delimit the file names
with the double-quote character.
3. Run minimalgls.tex through LATEX again (as step 1)
You should now have a complete document. The number following each entry in the glossary is the location number. By default, this is the page number where the entry was referenced.
sample4col.tex This document illustrates a four column glossary
where the entries have a symbol in addition to the name and
description. To create the complete document, you need to do:
latex sample4col
makeglossaries sample4col
13
1 Introduction
latex sample4col
As before, if you don’t have Perl installed, you will need to use
makeindex directly instead of using makeglossaries. The
vertical gap between entries is the gap created at the start of
each group. This can be suppressed using the nogroupskip package option.
sampleAcr.tex This document has some sample acronyms. It
also adds the glossary to the table of contents, so an extra run
through LATEX is required to ensure the document is up to date:
latex sampleAcr
makeglossaries sampleAcr
latex sampleAcr
latex sampleAcr
sampleAcrDesc.tex This is similar to the previous example, except that the acronyms have an associated description. As with
the previous example, the glossary is added to the table of contents, so an extra run through LATEX is required:
latex sampleAcrDesc
makeglossaries sampleAcrDesc
latex sampleAcrDesc
latex sampleAcrDesc
sampleDesc.tex This is similar to the previous example, except
that it defines the acronyms using \newglossaryentry instead of \newacronym. As with the previous example, the
glossary is added to the table of contents, so an extra run
through LATEX is required:
latex sampleDesc
makeglossaries sampleDesc
latex sampleDesc
latex sampleDesc
14
1 Introduction
sampleCustomAcr.tex This document has some sample acronyms
with a custom acronym style. It also adds the glossary to the table of contents, so an extra run through LATEX is required:
latex sampleCustomAcr
makeglossaries sampleCustomAcr
latex sampleCustomAcr
latex sampleCustomAcr
sampleFnAcrDesc.tex This is similar to sampleAcrDesc.tex,
except that it uses the footnote-sc-desc style. As with the previous
example, the glossary is added to the table of contents, so an
extra run through LATEX is required:
latex sampleFnAcrDesc
makeglossaries sampleFnAcrDesc
latex sampleFnAcrDesc
latex sampleFnAcrDesc
sample-FnDesc.tex This example defines a custom display format that puts the description in a footnote on first use.
latex sample-FnDesc
makeglossaries sample-FnDesc
latex sample-FnDesc
sample-custom-acronym.tex This document illustrates how to
define your own acronym style if the predefined styles don’t
suit your requirements.
latex sample-custom-acronym
makeglossaries sample-custom-acronym
latex sample-custom-acronym
15
1 Introduction
sample-crossref.tex This document illustrates how to crossreference entries in the glossary.
latex sample-crossref
makeglossaries sample-crossref
latex sample-crossref
sampleDB.tex This document illustrates how to load external files
containing the glossary definitions. It also illustrates how to
define a new glossary type. This document has the number list
suppressed and uses \glsaddall to add all the entries to the
glossaries without referencing each one explicitly. To create the
document do:
latex sampleDB
makeglossaries sampleDB
latex sampleDB
The glossary definitions are stored in the accompanying files
database1.tex and database2.tex. Note that if you don’t
have Perl installed, you will need to use makeindex twice instead of a single call to makeglossaries:
1. Create the main glossary (all on one line):
makeindex -s sampleDB.ist -t sampleDB.glg -o
sampleDB.gls sampleDB.glo
2. Create the secondary glossary (all on one line):
makeindex -s sampleDB.ist -t sampleDB.nlg -o
sampleDB.not sampleDB.ntn
sampleEq.tex This document illustrates how to change the location to something other than the page number. In this case, the
equation counter is used since all glossary entries appear inside an equation environment. To create the document do:
16
1 Introduction
latex sampleEq
makeglossaries sampleEq
latex sampleEq
sampleEqPg.tex This is similar to the previous example, but the
number lists are a mixture of page numbers and equation numbers. This example adds the glossary to the table of contents, so
an extra LATEX run is required:
latex sampleEqPg
makeglossaries sampleEqPg
latex sampleEqPg
latex sampleEqPg
sampleSec.tex This document also illustrates how to change the
location to something other than the page number. In this case,
the section counter is used. This example adds the glossary
to the table of contents, so an extra LATEX run is required:
latex sampleSec
makeglossaries sampleSec
latex sampleSec
latex sampleSec
sampleNtn.tex This document illustrates how to create an additional glossary type. This example adds the glossary to the table
of contents, so an extra LATEX run is required:
latex sampleNtn
makeglossaries sampleNtn
latex sampleNtn
latex sampleNtn
Note that if you don’t have Perl installed, you will need to use
makeindex twice instead of a single call to makeglossaries:
17
1 Introduction
1. Create the main glossary (all on one line):
makeindex -s sampleNtn.ist -t sampleNtn.glg
-o sampleNtn.gls sampleNtn.glo
2. Create the secondary glossary (all on one line):
makeindex -s sampleNtn.ist -t sampleNtn.nlg
-o sampleNtn.not sampleNtn.ntn
sample.tex This document illustrates some of the basics, including how to create child entries that use the same name as the
parent entry. This example adds the glossary to the table of contents and it also uses \glsrefentry, so an extra LATEX run is
required:
latex sample
makeglossaries sample
latex sample
latex sample
You can see the difference between word and letter ordering if
you substitute order=word with order=letter. (Note that this will
only have an effect if you use makeglossaries. If you use
makeindex explicitly, you will need to use the -l switch to
indicate letter ordering.)
sample-inline.tex This document is like sample.tex, above,
but uses the inline glossary style to put the glossary in a footnote.
sampletree.tex This document illustrates a hierarchical glossary
structure where child entries have different names to their corresponding parent entry. To create the document do:
latex sampletree
makeglossaries sampletree
latex sampletree
18
1 Introduction
sample-dual.tex This document illustrates how to define an entry that both appears in the list of acronyms and in the main
glossary. To create the document do:
latex sample-dual
makeglossaries sample-dual
latex sample-dual
sample-langdict.tex This document illustrates how to use the
glossaries package to create English to French and French to English dictionaries. To create the document do:
latex sample-langdict
makeglossaries sample-langdict
latex sample-langdict
samplexdy.tex This document illustrates how to use the glossaries
package with xindy instead of makeindex. The document
uses UTF8 encoding (with the inputenc package). The encoding
is picked up by makeglossaries. By default, this document
will create a xindy style file called samplexdy.xdy, but if you
uncomment the lines
\setStyleFile{samplexdy-mc}
\noist
\GlsSetXdyLanguage{}
it will set the style file to samplexdy-mc.xdy instead. This
provides an additional letter group for entries starting with
“Mc” or “Mac”. If you use makeglossaries, you don’t
need to supply any additional information. If you don’t use
makeglossaries, you will need to specify the required information. Note that if you set the style file to samplexdy-mc.xdy
you must also specify \noist, otherwise the glossaries package
will overwrite samplexdy-mc.xdy and you will lose the “Mc”
letter group.
To create the document do:
latex samplexdy
19
1 Introduction
makeglossaries samplexdy
latex samplexdy
If you don’t have Perl installed, you will have to call xindy
explicitly instead of using makeglossaries. If you are using
the default style file samplexdy.xdy, then do (no line breaks):
xindy -L english -C utf8 -I xindy -M samplexdy -t
samplexdy.glg -o samplexdy.gls samplexdy.glo
otherwise, if you are using samplexdy-mc.xdy, then do (no
line breaks):
xindy -I xindy -M samplexdy-mc -t samplexdy.glg
-o samplexdy.gls samplexdy.glo
samplexdy2.tex This document illustrates how to use the glossaries package where the location numbers don’t follow a standard format. This example will only work with xindy. To create the document do:
pdflatex samplexdy2
makeglossaries samplexdy2
pdflatex samplexdy2
If you can’t use makeglossaries then you need to do (all on
one line):
xindy -L english -C utf8 -I xindy -M samplexdy2
-t samplexdy2.glg -o samplexdy2.gls samplexdy2.glo
See Section 11.2 for further details.
sampleutf8.tex This is another example that uses xindy. Unlike makeindex, xindy can cope with accented or non-Latin
characters. This document uses UTF8 encoding. To create the
document do:
20
1 Introduction
latex sampleutf8
makeglossaries sampleutf8
latex sampleutf8
If you don’t have Perl installed, you will have to call xindy
explicitly instead of using makeglossaries (no line breaks):
xindy -L english -C utf8 -I xindy -M sampleutf8
-t sampleutf8.glg -o sampleutf8.gls sampleutf8.glo
If you remove the xindy option from sampleutf8.tex and do:
latex sampleutf8
makeglossaries sampleutf8
latex sampleutf8
you will see that the entries that start with a non-Latin character
now appear in the symbols group, and the word “manœuvre”
is now after “manor” instead of before it. If you are unable to
use makeglossaries, the call to makeindex is as follows (no
line breaks):
makeindex -s sampleutf8.ist -t sampleutf8.glg -o
sampleutf8.gls sampleutf8.glo
sample-index.tex This document uses the glossaries package to
create both a glossary and an index. This requires two makeglossaries
calls to ensure the document is up to date:
latex sample-index
makeglossaries sample-index
latex sample-index
makeglossaries sample-index
latex sample-index
21
1 Introduction
sample-newkeys.tex This document illustrates how add custom
keys.
sample-numberlist.tex This document illustrates how to reference the number list in the document text. This requires an additional LATEX run:
latex sample-numberlist
makeglossaries sample-numberlist
latex sample-numberlist
latex sample-numberlist
samplePeople.tex This document illustrates how you can hook
into the standard sort mechanism to adjust the way the sort key
is set. This requires an additional run to ensure the table of contents is up-to-date:
latex samplePeople
makeglossaries samplePeople
latex samplePeople
latex samplePeople
sampleSort.tex This is another document that illustrates how to
hook into the standard sort mechanism. An additional run is
required to ensure the table of contents is up-to-date:
latex sampleSort
makeglossaries sampleSort
latex sampleSort
latex sampleSort
sample-nomathhyper.tex This document illustrates how to selective enable and disable entry hyperlinks in \glsentryfmt.
sample-entryfmt.tex This document illustrates how to change
the way an entry is displayed in the text.
22
1 Introduction
sample-prefix.tex This document illustrates the use of the glossariesprefix package. An additional run is required to ensure the table
of contents is up-to-date:
latex sample-prefix
makeglossaries sample-prefix
latex sample-prefix
latex sample-prefix
sampleaccsupp.tex This document uses the experimental glossariesaccsupp package. The symbol is set to the replacement text.
Note that some PDF viewers don’t use the accessibility support.
Information about the glossaries-accsupp package can be found
in Section 18.
1.2 Multi-Lingual Support
As from version 1.17, the glossaries package can now be used with
xindy as well as makeindex. If you are writing in a language that
uses accented characters or non-Latin characters it is recommended
that you use xindy as makeindex is hard-coded for Latin languages.
This means that you are not restricted to the A, . . . , Z letter groups.
If you want to use xindy, remember to use the xindy package option.
For example:
\documentclass[frenchb]{article}
\usepackage[utf8]{inputenc}
\usepackage[T1]{fontenc}
\usepackage{babel}
\usepackage[xindy]{glossaries}
Note that although an accented character, such as é, looks like a
plain character in your tex file, it’s actually a macro and can
therefore cause expansion problems. You may need to switch off
the field expansions with \glsnoexpandfields.
If you use an accented (or other expandable) character at the
start of an entry name, you must place it in a group, or it will
cause a problem for commands that convert the first letter to
upper case (e.g. \Gls) due to expansion issues. For example:
\newglossaryentry{elite}{name={{é}lite},
description={select group or class}}
23
1 Introduction
If you use the inputenc package, makeglossaries will pick up the
encoding from the auxiliary file. If you use xindy explicitly instead
of via makeglossaries, you may need to specify the encoding using the -C option. Read the xindy manual for further details.
1.2.1 Changing the Fixed Names
As from version 1.08, the glossaries package now has limited multilingual support, thanks to all the people who have sent me the relevant translations either via email or via comp.text.tex. However
you must load babel or polyglossia before glossaries to enable this. Note
that if babel is loaded and the translator package is detected on TEX’s
path, then the translator package will be loaded automatically, unless
you use the translate=false or translate=babel package options. However, it may not pick up on the required languages so, if the predefined text is not translated, you may need to explicitly load the translator package with the required languages. For example:
\usepackage[spanish]{babel}
\usepackage[spanish]{translator}
\usepackage{glossaries}
Alternatively, specify the language as a class option rather than a
package option. For example:
\documentclass[spanish]{report}
\usepackage{babel}
\usepackage{glossaries}
If you want to use ngerman or german instead of babel, you will need
to include the translator package to provide the translations. For example:
\documentclass[ngerman]{article}
\usepackage{ngerman}
\usepackage{translator}
\usepackage{glossaries}
The languages are currently supported by the glossaries package
are listed in table 1.1. Please note that (apart from spelling mistakes)
I don’t intend to change the default translations as it will cause compatibility problems.
The language dependent commands and translator keys used by the
glossaries package are listed in table 1.2.
Due to the varied nature of glossaries, it’s likely that the predefined translations may not be appropriate. If you are using the babel
24
1 Introduction
Table 1.1: Supported Languages
Language
Brazilian Portuguese
Danish
Dutch
English
French
German
Irish
Italian
Hungarian
Polish
Serbian
Spanish
As from version
1.17
1.08
1.08
1.08
1.08
1.08
1.08
1.08
1.08
1.13
2.06
1.08
package and the glossaries package option translate=babel, you need
to be familiar with the advice given in http://www.tex.ac.uk/
cgi-bin/texfaq2html?label=latexwords. If you are using
the translator package, then you can provide your own dictionary with
the necessary modifications (using \deftranslation) and load it
using \usedictionary.
Note that the dictionaries are loaded at the beginning of the
document, so it won’t have any effect if you put
\deftranslation in the preamble. It should be put in your
personal dictionary instead (as in the example below). See the
translator documentation for further details. (Now with beamer
documentation.)
Your custom dictionary doesn’t have to be just a translation from
English to another language. You may prefer to have a dictionary for
a particular type of document. For example, suppose your institution’s in-house reports have to have the glossary labelled as “Nomenclature” and the page list should be labelled “Location”, then you can
create a file called, say,
myinstitute-glossaries-dictionary-English.dict
that contains the following:
\ProvidesDictionary{myinstitute-glossaries-dictionary}{English}
\deftranslation{Glossary}{Nomenclature}
25
1 Introduction
Table 1.2: Customised Text
Command Name
\glossaryname
\acronymname
Translator Key
Word
Glossary
Acronyms
\entryname
Notation
(glossaries)
\descriptionname
Description
(glossaries)
\symbolname
Symbol
(glossaries)
\pagelistname
Page List
(glossaries)
\glssymbolsgroupname Symbols
(glossaries)
\glsnumbersgroupname Numbers
(glossaries)
26
Purpose
Title of the main glossary.
Title of the list of acronyms
(when used with package
option acronym).
Header for first column in
the glossary (for 2, 3 or 4
column glossaries that
support headers).
Header for second column
in the glossary (for 2, 3 or 4
column glossaries that
support headers).
Header for symbol column
in the glossary for glossary
styles that support this
option.
Header for page list
column in the glossary for
glossaries that support this
option.
Header for symbols section
of the glossary for glossary
styles that support this
option.
Header for numbers
section of the glossary for
glossary styles that support
this option.
1 Introduction
\deftranslation{Page List (glossaries)}{Location}
You can now load it using:
\usedictionary{myinstitute-glossaries-dictionary}
(Make sure that myinstitute-glossaries-dictionary-English.dict
can be found by TEX.) If you want to share your custom dictionary,
you can upload it to CTAN.
If you are using babel and don’t want to use the translator interface,
you can use the package option translate=babel. For example:
\documentclass[british]{article}
\usepackage{babel}
\usepackage[translate=babel]{glossaries}
\addto\captionsbritish{%
\renewcommand*{\glossaryname}{List of Terms}%
\renewcommand*{\acronymname}{List of Acronyms}%
}
If you are using polyglossia instead of babel, glossaries-polyglossia will
automatically be loaded unless you specify the package option translate=false.
Note that xindy provides much better multi-lingual support than
makeindex, so it’s recommended that you use xindy if you have
glossary entries that contain diacritics or non-Roman letters. See Section 11 for further details.
1.3 Generating the Associated Glossary Files
In order to generate a sorted glossary with compact number lists, it is
necessary to use an external indexing application as an intermediate
step. It is this application that creates the file containing the code
that typesets the glossary. If this step is omitted, the glossaries will
not appear in your document. The two indexing applications that
are most commonly used with LATEX are makeindex and xindy. As
from version 1.17, the glossaries package can be used with either of
these applications. Previous versions were designed to be used with
makeindex only. Note that xindy has much better multi-lingual
support than makeindex, so xindy is recommended if you’re not
writing in English. Commands that only have an effect when xindy
is used are described in Section 11.
27
1 Introduction
This is a multi-stage process, but there are methods of automating
document compilation using applications such as latexmk and
arara. See http://www.dickimaw-books.com/latex/
thesis/html/build.html for more information.
The glossaries package comes with the Perl script makeglossaries
which will run makeindex or xindy on all the glossary files using a customized style file (which is created by \makeglossaries).
See Section 1.3.1 for further details. Perl is stable, cross-platform,
open source software that is used by a number of TEX-related applications. Further information is available at http://www.perl.org/
about.html. The advantages of using makeglossaries:
• It automatically detects whether to use makeindex or xindy
and sets the relevant application switches.
• One call of makeglossaries will run makeindex/xindy for
each glossary type.
• If things go wrong, makeglossaries will scan the messages
from makeindex or xindy and attempt to diagnose the problem in relation to the glossaries package. This will hopefully provide more helpful messages in some cases. If it can’t diagnose
the problem, you will have to read the relevant transcript file
and see if you can work it out from the makeindex or xindy
messages.
There is also a Java GUI alternative called makeglossariesgui,
distributed separately, that has diagnostic tools.
Whilst it is strongly recommended that you use the makeglossaries
script or makeglossariesgui, it is possible to use the glossaries
package without using either application. However, note that some
commands and package options have no effect if you don’t use
makeglossaries or makeglossariesgui. These are listed in table 1.3.
If you are choosing not to use makeglossaries because you
don’t want to install Perl, you will only be able to use makeindex
as xindy also requires Perl.
Note that if any of your entries use an entry that is not referenced outside the glossary, you will need to do an additional
makeglossaries, makeindex or xindy run, as appropriate. For
28
1 Introduction
example, suppose you have defined the following entries:3
\newglossaryentry{citrusfruit}{name={citrus fruit},
description={fruit of any citrus tree. (See also
\gls{orange})}}
\newglossaryentry{orange}{name={orange},
description={an orange coloured fruit.}}
and suppose you have \gls{citrusfruit} in your document but
don’t reference the orange entry, then the orange entry won’t appear in your glossary until you first create the glossary and then do
another run of makeglossaries, makeindex or xindy. For example, if the document is called myDoc.tex, then you must do:
latex myDoc
makeglossaries myDoc
latex myDoc
makeglossaries myDoc
latex myDoc
Likewise, an additional makeglossaries and LATEX run may be
required if the document pages shift with re-runs. For example, if the
page numbering is not reset after the table of contents, the insertion
of the table of contents on the second LATEX run may push glossary
entries across page boundaries, which means that the number lists in
the glossary may need updating.
The examples in this document assume that you are accessing
makeglossaries, xindy or makeindex via a terminal. Windows
users can use the MSDOS Prompt which is usually accessed via the
Start → All Programs menu or Start → All Programs → Accessories menu.
Alternatively, your text editor may have the facility to create a function that will call the required application. The article “Glossaries,
Nomenclature, List of Symbols and Acronyms” in the LATEX Community’s4 Know How section describes how to do this for TeXnicCenter, and the thread “Executing Glossaries’ makeindex from a WinEdt
macro” on the comp.text.tex newsgroup describes how to do it
for WinEdt. Section 1.1 (Building Your Document) of “Using LATEX to
Write a PhD Thesis”5 describes how to do it for TeXWorks. For other
editors see the editor’s user manual for further details.
If any problems occur, remember to check the transcript files (e.g.
.glg or .alg) for messages.
3 As
from v3.01 \gls is no longer fragile and doesn’t need protecting.
4 http://www.latex-community.org/
5 http://www.dickimaw-books.com/latex/thesis/
29
1 Introduction
Table 1.3: Commands and package options that have no effect when
using xindy or makeindex explicitly
Command or Package Option
order=letter
order=word
xindy={language=hlangi,codename=hcodei}
\GlsSetXdyLanguage{hlangi}
\GlsSetXdyCodePage{hcodei}
makeindex
use -l
default
N/A
N/A
N/A
xindy
use -M ord/letorder
default
use -L hlangi -C hcodei
use -L hlangi
use -C hcodei
1.3.1 Using the makeglossaries Perl Script
The makeglossaries script picks up the relevant information from
the auxiliary (.aux) file and will either call xindy or makeindex,
depending on the supplied information. Therefore, you only need to
pass the document’s name without the extension to makeglossaries.
For example, if your document is called myDoc.tex, type the following in your terminal:
latex myDoc
makeglossaries myDoc
latex myDoc
You may need to explicitly load makeglossaries into Perl:
perl makeglossaries myDoc
There is a batch file called makeglossaries.bat which does this
for Windows users, but you must have Perl installed to be able to use
it.6 You can specify in which directory the .aux, .glo etc files are
located using the -d switch. For example:
pdflatex -output-directory myTmpDir myDoc
makeglossaries -d myTmpDir myDoc
Note that makeglossaries assumes by default that makeindex/
xindy is on your operating system’s path. If this isn’t the case,
you can specify the full pathname using -m hpath/to/makeindexi for
makeindex or -x hpath/to/xindyi for xindy.
6 Apparently
MiKTeX has an alternative makeglossaries.exe but I don’t know
how using this differs from using makeglossaries.bat.
30
1 Introduction
The makeglossaries script contains POD (Plain Old Documentation). If you want, you can create a man page for makeglossaries
using pod2man and move the resulting file onto the man path. Alternatively do makeglossaries --help for a list of all options or
makeglossaries --version for the version number.
When upgrading the glossaries package, make sure you also
upgrade your version of makeglossaries. The current version
is 2.12.
1.3.2 Using xindy explicitly
Xindy comes with TeXLive, but not with MiKTeX. However MikTeX
users can install it. See How to use Xindy with MikTeX on TEX on
StackExchange7 .
If you want to use xindy to process the glossary files, you must
make sure you have used the xindy package option:
\usepackage[xindy]{glossaries}
This is required regardless of whether you use xindy explicitly or
whether it’s called implicitly via applications such as makeglossaries
or makeglossariesgui. This causes the glossary entries to be written in raw xindy format, so you need to use -I xindy not -I tex.
To run xindy type the following in your terminal (all on one line):
xindy -L hlanguagei -C hencodingi -I xindy -M hstylei -t hbasei.glg
-o hbasei.gls hbasei.glo
where hlanguagei is the required language name, hencodingi is the encoding, hbasei is the name of the document without the .tex extension and hstylei is the name of the xindy style file without the .xdy
extension. The default name for this style file is hbasei.xdy but can
be changed via \setStyleFile{hstylei}. You may need to specify
the full path name depending on the current working directory. If
any of the file names contain spaces, you must delimit them using
double-quotes.
For example, if your document is called myDoc.tex and you are
using UTF8 encoding in English, then type the following in your terminal:
xindy -L english -C utf8 -I xindy -M myDoc -t myDoc.glg
-o myDoc.gls myDoc.glo
7 http://www.stackexchange.com/
31
1 Introduction
Note that this just creates the main glossary. You need to do the
same for each of the other glossaries (including the list of acronyms if
you have used the acronym package option), substituting .glg, .gls
and .glo with the relevant extensions. For example, if you have used
the acronym package option, then you would need to do:
xindy -L english -C utf8 -I xindy -M myDoc -t myDoc.alg
-o myDoc.acr myDoc.acn
For additional glossaries, the extensions are those supplied when you
created the glossary with \newglossary.
Note that if you use makeglossaries instead, you can replace all
those calls to xindy with just one call to makeglossaries:
makeglossaries myDoc
Note also that some commands and package options have no effect if
you use xindy explicitly instead of using makeglossaries. These
are listed in table 1.3.
1.3.3 Using makeindex explicitly
If you want to use makeindex explicitly, you must make sure that
you haven’t used the xindy package option or the glossary entries will
be written in the wrong format. To run makeindex, type the following in your terminal:
makeindex -s hstylei.ist -t hbasei.glg -o hbasei.gls hbasei.glo
where hbasei is the name of your document without the .tex extension and hstylei.ist is the name of the makeindex style file. By default, this is hbasei.ist, but may be changed via \setStyleFile{hstylei}.
Note that there are other options, such as -l (letter ordering). See the
makeindex manual for further details.
For example, if your document is called myDoc.tex, then type the
following at the terminal:
makeindex -s myDoc.ist -t myDoc.glg -o myDoc.gls myDoc.glo
Note that this only creates the main glossary. If you have additional
glossaries (for example, if you have used the acronym package option)
then you must call makeindex for each glossary, substituting .glg,
.gls and .glo with the relevant extensions. For example, if you
32
1 Introduction
have used the acronym package option, then you need to type the following in your terminal:
makeindex -s myDoc.ist -t myDoc.alg -o myDoc.acr myDoc.acn
For additional glossaries, the extensions are those supplied when you
created the glossary with \newglossary.
Note that if you use makeglossaries instead, you can replace all
those calls to makeindex with just one call to makeglossaries:
makeglossaries myDoc
Note also that some commands and package options have no effect
if you use makeindex explicitly instead of using makeglossaries.
These are listed in table 1.3.
1.3.4 Note to Front-End and Script Developers
The information needed to determine whether to use xindy or
makeindex and the information needed to call those applications is
stored in the auxiliary file. This information can be gathered by a
front-end, editor or script to make the glossaries where appropriate.
This section describes how the information is stored in the auxiliary
file.
The file extensions used by each defined glossary are given by
\@newglossary
\@newglossary{hlabeli}{hlogi}{hout-exti}{hin-exti}
where hin-exti is the extension of the indexing application’s input file
(the output file from the glossaries package’s point of view), hout-exti
is the extension of the indexing application’s output file (the input file
from the glossaries package’s point of view) and hlogi is the extension
of the indexing application’s transcript file. The label for the glossary
is also given for information purposes only, but is not required by the
indexing applications. For example, the information for the default
main glossary is written as:
\@newglossary{main}{glg}{gls}{glo}
The indexing application’s style file is specified by
\@istfilename
\@istfilename{hfilenamei}
The file extension indicates whether to use makeindex (.ist) or
xindy (.xdy). Note that the glossary information is formatted dif-
33
1 Introduction
ferently depending on which indexing application is supposed to be
used, so it’s important to call the correct one.
Word or letter ordering is specified by:
\@glsorder
\@glsorder{horderi}
where horderi can be either word or letter.
If xindy should be used, the language and code page for each glossary is specified by
\@xdylanguage
\@gls@codepage
\@xdylanguage{hlabeli}{hlanguagei}
\@gls@codepage{hlabeli}{hcodei}
where hlabeli identifies the glossary, hlanguagei is the root language
(e.g. english) and hcodei is the encoding (e.g. utf8). These commands are omitted if makeindex should be used.
34
2 Package Options
This section describes the available glossaries package options. You
may omit the =true for boolean options. (For example, acronym is
equivalent to acronym=true).
Note that hkeyi=hvaluei package options can’t be passed via the
document class options. (This includes options where the hvaluei
part may be omitted, such as acronym.) This is a general limitation
not restricted to the glossaries package. Options that aren’t
hkeyi=hvaluei (such as makeindex) may be passed via the document
class options.
2.1 General Options
nowarn This suppresses all warnings generated by the glossaries
package. Don’t use this option if you’re new to using glossaries
as the warnings are designed to help detect common mistakes
(such as forgetting to use \makeglossaries).
nomain This suppresses the creation of the main glossary and asso-
ciated .glo file, if unrequired. Note that if you use this option, you must create another glossary in which to put all your
entries (either via the acronym (or acronyms) package option described in Section 2.5 or via the symbols, numbers or index options
described in Section 2.6 or via \newglossary described in Section 12).
35
2 Package Options
If you don’t use the main glossary and you don’t use this
option, makeglossaries will produce the following
warning:
Warning: File ’filename.glo’ is empty.
Have you used any entries defined in glossary
’main’?
Remember to use package option ’nomain’ if
you don’t want to use the main glossary.
If you did actually want to use the main glossary and you
see this warning, check that you have referenced the entries
in that glossary via commands such as \gls.
sanitizesort This is a boolean option that determines whether or not
to sanitize the sort value when writing to the external glossary
file. For example, suppose you define an entry as follows:
\newglossaryentry{hash}{name={\#},sort={#},
description={hash symbol}}
The sort value (#) must be sanitized before writing it to the glossary file, otherwise LATEX will try to interpret it as a parameter
reference. If, on the other hand, you want the sort value expanded, you need to switch off the sanitization. For example,
suppose you do:
\newcommand{\mysortvalue}{AAA}
\newglossaryentry{sample}{%
name={sample},
sort={\mysortvalue},
description={an example}}
and you actually want \mysortvalue expanded, so that the
entry is sorted according to AAA, then use the package option
sanitizesort=false. (The default is sanitizesort=true.)
savewrites This is a boolean option to minimise the number of
write registers used by the glossaries package. (Default is
savewrites=false.) There are only a limited number of write reg-
isters, and if you have a large number of glossaries or if you are
using a class or other packages that create a lot of external files,
you may exceed the maximum number of available registers. If
savewrites is set, the glossary information will be stored in token
36
2 Package Options
registers until the end of the document when they will be written to the external files. If you run out of token registers, you
can use etex.
This option can significantly slow document compilation.
As an alternative, you can use the scrwfile package (part of
the KOMA-Script bundle) and not use this option.
If you want to use TEX’s \write18 mechanism to call
makeindex or xindy from your document and use
savewrites, you must create the external files with
\glswritefiles before you call makeindex/xindy.
Also set \glswritefiles to nothing or \relax before the
end of the document to avoid rewriting the files. For
example:
\glswritefiles
\write18{makeindex -s \istfilename\space
-t \jobname.glg -o \jobname.gls \jobname}
\let\glswritefiles\relax
translate This can take the following values:
translate=true If babel has been loaded and the translator package is installed, translator will be loaded and the translations will be provided by the translator package inter-
face. You can modify the translations by providing your
own dictionary. If the translator package isn’t installed
and babel is loaded, the glossaries-babel package will be
loaded and the translations will be provided using babel’s
\addto\captionhlanguagei mechanism. If polyglossia has
been loaded, glossaries-polyglossia will be loaded.
translate=false Don’t provide translations, even if babel or polyglossia has been loaded. (Note that babel provides the com-
mand \glossaryname so that will still be translated if
you have loaded babel.)
translate=babel Don’t load the translator package. Instead load
glossaries-babel.
37
2 Package Options
I recommend you use translate=babel if you have any
problems with the translations or with PDF
bookmarks, but to maintain backward compatibility, if
babel has been loaded the default is translate=true.
If translate is specified without a value, translate=true is assumed.
If translate isn’t specified, translate=true is assumed if babel, polyglossia or translator have been loaded. Otherwise translate=false is
assumed.
See Section 1.2.1 for further details.
notranslate This is equivalent to translate=false and may be passed via
the document class options.
hyperfirst This is a boolean option that specifies whether each term
has a hyperlink on first use. The default is hyperfirst=true (terms
on first use have a hyperlink, unless explicitly suppressed using
starred versions of commands such as \gls*). Note that this
applies to all glossary types. It may be that you only want to
apply this to just the acronyms (where the first use explains the
meaning of the acronym) but not for ordinary glossary entries
(where the first use is identical to subsequent uses). In this case,
you can use hyperfirst=false and apply \glsunsetall to all the
regular (non-acronym) glossaries. For example:
\usepackage[acronym,hyperfirst=false]{glossaries}
% acronym and glossary entry definitions
% at the end of the preamble
\glsunsetall[main]
nohypertypes Use this option if you have multiple glossaries and you
want to suppress the entry hyperlinks for a particular glossary
or glossaries. The value of this option should be a commaseparated list of glossary types where \gls etc shouldn’t have
hyperlinks by default. Make sure you enclose the value in
braces if it contains any commas. Example:
\usepackage[acronym,nohypertypes={acronym,notation}]
{glossaries}
\newglossary[nlg]{notation}{not}{ntn}{Notation}
The values must be fully expanded, so don’t try nohypertypes
=\acronymtype. You may also use
38
2 Package Options
\GlsDeclareNoHyperList{hlisti}
instead or additionally. See Section 6 for further details.
savenumberlist This is a boolean option that specifies whether or not
to gather and store the number list for each entry. The default is savenumberlist=false. (See \glsentrynumberlist and
\glsdisplaynumberlist in Section 9.)
2.2 Sectioning, Headings and TOC Options
toc Add the glossaries to the table of contents. Note that an extra
LATEX run is required with this option. Alternatively, you can
switch this function on and off using
\glstoctrue
\glstoctrue
and
\glstocfalse
\glstocfalse
numberline When used with toc, this will add \numberline{} in
the final argument of \addcontentsline. This will align the
table of contents entry with the numbered section titles. Note
that this option has no effect if the toc option is omitted. If toc is
used without numberline, the title will be aligned with the section
numbers rather than the section titles.
section This is a hkeyi=hvaluei option. Its value should be the name of
a sectional unit (e.g. chapter). This will make the glossaries appear in the named sectional unit, otherwise each glossary will
appear in a chapter, if chapters exist, otherwise in a section. Unnumbered sectional units will be used by default. Example:
\usepackage[section=subsection]{glossaries}
You can omit the value if you want to use sections, i.e.
\usepackage[section]{glossaries}
is equivalent to
\usepackage[section=section]{glossaries}
39
2 Package Options
You can change this value later in the document using
\setglossarysection
\setglossarysection{hnamei}
where hnamei is the sectional unit.
The start of each glossary adds information to the page header
via
\glsglossarymark
\glsglossarymark{hglossary titlei}
By default this uses \@mkboth1 but you may need to redefine
it. For example, to only change the right header:
\renewcommand{\glsglossarymark}[1]{\markright{#1}}
or to prevent it from changing the headers:
\renewcommand{\glsglossarymark}[1]{}
If you want \glsglossarymark to use \MakeUppercase in
the header, use the ucmark option described below.
\glsclearpage
Occasionally you may find that another package defines
\cleardoublepage when it is not required. This may cause
an unwanted blank page to appear before each glossary. This
can be fixed by redefining \glsclearpage:
\renewcommand*{\glsclearpage}{\clearpage}
ucmark This is a boolean option (default: ucmark=false, unless memoir
has been loaded, in which case it defaults to ucmark=true). If set,
\glsglossarymark uses \MakeTextUppercase2 . You can
test whether this option has been set or not using
\ifglsucmark
\ifglsucmark htrue parti\else hfalse parti\fi
For example:
\renewcommand{\glsglossarymark}[1]{%
1 unless memoir is loaded, which case it uses \markboth
2 Actually it uses \mfirstucMakeUppercase which
is set to textcase’s
\MakeTextUppercase by the glossaries package. This makes it consistent with
\makefirstuc. (The textcase package is automatically loaded by glossaries.)
40
2 Package Options
\ifglsucmark
\markright{\MakeTextUppercase{#1}}%
\else
\markright{#1}%
\fi}
If memoir has been loaded and ucfirst is set, then memoir’s \memUChead
is used.
numberedsection The glossaries are placed in unnumbered sectional
units by default, but this can be changed using numberedsection.
This option can take one of the following values:
• false: no number, i.e. use starred form of sectioning command (e.g. \chapter* or \section*);
• nolabel: use a numbered section, i.e. the unstarred form of
sectioning command (e.g. \chapter or \section), but
the section not labelled;
• autolabel: numbered with automatic labelling. Each glossary uses the unstarred form of a sectioning command
(e.g. \chapter or \section) and is assigned a label (via
\label). The label is formed from
\glsautoprefix
\glsautoprefix htypei
where htypei is the label identifying that glossary. The default value of \glsautoprefix is empty. For example, if
you load glossaries using:
\usepackage[section,numberedsection=autolabel]
{glossaries}
then each glossary will appear in a numbered section, and
can be referenced using something like:
The main glossary is in section~\ref{main} and
the list of acronyms is in section~\ref{acronym}.
If you can’t decide whether to have the acronyms in the
main glossary or a separate list of acronyms, you can use
\acronymtype which is set to main if the acronym option
is not used and is set to acronym if the acronym option is
used. For example:
The list of acronyms is in section~\ref{\acronymtype}.
You can redefine the prefix if the default label clashes with
another label in your document. For example:
\renewcommand*{\glsautoprefix}{glo:}
41
2 Package Options
will add glo: to the automatically generated label, so you
can then, for example, refer to the list of acronyms as follows:
The list of acronyms is in
section~\ref{glo:\acronymtype}.
Or, if you are undecided on a prefix:
The list of acronyms is in
section~\ref{\glsautoprefix\acronymtype}.
• nameref: this is like autolabel but uses an unnumbered sectioning command (e.g. \chapter* or \section*). It’s
designed for use with the nameref package. For example:
\usepackage{nameref}
\usepackage[numberedsection=nameref]{glossaries}
Now \nameref{main} will display the (TOC) section title associated with the main glossary. As above, you can
redefine \glsautoprefix to provide a prefix for the label.
2.3 Glossary Appearance Options
entrycounter This is a boolean option. (Default is entrycounter=false.)
glossaryentry
If set, each main (level 0) glossary entry will be numbered
when using the standard glossary styles. This option creates
the counter glossaryentry.
If you use this option, you can reference the entry number
within the document using
\glsrefentry
\glsrefentry{hlabeli}
where hlabeli is the label associated with that glossary entry.
If you use \glsrefentry, you must run LATEX twice after
creating the glossary files using makeglossaries,
makeindex or xindy to ensure the cross-references are
up-to-date.
counterwithin This is a hkeyi=hvaluei option where hvaluei is the name
of a counter. If used, this option will automatically set entrycounter=true and the glossaryentry counter will be reset every
time hvaluei is incremented.
42
2 Package Options
The glossaryentry counter isn’t automatically reset at the start
of each glossary, except when glossary section numbering is
on and the counter used by counterwithin is the same as the
counter used in the glossary’s sectioning command.
If you want the counter reset at the start of each glossary, you
can redefine \glossarypreamble to use
\glsresetentrycounter
\glsresetentrycounter
which sets glossaryentry to zero:
\renewcommand{\glossarypreamble}{%
\glsresetentrycounter
}
or if you are using \setglossarypreamble, add it to each
glossary preamble, as required. For example:
\setglossarypreamble[acronym]{%
\glsresetentrycounter
The preamble text here for the list of acronyms.
}
\setglossarypreamble{%
\glsresetentrycounter
The preamble text here for the main glossary.
}
subentrycounter This is a boolean option. (Default is subentrycounter=false.)
glossarysubentry
If set, each level 1 glossary entry will be numbered when using
the standard glossary styles. This option creates the counter
glossarysubentry. The counter is reset with each main (level 0)
entry. Note that this package option is independent of entrycounter. You can reference the number within the document
using \glsrefentry{hlabeli} where hlabeli is the label associated with the sub-entry.
style This is a hkeyi=hvaluei option. (Default is style=list.) Its value
should be the name of the glossary style to use. This key
may only be used for styles defined in glossary-list, glossary-long,
glossary-super or glossary-tree. Alternatively, you can set the style
using
\setglossarystyle{hstyle namei}
43
2 Package Options
(See Section 15 for further details.)
nolong This prevents the glossaries package from automatically loading glossary-long (which means that the longtable package also
won’t be loaded). This reduces overhead by not defining unwanted styles and commands. Note that if you use this option,
you won’t be able to use any of the glossary styles defined in the
glossary-long package (unless you explicitly load glossary-long).
nosuper This prevents the glossaries package from automatically loading glossary-super (which means that the supertabular package
also won’t be loaded). This reduces overhead by not defining
unwanted styles and commands. Note that if you use this option, you won’t be able to use any of the glossary styles defined
in the glossary-super package (unless you explicitly load glossarysuper).
nolist This prevents the glossaries package from automatically loading glossary-list. This reduces overhead by not defining un-
wanted styles. Note that if you use this option, you won’t be
able to use any of the glossary styles defined in the glossary-list
package (unless you explicitly load glossary-list). Note that since
the default style is list, you will also need to use the style option
to set the style to something else.
notree This prevents the glossaries package from automatically loading glossary-tree. This reduces overhead by not defining un-
wanted styles. Note that if you use this option, you won’t be
able to use any of the glossary styles defined in the glossary-tree
package (unless you explicitly load glossary-tree).
nostyles This prevents all the predefined styles from being loaded.
If you use this option, you need to load a glossary style package (such as glossary-mcols). Also if you use this option, you
can’t use the style package option. Instead you must either use
\setglossarystyle{hstylei} or the style key in the optional
argument to \printglossary. Example:
\usepackage[nostyles]{glossaries}
\usepackage{glossary-mcols}
\setglossarystyle{mcoltree}
nonumberlist This option will suppress the associated number lists in
the glossaries (see also Section 5).
44
2 Package Options
seeautonumberlist If you suppress the number lists with nonumberlist,
described above, this will also suppress any cross-referencing
information supplied by the see key in \newglossaryentry
or \glssee. If you use seeautonumberlist, the see key will automatically implement nonumberlist=false for that entry. (Note this
doesn’t affect \glssee.) For further details see Section 8.
counter This is a hkeyi=hvaluei option. (Default is counter=page.) The
value should be the name of the default counter to use in the
number lists (see Section 5).
nopostdot This is a boolean option. If no value is specified, true is
assumed. When set to true, this option suppresses the default
post description dot used by some of the predefined styles. The
default setting is nopostdot=false.
nogroupskip This is a boolean option. If no value is specified, true is
assumed. When set to true, this option suppresses the default
vertical gap between groups used by some of the predefined
styles. The default setting is nogroupskip=false.
2.4 Sorting Options
sort This is a hkeyi=hvaluei option where the option can only have
one of the following values:
• standard : entries are sorted according to the value of the
sort key used in \newglossaryentry (if present) or the
name key (if sort key is missing);
• def : entries are sorted in the order in which they were defined (the sort key in \newglossaryentry is ignored);
• use : entries are sorted according to the order in which they
are used in the document (the sort key in \newglossaryentry
is ignored).
Both sort=def and sort=use set the sort key to a six digit number via
\glssortnumberfmt
\glssortnumberfmt{hnumberi}
(padded with leading zeros, where necessary). This can be
redefined, if required, before the entries are defined (in the
case of sort=def) or before the entries are used (in the case
of sort=use).
45
2 Package Options
The default is sort=standard. When the standard sort option is in
use, you can hook into the sort mechanism by redefining:
\glsprestandardsort
\glsprestandardsort{hsort csi}{htypei}{hlabeli}
where hsort csi is a temporary control sequence that stores the
sort value (which was either explicitly set via the sort key or
implicitly set via the name key) before any escaping of the
makeindex/xindy special characters is performed. By default
\glsprestandardsort just does:
\glsdosanitizesort
\glsdosanitizesort
which sanitizes hsort csi if the sanitizesort package option is set
(or does nothing if the package option sanitizesort=false is used).
The other arguments, htypei and hlabeli, are the glossary type
and the entry label for the current entry. Note that htypei will
always be a control sequence, but hlabeli will be in the form used
in the first argument of \newglossaryentry.
Redefining \glsprestandardsort won’t affect any
entries that have already been defined and will have no
effect at all if you are using sort=def or sort=use.
Example 1 (Mixing Alphabetical and Order of Definition
Sorting)
Suppose I have three glossaries: main, acronym and notation,
and let’s suppose I want the main and acronym glossaries to be
sorted alphabetically, but the notation type should be sorted
in order of definition. I can set the sort to standard (which
is the default, but can be explicitly set via the package option
sort=standard), and I can either define all my main and acronym
entries, then redefine \glsprestandardsort to set hsort csi
to an incremented integer, and then define all my notation
entries. Alternatively, I can redefine \glsprestandardsort
to check for the glossary type and only modify hsort csi if htypei
is notation.
The first option can be achieved as follows:
46
2 Package Options
\newcounter{sortcount}
\renewcommand{\glsprestandardsort}[3]{%
\stepcounter{sortcount}%
\edef#1{\glssortnumberfmt{\arabic{sortcount}}}%
}
The second option can be achieved as follows:
\newcounter{sortcount}
\renewcommand{\glsprestandardsort}[3]{%
\ifdefstring{#2}{notation}%
{%
\stepcounter{sortcount}%
\edef#1{\glssortnumberfmt{\arabic{sortcount}}}%
}%
{%
\glsdosanitizesort
}%
}
(\ifdefstring is defined by the etoolbox package.) For a complete document, see the sample file sampleSort.tex.
Example 2 (Customizing Standard Sort)
Suppose you want a glossary of people and you want the names
listed as hfirst-namei hsurnamei in the glossary, but you want
the names sorted by hsurnamei, hfirst-namei. You can do this by
defining a command called, say, \name{hfirst-namei}{hsurnamei}
that you can use in the name key when you define the entry, but
hook into the standard sort mechanism to temporarily redefine
\name while the sort value is being set.
First, define two commands to set the person’s name:
\newcommand{\sortname}[2]{#2, #1}
\newcommand{\textname}[2]{#1 #2}
and \name needs to be initialised to \textname:
\let\name\textname
47
2 Package Options
Now redefine \glsprestandardsort so that it temporarily
sets \name to \sortname and expands the sort value, then
sets \name to \textname so that the person’s name appears
as hfirst-namei hsurnamei in the text:
\renewcommand{\glsprestandardsort}[3]{%
\let\name\sortname
\edef#1{\expandafter\expandonce\expandafter{#1}}%
\let\name\textname
\glsdosanitizesort
}
(The somewhat complicate use of \expandafter etc helps to
protect fragile commands, but care is still needed.)
Now the entries can be defined:
\newglossaryentry{joebloggs}{name={\name{Joe}{Bloggs}},
description={some information about Joe Bloggs}}
\newglossaryentry{johnsmith}{name={\name{John}{Smith}},
description={some information about John Smith}}
For a complete document, see the sample file samplePeople.tex.
order This may take two values: word or letter. The default is word
ordering.
Note that the order option has no effect if you don’t use
makeglossaries.
makeindex (Default) The glossary information and indexing style file
will be written in makeindex format. If you use makeglossaries,
it will automatically detect that it needs to call makeindex. If
you don’t use makeglossaries, you need to remember to use
makeindex not xindy. The indexing style file will been given
a .ist extension.
xindy The glossary information and indexing style file will be writ-
ten in xindy format. If you use makeglossaries, it will automatically detect that it needs to call xindy. If you don’t use
makeglossaries, you need to remember to use xindy not
48
2 Package Options
makeindex. The indexing style file will been given a .xdy extension.
This package option may additionally have a value that is a
hkeyi=hvaluei comma-separated list to override the language
and codepage. For example:
\usepackage[xindy={language=english,codepage=utf8}]
{glossaries}
You can also specify whether you want a number group in the
glossary. This defaults to true, but can be suppressed. For example:
\usepackage[xindy={glsnumbers=false}]{glossaries}
If no value is supplied to this package option (either simply
writing xindy or writing xindy={}) then the language, codepage and number group settings are unchanged. See Section 11
for further details on using xindy with the glossaries package.
xindygloss This is equivalent to xindy={} (that is, the xindy op-
tion without any value supplied) and may be used as a document class option. The language and code page can be set via
\GlsSetXdyLanguage and \GlsSetXdyCodePage (see Section 11.1.)
xindynoglsnumbers This is equivalent to xindy={glsnumbers=false}
and may be used as a document class option.
2.5 Acronym Options
acronym This creates a new glossary with the label acronym. This is
equivalent to:
\newglossary[alg]{acronym}{acr}{acn}{\acronymname}
It will also define
\printacronyms
\printacronyms[hoptionsi]
that’s equivalent to
\printglossary[type=acronym,hoptionsi]
49
2 Package Options
(unless that command is already defined before the beginning
of the document or the package option compatible-3.07 is used).
If the acronym package option is used, \acronymtype is set to
acronym otherwise it is set to main.3 Entries that are defined
using \newacronym are placed in the glossary whose label is
given by \acronymtype, unless another glossary is explicitly
specified.
Remember to use the nomain package option if you’re only
interested in using this acronym glossary.
acronyms This is equivalent to acronym=true and may be used in the
document class option list.
acronymlists By default, only the \acronymtype glossary is consid-
ered to be a list of acronyms. If you have other lists of acronyms,
you can specify them as a comma-separated list in the value of
acronymlists. For example, if you use the acronym package option but you also want the main glossary to also contain a list
of acronyms, you can do:
\usepackage[acronym,acronymlists={main}]{glossaries}
No check is performed to determine if the listed glossaries exist,
so you can add glossaries you haven’t defined yet. For example:
\usepackage[acronym,acronymlists={main,acronym2}]
{glossaries}
\newglossary[alg2]{acronym2}{acr2}{acn2}%
{Statistical Acronyms}
You can use
\DeclareAcronymList
\DeclareAcronymList{hlisti}
instead of or in addition to the acronymlists option. This will
add the glossaries given in hlisti to the list of glossaries that are
identified as lists of acronyms. To replace the list of acronym
lists with a new list use:
\SetAcronymLists
\SetAcronymLists{hlisti}
3 Actually
it sets \acronymtype to \glsdefaulttype if the acronym package option is not used, but \glsdefaulttype usually has the value main unless the
nomain option has been used.
50
2 Package Options
You can determine if a glossary has been identified as being a
list of acronyms using:
\glsIfListOfAcronyms
\glsIfListOfAcronyms{hlabeli}{htrue parti}{hfalse
parti}
shortcuts This option provides shortcut commands for acronyms.
See Section 13 for further details. Alternatively you can use:
\DefineAcronymShortcuts
\DefineAcronymShortcuts
2.5.1 Deprecated Acronym Style Options
The package options listed in this section are now deprecated but are
kept for backward-compatibility. Use \setacronymstyle instead.
See Section 13 for further details.
description This option changes the definition of \newacronym to
allow a description. This option may be replaced by
\setacronymstyle{long-short-desc}
or (with smallcaps)
\setacronymstyle{long-sc-short-desc}
or (with smaller)
\setacronymstyle{long-sm-short-desc}
or (with footnote)
\setacronymstyle{footnote-desc}
or (with footnote and smallcaps)
\setacronymstyle{footnote-sc-desc}
or (with footnote and smaller)
\setacronymstyle{footnote-sm-desc}
51
2 Package Options
or (with dua)
\setacronymstyle{dua-desc}
smallcaps This option changes the definition of \newacronym and
the way that acronyms are displayed. This option may be replaced by:
\setacronymstyle{long-sc-short}
or (with description)
\setacronymstyle{long-sc-short-desc}
or (with description and footnote)
\setacronymstyle{footnote-sc-desc}
smaller This option changes the definition of \newacronym and the
way that acronyms are displayed.
If you use this option, you will need to include the relsize
package or otherwise define \textsmaller or redefine
\acronymfont.
This option may be replaced by:
\setacronymstyle{long-sm-short}
or (with description)
\setacronymstyle{long-sm-short-desc}
or (with description and footnote)
\setacronymstyle{footnote-sm-desc}
footnote This option changes the definition of \newacronym and the
way that acronyms are displayed. This option may be replaced
by:
\setacronymstyle{footnote}
or (with smallcaps)
\setacronymstyle{footnote-sc}
52
2 Package Options
or (with smaller)
\setacronymstyle{footnote-sm}
or (with description)
\setacronymstyle{footnote-desc}
or (with smallcaps and description)
\setacronymstyle{footnote-sc-desc}
or (with smaller and description)
\setacronymstyle{footnote-sm-desc}
dua This option changes the definition of \newacronym so that
acronyms are always expanded. This option may be replaced
by:
\setacronymstyle{dua}
or (with description)
\setacronymstyle{dua-desc}
2.6 Other Options
Other available options that don’t fit any of the above categories are:
symbols This option defines a new glossary type with the label
symbols via
\newglossary[slg]{symbols}{sls}{slo}{\glssymbolsgroupname}
It also defines
\printsymbols
\printsymbols[hoptionsi]
which is a synonym for \printglossary[type=symbols,hoptionsi].
Remember to use the nomain package option if you’re only
interested in using this symbols glossary.
53
2 Package Options
numbers This option defines a new glossary type with the label
numbers via
\newglossary[nlg]{numbers}{nls}{nlo}{\glsnumbersgroupname}
It also defines
\printnumbers
\printnumbers[hoptionsi]
which is a synonym for \printglossary[type=numbers,hoptionsi].
Remember to use the nomain package option if you’re only
interested in using this numbers glossary.
index This option defines a new glossary type with the label index
via
\newglossary[ilg]{index}{ind}{idx}{\indexname}%
It also defines
\printindex
\printindex[hoptionsi]
which is a synonym for \printglossary[type=index,hoptionsi]
and
\newterm
\newterm[hoptionsi]{htermi}
which is a synonym for
\newglossaryentry{htermi}[type=index,name={htermi},%
description=\nopostdesc,hoptionsi]
Remember to use the nomain package option if you’re only
interested in using this index glossary. Note that you can’t
mix this option with \index. Either use glossaries for the
indexing or use a custom indexing package, such as makeidx,
index or imakeidx. (You can, of course, load one of those
packages and load glossaries without the index package
option.)
54
2 Package Options
Since the index isn’t designed for terms with descriptions, you
might also want to disable the hyperlinks for this glossary using
the package option nohypertypes=index or the command
\GlsDeclareNoHyperList{index}
The example file sample-index.tex illustrates the use of the
index package option.
compatible-2.07 Compatibility mode for old documents created using
version 2.07 or below.
compatible-3.07 Compatibility mode for old documents created using
version 3.07 or below.
2.7 Setting Options After the Package is Loaded
Some of the options described above may also be set after the glossaries package has been loaded using
\setupglossaries
\setupglossaries{hkey-val listi}
The following package options can’t be used in \setupglossaries:
xindy, xindygloss, xindynoglsnumbers, makeindex, nolong, nosuper, nolist,
notree, nostyles, nomain, compatible-2.07, translate, notranslate, acronym.
These options have to be set while the package is loading, except
for the xindy sub-options which can be set using commands like
\GlsSetXdyLanguage (see Section 11 for further details).
I recommend you use this command as soon as possible after
loading glossaries otherwise you might end up using it too late for
the change to take effect. For example, if you try changing the
acronym styles (such as smallcaps) after you have started defining
your acronyms, you are likely to get unexpected results. If you try
changing the sort option after you have started to define entries,
you may get unexpected results.
55
3 Setting Up
The command
\makeglossaries
\makeglossaries
must be placed in the preamble in order to create the customised
makeindex (.ist) or xindy (.xdy) style file and to ensure that
glossary entries are written to the appropriate output files. If you
omit \makeglossaries none of the glossaries will be created.
Note that some of the commands provided by the glossaries
package must be placed before \makeglossaries as they are
required when creating the customised style file. If you attempt to
use those commands after \makeglossaries you will generate
an error.
Similarly, there are some commands that must be used after
\makeglossaries.
You can suppress the creation of the customised xindy or makeindex
style file using
\noist
\noist
Note that this command must be used before \makeglossaries.
Note that if you have a custom .xdy file created when using
glossaries version 2.07 or below, you will need to use the
compatible-2.07 package option with it.
The default name for the customised style file is given by \jobname.ist
(for makeindex) or \jobname.xdy (for xindy). This name may be
changed using:
\setStyleFile
\setStyleFile{hnamei}
where hnamei is the name of the style file without the extension. Note
that this command must be used before \makeglossaries.
56
3 Setting Up
Each glossary entry is assigned a number list that lists all the locations in the document where that entry was used. By default, the
location refers to the page number but this may be overridden using
the counter package option. The default form of the location number
assumes a full stop compositor (e.g. 1.2), but if your location numbers
use a different compositor (e.g. 1-2) you need to set this using
\glsSetCompositor
\glsSetCompositor{hsymboli}
For example:
\glsSetCompositor{-}
Note that this command must be used before \makeglossaries.
If you use xindy, you can have a different compositor for page
numbers starting with an upper case alphabetical character using:
\glsSetAlphaCompositor
\glsSetAlphaCompositor{hsymboli}
Note that this command has no effect if you haven’t used the xindy
package option. For example, if you want number lists containing a
mixture of A-1 and 2.3 style formats, then do:
\glsSetCompositor{.}\glsSetAlphaCompositor{-}
See Section 5 for further information about number lists.
57
4 Defining Glossary Entries
All glossary entries must be defined before they are used, so it is better to define them in the preamble to ensure this.1 However only
those entries that occur in the document (using any of the commands
described in Section 6, Section 7 or Section 8) will appear in the glossary. Each time an entry is used in this way, a line is added to an associated glossary file (.glo), which then needs to be converted into a
corresponding .gls file which contains the typeset glossary which is
input by \printglossary or \printglossaries. The Perl script
makeglossaries can be used to call makeindex or xindy, using a
customised indexing style file, for each of the glossaries that are defined in the document. Note that there should be no need for you to
explicitly edit or input any of these external files.2 See Section 1.3
for further details.
New glossary entries are defined using the command:
\newglossaryentry
\newglossaryentry{hlabeli}{hkey=value listi}
This is a short command, so values in hkey-val listi can’t contain any
paragraph breaks. If you have a long description that needs to span
multiple paragraphs, use
\longnewglossaryentry
\longnewglossaryentry{hlabeli}{hkey=value listi}{hlong
descriptioni}
instead. Note that, unlike \newglossaryentry, the command
\longnewglossaryentry may only be used in the preamble. Be
careful of unwanted spaces. \longnewglossaryentry will remove trailing spaces in the description (via \unskip) but won’t remove leading spaces (otherwise it would interfere with commands
like \Glsentrydesc).
1 The
only preamble restriction on \newglossaryentry and \newacronym was
removed in version 1.13, but the restriction remains for \loadglsentries. See
Section 4.8 for a discussion of the problems with defining entries within the document instead of in the preamble.
2 Except possibly the style file but then you’ll need to use \noist to prevent your
changes from being overwritten.
58
4 Defining Glossary Entries
There are also commands that will only define the entry if it hasn’t
already been defined:
\provideglossaryentry
\provideglossaryentry{hlabeli}{hkey=value listi}
and
\longprovideglossaryentry
\longprovideglossaryentry{hlabeli}{hkey=value listi}{hlong
descriptioni}
(These are both preamble-only commands.)
For all the above commands, the first argument, hlabeli, must be
a unique label with which to identify this entry. This can’t contain
any non-expandable commands or active characters.
Note that although an accented character or other non-Latin
character, such as é or ß, looks like a plain character in your .tex
file, it’s actually a macro (an active character) and therefore can’t
be used in the label. Also be careful of babel’s options that change
certain punctuation characters (such as : or -) to active
characters.
The second argument, hkey=value listi, is a hkeyi=hvaluei list that
supplies the relevant information about this entry. There are two required fields: description and either name or parent. Available fields are
listed below:
name The name of the entry (as it will appear in the glossary). If this
key is omitted and the parent key is supplied, this value will be
the same as the parent’s name.
description A brief description of this term (to appear in the glossary).
Within this value, you can use
\nopostdesc
\nopostdesc
to suppress the description terminator for this entry. For example, if this entry is a parent entry that doesn’t require a description, you can do description={\nopostdesc}. If you want
a paragraph break in the description use
\glspar
\glspar
59
4 Defining Glossary Entries
or, better, use \longnewglossaryentry. However, note that
not all glossary styles support multi-line descriptions. If you are
using one of the tabular-like glossary styles that permit multiline descriptions, use \newline not \\ if you want to force a
line break.
parent The label of the parent entry. Note that the parent entry must
be defined before its sub-entries. See Section 4.5 for further details.
descriptionplural The plural form of the description, if required. If
omitted, the value is set to the same as the description key.
text How this entry will appear in the document text when using
\gls (or one of its upper case variants). If this field is omitted,
the value of the name key is used.
first How the entry will appear in the document text on first use with
\gls (or one of its upper case variants). If this field is omitted,
the value of the text key is used. Note that if you use \glspl,
\Glspl, \GLSpl, \glsdisp before using \gls, the firstplural
value won’t be used with \gls.
plural How the entry will appear in the document text when using
\glspl (or one of its upper case variants). If this field is omitted, the value is obtained by appending \glspluralsuffix
to the value of the text field. The default value of \glspluralsuffix
is the letter “s”.
firstplural How the entry will appear in the document text on first
use with \glspl (or one of its upper case variants). If this field
is omitted, the value is obtained from the plural key, if the first
key is omitted, or by appending \glspluralsuffix to the
value of the first field, if the first field is present. Note that if you
use \gls, \Gls, \GLS, \glsdisp before using \glspl, the
firstplural value won’t be used with \glspl.
Note: prior to version 1.13, the default value of firstplural was
always taken by appending “s” to the first key, which meant that
you had to specify both plural and firstplural, even if you hadn’t
used the first key.
symbol This field is provided to allow the user to specify an associ-
ated symbol. If omitted, the value is set to \relax. Note that
not all glossary styles display the symbol.
60
4 Defining Glossary Entries
symbolplural This is the plural form of the symbol (as passed to
\glsdisplay and \glsdisplayfirst by \glspl, \Glspl
and \GLSpl). If omitted, the value is set to the same as the
symbol key.
sort This value indicates how makeindex or xindy should sort this
entry. If omitted, the value is given by the name field unless one
of the package options sort=def and sort=use have been used. In
general, it’s best to use the sort key if the name contains com-
mands (e.g. \ensuremath{\alpha}). You can also override
the sort key by redefining \glsprestandardsort (see Section 2.4).
type This specifies the label of the glossary in which this entry
belongs. If omitted, the default glossary is assumed unless
\newacronym is used (see Section 13).
user1, . . . , user6 Six keys provided for any additional information
the user may want to specify. (For example, an associated
dimension or an alternative plural or some other grammatical construct.) Alternatively, you can add new keys using
\glsaddkey (see Section 4.3). Other keys are also provided
by the glossaries-prefix (Section 17) and glossaries-accsupp (Section 18) packages.
nonumberlist A boolean key. If the value is missing or is true, this
will suppress the number list just for this entry. Conversely, if
you have used the package option nonumberlist, you can activate
the number list just for this entry with nonumberlist=false. (See
Section 5.)
see Cross-reference another entry. Using the see key will automati-
cally add this entry to the glossary, but will not automatically
add the cross-referenced entry. The referenced entry should be
supplied as the value to this key. If you want to override the
“see” tag, you can supply the new tag in square brackets before
the label. For example see=[see also]{anotherlabel}.
Note that if you have suppressed the number list, the crossreferencing information won’t appear in the glossary, as it
forms part of the number list. You can override this for individual glossary entries using nonumberlist=false (see above). Alternatively, you can use the seeautonumberlist package option. For
further details, see Section 8.
61
4 Defining Glossary Entries
\makeglossaries must be used before any occurrence of
\newglossaryentry that contains the see key.
The following keys are reserved for \newacronym (see Section 13):
long, longplural, short and shortplural. Additional keys are provided by
the glossaries-prefix (Section 17) and the glossaries-accsupp (Section 18)
packages. You can also define your own custom keys (see Section 4.3).
Note that if the name starts with an accented letter or other nonLatin character, you must group the character, otherwise it will cause
a problem for commands like \Gls and \Glspl. For example:
\newglossaryentry{elite}{name={{\’e}lite},
description={select group or class}}
Note that the same applies if you are using the inputenc package:
\newglossaryentry{elite}{name={{é}lite},
description={select group or class}}
Note that in both of the above examples, you will also need to supply
the sort key if you are using makeindex whereas xindy is usually
able to sort accented letters correctly.
4.1 Plurals
You may have noticed from above that you can specify the plural
form when you define a term. If you omit this, the plural will be
obtained by appending
\glspluralsuffix
\glspluralsuffix
to the singular form. This command defaults to the letter “s”. For
example:
\newglossaryentry{cow}{name=cow,description={a fully grown
female of any bovine animal}}
defines a new entry whose singular form is “cow” and plural form
is “cows”. However, if you are writing in archaic English, you may
want to use “kine” as the plural form, in which case you would have
to do:
\newglossaryentry{cow}{name=cow,plural=kine,
description={a fully grown female of any bovine animal}}
62
4 Defining Glossary Entries
If you are writing in a language that supports multiple plurals (for
a given term) then use the plural key for one of them and one of the
user keys to specify the other plural form. For example:
\newglossaryentry{cow}{%
name=cow,%
description={a fully grown female of any bovine animal
(plural cows, archaic plural kine)},%
user1={kine}}
You can then use \glspl{cow} to produce “cows” and \glsuseri{cow}
to produce “kine”. You can, of course, define an easy to remember
synonym. For example:
\let\glsaltpl\glsuseri
Then you don’t have to remember which key you used to store the
second plural. Alternatively, you can define your own keys using
\glsaddkey, described in Section 4.3.
If you are using a language that usually forms plurals by appending a different letter, or sequence of letters, you can redefine
\glspluralsuffix as required. However, this must be done before
the entries are defined. For languages that don’t form plurals by simply appending a suffix, all the plural forms must be specified using
the plural key (and the firstplural key where necessary).
4.2 Other Grammatical Constructs
You can use the six user keys to provide alternatives, such as participles. For example:
\let\glsing\glsuseri
\let\glsd\glsuserii
\newcommand*{\ingkey}{user1}
\newcommand*{\edkey}{user2}
\newcommand*{\newword}[3][]{%
\newglossaryentry{#2}{%
name={#2},%
description={#3},%
\edkey={#2ed},%
\ingkey={#2ing},#1%
}%
}
With the above definitions, I can now define terms like this:
63
4 Defining Glossary Entries
\newword{play}{to take part in activities for enjoyment}
\newword[\edkey={ran},\ingkey={running}]{run}{to move fast using
the legs}
and use them in the text:
Peter is \glsing{play} in the park today.
Jane \glsd{play} in the park yesterday.
Peter and Jane \glsd{run} in the park last week.
Alternatively, you can define your own keys using \glsaddkey,
described below in Section 4.3.
4.3 Additional Keys
You can now also define your own custom keys using:
\glsaddkey
\glsaddkey{hkeyi}{hdefault valuei}{hno link csi}{hno link ucfirst
csi}{hlink csi}{hlink ucfirst csi}{hlink allcaps csi}
where:
hkeyi is the new key to use in \newglossaryentry (or similar
commands such as \longnewglossaryentry);
hdefault valuei is the default value to use if this key isn’t used in an
entry definition (this may reference the current entry label via
\glslabel, but you will have to switch on expansion via the
starred version of \glsaddkey and protect fragile commands);
hno link csi is the control sequence to use analogous to commands
like \glsentrytext;
hno link ucfirst csi is the control sequence to use analogous to commands like \Glsentrytext;
hlink csi is the control sequence to use analogous to commands like
\glstext;
hlink ucfirst csi is the control sequence to use analogous to commands like \Glstext;
hlink allcaps csi is the control sequence to use analogous to commands like \GLStext.
64
4 Defining Glossary Entries
The starred version of \glsaddkey switches on expansion for this
key. The unstarred version doesn’t override the current expansion
setting.
Example 3 (Defining Custom Keys)
Suppose I want to define two new keys, ed and ing, that default to
the entry text followed by “ed” and “ing”, respectively. The default
value will need expanding in both cases, so I need to use the starred
form:
% Define "ed" key:
\glsaddkey*
{ed}% key
{\glsentrytext{\glslabel}ed}% default value
{\glsentryed}% command analogous to \glsentrytext
{\Glsentryed}% command analogous to \Glsentrytext
{\glsed}% command analogous to \glstext
{\Glsed}% command analogous to \Glstext
{\GLSed}% command analogous to \GLStext
% Define "ing" key:
\glsaddkey*
{ing}% key
{\glsentrytext{\glslabel}ing}% default value
{\glsentrying}% command analogous to \glsentrytext
{\Glsentrying}% command analogous to \Glsentrytext
{\glsing}% command analogous to \glstext
{\Glsing}% command analogous to \Glstext
{\GLSing}% command analogous to \GLStext
Now I can define some entries:
% No need to override defaults for this entry:
\newglossaryentry{jump}{name={jump},description={}}
% Need to override defaults on these entries:
\newglossaryentry{run}{name={run},%
ed={ran},%
ing={running},%
description={}}
\newglossaryentry{waddle}{name={waddle},%
ed={waddled},%
ing={waddling},%
description={}}
These entries can later be used in the document:
65
4 Defining Glossary Entries
The dog \glsed{jump} over the duck.
The duck was \glsing{waddle} round the dog.
The dog \glsed{run} away from the duck.
For a complete document, see the sample file sample-newkeys.tex.
4.4 Expansion
When you define new glossary entries expansion is performed by
default, except for the name, description, descriptionplural, symbol, symbolplural and sort keys (these keys all have expansion suppressed via
\glssetnoexpandfield).
You can switch expansion on or off for individual keys using
\glssetexpandfield
\glssetexpandfield{hfieldi}
or
\glssetnoexpandfield
\glssetnoexpandfield{hfieldi}
respectively, where hfieldi is the field tag corresponding to the key. In
most cases, this is the same as the name of the key except for those
listed in table 4.1.
Table 4.1: Key to Field Mappings
Key
sort
firstplural
description
descriptionplural
user1
user2
user3
user4
user5
user6
longplural
shortplural
66
Field
sortvalue
firstpl
desc
descplural
useri
userii
useriii
useriv
userv
uservi
longpl
shortpl
4 Defining Glossary Entries
Any keys that haven’t had the expansion explicitly set using
\glssetexpandfield or \glssetnoexpandfield are governed
by
\glsexpandfields
\glsexpandfields
and
\glsnoexpandfields
\glsnoexpandfields
If your entries contain any fragile commands, I recommend you
switch off expansion via \glsnoexpandfields. (This should be
used before you define the entries.)
4.5 Sub-Entries
As from version 1.17, it is possible to specify sub-entries. These may
be used to order the glossary into categories, in which case the subentry will have a different name to its parent entry, or it may be used
to distinguish different definitions for the same word, in which case
the sub-entries will have the same name as the parent entry. Note that
not all glossary styles support hierarchical entries and may display
all the entries in a flat format. Of the styles that support sub-entries,
some display the sub-entry’s name whilst others don’t. Therefore you
need to ensure that you use a suitable style. (See Section 15 for a list
of predefined styles.) As from version 3.0, level 1 sub-entries are automatically numbered in the predefined styles if you use the subentrycounter package option (see Section 2.3 for further details).
Note that the parent entry will automatically be added to the glossary if any of its child entries are used in the document. If the parent
entry is not referenced in the document, it will not have a number
list. Note also that makeindex has a restriction on the maximum
sub-entry depth.
4.5.1 Hierarchical Categories
To arrange a glossary with hierarchical categories, you need to first
define the category and then define the sub-entries using the relevant
category entry as the value of the parent key.
Example 4 (Hierarchical Categories—Greek and Roman Mathematical Symbols)
Suppose I want a glossary of mathematical symbols that are di-
67
4 Defining Glossary Entries
vided into Greek letters and Roman letters. Then I can define the
categories as follows:
\newglossaryentry{greekletter}{name={Greek letters},
description={\nopostdesc}}
\newglossaryentry{romanletter}{name={Roman letters},
description={\nopostdesc}}
Note that in this example, the category entries don’t need a description so I have set the descriptions to \nopostdesc. This gives
a blank description and suppresses the description terminator.
I can now define my sub-entries as follows:
\newglossaryentry{pi}{name={\ensuremath{\pi}},sort={pi},
description={ratio of the circumference of a circle to
the diameter},
parent=greekletter}
\newglossaryentry{C}{name={\ensuremath{C}},sort={C},
description={Euler’s constant},
parent=romanletter}
For a complete document, see the sample file sampletree.tex.
4.5.2 Homographs
Sub-entries that have the same name as the parent entry, don’t need
to have the name key. For example, the word “glossary” can mean
a list of technical words or a collection of glosses. In both cases the
plural is “glossaries”. So first define the parent entry:
\newglossaryentry{glossary}{name=glossary,
description={\nopostdesc},
plural={glossaries}}
Again, the parent entry has no description, so the description terminator needs to be suppressed using \nopostdesc.
Now define the two different meanings of the word:
\newglossaryentry{glossarylist}{
description={list of technical words},
sort={1},
parent={glossary}}
\newglossaryentry{glossarycol}{
description={collection of glosses},
sort={2},
parent={glossary}}
68
4 Defining Glossary Entries
Note that if I reference the parent entry, the location will be added
to the parent’s number list, whereas if I reference any of the child
entries, the location will be added to the child entry’s number list.
Note also that since the sub-entries have the same name, the sort key is
required unless you are using the sort=use or sort=def package options
(see Section 2.4). You can use the subentrycounter package option to
automatically number the first-level child entries. See Section 2.3 for
further details.
In the above example, the plural form for both of the child entries
is the same as the parent entry, so the plural key was not required for
the child entries. However, if the sub-entries have different plurals,
they will need to be specified. For example:
\newglossaryentry{bravo}{name={bravo},
description={\nopostdesc}}
\newglossaryentry{bravocry}{description={cry of approval
(pl.\ bravos)},
sort={1},
plural={bravos},
parent=bravo}
\newglossaryentry{bravoruffian}{description={hired
ruffian or killer (pl.\ bravoes)},
sort={2},
plural={bravoes},
parent=bravo}
4.6 Loading Entries From a File
You can store all your glossary entry definitions in another file and
use:
\loadglsentries
\loadglsentries[htypei]{hfilenamei}
where hfilenamei is the name of the file containing all the \newglossaryentry
or \longnewglossaryentry commands. The optional argument
htypei is the name of the glossary to which those entries should
belong, for those entries where the type key has been omitted (or,
more specifically, for those entries whose type has been specified by
\glsdefaulttype, which is what \newglossaryentry uses by
default).
69
4 Defining Glossary Entries
Example 5 (Loading Entries from Another File)
Suppose I have a file called myentries.tex which contains:
\newglossaryentry{perl}{type=main,
name={Perl},
description={A scripting language}}
\newglossaryentry{tex}{name={\TeX},
description={A typesetting language},sort={TeX}}
\newglossaryentry{html}{type=\glsdefaulttype,
name={html},
description={A mark up language}}
and suppose in my document preamble I use the command:
\loadglsentries[languages]{myentries}
then this will add the entries tex and html to the glossary whose
type is given by languages, but the entry perl will be added to the
main glossary, since it explicitly sets the type to main.
Note: if you use \newacronym (see Section 13) the type is set as
type=\acronymtype unless you explicitly override it. For example,
if my file myacronyms.tex contains:
\newacronym{aca}{aca}{a contrived acronym}
then (supposing I have defined a new glossary type called altacronym)
\loadglsentries[altacronym]{myacronyms}
will add aca to the glossary type acronym, if the package option
acronym has been specified, or will add aca to the glossary type
altacronym, if the package option acronym is not specified.3
If you have used the acronym package option, there are two possible
solutions to this problem:
1. Change myacronyms.tex so that entries are defined in the
form:
\newacronym[type=\glsdefaulttype]{aca}{aca}{a
contrived acronym}
3 This
is because \acronymtype is set to \glsdefaulttype if the acronym package option is not used.
70
4 Defining Glossary Entries
and do:
\loadglsentries[altacronym]{myacronyms}
2. Temporarily change \acronymtype to the target glossary:
\let\orgacronymtype\acronymtype
\renewcommand{\acronymtype}{altacronym}
\loadglsentries{myacronyms}
\let\acronymtype\orgacronymtype
Note that only those entries that have been used in the text will
appear in the relevant glossaries. Note also that \loadglsentries
may only be used in the preamble.
Remember that you can use \provideglossaryentry rather
than \newglossaryentry. Suppose you want to maintain a large
database of acronyms or terms that you’re likely to use in your documents, but you may want to use a modified version of some of
those entries. (Suppose, for example, one document may require
a more detailed description.) Then if you define the entries using
\provideglossaryentry in your database file, you can override
the definition by simply using \newglossaryentry before loading
the file. For example, suppose your file (called, say, terms.tex) contains:
\provideglossaryentry{mallard}{name=mallard,
description={a type of duck}}
but suppose your document requires a more detailed description, you
can do:
\usepackage{glossaries}
\makeglossaries
\newglossaryentry{mallard}{name=mallard,
description={a dabbling duck where the male has a green head}}
\loadglsentries{terms}
Now the mallard definition in the terms.tex file will be ignored.
4.7 Moving Entries to Another Glossary
As from version 3.02, you can move an entry from one glossary to
another using:
\glsmoveentry
\glsmoveentry{hlabeli}{htarget glossary labeli}
71
4 Defining Glossary Entries
where hlabeli is the unique label identifying the required entry and
htarget glossary labeli is the unique label identifying the glossary in
which to put the entry.
Note that no check is performed to determine the existence of the
target glossary. This means that you can, for example, move an entry
to an undefined glossary so you can use the entry in the document
text but not have it listed in any of the glossaries. (Maybe you have
an acronym that is so common it doesn’t need listing.)
If you move an entry to an undefined glossary and you have
hyperlinked entries, the link will point to an undefined target.
(Unless you identify that glossary using nohypertypes or
\GlsDeclareNoHyperList, as described in Section 6.) Also,
you will get warnings about no file defined for that glossary
(unless you use the nowarn package option). Unpredictable results
may occur if you move an entry to a different glossary from its
parent or children.
4.8 Drawbacks With Defining Entries in the Document
Environment
Originally, \newglossaryentry (and \newacronym) could only
be used in the preamble. I reluctantly removed this restriction in version 1.13, but there are issues with defining commands in the document environment instead of the preamble.
4.8.1 Technical Issues
1. If you define an entry mid-way through your document, but
subsequently shuffle sections around, you could end up using
an entry before it has been defined.
2. Entry information is required when the glossary is displayed
using \printglossary or \printglossaries. When either
of these commands occur at the start of the document, the entry
details are being looked up before the entry has been defined.
To overcome these problems, as from version 4.0 the glossaries package modifies the definition of \newglossaryentry at the beginning
of the document environment so that the definitions are written to an
external file (\jobname.glsdefs) which is then read in at the start
72
4 Defining Glossary Entries
of the document on the next run. The entry will then only be defined if it doesn’t already exist. This means that the entry can now be
looked up in the glossary, even if the glossary occurs at the beginning
of the document.
There are drawbacks to this mechanism: if you modify an entry
definition, you need a second run to see the effect of your modification; this method requires an extra \newwrite, which may exceed
TEX’s maximum allocation; if you have very long entries, you could
find unexpected line breaks have been written to the temporary file.
The last reason is why \longnewglossaryentry has the preambleonly restriction, which I don’t intend to lift.
4.8.2 Good Practice Issues
The above section covers technical issues that can cause your document to have compilation errors or produce incorrect output. This
section focuses on good writing practice. The main reason cited
by users wanting to define entries within the document environment
rather than in the preamble is that they want to write the definition
as they type in their document text. This suggests a “stream of consciousness” style of writing that may be acceptable in certain literary
genres but is inappropriate for factual documents.
When you write technical documents, regardless of whether it’s a
PhD thesis or an article for a journal or proceedings, you must plan
what you write in advance. If you plan in advance, you should have
a fairly good idea of the type of terminology that your document will
contain, so while you are planning, create a new file with all your
entry definitions. If, while you’re writing your document, you remember another term you need, then you can switch over to your
definition file and add it. Most text editors have the ability to have
more than one file open at a time.
73
5 Number lists
Each entry in the glossary has an associated number list. By default,
these numbers refer to the pages on which that entry has been used
(using any of the commands described in Section 6 and Section 7).
The number list can be suppressed using the nonumberlist package
option, or an alternative counter can be set as the default using the
counter package option. The number list is also referred to as the location list.
Both makeindex and xindy concatenate a sequence of 3 or more
consecutive pages into a range. With xindy you can vary the minimum sequence length using \GlsSetXdyMinRangeLength{hni}
where hni is either an integer or the keyword none which indicates
that there should be no range formation.
Note that \GlsSetXdyMinRangeLength must be used before
\makeglossaries and has no effect if \noist is used.
With both makeindex and xindy, you can replace the separator
and the closing number in the range using:
\glsSetSuffixF
\glsSetSuffixFF
\glsSetSuffixF{hsuffixi}
\glsSetSuffixFF{hsuffixi}
where the former command specifies the suffix to use for a 2 page list
and the latter specifies the suffix to use for longer lists. For example:
\glsSetSuffixF{f.}
\glsSetSuffixFF{ff.}
Note that if you use xindy, you will also need to set the minimum
range length to 1 if you want to change these suffixes:
\GlsSetXdyMinRangeLength{1}
Note that if you use the hyperref package, you will need to use
\nohyperpage in the suffix to ensure that the hyperlinks work correctly. For example:
74
5 Number lists
\glsSetSuffixF{\nohyperpage{f.}}
\glsSetSuffixFF{\nohyperpage{ff.}}
Note that \glsSetSuffixF and \glsSetSuffixFF must be
used before \makeglossaries and have no effect if \noist is
used.
75
6 Links to Glossary Entries
Once you have defined a glossary entry using \newglossaryentry,
you can refer to that entry in the document using one of the commands listed in this section. The text which appears at that point in
the document when using one of these commands is referred to as
the link text (even if there are no hyperlinks). The commands in this
section also add a line to an external file that is used by makeindex
or xindy to generate the relevant entry in the glossary. This information includes an associated location that is added to the number list
for that entry. By default, the location refers to the page number. For
further information on number lists, see Section 5.
It is strongly recommended that you don’t use the commands
defined in this section in the arguments of sectioning or caption
commands or any other command that has a moving argument.
The above warning is particularly important if you are using the
glossaries package in conjunction with the hyperref package. Instead,
use one of the expandable commands listed in Section 9 (such as
\glsentrytext but not the non-expandable case changing versions
like \Glsentrytext) or provide an alternative via the optional argument to the sectioning/caption command. Examples:
\chapter{An overview of \glsentrytext{perl}}
\chapter[An overview of Perl]{An overview of \gls{perl}}
If you want the link text to produce a hyperlink to the corresponding entry details in the glossary, you should load the hyperref package
before the glossaries package. That’s what I’ve done in this document,
so if you see a hyperlinked term, such as link text, you can click on
the word or phrase and it will take you to a brief description in this
document’s glossary.
76
6 Links to Glossary Entries
If you use the hyperref package, I strongly recommend you use
pdflatex rather than latex to compile your document, if
possible. The DVI format of LATEX has limitations with the
hyperlinks that can cause a problem when used with the glossaries
package. Firstly, the DVI format can’t break a hyperlink across a
line whereas PDFLATEX can. This means that long glossary entries
(for example, the full form of an acronym) won’t be able to break
across a line with the DVI format. Secondly, the DVI format
doesn’t correctly size hyperlinks in subscripts or superscripts.
This means that if you define a term that may be used as a
subscript or superscript, if you use the DVI format, it won’t come
out the correct size.
It may be that you only want terms in a certain glossary to have
links, but not for another glossary. In which case, you can use
the package option nohypertypes to identify the glossary lists that
shouldn’t have hyperlinked link text. For example, suppose your
document contains lots of technical acronyms that the reader might
not know, but it also contains some very common acronyms that most
readers will recognise. So you might want two acronym lists, but only
the technical list will get displayed in your document. The technical acronyms can be hyperlinked to that list, but common acronyms
shouldn’t have hyperlinks as there’s no target for them. In this case,
identify the common acronym list as having non-hyperlinked entries
using nohypertypes. Example:
\usepackage[acronym,nohypertypes={common}]{glossaries}
\newglossary{common}{cacr}{cacn}{Common Acronyms}
Alternatively, you can use
\GlsDeclareNoHyperList
\GlsDeclareNoHyperList{htypei}
For example:
\usepackage[acronym]{glossaries}
\newglossary{common}{cacr}{cacn}{Common Acronyms}
\GlsDeclareNoHyperList{common}
Note that no check is performed to see if the glossary types listed in
nohypertypes or \GlsDeclareNoHyperList have been defined.
77
6 Links to Glossary Entries
The values must be fully expanded, so don’t try
nohypertypes=\acronymtype or
\GlsDeclareNoHyperList{\acronymtype}. Also, avoid
unnecessary braces. For example,
\GlsDeclareNoHyperList{{acronym},{common}} won’t
work. You do however need an enclosing brace for the whole list
when using the package option. So
\usepackage[nohypertypes={acronym,common}]{glossaries}
is correct, but nohypertypes={{acronym},{common}} won’t
work.
You can override the effect of nohypertypes or \GlsDeclareNoHyperList
by explicitly setting the hyper option in commands such as \glslink
or \gls.
The way the link text is displayed depends on
\glstextformat
\glstextformat{htexti}
For example, to make all link text appear in a sans-serif font, do:
\renewcommand*{\glstextformat}[1]{\textsf{#1}}
Further customisation can be done via \defglsentryfmt or by redefining \glsentryfmt. See Section 6.1 for further details.
Each entry has an associated conditional referred to as the first use
flag. This determines whether \gls or \glspl (or their upper case
variants) should use the value of the first/firstplural or text/plural keys.
Note that an entry can be used without affecting the first use flag (for
example, when used with \glslink). See Section 14 for commands
that unset or reset this conditional.
The command:
\glslink
\glslink[hoptionsi]{hlabeli}{htexti}
will place \glstextformat{htexti} in the document at that point
and add a line into the associated glossary file for the glossary entry
given by hlabeli. If hyperlinks are supported, htexti will be a hyperlink
to the relevant line in the glossary. (Note that this command doesn’t
affect the first use flag: use \glsdisp instead.) The optional argument hoptionsi must be a hkeyi=hvaluei list which can take any of the
following keys:
format This specifies how to format the associated location number
for this entry in the glossary. This value is equivalent to the
78
6 Links to Glossary Entries
makeindex encap value, and (as with \index) the value needs
to be the name of a command without the initial backslash. As
with \index, the characters ( and ) can also be used to specify the beginning and ending of a number range. Again as
with \index, the command should be the name of a command
which takes an argument (which will be the associated location). Be careful not to use a declaration (such as bfseries)
instead of a text block command (such as textbf) as the effect
is not guaranteed to be localised. If you want to apply more
than one style to a given entry (e.g. bold and italic) you will
need to create a command that applies both formats, e.g.
\newcommand*{\textbfem}[1]{\textbf{\emph{#1}}}
and use that command.
In this document, the standard formats refer to the standard text
block commands such as \textbf or \emph or any of the commands listed in table 6.1.
If you use xindy instead of makeindex, you must specify
any non-standard formats that you want to use with the
format key using \GlsAddXdyAttribute{hnamei}. So if
you use xindy with the above example, you would need to
add:
\GlsAddXdyAttribute{textbfem}
See Section 11 for further details.
Note that unlike \index, you can’t have anything following the
command name, such as an asterisk or arguments. If you want
to cross-reference another entry, either use the see key when you
define the entry or use \glssee (described in Section 8).
If you are using hyperlinks and you want to change the font of
the hyperlinked location, don’t use \hyperpage (provided by
the hyperref package) as the locations may not refer to a page
number. Instead, the glossaries package provides number formats listed in table 6.1.
Note that if the \hyperlink command hasn’t been defined, the
hyperhxxi formats are equivalent to the analogous texthxxi
font commands (and hyperemph is equivalent to emph). If you
want to make a new format, you will need to define a command
which takes one argument and use that. For example, if you
79
6 Links to Glossary Entries
Table 6.1: Predefined Hyperlinked Location Formats
hyperrm
hypersf
hypertt
hyperbf
hypermd
hyperit
hypersl
hyperup
hypersc
hyperemph
serif hyperlink
sans-serif hyperlink
monospaced hyperlink
bold hyperlink
medium weight hyperlink
italic hyperlink
slanted hyperlink
upright hyperlink
small caps hyperlink
emphasized hyperlink
want the location number to be in a bold sans-serif font, you
can define a command called, say, \hyperbsf:
\newcommand{\hyperbsf}[1]{\textbf{\hypersf{#1}}}
and then use hyperbsf as the value for the format key. (See also
section 1.15 “Displaying the glossary” in the documented code,
glossaries-code.pdf.) Remember that if you use xindy,
you will need to add this to the list of location attributes:
\GlsAddXdyAttribute{hyperbsf}
counter This specifies which counter to use for this location. This
overrides the default counter used by this entry. (See also Section 5.)
hyper This is a boolean key which can be used to enable/disable
the hyperlink to the relevant entry in the glossary. (Note that
setting hyper=true will have no effect if \hyperlink has
not been defined.) The default value is hyper=true, unless the entry belongs to a glossary that either has been listed
in the package option nohypertypes or has been identified using \GlsDeclareNoHyperList in which case the default is
hyper=false.
local This is a boolean key that only makes a different when used
with commands that change the entry’s first use flag (such as
\gls). If local=true, the change to the first use flag will be
localised to the current scope. The default is local=false.
80
6 Links to Glossary Entries
There is also a starred version:
\glslink*
\glslink*[hoptionsi]{hlabeli}{htexti}
which is equivalent to \glslink, except it sets hyper=false. Similarly, all the following commands described in this section also have
a starred version that disables the hyperlink.
Don’t use commands like \glslink or \gls in the htexti
argument of \glslink.
The command:
\gls
\gls[hoptionsi]{hlabeli}[hinserti]
is the same as \glslink, except that the link text is determined from
the values of the text and first keys supplied when the entry was defined using \newglossaryentry. If the entry has been marked as
having been used, the value of the text key will be used, otherwise the
value of the first key will be used. On completion, \gls will mark the
entry’s first use flag as used.
There are two upper case variants:
\Gls
\Gls[hoptionsi]{hlabeli}[hinserti]
and
\GLS
\GLS[hoptionsi]{hlabeli}[hinserti]
which make the first letter of the link text or all the link text upper
case, respectively.
The final optional argument hinserti, allows you to insert some additional text into the link text. By default, this will append hinserti at
the end of the link text, but this can be changed (see Section 6.1).
The first optional argument hoptionsi is the same as the optional
argument to \glslink. As with \glslink, these commands also
have a starred version that disable the hyperlink.
Don’t use commands like \glslink or \gls in the hinserti
argument of \gls and its variants.
There are also analogous plural forms:
81
6 Links to Glossary Entries
\glspl
\glspl[hoptionsi]{hlabeli}[hinserti]
\Glspl
\Glspl[hoptionsi]{hlabeli}[hinserti]
\GLSpl
\GLSpl[hoptionsi]{hlabeli}[hinserti]
These determine the link text from the plural and firstplural keys supplied when the entry was first defined. As before, these commands
also have a starred version that disable the hyperlink.
Be careful when you use glossary entries in math mode especially
if you are using hyperref as it can affect the spacing of subscripts
and superscripts. For example, suppose you have defined the
following entry:
\newglossaryentry{Falpha}{name={F_\alpha},
description=sample}
and later you use it in math mode:
$\gls{Falpha}^2$
This will result in Fα 2 instead of Fα2 . In this situation it’s best to
bring the superscript into the hyperlink using the final hinserti
optional argument:
$\gls{Falpha}[^2]$
Note that \glslink doesn’t use or affect the first use flag, nor
does it use \glsentryfmt or the equivalent definition provided by
\defglsentryfmt (see Section 6.1). Instead, you can use:
\glsdisp
\glsdisp[hoptionsi]{hlabeli}{hlink texti}
This behaves in the same way as \gls, except that it uses hlink texti
instead of the value of the first or text key. (Note that this command
always sets hinserti to nothing.) This command affects the first use
flag, and uses \glsentryfmt or the equivalent definition provided
by \defglsentryfmt.
The command:
\glstext
\glstext[hoptionsi]{hlabeli}[hinserti]
82
6 Links to Glossary Entries
is similar to \gls except that it always uses the value of the text
key and does not affect the first use flag. Unlike \gls, the inserted
text hinserti is always appended to the link text since \glstext
doesn’t use \glsentryfmt or the equivalent definition provided
by \defglsentryfmt. (The same is true for all the following commands described in the rest of this section.)
There are also analogous commands:
\Glstext
\Glstext[hoptionsi]{htexti}[hinserti]
\GLStext
\GLStext[hoptionsi]{htexti}[hinserti]
As before, these commands also have a starred version that disable
the hyperlink.
The command:
\glsfirst
\glsfirst[hoptionsi]{hlabeli}[hinserti]
is similar to \glstext except that it always uses the value of the first
key. Again, hinserti is always appended to the end of the link text and
does not affect the first use flag.
There are also analogous commands:
\Glsfirst
\Glsfirst[hoptionsi]{htexti}[hinserti]
\GLSfirst
\GLSfirst[hoptionsi]{htexti}[hinserti]
As before, these commands also have a starred version that disable
the hyperlink.
The command:
\glsplural
\glsplural[hoptionsi]{hlabeli}[hinserti]
is similar to \glstext except that it always uses the value of the
plural key. Again, hinserti is always appended to the end of the link
text and does not mark the entry as having been used.
There are also analogous commands:
\Glsplural
\Glsplural[hoptionsi]{htexti}[hinserti]
83
6 Links to Glossary Entries
\GLSplural
\GLSplural[hoptionsi]{htexti}[hinserti]
As before, these commands also have a starred version that disable
the hyperlink.
The command:
\glsfirstplural
\glsfirstplural[hoptionsi]{hlabeli}[hinserti]
is similar to \glstext except that it always uses the value of the
firstplural key. Again, hinserti is always appended to the end of the link
text and does not mark the entry as having been used.
There are also analogous commands:
\Glsfirstplural
\Glsfirstplural[hoptionsi]{htexti}[hinserti]
\GLSfirstplural
\GLSfirstplural[hoptionsi]{htexti}[hinserti]
As before, these commands also have a starred version that disable
the hyperlink.
The command:
\glsname
\glsname[hoptionsi]{hlabeli}[hinserti]
is similar to \glstext except that it always uses the value of the
name key. Again, hinserti is always appended to the end of the link
text and does not mark the entry as having been used.
There are also analogous commands:
\Glsname
\Glsname[hoptionsi]{htexti}[hinserti]
\GLSname
\GLSname[hoptionsi]{htexti}[hinserti]
As before, these commands also have a starred version that disable
the hyperlink.
The command:
\glssymbol
\glssymbol[hoptionsi]{hlabeli}[hinserti]
is similar to \glstext except that it always uses the value of the
symbol key. Again, hinserti is always appended to the end of the link
text and does not mark the entry as having been used.
84
6 Links to Glossary Entries
There are also analogous commands:
\Glssymbol
\Glssymbol[hoptionsi]{htexti}[hinserti]
\GLSsymbol
\GLSsymbol[hoptionsi]{htexti}[hinserti]
As before, these commands also have a starred version that disable
the hyperlink.
The command:
\glsdesc
\glsdesc[hoptionsi]{hlabeli}[hinserti]
is similar to \glstext except that it always uses the value of the
description key. Again, hinserti is always appended to the end of the
link text and does not mark the entry as having been used.
There are also analogous commands:
\Glsdesc
\Glsdesc[hoptionsi]{htexti}[hinserti]
\GLSdesc
\GLSdesc[hoptionsi]{htexti}[hinserti]
As before, these commands also have a starred version that disable
the hyperlink.
The command:
\glsuseri
\glsuseri[hoptionsi]{hlabeli}[hinserti]
is similar to \glstext except that it always uses the value of the
user1 key. Again, hinserti is always appended to the end of the link
text and does not mark the entry as having been used.
There are also analogous commands:
\Glsuseri
\Glsuseri[hoptionsi]{htexti}[hinserti]
\GLSuseri
\GLSuseri[hoptionsi]{htexti}[hinserti]
As before, these commands also have a starred version that disable
the hyperlink. Similarly for the other user keys:
\glsuserii
\glsuserii[hoptionsi]{htexti}[hinserti]
85
6 Links to Glossary Entries
\Glsuserii
\Glsuserii[hoptionsi]{htexti}[hinserti]
\GLSuserii
\GLSuserii[hoptionsi]{htexti}[hinserti]
\glsuseriii
\glsuseriii[hoptionsi]{htexti}[hinserti]
\Glsuseriii
\Glsuseriii[hoptionsi]{htexti}[hinserti]
\GLSuseriii
\GLSuseriii[hoptionsi]{htexti}[hinserti]
\glsuseriv
\glsuseriv[hoptionsi]{htexti}[hinserti]
\Glsuseriv
\Glsuseriv[hoptionsi]{htexti}[hinserti]
\GLSuseriv
\GLSuseriv[hoptionsi]{htexti}[hinserti]
\glsuserv
\glsuserv[hoptionsi]{htexti}[hinserti]
\Glsuserv
\Glsuserv[hoptionsi]{htexti}[hinserti]
\GLSuserv
\GLSuserv[hoptionsi]{htexti}[hinserti]
\glsuservi
\glsuservi[hoptionsi]{htexti}[hinserti]
\Glsuservi
\Glsuservi[hoptionsi]{htexti}[hinserti]
\GLSuservi
\GLSuservi[hoptionsi]{htexti}[hinserti]
86
6 Links to Glossary Entries
6.1 Changing the format of the link text
The default format of the link text for \gls, \glspl and their upper
case variants and also for \glsdisp is governed by1 :
\glsentryfmt
\glsentryfmt
This may be redefined but if you only want the change the display
style for a given glossary, then you need to use
\defglsentryfmt
\defglsentryfmt[htypei]{hdefinitioni}
instead of redefining \glsentryfmt. The optional first argument
htypei is the glossary type. This defaults to \glsdefaulttype if
omitted. The second argument is the entry format definition.
Note that \glsentryfmt is the default display format for
entries. Once the display format has been changed for an
individual glossary using \defglsentryfmt, redefining
\glsentryfmt won’t have an effect on that glossary, you must
instead us \defglsentryfmt again. Note that glossaries that
have been identified as lists of acronyms (via the package option
acronymlists or the command \DeclareAcronymList, see
Section 2.5) use \defglsentryfmt to set their display style.
Within the hdefinitioni argument of \defglsentryfmt, or if you
want to redefine \glsentryfmt, you may use the following commands:
\glslabel
\glslabel
This is the label of the entry being referenced.
\glscustomtext
\glscustomtext
This is the custom text supplied in \glsdisp. It’s always empty for
\gls, \glspl and their upper case variants. (You can use etoolbox’s
\ifdefempty to determine if \glscustomtext is empty.)
\glsinsert
\glsinsert
1 \glsdisplayfirst
and \glsdisplay are now deprecated. Backwards compatibility should be preserved but you may need to use the compatible-3.07 option
87
6 Links to Glossary Entries
The custom text supplied in the final optional argument to \gls,
\glspl and their upper case variants.
\glsifplural
\glsifplural{htrue texti}{hfalse texti}
If \glspl, \Glspl or \GLSpl was used, this command does htrue
texti otherwise it does hfalse texti.
\glscapscase
\glscapscase{hno casei}{hfirst uci}{hall capsi}
If \gls, \glspl or \glsdisp were used, this does hno casei. If \Gls
or \Glspl were used, this does hfirst uci. If \GLS or \GLSpl were
used, this does hall capsi.
Note that you can also use commands such as \ifglsused within
the definition of \glsentryfmt (see Section 14).
If you only want to make minor modifications to \glsentryfmt,
you can use
\glsgenentryfmt
\glsgenentryfmt
This uses the above commands to display just the first, text, plural or
firstplural keys (or the custom text) with the insert text appended.
Alternatively, if want to change the entry format for acronyms (defined via \newacronym) you can use:
\glsgenacfmt
\glsgenacfmt
This uses the values from the long, short, longplural and shortplural keys,
rather than using the text, plural, first and firstplural keys. The first use
singular text is obtained via:
\genacrfullformat
\genacrfullformat{hlabeli}{hinserti}
instead of from the first key, and the first use plural text is obtained
via:
\genplacrfullformat
\genplacrfullformat{hlabeli}{hinserti}
instead of from the firstplural key. In both cases, hlabeli is the entry’s
label and hinserti is the insert text provided in the final optional argument of commands like \gls. The default behaviour is to do the
long form (or plural long form) followed by hinserti and a space and
the short form (or plural short form) in parentheses, where the short
88
6 Links to Glossary Entries
form is in the argument of \firstacronymfont. There are also first
letter upper case versions:
\Genacrfullformat
\Genacrfullformat{hlabeli}{hinserti}
and
\Genplacrfullformat
\Genplacrfullformat{hlabeli}{hinserti}
By default these perform a protected expansion on their no-casechange equivalents and then use \makefirstuc to convert the first
character to upper case. If there are issues caused by this expansion, you will need to redefine those commands to explicitly use commands like \Glsentrylong (which is what the predefined acronym
styles, such as long-short, do). Otherwise, you only need to redefine
\genacrfullformat and \genplacrfullformat to change the
behaviour of \glsgenacfmt. See Section 13 for further details on
changing the style of acronyms.
Note that \glsentryfmt is not used by \glslink or any of the
other commands, such as \glstext.
Example 6 (Custom Entry Display in Text)
Suppose you want a glossary of measurements and units, you can
use the symbol key to store the unit:
\newglossaryentry{distance}{name=distance,
description={The length between two points},
symbol={km}}
and now suppose you want \gls{distance} to produce “distance
(km)” on first use, then you can redefine \glsentryfmt as follows:
\renewcommand*{\glsentryfmt}{%
\glsgenentryfmt
\ifglsused{\glslabel}{}{\space (\glsentrysymbol{\glslabel})}%
}
(Note that I’ve used \glsentrysymbol rather than \glssymbol
to avoid nested hyperlinks.)
Note also that all of the link text will be formatted according to
\glstextformat (described earlier). So if you do, say:
\renewcommand{\glstextformat}[1]{\textbf{#1}}
\renewcommand*{\glsentryfmt}{%
89
6 Links to Glossary Entries
\glsgenentryfmt
\ifglsused{\glslabel}{}{\space(\glsentrysymbol{\glslabel})}%
}
then \gls{distance} will produce “distance (km)”.
For a complete document, see the sample file sample-entryfmt.tex.
Example 7 (Custom Format for Particular Glossary)
Suppose you have created a new glossary called notation and
you want to change the way the entry is displayed on first use so that
it includes the symbol, you can do:
\defglsentryfmt[notation]{\glsgenentryfmt
\ifglsused{\glslabel}{}{\space
(denoted \glsentrysymbol{\glslabel})}}
Now suppose you have defined an entry as follows:
\newglossaryentry{set}{type=notation,
name=set,
description={A collection of objects},
symbol={$S$}
}
The first time you reference this entry it will be displayed as: “set
(denoted S)” (assuming \gls was used).
Alternatively, if you expect all the symbols to be set in math mode,
you can do:
\defglsentryfmt[notation]{\glsgenentryfmt
\ifglsused{\glslabel}{}{\space
(denoted $\glsentrysymbol{\glslabel}$)}}
and define entries like this:
\newglossaryentry{set}{type=notation,
name=set,
description={A collection of objects},
symbol={S}
}
Remember that if you use the symbol key, you need to use a glossary
style that displays the symbol, as many of the styles ignore it.
90
6 Links to Glossary Entries
6.2 Enabling and disabling hyperlinks to glossary
entries
If you load the hyperref or html packages prior to loading the glossaries
package, commands such as \glslink and \gls, described above,
will automatically have hyperlinks to the relevant glossary entry, unless the hyper option has been set to false. You can disable or enable
links using:
\glsdisablehyper
\glsdisablehyper
and
\glsenablehyper
\glsenablehyper
respectively. The effect can be localised by placing the commands
within a group. Note that you should only use \glsenablehyper if
the commands \hyperlink and \hypertarget have been defined
(for example, by the hyperref package).
You can disable just the first use links using the package option hyperfirst=false. Note that this option only affects commands that recognise the first use flag, for example \gls, \glspl and \glsdisp but
not \glslink.
Example 8 (First Use With Hyperlinked Footnote Description)
Suppose I want the first use to have a hyperlink to the description
in a footnote instead of hyperlinking to the relevant place in the glossary. First I need to disable the hyperlinks on first use via the package
option hyperfirst=false:
\usepackage[hyperfirst=false]{glossaries}
Now I need to redefine \glsentryfmt (see Section 6.1):
\renewcommand*{\glsentryfmt}{%
\glsgenentryfmt
\ifglsused{\glslabel}{}{\footnote{\glsentrydesc{\glslabel}}}%
}
Now the first use won’t have hyperlinked text, but will be followed
by a footnote. See the sample file sample-FnDesc.tex for a complete document.
91
6 Links to Glossary Entries
Note that the hyperfirst option applies to all defined glossaries. It
may be that you only want to disable the hyperlinks on first use for
glossaries that have a different form on first use. This can be achieved
by noting that since the entries that require hyperlinking for all instances have identical first and subsequent text, they can be unset via
\glsunsetall (see Section 14) so that the hyperfirst option doesn’t
get applied.
Example 9 (Suppressing Hyperlinks on First Use Just For
Acronyms)
Suppose I want to suppress the hyperlink on first use for acronyms
but not for entries in the main glossary. I can load the glossaries package using:
\usepackage[hyperfirst=false,acronym]{glossaries}
Once all glossary entries have been defined I then do:
\glsunsetall[main]
For more complex requirements, you might find it easier to switch
off all hyperlinks via \glsdisablehyper and put the hyperlinks
(where required) within the definition of \glsentryfmt (see Section 6.1) via \glshyperlink (see Section 9).
Example 10 (Only Hyperlink in Text Mode Not Math Mode)
This is a bit of a contrived example, but suppose, for some reason,
I only want commands like \gls and \glsdisp to have hyperlinks
when used in text mode, but not in math mode. I can do this by
disabling all hyperlinks and redefining \glsentryfmt:
\glsdisablehyper
\renewcommand*{\glsentryfmt}{%
\ifmmode
\glsgenentryfmt
\else
% Temporarily enable hyperlinks:
\glsenablehyper
\glshyperlink[\glsgenentryfmt]{\glslabel}%
% Disable hyperlinks again
\glsdisablehyper
\fi
}
92
6 Links to Glossary Entries
To ensure the target exists, the hyperlinks must be enabled again
when the glossary is displayed:
\renewcommand{\glossarypreamble}{\glsenablehyper}
\renewcommand{\glossarypostamble}{\glsdisablehyper}
(The redefinition of \glossarypostamble is only necessary if the
glossary is displayed at the start of the document instead of at the
end.) See the sample file sample-nomathhyper.tex for a complete
document.
93
7 Adding an Entry to the Glossary
Without Generating Text
It is possible to add a line in the glossary file without generating any
text at that point in the document using:
\glsadd
\glsadd[hoptionsi]{hlabeli}
This is similar to \glslink, only it doesn’t produce any text (so
therefore, there is no hyper key available in hoptionsi but all the other
options that can be used with \glslink can be passed to \glsadd).
For example, to add a page range to the glossary number list for the
entry whose label is given by set:
\glsadd[format=(]{set}
Lots of text about sets spanning many pages.
\glsadd[format=)]{set}
To add all entries that have been defined, use:
\glsaddall
\glsaddall[hoptionsi]
The optional argument is the same as for \glsadd, except there is
also a key types which can be used to specify which glossaries to use.
This should be a comma separated list. For example, if you only want
to add all the entries belonging to the list of acronyms (specified by
the glossary type \acronymtype) and a list of notation (specified by
the glossary type notation) then you can do:
\glsaddall[types={\acronymtype,notation}]
Note that \glsadd and \glsaddall add the current location to
the number list. In the case of \glsaddall, all entries in the
glossary will have the same location in the number list. If you
want to use \glsaddall, it’s best to suppress the number list
with the nonumberlist package option. (See sections 2.3 and 5.)
There is now a variation of \glsaddall that skips any entries that
have already been used:
94
7 Adding an Entry to the Glossary Without Generating Text
\glsaddallunused
\glsaddallunused[hlisti]
This command uses \glsadd[format=@gobble] which will ignore this location in the number list. The optional argument hlisti
is a comma-separated list of glossary types. If omitted, it defaults to
the list of all defined glossaries.
Example 11 (Dual Entries)
The example file sample-dual.tex makes use of \glsadd to allow for an entry that should appear both in the main glossary and in
the list of acronyms. This example sets up the list of acronyms using
the acronym package option:
\usepackage[acronym]{glossaries}
A new command is then defined to make it easier to define dual entries:
\newcommand*{\newdualentry}[5][]{%
\newglossaryentry{main-#2}{name={#4},%
text={#3\glsadd{#2}},%
description={#5},%
#1
}%
\newacronym{#2}{#3\glsadd{main-#2}}{#4}%
}
This has the following syntax:
\newdualentry[hoptionsi]{hlabeli}{habbrvi}{hlongi}{hdescriptioni}
You can then define a new dual entry:
\newdualentry{svm}% label
{SVM}% abbreviation
{support vector machine}% long form
{Statistical pattern recognition technique}% description
Now you can reference the acronym with \gls{svm} or you can reference the entry in the main glossary with \gls{main-svm}.
95
8 Cross-Referencing Entries
You must use \makeglossaries before defining any
cross-referenced entries. If any of the terms that you have
cross-referenced don’t appear in the glossary, check that you have
put \makeglossaries before all entry definitions.
There are several ways of cross-referencing entries in the glossary:
1. You can use commands such as \gls in the entries description.
For example:
\newglossaryentry{apple}{name=apple,
description={firm, round fruit. See also \gls{pear}}}
Note that with this method, if you don’t use the cross-referenced
term in the main part of the document, you will need two runs
of makeglossaries:
latex filename
makeglossaries filename
latex filename
makeglossaries filename
latex filename
2. As described in Section 4, you can use the see key when you
define the entry. For example:
\newglossaryentry{MaclaurinSeries}{name={Maclaurin
series},
description={Series expansion},
see={TaylorsTheorem}}
Note that in this case, the entry with the see key will automatically be added to the glossary, but the cross-referenced entry
won’t. You therefore need to ensure that you use the crossreferenced term with the commands described in Section 6 or
Section 7.
96
8 Cross-Referencing Entries
The “see” tag is produce using \seename, but can be overridden in specific instances using square brackets at the start of the
see value. For example:
\newglossaryentry{MaclaurinSeries}{name={Maclaurin
series},
description={Series expansion},
see=[see also]{TaylorsTheorem}}
3. After you have defined the entry, use
\glssee
\glssee[htagi]{hlabeli}{hxr label listi}
where hxr label listi is a comma-separated list of entry labels to
be cross-referenced, hlabeli is the label of the entry doing the
cross-referencing and htagi is the “see” tag. (The default value
of htagi is \seename.) For example:
\glssee[see also]{series}{FourierSeries,TaylorsTheorem}
Note that this automatically adds the entry given by hlabeli to
the glossary but doesn’t add the cross-referenced entries (specified by hxr label listi) to the glossary.
In both cases 2 and 3 above, the cross-referenced information appears in the number list, whereas in case 1, the cross-referenced information appears in the description. (See the sample-crossref.tex
example file that comes with this package.) This means that in cases 2
and 3, the cross-referencing information won’t appear if you have
suppressed the number list. In this case, you will need to activate
the number list for the given entries using nonumberlist=false. Alternatively, if you just use the see key instead of \glssee, you can automatically activate the number list using the seeautonumberlist package
option.
You must use \makeglossaries before the entry definitions
containing the see key and before any instances of \glssee or
the entry won’t be automatically added to the glossary.
8.1 Customising Cross-reference Text
When you use either the see key or the command \glssee, the crossreferencing information will be typeset in the glossary according to:
97
8 Cross-Referencing Entries
\glsseeformat
\glsseeformat[htagi]{hlabel-listi}{hlocationi}
The default definition of \glsseeformat is:
\emph{htagi} \glsseelist{hlabel-listi}
Note that the location is always ignored.1 For example, if you want
the tag to appear in bold, you can do:2
\renewcommand*{\glsseeformat}[3][\seename]{\textbf{#1}
\glsseelist{#2}}
The list of labels is dealt with by \glsseelist, which iterates
through the list and typesets each entry in the label. The entries are
separated by
\glsseesep
\glsseesep
or (for the last pair)
\glsseelastsep
\glsseelastsep
These default to “,\space” and “\space\andname\space” respectively. The list entry text is displayed using:
\glsseeitemformat
\glsseeitemformat{hlabeli}
This defaults to \glsentrytext{hlabeli}.3 For example, to make
the cross-referenced list use small caps:
\renewcommand{\glsseeitemformat}[1]{%
\textsc{\glsentrytext{#1}}}
1 makeindex
will always assign a location number, even if it’s not needed, so it
needs to be discarded.
2 If you redefine \glsseeformat, keep the default value of the optional argument
as \seename as both see and \glssee explicitly write [\seename] in the output file if no optional argument is given.
3 In versions before 3.0, \glsentryname was used, but this could cause problems
when the name key was sanitized.
98
8 Cross-Referencing Entries
You can use \glsseeformat and \glsseelist in the main
body of the text, but they won’t automatically add the
cross-referenced entries to the glossary. If you want them added
with that location, you can do:
Some information (see also
\glsseelist{FourierSeries,TaylorsTheorem}%
\glsadd{FourierSeries}\glsadd{TaylorsTheorem}).
99
9 Using Glossary Terms Without
Links
The commands described in this section display entry details without
adding any information to the glossary. They don’t use \glstextformat,
they don’t have any optional arguments, they don’t affect the first
use flag and, apart from \glshyperlink, they don’t produce hyperlinks.
Commands that aren’t expandable will be ignored by PDF
bookmarks, so you will need to provide an alternative via
hyperref’s \texorpdfstring if you want to use them in
sectioning commands. (This isn’t specific to the glossaries
package.) See the hyperref documentation for further details. All
the commands that convert the first letter to upper case aren’t
expandable.
\glsentryname
\glsentryname{hlabeli}
\Glsentryname
\Glsentryname{hlabeli}
These commands display the name of the glossary entry given by
hlabeli, as specified by the name key. \Glsentryname makes the first
letter upper case. Neither of these commands check for the existence
of hlabeli. The first form \glsentryname is expandable (unless the
name contains unexpandable commands).
\glossentryname
\glossentryname{hlabeli}
This is like \glsnamefont{\glsentryname{hlabeli}} but also checks
for the existence of hlabeli. This command is not expandable. It’s used
in the predefined glossary styles, so if you want to change the way the
name is formatted in the glossary, you can redefine \glsnamefont
to use the required fonts. For example:
\renewcommand*{\glsnamefont}[1]{\textmd{\sffamily #1}}
100
9 Using Glossary Terms Without Links
\Glossentryname
\Glossentryname{hlabeli}
This is like \glossentryname but makes the first letter of the name
upper case.
\glsentrytext
\glsentrytext{hlabeli}
\Glsentrytext
\Glsentrytext{hlabeli}
These commands display the subsequent use text for the glossary entry given by hlabeli, as specified by the text key. \Glsentrytext
makes the first letter upper case. The first form is expandable (unless
the text contains unexpandable commands). The second form is not
expandable. Neither checks for the existence of hlabeli.
\glsentryplural
\glsentryplural{hlabeli}
\Glsentryplural
\Glsentryplural{hlabeli}
These commands display the subsequent use plural text for the glossary entry given by hlabeli, as specified by the plural key. \Glsentryplural
makes the first letter upper case. The first form is expandable (unless
the value of that key contains unexpandable commands). The second
form is not expandable. Neither checks for the existence of hlabeli.
\glsentryfirst
\glsentryfirst{hlabeli}
\Glsentryfirst
\Glsentryfirst{hlabeli}
These commands display the first use text for the glossary entry given
by hlabeli, as specified by the first key. \Glsentryfirst makes the
first letter upper case. The first form is expandable (unless the value
of that key contains unexpandable commands). The second form is
not expandable. Neither checks for the existence of hlabeli.
\glsentryfirstplural
\glsentryfirstplural{hlabeli}
\Glsentryfirstplural
\Glsentryfirstplural{hlabeli}
101
9 Using Glossary Terms Without Links
These commands display the plural form of the first use text for
the glossary entry given by hlabeli, as specified by the firstplural key.
\Glsentryfirstplural makes the first letter upper case. The first
form is expandable (unless the value of that key contains unexpandable commands). The second form is not expandable. Neither checks
for the existence of hlabeli.
\glsentrydesc
\glsentrydesc{hlabeli}
\Glsentrydesc
\Glsentrydesc{hlabeli}
These commands display the description for the glossary entry given
by hlabeli. \Glsentrydesc makes the first letter upper case. The
first form is expandable (unless the value of that key contains unexpandable commands). The second form is not expandable. Neither
checks for the existence of hlabeli.
\glossentrydesc
\glossentrydesc{hlabeli}
This is like \glsentrydesc{hlabeli} but also checks for the existence of hlabeli. This command is not expandable. It’s used in the
predefined glossary styles to display the description.
\Glossentrydesc
\Glossentrydesc{hlabeli}
This is like \glossentrydesc but converts the first letter to upper
case. This command is not expandable.
\glsentrydescplural
\glsentrydescplural{hlabeli}
\Glsentrydescplural
\Glsentrydescplural{hlabeli}
These commands display the plural description for the glossary entry given by hlabeli. \Glsentrydescplural makes the first letter
upper case. The first form is expandable (unless the value of that key
contains unexpandable commands). The second form is not expandable. Neither checks for the existence of hlabeli.
\glsentrysymbol
\glsentrysymbol{hlabeli}
102
9 Using Glossary Terms Without Links
\Glsentrysymbol
\Glsentrysymbol{hlabeli}
These commands display the symbol for the glossary entry given by
hlabeli. \Glsentrysymbol makes the first letter upper case. The first
form is expandable (unless the value of that key contains unexpandable commands). The second form is not expandable. Neither checks
for the existence of hlabeli.
\glossentrysymbol
\glossentrysymbol{hlabeli}
This is like \glsentrysymbol{hlabeli} but also checks for the existence of hlabeli. This command is not expandable. It’s used in the
predefined glossary styles to display the symbol.
\Glossentrysymbol
\Glossentrysymbol{hlabeli}
This is like \glossentrysymbol but converts the first letter to upper case. This command is not expandable.
\glsentrysymbolplural
\glsentrysymbolplural{hlabeli}
\Glsentrysymbolplural
\Glsentrysymbolplural{hlabeli}
These commands display the plural symbol for the glossary entry
given by hlabeli. \Glsentrysymbolplural makes the first letter
upper case. The first form is expandable (unless the value of that key
contains unexpandable commands). The second form is not expandable. Neither checks for the existence of hlabeli.
\glsentryuseri
\glsentryuseri{hlabeli}
\Glsentryuseri
\Glsentryuseri{hlabeli}
\glsentryuserii
\glsentryuserii{hlabeli}
\Glsentryuserii
\Glsentryuserii{hlabeli}
103
9 Using Glossary Terms Without Links
\glsentryuseriii
\glsentryuseriii{hlabeli}
\Glsentryuseriii
\Glsentryuseriii{hlabeli}
\glsentryuseriv
\glsentryuseriv{hlabeli}
\Glsentryuseriv
\Glsentryuseriv{hlabeli}
\glsentryuserv
\glsentryuserv{hlabeli}
\Glsentryuserv
\Glsentryuserv{hlabeli}
\glsentryuservi
\glsentryuservi{hlabeli}
\Glsentryuservi
\Glsentryuservi{hlabeli}
These commands display the value of the user keys for the glossary
entry given by hlabeli. The lower case forms are expandable (unless
the value of the key contains unexpandable commands). The commands beginning with an upper case letter convert the first letter of
the required value to upper case and are not expandable. None of
these commands check for the existence of hlabeli.
\glshyperlink
\glshyperlink[hlink texti]{hlabeli}
This command provides a hyperlink to the glossary entry given by
hlabeli but does not add any information to the glossary file. The
link text is given by \glsentrytext{hlabeli} by default1 , but can
be overridden using the optional argument.
1 versions
before 3.0 used \glsentryname as the default, but this could cause
problems when name had been sanitized.
104
9 Using Glossary Terms Without Links
If you use \glshyperlink, you need to ensure that the relevant
entry has been added to the glossary using any of the commands
described in Section 6 or Section 7 otherwise you will end up with
an undefined link.
The next two commands are only available with the savenumberlist
package option:
\glsentrynumberlist
\glsdisplaynumberlist
\glsentrynumberlist{hlabeli}
\glsdisplaynumberlist{hlabeli}
Both display the number list for the entry given by hlabeli and require
a run of makeglossaries (or xindy or makeindex) followed by
one or two runs of LATEX. The first command, \glsentrynumberlist,
simply displays the number list as is. The second command,
\glsdisplaynumberlist, formats the list using:
\glsnumlistsep
\glsnumlistsep
as the separator between all but the last two elements and
\glsnumlistlastsep
\glsnumlistlastsep
between the final two elements. The defaults are , and \& , respectively.
\glsdisplaynumberlist is fairly experimental. It only works
when the default counter format is used (that is, when the format
key is set to glsnumberformat). This command also doesn’t
work with hyperref. If you try using it with that package,
\glsentrynumberlist will be used instead.
For further information see section 1.10.2 “Displaying entry details
without adding information to the glossary” in the documented code
(glossaries-code.pdf).
105
10 Displaying a glossary
The command
\printglossaries
\printglossaries
will display all the glossaries in the order in which they were defined.
Note that no glossaries will appear until you have either used the Perl
script makeglossaries or have directly used makeindex or xindy
(as described in Section 1.3). If the glossary still does not appear after you re-LATEX your document, check the makeindex/xindy log
files to see if there is a problem. Remember that you also need to
use the command \makeglossaries in the preamble to enable the
glossaries.
An individual glossary can be displayed using:
\printglossary
\printglossary[hoptionsi]
where hoptionsi is a hkeyi=hvaluei list of options. The following keys
are available:
type The value of this key specifies which glossary to print. If omit-
ted, the default glossary is assumed. For example, to print the
list of acronyms:
\printglossary[type=\acronymtype]
title This is the glossary’s title (overriding the title specified when the
glossary was defined).
toctitle This is the title to use for the table of contents (if the toc pack-
age option has been used). It may also be used for the page
header, depending on the page style. If omitted, the value of
title is used.
style This specifies which glossary style to use for this glossary, overriding the effect of the style package option or \glossarystyle.
numberedsection This specifies whether to use a numbered section
for this glossary, overriding the effect of the numberedsection
package option. This key has the same syntax as the numberedsection package option, described in Section 2.2.
106
10 Displaying a glossary
nonumberlist This is a boolean key. If true (nonumberlist=true)
the numberlist is suppressed for this glossary.
If false
(nonumberlist=false) the numberlist is displayed for this
glossary. If no value is supplied, true is assumed.
By default, the glossary is started either by \chapter* or by
\section*, depending on whether or not \chapter is defined.
This can be overridden by the section package option or the
\setglossarysection command. Numbered sectional units can
be obtained using the numberedsection package option. Each glossary
sets the page header via the command
\glsglossarymark
\glsglossarymark{htitlei}
If this mechanism is unsuitable for your chosen class file or page style
package, you will need to redefine \glsglossarymark. Further information about these options and commands is given in Section 2.2.
Information can be added to the start of the glossary (after the title
and before the main body of the glossary) by redefining
\glossarypreamble
\glossarypreamble
For example:
\renewcommand{\glossarypreamble}{Numbers in italic
indicate primary definitions.}
This needs to be done before the glossary is displayed using
\printglossaries or \printglossary.
If you want a different preamble per glossary you can use
\setglossarypreamble
\setglossarypreamble[htypei]{hpreamble texti}
If htypei is omitted, \glsdefaulttype is used.
For example:
\setglossarypreamble{Numbers in italic
indicate primary definitions.}
This will print the given preamble text for the main glossary, but not
have any preamble text for any other glossaries.
There is an analogous command to \glossarypreamble called
\glossarypostamble
\glossarypostamble
which is placed at the end of each glossary.
107
10 Displaying a glossary
Example 12 (Switch to Two Column Mode for Glossary)
Suppose you are using the superheaderborder style1 , and you want
the glossary to be in two columns, but after the glossary you want to
switch back to one column mode, you could do:
\renewcommand*{\glossarysection}[2][]{%
\twocolumn[{\chapter*{#2}}]%
\setlength\glsdescwidth{0.6\linewidth}%
\glsglossarymark{\glossarytoctitle}%
}
\renewcommand*{\glossarypostamble}{\onecolumn}
Within each glossary, each entry name is formatted according to
\glsnamefont
\glsnamefont{hnamei}
which takes one argument: the entry name. This command is always
used regardless of the glossary style. By default, \glsnamefont
simply displays its argument in whatever the surrounding font happens to be. This means that in the list-like glossary styles (defined in
the glossary-list style file) the name will appear in bold, since the name
is placed in the optional argument of \item, whereas in the tabular styles (defined in the glossary-long and glossary-super style files) the
name will appear in the normal font. The hierarchical glossary styles
(defined in the glossary-tree style file) also set the name in bold.
Example 13 (Changing the Font Used to Display Entry Names
in the Glossary)
Suppose you want all the entry names to appear in medium weight
small caps in your glossaries, then you can do:
\renewcommand{\glsnamefont}[1]{\textsc{\mdseries #1}}
1 you
can’t use the longheaderborder style for this example as you can’t use the
longtable environment in two column mode.
108
11 Xindy
If you want to use xindy to sort the glossary, you must use the package option xindy:
\usepackage[xindy]{glossaries}
This ensures that the glossary information is written in xindy syntax.
Section 1.3 covers how to use the external indexing application.
This section covers the commands provided by the glossaries package
that allow you to adjust the xindy style file (.xdy) and parameters.
To assist writing information to the xindy style file, the glossaries
package provides the following commands:
\glsopenbrace
\glsclosebrace
\glsopenbrace
\glsclosebrace
which produce an open and closing brace. (This is needed because
\{ and \} don’t expand to a simple brace character when written to
a file.)
In addition, if you are using a package that makes the double quote
character active (e.g. ngerman) you can use:
\glsquote
\glsquote{htexti}
which will produce "htexti". Alternatively, you can use \string"
to write the double-quote character. This document assumes that the
double quote character has not been made active, so the examples just
use " for clarity.
If you want greater control over the xindy style file than is available through the LATEX commands provided by the glossaries package, you will need to edit the xindy style file. In which case, you
must use \noist to prevent the style file from being overwritten
by the glossaries package. For additional information about xindy,
read the xindy documentation. I’m sorry I can’t provide any assistance with writing xindy style files. If you need help, I recommend
you ask on the xindy mailing list (http://xindy.sourceforge.
net/mailing-list.html).
109
11 Xindy
11.1 Language and Encodings
When you use xindy, you need to specify the language and encoding used (unless you have written your own custom xindy style
file that defines the relevant alphabet and sort rules). If you use
makeglossaries, this information is obtained from the document’s
auxiliary (.aux) file. The makeglossaries script attempts to find
the root language given your document settings, but in the event that
it gets it wrong or if xindy doesn’t support that language, then you
can specify the required language using:
\GlsSetXdyLanguage
\GlsSetXdyLanguage[hglossary typei]{hlanguagei}
where hlanguagei is the name of the language. The optional argument
can be used if you have multiple glossaries in different languages. If
hglossary typei is omitted, it will be applied to all glossaries, otherwise
the language setting will only be applied to the glossary given by
hglossary typei.
If the inputenc package is used, the encoding will be obtained from
the value of \inputencodingname. Alternatively, you can specify
the encoding using:
\GlsSetXdyCodePage
\GlsSetXdyCodePage{hcodei}
where hcodei is the name of the encoding. For example:
\GlsSetXdyCodePage{utf8}
Note that you can also specify the language and encoding using
the package option xindy={language=hlangi,codepage=hcodei}.
For example:
\usepackage[xindy={language=english,codepage=utf8}]{glossaries}
If you write your own custom xindy style file that includes the
language settings, you need to set the language to nothing:
\GlsSetXdyLanguage{}
(and remember to use \noist to prevent the style file from being
overwritten).
The commands \GlsSetXdyLanguage and
\GlsSetXdyCodePage have no effect if you don’t use
makeglossaries. If you call xindy without makeglossaries
you need to remember to set the language and encoding using the
-L and -C switches.
110
11 Xindy
11.2 Locations and Number lists
If you use xindy, the glossaries package needs to know which counters you will be using in the number list in order to correctly format
the xindy style file. Counters specified using the counter package
option or the hcounteri option of \newglossary are automatically
taken care of, but if you plan to use a different counter in the counter
key for commands like \glslink, then you need to identify these
counters before \makeglossaries using:
\GlsAddXdyCounters
\GlsAddXdyCounters{hcounter listi}
where hcounter listi is a comma-separated list of counter names.
The most likely attributes used in the format key (textrm, hyperrm
etc) are automatically added to the xindy style file, but if you want
to use another attribute, you need to add it using:
\GlsAddXdyAttribute
\GlsAddXdyAttribute{hnamei}
where hnamei is the name of the attribute, as used in the format key.
Example 14 (Custom Font for Displaying a Location)
Suppose I want a bold, italic, hyperlinked location. I first need to
define a command that will do this:
\newcommand*{\hyperbfit}[1]{\textit{\hyperbf{#1}}}
but with xindy, I also need to add this as an allowed attribute:
\GlsAddXdyAttribute{hyperbfit}
Now I can use it in the optional argument of commands like \gls:
Here is a \gls[format=hyperbfit]{sample} entry.
(where sample is the label of the required entry).
Note that \GlsAddXdyAttribute has no effect if \noist is
used or if \makeglossaries is omitted.
\GlsAddXdyAttribute must be used before
\makeglossaries. Additionally, \GlsAddXdyCounters must
come before \GlsAddXdyAttribute.
111
11 Xindy
If the location numbers don’t get expanded to a simple Arabic or
Roman number or a letter from a, . . . , z or A, . . . , Z, then you need to
add a location style in the appropriate format using
\GlsAddXdyLocation
\GlsAddXdyLocation[hprefix-locationi]{hnamei}{hdefinitioni}
where hnamei is the name of the format and hdefinitioni is the xindy
definition. The optional argument hprefix-locationi is needed if
\theHhcounteri either isn’t defined or is different from \thehcounteri.
Note that \GlsAddXdyLocation has no effect if \noist is used
or if \makeglossaries is omitted. \GlsAddXdyLocation
must be used before \makeglossaries.
Example 15 (Custom Numbering System for Locations)
Suppose I decide to use a somewhat eccentric numbering system
for sections where I redefine \thesection as follows:
\renewcommand*{\thesection}{[\thechapter]\arabic{section}}
If I haven’t done counter=section in the package option, I need to
specify that the counter will be used as a location number:
\GlsAddXdyCounters{section}
Next I need to add the location style (\thechapter is assumed to be
the standard \arabic{chapter}):
\GlsAddXdyLocation{section}{:sep "[" "arabic-numbers" :sep "]"
"arabic-numbers"
}
Note that if I have further decided to use the hyperref package and
want to redefine \theHsection as:
\renewcommand*{\theHsection}{\thepart.\thesection}
\renewcommand*{\thepart}{\Roman{part}}
then I need to modify the \GlsAddXdyLocation code above to:
\GlsAddXdyLocation["roman-numbers-uppercase"]{section}{:sep "["
"arabic-numbers" :sep "]" "arabic-numbers"
}
Since \Roman will result in an empty string if the counter is zero, it’s
a good idea to add an extra location to catch this:
\GlsAddXdyLocation{zero.section}{:sep "["
"arabic-numbers" :sep "]" "arabic-numbers"
}
112
11 Xindy
This example is illustrated in the sample file samplexdy2.tex.
Example 16 (Locations as Words not Digits)
Suppose I want the page numbers written as words rather than digits and I use the fmtcount package to do this. I can redefine \thepage
as follows:
\renewcommand*{\thepage}{\Numberstring{page}}
This gets expanded to \protect \Numberstringnum {hni} where
hni is the Arabic page number. This means that I need to define a new
location that has that form:
\GlsAddXdyLocation{Numberstring}{:sep "\string\protect\space
\string\Numberstringnum\space\glsopenbrace"
"arabic-numbers" :sep "\glsclosebrace"}
Note that it’s necessary to use \space to indicate that spaces also
appear in the format, since, unlike TEX, xindy doesn’t ignore spaces
after control sequences.
Note that \GlsAddXdyLocation{hnamei}{hdefinitioni} will define commands in the form:
\glsXhcounteriXhnamei{hHprefixi}{hlocationi}
for each counter that has been identified either by the counter package
option, the hcounteri option for \newglossary or in the argument of
\GlsAddXdyCounters.
The first argument hHprefixi is only relevant when used with
the hyperref package and indicates that \thehHcounteri is given by
\Hprefix.\thehcounteri. The sample file samplexdy.tex, which
comes with the glossaries package, uses the default page counter for
locations, and it uses the default \glsnumberformat and a custom
\hyperbfit format. A new xindy location called Numberstring,
as illustrated above, is defined to make the page numbers appear as “One”, “Two”, etc. In order for the location numbers to
hyperlink to the relevant pages, I need to redefine the necessary
\glsXhcounteriXhformati commands:
\renewcommand{\glsXpageXglsnumberformat}[2]{%
\linkpagenumber#2%
}
\renewcommand{\glsXpageXhyperbfit}[2]{%
113
11 Xindy
\textbf{\em\linkpagenumber#2}%
}
\newcommand{\linkpagenumber}[3]{\hyperlink{page.#3}{#1#2{#3}}}
In the number list, the locations are sorted according to type. The
default ordering is: roman-page-numbers (e.g. i), arabic-page-numbers
(e.g. 1), arabic-section-numbers (e.g. 1.1 if the compositor is a
full stop or 1-1 if the compositor is a hyphen1 ), alpha-page-numbers
(e.g. a), Roman-page-numbers (e.g. I), Alpha-page-numbers (e.g.
A), Appendix-page-numbers (e.g. A.1 if the Alpha compositor is
a full stop or A-1 if the Alpha compositor is a hyphen2 ), user defined
location names (as specified by \GlsAddXdyLocation in the order
in which they were defined), see (cross-referenced entries). This ordering can be changed using:
\GlsSetXdyLocationClassOrder
\GlsSetXdyLocationClassOrder{hlocation namesi}
where each location name is delimited by double quote marks and
separated by white space. For example:
\GlsSetXdyLocationClassOrder{
"arabic-page-numbers"
"arabic-section-numbers"
"roman-page-numbers"
"Roman-page-numbers"
"alpha-page-numbers"
"Alpha-page-numbers"
"Appendix-page-numbers"
"see"
}
Note that \GlsSetXdyLocationClassOrder has no effect if
\noist is used or if \makeglossaries is omitted.
\GlsSetXdyLocationClassOrder must be used before
\makeglossaries.
If a number list consists of a sequence of consecutive numbers, the
range will be concatenated. The number of consecutive locations that
causes a range formation defaults to 2, but can be changed using:
1 see
2 see
\setCompositor described in Section 3
\setAlphaCompositor described in Section 3
114
11 Xindy
\GlsSetXdyMinRangeLength
\GlsSetXdyMinRangeLength{hni}
For example:
\GlsSetXdyMinRangeLength{3}
The argument may also be the keyword none, to indicate that there
should be no range formations. See the xindy manual for further
details on range formations.
Note that \GlsSetXdyMinRangeLength has no effect if
\noist is used or if \makeglossaries is omitted.
\GlsSetXdyMinRangeLength must be used before
\makeglossaries.
See Section 5 for further details.
11.3 Glossary Groups
The glossary is divided into groups according to the first letter of the
sort key. The glossaries package also adds a number group by default,
unless you suppress it in the xindy package option. For example:
\usepackage[xindy={glsnumbers=false}]{glossaries}
Any entry that doesn’t go in one of the letter groups or the number
group is placed in the default group.
If you have a number group, the default behaviour is to locate it
before the “A” letter group. If you are not using a Roman alphabet,
you can change this using:
\GlsSetXdyFirstLetterAfterDigits
\GlsSetXdyFirstLetterAfterDigits{hletteri}
Note that \GlsSetXdyFirstLetterAfterDigits has no
effect if \noist is used or if \makeglossaries is omitted.
\GlsSetXdyFirstLetterAfterDigits must be used before
\makeglossaries.
115
12 Defining New Glossaries
A new glossary can be defined using:
\newglossary
\newglossary[hlog-exti]{hnamei}{hin-exti}{hout-exti}{htitlei}
[hcounteri]
where hnamei is the label to assign to this glossary. The arguments hin-exti and hout-exti specify the extensions to give to the input and output files for that glossary, htitlei is the default title for
this new glossary and the final optional argument hcounteri specifies
which counter to use for the associated number lists (see also Section 5). The first optional argument specifies the extension for the
makeindex or xindy transcript file (this information is only used by
makeglossaries which picks up the information from the auxiliary
file).
The glossary label hnamei must not contain any active characters.
It’s generally best to stick with just characters that have category
code 11 (typically a, . . . , z and A, . . . , Z).
You can also use:
\altnewglossary
\altnewglossary{hnamei}{htagi}{htitlei}[hcounteri]
This is equivalent to
\newglossary[htagi-glg]{hnamei}{htagi-gls}{htagi-glo}{htitlei}[hcounteri]
Note that the main (default) glossary is automatically created as:
\newglossary{main}{gls}{glo}{\glossaryname}
so it can be identified by the label main (unless the nomain package
option is used). Using the acronym package option is equivalent to:
\newglossary[alg]{acronym}{acr}{acn}{\acronymname}
\acronymtype
so it can be identified by the label acronym. If you are not sure
whether the acronym option has been used, you can identify the list of
acronyms by the command \acronymtype which is set to acronym,
116
12 Defining New Glossaries
if the acronym option has been used, otherwise it is set to main. Note
that if you are using the main glossary as your list of acronyms, you
need to declare it as a list of acronyms using the package option
acronymlists.
The symbols package option creates a new glossary with the label
symbols using:
\newglossary[slg]{symbols}{sls}{slo}{\glssymbolsgroupname}
and the numbers package option creates a new glossary with the label
numbers using:
\newglossary[nlg]{numbers}{nls}{nlo}{\glsnumbersgroupname}
All glossaries must be defined before \makeglossaries to
ensure that the relevant output files are opened.
See Section 1.2.1 if you want to redefine \glossaryname,
especially if you are using babel or translator. (Similarly for
\glssymbolsgroupname and \glsnumbersgroupname.)
117
13 Acronyms
You may have noticed in Section 4 that when you specify a new entry,
you can specify alternate text to use when the term is first used in the
document. This provides a useful means to define acronyms. For
convenience, the glossaries package defines the command:
\newacronym
\newacronym[hkey-val listi]{hlabeli}{habbrvi}{hlongi}
This uses \newglossaryentry to create an entry with the given
label in the glossary given by \acronymtype. You can specify a different glossary using the type key within the optional argument. The
\newacronym command also uses the long, longplural, short and shortplural keys in \newglossaryentry to store the long and abbreviated
forms and their plurals.
If you haven’t identified the specified glossary type as a list of
acronyms (via the package option acronymlists or the command
\DeclareAcronymList, see Section 2.5) \newacronym will
add it to the list and reset the display style for that glossary via
\defglsentryfmt. If you have a mixture of acronyms and
regular entries within the same glossary, care is needed if you
want to change the display style: you must first identify that
glossary as a list of acronyms and then use \defglsentryfmt
(not redefine \glsentryfmt) before defining your entries.
The optional argument {hkey-val listi} allows you to specify keys
such as description (when used with one of the styles that require a description, described in Section 13.1) or you can override plural forms
of habbrvi or hlongi using the shortplural or longplural keys. For example:
\newacronym[longplural={diagonal matrices}]%
{dm}{DM}{diagonal matrix}
If the first use uses the plural form, \glspl{dm} will display: diagonal matrices (DMs). If you want to use the longplural or shortplural
keys, I recommend you use \setacronymstyle to set the display
style rather than using one of the pre-version 4.02 acronym styles.
118
13 Acronyms
Since \newacronym uses \newglossaryentry, you can use
commands like \gls and \glsreset as with any other glossary entry.
Since \newacronym sets type=\acronymtype, if you want to
load a file containing acronym definitions using
\loadglsentries[htypei]{hfilenamei}, the optional argument
htypei will not have an effect unless you explicitly set the type as
type=\glsdefaulttype in the optional argument to
\newacronym. See Section 4.6.
Example 17 (Defining an Acronym)
The following defines the acronym IDN:
\newacronym{idn}{IDN}{identification number}
\gls{idn} will produce “identification number (IDN)” on first use
and “IDN” on subsequent uses. If you want to use one of the smallcaps acronym styles, described in Section 13.1, you need to use lower
case characters for the shortened form:
\newacronym{idn}{idn}{identification number}
Now \gls{idn} will produce “identification number (IDN)” on first
use and “IDN” on subsequent uses.
There are commands similar to \glstext (described in Section 6)
that allow you to access just the short form, just the long form or the
full form, without affecting the first use flag. (Note that the full form
isn’t necessarily the same as the text produced on first use.)
Although these commands are similar to commands such as
\glstext, they behave more like \glsdisp (except for the first
use behaviour) in that the display is governed by \defentryfmt
with \glscustomtext set as appropriate.
\acrshort
\acrshort[hoptionsi]{hlabeli}[hinserti]
This displays the short form (within the argument of \acronymfont)
for the entry given by hlabeli. The optional arguments are the same as
119
13 Acronyms
those for \glstext. There is also a starred version to suppress the
hyperlink. There are also analogous upper case variants:
\Acrshort
\Acrshort[hoptionsi]{hlabeli}[hinserti]
\ACRshort
\ACRshort[hoptionsi]{hlabeli}[hinserti]
There are also plural versions:
\acrshortpl
\acrshortpl[hoptionsi]{hlabeli}[hinserti]
\Acrshortpl
\Acrshortpl[hoptionsi]{hlabeli}[hinserti]
\ACRshortpl
\ACRshortpl[hoptionsi]{hlabeli}[hinserti]
Similarly for the long form:
\acrlong
\acrlong[hoptionsi]{hlabeli}[hinserti]
This displays the long form for the entry given by hlabeli. The optional arguments are the same as before. There is also a starred version to suppress the hyperlink. There are also analogous upper case
variants:
\Acrlong
\Acrlong[hoptionsi]{hlabeli}[hinserti]
\ACRlong
\ACRlong[hoptionsi]{hlabeli}[hinserti]
Again there are also plural versions:
\acrlongpl
\acrlongpl[hoptionsi]{hlabeli}[hinserti]
\Acrlongpl
\Acrlongpl[hoptionsi]{hlabeli}[hinserti]
\ACRlongpl
\ACRlongpl[hoptionsi]{hlabeli}[hinserti]
120
13 Acronyms
And for the full form:
\acrfull
\acrfull[hoptionsi]{hlabeli}[hinserti]
This defaults to hlongi (\acronymfont{hshorti}). The format (including hyperlinks) can be modified by redefining:
\acrfullfmt
\acrfullfmt{hoptionsi}{hlabeli}{hinserti}
There are also analogous upper case variants:
\Acrfull
\Acrfull[hoptionsi]{hlabeli}[hinserti]
\ACRfull
\ACRfull[hoptionsi]{hlabeli}[hinserti]
The formats (including hyperlinks) can be modified by redefining:
\Acrfullfmt
\Acrfullfmt{hoptionsi}{hlabeli}{hinserti}
\ACRfullfmt
\ACRfullfmt{hoptionsi}{hlabeli}{hinserti}
As before there are also plural versions:
\acrfullpl
\acrfullpl[hoptionsi]{hlabeli}[hinserti]
\Acrfullpl
\Acrfullpl[hoptionsi]{hlabeli}[hinserti]
\ACRfullpl
\ACRfullpl[hoptionsi]{hlabeli}[hinserti]
The formats (including hyperlinks) can be modified by redefining:
\acrfullplfmt
\acrfullplfmt{hoptionsi}{hlabeli}{hinserti}
\Acrfullplfmt
\Acrfullplfmt{hoptionsi}{hlabeli}{hinserti}
\ACRfullplfmt
\ACRfullplfmt{hoptionsi}{hlabeli}{hinserti}
121
13 Acronyms
If you find the above commands too cumbersome to write, you
can use the shortcuts package option to activate the shorter command
names listed in table 13.1.
Table 13.1: Synonyms provided by the package option shortcuts
Shortcut Command
\acs
\Acs
\acsp
\Acsp
\acl
\Acl
\aclp
\Aclp
\acf
\Acf
\acfp
\Acfp
\ac
\Ac
\acp
\Acp
Equivalent Command
\acrshort
\Acrshort
\acrshortpl
\Acrshortpl
\acrlong
\Acrlong
\acrlongpl
\Acrlongpl
\acrfull
\Acrfull
\acrfullpl
\Acrfullpl
\gls
\Gls
\glspl
\Glspl
It is also possible to access the long and short forms without
adding information to the glossary using commands analogous to
\glsentrytext (described in Section 9).
The commands that convert the first letter to upper case come
with the same caveats as those for analogous commands like
\Glsentrytext (non-expandable, can’t be used in PDF
bookmarks, care needs to be taken if the first letter is an accented
character etc). See Section 9.
The long form can be accessed using:
\glsentrylong
\glsentrylong{hlabeli}
or, with the first letter converted to upper case:
\Glsentrylong
\Glsentrylong{hlabeli}
Plural forms:
122
13 Acronyms
\glsentrylongpl
\glsentrylongpl{hlabeli}
\Glsentrylongpl
\Glsentrylongpl{hlabeli}
Similarly, to access the short form:
\glsentryshort
\glsentryshort{hlabeli}
or, with the first letter converted to upper case:
\Glsentryshort
\Glsentryshort{hlabeli}
Plural forms:
\glsentryshortpl
\glsentryshortpl{hlabeli}
\Glsentryshortpl
\Glsentryshortpl{hlabeli}
And the full form, hlongi (hshorti), can be obtained using:
\glsentryfull
\glsentryfull{hlabeli}
\Glsentryfull
\Glsentryfull{hlabeli}
\glsentryfullpl
\glsentryfullpl{hlabeli}
\Glsentryfullpl
\Glsentryfullpl{hlabeli}
(These may be redefined by the acronym style.)
13.1 Changing the Acronym Style
It may be that the default style doesn’t suit your requirements in
which case you can switch to another styles via
\setacronymstyle
\setacronymstyle{hstyle namei}
123
13 Acronyms
where hstyle namei is the name of the required style.
You must use \setacronymstyle before you define the
acronyms with \newacronym. If you have multiple glossaries
representing lists of acronyms, you must use
\setacronymstyle after using \DeclareAcronymList.
Note that unlike the default behaviour of \newacronym, the styles
used via \setacronymstyle don’t use the first or text keys, but instead they use \defglsentryfmt to set a custom format that uses
the long and short keys (or their plural equivalents). This means that
these styles cope better with plurals that aren’t formed by simply appending the singular form with the letter “s”. In fact, most of the
predefined styles use \glsgenacfmt and modify the definitions of
commands like \genacrfullformat.
Note that when you use \setacronymstyle the name key is set
to
\acronymentry
\acronymentry{hlabeli}
and the sort key is set to
\acronymsort
\acronymsort{hshorti}{hlongi}
These commands are redefined by the acronym styles. However,
you can redefine them again after the style has been set but before you use \newacronym. Protected expansion is performed on
\acronymsort when the entry is defined.
13.1.1 Predefined Acronym Styles
The glossaries package provides a number of predefined styles. These
styles apply
\firstacronymfont
\firstacronymfont{htexti}
to the short form on first use and
\acronymfont
\acronymfont{htexti}
on subsequent use. The styles modify the definition of \acronymfont
as required, but \firstacronymfont is only set once by the package when it’s loaded. By default \firstacronymfont{htexti} is
124
13 Acronyms
the same as \acronymfont{htexti}. If you want the short form displayed differently on first use, you can redefine \firstacronymfont
independently of the acronym style.
The predefined styles that contain sc in their name (for example
long-sc-short) redefine \acronymfont to use \textsc (so the short
form needs to be specified in lower case).
Some fonts don’t support bold smallcaps, so you may need to
redefine \glsnamefont (see Section 10) to switch to medium
weight if you are using a glossary style that displays entry names
in bold and you have chosen an acronym style that uses
\textsc.
The predefined styles that contain sm in their name (for example
long-sm-short) redefine \acronymfont to use \textsmaller.
Note that the glossaries package doesn’t define or load any
package that defines \textsmaller. If you use one of the
acronym styles that set \acronymfont to \textsmaller you
must explicitly load the relsize package or otherwise define
\textsmaller.
The remaining predefined styles redefine \acronymfont{htexti}
to simply do its argument htexti.
In most cases, the predefined styles adjust \acrfull and
\glsentryfull (and their plural and upper case variants) to
reflect the style. The only exceptions to this are the dua and
footnote styles (and their variants).
The following styles are supplied by the glossaries package:
• long-short, long-sc-short, long-sm-short:
With these three styles, acronyms are displayed in the form
hlongi (\firstacronymfont{hshorti})
on first use and
\acronymfont{hshorti}
on subsequent use. They also set \acronymsort{hshorti}{hlongi}
125
13 Acronyms
to just hshorti. This means that the acronyms are sorted according to their short form. In addition, \acronymentry{hlabeli}
is set to just the short form (enclosed in \acronymfont) and
the description key is set to the long form.
• short-long, sc-short-long, sm-short-long:
These three styles are analogous to the above three styles, except
the display order is swapped to
\firstacronymfont{hshorti} (hlongi)
on first use.
Note, however, that \acronymsort and \acronymentry are
the same as for the hlongi (hshorti) styles above, so the acronyms
are still sorted according to the short form.
• long-short-desc, long-sc-short-desc, long-sm-short-desc:
These are like the long-short, long-sc-short and long-sm-short styles
described above, except that the description key must be supplied
in the optional argument of \newacronym. They also redefine
\acronymentry to {hlongi} (\acronymfont{hshorti}) and
redefine \acronymsort{hshorti}{hlongi} to just hlongi. This
means that the acronyms are sorted according to the long form,
and in the list of acronyms the name field has the long form followed by the short form in parentheses. I recommend you use
a glossary style such as altlist with these acronym styles to allow
for the long name field.
• short-long-desc, sc-short-long-desc, sm-short-long-desc:
These styles are analogous to the above three styles, but the first
use display style is:
\firstacronymfont{hshorti} (hlongi)
The definitions of \acronymsort and \acronymentry are
the same as those for long-short-desc etc.
• dua, dua-desc:
These styles always display (via \gls) the long form regardless
of whether the entry has been used or not. However, \acrfull
and \glsentryfull will display hlongi (\acronymfont{hshorti}).
In the case of dua, the name and sort keys are set to the short
126
13 Acronyms
form and the description is set to the long form. In the case
of dua-desc, the name and sort keys are set to the long form
and the description is supplied in the optional argument of
\newacronym.
• footnote, footnote-sc, footnote-sm:
These three styles set the first use display to:
\firstacronymfont{hshorti}\footnote{hlongi}
However, \acrfull and \glsentryfull are set to \acronymfont{hshorti}
(hlongi). (And similarly for plural and upper case forms.) On
subsequent use the display is:
\acronymfont{hshorti}
The sort and name keys are set to the short form, and the description is set to the long form.
In order to avoid nested hyperlinks on first use the footnote
styles automatically implement hyperfirst=false.
• footnote-desc, footnote-sc-desc, footnote-sm-desc:
These three styles are similar to the previous three styles, but
the description has to be supplied in the optional argument of
\newacronym. The name key is set to the long form followed by
the short form in parentheses and the sort key is set to the long
form. This means that the acronyms will be sorted according to
the long form. In addition, since the name will typically be quite
wide it’s best to choose a glossary style that can accommodate
this, such as altlist.
Example 18 (Adapting a Predefined Acronym Style)
Suppose I want to use the footnote-sc-desc style, but I want the name
key set to the short form followed by the long form in parentheses
and the sort key set to the short form. Then I need to specify the
footnote-sc-desc style:
\setacronymstyle{footnote-sc-desc}
127
13 Acronyms
and then redefine \acronymsort and \acronymentry:
\renewcommand*{\acronymsort}[2]{#1}% sort by short form
\renewcommand*{\acronymentry}[1]{%
\acronymfont{\glsentryshort{#1}}\space (\glsentrylong{#1})}%
(I’ve used \space for extra clarity, but you can just use an actual
space instead.)
Since the default Computer Modern fonts don’t support bold
smallcaps, I’m also going to redefine \acronymfont so that it always switches to medium weight to ensure the smallcaps setting is
used:
\renewcommand*{\acronymfont}[1]{\textmd{\scshape #1}}
This isn’t necessary if you use a font that supports bold smallcaps.
The sample file sampleFnAcrDesc.tex illustrates this example.
13.1.2 Defining A Custom Acronym Style
You may find that the predefined acronyms styles that come with the
glossaries package don’t suit your requirements. In this case you can
define your own style using:
\newacronymstyle
\newacronymstyle{hstyle namei}{hdisplayi}{hdefinitionsi}
where hstyle namei is the name of the new style (avoid active characters). The second argument, hdisplayi, is equivalent to the mandatory
argument of \defglsentryfmt. You can simply use \glsgenacfmt
or you can customize the display using commands like \ifglsused,
\glsifplural and \glscapscase. (See Section 6.1 for further details.) If the style is likely to be used with a mixed glossary (that
is entries in that glossary are defined both with \newacronym and
\newglossaryentry) then you can test if the entry is an acronym
and use \glsgenacfmt if it is or \glsgenentryfmt if it isn’t. For
example, the long-short style sets hdisplayi as
\ifglshaslong{\glslabel}{\glsgenacfmt}{\glsgenentryfmt}%
(You can use \ifglshasshort instead of \ifglshaslong to test
if the entry is an acronym if you prefer.)
The third argument, hdefinitionsi, can be used to redefine the commands that affect the display style, such as \acronymfont or, if
hdisplayi uses \glsgenacfmt, \genacrfullformat and its variants.
128
13 Acronyms
Note that \setacronymstyle redefines \glsentryfull and
\acrfullfmt to use \genacrfullformat (and similarly for the
plural and upper case variants). If this isn’t appropriate for the style
(as in the case of styles like footnote and dua) \newacronymstyle
should redefine these commands within hdefinitionsi.
Within \newacronymstyle’s hdefinitionsi argument you can also
redefine
\GenericAcronymFields
\GenericAcronymFields
\glslabeltok
\glslongtok
\glsshorttok
This is a list of additional fields to be set in \newacronym. You can
use the following token registers to access the entry label, long form
and short form: \glslabeltok, \glslongtok and \glsshorttok.
As with all TEX registers, you can access their values by preceding the
register with \the. For example, the long-short style does:
\renewcommand*{\GenericAcronymFields}{%
description={\the\glslongtok}}%
which sets the description field to the long form of the acronym
whereas the long-short-desc style does:
\renewcommand*{\GenericAcronymFields}{}%
since the description needs to be specified by the user.
It may be that you want to define a new acronym style that’s based
on an existing style. Within hdisplayi you can use
\GlsUseAcrEntryDispStyle
\GlsUseAcrEntryDispStyle{hstyle namei}
to use the hdisplayi definition from the style given by hstyle namei.
Within hdefinitionsi you can use
\GlsUseAcrStyleDefs
\GlsUseAcrStyleDefs{hstyle namei}
to use the hdefinitionsi from the style given by hstyle namei. For example, the long-sc-short acronym style is based on the long-short style
with minor modifications (remember to use ## instead of # within
hdefinitionsi):
\newacronymstyle{long-sc-short}%
{% use the same display as "long-short"
\GlsUseAcrEntryDispStyle{long-short}%
}%
{% use the same definitions as "long-short"
\GlsUseAcrStyleDefs{long-short}%
129
13 Acronyms
% Minor modifications:
\renewcommand{\acronymfont}[1]{\textsc{##1}}%
\renewcommand*{\acrpluralsuffix}{\glstextup{\glspluralsuffix}}%
}
\glstextup
(\glstextup is used to cancel the effect of \textsc. This defaults
to \textulc, if defined, otherwise \textup. For example, the plural
of SVM should be rendered as SVMs rather than SVMS.)
Example 19 (Defining a Custom Acronym Style)
Suppose I want my acronym on first use to have the short form in
the text and the long form with the description in a footnote. Suppose
also that I want the short form to be put in small caps in the main
body of the document, but I want it in normal capitals in the list of
acronyms. In my list of acronyms, I want the long form as the name
with the short form in brackets followed by the description. That is,
in the text I want \gls on first use to display:
\textsc{habbrvi}\footnote{hlongi: hdescriptioni}
on subsequent use:
\textsc{habbrvi}
and in the list of acronyms, each entry will be displayed in the form:
hlongi (hshorti) hdescriptioni
Let’s suppose it’s possible that I may have a mixed glossary. I can
check this in the second argument of \newacronymstyle using:
\ifglshaslong{\glslabel}{\glsgenacfmt}{\glsgenentryfmt}%
This will use \glsgenentryfmt if the entry isn’t an acronym, otherwise it will use \glsgenacfmt. The third argument (hdefinitionsi)
of \newacronymstyle needs to redefine \genacrfullformat etc
so that the first use displays the short form in the text with the long
form in a footnote followed by the description. This is done as follows
(remember to use ## instead of #):
% No case change, singular first use:
\renewcommand*{\genacrfullformat}[2]{%
\firstacronymfont{\glsentryshort{##1}}##2%
\footnote{\glsentrylong{##1}: \glsentrydesc{##1}}%
}%
% First letter upper case, singular first use:
130
13 Acronyms
\renewcommand*{\Genacrfullformat}[2]{%
\firstacronymfont{\Glsentryshort{##1}}##2%
\footnote{\glsentrylong{##1}: \glsentrydesc{##1}}%
}%
% No case change, plural first use:
\renewcommand*{\genplacrfullformat}[2]{%
\firstacronymfont{\glsentryshortpl{##1}}##2%
\footnote{\glsentrylongpl{##1}: \glsentrydesc{##1}}%
}%
% First letter upper case, plural first use:
\renewcommand*{\Genplacrfullformat}[2]{%
\firstacronymfont{\Glsentryshortpl{##1}}##2%
\footnote{\glsentrylongpl{##1}: \glsentrydesc{##1}}%
}%
If you think it inappropriate for the short form to be capitalised at the
start of a sentence you can change the above to:
% No case change, singular first use:
\renewcommand*{\genacrfullformat}[2]{%
\firstacronymfont{\glsentryshort{##1}}##2%
\footnote{\glsentrylong{##1}: \glsentrydesc{##1}}%
}%
% No case change, plural first use:
\renewcommand*{\genplacrfullformat}[2]{%
\firstacronymfont{\glsentryshortpl{##1}}##2%
\footnote{\glsentrylongpl{##1}: \glsentrydesc{##1}}%
}%
\let\Genacrfullformat\genacrfullformat
\let\Genplacrfullformat\genplacrfullformat
Another variation is to use \Glsentrylong and \Glsentrylongpl
in the footnote instead of \glsentrylong and \glsentrylongpl.
Now let’s suppose that commands such as \glsentryfull and
\acrfull shouldn’t use a footnote, but instead use the format:
hlongi (hshorti). This means that the style needs to redefine \glsentryfull,
\acrfullfmt and their plural and upper case variants.
First, the non-linking commands:
\renewcommand*{\glsentryfull}[1]{%
\glsentrylong{##1}\space
(\acronymfont{\glsentryshort{##1}})%
}%
\renewcommand*{\Glsentryfull}[1]{%
\Glsentrylong{##1}\space
(\acronymfont{\glsentryshort{##1}})%
}%
\renewcommand*{\glsentryfullpl}[1]{%
\glsentrylongpl{##1}\space
131
13 Acronyms
(\acronymfont{\glsentryshortpl{##1}})%
}%
\renewcommand*{\Glsentryfullpl}[1]{%
\Glsentrylongpl{##1}\space
(\acronymfont{\glsentryshortpl{##1}})%
}%
Now for the linking commands:
\renewcommand*{\acrfullfmt}[3]{%
\glslink[##1]{##2}{%
\glsentrylong{##2}##3\space
(\acronymfont{\glsentryshort{##2}})%
}%
}%
\renewcommand*{\Acrfullfmt}[3]{%
\glslink[##1]{##2}{%
\Glsentrylong{##2}##3\space
(\acronymfont{\glsentryshort{##2}})%
}%
}%
\renewcommand*{\ACRfullfmt}[3]{%
\glslink[##1]{##2}{%
\MakeTextUppercase{%
\glsentrylong{##2}##3\space
(\acronymfont{\glsentryshort{##2}})%
}%
}%
}%
\renewcommand*{\acrfullplfmt}[3]{%
\glslink[##1]{##2}{%
\glsentrylongpl{##2}##3\space
(\acronymfont{\glsentryshortpl{##2}})%
}%
}%
\renewcommand*{\Acrfullplfmt}[3]{%
\glslink[##1]{##2}{%
\Glsentrylongpl{##2}##3\space
(\acronymfont{\glsentryshortpl{##2}})%
}%
}%
\renewcommand*{\ACRfullplfmt}[3]{%
\glslink[##1]{##2}{%
\MakeTextUppercase{%
\glsentrylongpl{##2}##3\space
(\acronymfont{\glsentryshortpl{##2}})%
}%
}%
}%
132
13 Acronyms
(This may cause problems with long hyperlinks, in which case adjust
the definitions so that, for example, only the short form is inside the
argument of \glslink.)
The style also needs to redefine \acronymsort so that the acronyms
are sorted according to the long form:
\renewcommand*{\acronymsort}[2]{##2}%
If you prefer them to be sorted according to the short form you can
change the above to:
\renewcommand*{\acronymsort}[2]{##1}%
The acronym font needs to be set to \textsc and the plural suffix
adjusted so that the “s” suffix in the plural short form doesn’t get
converted to smallcaps:
\renewcommand*{\acronymfont}[1]{\textsc{##1}}%
\renewcommand*{\acrpluralsuffix}{\glstextup{\glspluralsuffix}}%
There are a number of ways of dealing with the format in the list of
acronyms. The simplest way is to redefine \acronymentry to the
long form followed by the upper case short form in parentheses:
\renewcommand*{\acronymentry}[1]{%
\Glsentrylong{##1}\space
(\MakeTextUppercase{\glsentryshort{##1}})}%
(I’ve used \Glsentrylong instead of \glsentrylong to capitalise
the name in the glossary.)
An alternative approach is to set \acronymentry to just the long
form and redefine \GenericAcronymFields to set the symbol key
to the short form and use a glossary style that displays the symbol in
parentheses after the name (such as the tree style) like this:
\renewcommand*{\acronymentry}[1]{\Glsentrylong{##1}}%
\renewcommand*{\GenericAcronymFields}{%
symbol={\protect\MakeTextUppercase{\the\glsshorttok}}}%
I’m going to use the first approach and set \GenericAcronymFields
to do nothing:
\renewcommand*{\GenericAcronymFields}{}%
Finally, this style needs to switch off hyperlinks on first use to avoid
nested links:
\glshyperfirstfalse
133
13 Acronyms
Putting this all together:
\newacronymstyle{custom-fn}% new style name
{%
\ifglshaslong{\glslabel}{\glsgenacfmt}{\glsgenentryfmt}%
}%
{%
\renewcommand*{\GenericAcronymFields}{}%
\glshyperfirstfalse
\renewcommand*{\genacrfullformat}[2]{%
\firstacronymfont{\glsentryshort{##1}}##2%
\footnote{\glsentrylong{##1}: \glsentrydesc{##1}}%
}%
\renewcommand*{\Genacrfullformat}[2]{%
\firstacronymfont{\Glsentryshort{##1}}##2%
\footnote{\glsentrylong{##1}: \glsentrydesc{##1}}%
}%
\renewcommand*{\genplacrfullformat}[2]{%
\firstacronymfont{\glsentryshortpl{##1}}##2%
\footnote{\glsentrylongpl{##1}: \glsentrydesc{##1}}%
}%
\renewcommand*{\Genplacrfullformat}[2]{%
\firstacronymfont{\Glsentryshortpl{##1}}##2%
\footnote{\glsentrylongpl{##1}: \glsentrydesc{##1}}%
}%
\renewcommand*{\glsentryfull}[1]{%
\glsentrylong{##1}\space
(\acronymfont{\glsentryshort{##1}})%
}%
\renewcommand*{\Glsentryfull}[1]{%
\Glsentrylong{##1}\space
(\acronymfont{\glsentryshort{##1}})%
}%
\renewcommand*{\glsentryfullpl}[1]{%
\glsentrylongpl{##1}\space
(\acronymfont{\glsentryshortpl{##1}})%
}%
\renewcommand*{\Glsentryfullpl}[1]{%
\Glsentrylongpl{##1}\space
(\acronymfont{\glsentryshortpl{##1}})%
}%
\renewcommand*{\acrfullfmt}[3]{%
\glslink[##1]{##2}{%
\glsentrylong{##2}##3\space
(\acronymfont{\glsentryshort{##2}})%
}%
}%
\renewcommand*{\Acrfullfmt}[3]{%
\glslink[##1]{##2}{%
\Glsentrylong{##2}##3\space
134
13 Acronyms
(\acronymfont{\glsentryshort{##2}})%
}%
}%
\renewcommand*{\ACRfullfmt}[3]{%
\glslink[##1]{##2}{%
\MakeTextUppercase{%
\glsentrylong{##2}##3\space
(\acronymfont{\glsentryshort{##2}})%
}%
}%
}%
\renewcommand*{\acrfullplfmt}[3]{%
\glslink[##1]{##2}{%
\glsentrylongpl{##2}##3\space
(\acronymfont{\glsentryshortpl{##2}})%
}%
}%
\renewcommand*{\Acrfullplfmt}[3]{%
\glslink[##1]{##2}{%
\Glsentrylongpl{##2}##3\space
(\acronymfont{\glsentryshortpl{##2}})%
}%
}%
\renewcommand*{\ACRfullplfmt}[3]{%
\glslink[##1]{##2}{%
\MakeTextUppercase{%
\glsentrylongpl{##2}##3\space
(\acronymfont{\glsentryshortpl{##2}})%
}%
}%
}%
\renewcommand*{\acronymfont}[1]{\textsc{##1}}%
\renewcommand*{\acrpluralsuffix}{\glstextup{\glspluralsuffix}}%
\renewcommand*{\acronymsort}[2]{##2}%
\renewcommand*{\acronymentry}[1]{%
\Glsentrylong{##1}\space
(\MakeTextUppercase{\glsentryshort{##1}})}%
}
Now I need to specify that I want to use this new style:
\setacronymstyle{custom-fn}
I also need to use a glossary style that suits this acronym style, for
example altlist:
\setglossarystyle{altlist}
Once the acronym style has been set, I can define my acronyms:
135
13 Acronyms
\newacronym[description={set of tags for use in
developing hypertext documents}]{html}{html}{Hyper
Text Markup Language}
\newacronym[description={language used to describe the
layout of a document written in a markup language}]{css}
{css}{Cascading Style Sheet}
The sample file sample-custom-acronym.tex illustrates this
example.
13.2 Displaying the List of Acronyms
The list of acronyms is just like any other type of glossary and can be
displayed on its own using
\printglossary[type=\acronymtype]
or with all the other glossaries using \printglossaries. (If you
use the acronym package option you can also use
\printacronyms[hoptionsi]
as a synonym for
\printglossary[type=\acronymtype,hoptionsi]
See Section 2.5.)
However, care must be taken to choose a glossary style that’s appropriate to your acronym style. Alternatively, you can define your
own custom style (see Section 15.2 for further details).
13.3 Upgrading From the glossary Package
Users of the obsolete glossary package may recall that the syntax used
to define new acronyms has changed with the replacement glossaries
package. In addition, the old glossary package created the command
\hacr-namei when defining the acronym hacr-namei.
In order to facilitate migrating from the old package to the new one,
the glossaries package1 provides the command:
\oldacronym
\oldacronym[hlabeli]{habbrvi}{hlongi}{hkey-val listi}
1 as
from version 1.18
136
13 Acronyms
This uses the same syntax as the glossary package’s method of defining acronyms. It is equivalent to:
\newacronym[hkey-val listi]{hlabeli}{habbrvi}{hlongi}
In addition, \oldacronym also defines the commands \hlabeli, which
is equivalent to \gls{hlabeli}, and \hlabeli*, which is equivalent to
\Gls{hlabeli}. If hlabeli is omitted, habbrvi is used. Since commands
names must consist only of alphabetical characters, hlabeli must also
only consist of alphabetical characters. Note that \hlabeli doesn’t allow you to use the first optional argument of \gls or \Gls — you
will need to explicitly use \gls or \Gls to change the settings.
Recall that, in general, LATEX ignores spaces following command
names consisting of alphabetical characters. This is also true for
\hlabeli unless you additionally load the xspace package, but be
aware that there are some issues with using xspace.2
The glossaries package doesn’t load the xspace package since there
are both advantages and disadvantages to using \xspace in \hlabeli.
If you don’t use the xspace package you need to explicitly force a
space using \ (backslash space) however you can follow \hlabeli
with additional text in square brackets (the final optional argument
to \gls). If you use the xspace package you don’t need to escape the
spaces but you can’t use the optional argument to insert text (you will
have to explicitly use \gls).
To illustrate this, suppose I define the acronym “abc” as follows:
\oldacronym{abc}{example acronym}{}
This will create the command \abc and its starred version \abc*.
Table 13.2 illustrates the effect of \abc (on subsequent use) according
to whether or not the xspace package has been loaded. As can be
seen from the final row in the table, the xspace package prevents the
optional argument from being recognised.
2 See
David Carlisle’s explanation in http://tex.stackexchange.com/
questions/86565/drawbacks-of-xspace
137
13 Acronyms
Table 13.2: The effect of using xspace with \oldacronym
Code
\abc.
\abc xyz
\abc\ xyz
\abc* xyz
\abc[’s] xyz
With xspace
abc.
abc xyz
abc xyz
Abc xyz
abc [’s] xyz
138
Without xspace
abc.
abcxyz
abc xyz
Abc xyz
abc’s xyz
14 Unsetting and Resetting Entry
Flags
When using \gls, \glspl and their upper case variants it is possible
that you may want to use the value given by the first key, even though
you have already used the glossary entry. Conversely, you may want
to use the value given by the text key, even though you haven’t used
the glossary entry. The former can be achieved by one of the following
commands:
\glsreset
\glslocalreset
\glsreset{hlabeli}
\glslocalreset{hlabeli}
while the latter can be achieved by one of the following commands:
\glsunset
\glslocalunset
\glsunset{hlabeli}
\glslocalunset{hlabeli}
You can also reset or unset all entries for a given glossary or list of
glossaries using:
\glsresetall
\glslocalresetall
\glsunsetall
\glslocalunsetall
\glsresetall[hglossary listi]
\glslocalresetall[hglossary listi]
\glsunsetall[hglossary listi]
\glslocalunsetall[hglossary listi]
139
14 Unsetting and Resetting Entry Flags
where hglossary listi is a comma-separated list of glossary labels. If
omitted, all defined glossaries are assumed. For example, to reset all
entries in the main glossary and the list of acronyms:
\glsresetall[main,acronym]
You can determine whether an entry’s first use flag is set using:
\ifglsused
\ifglsused{hlabeli}{htrue parti}{hfalse parti}
where hlabeli is the label of the required entry. If the entry has been
used, htrue parti will be done, otherwise hfalse parti will be done.
Be careful when using commands such as \gls within an
environment or command argument that gets processed multiple
times as it can cause unwanted side-effects when the first use
displayed text is different from subsequent use.
For example, the frame environment in beamer processes its argument for each overlay. This means that the first use flag will be unset
on the first overlay and subsequent overlays will use the non-first use
form.
Consider the following example:
\documentclass{beamer}
\usepackage{glossaries}
\newacronym{svm}{SVM}{support vector machine}
\begin{document}
\begin{frame}
\frametitle{Frame 1}
\begin{itemize}
\item<+-> \gls{svm}
\item<+-> Stuff.
\end{itemize}
\end{frame}
\end{document}
On the first overlay, \gls{svm} produces “support vector machine (SVM)” and then unsets the first use flag. When the second
overlay is processed, \gls{svm} now produces “SVM”, which is unlikely to be the desired effect. I don’t know anyway around this and
140
14 Unsetting and Resetting Entry Flags
the only suggestion I can give is to explicitly reset each acronym on
first use:
\begin{frame}
\frametitle{Frame 1}
\begin{itemize}
\item<+-> \glsreset{svm}\gls{svm}
\item<+-> Stuff.
\end{itemize}
\end{frame}
This is non-optimal, but the beamer class is too complex for me to
suggest an alternative solution.
The amsmath environments, such as align, also process their contents
multiple times, but the glossaries package now checks for this.
141
15 Glossary Styles
Glossaries vary from lists that simply contain a symbol with a terse
description to lists of terms or phrases with lengthy descriptions.
Some glossaries may have terms with associated symbols. Some may
have hierarchical entries. There is therefore no single style that fits
every type of glossary. The glossaries package comes with a number of pre-defined glossary styles, described in Section 15.1. You can
choose one of these that best suits your type of glossary or, if none of
them suit your document, you can defined your own style (see Section 15.2).
The glossary style can be set using the style key in the optional argument to \printglossary or using the command:
\setglossarystyle
\setglossarystyle{hstyle-namei}
(before the glossary is displayed).
Some of the predefined glossary styles may also be set using the
style package option, it depends if the package in which they are defined is automatically loaded by the glossaries package.
15.1 Predefined Styles
\glsdescwidth
\glspagelistwidth
The predefined styles can accommodate numbered level 0 (main) and
level 1 entries. See the package options entrycounter, counterwithin and
subentrycounter described in Section 2.3. There is a summary of available styles in table 15.1.
The tabular-like styles that allow multi-line descriptions and page
lists use the length \glsdescwidth to set the width of the description column and the length \glspagelistwidth to set the
width of the page list column.1 These will need to be changed using \setlength if the glossary is too wide. Note that the long4col
and super4col styles (and their header and border variations) don’t
use these lengths as they are designed for single line entries. Instead
you should use the analogous altlong4col and altsuper4col styles. If you
1 These
lengths will not be available if you use both the nolong and nosuper package
options or if you use the nostyles package option unless you explicitly load the
relevant package.
142
15 Glossary Styles
Table 15.1: Glossary Styles. An asterisk in the style name indicates anything that matches that doesn’t match any previously listed style (e.g. long3col* matches long3col,
long3colheader, long3colborder and long3colheaderborder). A
maximum level of 0 indicates a flat glossary (sub-entries
are displayed in the same way as main entries). Where the
maximum level is given as — there is no limit, but note
that makeindex imposes a limit of 2 sub-levels. If the
homograph column is checked, then the name is not displayed for sub-entries. If the symbol column is checked,
then the symbol will be displayed.
Style
listdotted
sublistdotted
list*
altlist*
long*3col*
long4col*
altlong*4col*
long*
super*3col*
super4col*
altsuper*4col*
super*
*index*
treenoname*
*tree*
*alttree*
inline
Maximum Level
0
1
1
1
1
1
1
1
1
1
1
1
2
—
—
—
1
143
Homograph
3
3
3
3
3
3
3
3
3
3
3
3
Symbol
3
3
3
3
3
3
3
3
15 Glossary Styles
want to explicitly create a line-break within a multi-line description
in a tabular-like style it’s better to use \newline instead of \\.
Note that if you use the style key in the optional argument to
\printglossary, it will override any previous style settings for the
given glossary, so if, for example, you do
\renewcommand*{\glsgroupskip}{}
\printglossary[style=long]
then the new definition of \glsgroupskip will not have an affect for
this glossary, as \glsgroupskip is redefined by style=long. Likewise, \setglossarystyle will also override any previous style
definitions, so, again
\renewcommand*{\glsgroupskip}{}
\setglossarystyle{long}
will reset \glsgroupskip back to its default definition for the
named glossary style (long in this case). If you want to modify the
styles, either use \newglossarystyle (described in the next section) or make the modifications after \setglossarystyle, e.g.:
\setglossarystyle{long}
\renewcommand*{\glsgroupskip}{}
As from version 3.03, you can now use the package option nogroupskip
to suppress the gap between groups for the default styles instead of
redefining \glsgroupskip.
All the styles except for the three- and four-column styles and the
listdotted style use the command
\glspostdescription
\glspostdescription
after the description. This simply displays a full stop by default.
To eliminate this full stop (or replace it with something else, say, a
comma) you will need to redefine \glspostdescription before
the glossary is displayed. Alternatively, you can suppress it for a
given entry by placing \nopostdesc in the entry’s description.
As from version 3.03 you can now use the package option nopostdot
to suppress this full stop.
15.1.1 List Styles
The styles described in this section are all defined in the package
glossary-list. Since they all use the description environment, they are
governed by the same parameters as that environment. These styles
all ignore the entry’s symbol. Note that these styles will automatically
be available unless you use the nolist or nostyles package options.
144
15 Glossary Styles
list The list style uses the description environment. The entry name is
placed in the optional argument of the \item command (so it
will usually appear in bold by default). The description follows,
and then the associated number list for that entry. The symbol is
ignored. If the entry has child entries, the description and number list follows (but not the name) for each child entry. Groups
are separated using \indexspace.
listgroup The listgroup style is like list but the glossary groups have
headings.
listhypergroup The listhypergroup style is like listgroup but has a navi-
gation line at the start of the glossary with links to each group
that is present in the glossary. This requires an additional run
through LATEX to ensure the group information is up to date. In
the navigation line, each group is separated by
\glshypernavsep
\glshypernavsep
which defaults to a vertical bar with a space on either side. For
example, to simply have a space separating each group, do:
\renewcommand*{\glshypernavsep}{\space}
Note that the hyper-navigation line is now (as from version
1.14) set inside the optional argument to \item instead of after
it to prevent a spurious space at the start. This can be changed
by redefining \glossaryheader, but note that this needs to
be done after the glossary style has been set.
altlist The altlist style is like list but the description starts on the line following the name. (As with the list style, the symbol is ignored.)
Each child entry starts a new line, but as with the list style, the
name associated with each child entry is ignored.
altlistgroup The altlistgroup style is like altlist but the glossary groups
have headings.
altlisthypergroup The altlisthypergroup style is like altlistgroup but has a
set of links to the glossary groups. The navigation line is the
same as that for listhypergroup, described above.
listdotted This style uses the description environment.2
Each entry
starts with \item[], followed by the name followed by a dot-
2 This
style was supplied by Axel Menzel.
145
15 Glossary Styles
ted line, followed by the description. Note that this style ignores
both the number list and the symbol. The length
\glslistdottedwidth
\glslistdottedwidth
governs where the description should start. This is a flat style,
so child entries are formatted in the same way as the parent
entries.
sublistdotted This is a variation on the listdotted style designed for hi-
erarchical glossaries. The main entries have just the name displayed. The sub entries are displayed in the same manner as
listdotted.
15.1.2 Longtable Styles
The styles described in this section are all defined in the package
glossary-long. Since they all use the longtable environment, they are
governed by the same parameters as that environment. Note that
these styles will automatically be available unless you use the nolong
or nostyles package options. These styles fully justify the description
and page list columns. If you want ragged right formatting instead,
use the analogous styles described in Section 15.1.3.
long The long style uses the longtable environment (defined by the
longtable package). It has two columns: the first column con-
tains the entry’s name and the second column contains the description followed by the number list. The entry’s symbol is
ignored. Sub groups are separated with a blank row. The width
of the first column is governed by the widest entry in that column. The width of the second column is governed by the length
\glsdescwidth. Child entries have a similar format to the
parent entries except that their name is suppressed.
longborder The longborder style is like long but has horizontal and ver-
tical lines around it.
longheader The longheader style is like long but has a header row.
longheaderborder The longheaderborder style is like longheader but has
horizontal and vertical lines around it.
long3col The long3col style is like long but has three columns. The first
column contains the entry’s name, the second column contains
the description and the third column contains the number list.
146
15 Glossary Styles
The entry’s symbol is ignored. The width of the first column
is governed by the widest entry in that column, the width of
the second column is governed by the length \glsdescwidth,
and the width of the third column is governed by the length
\glspagelistwidth.
long3colborder The long3colborder style is like the long3col style but has
horizontal and vertical lines around it.
long3colheader The long3colheader style is like long3col but has a
header row.
long3colheaderborder The long3colheaderborder style is like long3colheader
but has horizontal and vertical lines around it.
long4col The long4col style is like long3col but has an additional col-
umn in which the entry’s associated symbol appears. This style
is used for brief single line descriptions. The column widths
are governed by the widest entry in the given column. Use altlong4col for multi-line descriptions.
long4colborder The long4colborder style is like the long4col style but has
horizontal and vertical lines around it.
long4colheader The long4colheader style is like long4col but has a
header row.
long4colheaderborder The long4colheaderborder style is like long4colheader
but has horizontal and vertical lines around it.
altlong4col The altlong4col style is like long4col but allows multi-line
descriptions and page lists. The width of the description column is governed by the length \glsdescwidth and the width
of the page list column is governed by the length
\glspagelistwidth. The widths of the name and symbol
columns are governed by the widest entry in the given column.
altlong4colborder The altlong4colborder style is like the long4colborder
but allows multi-line descriptions and page lists.
altlong4colheader The altlong4colheader style is like long4colheader but
allows multi-line descriptions and page lists.
altlong4colheaderborder The altlong4colheaderborder style is like
long4colheaderborder but allows multi-line descriptions and page
lists.
147
15 Glossary Styles
15.1.3 Longtable Styles (Ragged Right)
The styles described in this section are all defined in the package
glossary-longragged. These styles are analogous to those defined in
glossary-long but the multiline columns are left justified instead of
fully justified. Since these styles all use the longtable environment,
they are governed by the same parameters as that environment. The
glossary-longragged package additionally requires the array package.
Note that these styles will only be available if you explicitly load
glossary-longragged:
\usepackage{glossaries}
\usepackage{glossary-longragged}
Note that you can’t set these styles using the style package option
since the styles aren’t defined until after the glossaries package has
been loaded.
longragged The longragged style has two columns: the first column
contains the entry’s name and the second column contains the
(left-justified) description followed by the number list. The entry’s symbol is ignored. Sub groups are separated with a blank
row. The width of the first column is governed by the widest
entry in that column. The width of the second column is governed by the length \glsdescwidth. Child entries have a similar format to the parent entries except that their name is suppressed.
longraggedborder The longraggedborder style is like longragged but has
horizontal and vertical lines around it.
longraggedheader The longraggedheader style is like longragged but has
a header row.
longraggedheaderborder The longraggedheaderborder style is like longraggedheader but has horizontal and vertical lines around it.
longragged3col The longragged3col style is like longragged but has three
columns. The first column contains the entry’s name, the second column contains the (left justified) description and the third
column contains the (left justified) number list. The entry’s symbol is ignored. The width of the first column is governed by the
widest entry in that column, the width of the second column is
governed by the length \glsdescwidth, and the width of the
third column is governed by the length \glspagelistwidth.
148
15 Glossary Styles
longragged3colborder The longragged3colborder style is like the longragged3col style but has horizontal and vertical lines around
it.
longragged3colheader The longragged3colheader style is like longragged3col
but has a header row.
longragged3colheaderborder The longragged3colheaderborder style is like
longragged3colheader but has horizontal and vertical lines around
it.
altlongragged4col The altlongragged4col style is like longragged3col but
has an additional column in which the entry’s associated symbol appears. The width of the description column is governed
by the length \glsdescwidth and the width of the page list
column is governed by the length \glspagelistwidth. The
widths of the name and symbol columns are governed by the
widest entry in the given column.
altlongragged4colborder The altlongragged4colborder style is like the altlongragged4col but has horizontal and vertical lines around it.
altlongragged4colheader The altlongragged4colheader style is like altlongragged4col but has a header row.
altlongragged4colheaderborder The altlongragged4colheaderborder style
is like altlongragged4colheader but has horizontal and vertical
lines around it.
15.1.4 Supertabular Styles
The styles described in this section are all defined in the package
glossary-super. Since they all use the supertabular environment, they
are governed by the same parameters as that environment. Note that
these styles will automatically be available unless you use the nosuper or nostyles package options. In general, the longtable environment
is better, but there are some circumstances where it is better to use
supertabular.3 These styles fully justify the description and page list
columns. If you want ragged right formatting instead, use the analogous styles described in Section 15.1.5.
super The super style uses the supertabular environment (defined by
the supertabular package). It has two columns: the first column
contains the entry’s name and the second column contains the
3 e.g.
with the flowfram package.
149
15 Glossary Styles
description followed by the number list. The entry’s symbol
is ignored. Sub groups are separated with a blank row. The
width of the first column is governed by the widest entry in that
column. The width of the second column is governed by the
length \glsdescwidth. Child entries have a similar format to
the parent entries except that their name is suppressed.
superborder The superborder style is like super but has horizontal and
vertical lines around it.
superheader The superheader style is like super but has a header row.
superheaderborder The superheaderborder style is like superheader but
has horizontal and vertical lines around it.
super3col The super3col style is like super but has three columns. The
first column contains the entry’s name, the second column contains the description and the third column contains the number list. The entry’s symbol is ignored. The width of the
first column is governed by the widest entry in that column.
The width of the second column is governed by the length
\glsdescwidth. The width of the third column is governed
by the length \glspagelistwidth.
super3colborder The super3colborder style is like the super3col style but
has horizontal and vertical lines around it.
super3colheader The super3colheader style is like super3col but has a
header row.
super3colheaderborder The super3colheaderborder style is like the
super3colheader style but has horizontal and vertical lines around
it.
super4col The super4col style is like super3col but has an additional
column in which the entry’s associated symbol appears. This
style is designed for entries with brief single line descriptions.
The column widths are governed by the widest entry in the
given column. Use altsuper4col for multi-line descriptions.
super4colborder The super4colborder style is like the super4col style but
has horizontal and vertical lines around it.
super4colheader The super4colheader style is like super4col but has a
header row.
150
15 Glossary Styles
super4colheaderborder The super4colheaderborder style is like the
super4colheader style but has horizontal and vertical lines around
it.
altsuper4col The altsuper4col style is like super4col but allows multi-
line descriptions and page lists. The width of the description column is governed by the length \glsdescwidth and
the width of the page list column is governed by the length
\glspagelistwidth. The width of the name and symbol
columns is governed by the widest entry in the given column.
altsuper4colborder The altsuper4colborder style is like the super4colborder
style but allows multi-line descriptions and page lists.
altsuper4colheader The altsuper4colheader style is like super4colheader
but allows multi-line descriptions and page lists.
altsuper4colheaderborder The altsuper4colheaderborder style is like super4colheaderborder but allows multi-line descriptions and page
lists.
15.1.5 Supertabular Styles (Ragged Right)
The styles described in this section are all defined in the package
glossary-superragged. These styles are analogous to those defined in
glossary-super but the multiline columns are left justified instead of
fully justified. Since these styles all use the supertabular environment,
they are governed by the same parameters as that environment. The
glossary-superragged package additionally requires the array package.
Note that these styles will only be available if you explicitly load
glossary-superragged:
\usepackage{glossaries}
\usepackage{glossary-superragged}
Note that you can’t set these styles using the style package option
since the styles aren’t defined until after the glossaries package has
been loaded.
superragged The superragged style uses the supertabular environment
(defined by the supertabular package). It has two columns: the
first column contains the entry’s name and the second column
contains the (left justified) description followed by the number
list. The entry’s symbol is ignored. Sub groups are separated
with a blank row. The width of the first column is governed
by the widest entry in that column. The width of the second
151
15 Glossary Styles
column is governed by the length \glsdescwidth. Child entries have a similar format to the parent entries except that their
name is suppressed.
superraggedborder The superraggedborder style is like superragged but
has horizontal and vertical lines around it.
superraggedheader The superraggedheader style is like superragged but
has a header row.
superraggedheaderborder The superraggedheaderborder style is like superraggedheader but has horizontal and vertical lines around it.
superragged3col The superragged3col style is like superragged but has
three columns. The first column contains the entry’s name, the
second column contains the (left justified) description and the
third column contains the (left justified) number list. The entry’s symbol is ignored. The width of the first column is governed by the widest entry in that column. The width of the
second column is governed by the length \glsdescwidth.
The width of the third column is governed by the length
\glspagelistwidth.
superragged3colborder The superragged3colborder style is like the superragged3col style but has horizontal and vertical lines around
it.
superragged3colheader The superragged3colheader style is like superragged3col but has a header row.
superragged3colheaderborder The superragged3colheaderborder style is
like superragged3colheader but has horizontal and vertical lines
around it.
altsuperragged4col The altsuperragged4col style is like superragged3col
but has an additional column in which the entry’s associated
symbol appears. The column widths for the name and symbol
column are governed by the widest entry in the given column.
altsuperragged4colborder The altsuperragged4colborder style is like the
altsuperragged4col style but has horizontal and vertical lines
around it.
altsuperragged4colheader The altsuperragged4colheader style is like altsuperragged4col but has a header row.
altsuperragged4colheaderborder The altsuperragged4colheaderborder style
is like altsuperragged4colheader but has horizontal and vertical
lines around it.
152
15 Glossary Styles
15.1.6 Tree-Like Styles
The styles described in this section are all defined in the package
glossary-tree. These styles are designed for hierarchical glossaries but
can also be used with glossaries that don’t have sub-entries. These
styles will display the entry’s symbol if it exists. Note that these styles
will automatically be available unless you use the notree or nostyles
package options.
index The index style is similar to the way indices are usually format-
ted in that it has a hierarchical structure up to three levels (the
main level plus two sub-levels). The name is typeset in bold,
and if the symbol is present it is set in parentheses after the
name and before the description. Sub-entries are indented and
also include the name, the symbol in brackets (if present) and
the description. Groups are separated using \indexspace.
indexgroup The indexgroup style is similar to the index style except that
each group has a heading.
indexhypergroup The indexhypergroup style is like indexgroup but has a
set of links to the glossary groups. The navigation line is the
same as that for listhypergroup, described above.
tree The tree style is similar to the index style except that it can have
\glstreeindent
arbitrary levels. (Note that makeindex is limited to three levels, so you will need to use xindy if you want more than three
levels.) Each sub-level is indented by \glstreeindent. Note
that the name, symbol (if present) and description are placed in
the same paragraph block. If you want the name to be apart
from the description, use the alttree style instead. (See below.)
treegroup The treegroup style is similar to the tree style except that
each group has a heading.
treehypergroup The treehypergroup style is like treegroup but has a set
of links to the glossary groups. The navigation line is the same
as that for listhypergroup, described above.
treenoname The treenoname style is like the tree style except that the
name for each sub-entry is ignored.
treenonamegroup The treenonamegroup style is similar to the treenoname style except that each group has a heading.
treenonamehypergroup The treenonamehypergroup style is like treenonamegroup but has a set of links to the glossary groups. The navigation line is the same as that for listhypergroup, described above.
153
15 Glossary Styles
alttree The alttree style is similar to the tree style except that the in-
dentation for each level is determined by the width of the text
specified by
\glssetwidest
\glssetwidest[hleveli]{htexti}
The optional argument hleveli indicates the level, where 0 indicates the top-most level, 1 indicates the first level sub-entries,
etc. If \glssetwidest hasn’t been used for a given sub-level,
the level 0 widest text is used instead. If hleveli is omitted, 0 is
assumed.
For each level, the name is placed to the left of the paragraph
block containing the symbol (optional) and the description. If
the symbol is present, it is placed in parentheses before the description.
alttreegroup The alttreegroup is like the alttree style except that each
group has a heading.
alttreehypergroup The alttreehypergroup style is like alttreegroup but has
a set of links to the glossary groups. The navigation line is the
same as that for listhypergroup, described above.
15.1.7 Multicols Style
The glossary-mcols package provides tree-like styles that are in the multicols environment (defined by the multicol package). The style names
are as their analogous tree styles (as defined in Section 15.1.6) but are
prefixed with “mcol”. For example, the mcolindex style is essentially
the index style but put in a multicols environment. For the complete list,
see table 15.2.
Note that glossary-mcols is not loaded by glossaries. If you want to
use any of the multicol styles in that package you need to load it
explicitly with \usepackage and set the required glossary style
using \setglossarystyle.
The default number of columns is 2, but can be changed by redefining
\glsmcols
\glsmcols
to the required number. For example, for a three column glossary:
154
15 Glossary Styles
\usepackage{glossary-mcols}
\renewcommand*{\glsmcols}{3}
\setglossarystyle{mcolindex}
Table 15.2: Multicolumn Styles
glossary-mcols Style
mcolindex
mcolindexgroup
mcolindexhypergroup
mcoltree
mcoltreegroup
mcoltreehypergroup
mcoltreenoname
mcoltreenonamegroup
mcoltreenonamehypergroup
mcolalttree
mcolalttreegroup
mcolalttreehypergroup
Analogous Tree Style
index
indexgroup
indexhypergroup
tree
treegroup
treehypergroup
treenoname
treenonamegroup
treenonamehypergroup
alttree
alttreegroup
alttreehypergroup
15.1.8 In-Line Style
This section covers the glossary-inline package that supplies the inline
style. This is a style that is designed for in-line use (as opposed to
block styles, such as lists or tables). This style doesn’t display the
number list.
You will most likely need to redefine \glossarysection with
this style. For example, suppose you are required to have your glossaries and list of acronyms in a footnote, you can do:
\usepackage{glossary-inline}
\renewcommand*{\glossarysection}[2][]{\textbf{#1}: }
\setglossarystyle{inline}
Note that you need to include glossary-inline with \usepackage
as it’s not automatically included by the glossaries package and
then set the style using \setglossarystyle.
Where you need to include your glossaries as a footnote you can
do:
\footnote{\printglossaries}
155
15 Glossary Styles
The inline style is governed by the following:
\glsinlineseparator
\glsinlineseparator
This defaults to “; ” and is used between main (i.e. level 0) entries.
\glsinlinesubseparator
\glsinlinesubseparator
This defaults to “, ” and is used between sub-entries.
\glsinlineparentchildseparator
\glsinlineparentchildseparator
This defaults to “:
its first sub-entry.
\glspostinline
” and is used between a parent main entry and
\glspostinline
This defaults to “; ” and is used at the end of the glossary.
15.2 Defining your own glossary style
If the predefined styles don’t fit your requirements, you can define
your own style using:
\newglossarystyle
\newglossarystyle{hnamei}{hdefinitionsi}
where hnamei is the name of the new glossary style (to be used in
\setglossarystyle). The second argument hdefinitionsi needs to
redefine all of the following:
theglossary
theglossary
This environment defines how the main body of the glossary should
be typeset. Note that this does not include the section heading, the
glossary preamble (defined by \glossarypreamble) or the glossary postamble (defined by \glossarypostamble). For example,
the list style uses the description environment, so the theglossary environment is simply redefined to begin and end the description environment.
\glossaryheader
\glossaryheader
This macro indicates what to do at the start of the main body of the
glossary. Note that this is not the same as \glossarypreamble,
156
15 Glossary Styles
which should not be affected by changes in the glossary style. The list
glossary style redefines \glossaryheader to do nothing, whereas
the longheader glossary style redefines \glossaryheader to do a
header row.
\glsgroupheading
\glsgroupheading{hlabeli}
This macro indicates what to do at the start of each logical block
within the main body of the glossary. If you use makeindex the glossary is sub-divided into a maximum of twenty-eight logical blocks
that are determined by the first character of the sort key (or name key
if the sort key is omitted). The sub-divisions are in the following order: symbols, numbers, A, . . . , Z. If you use xindy, the sub-divisions
depend on the language settings.
Note that the argument to \glsgroupheading is a label not the
group title. The group title can be obtained via
\glsgetgrouptitle
\glsgetgrouptitle{hlabeli}
This obtains the title as follows: if hlabeli consists of a single nonactive character or hlabeli is equal to glssymbols or glsnumbers
and \hlabeligroupname exists, this is taken to be the title, otherwise the title is just hlabeli. (The “symbols” group has the label
glssymbols, so the command \glssymbolsgroupname is used,
and the “numbers” group has the label glsnumbers, so the command \glsnumbersgrouptitle is used.) If you are using xindy,
hlabeli may be an active character (for example ø), in which case the
title will be set to just hlabeli. You can redefine \glsgetgrouptitle
if this is unsuitable for your document.
A navigation hypertarget can be created using
\glsnavhypertarget
\glsnavhypertarget{hlabeli}{htexti}
For further details about \glsnavhypertarget, see section 4.1 in
the documented code (glossaries-code.pdf).
Most of the predefined glossary styles redefine \glsgroupheading
to simply ignore its argument. The listhypergroup style redefines
\glsgroupheading as follows:
\renewcommand*{\glsgroupheading}[1]{%
\item[\glsnavhypertarget{##1}{\glsgetgrouptitle{##1}}]}
See also \glsgroupskip below. (Note that command definitions
within \newglossarystyle must use ##1 instead of #1 etc.)
157
15 Glossary Styles
\glsgroupskip
\glsgroupskip
This macro determines what to do after one logical group but before
the header for the next logical group. The list glossary style simply redefines \glsgroupskip to be \indexspace, whereas the tabularlike styles redefine \glsgroupskip to produce a blank row.
As from version 3.03, the package option nogroupskip can be used to
suppress this default gap for the predefined styles.
\glossentry
\glossentry{hlabeli}{hnumber listi}
This macro indicates what to do for each level 0 glossary entry. The
entry label is given by hlabeli and the associated number list is given
by hnumber listi. You can redefine \glossentry to use commands
like \glossentryname{hlabeli}, \glossentrydesc{hlabeli} and
\glossentrysymbol{hlabeli} to display the name, description and
symbol fields, or to access other fields, use commands like \glsentryuseri{hlabeli}.
(See Section 9 for further details.) You can also use the following commands:
\glsentryitem
\glsentryitem{hlabeli}
This macro will increment and display the associated counter for the
main (level 0) entries if the entrycounter or counterwithin package options have been used. This macro is typically called by \glossentry
before \glstarget. The format of the counter is controlled by the
macro
\glsentrycounterlabel
\glsentrycounterlabel
Each time you use a glossary entry it creates a hyperlink (if hyperlinks are enabled) to the relevant line in the glossary. Your new
glossary style must therefore redefine \glossentry to set the appropriate target. This is done using
\glstarget
\glstarget{hlabeli}{htexti}
where hlabeli is the entry’s label. Note that you don’t need to worry
about whether the hyperref package has been loaded, as \glstarget
won’t create a target if \hypertarget hasn’t been defined.
For example, the list style defines \glossentry as follows:
\renewcommand*{\glossentry}[2]{%
\item[\glsentryitem{##1}%
\glstarget{##1}{\glossentryname{##1}}]
158
15 Glossary Styles
\glossentrydesc{##1}\glspostdescription\space ##2}
Note also that hnumber listi will always be of the form
\glossaryentrynumbers{\relax
\setentrycounter[hHprefixi]{hcounter namei}hformat
cmdi{hnumber(s)i}}
where hnumber(s)i may contain \delimN (to delimit individual numbers) and/or \delimR (to indicate a range of numbers). There may
be multiple occurrences of \setentrycounter[hHprefixi]{hcounter
namei}hformat cmdi{hnumber(s)i}, but note that the entire number list
is
enclosed
within
the
argument
of
\glossaryentrynumbers. The user can redefine this to change
the way the entire number list is formatted, regardless of the glossary
style. However the most common use of \glossaryentrynumbers
is to provide a means of suppressing the number list altogether. (In
fact, the nonumberlist option redefines \glossaryentrynumbers to
ignore its argument.) Therefore, when you define a new glossary
style, you don’t need to worry about whether the user has specified
the nonumberlist package option.
\subglossentry
\subglossentry{hleveli}{hlabeli}{hnumber listi}
This is used to display sub-entries. The first argument, hleveli, indicates the sub-entry level. This must be an integer from 1 (first sublevel) onwards. The remaining arguments are analogous to those for
\glossentry described above.
\glssubentryitem
\glssubentryitem{hlabeli}
This macro will increment and display the associated counter for
the level 1 entries if the subentrycounter package option has been
used. This macro is typically called by \subglossentry before
\glstarget. The format of the counter is controlled by the macro
\glssubentrycounterlabel\glssubentrycounterlabel
Note that \printglossary (which \printglossaries calls)
sets
\currentglossary
\currentglossary
to the current glossary label, so it’s possible to create a glossary style
159
15 Glossary Styles
that varies according to the glossary type.
For further details of these commands, see section 1.15 “Displaying
the glossary” in the documented code (glossaries-code.pdf).
Example 20 (Creating a completely new style)
If you want a completely new style, you will need to redefine all of
the commands and the environment listed above.
For example, suppose you want each entry to start with a bullet
point. This means that the glossary should be placed in the itemize
environment, so theglossary should start and end that environment.
Let’s also suppose that you don’t want anything between the glossary groups (so \glsgroupheading and \glsgroupskip should
do nothing) and suppose you don’t want anything to appear immediately after \begin{theglossary} (so \glossaryheader should
do nothing). In addition, let’s suppose the symbol should appear in
brackets after the name, followed by the description and last of all the
number list should appear within square brackets at the end. Then
you can create this new glossary style, called, say, mylist, as follows:
\newglossarystyle{mylist}{%
% put the glossary in the itemize environment:
\renewenvironment{theglossary}%
{\begin{itemize}}{\end{itemize}}%
% have nothing after \begin{theglossary}:
\renewcommand*{\glossaryheader}{}%
% have nothing between glossary groups:
\renewcommand*{\glsgroupheading}[1]{}%
\renewcommand*{\glsgroupskip}{}%
% set how each entry should appear:
\renewcommand*{\glossentry}[2]{%
\item % bullet point
\glstarget{##1}{\glossentryname{##1}}% the entry name
\space (\glossentrysymbol{##1})% the symbol in brackets
\space \glossentrydesc{##1}% the description
\space [##2]% the number list in square brackets
}%
% set how sub-entries appear:
\renewcommand*{\subglossentry}[3]{%
\glossentry{##2}{##3}}%
}
Note that this style creates a flat glossary, where sub-entries are displayed in exactly the same way as the top level entries. It also hasn’t
used \glsentryitem or \glssubentryitem so it won’t be affected by the entrycounter, counterwithin or subentrycounter package options.
160
15 Glossary Styles
Variations:
• You might want the entry name to be capitalised, in which case
use \Glossentryname instead of \glossentryname.
• You might want to check if the symbol hasn’t been set and omit
the parentheses if the symbol is absent. In this case you can use
\ifglshassymbol (see Section 16):
\renewcommand*{\glossentry}[2]{%
\item % bullet point
\glstarget{##1}{\glossentryname{##1}}% the entry name
\ifglshassymbol{##1}% check if symbol exists
{%
\space (\glossentrysymbol{##1})% the symbol in brackets
}%
{}% no symbol so do nothing
\space \glossentrydesc{##1}% the description
\space [##2]% the number list in square brackets
}%
Example 21 (Creating a new glossary style based on an existing style)
If you want to define a new style that is a slightly modified version
of an existing style, you can use \setglossarystyle within the
second argument of \newglossarystyle followed by whatever alterations you require. For example, suppose you want a style like
the list style but you don’t want the extra vertical space created by
\indexspace between groups, then you can create a new glossary
style called, say, mylist as follows:
\newglossarystyle{mylist}{%
\setglossarystyle{list}% base this style on the list style
\renewcommand{\glsgroupskip}{}% make nothing happen
% between groups
}
(In this case, you can actually achieve the same effect using the list
style in combination with the package option nogroupskip.)
161
15 Glossary Styles
Example 22 (Example: creating a glossary style that uses the
user1, . . . , user6 keys)
Suppose each entry not only has an associated symbol, but also
units (stored in user1) and dimension (stored in user2). Then you can
define a glossary style that displays each entry in a longtable as follows:
\newglossarystyle{long6col}{%
% put the glossary in a longtable environment:
\renewenvironment{theglossary}%
{\begin{longtable}{lp{\glsdescwidth}cccp{\glspagelistwidth}}}%
{\end{longtable}}%
% Set the table’s header:
\renewcommand*{\glossaryheader}{%
\bfseries Term & \bfseries Description & \bfseries Symbol &
\bfseries Units & \bfseries Dimensions & \bfseries Page List
\\\endhead}%
% No heading between groups:
\renewcommand*{\glsgroupheading}[1]{}%
% Main (level 0) entries displayed in a row optionally numbered:
\renewcommand*{\glossentry}[2]{%
\glsentryitem{##1}% Entry number if required
\glstarget{##1}{\glossentryname{##1}}% Name
& \glossentrydesc{##1}% Description
& \glossentrysymbol{##1}% Symbol
& \glsentryuseri{##1}% Units
& \glsentryuserii{##1}% Dimensions
& ##2% Page list
\tabularnewline % end of row
}%
% Similarly for sub-entries (no sub-entry numbers):
\renewcommand*{\subglossentry}[3]{%
% ignoring first argument (sub-level)
\glstarget{##2}{\glossentryname{##2}}% Name
& \glossentrydesc{##2}% Description
& \glossentrysymbol{##2}% Symbol
& \glsentryuseri{##2}% Units
& \glsentryuserii{##2}% Dimensions
& ##3% Page list
\tabularnewline % end of row
}%
% Nothing between groups:
\renewcommand*{\glsgroupskip}{}%
}
162
16 Utilities
This section describes some utility commands. Additional commands
can be found in the documented code (glossaries-code.pdf).
Some of the commands described here take a comma-separated
list as an argument. As with LATEX’s \@for command, make sure
your list doesn’t have an unwanted spaces in it as they don’t get
stripped.
\forallglossaries
\forallglossaries[hglossary listi]{hcsi}{hbodyi}
This iterates through hglossary listi, a comma-separated list of glossary labels (as supplied when the glossary was defined). At each iteration hcsi (which must be a control sequence) is set to the glossary
label for the current iteration and hbodyi is performed. If hglossary listi
is omitted, the default is to iterate over all glossaries.
\forglsentries
\forglsentries[hglossary labeli]{hcsi}{hbodyi}
This iterates through all entries in the glossary given by hglossary
labeli. At each iteration hcsi (which must be a control sequence) is
set to the entry label for the current iteration and hbodyi is performed.
If hglossary labeli is omitted, \glsdefaulttype (usually the main
glossary) is used.
\forallglsentries
\forallglsentries[hglossary listi]{hcsi}{hbodyi}
This is like \forglsentries but for each glossary in hglossary listi
(a comma-separated list of glossary labels). If hglossary listi is omitted,
the default is the list of all defined glossaries. At each iteration hcsi is
set to the entry label and hbodyi is performed. (The current glossary
label can be obtained using \glsentrytype{hcsi} within hbodyi.)
\ifglossaryexists
\ifglossaryexistshlabelihtrue partihfalse parti
163
16 Utilities
This checks if the glossary given by hlabeli exists. If it does htrue parti
is performed, otherwise hfalse parti.
\ifglsentryexists
\ifglsentryexistshlabelihtrue partihfalse parti
This checks if the glossary entry given by hlabeli exists. If it does htrue
parti is performed, otherwise hfalse parti. (Note that \ifglsentryexists
will always be true after the containing glossary has been displayed
via \printglossary or \printglossaries even if the entry is
explicitly defined later in the document. This is because the entry
has to be defined before it can be displayed in the glossary, see Section 4.8.1 for further details.)
\glsdoifexists
\glsdoifexists{hlabeli}{hcodei}
Does hcodei if the entry given by hlabeli exists. If it doesn’t exist, an
error is generated. (This command uses \ifglsentryexists.)
\glsdoifnoexists
\glsdoifnoexists{hlabeli}{hcodei}
Does the reverse of \glsdoifexists. (This command uses \ifglsentryexists.)
\glsdoifexistsorwarn
\glsdoifexistsorwanr{hlabeli}{hcodei}
As \glsdoifexists but issues a warning rather than an error if the
entry doesn’t exist.
\ifglsused
\ifglsusedhlabelihtrue partihfalse parti
See Section 14.
\ifglshaschildren
\ifglshaschildrenhlabelihtrue partihfalse parti
This checks if the glossary entry given by hlabeli has any sub-entries.
If it does, htrue parti is performed, otherwise hfalse parti.
\ifglshasparent
\ifglshasparenthlabelihtrue partihfalse parti
This checks if the glossary entry given by hlabeli has a parent entry. If
it does, htrue parti is performed, otherwise hfalse parti.
\ifglshassymbol
\ifglshassymbol{hlabeli}{htrue parti}{hfalse parti}
164
16 Utilities
This checks if the glossary entry given by hlabeli has had the symbol
field set. If it has, htrue parti is performed, otherwise hfalse parti.
\ifglshaslong
\ifglshaslong{hlabeli}{htrue parti}{hfalse parti}
This checks if the glossary entry given by hlabeli has had the long field
set. If it has, htrue parti is performed, otherwise hfalse parti. This
should be true for any entry that has been defined via \newacronym.
There is no check for the existance of hlabeli.
\ifglshasshort
\ifglshasshort{hlabeli}{htrue parti}{hfalse parti}
This checks if the glossary entry given by hlabeli has had the short
field set. If it has, htrue parti is performed, otherwise hfalse parti. This
should be true for any entry that has been defined via \newacronym.
There is no check for the existance of hlabeli.
\ifglshasdesc
\ifglshasdesc{hlabeli}{htrue parti}{hfalse parti}
This checks if the description field is non-empty for the entry given
by hlabeli. If it has, htrue parti is performed, otherwise hfalse parti.
Compare with:
\ifglsdescsuppressed
\ifglsdescsuppressed{hlabeli}{htrue parti}{hfalse parti}
This checks if the description field has been set to just \nopostdesc
for the entry given by hlabeli. If it has, htrue parti is performed, otherwise hfalse parti. There is no check for the existance of hlabeli.
For all other fields you can use:
\ifglshasfield{hfieldi}{hlabeli}{htrue parti}{hfalse parti}
This checks if the field given by hfieldi for the entry identified by
hlabeli is empty. If it is, htrue parti is performed, otherwise hfalse
parti. If the field supplied is unrecognised hfalse parti is performed
and a warning is issued. Unlike the above commands, such as
\ifglshasshort, an error occurs if the entry is undefined.
165
17 Prefixes or Determiners
The glossaries-prefix package provides additional keys that can be used
as prefixes. For example, if you want to specify determiners (such as
“a”, “an” or “the”). The glossaries-prefix package automatically loads
the glossaries package and has the same package options.
The extra keys for \newglossaryentry are as follows:
prefix The prefix associated with the text key. This defaults to nothing.
prefixplural The prefix associated with the plural key. This defaults to
nothing.
prefixfirst The prefix associated with the first key. If omitted, this defaults to the value of the prefix key.
prefixfirstplural The prefix associated with the firstplural key. If omitted, this defaults to the value of the prefixplural key.
Example 23 (Defining Determiners)
Here’s the start of my example document:
documentclass{article}
\usepackage[colorlinks]{hyperref}
\usepackage[toc,acronym]{glossaries-prefix}
Note that I’ve simply replaced glossaries from previous sample documents with glossaries-prefix. Now for a sample definition1 :
\newglossaryentry{sample}{name={sample},%
description={an example},%
prefix={a~},%
prefixplural={the\space}%
}
Note that I’ve had to explicitly insert a space after the prefix. This
allows for the possibility of prefixes that shouldn’t have a space, such
as:
1 Single
letter words, such as “a” and “I” should typically not appear at the end of
a line, hence the non-breakable space after “a” in the prefix field.
166
17 Prefixes or Determiners
\newglossaryentry{oeil}{name={oeil},
plural={yeux},
description={eye},
prefix={l’},
prefixplural={les\space}}
Where a space is required at the end of the prefix, you must use
a spacing command, such as \space, \ (backslash space) or ~ due
to the automatic spacing trimming performed in hkeyi=hvaluei options.
The prefixes can also be used with acronyms. For example:
\newacronym
[%
prefix={an\space},prefixfirst={a~}%
]{svm}{SVM}{support vector machine}
The glossaries-prefix package provides convenient commands to use
these prefixes with commands such as \gls. Note that the prefix is
not considered part of the link text, so it’s not included in the hyperlink (where hyperlinks are enabled).
\pgls
\pgls[hoptionsi]{hlabeli}[hinserti]
This is prepends the value of the prefix key (or prefixfirst key, on first
use) in front of \gls[hoptionsi]{hlabeli}[hinserti].
\Pgls
\Pgls[hoptionsi]{hlabeli}[hinserti]
If the prefix key (or prefixfirst, on first use) has been set, this displays the
value of that key with the first letter converted to upper case followed
by \gls[hoptionsi]{hlabeli}[hinserti]. If that key hasn’t been set,
this is equivalent to \Gls[hoptionsi]{hlabeli}[hinserti].
\PGLS
\PGLS[hoptionsi]{hlabeli}[hinserti]
As \pgls but converts the prefix to upper case and uses \GLS instead
of \gls.
\pglspl
\pglspl[hoptionsi]{hlabeli}[hinserti]
This is prepends the value of the prefixplural key (or prefixfirstplural key,
on first use) in front of \glspl[hoptionsi]{hlabeli}[hinserti].
167
17 Prefixes or Determiners
\Pglspl
\Pglspl[hoptionsi]{hlabeli}[hinserti]
If the prefixplural key (or prefixfirstplural, on first use) has been set, this
displays the value of that key with the first letter converted to upper
case followed by \glspl[hoptionsi]{hlabeli}[hinserti]. If that key
hasn’t been set, this is equivalent to \Glspl[hoptionsi]{hlabeli}[hinserti].
\PGLSpl
\PGLSpl[hoptionsi]{hlabeli}[hinserti]
As \pglspl but converts the prefix to upper case and uses \GLSpl
instead of \glspl.
Example 24 (Using Prefixes)
Continuing from Example 23, now that I’ve defined my entries,
I can use them in the text via the above commands:
First use: \pgls{svm}. Next use: \pgls{svm}.
Singular: \pgls{sample}, \pgls{oeil}.
Plural: \pglspl{sample}, \pglspl{oeil}.
which produces:
First use: a support vector machine (SVM). Next use: an
SVM. Singular: a sample, l’oeil. Plural: the samples, les
yeux.
For a complete document, see sample-prefix.tex.
This package also provides the following commands:
\ifglshasprefix
\ifglshasprefix{hlabeli}{htrue parti}{hfalse parti}
Does htrue parti if the entry identified by hlabeli has a non-empty
value for the prefix key.
This package also provides the following commands:
\ifglshasprefixplural
\ifglshasprefixplural{hlabeli}{htrue parti}{hfalse parti}
Does htrue parti if the entry identified by hlabeli has a non-empty
value for the prefixplural key.
\ifglshasprefixfirst
\ifglshasprefixfirst{hlabeli}{htrue parti}{hfalse parti}
168
17 Prefixes or Determiners
Does htrue parti if the entry identified by hlabeli has a non-empty
value for the prefixfirst key.
\ifglshasprefixfirstplural
\ifglshasprefixfirstplural{hlabeli}{htrue parti}{hfalse
parti}
Does htrue parti if the entry identified by hlabeli has a non-empty
value for the prefixfirstplural key.
\glsentryprefix
\glsentryprefix{hlabeli}
Displays the value of the prefix key for the entry given by hlabeli. (No
check is performed to determine if the entry exists.)
\glsentryprefixfirst
\glsentryprefixfirst{hlabeli}
Displays the value of the prefixfirst key for the entry given by hlabeli.
(No check is performed to determine if the entry exists.)
\glsentryprefixplural
\glsentryprefixplural{hlabeli}
Displays the value of the prefixplural key for the entry given by hlabeli.
(No check is performed to determine if the entry exists.)
\glsentryprefixfirstplural
\glsentryprefixfirstplural{hlabeli}
Displays the value of the prefixfirstplural key for the entry given by
hlabeli. (No check is performed to determine if the entry exists.)
There are also variants that convert the first letter to upper case2 :
\Glsentryprefix
\Glsentryprefixfirst
\Glsentryprefixplural
\Glsentryprefix{hlabeli}
\Glsentryprefixfirst{hlabeli}
\Glsentryprefixplural{hlabeli}
\Glsentryprefixfirstplural
2 The
earlier caveats about initial non-Latin characters apply.
169
17 Prefixes or Determiners
\Glsentryprefixfirstplural{hlabeli}
As with analoguous commands such as \Glsentrytext, these
commands aren’t expandable so can’t be used in PDF bookmarks.
Example 25 (Adding Determiner to Glossary Style)
You can use the above commands to define a new glossary style
that uses the determiner. For example, the following style is a slight
modification of the list style that inserts the prefix before the name:
\newglossarystyle{plist}{%
\setglossarystyle{list}%
\renewcommand*{\glossentry}[2]{%
\item[\glsentryitem{##1}%
\Glsentryprefix{##1}%
\glstarget{##1}{\glossentryname{##1}}]
\glossentrydesc{##1}\glspostdescription\space ##2}%
}
170
18 Accessibility Support
Limited accessibility support is provided by the accompanying glossariesaccsupp package, but note that this package is experimental and it
requires the accsupp package which is also listed as experimental.
This package defines additional keys that may be used when defining
glossary entries. The keys are as follows:
access The replacement text corresponding to the name key.
textaccess The replacement text corresponding to the text key.
firstaccess The replacement text corresponding to the first key.
pluralaccess The replacement text corresponding to the plural key.
firstpluralaccess The replacement text corresponding to the firstplural
key.
symbolaccess The replacement text corresponding to the symbol key.
symbolpluralaccess The replacement text corresponding to the symbolplural key.
descriptionaccess The replacement text corresponding to the description key.
descriptionpluralaccess The replacement text corresponding to the
descriptionplural key.
longaccess The replacement text corresponding to the long key (used
by \newacronym).
shortaccess The replacement text corresponding to the short key
(used by \newacronym).
longpluralaccess The replacement text corresponding to the longplural
key (used by \newacronym).
shortpluralaccess The replacement text corresponding to the shortplural key (used by \newacronym).
171
18 Accessibility Support
For example:
\newglossaryentry{tex}{name={\TeX},description={Document
preparation language},access={TeX}}
Now \gls{tex} will be equivalent to
\BeginAccSupp{ActualText=TeX}\TeX\EndAccSupp{}
The sample file sampleaccsupp.tex illustrates the glossaries-accsupp
package.
See section 6 in the documented code (glossaries-code.pdf)
for further details. It is recommended that you also read the accsupp
documentation.
172
19 Troubleshooting
The glossaries package comes with a minimal file called minimalgls.tex
which can be used for testing. This should be located in the samples
subdirectory (folder) of the glossaries documentation directory. The
location varies according to your operating system and TEX installation. For example, on my Linux partition it can be found in /usr/
local/texlive/2013/texmf-dist/doc/latex/glossaries/.
Further information on debugging LATEX code is available at http:
//www.dickimaw-books.com/latex/minexample/.
Below is a list of the most frequently asked questions. For other
queries, consult the glossaries FAQ1 . If that doesn’t help, try posting
your query to somewhere like the comp.text.tex newsgroup, the LATEX
Community Forum2 or TEX on StackExchange3 . Bug reports can be
submitted via my package bug report form4 .
1. Q. I get the error message:
! Undefined control sequence.
\in@ #1#2->\begingroup \def \in@@
A. This error can occur if you have a fragile command in one of
your entry definitions. In most cases using \glsnoexpandfields
before defining your entry should fix this, but there are still a
few fragile commands that will still cause this error even with
\glsnoexpandfields. If this is the case put \protect in
front of the fragile command.
2. Q. I get the error message:
Missing \begin{document}
A. Check you are using an up to date version of the xkeyval package.
1 http://www.dickimaw-books.com/faqs/glossariesfaq.html
2 http://www.latex-community.org/
3 http://tex.stackexchange.com/
4 http://www.dickimaw-books.com/bug-report.html
173
19 Troubleshooting
3. Q. When I use xindy, I get the following error message:
ERROR: CHAR: index 0 should be less than the length of
the string
A. xindy discards all commands and braces from the sort
string. If your sort string (either specified by the sort key or the
name key) only consists of commands, this will be treated by
xindy as an empty sort string, which produces an error message in newer versions of xindy. For example, the following
will cause a problem:
\newglossaryentry{alpha}{name={\ensuremath{\alpha}},
description=alpha}
Either use a different sort key for the entry, for example:
\newglossaryentry{alpha}{sort=alpha,
name={\ensuremath{\alpha}},
description=alpha}
or, if all entries are like this, you may prefer to use the sort=use
or sort=def package options. See Section 2.4 for further details of
the sort option.
4. Q. I’ve used the smallcaps option, but the acronyms are displayed in normal sized upper case letters.
A. The smallcaps package option uses \textsc to typeset the
acronyms. This command converts lower case letters to small
capitals, while upper case letters remain their usual size. Therefore you need to specify the acronym in lower case letters.
5. Q. My acronyms won’t break across a line when they’re expanded.
A. PDFLATEX can break hyperlinks across a line, but LATEX can’t.
If you can’t use PDFLATEX then disable the first use links using
the package option hyperfirst=false.
6. Q. How do I change the font that the acronyms are displayed
in?
A. The easiest way to do this is to specify the smaller package
option and redefine \acronymfont to use the required typesetting command. For example, suppose you would like the
acronyms displayed in a sans-serif font, then you can do:
\usepackage[smaller]{glossaries}
\renewcommand*{\acronymfont}[1]{\textsf{#1}}
174
19 Troubleshooting
7. Q. How do I change the font that the acronyms are displayed in
on first use?
A. The easiest way to do this is to specify the smaller package
option and redefine \firstacronymfont to use the required
command. Note that if you don’t want the acronym on subsequent use to use \textsmaller, you will also need to redefine
\acronymfont, as above. For example to make the acronym
emphasized on first use, but use the surrounding font for subsequent use, you can do:
\usepackage[smaller]{glossaries}
\renewcommand*{\firstacronymfont}[1]{\emph{#1}}
\renewcommand*{\acronymfont}[1]{#1}
8. Q. I don’t have Perl installed, do I have to use makeglossaries?
A. No. Although it is strongly recommended, you don’t have
to use makeglossaries. If you prefer a GUI application
and have Java installed, you can use makeglossariesgui instead. Otherwise you can just call makeindex explicitly (see
Section 1.3.3). Note that you can’t use xindy if you don’t have
Perl installed.
9. Q. I’m used to using the glossary package: are there any instructions on migrating from the glossary package to the glossaries
package?
A. Read “Upgrading from the glossary package to the glossaries
package” (glossary2glossaries.pdf) which should be available
from the same location as this document.
10. Q. I’m using babel but the fixed names haven’t been translated.
A. The glossaries package currently only supports the following languages: Brazilian Portuguese, Danish, Dutch, English,
French, German, Irish, Italian, Hungarian, Polish, Serbian and
Spanish. If you want to add another language, send me the
translations, and I’ll add them to the next version.
If you are using one of the above languages, but the text hasn’t
been translated, try using the glossaries package option translate=babel. Also, try adding the language as a global option to
the class file.
11. Q. My glossaries haven’t appeared.
A. Remember to do the following:
• Add \makeglossaries to the document preamble.
175
19 Troubleshooting
• Use either \printglossary for each glossary that has
been defined or \printglossaries.
• Use the commands listed in Section 6, Section 7 or Section 8
for each entry that you want to appear in the glossary.
• Run LATEX on your document, then run makeglossaries,
then run LATEX on your document again. If you want the
glossaries to appear in the table of contents, you will need
an extra LATEX run. If any of your entries cross-reference
an entry that’s not referenced in the main body of the document, you will need to run makeglossaries (see Section 1.3) after the second LATEX run, followed by another
LATEX run.
Check the log files (.log, .glg etc) for any warnings.
12. Q. Why is glossaries creating an empty .glo file?
A. Because you haven’t used any entries in the main glossary
via commands such as \gls. If you don’t want to use this glossary, you can suppress its creation via the package option nomain.
13. Q. It is possible to change the rules used to sort the glossary
entries?
A. If it’s for an individual entry, then you can use the entry’s
sort key to sort it according to a different term. If it’s for the
entire alphabet, then you will need to use xindy (instead of
makeindex) and use an appropriate xindy language module.
Writing xindy modules or styles is beyond the scope of this
manual. Further information about xindy can be found at the
Xindy Web Site5 . There is also a link to the xindy mailing list
from that site.
If you want to sort according to order of definition or order of
use, use the sort package option described in Section 2.4.
14. Q. I get an error when using TeX4HT with glossaries.
A. TeX4HT seems to have a problem with the glossary styles
that use \indexspace. I don’t know enough about TeX4HT to
find out why. Either use a different glossary style or redefine
the style command that uses \indexspace. For example, if
you are using the list style, try:
\renewcommand*{\glsgroupskip}{}
5 http://xindy.sourceforge.net/
176
19 Troubleshooting
or
\renewcommand*{\glsgroupskip}{\item[]}
177
Index
Symbols
\@gls@codepage . .
\@glsorder . . . . . .
\@istfilename . . .
\@newglossary . . .
\@xdylanguage . . .
.
.
.
.
.
.
.
.
.
.
.
.
.
.
.
.
.
.
.
.
.
.
.
.
.
.
.
.
.
.
34
34
33
33
34
A
\Ac . . . . . . . . . . . . . . . . . . . 122
\ac . . . . . . . . . . . . . . . . . . . 122
accsupp package . . . . . . 171, 172
\Acf . . . . . . . . . . . . . . . . . . 122
\acf . . . . . . . . . . . . . . . . . . 122
\Acfp . . . . . . . . . . . . . . . . . 122
\acfp . . . . . . . . . . . . . . . . . 122
\Acl . . . . . . . . . . . . . . . . . . 122
\acl . . . . . . . . . . . . . . . . . . 122
\Aclp . . . . . . . . . . . . . . . . . 122
\aclp . . . . . . . . . . . . . . . . . 122
\Acp . . . . . . . . . . . . . . . . . . 122
\acp . . . . . . . . . . . . . . . . . . 122
\ACRfull . . . . . . . . . . . . . . 121
\Acrfull . . . . . . . . . . 121, 122
\acrfull 121, 122, 125–127, 131
\ACRfullfmt . . . . . . . . . . . 121
\Acrfullfmt . . . . . . . . . . . 121
\acrfullfmt . . . . 121, 129, 131
\ACRfullpl . . . . . . . . . . . . 121
\Acrfullpl . . . . . . . . 121, 122
\acrfullpl . . . . . . . . 121, 122
\ACRfullplfmt . . . . . . . . . 121
\Acrfullplfmt . . . . . . . . . 121
\acrfullplfmt . . . . . . . . . 121
\ACRlong . . . . . . . . . . . . . . 120
\Acrlong . . . . . . . . . . 120, 122
\acrlong . . . . . . . . . . 120, 122
\ACRlongpl . . . . . . . . . . . . 120
\Acrlongpl . . . . . . . . 120, 122
\acrlongpl . . . . . . . . 120, 122
acronym styles:
dua . . . . . . . . . . 125, 126, 129
dua-desc . . . . . . . . 126, 127
footnote . . . . . 125, 127, 129
footnote-desc . . . . . . . 127
footnote-sc . . . . . . . . . 127
footnote-sc-desc . 15, 127
footnote-sm . . . . . . . . . 127
footnote-sm-desc . . . . 127
long-sc-short 125, 126, 129
long-sc-short-desc . . 126
long-short . . . . . . . . . .
. . . . . 89, 125, 126, 128, 129
long-short-desc . 126, 129
long-sm-short . . . 125, 126
long-sm-short-desc . . 126
sc-short-long . . . . . . . 126
sc-short-long-desc . . 126
short-long . . . . . . . . . . 126
short-long-desc . . . . . 126
sm-short-long . . . . . . . 126
sm-short-long-desc . . 126
\acronymentry 124, 126, 128, 133
\acronymfont . . . . 52, 119,
121, 124, 125, 128, 174, 175
\acronymname . . . . . . . . . . 26
\acronymsort 124, 126, 128, 133
\acronymtype . . . . . . . . 38,
41, 50, 70, 94, 116, 118, 136
\ACRshort . . . . . . . . . . . . . 120
\Acrshort . . . . . . . . . 120, 122
\acrshort . . . . . . . 11, 119, 122
\ACRshortpl . . . . . . . . . . . 120
\Acrshortpl . . . . . . . 120, 122
\acrshortpl . . . . . . . 120, 122
\Acs . . . . . . . . . . . . . . . . . . 122
\acs . . . . . . . . . . . . . . . . . . 122
\Acsp . . . . . . . . . . . . . . . . . 122
\acsp . . . . . . . . . . . . . . . . . 122
\addcontentsline . . . . . . 39
178
Index
align (environment)
\altnewglossary .
amsmath package . . . .
\andname . . . . . . . .
arara . . . . . . . . . . .
array package . . . . . .
.
.
.
.
.
.
.
.
.
.
.
.
.
.
.
.
.
. . . 141
. . . 116
. . . 141
. . . 98
. . . 28
148, 151
B
babel package . . . . . . . . . . . .
. . 24, 27, 37, 38, 59, 117, 175
beamer class . . . . . . . . . 140, 141
beamer package . . . . . . . . . . . 25
C
\chapter . . . . . . . . . . . . . . 107
\chapter* . . . . . . . . . . 42, 107
\currentglossary . . . . . . 159
D
\DeclareAcronymList . . .
. . . . . . . . . . . . . 50, 87, 118
\defentryfmt . . . . . . . . . . 119
\defglsentryfmt . . . . . 78,
82, 83, 87, 87, 118, 124, 128
\DefineAcronymShortcuts 51
\delimN . . . . . . . . . . . . . . . 159
\delimR . . . . . . . . . . . . . . . 159
description (environment)
. . . . . . . . . . . 144, 145, 156
\descriptionname . . . . . . 26
doc package . . . . . . . . . . . . . . 2
document (environment) . 72, 73
E
\emph . . . . . . . . . . . . . . . . . 79
entry location . . . . . . . . . . . . . 8
\entryname . . . . . . . . . . . . 26
environments:
align . . . . . . . . . . . . . . . 141
description . . 144, 145, 156
document . . . . . . . . . . 72, 73
equation . . . . . . . . . . . . 16
frame . . . . . . . . . . . . . . . 140
itemize . . . . . . . . . . . . . 160
longtable . . . . . . . . . . .
. . . . 108, 146, 148, 149, 162
multicols . . . . . . . . . . . 154
supertabular . . . . 149, 151
theglossary . . 156, 156, 160
equation (environment) . . . 16
etex package . . . . . . . . . . . . . 37
etoolbox package . . . . . . . . 47, 87
F
file types
.alg . . . . . . . . . . . . . . . . 29
.aux . . . . . . . . . . . . . 30, 110
.glg . . . . . . . . . . . 29, 32, 176
.glg2 . . . . . . . . . . . . . . . . 2
.glo . . . . . . . . 30, 32, 58, 176
.gls . . . . . . . . . . . . . . 32, 58
.glsdefs . . . . . . . . . . . . 72
.ist . . . . . . . . . 32, 33, 48, 56
.log . . . . . . . . . . . . . . . . 176
.tex . . . . . . . . . . . . . . 31, 32
.xdy . . . . . . 31, 33, 49, 56, 109
glo2 . . . . . . . . . . . . . . . . . 2
gls2 . . . . . . . . . . . . . . . . . 2
first use . . . . . . . . . . . . . . . . . 8
flag . . . . . . . . . . . . . . . . 8, 81
text . . . . . . . . . . . . . . . . . . 8
\firstacronymfont . . . . .
. . 89, 124, 124, 125, 126, 175
flowfram package . . . . . . . . . . 149
fmtcount package . . . . . . . . . . 113
\footnote . . . . . . . . . . . . . 127
\forallglossaries . . . . . 163
\forallglsentries . . . . . 163
\forglsentries . . . . . . . . 163
frame (environment) . . . . . . 140
G
\Genacrfullformat . . . . . 89
\genacrfullformat . . . . .
. . . . . . 88, 89, 124, 128–130
\GenericAcronymFields .
. . . . . . . . . . . . . . 129, 133
\Genplacrfullformat . . . 89
\genplacrfullformat . 88, 89
german package . . . . . . . . . . . 24
glossaries-accsupp package . . .
. . . . . . . 23, 61, 62, 171, 172
glossaries-babel package . . . . . 37
glossaries-polyglossia package 27, 37
glossaries-prefix package . . . . .
. . . . . . . 23, 61, 62, 166, 167
glossary counters:
glossaryentry . . . . . . . 42
glossarysubentry . . . . 43
179
Index
glossary package 1, 11, 136, 137, 175
long4colborder . . . . . . 147
glossary styles:
long4colheader . . . . . . 147
altlist . . . 126, 127, 135, 145
long4colheaderborder 147
altlistgroup . . . . . . . . 145
longborder . . . . . . . . . . 146
altlisthypergroup . . . 145
longheader . . . . . . 146, 157
altlong4col . . . . . 142, 147
longheaderborder 108, 146
altlong4colborder . . . 147
longragged . . . . . . . . . . 148
altlong4colheader . . . 147
longragged3col . . 148, 149
altlong4colheaderborder
longragged3colborder 149
. . . . . . . . . . . . . . . . . . 147
longragged3colheader 149
altlongragged4col . . . 149
longragged3colheaderborder
altlongragged4colborder
. . . . . . . . . . . . . . . . . . 149
. . . . . . . . . . . . . . . . . . 149
longraggedborder . . . . 148
altlongragged4colheader
longraggedheader . . . . 148
. . . . . . . . . . . . . . . . . . 149
longraggedheaderborder
altlongragged4colheaderborder
. . . . . . . . . . . . . . . . . . 148
. . . . . . . . . . . . . . . . . . 149
mcolalttree . . . . . . . . . 155
altsuper4col . 142, 150, 151
mcolalttreegroup . . . . 155
altsuper4colborder . . 151
mcolalttreehypergroup
altsuper4colheader . . 151
. . . . . . . . . . . . . . . . . . 155
altsuper4colheaderborder
mcolindex . . . . . . . 154, 155
. . . . . . . . . . . . . . . . . . 151
mcolindexgroup . . . . . . 155
altsuperragged4col . . 152
mcolindexhypergroup . 155
altsuperragged4colborder
mcoltree . . . . . . . . . . . . 155
. . . . . . . . . . . . . . . . . . 152
mcoltreegroup . . . . . . . 155
altsuperragged4colheader
mcoltreehypergroup . . 155
. . . . . . . . . . . . . . . . . . 152
altsuperragged4colheaderbordermcoltreenoname . . . . . . 155
mcoltreenonamegroup . 155
. . . . . . . . . . . . . . . . . . 152
mcoltreenonamehypergroup
alttree . . . . . . . . . 153–155
. . . . . . . . . . . . . . . . . . 155
alttreegroup . . . . 154, 155
super
. . . . . . . . . . . 149, 150
alttreehypergroup 154, 155
super3col
. . . . . . . . . . . 150
index . . . . . . . . . . . 153–155
super3colborder
. . . . . 150
indexgroup . . . . . . 153, 155
super3colheader
. . . . . 150
indexhypergroup . 153, 155
super3colheaderborder
inline . . . . . . . . 18, 155, 156
. . . . . . . . . . . . . . . . . . 150
list . . . . . . . . . . . . . . 44,
super4col
. . . . 142, 150, 151
145, 156–158, 161, 170, 176
super4colborder
. 150, 151
listdotted . . . . . . 144, 146
super4colheader
. 150, 151
listgroup . . . . . . . . . . . 145
super4colheaderborder
listhypergroup . . . . . .
. . . . . . . . . . . . . . . . . . 151
. . . . . . . . 145, 153, 154, 157
superborder . . . . . . . . . 150
long . . . . . . . . . . . . 144, 146
superheader . . . . . . . . . 150
long3col . . . . . 143, 146, 147
superheaderborder 108, 150
long3colborder . . 143, 147
superragged . . . . . 151, 152
long3colheader . . 143, 147
superragged3col . . . . . 152
long3colheaderborder
. . . . . . . . . . . . . . 143, 147
superragged3colborder
. . . . . . . . . . . . . . . . . . 152
long4col . . . . . . . . 142, 147
180
Index
superragged3colheader
\gls . . 8, 9, 29, 36, 38, 60, 78,
. . . . . . . . . . . . . . . . . . 152
80, 81, 82, 83, 87, 88, 90–
92, 96, 111, 119, 122, 126,
superragged3colheaderborder
130, 137, 139, 140, 167, 176
. . . . . . . . . . . . . . . . . . 152
\gls* . . . . . . . . . . . . . . . . . 38
superraggedborder . . . 152
\glsadd . . . . . . . . . . . . . . . 94
superraggedheader . . . 152
\glsaddall . . . . . . . . . . 16, 94
superraggedheaderborder
\glsaddall options
. . . . . . . . . . . . . . . . . . 152
types . . . . . . . . . . . . . . . . 94
tree . . . . . . . . . 133, 153–155
\glsaddallunused
. . . . . . 95
treegroup . . . . . . . 153, 155
\glsaddkey
.
.
.
.
.
61,
63, 64, 64
treehypergroup . . 153, 155
\GlsAddXdyAttribute
79, 111
treenoname . . . . . . 153, 155
\GlsAddXdyCounters
111,
113
treenonamegroup . 153, 155
\GlsAddXdyLocation
112,
114
treenonamehypergroup
\glsautoprefix
.
.
.
.
.
.
.
.
41
. . . . . . . . . . . . . . 153, 155
\glscapscase . . . . . . . 88, 128
glossary-inline package . . . . . . 155
\glsclearpage . . . . . . . . . 40
glossary-list package 43, 44, 108, 144
\glsclosebrace . . . . . . . . 109
glossary-long package . . . . . . .
\glscustomtext . . . . . 87, 119
. . . . . . 43, 44, 108, 146, 148
\GlsDeclareNoHyperList
glossary-longragged package . . 148
. . . . . . . . 39, 55, 72, 77, 80
glossary-mcols package 44, 154, 155
\glsdefaulttype . . . . . . .
glossary-super package . . . . . .
. . . . . . . . 50, 69, 70, 87, 163
. . . . . . 43, 44, 108, 149, 151
\GLSdesc . . . . . . . . . . . . . . 85
glossary-superragged package . 151
\Glsdesc . . . . . . . . . . . . . . 85
glossary-tree package . . . . . . .
\glsdesc . . . . . . . . . . . . . . 85
. . . . . . . . . 43, 44, 108, 153
\glsdescwidth . . 142, 146–152
glossaryentry (counter) . .
\glsdisablehyper . . . . 91, 92
. . . . . . . . . . . . . 42, 42, 43
\glsdisp . . . . . . . . . . . . . .
\glossaryentrynumbers . 159
. 8, 60, 78, 82, 87, 91, 92, 119
\glossaryheader . . . . . . .
\glsdisplay . . . . . . . . . 61, 87
. . . . . . . . 145, 156, 157, 160
\glsdisplayfirst . . . . 61, 87
\glossaryname . . . . . . . 26, 37
\glsdisplaynumberlist .
\glossarypostamble . . . .
. . . . . . . . . . . . . . . 39, 105
. . . . . . . . . . . . 93, 107, 156
\glsdoifexists . . . . . . . . 164
\glossarypreamble 43, 107, 156
\glsdoifexistsorwarn . . 164
\glossarysection . . . . . . 155
\glsdoifnoexists . . . . . . 164
\glossarystyle . . . . . . . . 106
\glsdosanitizesort . . . . 46
glossarysubentry (counter) 43
\glsenablehyper . . . . . . . 91
\glossentry . . . . 158, 158, 159
\glsentrycounterlabel . 158
\Glossentrydesc . . . . . . . 102
\Glsentrydesc . . . . . . . . . 102
\glossentrydesc . . . 102, 158
\glsentrydesc . . . . . . . . . 102
\Glossentryname . . . 101, 161
\Glsentrydescplural . . . 102
\glossentryname 100, 158, 161
\glsentrydescplural . . . 102
\Glossentrysymbol . . . . . 103
\Glsentryfirst . . . . . . . . 101
\glossentrysymbol . 103, 158
\glsentryfirst . . . . . . . . 101
\GLS . . . . . . . . . . . 8, 60, 81, 167
\Glsentryfirstplural . . 101
\glsentryfirstplural . . 101
\Gls 8, 23, 60, 62, 81, 122, 137, 167
181
Index
\glsentryfmt . . . . . . . . 22,
78, 82, 83, 87, 89, 91, 92, 118
\Glsentryfull . . . . . . . . . 123
\glsentryfull . . . . . . . . .
. . . . 123, 125–127, 129, 131
\Glsentryfullpl . . . . . . . 123
\glsentryfullpl . . . . . . . 123
\glsentryitem . . . . . 158, 160
\Glsentrylong 89, 122, 131, 133
\glsentrylong . . 122, 131, 133
\Glsentrylongpl . . . 123, 131
\glsentrylongpl . . . 123, 131
\Glsentryname . . . . . . . . . 100
\glsentryname . . . . . 100, 104
\glsentrynumberlist 39, 105
\Glsentryplural . . . . . . . 101
\glsentryplural . . . . . . . 101
\Glsentryprefix . . . . . . . 169
\glsentryprefix . . . . . . . 169
\Glsentryprefixfirst . . 169
\glsentryprefixfirst . . 169
\Glsentryprefixfirstplural
. . . . . . . . . . . . . . . . . . 169
\glsentryprefixfirstplural
. . . . . . . . . . . . . . . . . . 169
\Glsentryprefixplural . 169
\glsentryprefixplural . 169
\Glsentryshort . . . . . . . . 123
\glsentryshort . . . . . . . . 123
\Glsentryshortpl . . . . . . 123
\glsentryshortpl . . . . . . 123
\Glsentrysymbol . . . . . . . 103
\glsentrysymbol . . . . 89, 102
\Glsentrysymbolplural . 103
\glsentrysymbolplural . 103
\Glsentrytext . . . . . . . . .
. . . . . . 64, 76, 101, 122, 170
\glsentrytext . . . . . . . . .
. . . 64, 76, 98, 101, 104, 122
\Glsentryuseri . . . . . . . . 103
\glsentryuseri . . . . 103, 158
\Glsentryuserii . . . . . . . 103
\glsentryuserii . . . . . . . 103
\Glsentryuseriii . . . . . . 104
\glsentryuseriii . . . . . . 104
\Glsentryuseriv . . . . . . . 104
\glsentryuseriv . . . . . . . 104
\Glsentryuserv . . . . . . . . 104
\glsentryuserv . . . . . . . . 104
\Glsentryuservi . . . . . . . 104
\glsentryuservi . . . . . . . 104
\glsexpandfields . . . . . . 67
\GLSfirst . . . . . . . . . . . . . 83
\Glsfirst . . . . . . . . . . . . . 83
\glsfirst . . . . . . . . . . . . . 83
\GLSfirstplural . . . . . . . 84
\Glsfirstplural . . . . . . . 84
\glsfirstplural . . . . . . . 84
\glsgenacfmt . . . . . . . . . .
. . . . . . 88, 89, 124, 128, 130
\glsgenentryfmt . 88, 128, 130
\glsgetgrouptitle . . . . . 157
\glsglossarymark . . . . . .
. . . . . . . . . 40, 40, 107, 107
\glsgroupheading . . 157, 160
\glsgroupskip . . 144, 158, 160
\glshyperlink . . . 92, 100, 104
\glshypernavsep . . . . . . . 145
\glsIfListOfAcronyms . . 51
\glsifplural . . . . . . . 88, 128
\glsinlineparentchildseparator
. . . . . . . . . . . . . . 156, 156
\glsinlineseparator 156, 156
\glsinlinesubseparator
. . . . . . . . . . . . . . 156, 156
\glsinsert . . . . . . . . . . . . 87
\glslabel . . . . . . . . . . . . . 87
\glslabeltok . . . . . . . . . . 129
\glslink . . . . . . . . . . . . 78,
81, 82, 89, 91, 94, 111, 133
\glslink options
counter . . . . . . . . . . . . 80, 111
format . . . . . . 78, 79, 105, 111
hyper . . . . . . . . . 78, 80, 91, 94
local . . . . . . . . . . . . . . . . . 80
\glslink* . . . . . . . . . . . . . 81
\glslistdottedwidth . . . 146
\glslocalreset . . . . . . . . 139
\glslocalresetall . . . . . 139
\glslocalunset . . . . . . . . 139
\glslocalunsetall . . . . . 139
\glslongtok . . . . . . . . . . . 129
\glsmcols . . . . . . . . . . . . . 154
\glsmoveentry . . . . . . . . . 71
\GLSname . . . . . . . . . . . . . . 84
\Glsname . . . . . . . . . . . . . . 84
\glsname . . . . . . . . . . . . . . 84
\glsnamefont . . . . . . 108, 125
182
Index
\glsnavhypertarget . . . . 157
\glsshorttok . . . . . . . . . . 129
\glsnoexpandfields . . . . 67
\glssortnumberfmt . . . . . 45
\glsnumberformat . . . . . . 113
\glssubentrycounterlabel
. . . . . . . . . . . . . . . . . . 159
\glsnumbersgroupname . . 26
\glssubentryitem . . 159, 160
\glsnumbersgrouptitle . 157
\glsnumlistlastsep . . . . 105
\GLSsymbol . . . . . . . . . . . . 85
\glsnumlistsep . . . . . . . . 105
\Glssymbol . . . . . . . . . . . . 85
\glsopenbrace . . . . . . . . . 109
\glssymbol . . . . . . . . . . 84, 89
\glspagelistwidth . . . . .
\glssymbolsgroupname 26, 157
. . . . . . . . . . . 142, 147–152
\glstarget . . . . . . . . 158, 159
\glspar . . . . . . . . . . . . . . . 59
\GLStext . . . . . . . . . . . . 64, 83
\GLSpl . . . . . . 8, 60, 61, 82, 168
\Glstext . . . . . . . . . . . . 64, 83
\Glspl . . . 8, 60–62, 82, 122, 168
\glstext . . . . . . . . . . . . . .
\glspl . . . . . . . . . . . . . . 8,
. . 64, 82, 83–85, 89, 119, 120
60, 61, 78, 82, 87, 91, 122, 139
\glstextformat . . . 78, 89, 100
\GLSplural . . . . . . . . . . . . 84
\glstextup . . . . . . . . . . . . 130
\Glsplural . . . . . . . . . . . . 83
\glstocfalse . . . . . . . . . . 39
\glsplural . . . . . . . . . . . . 83
\glstoctrue . . . . . . . . . . . 39
\glspluralsuffix . . . . 60, 62
\glstreeindent . . . . . . . . 153
\glspostdescription . . . 144
\glsunset . . . . . . . . . . . . . 139
\glspostinline . . . . 156, 156
\glsunsetall . . . . . . . 92, 139
\glsprestandardsort . 46, 61
\GlsUseAcrEntryDispStyle
\glsquote . . . . . . . . . . . . . 109
. . . . . . . . . . . . . . . . . . 129
\glsrefentry . . . . . 18, 42, 43
\GlsUseAcrStyleDefs . . . 129
\glsreset . . . . . . . . . 119, 139
\GLSuseri . . . . . . . . . . . . . 85
\glsresetall . . . . . . . . . . 139
\Glsuseri . . . . . . . . . . . . . 85
\glsresetentrycounter . 43
\glsuseri . . . . . . . . . . . . . 85
\glssee . . . . . 11, 45, 79, 97, 97
\GLSuserii . . . . . . . . . . . . 86
\glsseeformat . . . . . 8, 98, 99
\Glsuserii . . . . . . . . . . . . 86
\glsseeitemformat . . . . . 98
\glsuserii . . . . . . . . . . . . 85
\glsseelastsep . . . . . . . . 98
\GLSuseriii . . . . . . . . . . . 86
\glsseelist . . . . . . . . . . 8, 99
\Glsuseriii . . . . . . . . . . . 86
\glsseesep . . . . . . . . . . . . 98
\glsuseriii . . . . . . . . . . . 86
\glsSetAlphaCompositor 57
\GLSuseriv . . . . . . . . . . . . 86
\glsSetCompositor . . . . . 57
\Glsuseriv . . . . . . . . . . . . 86
\glssetexpandfield . . . . 66
\glsuseriv . . . . . . . . . . . . 86
\glssetnoexpandfield . . 66
\GLSuserv . . . . . . . . . . . . . 86
\glsSetSuffixF . . . . . . . . 74
\Glsuserv . . . . . . . . . . . . . 86
\glsSetSuffixFF . . . . . . . 74
\glsuserv . . . . . . . . . . . . . 86
\glssetwidest . . . . . . . . . 154
\GLSuservi . . . . . . . . . . . . 86
\GlsSetXdyCodePage 30, 49, 110
\Glsuservi . . . . . . . . . . . . 86
\GlsSetXdyFirstLetterAfterDigits
\glsuservi . . . . . . . . . . . . 86
. . . . . . . . . . . . . . . . . . 115
H
\GlsSetXdyLanguage . . . .
html package . . . . . . . . . . . . . 91
. . . . . . . . . . 30, 49, 55, 110
\GlsSetXdyLocationClassOrder \hyperbf . . . . . . . . . . . . . . 80
\hyperbsf . . . . . . . . . . . . . 80
. . . . . . . . . . . . . . . . . . 114
\hyperemph . . . . . . . . . . . . 80
\GlsSetXdyMinRangeLength
\hyperit . . . . . . . . . . . . . . 80
. . . . . . . . . . . . . . . 74, 115
183
Index
\hyperlink . . . . . . . 79, 80, 91
\hypermd . . . . . . . . . . . . . . 80
\hyperpage . . . . . . . . . . . . 79
hyperref package 2, 74, 76, 77, 79,
82, 91, 100, 105, 112, 113, 158
\hyperrm . . . . . . . . . . . 80, 111
\hypersc . . . . . . . . . . . . . . 80
\hypersf . . . . . . . . . . . . . . 80
\hypersl . . . . . . . . . . . . . . 80
\hypertarget . . . . . . . . . . 91
\hypertt . . . . . . . . . . . . . . 80
\hyperup . . . . . . . . . . . . . . 80
I
\ifglossaryexists . . . . . 163
\ifglsdescsuppressed . . 165
\ifglsentryexists . . . . . 164
\ifglshaschildren . . . . . 164
\ifglshasdesc . . . . . . . . . 165
\ifglshaslong . . . . . 128, 165
\ifglshasparent . . . . . . . 164
\ifglshasprefix . . . . . . . 168
\ifglshasprefixfirst . . 168
\ifglshasprefixfirstplural
. . . . . . . . . . . . . . . . . . 169
\ifglshasprefixplural . 168
\ifglshasshort . . . . 128, 165
\ifglshassymbol . . . 161, 164
\ifglsucmark . . . . . . . . . . 40
\ifglsused . . 88, 128, 140, 164
imakeidx package . . . . . . . . . . 54
\index . . . . . . . . . . . . . . 54, 79
index package . . . . . . . . . . . . 54
\indexspace . . . . . . . . . . .
. . . . 145, 153, 158, 161, 176
inputenc package . . 19, 24, 62, 110
\inputencodingname . . . . 110
\item . . . . . . . . . . . . . . . . . 145
itemize (environment) . . . . 160
J
\jobname . . . . . . . . . . . . . .
56
L
\label . . . . . . . . . . . . . . . . 41
latex . . . . . . . . . . . . . . . . 2, 77
latexmk . . . . . . . . . . . . . . . 28
link text . 9, 76–78, 81, 87, 89, 167
\loadglsentries . . 58, 69, 119
location list . . . . . see number list
\longnewglossaryentry .
. . . . . . . . . . . 58, 64, 69, 73
\longprovideglossaryentry
. . . . . . . . . . . . . . . . . . 59
longtable (environment) . .
. . . . 108, 146, 148, 149, 162
longtable package . . . . . . . 44, 146
M
\makefirstuc . . . . . . . . 40, 89
makeglossaries . . . . . . 9,
9, 11, 13, 14, 16–21, 24,
28–33, 36, 42, 48, 58, 96,
105, 106, 110, 116, 175, 176
\makeglossaries . . 28, 35,
56, 62, 74, 75, 96, 97, 106,
111, 112, 114, 115, 117, 175
makeglossariesgui . . . . .
. . . . . . . . . . . 9, 28, 31, 175
makeidx package . . . . . . . . . . 54
makeindex . . . . . . . . . . . 9,
9, 11, 13, 14, 16–21, 23,
27–30, 32–34, 37, 42, 46,
48, 49, 56, 58, 61, 62, 67,
74, 76, 79, 98, 105, 106,
116, 143, 153, 157, 175, 176
\MakeTextUppercase . . . . 40
\markboth . . . . . . . . . . . . . 40
memoir class . . . . . . . . . . . 40, 41
\memUChead . . . . . . . . . . . . 41
mfirstuc package . . . . . . . . . . . 2
\mfirstucMakeUppercase 40
multicol package . . . . . . . . . . . 154
multicols (environment) . . 154
N
nameref package . . . . . . . . . .
42
\newacronym . . . . 14, 50–53,
58, 61, 62, 70, 72, 88, 118,
119, 126–129, 137, 165, 171
\newacronymstyle . . 128, 130
\newdualentry . . . . . . . . . 95
\newglossary . . . . . . . . . .
. . . 32, 33, 35, 111, 113, 116
\newglossaryentry . . . . .
. . . . . . . . . 8, 14, 45, 46,
54, 58, 58, 62, 64, 69, 71,
72, 76, 81, 118, 119, 128, 166
\newglossaryentry options
access . . . . . . . . . . . . . . . 171
184
Index
. . 59, 60, 66, 85,
118, 126, 127, 129, 165, 171
descriptionaccess . . . . . . . . 171
descriptionplural . . . . 60, 66, 171
descriptionpluralaccess . . . . 171
first . . . . . . . 8, 60, 78, 81–
83, 88, 101, 124, 139, 166, 171
firstaccess . . . . . . . . . . . . . 171
firstplural . . . . . 8, 60, 63, 66,
78, 82, 84, 88, 102, 166, 171
firstpluralaccess . . . . . . . . . 171
format . . . . . . . . . . . . . . . 80
long . . 62, 88, 118, 124, 165, 171
longaccess . . . . . . . . . . . . 171
longplural . . 62, 66, 88, 118, 171
longpluralaccess . . . . . . . . . 171
name . . . . 45–47, 59–61, 66,
68, 84, 98, 100, 104, 124,
126, 127, 133, 157, 171, 174
nonumberlist . . . . . . . . . . . 61
parent . . . . . . . . . . 59, 60, 67
plural . . . . . . . . . 60, 63, 69,
78, 82, 83, 88, 101, 166, 171
pluralaccess . . . . . . . . . . . 171
prefix . . . . . . . . . . . . 166–169
prefixfirst . . . . . . . 166, 167, 169
prefixfirstplural . . . . . . 166–169
prefixplural . . . . . . . . 166–169
see . . 11, 45, 61, 62, 79, 96–98
short . 62, 88, 118, 124, 165, 171
shortaccess . . . . . . . . . . . . 171
shortplural . . 62, 66, 88, 118, 171
shortpluralaccess . . . . . . . . 171
sort
9, 45, 46, 61, 62, 66, 69,
124, 126, 127, 157, 174, 176
symbol . . . . . . . . . . 60, 61,
66, 84, 89, 90, 133, 165, 171
symbolaccess . . . . . . . . . . 171
symbolplural . . . . . . 61, 66, 171
symbolpluralaccess . . . . . . . 171
text . . . . . . . . . 60, 78, 81–
83, 88, 101, 124, 139, 166, 171
textaccess . . . . . . . . . . . . . 171
type . . . . . . . . . . . . 61, 69, 118
user1 . . . . . . 6, 61, 66, 85, 162
user2 . . . . . . . . . . . 61, 66, 162
user3 . . . . . . . . . . . . . . 61, 66
user4 . . . . . . . . . . . . . . 61, 66
user5 . . . . . . . . . . . . . . 61, 66
description
user6 . . . . . . . . . 6, 61, 66, 162
\newglossarystyle . . . . .
. . . . . . . . 144, 156, 157, 161
\newline . . . . . . . . . . . 60, 144
\newterm . . . . . . . . . . . . . . 54
ngerman package . . . . . . . 24, 109
\nohyperpage . . . . . . . . . . 74
\noist . . . . . . . . . . . 19, 56,
58, 74, 75, 109–112, 114, 115
\nopostdesc 54, 59, 68, 144, 165
number list . . . 9, 9, 16, 17, 22,
27, 29, 39, 44, 45, 57, 61,
67, 69, 74, 76, 94, 97, 105,
111, 114, 116, 145, 146,
148, 150–152, 155, 158, 160
\numberline . . . . . . . . . . . 39
O
\oldacronym . . . . . . . 136, 137
P
package options:
acronym 26, 32, 33, 35, 41, 49,
50, 55, 70, 95, 116, 117, 136
true . . . . . . . . . . . . . 35, 50
acronymlists . . 50, 87, 117, 118
acronyms . . . . . . . . . . . 35, 50
compatible-2.07 . . . . . . . 55, 56
compatible-3.07 . . . . 50, 55, 87
counter . . . . 45, 57, 74, 111, 113
page . . . . . . . . . . . . . . . 45
counterwithin 42, 43, 142, 158, 160
description . . . . . . . . . . 51–53
dua . . . . . . . . . . . . . . . 52, 53
entrycounter 42, 43, 142, 158, 160
false . . . . . . . . . . . . . . . 42
true . . . . . . . . . . . . . . . 42
footnote . . . . . . . . . . . . 51, 52
hyperfirst . . . . . . . . . . . . 38, 92
false . . . . . . 38, 91, 127, 174
true . . . . . . . . . . . . . . . 38
index . . . . . . . . . . . 35, 54, 55
makeindex . . . . . . . . 35, 48, 55
nogroupskip 14, 45, 144, 158, 161
false . . . . . . . . . . . . . . . 45
nohypertypes . 38, 72, 77, 78, 80
index . . . . . . . . . . . . . . 55
nolist . . . . . . . . . . . 44, 55, 144
nolong . . . . . . 44, 55, 142, 146
185
Index
nomain . 35, 50, 53–55, 116, 176
nonumberlist . . . . . . . . . . .
...
9, 44, 45, 61, 74, 94, 159
nopostdot . . . . . . . . . . 45, 144
false . . . . . . . . . . . . . . . 45
nostyles . . . . . . . . . . . . . .
44, 55, 142, 144, 146, 149, 153
nosuper . . . . . 44, 55, 142, 149
notranslate . . . . . . . . . . 38, 55
notree . . . . . . . . . . 44, 55, 153
nowarn . . . . . . . . . . . . . 35, 72
numberedsection . . 41, 106, 107
autolabel . . . . . . . . . . 41, 42
false . . . . . . . . . . . . . . . 41
nameref . . . . . . . . . . . . . 42
nolabel . . . . . . . . . . . . . 41
numberline . . . . . . . . . . . . 39
numbers . . . . . . . . . 35, 54, 117
order . . . . . . . . . . . . . . . . 48
letter . . . . . . . . . . 18, 30, 48
word . . . . . . . . . . 18, 30, 48
sanitizesort . . . . . . . . . . 36, 46
false . . . . . . . . . . . . . 36, 46
true . . . . . . . . . . . . . . . 36
savenumberlist . . . . . . . 39, 105
false . . . . . . . . . . . . . . . 39
savewrites . . . . . . . . . . . 36, 37
false . . . . . . . . . . . . . . . 36
section . . . . . . . . . . . . 39, 107
seeautonumberlist . . . 45, 61, 97
shortcuts . . . . . . . . . . . 51, 122
smallcaps . . . . . 51–53, 55, 174
smaller . . . . . . 51–53, 174, 175
sort . . . . . . . . . . . 45, 174, 176
def . . . . . . 45, 46, 61, 69, 174
standard . . . . . . . . . . 45, 46
use . . . . . . 45, 46, 61, 69, 174
style . . 43, 44, 106, 142, 148, 151
list . . . . . . . . . . . . . . . . 43
subentrycounter . . . . . . . . .
. . . 43, 67, 69, 142, 159, 160
false . . . . . . . . . . . . . . . 43
symbols . . . . . . . . . 35, 53, 117
toc . . . . . . . . . . . . . . . 39, 106
translate . . . . . . . . . 37, 38, 55
babel . 24, 25, 27, 37, 38, 175
false . . . . . . . . 24, 27, 37, 38
true . . . . . . . . . . . . . 37, 38
ucfirst . . . . . . . . . . . . . . . . 41
.....
.....
.....
.....
48, 49, 55,
xindygloss . . .
. . . . . . . . . . 40
. . . . . . . . . . 40
. . . . . . . . . . 40
21, 23, 30–32,
57, 109, 111, 115
. . . . . . . . 49, 55
xindynoglsnumbers . . . . . 49, 55
page (counter) . . . . . . . . . . . 113
\pagelistname . . . . . . . . . 26
pdflatex . . . . . . . . . . . . . 2, 77
\PGLS . . . . . . . . . . . . . . . . . 167
\Pgls . . . . . . . . . . . . . . . . . 167
\pgls . . . . . . . . . . . . . . . . . 167
\PGLSpl . . . . . . . . . . . . . . . 168
\Pglspl . . . . . . . . . . . . . . . 168
\pglspl . . . . . . . . . . . . . . . 167
pod2man . . . . . . . . . . . . . . . 31
polyglossia package . 24, 27, 37, 38
\printacronyms . . . . . 49, 136
\printglossaries . . . . . .
58, 72, 106, 136, 159, 164, 176
\printglossary . . . . . . . .
44, 49, 53, 54, 58, 72, 106,
136, 142, 144, 159, 164, 176
\printglossary options
nonumberlist . . . . . . . . . . . 107
numberedsection . . . . . . . . 106
style . . . . . . . 44, 106, 142, 144
title . . . . . . . . . . . . . . . . . 106
toctitle . . . . . . . . . . . . . . . 106
type . . . . . . . . . . . . . . . . . 106
\printindex . . . . . . . . . . . 54
\printnumbers . . . . . . . . . 54
\printsymbols . . . . . . . . . 53
\provideglossaryentry .
. . . . . . . . . . . . . . . . 59, 71
ucmark
false
true
xindy .
R
. . . . . . . . 52, 125
\Roman . . . . . . . . . . . . . . . . 112
relsize package
S
sanitize . . . . . . . . . 9, 36, 98, 104
scrwfile package . . . . . . . . . . . 37
\section* . . . . . . . . . . 42, 107
\seename . . . . . . . . . . 8, 97, 98
\SetAcronymLists . . . . . . 50
\setacronymstyle . . . . . .
. . . . . . . . 51, 118, 123, 129
186
Index
\setAlphaCompositor . . . 114
\setCompositor . . . . . . . . 114
\setentrycounter . . . . . . 159
\setglossarypreamble 43, 107
\setglossarysection 40, 107
\setglossarystyle . . . . .
. . 44, 142, 144, 154, 155, 161
\setStyleFile . . . . 31, 32, 56
\setupglossaries . . . . . . 55
\subglossentry . . . . . . . . 159
supertabular (environment)
. . . . . . . . . . . . . . 149, 151
supertabular package . 44, 149, 151
\symbolname . . . . . . . . . . . 26
T
TeX4HT . . . . . . . . . . . . . . . . 176
\textbf . . . . . . . . . . . . . . . 79
textcase package . . . . . . . . . . 40
\textrm . . . . . . . . . . . . . . . 111
\textsc . . . . . 125, 130, 133, 174
\textsmaller . . . . 52, 125, 175
\textulc . . . . . . . . . . . . . . 130
\textup . . . . . . . . . . . . . . . 130
\the . . . . . . . . . . . . . . . . . . 129
theglossary (environment)
. . . . . . . . . . . 156, 156, 160
\thepage . . . . . . . . . . . . . . 113
translator package . . . . . . . . . .
. . . . . 24, 25, 27, 37, 38, 117
W
\write18 . . . . . . . . . . . . . .
37
X
xindy . . . 9, 10, 11, 19–21, 23,
24, 27–34, 37, 42, 46, 48,
49, 56–58, 61, 62, 74, 76,
79, 80, 105, 106, 109–113,
115, 116, 153, 157, 174–176
xkeyval package . . . . . . . . 13, 173
\xmakefirstuc . . . . . . . . . . 8
\xspace . . . . . . . . . . . . . . . 137
xspace package . . . . . . . . . . . 137
187