1
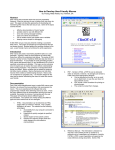
JDS7 Label design software USER MANUAL IMPORTANT NOTES Important Notes Copyright The present document and the described software therein belong to the company Allen Coding. All rights remain reserved. Reproduction of this document, in full or in part, requires prior explicit and written approval of the company Allen Coding. ©Copyright 2013 Allen Coding GmbH, all rights reserved. Disclaimer The company Allen Coding undertakes all measures to ensure that the published document is up to date at the time of publication. However no guarantee may be given that the document is error-free. Allen Coding does not accept liability for possible damages that may have been caused by faulty information in this document. The company Allen Coding reserves the right to change the present document at any time without prior notice and to alter its content in regards to continuous product improvement. Contact Information Allen Coding GmbH Friedrich-Bergius-Ring 30 D-97076 Würzburg Direct +49 931 250 76 - 0 Fax +49 931 250 76 – 50 Email: [email protected] Website: www.allen.de JDS7 M00901100EN0413 3 TABLE OF CONTENTS Table of Contents Important Notes .......................................................................................................................... 3 Table of Contents ........................................................................................................................ 4 1 Introduction ....................................................................................................................... 5 2 Installation ......................................................................................................................... 6 3 Select printer ...................................................................................................................... 8 4 Files .................................................................................................................................. 10 5 Fonts ................................................................................................................................ 11 6 Fields ................................................................................................................................ 12 6.1 Text .......................................................................................................................................................................... 12 6.1.1 Fixed text .................................................................................................................................................................. 12 6.1.2 Variable field ............................................................................................................................................................ 12 6.1.3 Multiple field ............................................................................................................................................................ 12 6.1.4 RS field ..................................................................................................................................................................... 12 6.1.5 Counter .................................................................................................................................................................... 13 6.1.6 Audit Code................................................................................................................................................................ 13 6.1.7 Common variable ..................................................................................................................................................... 13 6.1.8 Shift code ................................................................................................................................................................. 14 6.2 Barcode .................................................................................................................................................................... 14 6.3 Graphic ..................................................................................................................................................................... 15 6.4 Line and Frame ......................................................................................................................................................... 15 6.5 Date .......................................................................................................................................................................... 16 6.6 Time ......................................................................................................................................................................... 17 7 Multiple fields .................................................................................................................. 18 8 Setup ................................................................................................................................ 19 8.1 Printer Setup ............................................................................................................................................................ 19 8.2 Common variables and other printer parameters ................................................................................................... 20 8.3 Download fonts ........................................................................................................................................................ 20 8.4 Online Utilities.......................................................................................................................................................... 21 9 Print ................................................................................................................................. 22 4 JDS7 M00901100EN0413 INTRODUCTION 1 Introduction XLU printers have a powerful software tool, JDS7, which lets you design labels for your printer very quickly and easily through a true WYSIWYG user interface. JDS7 was developed in the Windows environment, full compatible with all Windows versions, included Windows7 (32 and 64 bits), and provides all the tools needed to create, edit and print labels on XLU printers. Moreover, JDS7 lets you simple management of the printer status and setup parameters. JDS7 has a context sensitive integrated help. JDS7 M00901100EN0413 5 INSTALLATION 2 Installation This chapter describes how to install JDS7 into your computer. Insert the installation disk into your computer’s CD-Rom drive. The installation program recommends c:\Program Files\jds7 as the directory to install the necessary files. You may accept this recommendation or specify a different directory with the Browse button if desired. Click on Next when you are ready to continue. The Program Folders option window will appear. 6 JDS7 M00901100EN0413 INSTALLATION You can place a shortcut into the desktop by checking the box that appears in this window. You may use the Back key to return to an earlier window and make changes or click on Next to continue with the JDS7 installation process. When you click Next the actual installation will commence and you will see progress indicators on your computer screen. Once the installation is complete you will see the following screen. To run JDS7 If you chose this option, an icon has been placed on your Windows Desktop for the JDS7 program. Double-click this icon to start JDS7. If not, click on Start>Programs>Jds7>Jds7 to run the program. JDS7 M00901100EN0413 7 SELECT PRINTER 3 Select printer Once JDS7 is open for the first time, the next step is setup a printer to work with. Select Add and choose the printer model and the way it is going to communicate with the computer. 8 JDS7 M00901100EN0413 SELECT PRINTER More printers can be added. In such case the user could define which of them the “default printer” is. JDS7 M00901100EN0413 9 FILES 4 Files When a label is designed and saved, JDS7 create two files with extensions jds imp The .jds file is only read by JDS7 and has all the fields information. The .imp file has the same information but in a way that the printer could "understand". This is the file that we will use for download labels into the printer through the USB port. They must be copied into the IMPPRX folder in the pen drive device. JDS7 needs to know for what printer you are going to design a label in order to setup the label parameters properly. In some cases, a label designed for a specific printer could be printed in another one; the user can choose this option. Label files created with JDS7, whose extensions are .jds, are not compatible with files created with JDS4, however there is the option File > Import label from JDS4 that allow the user to read a label created with JDS4 (.frm file) and save it with the new .jds extension. 10 JDS7 M00901100EN0413 FONTS 5 Fonts The tab Font is available whenever the user choose fields like text, date, time, variable fields, counters, shiftcode and audit code. There are 3 resident fonts. Fonts 2 and 3 are WGL4 fonts and have all the European characters. Font1 is not this kind and we keep for compatibility with JDS4 labels. In addition to the resident fonts, the user could choose any Windows installed TrueType font. All Unicode characters could be printed using Truetype fonts, Asian included. XLU printers have about 23Mb of free space to keep downloadable fonts. In these cases, be sure that the font is downloaded into the printer. (See section 8.3) NOTE It is the responsibility of the end users to ensure that they comply with the font licensing requirements provided by the owners of such fonts. Any fonts stored in memory of LTU printers may require licensing from the font vendor. Another option is to use a Truetype font and treat the text written with it as a graphic. This applies for fixed text into the label, not variable. JDS7 M00901100EN0413 11 FIELDS 6 Fields This chapter covers the different type of fields available for use when designing a label and their options. 6.1 Text 6.1.1 Fixed text This field is used to define non-variable text that will be printed in the image. Enter the desired contents in the one or multiline text box. In the last case, set the alignment option and the space between lines in mm. 6.1.2 Variable field Variable fields contain numeric or alphanumeric information. A Field number is used to identify the Variable field in the JDS7 editing window. The Title also appears on the handset to prompt the operator as to what type of information should be entered from the handset or PC keyboard as the image is selected for printing or loaded to the printer. Printing the title is optional. If you choose to print the title it will appear as a preface to the variable information. 6.1.3 Multiple field This is a combination of other existing fields. They are composed in the Multiple Fields section from the drop-down menu and assigned a number from 1 to 20. (see Chapter 7) 6.1.4 RS field This field is designed to be filled with information received through the printer serial port. This allows “real time” information to be loaded to the image very quickly, allowing for very fast printing. The rest of the image is pre-mapped ahead of time and then only needs to process and prepare the variable data received through the RS channel. The parameters for this type of text are the Position in the string received and the Length of the data to be used. The data to be sent to the printer needs to be enclosed in brackets [information]. 12 JDS7 M00901100EN0413 FIELDS 6.1.5 Counter It is possible to print a number that increases or decreases with each print cycle. This is referred to as a Counter. You can use a maximum of 20 counters per label. This is the Counter dialog box. It is necessary to define a Title for the Counter. The printing of this Title is optional. This Title will be used to prompt the operator to enter an initial value for the Counter. This initial value is the starting number, from which all subsequent numbers will be increased or decreased. The initial value can be entered from the computer (PC keyboard) or the handset. The Length box allows you to set the number of digits to print. The value in the box labeled Step determines how much to increase (or decrease) the number. For instance, with an initial value of 0 and a Step value of 2, the printer will print 2, 4, 6, 8…. A number can be repeated for a series of labels. To print several labels with the same number, it is necessary enter a value in the box labeled Repeat. For instance, with an initial value of 1 and a Repeat of 2 the printer will print 1,1,2,2,3,3,4,4… The Counter number box is assigned by the user and is used in the multiple field configuration. And about the field formatting, there are options to fill the remaining length with zeros, spaces or adjust the number to the length. 6.1.6 Audit Code This is an encrypted text field that reflects date and time of manufacturing and characters associated to the printer (customer ID, line ID and site ID). These characters are defined for each printer in the Printer Setup option described in Section 8.1 The Audit Code is composed of two lines of text, six characters on each line. When you choose audit code from the Text list, select number one or number two, program the general parameters (font type and rotation) and place it into the label. 6.1.7 Common variable Common variable is information associated to a specific printer. This information is stored in the printer rather than in the image. Typical uses would be for a production line number or plant designator. Using a Common variable field allows you to generate one image and send it to a variety of different printers and still produce printer specific images. Without the Common variable field it would be necessary to produce a separate image for each production line designation. There can be as many as five Common variable fields in any image. These are designated Common variable 1 through Common variable 5. Enter the general parameters for this field (font type, rotation) and place the defined field into the label. See section 8.2 to learn how to define and send Common variable to a printer JDS7 M00901100EN0413 13 FIELDS 6.1.8 Shift code Fields defined as a Shift code or Week shift code print up to 4 characters associated with intervals of time defined by the user. In the example dialog box above, for a shift defined as 08:00 to 16:00 the printer will print the letter B during this time period, the letter C in the next time period, and so on. It is necessary to define the interval of time and characters to be printed Begin by defining the Number of shifts, Starting at, and intervals values. Then, click the Set up button. The program will automatically set up the intervals. To add or edit the associated print string, double-click each interval and enter digits in the box marked Print. Follow the same process to define the Week shift code field for each day of the week. For a Shift code the Number of shifts, Starting at, and intervals will only need to be set-up once. The listing for the days of the week will be inactive. For both Shift code and Week shift code enter a number in the box labeled Shift code number to identify the field for use in a multiple field. 6.2 Barcode Here is an example of the Bar Code dialog box. The user selects the type of barcode and what type of data is going to be in it. Content like variable field, multiple field, counter, common variable, shift code, date and time need an identification number in order to look for the content inside these pre-defined fields. 14 JDS7 M00901100EN0413 FIELDS The following chart provides a list of number of digits and type of data allowed in each different code. Code Number of digits Type of data 2/5 Inter Variable Numeric Cod.93 Variable Alphanumeric UPC 11 Numeric EAN8 7 Numeric EAN13 12 Numeric Cod.39 Variable Alphanumeric Dun14 13 Numeric Cod.128 Variable Alphanumeric EAN 128 Variable Alphanumeric RSS14 (linear component) RSS14 (composite component) Datamatrix 13 Numeric 26 Alphanumeric Variable Alphanumeric 6.3 Graphic Select a valid image in one of the standard types: BMP JPG GIF PNG The printer resolution is 12 points by millimeter or 300 dpi. Place your cursor at the point in the label where you wish the upper left hand corner of the graphic to be and click the left mouse button. If necessary, you can later move the graphic just like any other field or resize it as desired. 6.4 Line and Frame Click the appropriate icon in the Toolbox and draw a line or a frame. The desired thickness could be changed by doubleclicking the line or frame and entering the value in the corresponding dialog box. Thickness is defined in printhead dots. 12 dots = 1 mm. JDS7 M00901100EN0413 15 FIELDS 6.5 Date Here is an example of the dialog box displayed when selecting the date field. The data from each column is exclusive; it is not possible to print the month in both numbers and letters simultaneously. Choose only one. When selecting an option all other options are instantly disabled. Active options appear as black, inactive ones in gray. This Undo button can be used to remove unwanted data from the date field. Simply click on in and the last item chosen will be removed. Multiple clicks will result in multiple items being removed. Enter a number in the box labeled Date n. to identify the field for use in a multiple field or a barcode. The Seven day batch and Time offset options are also exclusives and they have the following options: Seven day batch: Using the Seven day batch option allows the printing of a single expiration date for an entire week. The day and hour that the expiration date changes is determined by the printer configuration. See Printer setup section 8.1. Time offset: The printed time is modified according to the Time offset value entered in the Printer setup. Variable: This date is entered from PC keyboard or from the handset, as is done with Variable fields. Like the Variable field, you can enter a title and choose whether or not to print it. This title is also used to prompt the operator to enter the date at the handset. The date, entered as DDMMYY on the handset or PC keyboard, will be printed in the format determined by the image design. It is also possible to add years, months, or days to the date according to the values entered in the corresponding boxes except when using a Variable date. Select from the Separator box the character used to separate the Month, Day and Year in the Date field. Possible separators are: {none}, {space}, - (dash), : (colon), / (slash), and . (dot). By default, when printing months or days of the week in text form, the printer will use an alphabetic table. Selecting Printer language (Upcase) or Printer language (Lowcase) will provide upper or lower case text. Choosing Mon or Monday will determine if the full text or an abbreviation will be used. 16 JDS7 M00901100EN0413 FIELDS If you want to represent the days or months with another value it is possible to create and use one of up to 10 tables created by the user in the JDS7 program. Select table number and create or edit the string table of the months and days according to the following graphic: Tables will be loaded to the printer when the label that uses them is loaded. 6.6 Time This is the Time field options dialog box: All the fields in the Hour, Minute and Second columns are exclusive - you can only use each option once in a given field. Active options appear as black, inactive ones in gray. This Undo button can be used to remove unwanted data from the time field. Simply click on the Undo button and the last item chosen will be removed. Multiple clicks will result in multiple items being removed. Enter a number in the box labeled Hour n. to identify the field. JDS7 M00901100EN0413 17 MULTIPLE FIELDS 7 Multiple fields The Multiple Field allows the user to compose a single set of data from a combination of other fields. Go to the menu bar to locate this option. The fields that will be contained in the Multiple field must be created before a Multiple field can be composed. Note that the Multiple field itself is not used to print data. Rather, it is used to compile information from other fields that can be printed as a single field (Either as Text or a Barcode) It is possible to create up to 20 multiple fields. The following dialog box shows an example of a multiple field composition: The first step is to select the Multiple Field number to edit or create by using the forward-backward buttons. If the selected field was previously created, then the Composition box displays the existing combination of fields. The Selection box provides a list of available fields. Most of the available fields require that you supply an identifying number or information from the source field. Listed here are the specific requirements for some fields: Fnc1 (Function 1) is used as the first character in printing some barcodes. There are no options associated with this field. Common variable: select number from 1 to 5 Identifier: select a number that will appear between brackets in the composition. Checksum: will print a checksum from the beginning of data or from the last identifier if used. Fixed text: you can type in fixed text to be included in the multiple field composition. After you select a field and enter the necessary information, click on the Add button to place it in the Composition list. The final printed data will appear from left to right starting with the information at the top of the list. To eliminate a field from the Composition, select the field and press the Remove button. Also Remove All is allowed. 18 JDS7 M00901100EN0413 SETUP 8 Setup Select Setup from the drop down menu bar. This option is used to configure printers and the computer connection to them. It is also used to set and load Printer Setup parameters, edit Common Variables, Download fonts or enter the Online utilities option. Here is an example of the Setup dialog box: The printer connection to the computer is explained in Chapter 3 8.1 Printer Setup A typical intermittent printer configuration is indicated in the following graphic: The parameters above can also be modified with the PR5 or iView handsets. For more detail please refer to the printer User's Guide supplied with your printer. The numeric parameters appear with their corresponding value range in brackets. The Send to the Printer button transfers the parameters entered in the dialog box, through the associated port, to the printer. JDS7 M00901100EN0413 19 SETUP 8.2 Common variables and other printer parameters This is the dialog box corresponding to Common variables, described in section 6.1.7 This dialog allow changing options for the Seven day batch and Time offset explained in section 6.5 and Audit code explained in section 6.1.6 8.3 Download fonts This option allow download True Type fonts to the printer up to 23,5 Mb or 12 fonts. Notice the disclaimer window and go ahead. JDS7 gets the list of downloaded fonts into the printer and display this window: 20 JDS7 M00901100EN0413 SETUP Note that you can see how much fonts are currently in the printer memory and how much free space is available to download extra fonts. The option using sign allows you to select the font to download from the computer’s system fonts folder. The option using sign on the screen. allows you to delete all fonts. This is a time consuming procedure, please follow instructions 8.4 Online Utilities The Online utilities button allows you to view a list of images stored in the printer while in the stopped mode. Additionally, images can be deleted from this option. JDS7 M00901100EN0413 21 PRINT 9 Print This section is about sending the labels you have created in the JDS7 program to your printer. Note that you must have previously configured a connection to it in Printer Setup. Begin by opening the label you wish to send to the printer and then select File>Print or the corresponding icon in the Menu. The type of dialog box displayed depends on the fields selected when designing the label. Printing a label without variable fields Note that you can choose the printer that is going to receive the label although the dialog shows the default one as the first choice. You may want to keep the label into the printer memory and not print. Check the Send, not print option for this purpose. Printing a label with variable fields You are prompted to fill in the variable fields, counter or variable data content. In both cases, a Stop order is sent before sending the label. The machine status is always available through the button View machine status and only in case of IDLE status, the label is sent to the printer. 22 JDS7 M00901100EN0413