1
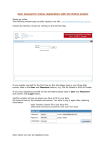
Beyond the Scores
User Manual
1|P a g e
SECTION 1: CLUB PROFILE
TABLE OF CONTENTS
SECTION/TITLE
Editing your Club Profile
Editing Members/Roster
1) Creating the Parent Circle
2) Adding Members
3) Adding Members to Circles
4) Adding more Circles
PAGE #
4
5
7
7
11
17
21
SECTION 2: SCHEDULE
26
SECTION 3: COMPETITIONS - INVITATIONS & ROSTERS
28
SECTION 4: HOST CLUBS
40
1) Responding to Invitations
2) Submitting Rosters
CREATE THE COMPETITION
PLAN
1) Description
2) League
3) Scoring
4) Media Gallery
PROMOTE
Manage Invitations
Fan Check-In
ORGANIZE
1) Attendees
2) Rounds
3) Sessions
4) Age Divisions
5) Team Match Ups
6) Squads
7) Judges
29
33
41
43
43
44
46
46
47
47
51
52
52
55
55
58
61
61
73
2|P a g e
8) Awards
HOST
1) Security
2) Dashboard
REPORTS
1) Pre-Competition
2) Awards and Results
79
79
79
79
87
87
89
SECTION 5: HARDWARE SET UP
90
1)
2)
3)
4)
Contents of Bin #1
Contents of Bin #2
Notebook and Monitor Set Up
Chief Scorer’s Table Set Up
91
97
99
100
3|P a g e
Section 1
Club Profile
4|P a g e
EDITING YOUR CLUB PROFILE
1) Log in to your account
2) To edit your club information, click on the blue “+ EDIT” button at the top right
5|P a g e
3) Change/Edit any information you need. Be sure that there is an email address listed under “Competition Invitation E-mail Address” as this is the email
that will be used when host clubs would like to invite you to their competition.
4) To change or add your club logo, click on “CHANGE LOGO” at the top right and follow the instructions.
6|P a g e
EDITING MEMBERS/ROSTER
1) Creating the Parent Circle: Circles are used for organizational purposes; to group your athletes (or members) as you see fit. You will notice later
when editing your athletes that there is no place to select your athletes’ levels. The reason for this is because levels can change several times
throughout the year. You use circles to group your athletes in their levels as you deem necessary.
a) Click on the “MEMBERS” button in the menu on the left of the page. You will now see a page similar to this (but without any members if you
do not have anyone in your roster yet
7|P a g e
b) Click on the blue “+” sign to create your circles for organizational purposes. When you hover over the button you will see that it says “add
circle”.
8|P a g e
c) After clicking it you will see
9|P a g e
d) This is your first circle. In the name tab, type “Gymnastics Ontario”. This will be your parent circle. After doing so you will see this page
NOTE: You will learn more about ‘circles’ after adding your members.
10 | P a g e
2) Adding Members:
a) From here you now want to add your members and athletes. Click on the blue “+ ADD NEW MEMBER” button at the top right of the screen
and follow the instructions to add a new member.
11 | P a g e
b) If you are adding an athlete who is already in the system (possibly switching from another club, or someone with the same name) they will
show up in this list. If the list is empty, they are a brand new athlete and you will click on the blue “+ ADD MEMBER” button.
12 | P a g e
c) If a list of athletes shows up, scroll through the list to see if your athlete is there. If they are, click on their name and click on the green
“NEXT” button. If you are unsure if an athlete in the list is the athlete you are trying to add, just click on the blue “+ ADD MEMBER” at the
top.
13 | P a g e
d) If you would like to add more information to their profile, you may do so at this time (most clubs do not add too much personal information
for the athlete). You can also go back and edit their information later.
e) If not, click on the green “NEXT” button
14 | P a g e
f)
You will see that the athlete has been successfully added and you can continue to add athletes to your roster.
15 | P a g e
g) When you are finished adding athletes, they will now show up in the main page
16 | P a g e
3) Adding Members to Circles:
a) Now you need to add them to your Gymnastics Ontario members circle. Click on the “GYMNASTIC ONTARIO” circle/button and the list will
disappear
17 | P a g e
b) Click on the blue “+ MEMBERS” button to the mid-right of the screen to add members to Gymnastics Ontario. A list of all of the members will
appear
c) Click on the blue “+ ADD” button beside their names to add them to Gymnastics Ontario
18 | P a g e
d) As you click them you will see it change to a green “ADDED” button. Click on “DONE” when you have selected the members you want to add
to Gymnastics Ontario
e) Your members will now show up in your Gymnastics Ontario circle and you should see the number of members you have in that circle. You
can see that Gymnastics Ontario has 9 members. You will see that there are more than 9 members showing. This is because not all members
have been added to the Gymnastics Ontario circle.
19 | P a g e
Please note that sometimes you need to log out and back in for the the changes to take effect.
20 | P a g e
4) Adding more Circles: This is where you organize your athletes into the levels you need for your club.
a) If your club has MAG and WAG athletes, those could be your next circles. After clicking on the Gymnastics Ontario circle (rectangle), a new
blue + button will appear. This is to add a new circle.
b) Follow the prompts to create a MAG circle and then do this again to add a WAG circle.
21 | P a g e
c) You can now add all of your MAG athletes to the MAG circle and then your WAG athletes to the WAG circle (follow the same steps as adding
athletes to the Gymnastics Ontario circle but this time you will click on the MAG circle first). Based on this example there are 2 members in
MAG and 6 in WAG. When you click on the WAG circle the option to add a new circle will appear with a new blue +.
22 | P a g e
d) You can now add circles to MAG and circles to WAG. Using WAG as an example, you can create 10 different circles to represent the 10
competitive levels (15 if you would like to include Aspire and HP). After you create a new circle, the page will refresh to only show the
Gymnastics Ontario circle. You will need to click on the Gymnastics Ontario and then the WAG circle each time you add a new circle to
continue. You can now see all of the WAG competitive levels.
23 | P a g e
e) From here you can now add your members to their levels. Using the example to add an athlete to the Level 5 circle:
i. Click on the Level 5 circle. Click on the blue “+ MEMBERS” button to the center right of the screen.
ii. Click the “+ ADD” beside the member’s name to add them to Level 5. In this example, Sally Smith and Jessica Smith have been added
to Level 5
iii. Repeat this process for any level.
iv. To remove athletes from circles, click on the same blue “+ MEMBERS” button. However, you will click on the green “ADDED” button
that will turn to blue “+ ADD”. They will no longer be in that circle/level.
24 | P a g e
f)
Please note that athletes can occur in as many levels as you want. If you add an athlete to a new level, they do not automatically disappear
from the old level, you need to remove them manually by following the process from iv. Also note, that you do not HAVE to do any of this.
As long as the athletes are listed under the Gymnastics Ontario circle you will be able to register them appropriately for competitions.
25 | P a g e
Section 2
Schedule
26 | P a g e
1) Schedule: When you click on the “SCHEDULE” tab in the menu on the left side you will see any upcoming competitions your athletes are registered in
as well as any past competitions your club has taken part in:
No competitions are displayed in this example because the club is not yet registered in any published competitions.
27 | P a g e
Section 3
Competitions:
Invitations & Rosters
28 | P a g e
1) Responding to Invitations:
a. Click on the blue “MY CLUBS” button on the top left of the screen
b. Select “MY COMPETITIONS”
c. Select “MY INVITES”
d. Scroll down the list to find the event you have been invited to and click on “SUBMIT RSVP”
29 | P a g e
e. Click on either “Yes, attending” or “No, not attending”
30 | P a g e
f.
After clicking on “Yes, attending” you will get this screen to submit your estimated number of athletes in each level. Fill out your estimates
and click “SEND RSVP”
31 | P a g e
g. The host club will receive this information and will send you a request for you to submit your roster.
32 | P a g e
2) Submitting Rosters:
a. Click on “SUBMIT ROSTER”. After doing so you will see this page:
b. Under “Leagues” choose “Gymnastics Ontario”
33 | P a g e
c. Under “Levels” you can choose “All Skill Levels”. You would then click “ADD COMPETITORS” and then you will see this page:
34 | P a g e
d. Click on the drop down error to reveal all of the levels offered in this competition. Select the level you would like to add competitors to. In
this example we will use Level 6. Once you have selected level 6, a list of all of your athletes will appear.
35 | P a g e
e. You will now click on “+ ADD” to register all of your level 6 athletes. As you click the “+ ADD” button you will see that they have been added
to your Level 6 roster.
36 | P a g e
f.
When you have finished adding your level 6 athletes, click “DONE” and you will see this page:
37 | P a g e
g. Complete for the remaining levels. When you have finished adding your athletes, you may click on ALL SKILL LEVELS again and the full list of
athletes will show up
h. Review your list
i. Click on “SUBMIT ROSTER”
38 | P a g e
j.
You will then see this page:
k. This competition will show up in your profile. The host club will now have control over your athletes who are registered in this competition.
If you need to change the level/category of an athlete you must contact the Meet Director directly to inform them of the change so that they
can adjust the roster.
39 | P a g e
Section 4
Host Clubs
40 | P a g e
CREATE THE COMPETITION
1) Log in to your club profile
2) Click on the MY CLUBS to access your MY COMPETITIONS and then this page will come up. Click on the CREATE NEW COMPETITION button
3) A new box will show up so that you can begin setting up your competition.
i. Enter the HOST ORGANIZATION and SPORT
41 | P a g e
ii.
iii.
iv.
v.
vi.
NAME YOUR COMPETITION
Choose the COMPETITION FORMAT – traditional is the one most often used
Choose your time-zone
Enter your start and end date
Enter the PUBLISH date. If you do not want the information to be seen at this time, then choose a later date.
4) Choose your support package. For all GO events, we use the WHITE package – click BUY
5) Then click UPGRADE
42 | P a g e
PLAN
1)
DESCRIPTION:
a. This now brings you to the competition set up page. You will see the menu on the left side. Follow the steps to set up your meet. Be
sure you save your changes on the bottom right of the DESCRIPTION page (not visible in the picture below).
43 | P a g e
2) LEAGUES:
a. Click LEAGUES on the left side and then click the blue ADD LEAGUE button on the top right.
b. Add the GYMNASTICS ONTARIO league
44 | P a g e
c. Choose the levels you will have at your competition and the age cut-off date (December 31st for most Ontario competitions). After
selecting your levels and age cut-off dates you will get a summary like this:
45 | P a g e
3) SCORING RULES:
a. Click on SCORING RULES on the left side.
b. Click on edit at the top right. When editing SCORING RULES you need to know that it is different for OCP levels and National levels. MAG
will also have different levels. For OCP WAG you click on the OCP levels (1-9 for this competition) and then the SCORING ALGORITHM is
A/B Panel. You then choose the RANKING ALGORITHM which is usually DENSE RANK.
c. You will need to go back and edit the National levels. The SCORING ALGORITHM is FIG and the RANKING ALGORITHM is DENSE RANK.
You may choose another ranking algorithm for your competition if necessary.
4) MEDIA GALLERY – Optional
46 | P a g e
PROMOTE
1) Click on “MANAGE INVITATIONS”
2) Click blue “ + INVITE CLUBS” in the top right corner
3) You will now see this box:
4) If you click on the State/Province and scroll down to Canada and select ON – the Ontario Clubs in Beyond the Scores will be listed alphabetically.
Currently there are still many clubs who have not provided an email address linked to their account. If you would like to invite a club who does not
47 | P a g e
have an email address you can add/change it manually later.
5) Click “ADD” next to the clubs you would like to send invitations to. When you are finished, click “DONE” at the bottom.
6) You will then see a list of all clubs you would like to send invitations to. This list has clubs who have been invited and accepted as well as clubs who
still need invitations. You can see in the STATUS column who has been sent an invite, who has not been sent an invite and who has accepted their
48 | P a g e
invitation.
7)
8)
9)
10)
11)
12)
To send invitations, click on the blue “SEND” button and select “INVITATIONS”
Select the clubs you would like to send the invite to and click “SEND”
A generic invitation has now been sent.
After the club accepts the invitation, you may request their roster by clicking on “SEND” then “ROSTER REQUESTS”
Select the clubs and click “SEND”. Those clubs will now be sent an email to submit their roster.
After a club has submitted their roster you will have the option to accept or decline their roster.
49 | P a g e
13) You will do so by clicking on the “EDIT” button beside the club’s name:
50 | P a g e
14) Scroll down if necessary to “ACCEPT” their roster. After doing so, the club will now be registered in your competition. This will be visible in the status
column. You will also see on the right side of the page that 6 clubs have been invited, 3 have accepted.
15) Of the 3 clubs who have accepted invitations, 2 have submitted rosters and they will now show up under ATTENDEES in the ORGANIZE section
The FAN CHECK-IN section is optional.
51 | P a g e
ORGANIZE
Follow the step below if you did NOT use the MANAGE INVITATIONS format under the PROMOTE SECTION. If you did use
the MANAGE INVITATIONS format, please skip to #2 - SESSIONS
1. ATTENDEES:
a. Click on the blue + ADD CLUB button at the top right
b. A pop-up box will occur where you can add the clubs that will be attending your meet. If you do not see the club in the list, do an individual
search.
52 | P a g e
c. After you have populated the clubs, a list appears of those clubs attending:
53 | P a g e
d. Click on the first club to populate their roster.
e. Click on the blue MANAGE ATHLETES button and a drop down will pop up. Click + ADD ATHLETES. A pop up of the club’s roster will occur and
you then select the athletes that are participating in your competition.
f. It is a good idea to double check the clubs’ roster at this point to be sure that the levels are the same in Beyond the Scores as what you have
in your own files for the competition as sometimes athletes participate in different levels throughout the season. You can edit the individual
athletes at this point.
g. Follow the same steps for all of the attending clubs
54 | P a g e
2. ROUNDS:
a. This section is only necessary if you have qualifying rounds. For example 2 days of competition where Day #1 is a qualifier for Day #2. If not,
you do not use this section as it will default to a standard competition.
3. SESSIONS:
a.
b.
c.
d.
Click on SESSIONS on the left hand side and then click + ADD SESSION on the right side.
Create the Session name and choose the date
Create your times for the session
Click save
55 | P a g e
e. Follow the same steps for all sessions
f.
Now that you have your sessions created, you need to assign athletes to the sessions.
i. Select your session and click the blue +ADD ATHLETES button in the center of the page.
ii. Follow the steps to add the athletes to your session
56 | P a g e
g. Once all athletes have been added to the sessions, a sample session will look like this:
57 | P a g e
4. AGE DIVISIONS
a. Click on AGE DIVISIONS on the left side
b. Select a session
c. Click the blue +ADD AGE DIVISION on the right side
d. Follow the steps for each category/level that you have during that session
58 | P a g e
e. The picture below is for the age category Level 1 age 7-9
59 | P a g e
f.
The picture below is for Level 2 age 9-13
g. Do this for the remaining levels and categories in that session.
h. Repeat the same steps for all sessions.
60 | P a g e
5. TEAM MATCH UPS: Only needed if you have a team competition component. More information to come.
6. SQUADS
a. Select the session in which you would like to set up the squads for.
61 | P a g e
b. Click the blue + ADD SQUADS button on the top right
c. If you see the above screen and click next, the squads will default to be set up by club and it will attempt to make the squads even.
62 | P a g e
d. If you are ok with the squads being set up by club, click next and then you get the breakdown:
63 | P a g e
e. However, for competitions where there are more than one level in a session, it is best to have the squads set up by level rather than club.
Click FINISH and then you get a screen like this:
64 | P a g e
f.
Now you want to change your squads so that they are organized by level rather than club. Unfortunately at this time, the best way known to
do this is to select each squad individually and remove the athletes from each squad like this:
65 | P a g e
g. Click the red x REMOVE button and you get this:
h. Click the box to the left of NAME and then remove all of the athletes. Repeat this for each squad.
i. The best idea right now is to set up your squads on your own in a spreadsheet or another method before continuing. In the case of this
session we have athletes in level 1, 2, 3 and 4. There are 18 athletes so it is best to have 2 squads with 5 and 2 squads with 4.
66 | P a g e
j.
After you have determined your squads, click on SQUAD A and then + ADD blue button to add athletes to the squad. When you have hit this
button, the list of athletes in that session will pop up:
67 | P a g e
k. From here you can individually select the athletes that you would like to start on Vault (squad A). For this sample, we have selected the level
1 and level 2 athletes
68 | P a g e
l.
Now click on EDIT to determine the starting order of the squad
69 | P a g e
m. Click RANDOM ORDER and SAVE CHANGES the squad will now show up with an athlete starting on all 4 events. In this case the Level 1 athlete
from Niagara Acrocats is starting the lineup.
70 | P a g e
n. In looking at this squad order you can see that there is a level 1 athlete starting and a level 2 athlete following her. You need to go back in
and edit the squad
71 | P a g e
o. Use the arrows on the right to move the level 1 athlete from Kawartha to follow the Niagara Acrocat level 1 athlete. You may also need to
move athletes so that athletes in the same level from the same club follow each other.
p. Click SAVE CHANGES. Squad A is now complete. Follow the same steps for each squad.
q. You can view the athlete rotation schedule in the REPORTS section.
72 | P a g e
7. JUDGES:
a. Click on the OFFICIALS on the left panel
b. You now need to add officials to your meet. At this point you will have already had your judges selected for your meet as well as the events
they will be judging each session
73 | P a g e
c. Click the + ADD OFFICIAL button on the top right
74 | P a g e
d. Type in the first and last name of the judge you are adding to your meet and hit the blue search button or enter. The judge will pop up and
you can click ADD.
e. Repeat this process for all officials
75 | P a g e
f.
You will now have a list of judges for your competition
g. Note that if you have a floating CCJ (a CCJ that will not be judging on a panel) you will not add them to the meet.
h. You will now assign judges to their events for each session. In this case the competition has 4 sessions. Click on the blue EDIT button to the
right of the judges name. Kelly Bashak will be judging Vault for 2 sessions and Bars for 2 sessions. Click on the VT square and it becomes
76 | P a g e
green, click on the UB square and it becomes green. Click the UPDATE button
77 | P a g e
i.
Repeat for all judges and then you get a summary of your officials. You can also view this information in the REPORTS section
8. AWARDS: This is a new section and it is optional. It is designed to help you calculate and order the awards you need for your competition. More
information to come.
78 | P a g e
HOST
1) SECURITY: This is where you set the passwords for your competition
a. Score Entry Password: Password for general score entry login (judges)
b. Scoreboard Password: Password for scoreboard login (displays)
c. Head Judge Password: Password for head judge score entry login. This is only required if you have set a session’s score entry method to head
judge
2) DASHBOARD: This is the area of the website where your head score person will monitor the competition. This is also where you create the
scoreboards (displays) for the competition.
a. Creating displays: You need to create a display for each event. Traditionally we use 4-6 TV’s to display the scores (one per event). To do this,
go to the dashboard and click the blue “+ CREATE NEW DISPLAY” button in the middle right of the screen.
79 | P a g e
b. You need to name your display (for example, Vault) as it will displays the vault scores. Choose a back ground and choose a layout. The simple
version is the first one. If you want to discover other things to display (banners, leaderboard, advertisements) you can experiment with
different layouts and edit different zones. After selecting your layout, click SAVE
80 | P a g e
c. You will see this screen:
d. Click on the drop menu to the middle right of the screen (under CREATE NEW DISPLAY) and select zone 1 (you would have more than one
zone if you chose a different layout. Scroll down the screen and click the blue “EDIT” button (not displayed here)
81 | P a g e
e. Select LIVE SCORING on the left
f. Type in the CHANNEL NAME (Vault)
g. Click DISPLAY OPTIONS (skill level and age division is already selected) and select SHOW SCORING BREAKDOWN so that the start value,
execution and final score will all be displayed.
h. Scroll down and click FILTER BY SESSION and select the sessions that you would like to display for. In most cases the display is the same for
every session but you can choose to have a different display for every session if you wish. If that is the case, only select the session you would
like to display at this time
i. Choose FILTER BY EVENT (click Vault)
82 | P a g e
j.
Click SAVE and then the information you have selected will be summarized on the right
k. Repeat for Bars, Beam and Floor (or for the MAG events)
l. If you are running more than one gym, you would need to create displays for GYM A and displays for GYM B. This is where you would need to
be careful when editing the display and selecting filter by session. If you have 2 gyms running, you would have Session 1 – GYM A and Session
1 – GYM B. You would have a display for GYM A – Vault in which you would only select the GYM A sessions while editing that filter. You
would have a separate display for GYM B – Vault in which you would select the GYM B sessions while editing that filter.
83 | P a g e
m. You will now see all 4 of your displays on the left. In the center (top and to the left) of the screen you can choose to turn on LIVE PREVIEW
84 | P a g e
n. This is what you will now see (takes a bit of time to show up)
o. This process will need to be completed on each notebook for each television. There is one television per event so on the first television and
notebook you will be logged in to your competition and will need to go to the above page. The first television will be for VAULT so you would
select the VAULT display.
85 | P a g e
p. In the center of the screen you will see “CLICK HERE TO VIEW THIS DISPLAY IN A NEW WINDOW” and the following screen will pop up
q. Fill in what you would like to call this display. The display must be called something other than VAULT. In this case we will call it VAULT
DISPLAY. Enter the competition password that you set up in the security section. Choose the event and then click VIEW SCOREBOARD.
r. You will now see the scoreboard. Click F11 to go full screen and then your vault display is ready to go!
s. Repeat for each event/television
86 | P a g e
REPORTS
1) PRE-COMPETITION: The main report we use here is “ATHLETE ROTATION SCHEDULE” (athlete draw). The rest are optional for you to use as you feel
are needed.
87 | P a g e
a. After you have created all of the squads for all of your sessions, you can view your athlete draw by clicking on the blue “EXPORT” button
beside ATHLETE ROTATION SCHEDULE. Click on the PDF option. This screen will now show up
b. If you would like to view the entire competition then select all sessions. Be sure to click on the box beside “Include Age Division and Skill
Level”. If you forget to do this, only the athlete name and club will show up on the draw. Then click “VIEW REPORT”. You will now get a PDF
for your athlete draw. You can save this to your computer and distribute it to participating clubs.
88 | P a g e
2) AWARDS AND RESULTS: The main report you will use here will be “ATHLETE RESULTS WITH BREAKDOWN”. This is for posting results. It is important
for you to select this report as it will display the start value for the routine. Click on the blue “EXPORT” button and you can choose to display by
session or by level. Select PDF. Select the levels you would like to see the results for and click “VIEW REPORT”. You will then get a pdf of results to
save to your computer or print and post.
If you would like to learn more about different sections of the website that are not discussed in this manual, the help section of the website is
very informative. As well, there is a live chat feature or you can email [email protected] if you have more detailed questions.
89 | P a g e
Section 5
Hardware Set Up
90 | P a g e
1) CONTENTS OF BIN #1
a. Packing of Tablet & Notebook Case
91 | P a g e
92 | P a g e
b. Cables are to be placed in side zipper pouch and not with the tablet to avoid screen being scratched
93 | P a g e
c. All five notebook bags are to be placed into one bin
94 | P a g e
d. Wireless hubs along with HDMI cables are to be placed into bin
95 | P a g e
e. Laptop bag with computer, power cable & mouse placed on top; cover with lid
96 | P a g e
2) CONTENTS OF BIN #2
97 | P a g e
Packing of bin (missing are the four TP-Link antennas to be placed into bin); cover with lid
98 | P a g e
3) NOTEBOOK AND TV MONITOR SET UP
Not shown are the TV’s in the first few pages. You will need to attach the base plates with three screws that are stored in Bin # 2 in a Ziploc bag; also provided
is a Robertson screwdriver to do so.
Each piece of gymnastics apparatus will require the following;
1 x Television Monitor & HDMI Cable
1 x Notebook with Power Cable
1 x Tablet with Power Cable and Stylus Pen
1 x Power Bar
IMPORTANT: Do NOT connect the HDMI cable to the notebook until the computer is fully booted up.
Clubs can setup the monitors in one of two ways;
a) A monitor at each apparatus (preferred choice)
b) All monitors in one central location
In either instance the athletes, coaches and judges should be able to easily view the monitors. The monitors are for the athletes, coaches and judges to view;
spectators may use the app to see the scores displayed (except for Blackberry users).
Be sure you charge the tablets the night before your competition is scheduled. Remind the judges or your floor manager to have judges plug the tablets in
during each of their breaks between sessions to insure the tablets remain charged throughout your competition.
99 | P a g e
4) CHIEF SCORER’S TABLE SET UP
The following equipment is to be setup at the scoring table;
1 x Laptop computer with power cable & mouse
1 x Printer with power cable & USB cable to connect to laptop (club provides paper)
2 x Bell Wireless Hubs with power cable & network cable
4 x TP-Link Antennas (2 each to be attached to each of the Bell hubs)
1 x Power Bar (not shown)
IMPORTANT: the wireless hubs should be separated on either end of your scorer’s table and the antennas further separated from the hub to insure maximum
efficiency in signal strength.
The laptop should be connected to a hub using the network cable and not by wireless to improve signal strength for the notebooks and tablets. (not shown in
the picture below) One of the Bell hubs will connect the netbooks to the internet (see label on top of hub); while the other Bell hub will connect the tablets to
the internet (see label on top of hub). Each hub will be identified with a distinct name; for example BellE75E. The name of the hub is listed on the rear of the
hub along with the password.
When the hardware left the office each notebook and tablet was programmed to automatically connect to the appropriate wireless hub. When connecting
your computers quickly review to insure that each device is connecting to the proper hub. On the bottom toolbar you will notice the wireless icon, placing the
cursor over it will display the name of the hub it is connected to.
IMPORTANT: Under no circumstances should the password for a Bell hub be given to any supporter, athlete, coach, staff member or any other individual
requesting access to it. By giving this information out you will overload the network and your access to the network will crash.
100 | P a g e