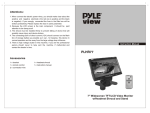
1
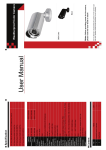
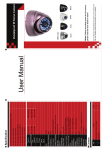
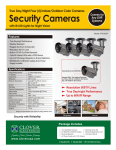
Specifications
Images sensors:
Power upply:
Lens Angle(Deg.):
TV System:
Video Output:
S/N Ratio:
MT9V011
DC12V
170
PAL/NTSC
1.0vp-p,75ohm
48dB
IP rating:
IP67
Operating
-30
~ +70
RH95%MAX.
Temperature(Deg.C):
White Balance:
Minimum illumination:
AGC:
Resolution(TV Lines):
Electronic shutter
Auto
0.5Lux
Auto
420
1/60(NTSC) 1/50(PAL)
1/10,000second
Effective pixels:
Universal Mount Optional Front
View & Rear View Backup Color CMD
Camera Built-In Distance Scale Line
640*480
The above parameters can be modified without separate notification
Model : PLCM38FRV
User Manual
Please read these instructions carefully before installation
and use. Installation should be performed by professional
staff.
1. Wire connection
2. Installation
The camera can be installed in the following ways:
A. Bracket-mount (see diagram 1)
B. Flush-mount (see diagram 2)
C. License plate screw-hole mount (see diagram 3)
Car body
Car body
(diagram 1)
(C)
Green, Brown,
and White:
Control
Wires
(B)
Yellow Wire:
Video Out
(A)
Red Wire:
Power
Connect the 12V power to the red wire (A) using the
included 1.2m cable. Use the included 5m cable to
connect the yellow wire (B) to your video monitor.
(diagram 2)
(diagram 3)
2.1: Bracket-mount: Install in the rear bumper or on the
license plate. Affix with screws.
2.2: Flush-mount: Install by drilling a hole on the rear
bumper.
2.3: License plate camera: Mount in the screw hole on
the license plate, then affix with a nut.
Attention: The camera switch is controlled by the reverse
gear shift.
For further control, use the control wires (C). Connect power
wire, and then connect brown and green wires to reverse the
image. Connect brown and white wires first and then connect
power wire to show distance lines onscreen.
PYLE BACKUP CAMERAS
BACKUP CAMERA SYSTEMS