Transcript
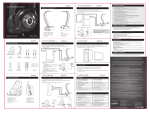
SET UP: PLAYSTATION ® 3 ENGLISH SET UP: XBOX 360 ® CONNECTED WITH COMPONENT/COMPOSITE CABLE* ENGLISH SET UP: NINTENDO Wii™ CONNECTED WITH COMPONENT/COMPOSITE CABLE* *Cable comes with the PS3 ® console. ENGLISH SET UP: PC ENGLISH CONNECTED WITH COMPOSITE CABLE* *Cable comes with the Xbox 360 ® console. *Cable comes with the Nintendo Wii™ console. 1. Plug the Afterglow ® USB transmitter into one of the USB ports of the PC/Mac. 1. Plug the Afterglow ® USB transmitter into one of the USB ports of the PS3 ® console . 4. Re-plug in the RCA cable from the console into the pass-through of the Afterglow ® RCA cable that is now plugged into the TV. 2. Unplug the RCA cable (Red/White only) that runs from your console to the TV. 5. Leave the PlayStation ® 3 component/composite video plugs connected to the TV. 3. Plug the RCA cable that is attached to the Afterglow ® USB transmitter (Red/White) into the TV. 1. Plug the Afterglow ® USB transmitter into one of the front USB ports of the Xbox 360 ® console. 4. Re-plug in the RCA cable from the console into the pass-through of the Afterglow ® RCA cable that is now plugged into the TV. 2. Unplug the RCA cable (Red/White only) that runs from your console to the TV. 3. Plug the RCA cable that is attached to the Afterglow USB transmitter (Red/White) into the TV. ® 5. Leave the Xbox 360 ® component/composite video plugs connected to the TV. 3. Plug the RCA cable that is attached to the Afterglow ® USB transmitter (Red/White) into the TV. 4. Re-plug in the RCA cable from the console into the pass-through of the Afterglow ® RCA cable that is now plugged into the TV. 5. Leave the Wii™ composite video plugs connected to the TV. Pb R Pr R Pr Audio Input L www.pdp.com Audio/Video Input Video L R Audio Input L Our goods come with guarantees that cannot be excluded under the Australian Consumer Law. You are entitled to a replacement or refund for a major failure and for compensation for any other reasonably foreseeable loss or damage. You are also entitled to have the goods repaired or replaced if the goods fail to be of acceptable quality and the failure does not amount to a major failure. R R Audio Input L CONNECTED WITH HDMI* 7. Turn the TV, console, and headset power ON. 6. Turn the TV, console, and headset power ON. CONNECTED WITH HDMI* *HDMI cable not included. 3. Plug the RCA cable that is attached to the Afterglow® USB transmitter (Red/White) into the TV. 1. Plug the Afterglow ® USB transmitter into the front USB port of the Xbox 360 ® console 1. Plug the Afterglow ® USB transmitter into the front USB port of the Wii™ console. 2. Unplug the RCA cable (Red/White only) that runs from your console to the TV. 4. Re-plug in the RCA cable from the console into the pass-through of the Afterglow ® RCA cable that is now plugged into the TV. 2. Plug the RCA (Red/White) ends of the transmitter's audio cable into the TV's Audio Out. Then skip to step 4. 2. Plug the RCA (Red/White) ends of transmitter's audio cable into the TV's Audio Out. Then skip to step 4. R HDMI HDMI HDMI Audio Output L R 4. Plug one end of the Xbox 360® chat cable into the headset, plug the other end into the controller. R Audio Input USB TRANSMITTER HDMI L CHARGE & PLAY USB CABLE Audio Input L RCA CABLE *Note: This setup may vary depending on the TV 1. Plug the Afterglow ® USB transmitter into one of the USB ports of the PS3 ® console . 3. If your TV does not have an RCA Audio Out: disconnect the RCA cable at its breakaway and expose the headphone jack. Plug the headphone jack of the USB transmitter into the TV's headphone input. SET UP:MOBILE MOBILEDEVICES DEVICES SET UP: DIRECT TO TV CONNECTION METHOD* *HDMI cable not included. Audio Output L L R Audio Output L R R IMPORTANT: If your TV doesn’t support audio out, you may require an Xbox 360 ® HDMI Audio Adapter. L 2. Select "Sound Settings" AFTERGLOW STICKER ® AFTERGLOW ONLINE OFFERING ® 5. Leave your HDMI connection intact. Turn the TV, console, and headset power ON. 3. Select "Audio Output Settings" USER MANUAL 4. Select the audio out as "Audio Input Connector" 4. Turn the TV, console, and headset power ON. R L 5. Adjust the TV volume to a comfortable level first, then adjust the volume level on your headset. 6. Adjust the TV volume to a comfortable level first, then adjust the volume level on your headset. 1. Go to Settings If you have lost your PS3 composite cable, contact PDP customer service at 1-800-331-3844 or go to www.pdp.com/support The cable and shipping (priority 2-day) is free. 2. Select "Sound Settings" 3. Audio Multi-Out: Turn it ON giving us the time to create the very best gaming headset. We've read thousands of reviews and held multiple focus 1. Unplug the USB transmitter from the game console or PC/Mac. (this ensures that the USB transmitter is not transmitting) 2. Turn the headset ON by pressing the Power/Mute button. 3. Notice the Afterglow® lights are ON and the microphone multicolor LED is constantly cycling between the colors red, green, and blue. 4. Press and hold the "Mode" button until the microphone multicolor LED turns OFF. 5. Plug one end of the (gray) audio cable into the "Line In" port on the bottom of the headset. 6. Plug the other end of the audio cable into the mobile device. 7. Adjust the volume level of the mobile device to a comfortable level. Note: In Mobile mode the Afterglow® headset acts as a passive headset. As the connection between the mobile device and the headset is wired, the capabilities of the headset are limited in this mode: • Custom audio modes will not function – you will be in default Pure Audio mode. • You can use the microphone BUT cannot mute it with the headset's mute button (you can use the mute function on your mobile device). • Volume levels can only be adjusted on the mobile device. • Game Chat balance will be non-functional. them in our design. You said that it was important to have a headset that could be used with any gaming platform as R Note: If you want the game audio to come from the headset and the TV simultaneously: 1. ON/OFF & MUTE BUTTON: Press and hold to power ON. Press and hold to power off. Once connected, button now functions as mute. Click button to mute microphone, click again to unmute. The Afterglow® headset is a wireless product designed to work with gaming consoles and computers. In addition, a cable which makes your headset compatible with mobile phones and music players is provided. Note: in order to use this headset in mobile mode the device must have a 3.5mm headphone jack (commonly found on the iPhone ®, iPod®, and other smartphones and tablets) You can use the headset with a mobile device while the headset is powered OFF. The below instructions are for using the headset with a mobile device while keeping the headset lights ON. Audio Output 5. Press X – Enter HEADSET OVERVIEW: Message from Developer: Thank you for the purchase of PDP's Afterglow Gaming Headset. This product has been two years in the making, 3. If your TV does not have an RCA Audio Out, disconnect the RCA cable at its breakaway and expose the headphone jack. Plug the headphone jack of the USB transmitter into TV's headphone input. Contact PDP Customer Service at 1-800-331-3844 or go to www.pdp.com/support The cable and shipping (priority 2-day) is free. ENGLISH Dear Customer, Audio Output Audio Output 1. Go to Settings MUSIC/LINE-IN CABLE 2 year limited warranty. See www.pdp.com for details. Garantie limitée de 2 ans. Voir www.pdp.com pour plus de détails. 4. Adjust your PC/Mac volume to a comfortable level. © 2013 Performance Designed Products LLC. All Rights Reserved. PDP and AFTERGLOW are registered trademarks, of Performance Designed Products LLC. PlayStation 3 is a registered trademark of Sony Computer Entertainment, Inc. Xbox 360 is a registered trademark of Microsoft Corporation. Wii and Wii U are trademarks of Nintendo. This product is not designed, manufactured, sponsored or endorsed by Sony, Microsoft or Nintendo. Then in your Playstation XMB menu: XBOX 360 CHAT CABLE 1840 East 27th Street Vernon, CA 90058 USA Ph: 800-331-3844 (USA and Canada only) 3. Connect the 3.5mm audio jack into the headphone input of your PC/Mac. 59-60 Thames Street Windsor SL4 1TX, UK 5. Turn the console and headset power ON. ® 2. Disconnect the RCA cable at its breakaway and expose the 3.5mm universal audio jack. USER MANUAL WHAT'S IN THE BOX: WIRELESS HEADSET 2. Unplug the RCA cable (Red/White only) that runs from your console to the TV. Component Video Input Y L Audio Input Pb Component Video Input Y R Audio Input L 6. Plug one end of the Xbox 360 ® chat cable into the headset, plug the other end into the controller. 6. Turn the TV, console, and headset power ON. WIRELESS HEADSET 1. Plug the Afterglow ® USB transmitter into one of the USB ports of the Wii™ console. groups, learning what was important to you, the user. As we listened to our user comments, we learned that sound quality and performance was the paramount concern. So we elicited the help of a renowned sound studio to help optimize our sound by designing the right cavity, selecting the optimal driver, and then tuning the digital sound precisely for three different listening modes – I think you'll agree with me, they sound awesome. Comfort, connectivity and user friendly features were all highly rated concerns and we took the time to address all of well as your mobile music devices, so, our headset comes universal right out of the box and will work with all of your devices. Lastly, (and only after we got everything else right!) we decided to incorporate the Afterglow brand and lighting effects, adding a cool factor that puts it well beyond the reach of other, similarly priced, headsets. Enjoy the many hours of gaming ahead. Chris Richards CEO/President Performance Designed Products 2. MODE BUTTON: Click to change the audio modes. (3 modes) 3. RETRACTABLE NOISE-CANCELLING MICROPHONE: Extends 3.5" and adjusts with its flexible cable. *Note: This setup may vary depending on the TV 5. VOLUME DIAL: Adjusts the master volume level. 1. Plug the Afterglow USB transmitter into the front USB port of the PS3 ® console. 6. GAME/CHAT VOLUME BALANCE: Adjusts the balance of incoming chat and game volume levels. 2. Plug the RCA (Red/White) ends of the transmitter's audio cable into the TV's Audio Out. Then skip to step 4. 7. XBOX 360 TALK BACK PORT: Plug the green Xbox 360 chat cable and the other end of the cable into the game controller. ® ® 3. If your TV does not have an RCA Audio Out: disconnect the RCA cable at its breakaway and expose the headphone jack. Plug the headphone jack of the USB transmitter into the TV's headphone input. 4. Leave your HDMI connection intact. Turn the TV, console, and headset power ON. 9. CHARGING PORT: Plug the 10’ black Play & Charge cable's mini USB connector into this port and the other end into a game console or other powered USB source to charge the built-in rechargeable battery. 12. AUDIO CABLE: Analog audio cable; plug into the sound source (console, PC, receiver, or TV). HDMI Audio Output L R Audio Output L USB TRANSMITTER: 11. STATUS LED: A blinking LED means headset is powered OFF. A solid light means the headset and transmitter are communicating properly. HDMI ® 8. UNIVERSAL AUDIO LINE-IN PORT: Plug the grey universal audio cable into this port and the other end of the cable into a sound source (e.g. iPod®, iPhone ®, MP3 player) – microphone is supported. 10. USB CONNECTOR: Plug into a game console or PC. TROUBLESHOOTING: DIRECT TO TV CONNECTION WITH NO PS3 ® COMPOSITE CABLE* 4. MODE INDICATION LED: Multi-color LED indicator on the microphone tip tells you that you are paired, which audio mode you are in, and if you are muted. 5. Adjust the TV volume to a comfortable level first, then adjust the volume level on your headset. R Audio Output L R MY XBOX 360 ® IS CONNECTED TO TV WITH HDMI AND I CAN'T GET GAME SOUND FROM MY CONSOLE: Leave your Xbox 360 ® HDMI connection to TV intact. Try this alternative (direct to TV) connection method; (note the set up may vary depending on your TV audio out capabilities). 1. Plug the Afterglow ® USB transmitter into the front USB port of the Xbox 360 ® console. 2. Plug the RCA (Red/White) ends of the transmitter's audio cable into the TV's "Audio Out." 3. If your TV does not have an RCA Audio Out: disconnect the RCA cable of the USB transmitter at its breakaway and expose the headphone jack. 4. Plug the headphone jack of the USB transmitter into TV's headphone input. 5. Turn the TV, console, and headset power ON. If your TV does not have RCA or Headphone inputs then you will need an Xbox 360 ® HDMI adapter. This adapter is NOT included in the box. You can obtain this adapter free of charge by contacting PDP support. If you have followed all of these instructions and still have issues please contact PDP customer service at 1-800-331-3844 (USA and Canada Only) or visit www.pdp.com/support for more information. Class B: FEDERAL COMMUNICATIONS COMMISSION INTERFERENCE STATEMENT This equipment has been tested and found to comply with the limits for a Class B digital device, pursuant to part 15 of the FCC Rules. These limits are designed to provide reasonable protection against harmful interference in a residential installation. This equipment generates, uses and can radiate radio frequency energy and, if not installed and used in accordance with the instructions, may cause harmful interference to radio communications. However, there is no guarantee that interference will not occur in a particular installation. If this equipment does cause harmful interference to radio or television reception, which can be determined by turning the equipment off and on, the user is encouraged to try to correct the interference by one or more of the following measures: -Reorient or relocate the receiving antenna. -Increase the separation between the equipment and receiver. -Connect the equipment into an outlet on a circuit different from that to which the receiver is connected. -Consult the dealer or an experienced radio/ TV technician for help. TROUBLESHOOTING: Check that the headphone volume is turned up. Check that the game/chat balance is in the middle or towards "game". Make sure the USB cable is plugged in to a powered USB port and the LED on it is solid. Check that the RCA or 3.5mm cable attached to the headset is plugged into an audio source with live audio. OTHER PLAYERS CANNOT HEAR ME: Check that the microphone is not muted. Microphone tip LED will blink once every minute when the microphone is muted. Make sure the USB cable is plugged in to a powered USB port and the LED on it is solid. POWER & CHARGING: The Afterglow headset offers 3 different audio modes. You can tell which mode you are in by the designated color shown on the microphone LED. The wireless Afterglow ® headset has a built-in, rechargeable Lithium battery that will last 10 to 12 hours, depending on use and lighting mode. The headset comes partially charged, but it's recommended that you fully charge the headset using the provided 10' Play & Charge cable prior to use. It will take approximately 3 hours to fully charge a completely drained battery. When charging, the Afterglow lights will pulsate indicating positive charge. When fully charged, the Afterglow lights will go back to the last active lighting mode and stop pulsating. ® NO SOUND: On the Xbox 360 ®: Make sure you're connected to Xbox LIVE® and the chat back cable (green) is plugged into the controller and the headset. AUDIO MODES: Pure Audio: (blue) Raw audio without any digital enhancement. In this mode the Afterglow ® headset offers its well balanced acoustic tuning, letting you hear everything the game developers meant for you to hear. Bass Boost: (red) For those who prefer an extra kick on the low end of the frequency spectrum, an undistorted, clean, digitally enriched bass sound. Immersive: (green) With the powerful digital signal processor on board, the Afterglow ® headset offers this proprietary 3D sound algorithm which expands the audio, creating a more immersive sound without altering the directionality, giving you a competitive edge in gaming. Additional notes on Audio Modes: • The headset will default to the "Pure Audio" mode at startup and will revert to this mode every time you turn it ON/OFF. • This light will blink once per minute if you are on MUTE and it will blink the color of the audio mode. On PS3®: In the Audio device settings menu, select “Afterglow ® Headset” as the incoming and outgoing chat source. LIGHTING: On the XMB menu go to: The Afterglow ® wireless headset offers different lighting modes. Once the headset is connected to the USB transmitter, you can control the lighting modes by holding the MODE button. • Settings • Accessory Settings • Audio Device Settings • Assign “PDP Audio Device” as the input and the output device • Adjust microphone levels here if needed. • Hit OK After holding 2 seconds the headset will cycle through 4 settings: • • • • Headband only Ear-cups only All lights OFF Default: Ear-cup and headband lights are ON Note the following: • The lighting will go back to default mode every time you turn the headset ON/OFF. • The microphone multicolor LED will not be affected by the above lighting modes, and as long as there is a wireless connection it will be ON. • While charging, the lighting modes will NOT function as the lights are used to display the charging sequence. • If the headset is low on battery, the Afterglow ® lights will automatically turn OFF to conserve power. • • • • Low Battery: • The Afterglow headset will play a tone to warn the user that it's running low on battery. • This low battery tone will play once every minute until the battery is completely out of power. • Play time is estimated to be 10 minutes once the headset goes into low battery state. • Plug the provided 10' USB Play & Charge cable into the headset and the other end into the console/computer to charge while headset is active. • The headset can also be charged while it's OFF. Note: Some gaming consoles and computers DO NOT provide power to their USB ports when they are OFF. The headset needs a powered USB port in order to complete charging. TECHNICAL SPECIFICATION: • Closed back dynamic headphones. • 50mm drivers with Neodymium rare-earth magnets. • 20 degree angled acoustic baffle for accurate, linear sound reproduction. • Audio frequency response: 20Hz – 20Khz at 115dB. • Digital signal processor with customized audio algorithms. • 2.4gHz wireless communication via Avnera technology. • 900mAh rechargeable Lithium Polymer battery ~ 10 hours of battery life.


![[PDF:3.6MB]](http://vs1.manualzilla.com/store/data/005700359_1-411bc916f99a59f282120c6ff0bb3aea-150x150.png)