1
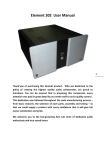
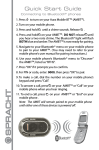
User manual MUSICA C101 preamplifier 1 Thank’you of purchasing this EamLab product. Who are dedicated to the policy of creating the highest quality audio components, are proud to introduce. You can be assured that in preparing this component, every attention was paid in great detail by our entire staff to strict quality control . This dedication was followed throughout the wole manufacturing process – from basic research, the selection of each parts, assembly and testing – so that we could supply a product with every confidence that it will give full owner satisfaction and pride. We welcome you to the fast-growning Eam Lab circle of dedicated audio enthusiasts and true sound lovers Features The C101 is substantially the evolution of the preamplifier HP01. In C101 the circuit of signal amplification is entrusted darlington transistor technology in configuration DPFETM (Darlington Parallel Follow Emitter) operating in pure Class A. The new stadiums input and output HDCA guarantee wide flat frequency response with high slew / rate and high crest factor. improvements on the dynamics of reproduction and micro- contrast are to unprecedented levels. The volume control is provided by the digital potentiometer PGA2310 Burr Brown who is currently the best potentiometer in high-end market. The power transformer is encapsulated with resin and thus eliminating any possible variation of the original audio signal which would become dirty through electromagnetic fields. The main power capacitors are designed on our tight specifications. They have a very high temperature coefficient and aluminum armor. Together with the resistors in the metal film 1% tolerance and the decoupling capacitors in polypropylene audiograde we obtained results certainly real., 2 Contents 2 …………….Introduction & features 3 …………….Table of contents 4 …………….Safety instructions 5 …………….Use remote control 6 …………….Menu and Submenu on display 8 …………….Front pannel instruction 9 …………….Connections 10 …………….Troubleshooting guide 11 …………….Datasheet 12 …………….guarantee policy 3 Before you start to use read following information Safety information 1. For best performance, please read this manual carefully. Keep it in a safe place for future reference. 2. Install the unit in a cool, dry, clean place away from windows, heat sources, intense vibration, dust, humidity, cold, and sources of humming (transformers, motors, etc.).. To prevent fire or shock hazard do not expose the unit to water and moisture. 3. Never open the equipment. If something should get into all 'inside, contact your dealer. 4. Do not operate the switches and other controls with force. When moving the unit, first disconnect the power cord and cables connected to other devices. Never pull the wires themselves. 5. The voltage used must be specified. Using this product with a current whose voltage is higher than specified is dangerous and may cause fire or other damage. EAM LAB is not responsible for any damage due to an incorrect use of the appliance 6. Always set the VOLUME control to min. before starting playback of the audio source. Gradually increase the volume to an appropriate level after playback has started. 7. Do not clean the unit with chemical solvents: this could ruin the finish. Instead, use a soft, dry cloth or denatured alcohol. 8. In case of malfunction, before concluding that the unit needs to be repaired, consult the chapter on "TROUBLESHOOTING". 9. If you are not using the unit for long periods of time (eg for a vacation), disconnect the power plug 10. During thunderstorms, disconnect the power cord to avoid any lightning damage the unit. 11. Grounding or Polarization: take the necessary precautions to ensure that the grounding or polarization are not canceled. 4 Unpacking: Carefully remove from the box your amplifier and keep the original carton and packing materials for future trips, expeditions or long-term storage Before the installation : remove your amplifier, taking care to keep it in the future if you ever require to be shipped to a service center EAMLAB to be overhauled or repaired. package contents: Verify that the following acessories are included in the package: remote control, power cord and this manual. Replacing Batteries Use remote control The remote control transmits a directional infrared beam. During operation, be sure to point the remote directly at the infrared sensor. When the sensor is covered or there is a large object between the remote control and the sensor, the sensor is not receiving the signals. The sensor may not be able to receive signals properly when it is exposed to direct sunlight or strong artificial light (such as a fluorescent light or a flashing). In this case, change the direction of light or reposition the unit to avoid direct lighting. Note If the remote control only works when it is near the unit, the batteries are weak. Replace the batteries with new ones. • Handle the remote control carefully. • Do not spill water or other liquids on the remote control. Note • Do not drop the remote control. For replacement use only batteries model CR3020. Make sure the polarity is correct For change battery remove 4 screw in bottom side and leave the electronic board . battery are bottom of printed circuit • Do not leave or put away the remote control in the following conditions: - High humidity or temperature such as near a heater, a stove or a bathroom; _ Dusty; Expose to temperatures very low or very high 5 Remote control function Set – button for sub menu dipaly to command balance and mono/stereo operation Pwr – turn on /off preamplifier DSP – same set button V+ increase volume V - decrease volume Mute – muting signal out CH+ / Ch- select input 6 In the master menu use button: CH+/CH- for changing input source, V+/V- button for increase or decrease volume Mute buttom for muting output signals Pwr for turn on or turn off preamplifier To master menu use DSP or SET button for enter in this menu. When inside this menu choose button : Mute for changing MONO/STEREO operating V+ / V- for changing balance left/right gain DSP or Set for return to master menu 7 Front pannel functions LEFT encoder LEFT encoder Rotate to select input source Rotate To increase /decrease Volume Push for turn OFF or turn ON Status LED to input selected (indicated also on display) 8 Connection and functions 1 – trigger signal * 2 – XLR / RCA output to connect power amplifier ** 3 – thre line single endend inputs 4 – one balanced XLR input 5 – ON/OFF general switch 6 – power cord and main fuse place holder *- trigger signals use for interconnectig preamplifier and Power amplifier (with terminated jack cable supplied) when desire turn/off and turn ON power Amp and Preamp simultaneous with remote control when each machine are in Stand-by. **- XLR and RCA output . Is possible use each output to send signal to two different amplifiers Simultaneous if necessary 9 Troubleshooting problem Possible cause remedy No power on The plug on the power cord is not connected or is not fully inserted . The mains fuse is blown Connecting signal Input or output cables incorrect Securely connect the plug or check the fuse on the rear panel next to the socket No sound Distorted sound The signal is low Main fuse is blow The source has an output signal too high and preamplifier input is saturated Switch XLR / RCA on power amplifier Current overload Remote control do Batteries , objects in front of receiver not work Check the RCA or XLR cables and / or the correct connection sequence of sources Turn down the volume of the source if it is equipped with such control check the correct position of the switch for connecting balanced XLR or unbalanced RCA replace with identical fuse. if the fuse blows again contact service center replace batteries or remove any obstacles in front of the infrared receiver 10 C101 Datasheet Input 1 stereo XLR balanced 1 stereo RCA single ended Output 1 stereo Male XLR balanced 1 stero RCA single ende XLR input impedance (xlr input) 47 Kohm RCA input impedance (input 2/3/4) Output impedance XLR 22 Kohm Output impedance RCA 70 ohm Frequency response 5 hz to 80 Khz +/- 0.3db 80Khz to 150Khz +/- 2db BurrBrown digital potentiometer PGA2310 Volume control < 1 ohm Max output Voltage 8 Volt THD 0.005% >115 Db Signal to noise ratio >115 Db Idle current 400mA @ 230Vac 11 Return Authorization Procedure How to expedite service If you believe there is a problem with your component, please contact your dealer, distributor, or the EamLab factory to discuss the problem before you return the component for repair. To expedite service, you may wish to complete and e-mail the Service Request Form in the Service section of our website at: www.eamlab.com To contact EamLab service Tel. +39 0331 1836780 MAIL : [email protected] Website : www.eamlab.com How to return a product To return a product to EAMLAB, please follow this procedure so that we may serve you better: 1. Obtain a Return Authorization Number (R/A number) and shipping address from the Krell Service Department. 2. Insure and accept all liability for loss or damage to the product during shipment to the Krell factory and ensure all freight (shipping) charges are prepaid. The product may also be hand delivered if arrangements with the Service Department have been made in advance. Proof of purchase will be required for warranty validation at the time of hand delivery 12