1
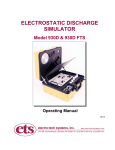
Dear Customer:
Congratulations! Compliance West USA is proud to present you with
your MegaPulse D5-PF Impulse Tester. Your instrument features a
groundbreaking logic-controlled circuit design and ergonomic front
panel and represents the latest in high voltage impulse testing.
To fully appreciate all the features of your new instrument, we
suggest that you take a few moments to review this manual.
Compliance West USA stands by your instrument with a full one-year
warranty. If the need arises, please don't hesitate to call on us.
Thank you for your trust and confidence.
Rev 1.0 June 2014
i
ii
Table of Contents
An Introduction to Impulse Testing with the MegaPulse PF series tester .................................................. 2
Safety Precautions ....................................................................................................................... 2
Test Personnel ............................................................................................................... 2
Testing Area .................................................................................................................. 2
Safety Techniques ......................................................................................................... 3
Using the MegaPulse PF Impulse Tester ..................................................................................... 4
Getting Started ........................................................................................................................................... 5
Unpacking and Inspection ........................................................................................................... 5
Packaging ...................................................................................................................... 5
Product Package for D5-PF........................................................................................... 5
Returning the Instrument ............................................................................................... 5
AC Line Voltage Requirements ................................................................................................... 6
Fuse Replacement ........................................................................................................................ 6
Specifications and Controls ....................................................................................................................... 7
Megapulse D5-PF Specifications ................................................................................................ 7
Front and Rear Panel Features ..................................................................................................... 8
General High Voltage Electrical Diagram ................................................................................... 13
Operating Instructions................................................................................................................................ 14
External Interlock ........................................................................................................................ 14
Front Keyboard and Voltage Knob Enable ................................................................................. 14
Discharging Residual Voltage ..................................................................................................... 14
Polarity Pulse Selection ............................................................................................................... 15
Voltage Set Point Adjustment ..................................................................................................... 15
Charge and Trigger a Pulse ......................................................................................................... 15
Checkout Pulse Procedure ........................................................................................................... 16
TestMinder .................................................................................................................................. 19
An Introduction to the MegaPulse P USB TestMinder ................................................. 19
Software Installation and Setup ..................................................................................... 19
Test operation using MegaPulse P USB TestMinder .................................................... 20
Manual Operation from the Computer ............................................................ 20
Automatic Operation in Multi-Pulse Mode ..................................................... 22
AC Setup for TestMinder .............................................................................................. 25
Energy Measurement ................................................................................................................... 26
Energy Measurement using System Included on D5-PF ............................................... 26
Energy Measurement with an External Acquisition System .......................................... 27
Measurement Terminals Y1 and Y2 ............................................................................................ 27
Pass Fail Reference Built in......................................................................................................... 28
Testing with the D5-PF .............................................................................................................................. 29
Options ...................................................................................................................................................... 31
Circuit for Invasive Blood Pressure test (IEC 60601-2-34 Issue 2) ............................................ 31
100X ............................................................................................................................................ 31
Sine Wave Generator................................................................................................................... 32
Vacuum Trigger Relay ................................................................................................................ 33
Maintenance and Calibration ..................................................................................................................... 34
Service Information ..................................................................................................................... 34
Calibration Information ............................................................................................................... 34
Technical Assistance ................................................................................................................... 34
iii
1
Section 1
An Introduction to Impulse Testing with the MegaPulse PF series tester
The impulse test is designed to simulate impulse surges which occur in everyday life due to nearby
lightning strikes, switching transients, and other high-frequency faults on the power distribution network.
Impulse testing is the fundamental method for empirical verification of the adequacy of insulation. Other
methods of ensuring adequate insulation (AC or DC Dielectric Withstand testing, measurement of oversurface creep age, through-air clearance, or distance-through-insulation) are all extrapolated from the
results of impulse testing. The impulse test is performed to ensure that the insulation in question will be
able to function properly when subjected to similar impulse surges in the field.
Safety Precautions
The impulse withstand test can generate voltages in excess of 5000V peak at potentially lethal current
levels. Currents of as little as 5mA at 120 volts can cause death; the MegaPulse can deliver currents of
more than 100 Amps peak for very short time duration. The potential for serious injury or death exists
and personnel should be aware when they conduct this test.
Test Personnel
Personnel require special training to conduct the impulse test. They should understand electrical
fundamentals clearly, and be aware that high voltage is adept and creative at completing a path to ground.
Instructions should include a warning against any metal jewelry. Operators should not allow others in
the testing area, especially when tests are being conducted. Organization is to be stressed. The operator
should keep the area free of unused leads and equipment.
Testing Area
The area used for conducting the impulse test should be as remote as possible from normal production
line activities. Only personnel actually conducting the test should be allowed in the area, and it should be
taped or roped off to preclude casual entry by other employees. In addition, the area should be marked
"WARNING - HIGH VOLTAGE TESTING" or the equivalent to warn others of the nature of the testing
taking place.
The bench being used should be non-conductive, and any exposed metal parts should be tied together and
grounded. If a conductive surface must be used, it should be grounded. Because of sparking during an
impulse test failure, it is not safe to conduct impulse testing in combustible atmospheres.
It is imperative that a good ground be provided to the MegaPulse tester. Before connecting the
equipment, ensure that the building wiring provides a low-resistance ground. If the MegaPulse tester is
used on a high-resistance grounding circuit, dangerous high voltages may be present to the operator. In
addition, the power to the Testing Area should be provided with an easily reached shutoff switch which
can be actuated by personnel outside the Area if needed.
2
Safety Techniques
The high voltage circuit of the MegaPulse D5-PF can be shut off at any time by turning OFF the rear
power switch. Always press TRIGGER to discharge the tester before turning OFF.
The MegaPulse tester is provided with a digital VOLTAGE ADJUST knob on the front panel. This
voltage setting should always confirm by pressing the VOLTAGE ADJUST knob before start any testing.
The MegaPulse tester is provided with a CHARGE switch that is in the unarmed "Standby" setting when
the tester is first turned ON. When the yellow CHARGE button is lit, the tester will not provide high
voltage until the CHARGE Button and the TRIGGER Button have been pressed in order. To prevent
inadvertent operation, the operator should be instructed not to press the CHARGE Button until the test is
ready.
The MegaPulse tester has been designed for one-touch operation with the right hand. If possible, it
should be set up to the left and in front of the equipment under test. The equipment under test should be
connected to the MegaPulse tester and then left alone by the operator. After the operator is clear of the
Tester and the equipment under test, the operator should turn the rear-panel power switch to ON, confirm
or adjust the Voltage Set Point, then press the CHARGE Button and wait until the front meter reaches
the voltage selected, then press the TRIGGER Button, with his right hand. This will allow the greatest
separation between the operator and the test being conducted.
The MegaPulse PF tester is designed to bleed the high voltage away after the test has concluded. In order
to ensure that any voltage present in the equipment being tested has been completely bled away, the
operator should not unplug the equipment under test from the MegaPulse until the front panel meter
reads a safe level (40 volts or less is generally considered a safe level). Pressing the TRIGGER button
before disconnecting main power (or turning the equipment off) will ensure that the internal capacitors
are discharged as much as possible.
3
Using the MegaPulse PF Impulse Tester
The impulse test involves high voltage and caution should be exercised when using the tester. The
RETURN lead is referenced to building ground when properly connected. However, both the OUTPUT
and RETURN leads must always be treated as Hazardous whenever the power switch of the MegaPulse
is in the ON position.
The MegaPulse impulse tester generates the impulse waveform only; it does not determine Passing or
Failing results. It is the operator’s responsibility to monitor the output waveform and determine Passing
or Failing results. In monitoring the impulse waveform, consider the following points: The Impulse
waveform is high voltage and high frequency (short duration). Always ensure that the measuring
instrument (usually an oscilloscope with a high-voltage probe) is rated for the voltage involved, and that
the frequency response of the instrument and probe are capable of measuring the output waveform of the
MegaPulse Impulse Tester. A measuring instrument or probe with a low frequency response will result
in erroneous readings that could be mis-read.
Pressing the POLARITY switch on the front panel can change the polarity of the output waveform. The
polarity is Normal when the NOR indicator is lit. In this case, the high voltage will appear on the
OUTPUT as a positive pulse relative to the RETURN jack. When the polarity switch is in the Reverse
position (REV indicator is lit), the high voltage will appear on the OUTPUT as a negative pulse relative
to the RETURN jack. The polarity switch only operates when the CHARGE LED is lit, i.e. the output
is not charged.
Note that the voltage meter may indicate that some residual voltage is present on the main storage
capacitor, even when the tester is first turned ON. This is due to inherent charging of the internal
capacitors. Pressing the TRIGGER switch will discharge the capacitors (be sure not to touch the
output and return leads when pressing the trigger switch).
Note that the peak amplitude of the measured output waveform is proportional to the voltage that is read
on the front panel of the MegaPulse, but it will always be somewhat lower. This is because the
meter on the MegaPulse is measuring the voltage on the main impulse storage capacitor. This
voltage will intentionally dissipate to some extent before reaching the output leads. Therefore, it is
important to measure the peak amplitude of the output waveform, and adjust the output of the
MegaPulse accordingly.
4
Section 2
Getting Started
This section contains information for the unpacking, inspection, preparation for use and storage of your
Compliance West product.
Unpacking and Inspection
Packaging
Your Tester is shipped in a special protective container that should prevent damage to the instrument
during shipping. Check the shipping order against the contents of the container and report any damage or
short shipment to Compliance West USA. Please save the shipping carton and packing material for the
carriers inspection. Our customer support department will assist you in the repair or replacement of your
instrument. Please do not return your product without first notifying us and receiving and RMA (return
material authorization) number. To receive and RMA number, please contact our customer support
department at (1-800-748-6224)
Product Package for D5-PF
The container includes the following:
Description
D5-PF Tester
TestMinder
Part Number
Megapulse Tester
User Manual
High Voltage Test Lead, Red
High Voltage Test Lead, Black
High Voltage Jumper, Red
HVLR (Qty 3)
HVLB (Qty 2)
HVLEC13, Option 100X includes one Jumper and
option 34 also includes one Jumper. Total Qty 2 if
all options are ordered.
70-101
18 AWG AC Power Cord
User Manual
Software CD
RS232 cable
USBD box
USB cable
Megapulse TestMinder USB V1.3 or newer
60-134
00-USBDBOX
60-221
Returning the Instrument
When is necessary to return the instrument for servicing or calibration, repackage the instrument in its
original container, please include all accessories and test leads. Indicate the nature of the problem or type
of service needed. Also, please mark the container as “FRAGILE” to insure proper handling.
If you do not have the original packaging materials, please follow these guidelines:
Wrap the instrument in a bubble pack or similar foam including all the included cables.
Use a strong double-wall container that is made for shipping instrumentation.
Use a layer of shock absorbing material 70 to 100mm (3 to 4 inch) thick around all sides
of the instrument. Protect the control panel with cardboard.
Seal the container securely.
5
Mark the container as “FRAGILE” to insure proper handling.
Please contact Compliance West USA (1-800-748-6224) to inform about the service for
your instrument.
AC Line Voltage Requirements
AC line voltage requirements for your Tester are noted on the rear panel of the instrument. Do not
connect the instrument to a different voltage source. The cord packaged with your MegaPulse Tester is
for use in the United States. If another power cord must be used, the cord must be rated for the maximum
current noted on the rear panel. It must also meet the requirements of IEC 227 or IEC 245, and mains
cords that are certified or approved by any recognized national test house are regarded as meeting this
requirement.
Fuse Replacement
There is a user-replaceable fuse (F1) located on the rear panel of the instrument. It is located behind a
door in the Power Inlet-Power Switch-Fuse Holder device. The fuse rating is noted on the rear panel. Do
not attempt to replace it with a fuse of any other rating.
Use the following procedure to replace the fuse F1:
1. Turn the power switch to the OFF position.
2. Unplug the instrument from the source of supply.
3. Remove the power inlet cord from the instrument.
4. Using a small screwdriver, pry open the fuse holder door.
5. Replace the fuse with a new one of the correct rating.
6. Replace the fuse holder door and power inlet cord.
6
Section 3
Specifications and Controls
Megapulse D5-PF Specifications
ELECTRICAL
Charge Voltage:
Main Capacitance:
Inductances:
Main Resistances:
Voltage Control:
Polarity Control:
Voltage Display:
Voltage Meter resolution:
Duty Cycle:
Line Voltage:
0 - 5000 V tolerance ±1%
32 uF ±5% (Dry capacitor type, 2.5 million cycles life)
500uH and 25 mH ±5%
100 Ω, 50 Ω and 400 Ω ±1% non inductive.
Digital Set point adjusted by frontal VOLTAGE knob or by PC
TestMinder.
Positive and Negative. Alternating control available with
optional computer control.
4 Digit LED Display.
2V
1 pulse every 20s.
120V AC, 50/60Hz * (optional different line voltages available
100V, 110V, 220V, 230V, 240V)
ENVIROMENTAL
Operating Temperature:
Relative Humidity Range:
15-40 ºC
0-90% non-condensing
GENERAL
Dimensions:
Weight:
17” wide x 18” high x 17” in deep
45 lbs approx.
7
Front and Rear Panel Features
Before using your Tester, take a few minutes to become familiar with the use of its controls, indicators and connectors. The front panel features
of the MegaPulse are shown in Figure 1 and described in Table 1. The rear panel features of the MegaPulse are shown in Figure 2 and described
in Table 2.
8
ITEM
NAME
1
VOLTAGE Adjust Knob
2
POLARITY switch
3
NOR REV indicator
4
CHARGE switch
5
CHARGE indicator
6
TRIGGER switch
7
TRIGGER indicator
8
VOLTAGE meter
9
10
RETURN jack
50 ohm OUTPUT jack
FUNCTION
Adjust the digital voltage set point in the tester.
Press the voltage knob to display the voltage set point. This setting will blink for a few seconds on the front meter.
Turn Clockwise to increase the setting Voltage Setting Point before pressing CHARGE button.
Toggles the output pulse polarity from Normal (Positive) to Reverse (Negative).
The pulse will appear on the Output jack relative to the return jack.
The polarity switch only operates when the CHARGE indicator is lit and the voltage on the display meter is less than 200V.
The polarity is Normal when the NOR indicator is lit and, Reverse when the REV indicator is lid.
This indicates the state of the Output Polarity switch.
NOR indicates Normal (Positive) position.
REV indicates Reverse (Negative) position.
Charge the capacitor to the voltage set point.
The CHARGE indicator will turn off after the CHARGE switch is pressed, and the TRIGGER indicator will turn on.
This yellow indicator is lit when the tester is ready to charge.
CHARGE indicator will go out after pressing CHARGE button.
CHARGE and TRIGGER Indicators will be blinking if the Interlock Switch is open.
Triggers the output impulse waveform.
The impulse waveform will appear across the output leads.
This red indicator is lit to when the tester can be trigger.
TRIGGER indicator will go out after pressing TRIGGER button.
TRIGGER and CHARGE Indicators will be blinking if the Interlock Switch is open.
This meter displays the voltage on the internal high voltage capacitor.
The meter will start flashing at 5100V or above to indicate that voltage is in the maximum limits.
Displays the output voltage set point (Blinking mode).
If the Keyboard is locked, the display will show OFF.
If the Digital Voltage knob is locked, the display will show OFF
This is the return for the impulse waveform. This jack is referenced to the chassis of the MegaPulse, and is referenced to earth
ground as long as the MegaPulse is properly grounded. Even though this jack is referenced to ground, it should be treated as
hazardous whenever the MegaPulse is turned ON.
The impulse waveform appears on the OUTPUT jack, referenced to the RETURN jack.
When the POLARITY switch is in the Normal position (NOR indicator is lit) the output will be a positive pulse.
When the POLARITY switch is in the Reverse position (REV indicator is lit) the output will be a negative pulse.
Figure 1. Controls, Indicators, Connectors – MegaPulse D5-PF Front Panel
9
ITEM
NAME
11
400 ohm OUTPUT jack
12
AUX OUTPUT jack
13
MEAS. POINT jack
14
Y1 – Y2 outputs
15
ENERGY MEAS. switch
16
17
18
PASS FAIL REF. switch
PASS FAIL REF. indicator
AUX OUTPUT switch
19
AUX OUTPUT indicator
20
S3 switch
21
S3 indicator
22
INDUCTOR left switch
23
INDUCTOR right switch
24
S2 left switch
25
S2 right switch
26
BNC INPUT 10Hz, 20Vp-p
27
COARSE adjustment (optional)
28
FINE adjustment (optional)
FUNCTION
The impulse waveform appears on the OUTPUT jack, referenced to the RETURN jack.
When the POLARITY switch is in the Normal position (NOR indicator is lit) the output will be a positive pulse.
When the POLARITY switch is in the Reverse position (REV indicator is lit) the output will be a negative pulse.
The AUX OUTPUT is connected at the grounded side of the 100ohm resistor, but this output is only used when it is required to
float the 100ohm resistor.
Used to perform the Pass/Fail reference test.
These differential outputs are to be connected to two different channels of an oscilloscope. The outputs are then subtracted and
the resulting waveform is used to judge acceptability of the EUT.
By pressing this switch, the front display will blink showing for a few seconds the energy measurement from the last pulse.
Note: This function only works when the Megapulse unit is not charging or triggering.
The D5-PF Include the Pass Fail reference circuit build in, to use properly refer to the directions on front panel.
This Green indicator is lit to show that the pass/fail reference is connected (AUX OUTPUT must be grounded).
It is used to control the AUX output position (Floated or Grounded).
This Green indicator is lit to show that AUX OUPUT switch is set on the FLOAT position.
Used for common mode testing of figure 201.103, S3 switch should be closed only when auxiliary output is floated from ground.
This Green indicator is lit to show that S3 switch is set on the SHORT position.
This switch allows the user to select the inductance value between 500uH and 25mH.
This switch allows the user to select the inductance resistance value between 10 ohm and 11ohm when INDUCTOR left switch is
on 25mH.
This switch is provided to protect the Signal Generator from the output pulse of the D5-PF when OFF, and to allow the required
20V p-p signal to be injected when SINE WAVE is selected.
This switch is enable only when S2 left switch is on SINE WAVE position and allows selecting between 390K or 470K ohm.
BNC Input provided on front panel is for connecting the output signal generator. See Figure 12 Part 9A.
Note: If the unit includes the Sine Wave Generation option, the item 30 will be a BNC OUTPUT 10Hz, for monitoring the Sine
Wave with an oscilloscope.
It is used to adjust the amplitude of the sine waveform. Only for models with Sine Wave Generation option.
It is used to fine adjust the amplitude of the sine waveform. Only for models with Sine Wave Generation option.
Table 1. Controls, Indicators, Connectors – MegaPulse D5-PF Front Panel
10
Figure 2. Controls, Indicators, Connectors – MegaPulse D5-PF Rear Panel
11
ITEM NO.
NAME
1
Ground for Energy Measurement
2
Energy Measurement jack
3
Fans
4
Appliance Inlet / Fuse holder /
Power Switch
5
TestMinder
FUNCTION
This jack is used along with the ENERGY MEASUREMENT jack to calculate the energy. This jack is
referenced to the chassis of the MegaPulse, and is referenced to earth ground as long as the MegaPulse is
properly grounded. Even though this jack is referenced to ground, it should be treated as hazardous
whenever the MegaPulse is turned ON.
This jack is necessary to verify the value of the 100 ohm resistor. The 100 ohm resistor value is measured
between the ENERGY MEASUREMENT jack and the GROUND jack on the rear panel.
The Fans on the rear panel maintain the air flow to cool down the tester.
6
Interlock Switch
7
Fuse replacement warning /
Rating of power supply
Use supplied cordset to connect the MegaPulse D5-PF tester to an appropriate source of supply. Fuse
holder provides access for Fuse replacement, and the Power Switch is used to turn the tester ON and OFF.
Allow the communication between the tester and computer interface; a RS-232 to USB.
Emergency Stop
Close: Enables the tester buttons for operation.
Open: Stops any process in the tester and disables the buttons. The TRIGGER and CHARGE Indicators
will be blinking
Specifies replacement fuse and required supply voltage.
Table 2. Control, Indicators, Connectors – MegaPulse D5-PF Rear Panel
12
General High Voltage Electrical Diagram
Figure 3. General High Voltage Electrical Diagram– MegaPulse D5-PF
13
Section 4
Operating Instructions
The D5-PF Medical Defibrillation tester consists of two parts; the pulse generation portion and the
measurement portion. Please refer to the general electric circuit shown in Figure 3 to show the function
of the D5-PF.
The following procedure will explain how to generate a high voltage pulse with the MegaPulse unit.
External Interlock
The external interlock is a two position terminal block located on the rear panel. When the External
Interlock is open:
TRIGGER and CHARGE lights will be blinking.
The front keyboard will be disabled.
If the unit is connected with a computer with the TestMinder software, the interlock
status will be shown on the computer, condition that will also disable polarity changes,
charge, and trigger conditions.
When the Interlock is closed, it enables all normal operations of the Megapulse D5-PF features.
Front Keyboard and Voltage Knob Enable
If the MegaPulse D5-PF tester has disabled the keyboard or Voltage Knob, it is possible to enable them by using the
next keyboard sequence:
1.
2.
3.
4.
5.
Turn OFF the MegaPulse P tester.
Press and hold the TRIGGER and NOR-REV buttons.
Turn ON the Megapulse tester.
Wait until the display shows rESE.
Release the TRIGGER and NOR-REV buttons.
Discharging Residual Voltage
Note that the Voltage meter may indicate that some residual voltage is present on the main storage
capacitor, even when the Megapulse tester is first turned ON. This is due to inherent charging of the
internal capacitors. The following procedure will explain how to discharge a remaining voltage stored on
the main internal capacitor.
CAUTION
High voltage generated by the MegaPulse tester is exposed during this test. A risk of shock
exists. Exercise care when using the MegaPulse unit.
1. Turn the rear-panel Power Switch OFF.
2. Set AUX OUTPUT switch to “Return” position.
14
3. Set S3 switch to “Open” position.
4. If the Megapulse includes option 100X, install the 100X jumper on the rear panel.
5. If the Megapulse includes option 34, set the Trigger time switch to 200mS, install the 50k ohm
jumper on the front panel.
6. Disconnect the high voltage cables from the outputs connectors (50 ohm, 400 ohm, Aux Output,
Energy Measurement point and 50K ohm “If included”).
7. Turn the rear-panel Power Switch ON.
8. Press the red TRIGGER button to discharge the main capacitor into the internal resistor of the
Megapulse unit.
9. Turn the rear-panel Power Switch OFF.
Polarity Pulse Selection
NOTE
If the red Trigger light is lit or more than 200V remains on the internal capacitor, the
polarity pulse selection will be automatically blocked for safety reasons.
1. Turn the rear-panel Power Switch ON. Positive polarity always is set by default after the unit is
turned ON.
2. Press the POLARITY switch button to toggle between positive and negative.
Voltage Set Point Adjustment
NOTE
If the front display shows the word “Off” when trying the adjustment, it means the front Voltage
knob had been disabled by the testminder software. See section “Front Keyboard and Voltage
Knob Enable”
To adjust the Voltage Set Point:
1. Press the VOLTAGE Adjust knob one time to enable the adjustment mode, digits for thousands
and hundreds will start blinking for a few seconds.
2. While digits still blinking, turn up or down the VOLTAGE Adjust knob to change the value of
the blinking digits.
3. While digits still blinking, press again the VOLTAGE Adjust knob and the tens and unit digits
will blinking for a few seconds.
4. While digits are blinking, turn up or down the VOLTAGE Adjust knob to change the value of the
blinking digits.
5. After a few seconds without any change on the VOLTAGE Adjust knob, the me
Charge and Trigger a Pulse
The following procedure will explain how to generate a high voltage pulse with the MegaPulse unit. The
Megapulse D5-PF is capable to maintain a specific voltage charge selected by the Voltage Set Point.
15
CAUTION
High voltage generated by the MegaPulse tester is exposed during this test. A risk of shock
exists. Exercise care when using the MegaPulse unit.
1. Confirm the Voltage Set Point by pressing the VOLTAGE Adjust Knob, the setting will blink for
a few seconds on the front meter.
2. If a different Voltage Set Point is need it, see section “Voltage Set Point Adjustment.”
3. Set the front panel switches depending the type of test need it. Follow the front panel directions
or see figure 3 for the electrical diagram.
4. Push the yellow CHARGE button to start charging the internal high voltage capacitor and wait
until the front meter reaches value set on step1 or 2. Verify the red TRIGGER indicator is now
lit.
5. Once the desired voltage is reached, press the red TRIGGER button to deliver the high voltage
pulse (be sure not to touch the output and return leads when pressing the trigger switch).
6. Turn the rear-panel Power Switch OFF.
Checkout Pulse Procedure
The following procedure will verify that the high voltage pulse is generated properly by the D5-PF tester.
We recommend that this procedure be conducted periodically to ensure proper operation of the tester.
The following items are needed to conduct this procedure:
-
High voltage oscilloscope probe (1000:1)
Digital Oscilloscope
Always ensure that the measuring instruments are rated for the voltage and frequency response involved.
A digital oscilloscope or probe with a low frequency response will result in erroneous readings that could
be miss-read.
CAUTION
High voltage generated by the MegaPulse tester is exposed during this test. A risk of shock
exists. Exercise care when using the MegaPulse tester.
1.
2.
3.
4.
5.
6.
7.
8.
9.
10.
11.
12.
Turn the rear-panel Power Switch OFF.
Set Aux output switch to “Return” position.
Set S3 to “Open” position.
If the Megapulse includes option 100X, install the 100X jumper on the rear panel.
If the Megapulse includes option 34, set the Trigger time switch to 200mS, install the 50k ohm
jumper on the front panel.
Disconnect all high voltage cables from the outputs (50 ohm, 400 ohm, Energy Measurement
Point and 50k ohm if included).
Turn the rear-panel Power Switch ON. If residual voltage is shown on led display:
a. Press the red TRIGGER button to discharge the main capacitor into the internal resistor
of the Megapulse unit.
Set the Voltage Set Point to 5000V, see section “Voltage Set Point Adjustment.”
Select the internal inductance of 500uH by using the front panel switch “INDUCTOR.”
Plug the high voltage test lead (black) into the Return jack, located on the front panel.
Plug the high voltage test lead (red) into the 50 ohm jack, located on the front panel.
Connect the ends of the test leads to the measuring instrument. See Figure 4 as an example.
16
13. Set the next capturing setting on the digital oscilloscope in order to capture the high voltage
pulse:
a. Vertical Scale = 1.00KV / div.
b. Horizontal Scale = 500uS / div
c. Trigger Level = + 1kV
d. Slope transition “Low to High.”
e. Set “High Frequency Reject” mode.
f. Set “Single Pulse” capture mode.
14. Press the Charge button and wait until voltage reaches 5000V.
15. Press the Trigger button to deliver the pulse (be sure not to touch the output and return leads
when pressing the trigger switch).
16. Verified the amplitude of the positive pulse captured on the digital oscilloscope:
a. Vpeak about 4.64KV, see figure 5 (When inductor selected is 500uH).
b. Vpeak about 3.90KV, see figure 6 (When inductor selected is 25mH).
17. Select a negative pulse by pressing the polarity button, and verify the yellow REV indicator is lit.
18. Change the capturing setting on the digital oscilloscope in order to capture the negative pulse:
a. Trigger Level = -1kV.
b. Slope transition “High to Low”
19. Charge and Trigger the pulse at 5000V.
a. Push the yellow CHARGE button to start charging the internal high voltage capacitor.
b. Once the desired voltage is reached, press the red TRIGGER button to deliver the pulse
(be sure not to touch the output and return leads when pressing the trigger switch).
20. Verified the amplitude of the negative pulse captured on the digital oscilloscope:
a. Vpeak about - 4.64KV (When inductor selected is 500uH).
b. Vpeak about - 3.90KV (When inductor selected is 25mH).
1000:1
HV Probe
Figure 4. Checkout Pulse Setup
17
Figure 5. Vpeak = 4.65kV with 500uH inductor
Figure 6. Vpeak = 3.90kV with 25mH inductor
Figure 7. Y1 Y2 Test Output
18
TestMinder
An Introduction to the MegaPulse P USB TestMinder
The Testminder is an USB adaptor that enables the control of your tester from a Windows-equipped
computer. The Testminder software allows to setup testing parameters as: “time between pulses”,
“polarity”, “Voltage”, “Pulse Cycles”, etc. A record of every test can be saved in a computer file as
“.txt” or “.csv” format. The “.csv” file can be read by Microsoft Excel.
Software Installation and Setup
1. Insert the CD “Compliance West USA TestMinder MegaPulse PF USB” into the drive on your
computer and follow the prompts. If the CD does not start automatically, browse to the CD and run
the file “Setup.exe.” The files will be installed to the location of your choice.
2. Connect the Megapulse to the computer using the Compliance West supplied USBD box. Do not
connect the USB cable through a USB hub or a device on your computer like a USB port on your
keyboard. A window will pop up on the screen: “Found New Hardware Wizard”.
3. Click on “Cancel”.
4. Ignore the following message “A problem occurred during hardware installation”
5. Browse to the CD and run the file “Install_Driver.exe.” It will install the necessary drivers.
6. Installation is finished. Run “TestMinder_PF_USBv1.0.exe”.
19
Test operation using MegaPulse P USB TestMinder
Manual Operation from the Computer
1. Click Start, Programs, TestMinder_PF_USB, TestMinder_PF_USB on the Windows main screen to
start the program. The following screen is displayed.
2. The MegaPulse may be run in manual mode from the computer. To conduct a manual test, first setup
a name for a file to record the test results: at the lower right of the screen: click the “Select file”
button to show the “Open File” dialog box, then select a file name and suffix. “.txt” files can be
opened by the windows text editor, “.csv” files can be imported into Microsoft Excel if desired.
After the file is selected, the text box will show the file location.
3. For reference, enter a Description and/or the EUT’s Serial Number at the bottom center of the screen.
The up and down arrows allow the user to increment or decrement a previously entered serial number
without retyping.
20
4. Press the Option button to confirm or change the following settings.
Voltage Set: Press “Change” to set a charging voltage level. This charge setting is permanently
stored until changed. Every time this value is changed it is also copied to the “Temporary Voltage”
setting.
Temporary Voltage: Press “Change” to set a temporary charging voltage level. This setting
overrides the “Voltage set” parameter. The temporary voltage setting will be lost when the tester is
turned OFF. After the tester is turned OFF, Temporary Voltage will be equal to the “Voltage Set”
value.
Front panel control: This option disables or enables the front panel buttons and knob on the actual
Megapulse tester.
5. Energy Measurement. If the Megapulse is equipped with Energy Measurement, the software will
display the Energy in the main window.
Click on the Check box to display the Energy and save it on the selected file.
6. To conduct the test, select either positive or negative polarity by clicking on the “Polarity” button.
As it is clicked, it alternates between Normal (positive) and Reverse (negative) polarity. Polarity
selection must be entered before clicking on the “Charge” button. After the charge button has been
clicked, the “Polarity” button is disabled.
7. Press “Auto trigger” button to trigger automatically when the charging voltage level is reached.
8.
Press the Trigger button to deliver the pulse into the EUT.
21
Automatic Operation in Multi-Pulse Mode
1. Click Start, All Programs, TestMinder_PF_USB, TestMinder_PF_USB on the Windows main screen
to start the program. The following screen is displayed.
2. The MegaPulse is run in multi-pulse mode only from the computer. To conduct an automatic test,
first enter a test result file in the window at the lower right hand part of the screen. First, set up a
name for a file to record the test results: at the lower right of the screen: click the “Select file” button
to show the “Open File” dialog box, then select a file name and suffix. “.txt” files can be opened by
the windows text editor, “.csv” files can be imported into Microsoft Excel if desired. After the file is
selected, the text box will show the file location.
3. For reference, enter a Description and/or the EUT’s Serial Number at the bottom center of the screen.
The up and down arrows allow the user to increment or decrement a previously entered serial number
without retyping.
4.
To set the number of pulses and a repetition rate for the multi-pulse test, first click the check box in
the “Multi-Pulse Test” field. Two buttons will become available; “Setup” and “Start”. Click on the
“Setup” button.
22
5. The setup screen is displayed. This screen allows the user to define up to three test sequences within
the following parameters:
Pulses: 0 - 1000 pulses
Polarity: Positive, Negative or Toggle
Test voltage: 0 - 30,000V “Depending on the Megapulse model”
Time between pulses: 2- 1000 seconds
Repeat sequences: 0- 499 times
Time between sequences: 0-1000 seconds.
NOTE: It is possible to set the time between pulses faster than the charge time of the MegaPulse.
Care must be taken to allow enough charging time or the multi-test will be conducted at a lower
voltage and stopped. To optimize testing, we suggest running manual tests to become familiar with
charging times and then optimize the multi-pulse test times. In addition, it is recommended to
practice the multi-pulse options with tests at low voltage until operation is familiar.
6. After Multi-Pulse Test Parameters are correctly entered, click the “OK” button to return to the
TestMinder Main Screen.
7. To conduct a Multi-Pulse test, click on the “Start” button in the Multi-Pulse Test field. The test
starts immediately (see next figure), and status is shown on the Main Screen. Note that the charge
process can be stopped and pause the multipulse at any time by pressing the Safety “STOP” button,
the multipulse can be stopped by pressing on the bottom left yellow button “Stop Multipulse Test”,
but if the unit was charging the unit will deliver that pulse, and then stop, “Do not use this button for
emergency stop”. When a multi-pulse test is paused with interlock the Trigger and Charge buttons
start blinking until the “GO” button is pressed to clear the emergency state and continue testing.
Care must be taken at this point because the tester might still have charge. Make sure to safely
discharge the tester before starting a new sequence to avoid any risk.
23
Multi-pulse test window
24
AC Setup for TestMinder
WARNING
To prevent damage of the PC you must connect the AC power to a separate line, otherwise the PC can
suffer damage due to the High Voltage Output of the MegaPulse Tester.
Correct Connection
Incorrect Connection
25
Energy Measurement
Many medical equipment standards require energy measurements to be taken during surge testing. The
D5-PF allows calculation of these measurements in two different ways; by using the automatic energy
measurement system included in the tester or by connecting an external high voltage acquisition system
to capture the pulse using the rear panel receptacles and manually calculating the energy using the
formula shown in Figure 8.
Figure 8. Formula to Calculate Energy
Where:
“s” is the voltage pulse captured with a high voltage acquisition system *.
“dt” is the difference on time between samples of the acquisition system.
“T” is the total duration of the pulse.
“R” is the resistance value where the pulse is applied **.
“E” is the energy in joules.
* The high voltage acquisition system can be a 1000:1 oscilloscope probe connected to a digital
oscilloscope capable of executing advanced mathematical functions. The oscilloscope would then be
used to calculate the energy by calculating the area under the curve.
** The D5-PF has been designed with a resistor value R of 100Ω ±1%, which will result in a value
between 99 and 101 Ω. We recommend using a value of 100 Ω during energy calculations as a good
approximation of the value for “R” over the test period.
Energy Measurement using System Included on D5-PF
The Megapulse D5-PF tester is equipped with an internal high voltage pulse acquisition system
connected directly to the internal 100 ohm resistor. This system automatically calculates the energy for
each single pulse delivered.
Note 1: To calculate the energy, this automated measurement system uses the mathematical formula
showed on figure 8, where R = 100 .
Note 2: This automatic option only operates when the D5-PF tester has the following settings:
AUX OUTPUT switch is in the RETURN position
S3 switch is in the OPEN position
INDUCTOR switch is for 25mH
Voltage Set point adjusted between 3500V - 5000V
To perform the automatic energy measurement follows the next steps:
1. Select the desired polarity.
2. Charge and Trigger the D5-PF between 3500V - 5000V
26
3. Press the Energy Measurement Button. The front display will blink for a few seconds showing
the energy measurement in joules from the last pulse. If the display shows the word “none”, it
means the last pulse was not captured.
Criteria to validate the energy results:
1. Measure the energy with open circuit (No DUT connected to the D5-PF)
2. Measure the energy with the DUT connected on the output.
3. Subtract the two energies measured on steps 1 and 2, and the difference on these two readings
must not exceed the % established on the standard that the user is following.
Energy Measurement with an External Acquisition System
The Megapulse D5-PF tester is equipped with two high voltage connectors located on the rear panel to
have access directly to the 100 resistor, allowing energy measurements with an external high voltage
acquisition system. The acquisition system must be capable of executing the advanced mathematical
formula shown on figure 8. The Figure 9 shows an example of how connect the external acquisition
system.
1000:1 HV Probe
Figure 9. Energy Measurement with an External Acquisition System
Measurement Terminals Y1 and Y2
There are two BNC jacks on the front panel of the D5-PF, labeled Y1 and Y2. These are used to verify
that the Applied Part or Chassis of the Equipment Under Test does not exceed 1 Volt peak in accordance
with IEC/EN/UL 60601-1. A marginally failing product will cause the voltage on the oscilloscope to rise
to 1 Volt (ref. 60101-1 clause 17h). Note that this voltage does not have the same waveshape as the
defibrillation pulse. The measurement point has a voltage rise time constant of 2 mSec (derived
empirically). The decay time of the measurement point is driven by the impedance of the oscilloscope,
which is typically 1 MΩ. In this case, the decay time would have a time constant of 1 second. When
testing using the math function, the time base should be set at 500mS/division. If a smaller time base is
used, there could be transient noise on the waveform.
27
Pass Fail Reference Built in
The Pass Fail Reference Built in circuit is designed to allow the user perform a quick check test of the
Y1-Y2 measurement system of the D5-PF tester.
To perform a quick test using the Pass Fail Reference Build in follow the next steps:
1.
2.
3.
4.
5.
6.
Set the Pass Fail switch to the ON position.
Set Aux output switch to “Return” position.
Set S3 to “Open” position.
Select Inductor switch to the 500uH.
Only if option 100X is included on the D5-PF tester, install the 100X jumper on the rear panel.
Only if option 34 is included on the D5-PF tester:
a. set the time switch to 200mS
b. Install the 50k jumper on the front panel. Select
7. Using two BNC cables, connect the D5-PF to an oscilloscope as follows:
a. Y1 to CH1
b. Y2 to CH2
8. Set the oscilloscope with the next parameters:
a. Set the Math function A-B on the oscilloscope.
b. Set channel 1 and 2 at 1X with 500mV.
c. Set the trigger on channel 1 at 100mV.
d. Set the time at 500ms.
e. Activate the Math function and turn off channel 1 and 2
9. Verify or adjust the Voltage Set Point to 5000V.
10. Press the CHARGE button to start charging the internal high voltage capacitor,
11. Once the desired voltage is reached, press the red TRIGGER button to deliver the high voltage
pulse and to capture the waveform in the oscilloscope.
12. The oscilloscope should display a waveform similar to Figure 10, with a peak value of
approximately 1 volt.
Note: If on the oscilloscope the horizontal time is set less than 500mS, it may capture transient noise
because the internal mechanical relays are switching the high voltage, but the correct criteria for Y1-Y2
signal must be on the 500mS scale.
Figure 10. Y1-Y2 Waveform using a Defib-5P Pass/Fail Reference
28
Section 5
Testing with the D5-PF
To perform actual testing, the D5-PF should be connected to the EUT as shown in the standard which the
EUT is being tested to. See figures 11 and 12 are examples of the MegaPulse D5-PF connections for
testing parameters of IEC60601. They can be used as a key for the inputs and outputs of the MegaPulse
D5-PF. Note the actual connections on the front panel of the D5-PF have been added to Figure 50 of IEC
601for illustrative purposes. Make sure to confirm your specific circuit connections based on the
standard the EUT is being tested to in order to verify your test connections are correct.
Figure 11. Example of D5-PF Connections on Figure 50 of IEC60601
29
NOTE:
All D5-PF meet the specifications of IEC 60601-2-27 ed 3.0 where a 390KΩ resistor replaced the
470KΩ.
Figure 12. Example of D5-PF Connections on Figures 9A and 9B of IEC60601
30
Section 6
Options
This section contains a list of available options for D5-PF.
Option Name
34
100X
MPxxx
SG
GVAC
Description
Incorporates a circuit for Invasive Blood Pressure test (IEC 60601-2-34 Issue 2)
HV jumper to disconnect the internal 100ohm resistor and use external Energy
measurement devices like Fluke 7000DP and 7010.
Different Line voltages, replace on the part number xxx for 100, 110, 220, 230
or 240 depending the line voltage. (120V for standard configuration).
Built in Sine Wave Generator 20Vp-p.
Vacuum trigger relay (20sec. duty cycle only)
Circuit for Invasive Blood Pressure test (IEC 60601-2-34 Issue 2)
This option gives you the convenience to select the discharge resistor 100ohm or 100kohm with a high
voltage jumper located in the front panel; it also has an additional output impedance of 50kohm and
switch to select trigger duration of 200ms or 20 seconds, this resistance values are need when testing to
IEC 60601-2-34. Ed. 2.0, If testing IEC 60601-2-34. Ed. 3.0 no need of adding option 34.
100X
The 100X Option is offered as a separate upgrade to the unit. The Purpose of the 100X Option is to
disconnect the internal 100Ω resistor and allow the user to connect an external load for energy
measurement purposes.
To connect or disconnect the internal 100 resistor, the D5-PF with option 100X is equipped with two
high voltage red connectors located on the rear panel. These two connectors are labeled with:
SHORT FOR INTERNAL LOAD: Internal 100Ω load connected.
OPEN FOR EXTERNAL LOAD: Internal 100Ω is disconnected (Note: Use an external load at
the Energy Measurement and Ground connectors).
WARNING:
If the Jumper is OPEN FOR EXTERNAL LOAD and the external load is not connected the unit will not
discharge properly. The external load should not be less than 95Ω or more than 1000Ω.
31
To connect an external load for energy measurement purposes follow the next steps:
1.
2.
3.
4.
5.
6.
7.
8.
9.
10.
11.
12.
13.
14.
Turn OFF the D5-PF tester.
Connect the 100X Jumper in the rear panel for internal load.
Unplug all the cables from the outputs.
Set Aux output switch to “Return” position.
Set S3 to “Open” position.
Set the inductor switch to 25 mH.
Only if the option 34 is included on the D5-P:2011, set the Trigger time switch to 200mS and,
install the 50k ohm jumper on the front panel. Select the internal inductance of
Turn ON the D5-PF tester.
Press the TRIGGER button to discharge the tester and make sure the front meter display reads a
safe low voltage.
Turn OFF the MegaPulse D5-PF.
Remove the 100X Jumper in the rear panel for external load.
Connect an external load at the Energy Measurement and Ground connectors.
Turn ON the MegaPulse D5-PF.
Tester is ready to CHARGE and TRIGGER with 100X Option.
To return the D5-PF tester to normal operation condition, follow the next steps:
1.
2.
3.
4.
5.
6.
Turn OFF the D5-PF tester.
Remove the load connected to Energy Measurement and Ground connectors.
Connect the 100X Jumper in the rear panel for internal load.
Turn ON the D5-PF tester.
Tester is ready to CHARGE and TRIGGER.
Turn OFF the D5-PF tester.
Sine Wave Generator
The Sine Wave Generator option is offered as a separate upgrade to the unit. The sine wave is adjustable
and must be set up using an oscilloscope. The Sine Wave Generator signal characteristics are defined as
follows:
Frequency = 10Hz
The sine wave is adjustable from 200mVp-p to 22Vp-p
Coarse and Fine adjustments for the peak voltage
The BNC is an output to monitor on an oscilloscope
A 1MΩ impedance input on the oscilloscope needs to be used in order to measure the sine waveform.
32
Figure 13. Sine Wave Generator option
To operate the Sine Wave Generator option follows the next steps:
1.
2.
3.
4.
5.
6.
Put the S2 switch in the SINE WAVE position.
Attach the 10 Hz sine wave BNC output to an oscilloscope with a 1MΩ impedance input.
Adjust the sine wave amplitude using the coarse and fine adjustments.
Put the S2 switch in the OFF position.
Charge and Trigger the pulse according to the directions in the user manual.
After the pulse, put the S2 switch in the SINE WAVE position to apply the sine wave.
Vacuum Trigger Relay
WARNING:
For this option never exceed 20 second duty cycle
This is high voltage filled with gas of sulfur hexafluoride type SF6, because of the way the gas performs
during switching. SF6 is an excellent insulator but once the switch is closed, if the relay bounces the SF6
becomes easily ionized and carries the arc current, this makes the relay electronically bounce less and
dramatically reduces contact wear.
33
Section 7
Maintenance and Calibration
Service Information
The MegaPulse D5-PF tester is warranted to the original purchaser for a period of 1 year. This warranty
does not cover problems due to misuse or neglect. Malfunctions which occur within the limits of the
warranty will be corrected at no charge. Mail the instrument post paid to the manufacturer. Dated proof
of purchase is required for all in-warranty repairs. The manufacturer is also available for calibration and
/ or repair of instruments that are beyond their warranty period. Contact the manufacturer for a cost
quotation. Ship the instrument and your remittance according to the instructions given by the
manufacturer.
Calibration Information
The Megapulse D5-PF has been fully calibrated at the factory in accordance to our published
specifications. It is recommended that you have this instrument re-calibrated and safety check done at
least once per year. The procedure consists on internal components tolerance verification and calibrating
the meter reading to agree with the capacitor bank.
The Calibration procedure must be performed by qualified personnel. Contact Compliance West USA for
the latest calibration procedure. Have ready the serial number of the Megapulse D5-PF tester.
Technical Assistance
Technical Assistance from Compliance West USA is available:
Phone: (800) 748-6224
Hours: 8:00 AM - 4:00 PM Pacific Time.
Also available on our web site at: www.compwest.com
Contact:
Compliance West USA
650 Gateway Center Way, Suite D
San Diego, CA., 92102
United States of America.
Phone: (619) 878-9696
FAX: (619) 794-0404
34