1
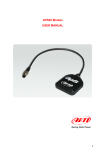
FITTING:
The dash will come supplied with the correct back plate fitted for your chosen
application. Just site this where your existing dash was and you will see it fits on in
exactly the same way. Plug in your bikes existing dash loom in to the back plate before
securing the dash to the bike. Secure using the supplied screws/nuts/washers*
UPDATING THE FIRMWARE:
This is not needed when you receive the Dash but may be required as we add features or
updates to the firmware in time. To check what version you have on the initial start up
screen of the Dash it will tell you the selected Manufacturer, Firmware Version and also
the current selected bike model.
Step 1, Download the USB drivers.
Step 2, You will then need to download the HM DASH Programmer Application.
Step 3, Search for the latest Firmware version relevant to your application and download
this also. (Full details should you require for the above 3 steps are on the website under
HM DASH in the DOWNLOADS section.
Step 4, Open the HM DASH Programmer Application and press ‘Open Hex File’ and
search for the firmware update you downloaded in step 3. Connect the HM DASH via a
normal USB to Mini USB cable. Press Upload. The HM DASH screen will go blank and
you may have line appear across the display and the most left LED will light up to show
the HM DASH is accepting the firmware update. When completed the HM DASH
Programmer Application will show ‘Success’ and the HM DASH will automatically turn
back on.
You have successfully updated the Dash!
SETUP:
This varies by options selected when you purchase the HM Dash and what manufacturer
and model selected.
You will see 2 buttons on the dash ‘MENU’ and ‘SEL’
MENU is used to navigate through the menus and SEL is used to select the current
option.
Press MENU, this will enter you in to the main menu where you will have the following
selections:
VIEW LAPS
RESET TRIP
DISPLAY MODE
SETUP
DATA LOG
SET GPS BEACONS*
Press SEL to enter in to the current selected MENU
VIEW LAPS: Shows all lap times
RESET TRIP: Pressing SEL here will reset the TRIP odo and automatically return you
to the main screen
DISPLAY MODE: Here you have 4 main options
RACE
LAP-TIMER
ROAD
DATA
RACE will show you options relevant to normal racing conditions, items you would not
need to see on the track such as the mileage will not be shown.
LAP-TIMER gives you different options for views BASIC, SECTOR TIMES, BEACON
TIMES, PREDICTIVE and PREDICTIVE DIFFERENCE.
Basic shows you basic information
Sector will show you the different sector times (if you have set up for this with more
SET GPS BEACONS explained later in the manual)
Beacon times shows the lap time if using a BEACON timer
Predictive will include a Preditced time you will complete the current lap in.
Predictive difference will show you how much quicker or slower you will complete the
current lap compared to your best set time.
ROAD: You have 2 options, Mode 1 and Mode 2.
Mode 1 will show you Temperature, Trip, Odo, Current gear, Fuel level*, Speed and rev
counter
Mode 2 will show you Temperature, Batt V, Trip, Odo, Fuel level*, Current gear and rev
counter in a slightly differing layout.
DATA has 5 options
OVERVIEW
VOLTAGES
GPS
LAP-TIMER
PREDICTIVE LAP-TIMER
OVERVIEW gives you a general overview of your bike and you can change the units of
measurement by pressing SEL
VOLTAGES will show the bikes Battery Volts and Fuel Volts
GPS shows all advanced GPS data
LAP-TIMER shows all advanced data
PREDICTIVE LAPTIMER shows all advanced data
SETUP: This will give you varying options depending on manufacturer and options
selected.
These are
DISPLAY
RPM
SHIFT LIGHTS
TEMPERATURE
LAP TIMER
ECU FI ERRORS
WARNINGS
FUEL MANAGEMENT
MODEL SETUP
GEAR RATIO SET UP
SPROCKETS SETUP
ADVANCED
GPS SETUP
DISPLAY: You can select the contrast, backlight and units displayed
RPM: This sets the maximum RPM to display. Press SEL to change and the range is
8000-17000 but will set as per the manufacturers setting in the firmware
SHIFT LIGHTS: The brightness can be adjusted to suit and also at what RPM they will
light up.
TEMPERATURE: You can set your own LOW TEMP and HIGH TEMP
LAP TIMER:
SOURCE – where it gets the information from and you have the option to select GPS,
MAGNETIC (not applicable), BEACON and BUTTON. You need to select GPS.
TOP DISPLAY: Lets you select what information you want shown in the top bar on the
display dependant on DISPLAY MODE set. CHRONO, BEST, LAST and DIFF
MAIN DISPLAY: As per the TOP DISPLAY but for the main section of the display.
It will also show the current GPS position as well as the coordinates for the start line
GPS: First set what you would like shown in the TOP and MAIN display. Your options
are BEST, LAST, DIFFERENCE and CHRONO
Then it takes you on to SETUP TYPE, either AUTO or MANUAL.
To do the AUTO option is make sure it is selected and return to the main screen. It is now
ready to start the auto setup. It does this by immediately dropping beacons and when you
pass over one again it is set up and will start laptiming using that point as the start/finish
of the lap.
When selecting MANUAL you will notice a new option appears here and also on the
MAIN MENU under DATA LOG which is SET GPS BEACONS. This is where you tell
it where to read from. So when you first select SET GPS BEACONS its asks you to set
the PRIMARY (LAP) BEACON which could be the start/finish line for example. When
you reach the point you want to be the PRIMARY BEACON press MENU (you need to
be moving more than 8mph for this operation. Once you have set this PRIMARY
BEACON every time you pass this point it will record as 1 lap.
You also now have the option to go to the MAIN MENU and select SET GPS BEACONS
from here and you can now add sectors. To do this all you do is press MENU again and
go in to the LAPTIMER set up screen again and change the SETUP TYPE to MANUAL
+ SECTOR. After this is done click on SET GPS BEACONS and you can now create
sectors. Just chose where you want the first sector to be after the PRIMARY BEACON.
Repeat this process for as many sectors you would like until you reach the PRIMARY
BEACON to complete the lap. With this done you can then select SECTOR TIMES and
some of the other options in the VIEWS to display different options within the timing
feature.
ECU FI ERRORS: Any ECU error codes will be shown here
WARNINGS: Lets you chose which items you would like to have on screen warnings for.
They include OIL LOW, FUEL LOW, ECU FAULT, INDICATORS, MAIN BEAM,
GLOBAL LED
FUEL MANAGEMENT: There are 2 options here. STOCK will only give you a “low
fuel” warning. The other option is ADVANCED which will require user calibration.
Make sure the tank is empty when starting the calibration. To start the calibration process
scroll down to CALIBRATE and press SEL. Here you will see measurements in Liters
and milliliters. First scroll down to ADD/NEXT and press SEL. This sets the first
calibration point of 0 liters and milliliters (an empty tank) then you need to start adding
fuel in to the tank, the smaller the amount the more accurate it will be. We recommend
adding 1 ltr at a time. Before you add any fuel you must set the volume of liters or
milliliters you are adding so if doing the calibration using 1ltr then change the LITRES
to1. Pour in 1ltr of fuel. Scroll down to ADD/NEXT and pour in the next liter of fuel.
Repeat this process with your chosen amount until the tank is full. When you have
finished scroll down to FINISHED/EXIT
MODEL SETUP: Select which model bike you have installed the HM Dash on.
GEAR RATIO SETUP: Some manufactures send this info automatically to the HM Dash
but others require you set this up manually. Should you need to do this manually we
recommend that you do it on a secure paddock stand with at least 2 persons present.
To do this select SET GEAR RATIOS. Start the bike if not already running making sure
you are in neutral. Go in to first gear and run at a steady RPM (we recommend 4000rpm
but whatever rpm you select make sure you use the same for all gears selection) hold this
steady and press SEL this will store the ratio selected for 1st gear and move on 2nd.
Change in to 2nd gear and again hold at a steady 4000rpm and repeat the above process.
Do this for all gears. Once completed it will return you to the GEAR RATIO SETUP
screen
SPROCKETS SET UP: Allows you to choose different teeth options for the front and
rear sprocket should you have changed them from the manufacturers supplied items
It will also display the speeds achievable with the sprockets you have selected for each
gear.
ADVANCED:
SPEED/ODO SOURCE: STOCK or GPS. The Dash gets its information from regarding
the speed and distance covered. Stock being the bikes original settings or GPS* getting
the information from the optional GPS unit
LOGGING START SPEED: You can change at what speed the data logging starts from
GPS SETUP:
TIME: The time and date are automatically picked up using the optional GPS sensor.
Here you can adjust the time from GMT. Just set the hours and minutes to your zone.
Show Time on Display: Yes or No
You can then select whether you would like the time shown in 12/24hr format.
At the bottom of the screen it will show the time and date and any differences you have
selected
DATA LOG:
This will show you the max RPM for every gear, Max TEMP and Max SPEED recorded
which can be reset at any time by pressing RESET which is the Menu button. To EXIT
press SEL. This will take you back to the main HM Dash screen
SET GPS BEACONS*: `
The GPS Beacons are little markers that are dropped by the GPS sensor which it uses as
it passes over them to know where you are on the current lap.
This will need to be done if you wish to use the optional GPS sensor for any of the lap
timer features of the HM DASH.
First off you will need to choose a start point to drop the first GPS Beacon but to start this
process you need to have a good GPS satellites connection (Which it will tell you) and be
moving faster than 8mph, again it will tell you your current speed providing you have a
GPS connection. The first beacon is usually the Start/Finish line but you can change this
as you see fit. To drop the first PRIMARY BEACON press MENU where you would like
it set. The DASH laptimer feature will then use this point as the start/finish and will
record the times between passing this point. You can now also drop more beacons and set
up sectors. Just while still in this menu press MENU where you would like to drop the
next beacon the create sector 1. Repeat this process until you complete a lap with as
many sectors as you have just created. You will now be able to use the different views
and functions of this very complex but easy to use Lap Timer function of the HM Dash.