1
Setting Up the System
Guide
Baseline Version 5.57.9
8/9/05
© 2005 Command Alkon Incorporated. All rights reserved.
Command Alkon Incorporated believes the statements contained herein
are accurate as of the date of publication of this document. HOWEVER,
COMMAND ALKON INCORPORATED HEREBY DISCLAIMS ALL
WARRANTIES EITHER EXPRESSED OR IMPLIED, INCLUDING WITHOUT
LIMITATION ANY IMPLIED WARRANT OF MERCHANTABILITY OR
FITNESS FOR A PARTICULAR PURPOSE. In no event will Command
Alkon Incorporated be liable for any damages, including any lost profits,
lost savings, or other incidental or consequential damage arising out of
the use of or inability to use any information provided through this
publication, even if Command Alkon Incorporated has been advised of
the possibility of such damages, or for any claim by any other party.
Some states do not allow the limitation or exclusion of liability or
consequential damages, so the above limitation may not apply.
This information is not intended to be an assertion of future action. The
contents of this document are for informational purposes only and are
subject to change without notice. Command Alkon Incorporated
expressly reserves the right to change or withdraw current products
that may or may not have the same characteristics listed in this
publication. Should Command Alkon Incorporated modify its products in
a way that may affect the information contained in this publication,
Command Alkon Incorporated assumes no obligation whatever to
inform any user of the modification.
This publication may contain technical inaccuracies or typographical
errors. Command Alkon Incorporated assumes no responsibility for any
errors that may appear in this manual. This publication is intended only
for the direct benefit of users of Command Alkon Incorporated
products. This manual may not be used for any purposes other than
those for which it is provided. Information disclosed herein was
originated by and is the property of Command Alkon Incorporated, and,
except for rights granted by written consent, such information shall not
be disclosed, disseminated, or duplicated in whole or in part. Command
Alkon Incorporated reserves all patent, proprietary, design,
manufacturing, use, and reproduction rights.
Command Alkon Incorporated
1800 International Park Drive, Suite 400
Birmingham, AL 35243-4232
(205) 879-3282
5168 Blazer Parkway
Dublin, OH 43017-1339
(614) 799-6650
www.commandalkon.com
COMMANDseries (and the names of its components, such as
COMMANDconcrete and COMMANDnetwork), Spectrum, Eagle, and
COMMANDbatch are registered trademarks of Command Alkon
Incorporated. All rights reserved.
Microsoft and Windows are trademarks of Microsoft Corporation of
Redmond, Washington.
Contents
Introduction
................................................................................ 11
Gathering Information .......................................................................... 11
Some Starting Tips ............................................................................... 21
Entering Codes .................................................................................... 22
General ............................................................................................ 22
Comm Managers ............................................................................... 22
How to Use This Document
.......................................................... 23
Style .................................................................................................. 24
Before You Begin .................................................................................. 24
Setting Up the System .......................................................................... 24
Starting COMMANDseries ...................................................................... 25
Logging into COMMANDseries .............................................................. 25
Exiting COMMANDseries ..................................................................... 26
Entering File Information .................................................................... 26
Accessing Help ..................................................................................... 27
Customer Lookup ................................................................................. 27
The Calendar ....................................................................................... 28
Five Important Functions ....................................................................... 29
The <Tab> Key ................................................................................. 29
Accepting (Saving) Screens ................................................................ 29
Detailing .......................................................................................... 30
Add Occurrence ................................................................................. 31
Smart Lookup ................................................................................... 32
Initial System Files
...................................................................... 34
COMMANDseries Licensing ..................................................................... 35
Making a Backup of the Existing License ............................................... 35
Entering a New License ...................................................................... 36
Temporary Licenses ........................................................................... 38
Restoring an Old License .................................................................... 39
License Codes .................................................................................. 40
User Configuration ................................................................................ 41
Password Security ................................................................................ 42
Process Flow ..................................................................................... 42
Implementation ................................................................................. 42
COMMANDseries User Accounts ........................................................... 43
Citrix Environments ........................................................................... 43
Other Considerations ......................................................................... 43
Assigning a User and Password ............................................................ 43
Preferences ...................................................................................... 44
User-level Licenses ............................................................................ 45
8/9/05
3
Privileges ......................................................................................... 46
Field-level Security ............................................................................ 47
Order Printers ................................................................................... 48
Communications Port Setup ................................................................ 50
Options ............................................................................................ 50
Plants .............................................................................................. 52
Cost Centers ..................................................................................... 53
Groups ............................................................................................... 54
Non-COD Price Change ......................................................................... 54
Printer Setup ....................................................................................... 55
Generic Printer Setup ............................................................................ 57
Print Models ........................................................................................ 58
Testing Ticket Printers in COMMANDseries ............................................. 59
Currency ............................................................................................. 60
Code Lengths ...................................................................................... 61
Companies .......................................................................................... 62
Company Setup ................................................................................. 63
Company Cost Centers Setup .............................................................. 64
Company Finance Charges Setup ......................................................... 64
Employees .......................................................................................... 65
Reason Codes ...................................................................................... 66
Modem Codes ...................................................................................... 68
Signaling Units ..................................................................................... 70
Signaling Units Setup ......................................................................... 71
Signaling Unit Options ........................................................................ 72
Signaling Unit Messages (General) ....................................................... 73
Signaling Unit Incoming Messages ....................................................... 73
Signaling Unit Outgoing Messages ........................................................ 74
Signaling Unit Statuses ...................................................................... 75
Auto-Ticketing Interface ........................................................................ 75
Tare Lane ......................................................................................... 75
Dispatch Lane ................................................................................... 76
Gross (Ticketing) Lane ....................................................................... 76
Combo Lane (Gross & Tare) ................................................................ 76
Supported Readers ............................................................................... 76
Scale Configuration .............................................................................. 77
Auto-Ticketing Units ............................................................................. 77
Auto-Ticketing Units Setup .................................................................. 77
Auto-Ticketing Units Communication .................................................... 78
Auto-Ticketing Units Communication (SmartPass) .................................. 79
Auto-Ticketing Units Lane Configuration ................................................ 79
Auto-Ticketing Units Libra Asphalt Interface Setup ................................. 80
Stop Light Setup ............................................................................... 80
Pre-Ticketing Setup .............................................................................. 81
Scale Types ......................................................................................... 81
Next Numbers ..................................................................................... 83
4
8/9/05
Document Tags .................................................................................... 85
Document Tag Setup .......................................................................... 86
Document Formats ............................................................................... 89
Tickets (plant copy and dispatch copy) ................................................. 89
Data Out and Data In ......................................................................... 89
Invoices, Statements, Quotes .............................................................. 90
Entering Document Formats ................................................................ 90
Adjusting Formats Using the Display Screen .......................................... 91
Adjusting Formats Using the Document Fields Screen ............................. 91
Mask Characters ................................................................................ 94
Document Format Groups ...................................................................... 95
Document Format Group Setup ........................................................... 96
Invoice Format Codes Setup ............................................................... 97
Statement Format Codes Setup ........................................................... 98
Project Quote Format Codes Setup ..................................................... 100
Receipt Format Codes Setup ............................................................. 101
Invoice Out Format Codes Setup ........................................................ 102
Ticket Overflow Format Codes Setup .................................................. 102
File Import/Export Format Codes Setup .............................................. 103
Document Formatting ......................................................................... 104
Message Text ..................................................................................... 106
Initial Accounting Information
................................................... 108
Inventory Accounting Periods ............................................................... 108
A/R Accounting Periods ....................................................................... 109
G/L Accounting Periods ....................................................................... 110
Bank Codes ....................................................................................... 111
Adjustment Codes .............................................................................. 112
Tax Authorities ................................................................................... 113
Tax Authority/Locations ....................................................................... 114
Tax Codes ......................................................................................... 117
Credit Codes ...................................................................................... 117
Terms Codes ...................................................................................... 120
Entering Terms Codes--Basic Definitions ............................................. 120
Entering Terms Codes--Examples ....................................................... 121
Accounting Categories ........................................................................ 124
Sales Analysis Codes .......................................................................... 125
Configuration
............................................................................. 127
Initial System Configuration ................................................................. 128
Defaults Configuration ........................................................................ 131
Defaults Configuration Setup ............................................................. 131
Customer Defaults .............................................................................. 132
Customer Sales Defaults Setup .......................................................... 133
Customer Taxing Defaults Setup ........................................................ 133
Customers Pricing Defaults Setup ...................................................... 134
8/9/05
5
Customer Charges Defaults Setup ...................................................... 135
Customer Accounting Defaults Setup .................................................. 136
Customer Invoicing Defaults Setup .................................................... 137
Customer Distribution Defaults Setup ................................................. 137
Distribution Configuration .................................................................... 138
Dispatch Configuration ........................................................................ 142
Aggregate Configuration ...................................................................... 143
Signaling Configuration ....................................................................... 146
Invoicing Configuration ....................................................................... 147
Inventory Configuration ...................................................................... 148
Receivables Configuration .................................................................... 149
Receivables Aging Configuration ........................................................... 151
Receivables Statements Configuration ................................................... 152
Financials Configuration ...................................................................... 153
Projects/Quotes Configuration .............................................................. 154
Lien Configuration .............................................................................. 155
User Fields Configuration ..................................................................... 155
Optimization Configuration .................................................................. 156
Plant & Delivery Information
..................................................... 158
Locations .......................................................................................... 158
Plants ............................................................................................... 159
Plant Setup ..................................................................................... 160
Plant Main Tab Setup ........................................................................ 161
Plant Communication Setup .............................................................. 162
Communications Port Setup .............................................................. 163
Plant Batching Setup ........................................................................ 164
Plant Scheduling Setup ..................................................................... 165
Plant Costs Setup ............................................................................ 166
Plant Plants Setup ........................................................................... 168
Plant Scale Setup ............................................................................ 168
Plant Bins Setup .............................................................................. 170
Constituent Order Setup ................................................................... 171
Plant User Fields .............................................................................. 172
Haulers ............................................................................................. 172
Truck Types ....................................................................................... 173
Trucks .............................................................................................. 174
Entering a New Truck ....................................................................... 174
Truck Scheduling Setup .................................................................... 175
Truck Tracking Setup ........................................................................ 176
Overhead Loadout ........................................................................... 177
Truck User Fields ............................................................................. 178
Trailers ............................................................................................. 178
Trailer Setup ................................................................................... 179
Trailers Scheduling Setup .................................................................. 179
Trailer Tare Setup ............................................................................ 180
6
8/9/05
Trailer Overhead Loadout Setup ......................................................... 180
Delivery Methods ............................................................................... 181
Pouring Methods ................................................................................ 182
Job Cost Phases & Jobs ....................................................................... 183
Zones ............................................................................................... 185
Map Pages ......................................................................................... 186
Map Page Time Periods Setup ............................................................ 186
Map Pages Setup ............................................................................. 187
Travel Times Setup .......................................................................... 188
Map Pages Zones Setup .................................................................... 189
Map Pages Coordinates .................................................................... 189
Automatic Travel Time Posting ........................................................... 189
Deadhead Setup ................................................................................ 192
Task Codes ........................................................................................ 193
Condition Codes ................................................................................. 194
Driver Overtime Tables ........................................................................ 196
Items and Pricing
...................................................................... 199
Price Categories ................................................................................. 199
Usage Codes ..................................................................................... 200
Units of Measure (UOM) ...................................................................... 201
UOM Related Fields ............................................................................. 202
Ordered Quantity ............................................................................. 203
Delivered Quantity ........................................................................... 203
Price Quantity ................................................................................. 204
Batch Quantity ................................................................................ 204
Inventory/Cost Quantity ................................................................... 205
Purchase Quantity ........................................................................... 205
Reporting Quantity .......................................................................... 205
Item Categories ................................................................................. 205
Item Types ..................................................................................... 205
Item Categories Setup ..................................................................... 206
Item Categories UOM Setup .............................................................. 207
Item Categories Mix Defaults Setup ................................................... 208
Item Categories Tax Override Setup ................................................... 209
Items ............................................................................................... 209
Initial Item Entry ............................................................................. 211
Item Entry ...................................................................................... 211
Item Main Tab Setup ........................................................................ 212
Item UOM Setup .............................................................................. 213
Item Conversions Setup ................................................................... 213
Item Sales Setup ............................................................................. 214
Item Tax Override Setup ................................................................... 215
Item Mix Setup ............................................................................... 216
Item User Fields Setup ..................................................................... 217
Item Locations Setup ....................................................................... 218
Item Costs Setup ............................................................................ 219
8/9/05
7
Item Prices Setup ............................................................................ 220
Item Inventory Setup ....................................................................... 221
Item Batching Setup ........................................................................ 222
Item Batch Codes Setup ................................................................... 224
Item Constituent Setup .................................................................... 224
Automatic Products .......................................................................... 225
Hints for Entering Items ................................................................... 226
Minimum Load Charge Tables ............................................................... 227
Seasonal Charges ............................................................................... 228
Unloading Charges ............................................................................. 229
Sundry Charges ................................................................................. 231
Vendors ............................................................................................ 234
Freight Methods ................................................................................. 236
Cartage & Delivery Information
................................................. 238
Cartage Accounting Periods ................................................................. 238
Cartage Rate Codes ............................................................................ 239
Hourly Cartage Rates ....................................................................... 240
Per Load Cartage Rates .................................................................... 242
Quantity/Distance Cartage Rates ....................................................... 243
Plant/Zone Cartage Rates ................................................................. 246
Quantity Cartage Rates .................................................................... 248
Setting up a Custom Cartage Rate Table w/ Equation ............................ 250
Cartage Surcharge Codes .................................................................... 251
Quoted Cartage Pay ............................................................................ 253
Hauler/Truck Information .................................................................... 254
Deduction Codes ................................................................................ 255
Quoted Deductions ............................................................................. 256
Customers and Projects
............................................................. 258
Sales Analysis Codes .......................................................................... 258
Customers ........................................................................................ 259
Customer Main Tab Setup ................................................................. 259
Customer Address Setup .................................................................. 260
Customer Sales Setup ...................................................................... 261
Customer Taxing Setup .................................................................... 262
Customer Pricing Setup .................................................................... 262
Customer Charges Setup .................................................................. 264
Customer Accounting Setup .............................................................. 266
Customer Invoicing Setup ................................................................. 268
Customer Distribution Setup ............................................................. 270
Customer User Fields Setup .............................................................. 270
Customer Products Setup ................................................................. 271
Projects ............................................................................................ 274
Project Initial Setup ......................................................................... 275
Entering Project Main Tab Information ................................................ 276
Entering Project Address Information ................................................. 277
8
8/9/05
Entering Project Pricing Information ................................................... 278
Entering Project Accounting Information ............................................. 281
Entering Project Invoicing Information ................................................ 283
Entering Project Distribution Information ............................................ 285
Entering Project User Fields Information ............................................. 286
Entering Project Distances Information ............................................... 287
Entering Project Products Information ................................................ 287
Fixed Delivery Pricing .......................................................................... 292
Adjusting Cartage Rates ................................................................... 294
Changing Price Types ....................................................................... 294
Entering Project Forecasting Information ............................................ 295
Payment Forms .................................................................................. 296
General Ledger Setup
................................................................ 298
Account Types ................................................................................... 298
Source Codes .................................................................................... 300
Cost Centers ...................................................................................... 301
Account Codes ................................................................................... 302
G/L Booking Codes ............................................................................. 304
User Preferences
....................................................................... 306
Functionality Preferences ..................................................................... 306
General Preferences Setup ................................................................ 306
User Preferences Setup .................................................................... 308
Sound Preferences Setup .................................................................. 309
Color Preferences Setup ................................................................... 310
Tracking Preferences Setup ............................................................... 311
Font Preferences Setup .................................................................... 312
Keys Preferences Setup .................................................................... 313
Toolbar Preferences Setup ................................................................ 314
COMMANDexecutive
................................................................... 316
Sales Data Periods ............................................................................. 316
Sales Data Configuration ..................................................................... 317
COMMANDquote Setup
............................................................... 320
Job Types .......................................................................................... 320
Job Source Codes ............................................................................... 320
Contacts ........................................................................................... 321
Setting Up Quote Printing .................................................................... 323
Setup/Troubleshooting Tips .................................................................. 325
Appendix A: Quick Reference Guide
Appendix B: Field Level Security
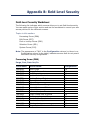
Field-Level Security Worksheet
8/9/05
........................................... 329
................................................ 338
............................................................. 338
9
Processing Forms (DBA) .................................................................. 338
Edit Forms (EDT) ............................................................................ 339
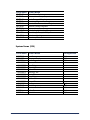
Find or Lookup Forms (FND) ............................................................ 351
Selection Forms (SEL) ..................................................................... 352
System Forms (SYS) ....................................................................... 354
Appendix C: UOM Examples
....................................................... 355
Appendix D: GL Booking Code Samples
...................................... 359
COMMANDinvoicing ............................................................................ 359
COMMANDreceivables ......................................................................... 361
COMMANDinventory GL Entries ............................................................ 363
Appendix E - Content Pricing
..................................................... 369
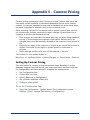
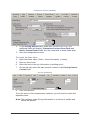
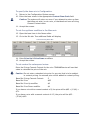
Setting Up Content Pricing ................................................................... 369
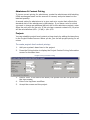
Admixtures & Content Pricing ............................................................ 372
Projects .......................................................................................... 372
Index
10
......................................................................................... 373
8/9/05
Introduction
Welcome to the COMMANDseries Setting Up the System Guide. Using this
manual will help you prepare the COMMANDseries system for use in your
construction materials business.
As you look through this manual, the amount of information needed to
properly set up the COMMANDseries system may seem overwhelming.
However, once you start to enter the information, you will realize that the
process moves quickly. Once you enter the required information, you will
notice the efficiency and ease of use that is part of the COMMANDseries
design. A properly configured system provides easily accessible information
and an efficient usage.
Topics in this section:
Gathering Information
Entering Codes
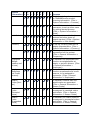
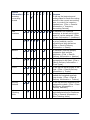
Gathering Information
Before you start entering data, you should take the time to complete several
preliminary tasks to ultimately make entering information and setting up your
system much easier.
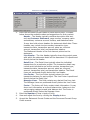
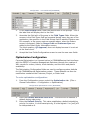
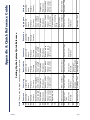
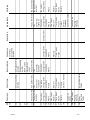
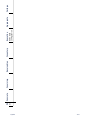
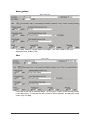
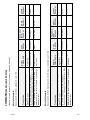
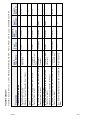
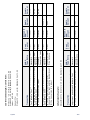
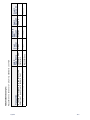
Review the checklist on the following pages for the information required to set
up your system. The checklist is organized with the following codes for each of
the Command Alkon applications.
CC – COMMANDconcrete
EX – COMMANDexecutive
CA – COMMANDaggregate
CT – COMMANDcartage
IY – COMMANDinventory
QU – COMMANDquote
IG – COMMANDinvoicing
LN – COMMANDlien
AR – COMMANDreceivables
8/9/05
11
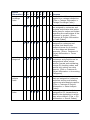
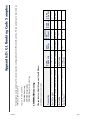
System
Information
C
C
C
A
I
Y
I
G
A
R
E
X
C
T
Q
U
L
N
Purpose
Licenses
Gives the privileged user access
to COMMANDseries product
licensing information. {Files >
System Information > Licenses}
Users
To set lifetime on installation
username; to set up other users
for getting started process.
{Files > System Information >
Users}
Print Models
To set up print models for the
printers and other types of
output required. {Files > System
Information > Print Model}
Currency
To set up currency code and its
display characteristics. {Files >
System Information > Currency}
Companies
To set up companies to be
represented on the system.
{Files > General Information >
Companies}
Employees
(Weighmasters and
Drivers)
To establish the employees who
function as weighmasters at
plants, or as truck drivers. {Files
> General Information >
Employees}
Employees
(Salesmen
and Credit
Persons)
To establish the employees that
function as salesmen and credit
persons, to be assigned to
customers. {Files > General
Information > Employees}
Reason
Codes (Nontax)
To establish reasons that nontaxable sales are generated.
{Files > General Information >
Reason Codes}
Reason
Codes
(Canceled
Items)
To establish the reason codes to
be assigned to canceled orders
and tickets. {Files > General
Information > Reason Codes}
Reason
Codes
(Suspended
Items)
To establish the reason codes to
be assigned to suspended orders
and tickets. {Files > General
Information > Reason Codes}
12
8/9/05
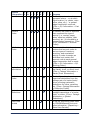
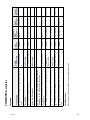
System
Information
Reason
Codes
(Lost
Quotes)
C
C
C
A
I
Y
I
G
A
R
E
X
C
T
Q
U
L
N
Purpose
To establish the reason codes to
be assigned to lost quotes in the
Quote system. {Files > General
Information > Reason Codes}
Modem
Codes
To set up modem codes and
characteristics to be used by the
system for any dial-up plants.
{Files > General Information >
Modem Codes}
Signaling
Units
To set up signaling units and
characteristics for interfaces.
{Files > General Information >
Signaling Units}
Scale Types
To set up scale types and
characteristics for interfaces.
{Files > General Information >
Scale Types}
Next
Numbers
To establish numbering sequence
groups for orders, tickets, and
invoices. {Files > General
Information > Next Numbers}
Document
Formats
To establish information about
the preferred style of tickets,
orders, invoices, statements, and
quotes. Also, to determine if you
will be importing or exporting
any information to other systems
for processing. {Files > General
Information > Documents >
Document Formats}
Document
Format
Groups
To set up the group codes for
combining document formats to
make up an invoice, statement,
or quote. {Files > General
Information > Documents >
Document Format Groups}
Message
Text
To establish messages that can
be printed on invoices and
statements for all customers, or
aging sensitive messages that
can be printed on applicable
statements. {Files > General
Information > Message Text}
8/9/05
13
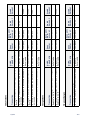
System
Information
C
C
C
A
I
Y
I
G
A
R
E
X
C
T
Q
U
L
N
Purpose
A/R
Accounting
Periods
To set up the beginning and
ending dates for each accounting
period in the current accounting
year, to control the invoicing and
receivables transactions. {Files >
General Information > A/R
Accounting Periods}
G/L
Accounting
Periods
To set up the beginning and
ending dates for each company,
for each accounting period in the
current accounting year, to
control the general ledger
transactions. {Files > General
Information > G/L Accounting
Periods}
Bank Codes
To set up banks to be used when
entering payment transactions.
{Files > General Information >
Bank Codes}
Adjustment
Codes
To set up adjustment codes to be
used when making A/R
adjustments, identifying the type
of adjustment, and controlling
the G/L codes that are used to
record the adjustment. {Files >
General Information >
Adjustment Codes}
Tax
Authorities
To establish the major groups of
taxing entities. {Files > Sales
Tax Information > Tax
Authorities}
Tax Authority
Locations
To set up the specific taxing
entities within each tax
authority. {Files > Sales Tax
Information > Tax Authority/
Locations}
Tax Codes
To set up the combinations of tax
authority/locations that
represent any given point of
taxation. {Files > Sales Tax
Information > Tax Codes}
14
8/9/05
System
Information
C
C
C
A
I
Y
I
G
A
R
E
X
C
T
Q
U
L
N
Purpose
Inventory
Accounting
Periods
To set up the beginning and
ending dates for each accounting
period in the current accounting
year, to control the inventory
transactions. {Files > General
Information > Inventory
Accounting Periods}
Item
Locations
To establish the locations
inventory is stored and to which
plants it can be assigned. {Files
> Item Information > Locations}
Plants
To set up the plants to be used
to price products, and to
schedule and ship deliveries.
{Files > Plant & Delivery
Information > Plants}
Haulers
To establish external people/
companies that perform
deliveries. {Files > Plant &
Delivery Information > Haulers}
Truck Types
To establish the types of trucks
represented in the fleet. {Files >
Plant & Delivery Information >
Truck Types}
Trucks
To set up the actual trucks in the
fleet. {Files > Plant & Delivery
Information > Trucks}
Trailers
To set up trailers that may be
loaded and weighed separate
from trucks. {Files > Plant &
Delivery Information > Trailers}
Delivery
Methods
To set up delivery methods to be
assigned to orders. {Files > Plant
& Delivery Information >
Delivery Methods}
AutoTicketing
Units
To set up auto-ticketing units
and characteristics for interfaces.
{Files > General Information >
Auto-Ticketing Units}
8/9/05
15
System
Information
C
C
C
A
I
Y
I
G
A
R
E
X
C
T
Q
U
L
N
Purpose
Map Page
Time Periods
To establish the intervals of time
to be used to record estimated
and actual travel times between
plants and map page locations.
{Files > General Information >
Map Page Time Periods}
Map Pages
To set up areas related to map
page books to which deliveries
can be made. {Files > Plant &
Delivery Information > Map
Pages}
Price
Categories
To establish the groups to which
customers can be assigned that
allow for assigning prices for
products purchased. {Files >
Item Information > Price
Categories}
Usage Codes
To establish the ways that
customers ultimately use readymixed concrete. {Files > Item
Information > Usage Codes}
Item
Categories
To set up the categories that
represent the groups of products
sold or used in the process of
making products for sale, or
items that are maintained in
inventory. {Files > Item
Information > Item Categories}
Items
To set up all products, those for
resale as well those that are
constituents for salable products,
also services and intangibles
charges (minimum load,
seasonal, unloading, etc.), also,
those items that, while not
related to products sold, are
simply maintained in inventory.
{Files > Item Information >
Items}
16
8/9/05
System
Information
C
C
C
A
I
Y
I
G
A
R
E
X
C
T
Q
U
L
N
Purpose
Minimum
Load Charge
Tables
To establish the table that
controls when minimum load
charges are to be assessed for
concrete tickets and the price for
various tiers of load sizes. {Files
> Item Information > Minimum
Load Charges}
Seasonal
Charges
To establish seasonal charges
and the date ranges for which
they are applied to orders and
tickets. {Files > Item
Information > Seasonal
Charges}
Unloading
Charges
To establish methods of
calculating unloading charges.
{Files > Item Information >
Unloading Charges}
Sundry
Charges
To set additional charges, such
as fuel surcharges or
environmental charges. {Files >
Item Information > Sundry
Charges}
Vendor
Types
To set up types of vendors
related to inventory receipts and
purchase orders. {Files > Item
Information > Vendor Types}
Vendors
To set up vendors related to
inventory receipts and purchase
orders. {Files > Item
Information > Vendors}
Freight
Methods
To set up freight methods related
to inventory receipts and
purchase orders. {Files > Item
Information > Freight Methods}
Zones
To set up the large geographical
areas to which deliveries can be
made. {Files > Plant & Delivery
Information > Zones}
Cartage Rate
Codes
To define cartage rates that are
later applied to orders, along
with the detailed information
specified during the code setup.
{Files > Cartage Information >
Cartage Rate Codes}
8/9/05
17
System
Information
C
C
C
A
I
Y
I
G
A
R
E
X
C
T
Q
U
L
N
Purpose
Cartage
Surcharge
Codes
To establish additional payments
applied to a cartage transaction.
{Files > Cartage Information >
Cartage Surcharge Codes}
Credit Codes
To establish the credit codes that
are assigned to customers and
projects and dictate what action
takes place for orders and tickets
regarding the credit status of the
customer or project. {Files >
Customer & Project Information
> Credit Codes}
Terms Codes
To set up the terms codes to be
assigned to customers and
projects that identify the
payment terms for an invoice,
i.e. due dates and discount
amounts. {Files > Customer &
Project Information > Terms
Codes}
Accounting
Categories
To establish the groups to which
customers and projects can be
assigned and allow unique
invoice formats and numbering,
unique G/L booking codes, and
special sort options on some
reports. {Files > Customer &
Project Information > Accounting
Categories}
Sales
Analysis
Codes
To set up sales analysis codes
that are assigned to customers
and allow sorting and totaling
options on sales analysis reports.
{Files > Customer & Project
Information > Sales Analysis
Codes}
Source
Codes
To set up source codes that are
assigned to G/L transactions to
identify the application in which
they were created. {Files > G/L
Information > Source Codes}
18
8/9/05
System
Information
C
C
C
A
I
Y
I
G
A
R
E
X
C
T
Q
U
L
N
Purpose
Configuration
To enter the first screen in the
Configuration file. To set up
customer defaults to serve as a
template for entering customers.
To set up parameters in all
appropriate windows, based on
applications being used. {Files >
General Information >
Configuration}
Customers
To set up customers and
customer-specific products for
special pricing if applicable.
Appropriate fields will be
defaulted from the configuration
customer defaults record. {Files
> Customer & Project
Information > Customers}
Projects
To set up projects for customers
and project-specific products for
special pricing if applicable.
Appropriate fields will be
defaulted from the customer
record. {Files > Customer &
Project Information > Projects}
Cartage
Accounting
Periods
To establish the beginning and
ending dates for accounting
periods within an accounting
year. {Files > Cartage
Information > Cartage
Accounting Periods}
Quoted
Cartage
Rates
To assign cartage rates, along
with associated information such
as “waiting” charge and a
“premium” charge to customers,
projects, quotes, haulers, trucks,
and drivers. {Files > Cartage
Information > Quoted Cartage
Rates}
Account
Types
To set up account types that are
assigned to account codes to
broadly define and group the
account codes. {Files > G/L
Information > Account Types}
8/9/05
19
System
Information
C
C
C
A
I
Y
I
G
A
R
E
X
C
T
Q
U
L
N
Purpose
Cost Centers
To identify cost centers that
represent where – or at which
fiscal location (i.e. plants, main
office, shop, etc.) – a general
ledger transaction occurred.
{Files > G/L Information > Cost
Centers}
Account
Codes
To identify the chart of accounts
that represent the type of
activity (i.e. receipt, usage,
sales, sales tax payable, cash
received, etc.) is recorded by a
general ledger transaction. {Files
> G/L Information > Account
Codes}
G/L Booking
Codes
To set up tables that tie cost
centers and account codes to
various types of inventory,
invoicing, and receivables
activity in order to assign an
individual cost center and
account code to each general
ledger transaction that is made.
{Files > G/L Information > G/L
Booking Codes}
Hauler/truck
Information
To specify cartage employees on
the hauler, truck, or driver level.
{Files > Cartage Information >
Hauler/Truck Information}
Deduction
Codes
To identify and implement
organized deductions from the
cartage rate of a hauler/truck/
driver, allowing systematic
deductions for loans, penalties,
etc. {Files > Cartage Information
> Deduction Codes}
Quoted
Deductions
To apply deductions to the
cartage transactions of a hauler,
truck, or driver. {Files > Cartage
Information > Quoted
Deductions}
Sales Data
Periods
To set up accounting years used
by COMMANDexecutive to sort
sales information. {Reporting >
Sales Data Periods}
20
8/9/05
System
Information
C
C
C
A
I
Y
I
G
A
R
E
X
C
T
Q
U
L
N
Purpose
Sales Data
Configuration
To define the layout of the
database table used for
COMMANDexecutive reports.
{Reporting > Sales Data
Configuration}
Contact Type
Codes
To set up tables that support the
multiple contacts assigned to
Quote records. {Files > Contacts
> Contact Information}
Contact
Information
To specify address and phone
number information about
contacts in the Quote records.
{Files > Contacts > Contacts}
Job Source
Codes
To specify the source of job
information in Quote records.
{Files > General Information >
Job Sources}
Job Types
To specify the type of job in
Quote records. {Files > General
Information > Job Types}
Some Starting Tips
Gather all of the information necessary before you begin entering data.
Having all of the information at hand allows you to quickly move through the
setup process without skipping over steps and potentially failing to enter
important information.
Caution: Follow the order presented in this manual. In many cases,
information entered in later sections builds on information entered
earlier.
Familiarize yourself with the online help. Read through the section titled
Using Online Help in The COMMANDseries Workplace manual and take some
time to move through the Online Help. Also, get used to pressing <Shift+F1>
when you are in a field that you do not understand. This opens the help
specific to the screen you are on and this will provide you with field
descriptions.
The COMMANDseries Workplace manual includes shortcuts and functionality
secrets. Once you become familiar with the system, your only limiation is your
typing speed.
8/9/05
21
Entering Codes
General
During your system setup, you will be repeatedly asked to assign codes to
various entries. Codes are composed of letters, numbers, or alphanumeric (a
combination of letters and numbers). They are assigned to values or entries
as a means of uniquely identifying the value or entry. Codes are also used to
sort and organize files and reports in groups such as customers, projects,
products, etc.
The system you use to apply codes to all of the files that will need them must
be uniform and organized for you to efficiently use the system. So for each
different file that requires a group of codes, adhere to the following rules:
1.
2.
Make ALL related codes (company, item, location, etc.) either all
number, all letters, or all numbers and letters; don’t make some codes all
numbers and other codes all letters, etc.
If your codes contain any letters, make ALL codes the same length; that
is, put the same number of characters in each code.
Following these simple guidelines will ensure that your files are properly
organized and can be readily accessed.
Caution: It is highly advisable to work out coding conventions prior to data
entry. Doing so helps ensure the usability of your codes.
Comm Managers
COMMANDseries uses a program called COMMANDcomm to monitor various
tyes of comminications--ticket printing at a plant, automated data out
routines, etc. Different instances of COMMANDcomm are needed to manage
different processes. A single instance of COMMANDcomm is referred to as a
Comm Manager.
Each comm manager is assigned an identifying number--that number allows
COMMANDseries to know what comm manager is used for a given routine.
The number is specified at the process (autoticketing setup, for example) and
the comm manager command line.
It is possible to have a lot of comm managers running on a single system. As
a result, it is critical to maintain a master list of all comm managers running
on your system. Each Comm manager should be documented as follows:
•
•
•
Computer Name--what computer is running the comm manager.
Manager Number
Manager Function--Ticket printer for plant 2, for example.
This list will greatly aid troubleshooting and maintenance.
22
8/9/05
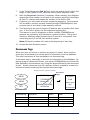
How to Use This Document
Locating What You Need
This section provides guidance for you to more easily locate information within
our manuals.
Contents
Use the Contents as an outline for the document. It enables you to quickly
locate the page that contains the information you need.
Headings
Scan the headings to find the topic you need.
Procedures
Procedures tell you how to perform a task and are indicated by numbered
sequences in the body of the document.
Appendices
Appendices provide information that is not necessary for the task at hand, but
is related to the topic. Use appendices to find out more about a particular
topic, for further documentation, or where to go for technical help if
necessary.
Topics in this section:
Style
Before You Begin
Setting Up the System
Starting COMMANDseries
Accessing Help
Customer Lookup
The Calendar
Five Important Functions
8/9/05
23
Style
This document uses a style designed to help you identify specific functionality.
•
Button names are capitalized and bold. For example:
Select the Pricing button.
•
Field names are capitalized and bold. For example:
Enter the Order Code in this field.
Note: To enhance the readability of the text, the enhanced formatting is only
used for the first instance of the name within a section.
•
Forms (also called screens or windows), Menu names, and Options are
capitalized. For example:
On the Edit menu, if you select Volume Calculator, the Item Code
screen may appear first.
•
Required user input examples use Courier New plain. For example:
Enter 123 Main Street in this field.
•
Braces and arrows { > } indicate how to navigate to a specific screen. For
example:
To navigate to the Tickets screen, go to the Dispatch menu and
select Tickets from the pull-down menu {Dispatch > Tickets}.
Before You Begin
COMMANDseries runs under Windows 2000 or Windows XP Professional
Edition). If you are not comfortable using Windows, you will not feel
comfortable using COMMANDseries. It would be helpful to spend some time
acquainting yourself with the environment.
There are several functions that are unique to COMMANDseries. To help you
with these functions, we have provided a COMMANDseries Getting Started in
the Workplace manual. This manual will show you how to work effectively in
COMMANDseries applications. We encourage you to look through the manual
before you begin working in the system, and we also hope that you will refer
to the manual when questions about the functionality of COMMANDseries
arise.
Setting Up the System
COMMANDseries manipulates a large database of information, and most of
this data is unique to your construction materials business. For
COMMANDseries to efficiently and properly operate, a basic set of information
must be entered before trying to perform your daily tasks with the system.
Files such as products, plants, trucks, and customers must be entered, along
with files pertaining to taxes, minimum load charges, and accounting periods.
There is a large amount of information that must exist before you can begin
using COMMANDseries.
24
8/9/05
With this in mind, Command Alkon has provided a Setting Up the System
document to assist you as you enter the information that will make your
system unique to your business. As the size of the Setting Up the System
document shows, there is a great deal of information to enter. However, once
this initial information exists in the system, the only products, projects,
customers, etc. that you will have to enter are new ones.
Properly built files make COMMANDseries extremely easy to use. The
information you need is either already in place or just a mouse click or
keystroke away.
Caution: Before attempting to use COMMANDseries, make sure you have
entered the information described in the Setting Up the System
document.
Starting COMMANDseries
There are several ways to start your COMMANDseries applications:
•
•
•
•
Select the COMMANDseries Program from the Windows Start button.
Select the application module icon from the COMMANDseries Program
group in Windows Explorer.
Select the COMMANDseries shortcut on your Desktop.
Implement the COMMANDstart feature, which starts COMMANDseries
automatically upon start-up of your computer.
After entering a COMMANDseries program, you can switch to another
COMMANDseries application by selecting the program from the Alternate
Menu list in the Misc drop-down menu of all COMMANDseries applications.
Topics in this section:
Logging into COMMANDseries
Exiting COMMANDseries
Entering File Information
Logging into COMMANDseries
Effective with version 5.57.7, COMMANDseries provides two different options
for user verification.
Windows Security
This options integrates COMMANDseries security with Windows security. When
a user launches COMMANDseries, the program retrieves the current Windows
username and validates it against the COMMANDseries User list. If the
Windows username matches a COMMANDseries user, that user is
automatically logged onto COMMANDseries. No username/password entry is
required.
8/9/05
25
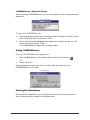
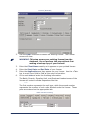
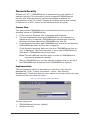
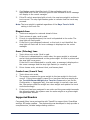
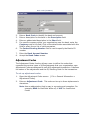
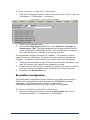
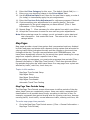
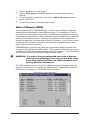
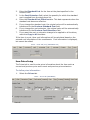
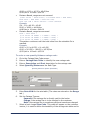
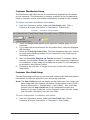
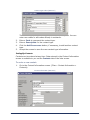
COMMANDseries (Standard) Security
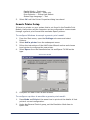
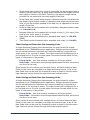
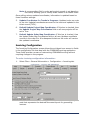
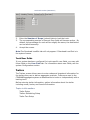
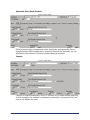
After launching COMMANDseries, you are prompted to enter a username and
password.
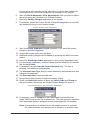
Log In Screen
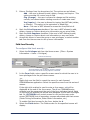
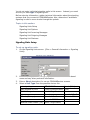
To log into COMMANDseries:
1.
2.
Enter the assigned username in the User field (the name is initially set by
your CA service team) and press <Tab>.
Enter the assigned Password (the password is initially set by your CA
service team) and press <Tab>.
The COMMANDseries application module opens.
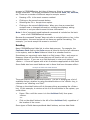
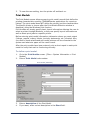
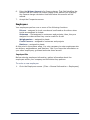
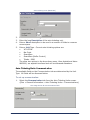
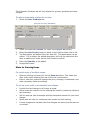
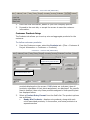
Exiting COMMANDseries
To exit a COMMANDseries application:
•
•
Click the Exit button in the upper right portion of the screen.
-orPress <Alt+F4>.
A screen appears which asks you to confirm that you want to close
COMMANDseries; click Yes.
Exit Window
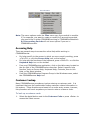
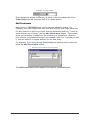
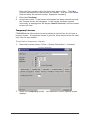
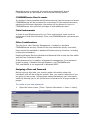
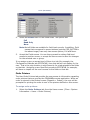
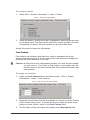
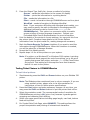
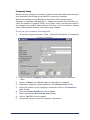
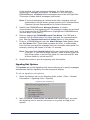
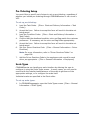
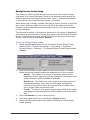
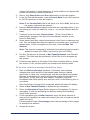
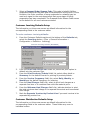
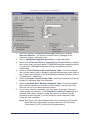
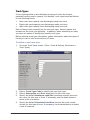
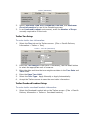
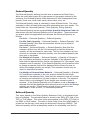
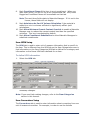
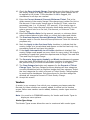
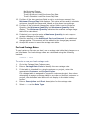
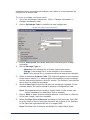
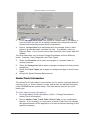
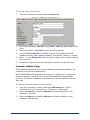
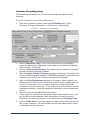
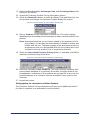
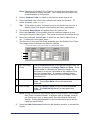
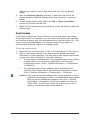
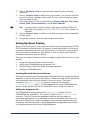
Entering File Information
Once inside the application, you will find that most of the screens used to
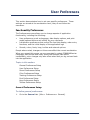
enter information are located in the Files menu.
26
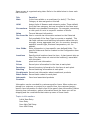
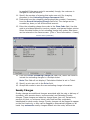
8/9/05
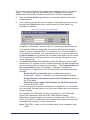
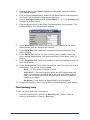
The Files Menu
Note: The menu options under the Files menu vary from module to module.
If, for example, you want to create or modify A/R accounting periods,
you need to be in either COMMANDinvoicing or COMMANDreceivables—
A/R Accounting Periods will not be an option if you are in
COMMANDconcrete.
Accessing Help
There are several ways to access the online Help while working in
COMMANDseries:
•
•
•
•
For help specific to the screen in which you are currently working, press
<Ctrl+F1> or click the Screen Help icon on the toolbar.
For help with the functions of the keyboard, press <Shift+F1> or click the
Keyboard Help icon on the toolbar.
From any COMMANDseries application, click on the Help menu located on
the far right of the COMMANDseries menu bar. Select a specific help
function, such as Screen Help, Keyboard Help, Contents, How to Use
Help, or the About window.
From the COMMANDseries Program Group in the Windows menu, select
the COMMANDseries Help icon.
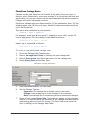
Customer Lookup
Many COMMANDseries procedures involve entering a customer code. It is
important that you feel comfortable finding customer-related information in
the system. These directions are based on an order entry screen; however,
this procedure will work anywhere you have to enter a customer code.
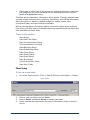
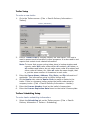
To look up a customer code:
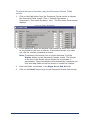
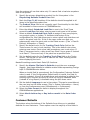
1.
8/9/05
Select the detail button next to the Customer Code or press <Enter> to
access the Select screen.
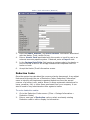
27
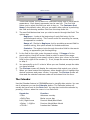
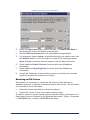
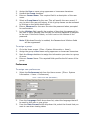
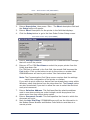
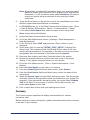
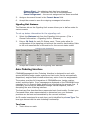
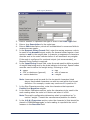
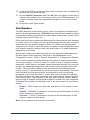
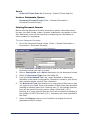
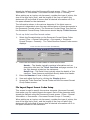
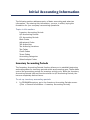
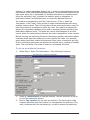
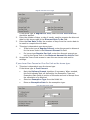
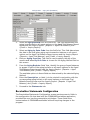
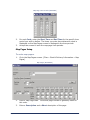
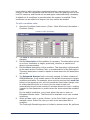
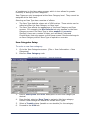
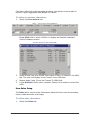
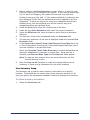
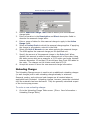
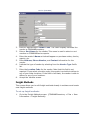
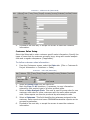
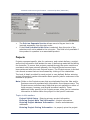
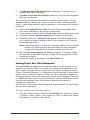
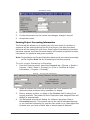
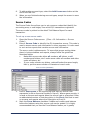
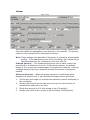
Select screen
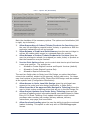
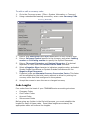
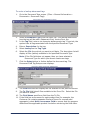
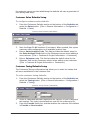
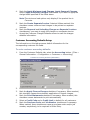
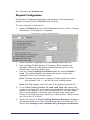
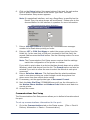
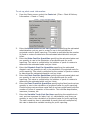
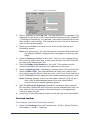
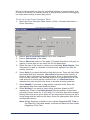
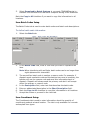
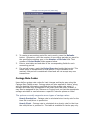
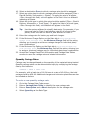
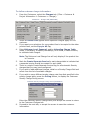
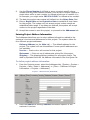
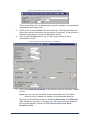
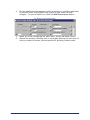
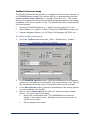
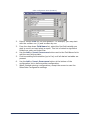
2.
This screen allows you to search for customers using one or more search
parameters. Each search parameter has its own line. The first field
allows you to select the field you wish to key on. The Customer Sort
Name is the default value, but you can select other options by selecting
the field and choosing another field from the drop-down list.
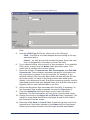
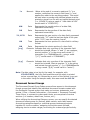
The next field determines how you wish to search through that field. The
options are:
Begins as - Looks at the beginning of each field entry for the
specified search string. This is most useful for searching for names,
as opposed to numbers.
Range of - Similar to Begins as, but by providing a second field for
a search string, this option allows for broader searches.
Contains - The system looks through the entire field for the search
string, as opposed to just the beginning.
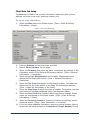
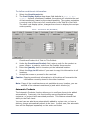
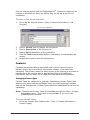
3.
4.
5.
6.
7.
In the field to the right, enter the search string. If Range of is the
search option, there will be two fields in which to specify the range.
If you wish to specify more search criteria, place your cursor in the next
field (to the right of the number 2). If not, accept the screen and proceed
to step 6.
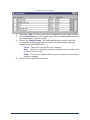
You can specify up to 10 criteria. When you are finished, accept the data
you have selected.
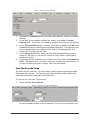
The Choices screen will display the customers that match your criteria.
When you have located the customer, either double-click or highlight the
desired customer and press <Enter> to accept. The Choices screen will
close and the selected customer code will be entered into the form.
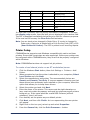
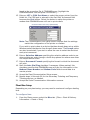
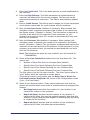
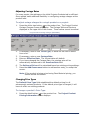
The Calendar
Use the Calendar feature in COMMANDseries to simplify date entries. You can
use it whenever you see the Calendar button. The Calendar button will
usually be found next to the Date field. You can also invoke the calendar by
pressing <Enter> when the cursor is in a Date field.
28
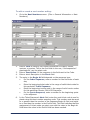
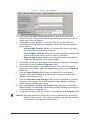
Keystroke
Function
<Tab>
Advances one day
<Shift+Tab>
Backs up one day
Left / Right Arrow
Previous Week/Next Week
<PgUp> / <PgDn>
Previous Month/Next Month
<Ctrl+R>
Invokes the Calendar
8/9/05
Keystroke
Function
<F11>
Searching toggle
<F2>
Closes the Calendar
{File > Search}
Searches for a month
Five Important Functions
COMMANDseries has a wide variety of tools and commands, and new users
can easily find themselves overwhelmed by the different options. Despite the
large number of options, four commands will serve you in most situations.
The <Tab> Key
Accepting (Saving) Screens
Detailing
Add Occurrence
Smart Lookup
The <Tab> Key
COMMANDseries is a form-based program. This means that most screens are
essentially entry forms, with a number of fields in which information is
entered. To move from field to field, press <Tab>. Doing so will move the
flashing cursor (which may also be referred to as the focus) through the entire
form. There are a couple of additional things to remember about <Tab>:
•
•
<Shift+Tab> takes you back one field, which can be useful if you
overshoot your target.
The cursor not only moves from field to field, but also moves across the
buttons on the screen. If the cursor is resting on a button, a faint box
appears inside it.
The cursor is on this button.
•
•
If you can’t find the cursor in a field, look at the buttons. If the cursor is
on a button, you can access the button by pressing <Enter>.
For a standard keyboard, COMMANDseries remaps the numeric keypad
<Enter> key to function as a <Tab> key. This mapping allows for more
efficient data entry. This remapping is only for COMMANDseries; in most
other programs, the key functions as a standard <Enter> key.
If you are directed to press <Enter>, make sure that you press the main
<Enter> key (the one that is equivalent to <Return> on a typewriter).
This enter key is frequently referred to as the “Center Enter” key.
Accepting (Saving) Screens
Throughout COMMANDseries you will often need to save your work (also
known as committing the data to the database). There are a host of different
8/9/05
29
screens in COMMANDseries, but they all have one thing in common: the
Accept command. The Accept command is the same as Save, OK, Execute,
etc. There are a number of different ways to accept a screen:
•
•
•
•
Pressing <F2> is the most common method.
Clicking on the screen’s accept button.
Selecting the File > Accept menu option.
Clicking on the screen’s Exit button. When you close a screen that
contains new or changed information, a dialog box displays, asking
whether or not you want to save this new information.
Note: A list of commonly-used keyboard commands is included on the back
cover of all COMMANDseries manuals.
Because the command “Accept” does not refer to a single button or key, in the
documentation, the word accept will not have any special formatting. For
example, “you must accept the screen to continue.”
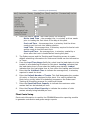
Detailing
Many COMMANDseries fields link to other data sources. For example, the
Customer Code field on the Order screen is linked to the list of all customers
in the system, and the Date fields are linked to a calendar function.
Sometimes you can simply enter data in a field, press <Tab>, and move on.
However, there will be other times that you will need to call up a list of
available choices. If you are on a field and want to view your options, press
<Enter>. A form will appear with a list of selections appropriate to that field.
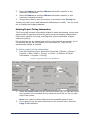
Some fields also have small buttons next to them that have the same effect:
Example of fields with detail buttons
The small buttons are called detail buttons. The act of bringing up a list of
available choices, whether by using the detail button or the <Enter> key, is
referred to as “detailing on a field”.
Clicking on the detail button will do the same thing as pressing the <Enter>
key. In this example, to retrieve a list of all the architects in the system, you
could either:
•
•
Press <Tab> until the cursor is in the Architect field, then press
<Enter>
-orClick on the detail button to the left of the Architect field, regardless of
the location of the cursor.
Some types of fields have specialized detail buttons, such as date fields:
30
8/9/05
Example of a Date button
Even though the button is different, its place to the immediate left of the
Order Date field lets you know that it is a detail button.
Add Occurrence
Many forms in COMMANDseries call for varying amounts of data. For
example, one order might have only one item, but the next might have four.
For any situation in which you finish entering something and say, “I need to
enter another one of these,” use the Add Occurrence button. The hooked
arrow on the button is taken from the symbol on a typewriter’s <Return>
key—the key you pressed whenever you needed a new line. Anytime you see
it, you can select it to create another line for data entry.
For example, if you are entering Task Codes and need to enter a new one,
press the Add Occurrence button:
Example of the Add Occurrence button
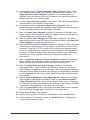
The Add Occurrence button appears throughout COMMANDseries:
8/9/05
31
Example of many types of Add Occurrence buttons
This Add Occurrence
button lets you add an
additional admixture to
Mix # 30656.
This Add Occurrence
button lets you add an
additional mix to this
project list.
This Add Occurrence
button lets you add an
additional extra product
to the project list.
You can also press <F6> to execute the Add Occurrence command.
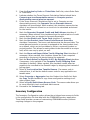
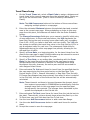
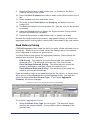
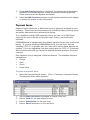
Smart Lookup
Many functions in COMMANDseries involve selecting information from a list.
In some cases--customer or items, for example--those lists can be quite long.
To simplify the lookup process, we have established Smart Lookup for
selected fields. This feature allows you to find a specific record quickly, even
if the list you are searching is long.
Most lookups in COMMANDseries are based on some sort of code--Customer
Code, Project Codes, etc. However, most of the codes used in
COMMANDseries are arbitrary numbers, and it is difficult to keep track of
them. Smart Lookup allows you to perform lookups based on the description
of the record--the Customer Name instead of the Customer Code, for
example. Because you are more likely to remember a customer’s actual
name that a code, smart lookup allows you to find a specific record faster than
if you were to search based solely on codes.
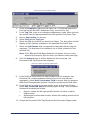
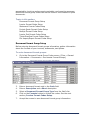
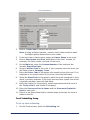
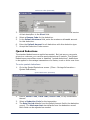
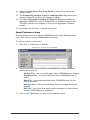
To use smart lookup:
Note: This example demonstrates looking up a specific customer. The basic
process is the same for all fields that support smart lookup.
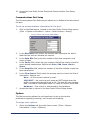
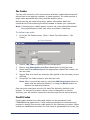
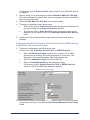
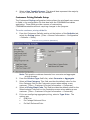
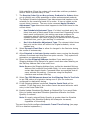
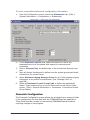
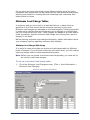
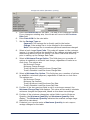
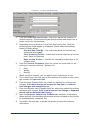
1.
32
Once the cursor is in the Customer Code field, enter the first few letters
of the Customer Description (not the customer code).
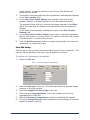
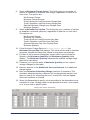
8/9/05
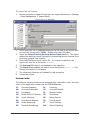
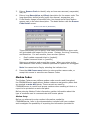
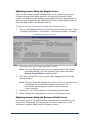
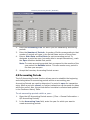
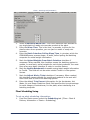
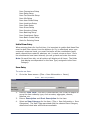
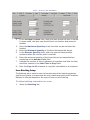
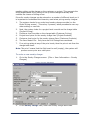
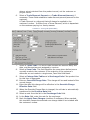
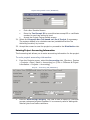
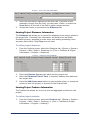
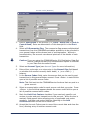
Searching for customers beginning with BA.
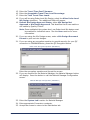
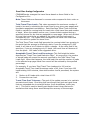
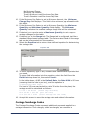
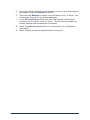
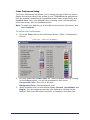
2.
Detail on the field. A lookup screen will appear.
The lookup screen displays all customer records that begin with the
search string. Across the top of the lookup screen are displayed the
search string and the selection key (in this case, the selection key is the
customer Sort Name).
Note: If only one record matches the entered string, the system will
simply retrieve the record into the form.
3.
4.
Double-click on the desired customer to enter that record in the form.
You will be returned to the Orders screen, with the selected record
retrieved. You can now continue order entry.
The following fields currently support smart lookup. Each field is listed by the
screen on which it appears, as well as the field used as a search key.
8/9/05
Field
Search Key
Customer Code
Customer Sort Name
Tax Code
Tax Code Description
Item Code
Item Description
33
Initial System Files
The following section addresses entry of basic system information. By
entering this information, you are, in effect, laying the foundation for your
company’s business operations.
There are a number of elements in the section that call for information that
has not yet been entered. For example, when you enter Employee
records, you can assign drivers to trucks, but you have not entered trucks
yet. Once you have entered trucks, you can return to the Employee screen
and assign trucks to drivers.
Topics in this section:
COMMANDseries Licensing
User Configuration
Non-COD Price Change
Printer Setup
Generic Printer Setup
Print Models
Currency
Code Lengths
Companies
Employees
Reason Codes
Modem Codes
Signaling Units
Auto-Ticketing Interface
Auto-Ticketing Units
Pre-Ticketing Setup
Scale Types
Next Numbers
Document Tags
Document Formats
Document Format Groups
Document Formatting
Message Text
34
8/9/05
COMMANDseries Licensing
COMMANDseries Licensing is accomplished through two methods:
•
•
A COMMANDseries license controls what specific modules are active.
A COMMANDnetwork license controls how many users may be connected
to COMMANDnetwork at any given time.
When your software is initially installed, your license will already be entered in
the system. If additional modules are purchased later, you will be issued a
new license. Installing a new license is a three step process:
1.
2.
3.
Make a backup of your existing license.
Delete the existing license.
Enter the new license.
Topics in this section:
Making a Backup of the Existing License
Entering a New License
Temporary Licenses
Restoring an Old License
Making a Backup of the Existing License
Backing up the existing license provides you with some additional security. In
the event that there is something wrong with your new license, you can
always restore the old license and keep your business up and running.
To back up an existing license:
1.
2.
3.
4.
8/9/05
Open the Export Data screen. {Manage > Data Manage > Export Data}
Scroll down the list of database tables until you see the license table
(LICN). Double-click the LICN table.
Enter a file name for the export file in the File field. If no name is
specified, the file name will be LICN.TXT.
The Output File Location will default from settings in the USYS72.INI
file. Enter a different path if necessary.
35
Export Data (DBAEXPR)
5.
Accept the screen. The export will only take a few seconds.
Entering a New License
If you purchase additional COMMANDseries modules, you will receive a new
license to activate the new features. You must enter the license manually.
Caution: License information must be entered exactly as it appears on your
COMMANDseries license. A single mispelled word will invalidate the
license.
To enter a new license:
1.
36
Ensure that all other users have logged off the system and open the
Licenses screen. {Files > System Information > Licenses}
8/9/05
Licenses (EDTLICN)
2.
0
Use the Clear command to delete the existing license. The License
screen will clear.
WARNING: This step erases your existing license from the
database. Do not perform this step without first
making a backup copy of your license!!
3.
4.
5.
6.
Enter the Client Name exactly as it appears on your printed license.
Enter the Start Date and End Date of your license.
Enter the Applications as they appear on your license. Use the <Tab>
key to move from field to field as you enter information.
Go to each tab and enter the licensing information.
The Batch Console, Signaling Unit, and Overhead Loadout areas of the
license will contain number sequences like this:
11/2
The first number represents the unit type, while the second number
represents the number of such units allowed under the license. These
pairs are entered on the appropriate tab:
Batch Console Licensing
8/9/05
37
7.
8.
Enter the first number in the first field, then press <Tab>. The Batch
Console represented by that number will display. Then go to the Count
field and enter the second number. Repeat as necessary.
Enter the Checksum.
Accept the screen. If the license information has been entered correctly,
the Licenses screen will disappear. If the license has been entered
incorrectly, a message box will display Invalid License!, and the license
screen will clear.
Temporary Licenses
COMMANDseries allows users to test modules for which they do not have a
primary license. A temporary license is good for thirty days and can be used
only once for any module.
To activate a temporary License:
1.
Open the Licenses screen. {Files > System Information > Licenses}
Licenses (EDTLICN)
2.
38
Select the Temporary button. The Temporary License Options screen
displays.
8/9/05
Temporary Licensing screen (EDTLICN1)
3.
4.
5.
Select the Applications you wish to activate. The Expiration Date of
the temporary license will display automatically.
Use the Add Occurrence button to add additional applications.
If a temporary feature appears to be affecting how your system runs, use
the Disable button to turn the feature on and off for testing purposes.
Note: Disabling a feature has not impact on the 30-day trial period.
6.
7.
8.
Select additional Batch Console functions and enter Counts as
neccessary.
Select additional Signaling Unit functions and enter Counts as
neccessary.
Accept the Temporary License Options screen, and accept the Licenses
screen to activate the temporary license(s).
Restoring an Old License
Sometimes it is necessary to restore an old license, either because of
database problems or because of problems with a new license. An old license
can restored in one of two ways:
•
•
Enter the license manually (see directions above).
Import the license (if you have made a backup copy).
To make it easier to import licenses (as well as other data), a shortcut to the
Data Import function is placed in the Windows Start menu. {Start > Programs
> COMMANDseries > Import COMMANDseries Data}
8/9/05
39
To import an old license:
1.
Ensure everyone is logged off and open the Import Data screen. {Manage
> Data Management > Import Data}
Import Data scren (DBAIMPR)
2.
3.
4.
5.
6.
7.
8.
Scroll down the list of database tables on the left side of the screen until
you see the license table (LICN). Double-click the LICN table.
Select the Delete Existing Records Before Import button. This option
deletes the existing license information, preventing the two licenses from
becoming merged (and invalid).
Enter the File name of the import file. If no name is specified, the
system will look for a file names LICN.TXT.
The Optional File field is not needed for this operation.
The Input File Location will default from the system’s USYS72.INI file.
Change the location if necessary.
The remaining fields are not needed for this procedure.
Accept the screen.
License Codes
The different licensed functions are accessed with a two-letter code. Here are
some of the application codes used by COMMANDseries :
40
CC
Concrete Dispatch
IG
Invoicing
AR
Accounts Receivable
AP
Accounts Payable
PO
Purchasing
GL
General Ledger
OE
Order Entry & Ticketing
SH
Scheduling
CR
Credit Checking
SR
Sales Reports
PR
Contribution Reports
TA
Time Analysis
OM
Order Monitoring
TT
Truck Tracking
DS
Dynamic Scheduling
MS
Mobile Signaling
8/9/05
AU
Auditing
IV
Inventory
RP
Replication Services
QU
Quotations
CA
Aggregate Dispatch
FS
Flat Scale Interfaces
CW
COMMANDwriter
CB
Block & Building Material Dispatch
CT
Cartage
CE
Eagle Batching
CR
Credit Checking
LN
Liens
CD
Asphalt
IN
Inform Interface
MO
Map Order Entry
RO
Rostering
PP
Pricing & Prep
MT
Map Truck Tracking
AT
Auto-ticketing
AL
Auto-loadout
EX
COMMANDexecutive
GP
Graphic Performance Monitor
PS
Product Sales Option
OL
Overhead Loadout
MP
Mix Proportioner
DI
Document Imaging
CP
COMMANDperformance
GM
Windows Tracking & Scheduling
AS
Auto-Statusing
MM
Material Manager
User Configuration
The Users screen defines the user records that allow individuals access to all
COMMANDseries applications. The user record controls certain aspects of an
individual’s use of the COMMANDseries applications.
When the application is installed, a temporary user is set up. At the minimum,
you need to extend the life of the temporary user by changing its Lifetime
field. Eventually, you will need to set up permanent user records for each
individual or group, before allowing them access to the applications.
Topics in this section:
Password Security
Assigning a User and Password
Preferences
User-level Licenses
Privileges
Field-level Security
Order Printers
Order Printers
Communications Port Setup
Options
Plants
8/9/05
41
Password Security
Effective in 5.57.7, COMMANDseries is implementing a new method of
password security. This new option, which integrates COMMANDseries
security with Windows security, has been developed to address the
requirements of the U.S. Public Company Accounting Reform and Investor
Protection Act of 2002, known as the Sarbanes-Oxley Act (SOx).
Process Flow
This option allows COMMANDseries to use Windows security to provide
seamless access to COMMANDseries:
1.
2.
3.
A User logs into Windows with a Username and Password.
The user subsequently launches COMMANDseries. No Username or
Password entry is required; COMMANDseries automatically tests the
Windows Username against the COMMANDseries User file.
If the Windows Username and COMMANDseries Username are identical,
COMMANDseries starts and the user is logged in.
If the Windows username does not exist as a COMMANDseries user, an
error is displayed: "Windows Username is not a valid COMMANDseries
Username". COMMANDseries will then close.
Note: The user will not have the option to enter a COMMANDseries
username & password manually.
4.
Once in COMMANDseries, the user has the privileges that are set up in
the COMMANDseries Username for all COMMANDseries features.
Implementation
The new password system is activated by a new form, User Security
Management {Files - System Information - Users - User Security
Management}. Please note that the menu option for the Users editor has been
moved into the new Users sub-menu.
The new User Security screen (EDTUSMG)
The two options are
•
•
42
COMMANDseries Security (default)
Windows Security
8/9/05
Once this screen is accepted, all people who subsequently launch
COMMANDseries will be subject to the selected security system.
COMMANDseries User Accounts
If a system is being installed with Windows security, the first person to launch
COMMANDseries will be prompted for a username. If the entered username
matches the Windows username, the person will be allowed to log on to
COMMANDseries with sufficient privileges to add additional users.
Citrix Environments
In order to use Windows security in a Citrix environment, users must be
configured so that their Windows, Citrix, and COMMANDseries usernames are
identical.
Other Considerations
The new form, User Security Management, is subject to standard
COMMANDseries security. Access to this form should be strictly controlled.
Users should be reminded of standard Windows security functions, including
locking the workstation.
Enabling Windows Security disables the Password field in both the User editor
and the User Preferences editor.
If Windows security is enabled, all password management, from password
length to aging, is handled through Windows, not COMMANDseries.
This new feature is not supported in Windows 98SE.
Assigning a User and Password
Before entering this data, you need to gather information about the
individuals who will be using the system. Also, you need to determine if you
are going to use groups. Using groups makes maintaining user information
easier by allowing you to set up the same information for a large number of
people.
To create a user and password:
1.
Open the Users screen. {Files > System Information > Users > Users}
Users (EDTUSNM)
8/9/05
43
2.
3.
4.
5.
6.
7.
Assign the User a name using uppercase or lowercase characters.
Unmark the Group checkbox.
Enter an Owner Name. This required field is a description of the user
name.
Select a Group Name for the user. This will specify the user record, if
any, to which this user will belong. A list of group names can be accessed
by clicking on the field’s detail button.
Enter a Password for the user. Re-enter the password when prompted
for confirmation.
In the Lifetime field, specify the number of days that the password for
this user is valid, starting from the day the current password is assigned
to the user. If the field is blank, no limit is set on the lifetime of the
password.
Note: If Windows Security is enabled, the Password and Lifetime fields
will be suppressed.
To assign a group:
1.
2.
3.
4.
Go to the Users screen. {Files > System Information > Users}
Assign the group a User name using uppercase or lowercase characters.
Mark the Group checkbox to assign the information you enter to a group
of users.
Enter an Owner Name. This required field specifies the full name of the
group.
Preferences
To assign user preferences:
1.
Select the Preferences tab from the Users screen. {Files > System
Information > Users > Preferences}
Users - Preferences Tab (EDTUSNM1)
2.
3.
44
From the Language field’s drop-down list, select the language that will
be used by this user or user group.
From the Date Format field’s drop-down list, select the format that you
want to use when viewing dates.
8/9/05
4.
5.
6.
7.
8.
9.
From the Date Order field, choose whether you want the month to
display before the day or the day to display before the month.
Select a printer from the Print Model field’s drop-down list.
Mark the Only Allow This Print Model checkbox if you want the user or
group to be able to use that printer only.
Select the Employee Code from the drop-down list. Populating this field
allows the system to automatically append to an order the employee code
of the person who took the order.
Select the Plant Code from the drop-down list. The value can do two
different things, based on the system’s license:
•
If the system is licensed for the Product Sales Option, this field
specifies the Point of Sale plant.
•
If the system is licensed for aggregate, the field specifies the user’s
default plant for aggregate ticketing and overhead loadout.
The field can be left blank.
If a plant is specified, the Scale Code field will appear. Entering a valid
scale code establishes a default scale code for aggregate dispatch and
ticketing screens.
If the Materials Manager is in the license, the Default Location for Mix
Conversion field appears. If you are deploying the Materials Manager in
a multi-region environment, this field allows you to override the systemlevel lab location (specified on the Configuration-Distribution-Materials
Manager screen).
User-level Licenses
The Licenses function allows you to specify what COMMANDseries modules the
user can access.
By default, all users have access to all modules in the system license. To
restrict a user’s access to a module or modules, specify the module(s) on this
tab. By entering CC, as in the screenshot below, you can quickly restrict a
dispatcher to the COMMANDconcrete module.
License-level restrictions are the broadest level of security control; you can
also restrict access by scree-level and field-level security.
To configure user-level licenses:
1.
Select the Licenses tab from the Users screen. {Files > System
Information > Users > Licenses}
Users – Licenses Tab (EDTUSNM2)
8/9/05
45
2.
3.
In the short Application field, enter the two-letter abbreviation for the
application(s) that should be available to the user, or select an
application from the drop-down list in the longer field. Only applications
that are licensed will be available.
To enter multiple applications, click on the Add Occurrence button.
Note: If nothing is entered on this tab, the system will grant full access
to all modules in the system license.
Privileges
The Licenses tab provides broad, module-level control over user access in
COMMANDseries. The Privileges tab provides screen and field-level control,
allowing you to define which forms the user will have access to and the type of
access (add, inquire, etc.) they will have.
To configure privileges:
1.
Select the Privileges tab from the Users screen. {Files > System
Information > Users > Privileges}
Users – Privileges Tab (EDTUSNM3)
2.
In the Form fields, enter the screen names for which the user must have
privileges from the pull-down menus.
-orRight-click over the field to display the menu for each licensed
COMMANDseries application. You can select the specific screen from this
series of menus.
Note: If using multiple applications within COMMANDseries, you can
grant a user privileges for an entire application and switch to
another application from the User Privileges screen by selecting
the application name from the Alternate Menu’s options. A prompt
will ask you which activity you wish to perform.
46
Caution: The form RPTWRIT must be included in the forms selected for
privileges when individual editors are selected if the user is to
have privileges to listings for that editor. When All or # is
selected, the form does not have to be individually specified
since it is included in the All selection.
8/9/05
3.
4.
5.
6.
Enter a Privilege from the drop-down list. The options are as follows:
Add – the user is allowed to add, delete, change, and inquire. This
option provides full control over a field.
Chg (change) – the user is allowed to change and list existing
records, but cannot delete existing records or create new ones.
Inq (inquire) – the user is allowed to inquire (but NOT add, delete,
or change). This option is the equivalent of Read Only.
None – the user is NOT allowed to access the form/field at all
Mark the Price Suppress checkbox if the user is NOT allowed to add,
delete, change or inquire about price information on any price fields.
Mark the Cost Suppress checkbox if the user is NOT allowed to add,
delete, change or inquire about cost information on any cost fields.
Accept this screen to save the group or user privileges, or select another
tab from the Users screen to set up more information.
Field-level Security
To configure field-level security:
1.
Select the Privileges tab from the Users screen. {Files > System
Information > Users > Privileges}
Field-level Security
The Field button will not display unless a specific
form with field-level security options is entered.
2.
3.
8/9/05
In the Form fields, enter a specific screen name for which the user is to
have privileges from the pull-down menus.
-orRight-click over the field to reveal the menu for each licensed
COMMANDseries application. Select the specific screen from this series of
menus.
If the right-click method is used to enter a form name, a # will be
displayed at the end of the form name. The # is a COMMANDseries
wildcard, and its presence at the end of the form indicates that all fields
on the form will assume the access level assigned on the main Privileges
tab. So, EDTORDR# will control access for not just the main order
screen (EDTORDR) but all secondary screens associated with that screen
(Order Pricing Information, Other Order Information, etc.)
To enable field-level access for the form, delete the #.
Select the Fields button. The Fields screen for the specified screen will
display.
47
Fields (EDTUSNMA)
4.
Select an Access level for the listed fields. The options are:
Full
Read Only
None
Note: Not all fields are available for field-level security. In addition, Field
names that correspond to screen buttons (such as COD_BUTTON in
the above image) have only two access options, Full and None.
5.
Accept the Fields screen. You can then proceed to setting field-level
access to another screen, or accept the User screen to save the changes
for the selected user or group.
If you assign a user an access level of None to a tab (for example, the
Configuration-Defaults tab–EDTCNFXB), then that tab will not display for the
user. That is the only situation in which security for a tab extends to the fields
on that tab. Assigning a user Read Only access to EDTCNFXB, for example,
will have no impact on the user’s access to the fields on that tab.
Order Printers
The User Order Printers tab provides the user access to information regarding
order printers that are used by the COMMANDconcrete application. When an
order is entered in the Orders screen {Dispatch > Orders}, the user will be
prompted for printing the order to one of the printers defined on this screen.
To assign order printers:
1.
48
Select the Order Printers tab from the Users screen. {Files > System
Information > Users > Order Printers}
8/9/05
Users – Order Printers Tab (EDTUSNM5)
2.
3.
4.
Enter a Description, then press <Tab>. The Short description field and
the Setup button will appear.
Enter a Short Description for the printer in the field that displays.
Click the Setup button to go to the User Order Printer Setup screen.
User Order Printer Setup (EDTUSNMB)
5.
6.
Enter a Manager Number. This specifies the COMMANDcomm manager
that will control the printer.
Enter an LPT or COM Port Name or select the proper printer from the
field’s drop-down list.
If a COM port is entered in the first field, the second field becomes the
Port button. Click on the button to set up the printer or modem that
COMMANDcomm will use to print orders. See instructions below.
Note: The Communication Port Setup screen requires that the settings
match the configuration of the printer or modem.
7.
8.
9.
8/9/05
If you wish to print orders to a device that has already been setup within
Windows, select that device from the drop-down list. The Prompt option
can also be selected if you wish to allow the user to select the device at
each print command.
Enter a Selective Address. This field specifies the selective address
code to use when printing an order through a multi-drop phone line
where more than one output device exists.
Enter a Document Format. This field specifies the format in which the
document will print.
Mark the Auto Dial Flag if COMMANDcomm will use the information in
the Modem Phone Number and Modem Code fields to send data to a
remote printer.
49
10. Accept the User Order Printer Setup and Communication Port Setup
screens.
Communications Port Setup
The Communications Port Setup screen allows you to define information about
the port.
To set up communications information for the port:
1.
Click on the Port button, located on the User Order Printer Setup screen.
{Files > System Information > Users > Order Printers > Setup}
Communication Port Setup (EDTUSNMD)
2.
3.
4.
5.
6.
7.
In the Baud Rate field, select the number that represents the bits of
data that the port can transfer per second.
In the Data Bits field, enter the number of bits that comprise a unit
(byte) of data.
In the Parity field, select the type of parity that will be used to check for
errors during transmission. Options are Even, Odd, None, Mark or
Space.
In the Stop Bits field, select the number of bits that indicate a byte has
been transmitted.
In the Flow Control field, select the process used to control the flow of
information. Options are:
None – no flow control method is used.
XON/XOFF – the receiving port sends an XOFF signal when the
buffer (a temporary storage area) is full. The port will stop sending
data. It sends an XON signal when it is ready to receive more data.
Hardware – flow control is determined by the hardware.
Accept the data to return to the User Order Printer Setup screen.
Options
The Options screen allows the privileged user to set up the various
preferences regarding invoicing, user access and ticketing.
To assign users options:
1.
50
Select the Options tab from the Users screen. {Files > System
Information > Users > Options}
8/9/05
Users – Options Tab (EDTUSNM6)
Mark the checkbox of the necessary options. The options are listed below (left
to right, top to bottom):
2.
3.
4.
5.
Allow Suspending of Orders/Tickets/Products for Invoicing gives
the user the privilege to suspend orders, tickets, or products so that the
particular transaction will not be invoiced.
Allow Release of Credit and Debit Memos gives the user privilege to
edit an AR creditor debit memo in a released status for posting.
Allow Release of Orders/Tickets/Products for Invoices gives the
user the privilege to release (un-suspend) an order, ticket, or product so
that the transaction may be invoiced.
Invoice Print Options allows you to control what invoice print functions
a user may perform. The options are:
•
Allowed to Create Original Invoices and Reprint Invoices (default)
•
Allowed to Create Original Invoices Only
•
Allowed to Reprint Invoices Only
The next two fields relate to Order Level Mix Design, an option that allows
mixes to be modified, subject to QA approval, during order entry. For these
user-level options to have any effect, Order LEvel Mix Design must be enabled
at the system level (Configuration-Distribution).
6.
7.
8.
9.
8/9/05
Allow Access to Order Level Mix Design gives the privileged user
access to the order level mix design functionality in Order Entry.
Allow Override of Un-approved Mix Designs in Ticketing allows the
user to ticket orders containing mixes that are not in the Mix Design file.
Allow Project Updates from Order Entry/Ticketing gives user the
privilege to update project information based upon data entered in Order
Entry or Full Scale Ticketing. Such update information could include
purchase order number, job number, delivery address, delivery
instructions, map page, and zone fields.
Allow Overhead Loading gives the user the ability to perform overhead
loadout ticketing. This option is valid only with a COMMANDaggregate
license.
51
10. Allow Access to Quotes for Orders allows order takers to activate
accepted quotes as projects during order entry.
11. Restrict customer lookup to company is useful in a multi-region
system. The field is enabled by selection the Maintain Credit by Comapny
option (Configuration-Receivables). Each customer can be assigned a
default pricing plant, which is itself assigned to a company. When a valid
company is entered, customer lookups will only return customers
associated with the specified company.
Note: At this point in the file build process, neither system configurations
nor companies have been entered. To activate this option, you
must return to the Users screen later in the process.
12. Suppress Minimum Load Charge Messages in Tickets — will not give
the user the option to dismiss a minimum load charge on a load. The
charge will be applied automatically. If this box is left unchecked, then
when a qualifying load is ticketed box, a dialog box will ask the user to
confirm the charge.
13. Suppress Season Charge Message in Tickets — will not give the user
the option to dismiss a seasonal charge on a load. The charge will be
applied automatically. If this box is left unchecked, then when a
qualifying load is ticketed box, a dialog box will ask the user to confirm
the charge.
14. Suppress Display of Pricing Information Messages — If an item’s
price is being drawn from the item file rather than the customer file, the
system will display the message in the message line instead of in a dialog
box.
15. Auto Display Instructions in Orders/Tickets — If this is selected, the
Delivery Instruction zoom box will automatically open when the cursor
enters the Delivery Instructions field.
16. Auto Display Instructions in Orders/Tickets — If this is selected, the
list of customer projects will automatically open when the cursor enters
the Projects field.
17. Auto Display Possible Projects in Orders/Tickets — If this is
selected, the list of possible products will automatically open when the
cursor enters the Item Code field.
18. Accept the screen to save user options information.
Plants
The Plants tab allows users to set up security to limit the number of plants in
most areas of COMMANDseries that a user can access to view, add, or change
data. This function effectively allows the user to divide a system into several
divisions from an operational view but keep a single unified database for file
storage of customers, projects, products and other files. This will not control
every area of the system. Areas covered are in the operational end of the
system, from projects, orders, tickets, Daily and Scheduling Reports to
Invoice Preparation. It assumes that users enabled to enter customers,
products, and other master files will have ability to see all plants.
52
8/9/05
To configure plants:
1.
Select Files > System Information > Users > Plants.
Users – Plants Tab (EDTUSNM7)
2.
Select the plant(s) to which the user is assigned by selecting the box next
to the plant name. This field can be used to tie a plant record to the user,
and possibly to restrict the user’s access to records at that plant.
Accept this screen to save the information.
Cost Centers
Cost centers are business units that incur costs or expenses but do not
directly generate revenue. It is here that specific cost centers for budgeting
purposes are made available to the user.
Caution: At this point in the configuration process, you have not yet created
yor cost centers. If you wish to link users to a cost center, you will
need to return to the user records after G/L account information has
been entered.
To assign cost centers:
1.
Select the Cost Centers tab on the Users screen. {Files > System
Information > Users > Cost Centers}
Users – Cost Centers Tab (EDTUSNM4)
2.
3.
8/9/05
Select the Cost Centers that will be available to the user from the Choices
(Cost Centers File) screen. To access the screen, press the down arrow
button or press <Enter> while in the Cost Centers field.
The full name of the cost center will display in the Description field.
53
4.
Accept the screen to save the cost center’s information.
Groups
Groups allow you to define a standard set of user-level privileges. Once a
group is created, you can make assign a user to the group using the Group
Name field on the Users editor.
Once a user has been assigned to a group, specific privileges can still be
assigned to the user.
Note: In the event that a user-level privilege conflicts with a group-level
privilege, the user-level pivilege will take precedent.
Non-COD Price Change
COMMANDseries by default allows price changes on COD orders. When an
order is flagged as COD, the Item Price field displays on the order form, where
the price can be entered. For non-COD orders, the Item Price does not
display. Displaying the price for COD orders is a business necessity—
otherwise, the order taker would not be able to give the customer a total for
the order.
It is possible that a user may need access pricing information for non-COD
orders as well. COMMANDseries allows you to grant privileged users the ability
to view or edit prices for non-COD orders. This feature is dependent on three
configuration settings:
User Field-level privileges — A user must have certain privileges for
the Order field PRICE_DISP.
Print Price on Ticket — This flag is found on both the customer and
project pricing tabs.
Allow Price Change in Order Entry — This flag is found on both the
customer and project pricing tabs.
Note: Selecting the Price Suppress flag in User Privileges has the same
effect as a field-level PRICE_DISP privilege of None. In the event that
the Price Suppress flag is set while user field-level privileges are set to
read only or full, the Price Suppress flag setting will take precedence.
During order entry, as soon as customer and (if necessary) project
information has been entered, the system determines what level of access the
user will have to item pricing, based on the following matrix:
54
Field-level
Privilege
Print Price
on Ticket
Allow Price
Change
User’s Access Level
None
N
N
no edit, no display
Y
N
no edit, no display
N
Y
no edit, no display
Y
Y
no edit, no display
8/9/05
Read Only
Full
N
N
no edit, no display
Y
N
display only
N
Y
display only
Y
Y
display only
N
N
no edit, no display
Y
N
display only
N
Y
edit
Y
Y
edit
If a user has no access, then no pricing information is displayed. If the user
has display only access, then the item price is displayed in an inactive field.
The PSC is displayed immediately below the price field for reference purposes.
If the user has full access, the Item Price field activates.
Note: You can track prices changed in Order Entry. If a price is changed in
Order entry, that price is labeled with a Price Source Code (PSC) of 90
(User Entered in Orders). The PSC is printed on all invoicing reports.
Printer Setup
COMMANDseries supports most Windows-compatible dot-matrix and laser
printers. Some older line printers are also supported. Before your printers can
be configured within COMMANDseries, they must first be properly configured
within Windows.
Note: COMMANDseries does not support ink-jet printers.
To create a local shared printer on an NT workstation/server:
1.
2.
3.
4.
5.
6.
7.
8.
9.
8/9/05
Click the Windows Start button, then click Settings > Printers > Add
Printer.
When prompted on how the printer is attached to your computers, Select
Local Printer and click Next.
Select the manufacturer and printer. The recommended choices are
Generic and Generic/Text Only. If a screen appears informing you that
these drivers have previously been installed on your computer, select the
option that allows you to keep those drivers.
Select the printer port and click Next.
Enter the name of the printer. This name must be eight characters or
less, must not contain any spaces, and must be unique among all printers
being set up. If the name would be a valid DOS filename (without
extension), then it will work.
If so desired, set the printer as your default printer.
Click Next, and then click Finish. An icon representing the new printer
will appear.
Right-click on the icon you just set up and select Properties.
From the General tab, click the Print Processor… button.
55
10.
11.
12.
13.
Select RAW from the Default Datatype field.
Mark the Always spool RAW Datatype checkbox and click OK.
Select the Scheduling tab and slide the Priority slider to the center.
Select Start printing after last page is spooled and click OK.
To connect to the above printer with an NT client:
1.
2.
3.
Double-click the Add Printer icon.
Select Network Printer and click Next.
Select the proper printer.
To connect to the above printer with a Windows 95/98 client:
1.
2.
3.
4.
5.
6.
7.
8.
9.
Double-click the Add Printer icon.
Select Network Printer and click Next.
Select the proper printer and click Next.
Enter the name of the printer and click Finish.
Right-mouse click on the printer’s icon and select Properties.
Select the Details tab.
Click the Spool Settings button.
Mark the Start printing after last page is spooled checkbox.
From the Spool Data Format pull-down menu, select RAW and click all
OK buttons to complete the procedure.
To set up a networked printer on Windows NT:
1.
2.
3.
4.
5.
6.
7.
8.
9.
Double-click the Add Printer icon.
Mark the Network Printer Server checkbox and click the Next button.
Enter the printer and click Next.
Click Finish.
Right-click on the new printer icon and select Properties.
Click the Print Processors button and select RAW from the Default
Datatype field’s pull-down menu.
Mark the Always Spool “RAW” Datatype and click OK.
Select the Scheduling tab and move the Priority slider to the center
position.
Mark the Start Printing after Last Page is Spooled checkbox and click
OK.
To configure a printer connected to a HP JetDirect network port.
1.
2.
3.
4.
56
Install the printer normally.
Right-click on the new printer icon and select Properties.
Select the Ports tab. Select the port being used and select Configure.
Select the Optional tab. The following settings should be selected:
8/9/05
5.
Parallel Mode -- Centronics
Parallel Handshaking -- Busy only
Error Behavior -- Dump then Reboot
Status Page Language -- Text
Select OK until the Printer Properties dialog has closed.
Generic Printer Setup
If there is a printer on your system that is not found in the Possible Print
Models, that printer and the computer can be configured to communicate
through a generic print format that emulates Epson printers.
To configure Windows to accept a generic print model:
1.
2.
3.
4.
From the Start menu, open the Settings sub-menu and select
Printers.
Select Add a printer from the subsequent menu.
Follow the instructions of the Add Printer Wizard routine and choose
Local printer to configure the new printer.
Select Epson from the Manufacturers list and Epson FX-286 as the
type.
Add Printer Wizard
5.
Complete the Add Printer Wizard screens.
To configure a printer to emulate a generic print model:
1.
2.
8/9/05
Press Mode and Print at the same time to print out the details of that
printer’s current configuration.
Under the General Control group, set the Emulation Mode item to
Epson FXE.
57
3.
To save the new setting, turn the printer off and back on.
Print Models
The Print Models screen allows access to print model records that define the
printing characteristics used by COMMANDseries applications for reports or
listings. The print model does NOT define the printer, just the characteristics.
The specific printer is chosen after the Print Models Selection window is
displayed, using the Windows Print function.
Print models can simply specifiy basic layout information allowing the user to
select a printer through Windows, or they can specify layout information as
well as direct print jobs to a specific printer.
Before entering print model information, determine where you want output
(listings, reports, orders, tickets, invoices, statements, etc.) directed. Also,
you need to know what brand and model printers will be connected to the
system and what size paper will be used in each.
After the print models have been entered, print a short report to each print
model to verify that each is functioning correctly.
To define a print model:
1.
2.
Go to the Print Models screen. {Files > System Information > Print
Models}
Enter a Print Model code number.
Print Models (EDTUPRT)
3.
4.
58
Enter a description of the Print Model.
If you want, enter a short description in the Short field.
8/9/05
5.
6.
7.
8.
9.
From the Output Type field’s list, choose a method of printing:
Screen – sends the information to the screen for display
Printer – prints the information to a printing device
File – sends the information to a file
Plant – sends information through COMMANDcomm and to a plant
WordPad – sends information to Windows WordPad
Note: If you encounter difficulties with Wordpad print models, you
may need to specify the path to Wordpad in the assignment file.
Additional information can be found in the SETUP.RME file.
COMMANDprint – This option is a conversion utility to enable
proper printing of foreign language characters. Contact your
Command Alkon Service Representative for more information
Print the details of the printer’s current settings. You can print this from
the printer itself. Compare these details to the Printer Options
information from the print model file, making changes as necessary.
Mark the Route Reports To Queue checkbox if you want to send the
information through COMMANDcomm. When this checkbox is marked,
you will be asked for a Manager Number.
Accept the Print Models screen.
Repeat steps 1-8 for all the printers on your system.
Note: If a printer on a Windows NT or Windows 2000 system is printing
an additional blank page at the end of everything, go to the print
models that access that printer, and enter <FF> in the Close Printer
String field. That setting will intercept the form feed character
before it is sent to the printer.
Testing Ticket Printers in COMMANDseries
To test ticket printers:
1.
Simultaneously press the Shift and Power buttons on your Okidata 320
printer.
Note: The Okidata printer mentioned here is only an example. If you are
using another printer, please refer to its documentation for
instructions on how to define printer specifications.
2.
3.
4.
5.
8/9/05
Press the Print button and make necessary changes. At any time, you
may press the Shift and Select buttons to put the printer back online.
Select the emulation mode. The recommended mode of emulation for
COMMANDseries printing is ML (micro-line) because it guards against
wrapping and character pitch shifting.
Select your page specifications including page length, rear feed, bottom
feed and top feed.
For Symbol Sets Code Page, select BRASCII. This setting allows the
proper interpretation and printing of international characters.
59
Note: If the printer is in Epson FX emulation mode, you must also select
Set II in Symbol Sets Character Set to properly print international
characters; if in ML emulation mode, select Standard. HP printers
require no special setup procedures for the printing of these
characters.
6.
7.
8.
Press the Print button on the printer to print the specifications you have
defined. Adjust these specifications as necessary.
In COMMANDseries, go to the Plant Communication Setup screen. {Files
> Plant & Delivery Information > Plants > Communication > Setup}
In the second Port Name field, enter the name of the new printer.
Note: Leave the first field blank.
9. Accept the Plant Communication Setup screen.
10. Go to the Data Maintenance screen. {Manage > Data Management >
Data Maintenance}
11. In the File field, enter PLNT and press the <Tab> button on your
keyboard.
12. Scroll down until you see the TKTING_PORT_SETUP (Ticketing Port
Setup) field. The contents of this field should be the name of the new
printer with @ preceding it. For example, if the name of your new printer
was print1, then the contents of this field would be @print1.
13. Enter and then ticket a test order. Send the ticket to the printer.
14. Review the printed ticket and confirm that pitch is set to its proper
setting. If not, adjust using the buttons on your printer.
15. Go to the Print Models screen. {Files > System Information > Print
Models}
16. Enter the Print Model you will use to run reports.
17. From the Output Type field’s pull-down menu, select Printer.
18. From the Print Device field’s pull-down menu, select the name of the
new printer.
19. Select the Device Type from the field’s pull-down menu. The device type
is directly related to the emulation mode you selected on your printer. For
example, if you selected ML emulation mode, you would select Okidata
320 in this field. If your printer is in Epson FX emulation mode, you
would select Epson in this field.
20. Print a report and confirm that your settings are correct.
Currency
The Currency screen specifies the display characteristics for various
currencies used.
Before entering currency information, gather information about the currencies
to be used in your system.
60
8/9/05
To add or edit a currency code:
1.
2.
Go to the Currency screen. {Files > System Information > Currency}
Using a standardized naming convention, enter a new Currency Code.
Currency (EDTCURR)
3.
4.
5.
6.
7.
8.
Enter a long Description and Short description for the currency type.
Enter a Currency Symbol specific to the currency, and select Leading
number or Following number to specify the Symbol Placement.
Enter a Thousand Separator and Decimal Separator. If a decimal
separator is used, mark the Decimal Places Used checkbox.
Select a Negative Sign character to indicate a negative value, and select
Symbol Inside Parentheses or Symbol Outside Parentheses for the
Negative Sign Placement.
If desired, enter an Alternate Currency Conversion Factor. This factor
will be multiplied by the total invoice amount to allow for printing in a
currency other than that configured in the systems.
Accept the screen to save the new or changed currency.
Code Lengths
Four codes form the heart of your COMMANDseries accounting structure:
•
•
•
•
Company Codes
Cost Center Codes
Account Codes
Sub-account Codes
Before going any further in the file build process, you must establish the
lengths for each of these codes. Once these lengths are entered, the
appropriate editor will enforce the lengths.
8/9/05
61
To establish code lengths:
1.
Open the Financials Configuration screen. {Files > General Information >
Configuration > Financials}
Setting Code Lengths (EDTCNFXL)
2.
3.
4.
5.
6.
7.
Enter a Company Code Length between 1-4.
Enter a Cost Center Length between 4-12. Cost Center codes must
begin with their associated Company Code. Therefore, the Cost Center
Length must be greater than the Company Code Length.
Enter an Account Code Length between 1-6.
Enter a Sub-Account Code Length between 1-6.
If you will be using Multiple Companies in your account structure, mark
the checkbox.
Accept the screen.
Note: The Number of Budgets and Budgets Round To Fields are artifacts
of an older COMMANDseries module and are not required.
Caution: These settings can be entered on this screen only once. After initial
entry, code lengths can only be changed by using the Realign
Accounts and Cost Centers function.
Companies
Companies represent business entities and are used to group plants for
various reports in all applications. Large clients may want to use the
Companies function to group and organize their plants and operations, but
smaller clients may want to enter just one company. If hauling companies
deliver your items for you, enter those companies here for use in
COMMANDcartage.
Topics in this section:
Company Setup
Company Cost Centers Setup
Company Finance Charges Setup
62
8/9/05
Company Setup
Before entering company information, gather information about the setup for
your business entities and group plants for reporting purposes.
Review the settings on the Realign Accounts and Cost Centers screen
{Manage > Application Management > Realign Accounts & Cost Centers} to
verify the length of Company Codes, Cost Center codes, and Account codes. If
any changes are needed, make them at this time—it is a lot easier to change
these values before account information gets entered.
To set up your company or companies:
1.
Go to the Companies screen. {Files > General Information > Companies}
Companies (EDTCOMP1)
2.
3.
4.
5.
6.
7.
8.
9.
8/9/05
Enter a numeric Company Code to identify the company and press
<Tab>.
Specify a Name and a Short name to describe the company.
Enter the company’s mailing address in the Address Line 1 field.
Enter the location of the company’s remittance office in the Remit-to
Line 1 field.
Enter the Phone Number for the company.
Enter the Current Accounting Year (fiscal).
Enter a Tax ID for the company.
Accept the screen to save the company information.
63
Company Cost Centers Setup
Cost Centers are areas or divisions within a company to which revenues and
costs are assigned. {Files > G/L Information > Cost Centers}
To assign company cost centers:
1.
2.
3.
Select a Cost Center, Account code, and Sub-Account code for which
to assign Net Profit. If cost centers have not yet been defined, leave this
field blank and return to it after cost centers are defined. {Files > G/L
Information > Cost Centers}
Select a Cost Center, Account code, and Sub-Account code to
associate with Retained Earnings for this company. If cost centers have
not yet been defined, leave this field blank and return to it after cost
centers are defined. {Files > G/L Information > Cost Centers}
Accept the screen to save the cost centers information.
Company Finance Charges Setup
The Company Finance Charges function allows the user (with appropriate
system security) to access company based finance charges that can be
assessed against customer balances in COMMANDreceivables. The Create
Finance Charges option passes through the customer balance file and creates
finance charge transactions that can then be posted to the customer’s record.
{Manage > Application Management > Create Finance Charges} The
information on this screen controls how the balances belonging to this
company will be treated with respect to finance charges.
To set up company finance charges:
1.
Click on the Finance Charges tab to enter company-based finance
charge information that can be assessed against customer balances in
COMMANDreceivables.
Companies (EDTCOMP2)
2.
3.
4.
5.
64
Select the Calculate on Finance Charges checkbox if the company
applies finance charges.
Enter the Annual Percentage rate to be charged the company.
Select the Calculation Method and Calculation Level for tabulating
the finance charges.
Enter the Minimum Amount of a finance charge. This field identifies the
minimum amount to be used as a finance charge. Any finance charge
calculation that falls below this amount is automatically raised to this
amount.
8/9/05
6.
7.
Enter the Waiver Amount of a finance charge. This field identifies the
amount that will cause the finance charge to be waived (not charged).
Any finance charge calculation that falls below this amount will be
waived.
Accept the Companies screen.
Employees
Your employees perform one or more of the following functions.
Drivers – assigned to truck records and confirmed as the driver when
trucks are assigned to tickets
Salesmen – first assigned to customers and projects; then, they are
assigned to orders where they receive credit for a sale
Weighmasters – assigned to plants
Credit Persons – assigned to customers and projects
Batchers – assigned to plants
At this point in the system setup, it is only necessary to enter employees who
are drivers, weighmasters, and batchers. But if you have the information on
your other employees, go ahead and enter them as well.
Employee Files
Before entering employee information, gather information about the
employees within your company and the duties they perform.
To enter a new employee:
1.
8/9/05
Go to the Employees screen. {Files > General Information > Employees}
65
Employees (EDTEMPL)
2.
3.
4.
5.
Enter an Employee Code to identify the employee.
Enter the employee Name for the assigned employee code.
If desired, enter employee information, such as Address, Phone
Number, etc.
Specify the employee’s job function by marking the checkbox next to the
appropriate job.
Note: These flags determine how an employee can be used within
COMMANDseries. For example, only employees flagged as drivers
can be assigned to a truck.
6.
7.
If needed, you may enter Payroll, Plant Code, Default Truck, and
Seniority.
If this employee is a driver, assign a Driver Overtime Code.
Note: If Driver Overtime Tables have not yet been entered, return to the
Employee files after the tables have been entered.
8.
Accept this screen to add the employee and related information to the
employees file.
Reason Codes
Reason codes explain why a field is set to a particular value. For instance, a
non-taxable reason code is used on the Customers screen to tell why a
particular customer is set to a non-taxable status.
Reason codes can be established to explain the following occurrences.
66
8/9/05
Removed Items — orders or tickets that have been removed or
canceled
Suspended Items — orders or tickets that have been suspended from
invoicing
Non-taxable Items — a customer/project/order is set to a non-taxable
status
A/R Balance Remaining — a balance remains for an invoice that has
had some A/R transaction applied
Job/Quote Status — status changes in a job or quote
Job/Quote Product — status change in a job or quote at the product
level
Removed/Cancelled Purchase Order — the customer cancelled the
order due to a removed or cancelled purchase order
Unapproved Purchase Order — your company has rejected the
customer’s purchase order
Inventory Adjustment — used in COMMANDinventory when adjusting
quantities; allows the user to assign a reason for the adjustment
Debit/Credit Memo Order — allows the user to assign a reason for a
debit or credit memo order
Truck Unavailability — provides a means of classifying periods during
which a truck in unavailable (scheduled maintenance, repairs, etc.)
Plant Unavailability — provides a means of classifying periods when a
plant is unavailable
Non-taxable reason codes are used in the Customers, Projects, Order Entry,
Items, Edit Orders and Tickets (Prep), and Configuration Defaults screens to
explain a customer is set to a non-taxable status.
Before entering reason codes information, gather information about each type
of reason code you want to enter. Each reason code type should have at least
two reason codes entered if you want to track the reason code type.
To enter a reason code:
1.
Go to the Reason Codes screen. {Files > General Information > Reason
Codes}
Reason Codes (EDTRSNC)
2.
8/9/05
Select the most accurate reason from the Reason Usage field’s list.
67
3.
4.
5.
Enter a Reason Code to identify why an item was removed, suspended,
lost, etc.
Enter a long Description and Short description for the reason code. The
long description should briefly justify the removal, suspension, etc.
If the Reason Usage is Removed Item, four boxes and a Detail button
appear next to the short description. The detail button calls the Reason
Code Detail screen.
Reason Code Detail (EDTRSNC1)
This screen allows you to specify how items removed with a given code
will be treated with respect to four areas: Cartage, Invoicing, Inventory,
and Executive. For each module, there are two options:
•
Don’t update removed ticket to [module]
•
Update removed ticket to [module]
Make your selections and accept the screen. When you return to the
main Reason Codes screen, modules specified for update will be flagged.
Note: You cannot set a flag by selecting the indicator box.
6.
Press the Add Occurrence button to enter another reason code, or
accept this screen to save the new Reason Codes.
Modem Codes
The Modem Codes screen defines modem code records used throughout
the COMMANDseries applications. Modem codes are assigned to plants that
are marked as auto-dial plants. These records are used by
COMMANDcomm to control and access modems when sending a ticket or a
report to be printed at an auto-dial plant.
Before entering Modem Codes information, gather information about the
type of modems used to communicate with remote plants.
Modem Setup
Before you attempt to enter modem information needed by
COMMANDseries, refer to the documentation included with your modem
and investigate the possibility of importing the information provided for
68
8/9/05
Hayes compatible modems and MultiTech modems. These two popular
brands include settings that are guaranteed to work for most modems.
If you do not have a modem that is compatible with the two brands listed,
refer to the Modems file, located in the Control Panel of your Windows
system. This file provides much of the information needed to set up the
modem.
To enter modem settings:
1.
Go to the Modem Codes screen. {Files > General Information >
Modem Codes}
Modem Codes (EDTMODM)
2.
3.
4.
5.
6.
8/9/05
Enter a Modem Code to identify the modem.
Enter a Description and a Short description to identify the type and
brand of modem.
Use the Prefixes area to enter modem control code sequences that
perform startup or connection activities, such as clearing the line,
auto-dialing a number, or setting the baud rate.
In the Timeout field, enter the maximum allowed amount of time, in
seconds, between the modem's transmission of any prefix control code
sequence and the modem's reception of the correct answering control
sequence from the device to which the modem is attempting to
connect. The default is 0, indicating that no timeout is set, so the
modem waits indefinitely for a response.
In the Code field, enter a specific modem control code sequence of
alphanumeric characters that performs a particular startup action,
such as clearing the line, autodialing a number, or setting the baud
rate. Up to nine prefix-control codes may be specified for a modem.
69
Note: The prefix information controls modem connection activity,
while the suffix information controls modem disconnection
activity.
7.
In the Response field, enter the sequence of alphanumeric characters
that COMMANDcomm expects to receive to indicate that the
corresponding prefix code was successfully received and
acknowledged by the device to which the modem is attempting to
connect. Up to nine prefix responses may be specified.
Note: Some internal modem commands (such as the Hays modem
ATH command) return messages directly from the modem itself
and not from the remote device; these commands must also be
included in this list if used as prefix codes. (ATH always returns
OK, unless there is a hardware problem with the modem, so you
would need to specify OK as the prefix response to the ATH
prefix code.)
8.
9.
Use the Suffixes area to enter modem control code sequences that
perform a shutdown action, such as hanging up the phone line. These
sequences vary from modem to modem. Consult your modem user's
guide for more information.
In the Timeout field, enter the maximum allowed amount of time
between the modem's transmission of any suffix control code
sequence and the modem's reception of the correct answering control
sequence from the device from which the modem is attempting to
disconnect from. The default is 0, indicating that no timeout is set, so
the modem waits indefinitely for a response.
Note: The prefix information controls modem connection activity,
while the suffix information controls modem disconnection
activity.
10. In the Code field, enter a specific modem control code sequence of
alphanumeric characters that perform a particular shutdown action,
such as hanging up the phone line. Up to nine suffix-control codes may
be specified for a particular modem.
11. In the Response field, enter a sequence of alphanumeric characters
that COMMANDcomm expects to receive to indicate that the
corresponding suffix code was successfully received and acknowledged
by the device that the modem is attempting to disconnect from. Up to
nine suffix responses may be specified.
12. Accept the Modem Codes screen to save the modem and its settings.
Signaling Units
Signaling units identify the signaling system connected to the
COMMANDseries system and the unique means of communicating with and
understanding each unit.
70
8/9/05
You do not enter individual signaling units in this screen. Instead, you need
an entry for each type of signaling unit.
Before entering information, gather technical information about the signaling
systems that you connect to COMMANDseries. Also, determine if automatic
signaling is used to move trucks through the system.
Topics in this section:
Signaling Units Setup
Signaling Unit Options
Signaling Unit Incoming Messages
Signaling Unit Outgoing Messages
Signaling Unit Statuses
Signaling Units Setup
To set up signaling units:
1.
Go the Signaling Units screen. {Files > General Information > Signaling
Units}
Signaling Units (EDTSIGU)
2.
3.
4.
Enter a Description of the signaling unit. This can include the brand
name and any other pertinent information.
Enter a Short description for use on COMMANDseries screens.
Select a Unit Type from the possible choices list:
Auto-signaling
PTT MM300 Traxis
Bosch (Befu)
Radio Holland mf1104
Coded Communication
Rohill
COMMANDsignal
Rohill 2 Digit Truck
Dinet
Sigtec
Generic
Speedcall Ric-C
Motorola (Europe)
Speedcall Ric-D
Motorola BSC-H
Ultralog
Motorola GCC-80
Vehicom
Motorola Smart-Status (1.4) Rohill 2 Digit Status
8/9/05
71
If the selected unit type supports messaging, the fields and tabs
pertaining to messages will display. In addition, if the unit type is
COMMANDsignal, a Default button will appear next to the Unit Type field.
This button creates default messages (see below).
Note: If you are attempting to communicate with a signaling unit not
represented in the list shown, please contact your Command Alkon
Customer Service Representative for further instructions.
5.
6.
7.
Identify the COMMANDcomm Manager Number to control
communication for this signaling unit. The manager number can be found
in the properties file of COMMANDcomm (highlight the COMMANDcomm
icon and press <Alt+Enter>).
Enter an appropriate COMMANDcomm Port Name. If a COM port is
entered, click the Port button to further configure the communications
port. See the Communications Port Setup section of this manual.
If this is a COMMANDsignal unit, the Attack Delays fields display below
the Port Name field. These fields represent the time, in milliseconds,
from the time you send the message until the unit sends a data pulse. For
example, entering 12 causes it to wait 1.2 seconds.
Note: There are three Attack Delay fields, one representing each card
of the RIC. If you have a single-card RIC, enter a value in the first
field. Enter values in he first two fields for a second-card RIC and
all three fields for a third-card RIC.
8.
Accept the screen to save the signaling unit information.
Signaling Unit Options
The Options tab on the Signaling Units screen allows you to specify messages
and statuses that the signaling unit can accept and display.
To set up signaling unit options:
1.
Select the Options tab on the Signaling Units screen. {Files > General
Information > Signaling Units > Options}
Signaling Units (EDTSIGU1)
2.
72
Mark the Allow Truck Punch-In/Punch-Out checkboxes if you want
this signaling unit to send a truck punch-in or punch-out flag to the
system.
8/9/05
3.
4.
5.
Mark the Acknowledge Valid/Invalid Statuses checkboxes if you
want COMMANDcomm to send a flag to the signaling unit acknowledging
that a valid/invalid status was received.
Mark the Allow Text Messages checkbox if you want this signaling unit
to accept and display text messages.
Accept the screen to save the signaling unit options.
Signaling Unit Messages (General)
All of the message fields are initially blank. If the unit type is
COMMANDsignal, then pressing the Default button will import a set if standard
messages, both incoming and outgoing.
All that is imported are the message code and message text. All other
message fields must be configured manually.
Signaling Unit Incoming Messages
The Incoming tab on the Signaling Units screen allows you to define
messages for certain events. The signaling unit will send these messages.
To set up incoming messages for the signaling unit:
1.
Click on the Incoming tab on the Signaling Units screen. {Files > General
Information > Signaling Units > Incoming}
Signaling Units (EDTSIGU2)
2.
3.
Enter a Code and the Inbound Message Text to accompany it.
Select an Event from the list.
Blank – no event is associated with the message
Clock in – the truck is clocking in
Clock out – the truck is clocking out
Leftover qty – the truck is carrying leftover material
4.
5.
6.
8/9/05
Select a Color for this message when it is displayed on the Tracking and
Scheduling screen.
Enter a Time to indicate the length of time allowed for this truck status.
Enter a symbol in the Flag field to be displayed on the Tracking and
Scheduling screen when this inbound message is received.
73
7.
Click on the Sound button if you want a sound to be played upon
reception of this inbound message. If you select this button, the Sound
window displays.
Sound
8.
9.
Locate and select the file (with a .WAV extension), then click the Open
button to accept and return to the Incoming tab.
Accept the screen to save incoming messages information.
Signaling Unit Outgoing Messages
The Outgoing tab on the Signaling Units screen allows you to define
messages for certain events. The signaling unit will receive these messages.
To set up outgoing messages for the signaling unit:
1.
2.
Select the Outgoing tab from the Signaling Units screen. {Files > General
Information > Signaling Units > Outgoing}
Enter a Code and the Outbound Message Text to accompany it.
Signaling Units (EDTSIGU3)
3.
4.
Select the Return Plant to indicate to which plant the truck is returning.
Select an Event from the list to define an action for the outgoing
message. The valid options are:
Blank – no event is associated with the message
Type Ticket – the ticket is being typed
Cancel Ticket – the ticket has been cancelled
74
8/9/05
Change Plant – the shipping plant has been changed
New Assignment – the driver now has a new assignment
Cancel Assignment – the current assignment has been cancelled
5.
6.
Assign a document format in the Format Name field.
Accept the screen to save the outgoing messages information.
Signaling Unit Statuses
The Statuses tab on the Signaling Unit screen allows you to define codes for
various events.
To set up status information for the signaling unit:
1.
2.
Select the Statuses tab from the Signaling Units screen. {Files >
General Information > Signaling Units > Statuses}
Enter a CA Code for each CA Status event. These codes allow for
configuration of the signaling unit without the need for hard coding. Refer
to the unit manufacturer’s information for the correct status codes.
Signaling Units (EDTSIGU4)
3.
Accept the screen to save the signaling unit statuses.
Auto-Ticketing Interface
COMMANDaggregate’s Auto-Ticketing Interface is designed to work with
several different badge reader systems so that trucks can be automatically
dispatched, weighed and ticketed without any action from the weighmaster.
The system provides full integration of COMMANDseries, badge readers,
scales, and stop lights. Error messages are displayed on the COMMANDcomm
message line, to prevent dialog boxes from interrupting the process flow. If
necessary, errors may be addressed through manual dispatch, without
disrupting the auto-ticketing interface.
The business flow described here represents basic functionality. Contact your
Command Alkon sales representative to determine how your business
practices can be best accommodated by the current interface.
An ID reader is assigned to a scale lane, and is identified by a Lane Type. The
lane type determines the auto-ticketing functionality:
Tare Lane
1.
8/9/05
Truck drives on scale.
75
2.
3.
Card/badge reader identifies truck. If the car/badge code is not
associated with a truck, the stop light will flash red and an error message
will display in the comm manager.
If the ID code is associated with a truck, the new tare weight is written to
truck record. The stop light flashes green to indicate that the truck may
proceed.
Note: The tare weight is updated regardless of the Days Tare is Valid
setting in the truck file.
Dispatch Lane
1.
2.
3.
4.
Trucks are assigned or rostered ahead of time.
Truck arrives at gate, card is read.
If truck is rostered/assigned, the truck is dispatched to the order. The
stop light will flash green.
If the truck is not assigned/rostered, or the truck is not identified, the
stop light will flash red. An error message is displayed on the comm
manager.
Gross (Ticketing) Lane
1.
2.
3.
Truck drives onto scale. Card is read.
If the truck is dispatched to a valid order, the gross weight is retrieved
and a ticket generated based on the gross weight. A ticket is printed and
the stop light turns green.
If the truck is not dispatched to a valid order, a message is displayed on
the comm manager and the stop light flashes (or remains) red.
Driver leaves scale, retrieves ticket, and leaves plant.
Combo Lane (Gross & Tare)
1.
2.
3.
Truck drives onto scale.
The system compares the gross weight to the tare weight in the truck
record. If the gross weight is equal to or less than the tare weight plus
the Truck Minimum Weight over Tare for Gross value (set on the
Configuration > Aggregate tab), the scale weight is read as a tare and
the, the system reads the weight as a tare weight and update the truck
record accordingly.
If the truck has been assigned to an order and the gross weight exceeds
the allowed weight, the system uses the scale weight as a gross weight
and generates a ticket.
Supported Readers
Command Alkon has a partnership with TransID to support their SmartPass
and Ego RF badge readers. The partnership was developed to help provide a
comprehensive, reliable badge reading solution.
76
8/9/05
We have also created an interface for XCI readers. XCI is a third-party vendor
who supplies badge reader hardware and badges.
Finally, the system provides support for standard bar code readers, including
the ability to print barcodes.
Scale Configuration
In addition to configuring COMMANDseries, you will also need to properly
configure your scales to optimize autoticketing performance.
Command Alkon recommends that scales be configured to send weights ondemand, including a motion character. Once COMMANDseries is configured to
recognize the motion character, the auto-ticketing interface will automatically
retry the scale reading until a stable weight is received.
Note: Scale configuration is handled by your scale vendor/service
representative.
Auto-Ticketing Units
An Auto-Ticketing Unit corresponds to a specific lane in the aggregate plant.
Once an auto-ticketing lane has been defined (based on the type of badge
reader being used), the lane is configured.
Topics in this section:
Auto-Ticketing Units
Auto-Ticketing Units
Auto-Ticketing Units
Auto-Ticketing Units
Stop Light Setup
Setup
Communication
Lane Configuration
Libra Asphalt Interface Setup
Auto-Ticketing Units Setup
To set up auto-ticketing units:
1.
8/9/05
In COMMANDaggregate, open the Auto-Ticketing Units screen. {Files >
General Information > Auto-Ticketing Units}
77
Auto-Ticketing Units (EDTAUTK1)
2.
3.
4.
5.
Enter the Auto-Ticketing Unit code.
Enter the long Description of the auto-ticketing unit.
Enter a Short description to be used in a number of fields to conserve
screen space.
Enter a Unit Type. Current auto-ticketing options are:
•
XCI LC20K
•
Bar Code
•
SmartPass
•
SmartPass (Buffer Control)
•
Toledo - 9360
The other two options in the drop-down menu, Libra Asphalt and Astec
WM2000, are asphalt interfaces and will be discussed elsewhere.
Auto-Ticketing Units Communication
The available fields on the Communication tab are determined by the Unit
Type. All fields will be discussed below.
To set up communication:
1.
Select the Communication tab from the Auto-Ticketing Units screen.
{Files > General Information > Auto-Ticketing Units > Communications}
This image shows all communications fields
78
8/9/05
2.
3.
Enter a Manager Number. This specifies the COMMANDcomm manager
number to be used when auto-ticketing.
If you have selected a Unit Type other than SmartPass, the Port Name
field displays. Enter an LPT or COM Port Name. When a COM port is
entered, a Port button appears. Click on the button to set up the printer
or modem that COMMANDcomm will use to print orders. See the
Communications Port Setup section of this manual.
Note: The Communication Port Setup screen requires that the settings
match the configuration of the unit.
4.
Accept the information.
Auto-Ticketing Units Communication (SmartPass)
To set up communication:
1.
2.
3.
4.
Select the Communication tab from the Auto-Ticketing Units screen.
{Files > General Information > Auto-Ticketing Units > Communications}
Enter a Manager Number. This specifies the COMMANDcomm manager
number to be used when auto-ticketing.
Enter the TCP/IP Address of the Moxa Server controlling your badge
readers.
Accept the information.
Auto-Ticketing Units Lane Configuration
Regardless of your auto-ticketing interface, the individual lane configuration
will be similar. The screen shot below shows an XCI LC20K.
Caution: Plants using SmartPass must have a separate comm manager for
each lane.
To configure a lane:
1.
Select the interface tab from the Auto-Ticketing Units screen. {Files >
General Information > Auto-Ticketing Units > [interface type]}
Auto-Ticketing Units (EDTAUTK2)
2.
3.
4.
8/9/05
(XCI LC20K only) Enter the unit’s Serial Number.
Enter a Lane number, Target Manager, Plant Code, and Scale Code.
In the Action field, define the type of lane.
79
5.
6.
7.
8.
Check the Stop Light checkbox if you want a stop light.
If you marked the Stop Light checkbox, click the Setup button. See
instructions below.
Select the Add Occurrence button to add other lanes.
Accept the screen.
Auto-Ticketing Units Libra Asphalt Interface Setup
Follow the instructions below if you selected Libra Asphalt Interface in the
Unit Type field.
To set up the Libra:
1.
Select the Libra tab from the Auto-Ticketing Units screen. {Files >
General Information > Auto-Ticketing Units > Libra}
Auto-Ticketing Units – Libra Tab (EDTAUTK3)
2.
3.
4.
5.
6.
7.
Enter a Manager Number, Plant Code, and Scale Code.
In the Action field, select Batch Operation, Silo Operation or Batch
or Silo Operation.
Mark the Stop Light checkbox if you want a stop light.
If you marked the Stop Light checkbox, click the Setup button. See
instructions below.
Select the Add Occurrence to add other target managers.
Accept the screen.
Stop Light Setup
To set up the stop light:
1.
2.
3.
4.
5.
80
Click the Setup button.
Select an Interface Type.
If the Interface Type is ICS I/O Controller or Kontron I/O, enter a
Base Address and Base Address Bit.
If the Interface Type is Serial, enter the Manager Number and Port
Name. Select the Port button to configure the specified port
If the Interface Type is SmartPass, no port configuration is needed.
Enter a Duration in seconds. This value is the length the stop light will
flash a given signal.
Accept the screen.
8/9/05
Pre-Ticketing Setup
You must follow a specific set of steps to set up pre-ticketing, regardless of
whether you initiate pre-ticketing through COMMANDseries or via a truck’s
VSC.
To set up pre-ticketing:
1.
2.
3.
4.
5.
6.
Load the Task Codes. {Files > Plant and Delivery Information > Task
Codes}
Accept the form. Failure to accept the form will result in the data not
being saved.
Load the Condition Codes. {Files > Plant and Delivery Information >
Task Codes}
Confirm that the deadhead condition color and flag match the customer
preference. If necessary, set the color and flag fields appropriately.
Accept the form. Failure to accept the form will result in the data not
being saved.
Set up a Driver Overtime Code. {Files > General Information > Driver
Overtime}
Note: For more information, refer to ”Driver Overtime Tables” on
page 196.
7.
Add the Driver Overtime Code to the employee code record for each
driver, as appropriate. {Files > General Information > Employees}
Scale Types
COMMANDseries can handle any scale interface by allowing the user to
configure it using the Scale Types screen. In many cases, you will need to
consult with the installer/manufactuerer of the scale to get some of the
appropriate settings, or to configure the scale itself.
Individual scales are specified in the Plant editor.
To set up scale types:
1.
8/9/05
In COMMANDaggregate, open the Scale Types screen. {Files > General
Information > Scale Types}
81
Scale Types (EDTSCTY)
2.
3.
4.
5.
6.
Enter a number to represent the type of scale in the Scale Type field.
Enter a long Description for the scale type.
Enter a Short description, which will be substituted in numerous fields to
conserve screen space.
In the Request String Format field, enter the arming sequence code to
be used for on demand output scales. On demand scales require a host
system to ask for the weight data. A character or sequence of characters
must be sent to the scale indicator before it will send back any weights.
If the scale is configured for continual output (not recommended), no
Request String Format is required.
In the Input String Format field, enter the mask used to define a packet
of weight data being sent by the scale indicator to the host. Special codes
must be used to define the weight string. Following is a list.
b – space
c – CRC or checksum (ignored)
m – motion detection
s – sign
u – unit of measure
w – weight
Note: Lowercase must be used for the six special characters listed
above. Hard coded characters can also be used within the format
definition. For example, a scale may send over G in position 11.
7.
8.
In the Sign Characters section, enter the characters that represent
Positive and Negative weights.
In the Motion Characters section, enter the characters to be used in the
scale reading when the scale is in Motion and when it is Still.
Note: The scale’s configuration determines what is considered an “in
motion” weight. Consult the manufactuere/installer for details.
9.
82
In the U.O.M. Characters section, enter the character(s) that should be
placed in COMMANDaggregate’ s scale reading to represent the unit of
measure in the Received field.
8/9/05
10. In the second field, use the pull-down menu to select a unit of measure to
decipher the first Received field.
11. On the Special Characters field, the Bit field, will display the bit that is
used by some scales in lieu of the sign, motion, and UOM characters. It is
a single character byte that represents settings for one or more of the
fields.
12. Accept the Scale Types screen.
Next Numbers
The Next Numbers screen allows you to control the sequential numbering of
specific records genereated by cOMMANDseries. Use the next numbers entries
to generate numbering sequences for order codes, ticket codes, invoice codes,
receipts codes, quote codes, etc.
Order and ticket next numbers are determined by the sequence code assigned
to a plant record. For orders, the pricing plant assigned to the order is used to
determine the next number sequence code. For tickets, the shipping plant
assigned to the ticket is used. More than one plant can be assigned the same
next number sequence code so that they would share in a single sequential
assignment of numbers.
Quote next numbers are determined by the next sequence code assigned in
the Next Quote Code Sequence Code field on the Quotes tab of the
Configuration screen. {Files > General Information > Configuration>Quotes}
Invoice next numbers are determined by the sequence code assigned to an
accounting category (if such is in use) or a plant record. If using accounting
categories, credit memos, and debit memos generated through the invoicing
process, an independent sequence code can be used to determine the next
number. The accounting category used would be the one assigned to the
project (if any) or the customer for which the invoice is generated. The plant
used would be the first pricing plant encountered for the invoice being
generated. If you want the orders, tickets, and invoice numbers to indicate
the plant for which each was generated, you could assign a unique sequence
code to each plant. The sequence could start with the plant number, and be
large enough to support an appropriate range of numbers for each document.
To employ this concept, the starting codes to set up for plant 12 would be as
follows.
Orders – 1200 (Starts over each day, and allow for 100 orders for that
plant)
Tickets – 12000000 (Continues to increment and would support 1 million
ticket numbers for that plant)
Invoices – 120000 (Continues to increment and would support 9,999
invoice numbers for that plant)
Note: Quote sequences are not set up by plant.
8/9/05
83
To add or create a next number setting:
1.
Go to the Next Numbers screen. {Files > General Information > Next
Numbers}
Next Numbers (EDTNEXT)
2.
3.
4.
5.
6.
84
Enter a Code to identify this numeric sequence for orders, tickets,
invoices, or quotes. This is the first field on the row, if the sequence if
plant-specific, use the plant code.
Enter a Description for the sequence in the field next to the Code.
Enter a short description in the Short field.
The entry in the Begin At field depends on the sequence type.
•
For the Order Sequence, enter a number for the first order of each
day.
•
Enter the beginning ticket code in the range of valid ticket codes for
this particular Ticket Sequence.
•
Enter the beginning invoice code in the range of valid invoice codes
for this particular Invoice, DM & CM Sequence.
•
For the Quote Sequence, enter a number for the beginning quote
in the sequence.
In the Ticket Sequence’s Next field, enter the next ticket code to use for
plants using this next number sequence code. This number must be equal
to or greater than the number in the Sequence Begin At field, and equal
to or less than the number in the End At field. This field indicates that the
assignment of ticket codes can start over with the value in the Begin At
field when the value in the End At field has been reached.
8/9/05
7.
In the Ticket Sequence’s End At field, enter the ending ticket code in the
range of valid codes for this particular next number sequence code.
8. Mark the Perpetual checkbox if necessary. When marked, this checkbox
causes the ticket number to roll back to the number specified in the Begin
At field if it reaches and passes the number in the End At field.
9. If desired, you can create a Project numbering sequence. The sequence
will be used to number projects created through COMMANDquote, and
projects that do not have a code manually entered.
10. This field allows the user to begin A/R batches with a number other than
one. If the field is blank, the A/R sequence begins with 1.
This feature is used in situations in which multiple COMMANDseries
systems are replicating A/R batches to a central location. Giving each
location a different range prevents the A/R record of one system from
overwriting the A/R record from another system.
Note: A/R batch numbers will reset at the beginning of each day.
11. Accept the Next Numbers screen.
Document Tags
When you print an invoice or perform an export or import, there must be
some sort of mechanism to extract specific information from the database.
The initial component of this mechanism is a document tag.
A document tag is, essentially, a shortcut to information in the database. By
placing a tag in a document format, you instruct COMMANDseries to insert the
data defined by the document tag, using the layout defined by the document
format. A basic document such as a delivery ticket is created by means of a
document format containing the required document tags.
Output Process (Delivery Ticket)
[DATLAB]
ORDR
UOMS
6/13/01
[CUSNAM]
Fred
Here’s your
Here’s your
[DELVQY][DELUAB]
TKTL
Database Tables
8/9/05
Document
Tags
9cy
of concrete
of concrete
Document Format
Printed Ticket
Document Tag
Description
Source
Field
DATLAB
Ticket Date
Current Date
n/a
CUSNAM
Customer Name
ORDR
CUST_NAME
DELVQY
Delivered Quantity
TKTL
ORDER_DELV_QTY
DELUAB
Delv Qty UOM Abbreviation
UOMS
DELV_QTY_UOM
85
COMMANDseries comes with an extensive set of document tags. Most users
will be able to address their needs with this initial tag set. However, new tags
can be created for certain functions. There are two features of the document
tag that you must understand prior to creating a new tag (Document Type
and Tag Type):
Document Type -- allows you to group tags by function. Any given group
type, such as Statement Print or Item Data I/O, can directly access a specific
set of tables. An Order Print tag, for example, can access order-related
tables, but cannot access customer balances.
A tag can only be used in document formats with the same document type.
Consequently, you will see duplication of tags between document types. Every
document type contains a current date tag (DATLAB).
Tag Type -- determines how the tag will access data. The four tag types are:
•
•
•
•
Field - The tag will access a specific field in one of the tables associated
with the selected Document Type. The Ticket Print tag CUSNAM, for
example, prints the Customer Name from the Ticket table (TICK).
Lookup - In some cases, the needed information is not in an available
table. For a ticket-level tag, for instance, the Customer’s Tax ID code is
not contained in the Order table (ORDR). However, the Order table itself
contains a reference to the Customer file (CUST), which contains the Tax
ID. For links that are one link from a specific table, use a Lookup tag.
Calculation - A Calculation tag can be one of two things:
A straightforward calculation - COD Amount, Invoice Total, etc.
An advanced reference tag - In some cases, you need to link to
data that is greater than one table link from the primary table (the
data is in a table that is referenced by a table that is referenced by a
table that is available in the selected Document Type). A
Calculation tag is needed for such links.
Code List - A different form of an advanced reference tag. For example,
in the Order file, the Order Type entry is 1, 2, 3, etc. The number
corresponds to a description of the specified Order Type. The Code List
tag allows you to pull the description of the Order Type (“Charge Order”,
for example).
Document Tag Setup
You can create Field and Lookup tags for any data in/out function except
Order Print & Data In/Out. Calculation and Code List tags can only be
created by Command Alkon.
To enter a field document tag:
1.
86
Go to the Document Tags screen. {Files > General Information >
Documents > Document Tags}
8/9/05
Document Tags (EDTDOCT-field)
2.
3.
4.
5.
6.
7.
Select a Document Type from the field’s list. This setting determines
how the tag will be used--Statement Print, Invoice Print, etc.
In the Tag field, enter a six-character alphanumeric code. When you tab,
the system lists all tags associated with the specified Document Type.
Enter a Description for the tag.
Select Field as the Tag Type.
Select the File from which you want to pull data. The drop-down list will
display all files (tables) available to the specified Document Type.
Select the Field Name that corresponds to that data that the tag will
represent. The drop-down list displays a list of fields contained in the
selected File.
Note: If the File and Field Name fields do not appear, then you have
selected a Document Type for which you cannot create new tags.
8.
Click the Setup button to further define the document tag. The
Document Field Tag Setup screen displays.
Document Field Tag Setup (EDTDOCT1)
9.
If the field has occurrences for each product line (for example, the
Customer file contains separate Discount Terms for concrete and
aggregate), select Multi-occurrence Field to ensure that the program
determines the applicable product line before retrieving the field value.
10. If the field will be used for sorting results (such as Customer Codes),
select Key Formatted Value to ensure proper sorting. Key Formatted
Values are formatted as follows:
•
Numeric values will be right-justified unless the value contains
leading zeros.
•
Alphanumeric values and numeric values with leading zeroes will be
left-justified.
11. Accept the Document Field Tag Setup and the Document Tags screens.
8/9/05
87
To enter a lookup document tag:
1.
Go to the Document Tags screen. {Files > General Information >
Documents > Document Tags}
Document Tags (EDTDOCT-lookup)
2.
3.
4.
5.
6.
Select a Document Type from the field’s list. This setting determines
how the tag will be used--Statement Print, Invoice Print, etc.
In the Tag field, enter a six-character alphanumeric tag. If you tab, the
system lists all tags associated with the specified Document Type.
Enter a Description for the tag.
Select Lookup as the Tag Type.
Select the File from which you want to pull data. The drop-down list will
display all files (tables) available to the specified Document Type.
Note: If the File field does not appear, then you have selected a
Document Type for which you cannot create new tags.
7.
Click the Setup button to further define the document tag. The
Document Field Tag Setup screen displays.
Document Field Tag Setup (EDTDOCT2)
8.
9.
The From File field will display the file selected on the previous screen.
The To File field lists all files available to the From File. Select the File
you want to access.
10. The Field Name specifies a field from the To File.
11. If the field has occurrences for each product line (for example, the
Customer file contains separate Discount Terms for concrete and
aggregate), select Multi-occurrence Field to ensure that the program
determines the applicable product line before retrieving the field value.
88
8/9/05
12. When extracting data from a secondary table, you must specify how the
system should select a given record within that table. The From Field
specifies what primary key to use in the From File when looking up the
data. The To Field specifies the corresponding field in the To File.
13. Accept the Document Field Tag Setup and the Document Tags screens.
Document Formats
Document formats specify page layouts for forms (i.e. tickets, orders,
invoices, statements, and quotes) that are printed with COMMANDseries
applications. Also, document formats are used to identify record layouts for
data out files created by the COMMANDseries applications for exporting
information to an external application and for data in files created by an
external system for importing into the COMMANDseries application. Your
Command Alkon Representative currently designs document formats.
Document format codes are assigned to records on the following screens
for the indicated use.
Topics in this section:
Tickets (plant copy and dispatch copy)
Data Out and Data In
Invoices, Statements, Quotes
Entering Document Formats
Adjusting Formats Using the Display Screen
Adjusting Formats Using the Document Fields Screen
Mask Characters
Tickets (plant copy and dispatch copy)
Plant Communication Setup {Files > Plant & Delivery Information >
Plants > Communication > Setup}
Orders {Dispatch > Orders}
Plant Communication Setup {Files > Plant & Delivery Information >
Plants > Communication > Setup}
User Order Printer Setup {Files > System Information > Users >
Order Printers > Setup}
Data Out and Data In
Data Out
Order Data Out {Invoicing > Order Data Out}
Ticket Data Out {Invoicing > Ticket Data Out}
Master File Data Out {Files > Master File Data Out}
G/L Distribution Data Out {COMMANDreceivables Manage >
Application Management > G/L Distribution Data Out}
8/9/05
89
Data In
Orders & Tickets Data In {Invoicing > Order & Ticket Data In}
Invoices, Statements, Quotes
Document Format Groups {Files > General Information >
Document Format Groups}
Entering Document Formats
Before entering document formats information, gather information about
the way you want tickets, orders, invoices, statements, and quotes to look.
Also determine if you will be importing or exporting any information to
other systems for processing.
To enter document formats:
1.
Go to the Document Format screen. {Files > General Information >
Documents > Document Formats}
Document Formats (EDTDOCS)
2.
3.
4.
5.
6.
7.
90
In the Document Format field, enter a code for the name of the
document format you wish to create.
Enter a Description and a Short description for the document format.
Select the Document Type from the field’s list.
From the Print Method field’s list, select Standard or Overstrike.
Standard is the typical configuration; Overstrike is used to print forms
with multiple passes, such as Thai characters.
The Bottom of Form field allows you to use printers that may or may
not support form feeds. Enter the number of blank lines that should be
inserted in between each form. Entering zero (0) will indicate that the
form will be ejected from the printer using a form feed (<FF>).
Entering 1 or more specifies that the form will be ejected by sending it
the number of ASCII line feed (<LF>) characters you have specified in
this field.
Select the Display button or the List button to adjust the form’s
appearance and/or content.
8/9/05
Adjusting Formats Using the Display Screen
There are two ways to adjust the appearance and content of document
formats: through the Display screen or through the Document Fields
screen. The Display screen allows you to adjust the form’s appearance in a
what-you-see-is-what-you-get (WYSIWYG) mode by granting the ability to
click and drag fields to the desired location.
To adjust document formats through the Display screen:
1.
Click on the Display button from the Document Formats screen. {Files
> General Information > Documents > Document Formats > Display}
COMMAND Aggregate Order Form
2.
Place the cursor over a field you wish to move.
Note: From the Display screen, you can toggle between Tag display
and Masks display. Click the mouse’s right button and select
Display Tags/Masks to toggle modes.
3.
Click and hold the left mouse button while dragging the field to the
desired location.
Note: The form’s title bar displays the name of the form as well as the
coordinates of the last field clicked by the mouse. The
coordinates are displayed in rows-to-columns format
(rows:columns).
4.
5.
Double-click on a field to define its formatting characteristics.
When finished with adjustments, exit from the Display screen.
Adjusting Formats Using the Document Fields Screen
A complete listing of all fields and their characteristics is available on the
Document Fields screen. This screen can be used to adjust the field’s
attributes in greater detail than the Display function.
8/9/05
91
To adjust document formats using the Document Format Fields
screen:
1.
Click on the List button from the Document Format screen to display
the Document Fields screen {Files > General Information >
Documents > Document Formats > List}. The Document Fields screen
displays.
Document Fields (EDTDOCS2)
2.
In the Line field, enter the physical row number on which the field is
to be printed for the form or section. If document format is for data
out, the line number represents a record.
Note: To determine the actual row or column numbers, click the
Display button on the Document Formats screen. The title bar
at the top of the Display screen shows the coordinates in
parentheses. These coordinates will automatically change as you
click and drag fields around the screen to reveal the location.
3.
4.
92
Enter the field’s coordinates in the Begin At and End At fields.
Click on the Detail button to go to the Document Format Field screen.
8/9/05
Document Format Field (EDTDOCS1)
The Line field value comes from the Document Formats screen Line
field.
5. From the Field Type field’s list, select one of the following:
Field – the field as one that changes value according to the tag
associated with it.
Literal – the field as one that includes the same literal text each
time, as designated in the Mask or Literal Text field.
6. If you selected Literal, skip to step 8 of this procedure. If you selected
Field, select a name from the Name field’s pull-down menu. This
menu lists all variable field content options.
7. Enter the number of Occurrences, Sub Occurrences, and Sub Sub
Occurrences. These numbers represent the specific occurrence and
sub occurrence to appear in the current field. For example, if you
selected Product Code from the Name field’s list and entered 3 in the
Occurrence field, the value of the third product code listed would
display in the document format. Sub Occurrences are typically used for
associated products and user-defined fields; Sub Sub Occurrences are
typically used for user-defined fields on an item.
8. Define new document tags associated with this field, if necessary, on
the Document Tags screen (accessible through the Tags button).
9. From the Attributes field’s pull-down menu, select the field’s
attributes. The field information will only print if the attribute exists.
10. Change the values in the Begin At and End At fields if necessary. The
values for these fields default from the Begin At and End At fields of
the Document Formats screen.
11. Enter the field’s Mask or Literal Text. A mask string may need to be
entered here if the option selected in the Name field involves dates;
literal text should be entered if the field type selected was Literal.
8/9/05
93
Note: Use the Zoom button if the entire text does not display.
12. Mark the Left Justify Value on Display checkbox if you want the
value of the field to be left justified when printing key fields to a table,
i.e. customer codes, project codes, and product codes.
13. Accept the Document Format Field, Document Fields, and Document
Formats screens.
Mask Characters
The mask characters that can be used in document formats are as follows.
Mask
Characte
r
94
Field
Type
Meaning, Use
#, N, 9
Numeric Represents a numeric value. Decimal places are zerofilled; insignificant places are space filled.
%
Numeric Represents a numeric value. All zeros are suppressed.
Z
Numeric Represents a numeric value. Non-significant places
are zero-filled.
*
Numeric Represents a number value. Non-significant places are
asterisk-filled. This would be used for example when
printing an amount on a check and filling the left-most
characters with asterisks.
$
Numeric Prints a US currency symbol in a fixed position, based
on the mask (i.e. 123456.78 using a mask of
“$#,###,###.##” would result in “$123,456.78”).
$$
Numeric Prints a US currency symbol in a floating position to
the left of the last significant digit printed within the
mask (i.e. 123456.78 using a mask of
“$$#,###,###.##” would result in “ $123,456.78”).
, and .
Numeric Represents the thousands and decimal point
separators. The comma is used as the thousands
separator, and the period as the decimal separator
regardless of the characters specified by the currency
in use as assigned in the Configuration file.
t, p
Numeric Represents the thousands and decimal point
separators, as dictated by the currency in use as
assigned in the Configuration file. For example, using
a US currency code, a comma would be the thousand
separator and a period would be the decimal
separator.
8/9/05
*n
Numeric
When at the end of a numeric mask and “n” is a
number, multiplies the numeric field times “n,” and
applies the mask to the resulting product. This would
be used when a number with decimal places must be
printed or stored in a file with an implied decimal point
(i.e. 123456.78 using a mask of “########*100”
would result in “12345678”).
MM
Date
Represents the month portion of a date field,
expressed numerically.
DD
Date
Represents the day portion of the date field,
expressed numerically.
YY, YYYY
Date
Represents the year portion of a date field, expressed
numerically. “YY” uses the last two digits of the year
while “YYYY” uses the century format.
HH
Time
Represents the hour portion of a time field in military
format.
NN
Date
Represents the minute portion of a time field.
[x:y]
Characte Indicates that only a portion of the character field
r
should be included. Where “x” and “y” are numbers,
start at position “x” in the string and include “y”
characters (i.e. COMMANDseries – using a mask
“[1:7]” would result in “COMMAND”).
[x,y]
Characte Indicates that only a portion of the character field
r
should be included. Start at number “x” in the string
and include through number “y” (i.e. COMMANDseries
– using a mask “[8,6}” would result in “series”).
Note: If a data value is too big for the mask, for example, with
12345.678375, the form field overflows and the mask is printed
out as a pound sign, #, followed by as much of the field as it can put
in the mask. Using the sample mask, this case would be #12.34.
Document Format Groups
The Document Format Group Codes screen allows access to the document
format groups that identify the individual document formats created with
the Document Formats screen that make up invoices, statements, and
quotes. {Files > General Information > Documents > Document Formats}
These forms, in contrast to orders and tickets, are comprised of various
sections (i.e. headers, detail lines, footers, etc.).
When utilizing the Accounting Category screen, you can specify the desired
document format group for invoices, debit memos, and credit memos.
Accounting categories specify a code that groups customers/projects
together for invoice creation, assigning invoice document formats,
assigning invoice number ranges, accounting for customer/project activity
8/9/05
95
generated by invoicing and accounts receivable, and reporting purposes.
Document format group codes can also be used for the creation of quote
documents.
Topics in this section:
Document Format Group Setup
Invoice Format Codes Setup
Statement Format Codes Setup
Project Quote Format Codes Setup
Receipt Format Codes Setup
Invoice Out Format Codes Setup
Ticket Overflow Format Codes Setup
File Import/Export Format Codes Setup
Document Format Group Setup
Before entering document format groups information, gather information
about the formats of your invoices, statements, and quotes.
To enter document format groups:
1.
Go to the Document Format Group Codes screen. {Files > General
Information > Documents > Documents Format Groups}
Document Format Group Codes (EDTDOCG)
2.
3.
4.
5.
6.
7.
96
Click on the Add Occurrence button to insert a new code.
Enter a document format code in the Code field.
Enter a Description and a Short description.
Select a Document Format Group Type from the field’s list.
Click on the Formats button to format the codes. See the next
section, Invoice Format Codes Setup.
Accept the screen to save document format group information.
8/9/05
Invoice Format Codes Setup
This screen is used to specify codes for the elements of the invoice
document formats. Each of the elements must already be defined on the
Document Format Fields screen function. {Files > General Information >
Documents > Document Format Groups > Formats}
When setting up a format, consider the type of printer, the size of the type
style (font), and the length of the form on which the statement will be
printed to ensure that all desired information will fit in the space allowed
on the form.
The Document Format Group Type field on the Document Format Group
Codes screen should display Invoice.
To set up invoice format codes:
1.
Select the Formats button on the Document Format Group Codes
screen {Files > General Information > Documents > Document
Format Groups > Formats}. The Invoice Format Codes screen
displays.
Invoice Format Codes (EDTDOCG1)
2.
8/9/05
Enter the document format codes for each desired field. The table
below shows the available codes and suggestions for their content.
Header - The Header is the first element printed on the form and
typically contains such information as descriptive title text (such
as Sales Invoice), page number, customer account number, and
date.
It may also contain column headers for the form’s detail data.
These column headers may include product code, product
description, quantity price, and extended price.
Line Header - The Line Header contains information to appear
directly below the Invoice Header.
Detail Line - The Detail Lines typically show the individual orders
for the customer or product. The detail lines may include such
information as product code, product description, quantity, price,
and extended price. The Detail Lines are positioned directly below
the Line Header.
97
3.
4.
5.
Line Footer - The Line Footer typically shows the subtotals. It is
positioned directly below the Detail Line.
Summary Ticket Header - This field contains a header for the
display of the tickets that were shipped for a particular plant. It
may contain such text as Ticket numbers shipped for plant
12. It is positioned directly below the Line Footer.
Summary Ticket Detail - This field contains detail for tickets
that were shipped for a particular plant. The Summary Ticket
Detail is positioned directly below the Summary Ticket Header.
Message Lines - This field contains user-defined text. This may
be, for example, Please note the price increase effective on
dd-mm-yyyy. The Message Lines are positioned directly below
the Line Footer.
Footer - The footer typically contains totals information. It may
show such information as total sales amount, total sales tax, and
total quantity. The Footer is positioned directly below the
Message Lines.
Enter the Number of lines in body of form.
View and adjust the form by clicking the Display button.
Accept the Invoice Format Codes and the Document Format Group
Codes screens.
Statement Format Codes Setup
This screen is used to specify the elements (document formats) that make
up the statement document being defined. Each of the elements must
already be defined using the Document Formats screen. {Files > General
Information > Documents > Document Format Groups > Formats}
When setting up a statement, consider the type of printer, the size of the
type style (font), and the length of the form on which the statement will be
printed to ensure that all desired information will fit in the space allowed
on the statement.
The information shown in the various elements of the statement is
dependent upon the user-defined setup of these documents in the
Document Formats screen. The Document Format Group Type field on the
Document Format Group Codes screen should display Statement.
To set up statement format codes:
1.
98
Select the Formats button on the Document Format Group Codes
screen {Files > General Information > Documents > Document
Format Groups > Formats}. The Statement Format Codes screen
displays.
8/9/05
Statement Format Codes (EDTDOCG2)
2.
3.
4.
5.
8/9/05
Enter the document format codes for each desired field. The table
below shows the available codes and suggestions for their content.
Header - The Header typically contains descriptive title text,
such as Customer Statement, page number, company name
and address, customer account number, and statement date.
It may also hold column headers for statement detail data. These
headers may include invoice number, transaction type,
transaction date, transaction amount, sales tax, discount
amount, transaction total, and transaction balance.
The Statement Header is the first element printed on the
statement.
Line Header - The Line Header typically shows the project name
with which the statement detail will be associated. It is positioned
directly below the Header.
Detail Line - The Detail Lines typically show the individual
transactions for a particular project. The transaction detail may
include such information as invoice number, transaction type,
transaction date, transaction amount, sales tax, discount
amount, transaction total, and transaction balance. The Detail
Lines are positioned directly below the Line Header.
Line Footer - The Line Footer typically shows the total
transaction balance for each project. The Line Footer is positioned
directly below the Detail Line.
Message Lines - This field contains any desired free form text.
The Message Lines are positioned directly below the Line Footer.
Footer - The footer will likely contain totals information. It may
show such information as current balance due, balances in the
various aging categories and total balance due. The Footer is
positioned directly below the Message Lines.
Enter the Number of lines in body of form.
View and adjust the form by clicking the Display button.
Accept the Statement Format Codes and the Document Format Group
Codes screens.
99
Project Quote Format Codes Setup
This screen is used to specify the various elements (document formats)
that make up a project quotation document being defined to the system.
Each of the elements must already be defined using the Document Format
screen. {Files > General Information > Documents > Document Format
Groups > Formats}
When setting up a project quote, consider the type of printer, the size of
the type style (font), and the length of the form on which the statement
will be printed to ensure that all desired information will fit in the space
allowed on the statement.
The information shown in the various elements of the quote is dependent
upon the user-defined setup of these documents in the Document Formats
screen. The Document Format Group Type field on the Document Format
Group Codes screen should display Quote.
To set up quote format codes:
1.
Select the Formats button on the Document Format Group Codes
screen {Files > General Information > Documents > Document
Format Groups > Formats}. The Project Quote Format Codes screen
displays.
Project Quote Format Codes (EDTDOCG3)
2.
3.
4.
5.
100
Enter the document format codes for each desired field. The table
below shows the available codes and suggestions for their content.
Header - The Header of a quote is generally printed at the
beginning of each page and typically consists of information such
as the customer name and address.
Detail Line - The Detail Line of a quote is generally printed in
between the Header and Footer for each page and typically
consists of product information.
Footer - The Footer of a quote is generally printed at the end of
each page and typically consists of information such as the totals
or terms of the quote.
Enter the Number of lines in body of form.
View and adjust the form by clicking the Display button.
Accept the Project Quote Format Codes and the Document Format
Group Codes screens.
8/9/05
Receipt Format Codes Setup
This screen is used to specify the various elements (document formats)
that make up a receipt document. Each of the elements must already be
defined using the Document Format screen. {Files > General Information
> Documents > Document Format Groups > Formats}
When setting up a receipt, consider the type of printer, the size of the type
style (font), and the length of the form on which the statement will be
printed to ensure that all desired information will fit in the space allowed
on the statement.
The information shown in the various elements of the receipt is dependent
upon the user-defined setup of these documents in the Document Formats
screen. The Document Format Group Type field on the Document Format
Group Codes screen should display Receipt.
To set up receipt format codes:
1.
Select the Formats button on the Document Format Group Codes
screen {Files > General Information > Documents > Document
Format Groups > Formats}. The Receipt Quote Format Codes screen
displays.
Receipt Format Codes (EDTDOCG4)
2.
3.
4.
5.
8/9/05
Enter the document format codes for each desired field. The table
below shows the available codes and suggestions for their content.
Header - The Header of a receipt is generally printed at the
beginning of each page and typically consists of information such
as the customer name and address and date.
Detail Line - The Detail Line of a receipt is generally printed in
between the Header and Footer for each page and typically
consists of information about the sale such as purchase order,
price, project code and product code.
Footer - The Footer of a receipt is generally printed at the end of
each page and typically consists of information such as the total
sale.
Enter the Number of lines in body of form.
View and adjust the form by clicking the Display button.
Accept the Receipt Format Codes and the Document Format Group
Codes screens.
101
Invoice Out Format Codes Setup
This screen is used to specify the various elements (document formats)
that make up an invoice out document. Each of the elements must already
be defined using the Document Format screen. {Files > General
Information > Documents > Document Format Groups > Formats}
When setting up an invoice out document, consider the type of printer, the
size of the type style (font), and the length of the form on which the
statement will be printed to ensure that all desired information will fit in
the space allowed on the statement.
The information shown in the various elements of the invoice out document
is dependent upon the user-defined setup of these documents in the
Document Formats screen. The Document Format Group Type field on the
Document Format Group Codes screen should display Invoice Out.
To set up invoice out format codes:
1.
Select the Formats button on the Document Format Group Codes
screen {Files > General Information > Documents > Document
Format Groups > Formats}. The Invoice Out Format Codes screen
displays.
Invoice Out Format Codes (EDTDOC5G)
2.
3.
4.
Enter the document format codes for each desired field.
Header - The Header of an invoice out document is generally
printed at the beginning of each page and typically consists of
information such as the customer name and address and date.
File Detail Invoice Header - The Fine Detail Invoice Header of
an invoice out document is generally positioned directly below the
Header of each page.
File Detail Invoice Detail - The Fine Detail Invoice Detail of an
invoice out document is generally printed between the Header
and Footer of each page and typically consists of information such
as product category, price, project code, and product code.
View and adjust the form by clicking the Display button.
Accept the Invoice Out Format Codes and the Document Format Group
Codes screens.
Ticket Overflow Format Codes Setup
This screen is used to specify the various elements (document formats)
that make up a ticket overflow document. Each of the elements must
102
8/9/05
already be defined using the Document Format screen. {Files > General
Information > Documents > Document Format Groups > Formats}
When setting up an invoice out document, consider the type of printer, the
size of the type style (font), and the length of the form on which the
statement will be printed to ensure that all desired information will fit in
the space allowed on the statement.
The information shown in the various elements of the ticket overrun
document is dependent upon the user-defined setup of these documents in
the Document Formats screen. The Document Format Group Type field on
the Document Format Group Codes screen should display Ticket Overrun.
To set up ticket overflow format codes:
1.
Select the Formats button on the Document Format Group Codes
screen {Files > General Information > Documents > Document
Format Groups > Formats}. The Ticket Overflow Format Codes screen
displays.
Ticket Overflow Format Codes (EDTDOCG6)
2.
3.
4.
5.
Enter the document format codes for each desired field.
Header - The Header typically contains information such as
descriptive title text like Ticket Overflow and page number. It is
the first element printed on the statement.
Detail Line - The Detail Lines typically show the details of the
overflow. These lines are positioned directly below the Header.
Enter the Number of lines in body of form.
View and adjust the form by clicking the Display button.
Accept the Ticket Overflow Format Codes and the Document Format
Group Codes screens.
File Import/Export Format Codes Setup
This screen is used to specify the various elements (document formats)
that make up a file import/export document. Each of the elements must
already be defined using the Document Format screen. {Files > General
Information > Documents > Document Format Groups > Formats}
When setting up an invoice out document, consider the type of printer, the
size of the type style (font), and the length of the form on which the
statement will be printed to ensure that all desired information will fit in
the space allowed on the statement.
8/9/05
103
The information shown in the various elements of the file import/export
document is dependent upon the user-defined setup of these documents in
the Document Formats screen. The Document Format Group Type field on the
Document Format Group Codes screen should display one of the following.
Master File In
Master File Out
Order Out
Ticket Out
Order/Ticket In
Mix Design In/Out
Materials Mix Design In/Out
To set up file import/export format codes:
1.
Select the Formats button on the Document Format Group Codes screen
{Files > General Information > Documents > Document Format Group
Codes > Formats}. The File Import/Export Format Codes screen
displays.
File Import / Export Format Codes (EDTDOCG8)
2.
3.
4.
5.
Enter the document format codes for each desired field.
File Header Format - The Header typically contains information
such as descriptive title text like Master File In. It is the first
element printed on the document.
File Detail Format - The Detail typically shows the details of the
file import or export. These lines are positioned directly below the
Header.
Indicate the Number of lines in body of form.
View and adjust the form by clicking the Display button.
Accept the File Import/Export Format Codes and the Document Format
Group Codes screens.
Document Formatting
Records in the document format file control the formatting of all printed forms
or data-out files.
Ticket/Order Data Out/Printing Formatting
The following comments relate to how the data can be formatted during the
data out (which also applies when printing tickets and/or orders).
104
8/9/05
•
•
•
•
•
•
String fields that contain only numeric characters can be formatted with a
mask of number signs (#), as many as are needed for the largest number
that might be stored in the field. Therefore, the specific length can be
provided for, as opposed to the total length of the field.
String fields that contain alpha/numeric characters can be formatted with
the length of the largest number of characters that might be stored in the
field, or just the number needed in the data out, as opposed to the total
length of the field.
Numeric fields can be formatted with a standard, adequate numeric mask
(i.e. ######.##).
Boolean fields can be formatted with a length of one (1); X is input if the
field is true, and a space if it is false.
Date fields can be formatted with a standard date mask (i.e. DD-MMYYYY).
Time fields can be formatted with a standard time mask (i.e. HH:NN).
Ticket Printing and Ticket Data Out Formatting Codes
A single document format record determines the print format for tickets
generated in the COMMANDconcrete application. Multiple document formats
can be maintained when individual and unique formatting is required for a
single plant or for a group of plants. The ticket format can be designed for a
pre-printed form or to print on plain paper. Document formats allow for two
types of information to be printed.
Literal fields – text that remains constant on all forms printed.
Data fields – information from the appropriate data files that varies from
one form to the next.
Since tickets do not continue onto multiple forms, all literal fields and data
fields for the ticket are recorded on a single document format. A list of the
data fields that can be used for formatting orders is stored in the document
tags table and can be viewed through the screen’s detail button.
Order Printing and Order Data Out Formatting Codes
A single document format record determines the print format for orders
generated in the COMMANDconcrete application. Multiple document formats
can be maintained when individual and unique formatting is required for a
single plant or for a group of plants. The order format can be designed for a
pre-printed form or to print on plain paper. Document formats allow for two
types of information to be printed.
Literal fields – text that remains constant on all forms printed.
Data fields – information from the appropriate data files that varies from
one form to the next.
Since orders do not continue onto multiple forms, all literal fields and data
fields for the order are recorded on a single document format. A list of the
data fields that can be used for formatting orders is stored in the document
tags table and can be viewed through the screen’s detail button.
8/9/05
105
GL Distribution Data Out Formatting Codes
The following table identifies the field codes to use when formatting data out
records based on the GL distribution data file.
Field Name
Description
ACCLAB
Account Code
BATDAT
Batch Date
BATNUM
Batch Number
BATSEQ
Batch Sequence
CHKNUM
Check Number for Cash Receipt
CMPCOD
Company
CCCLAB
Cost Center
CUSLAB
Customer Code
DATLAB
System Date
INCRCT
Message Text
The Message Text screen allows the user (with appropriate system security)
to enter and edit message text. Message text is used to communicate
information to customers using COMMANDreceivables statements and
COMMANDinvoicing invoices. For example, a message text code can be
established with the following text.
Our offices will be closed Thanksgiving Day and the following
Friday. Have a nice Holiday!
This message could be selected during invoice runs and the text would print
on each invoice. Also, statements can print messages based on the oldest
balance on a customer’s account. For example, a customer with a balance
over 120 days old could have the following message printed on their
statement.
Your account is overdue. Please contact our credit office
immediately!
The general message text to be printed on every order, invoice, or statement
is selected during the actual preparation of each form in the Print Invoices
screen in COMMANDinvoicing {Invoicing > Print Invoices}, in the Statements
screen in COMMANDreceivables {Reports > Statements} and on the Edit
Orders & Tickets screen in COMMANDconcrete {Options > Edit Orders &
Tickets}. Aging related statement messages are assigned to aging categories
in the Receivables Statement Configuration screen {Files > General
Information > Configuration > Receivables > Statements}.
106
8/9/05
Message Text Setup
To enter message text:
1.
Go to the Message Text screen. {Files > General Information > Message
Text}
Message Text (EDTMTXT)
2.
3.
4.
5.
8/9/05
Enter a message Code. This code identifies each message text and is
used to select a message to be printed on customer forms.
Select the Type of message from the list of valid options.
AR – the message text is available to print on statements
Invoicing – the message text is available to print on invoices
AR/Invoicing – the message text is available to print on
statements and invoices
Orders – the message text is available to print on orders and
tickets.
Any – the message text is available to print on all of the above
Enter the message Text. This field represents the message text that is
printed on a customer form when the associated message code is
selected. Multiple lines may be entered. The message automatically auto
wraps the message text unless the user defines each line break by
pressing <Enter>.
Accept the Message Text screen.
107
Initial Accounting Information
The following section addresses entry of basic accounting and sales tax
information. By entering this information, you are, in effect, laying the
foundation for your company’s accounting operations.
Topics in this section:
Inventory Accounting Periods
A/R Accounting Periods
G/L Accounting Periods
Bank Codes
Adjustment Codes
Tax Authorities
Tax Authority/Locations
Tax Codes
Credit Codes
Terms Codes
Accounting Categories
Sales Analysis Codes
Inventory Accounting Periods
The Inventory Accounting Periods function allows you to establish beginning
and ending dates for inventory periods within an accounting year. These dates
control the accounting periods for inventory activity only. While the Inventory
Accounting Periods look and function similar to A/R Accounting Periods, the
two are completely distinct items.
To set up inventory accounting periods:
1.
108
In COMMANDinventory, go to the Inventory Accounting Periods screen.
{Files > General Information > Inventory Accounting Periods}
8/9/05
Inventory Accounting Periods (EDTIVPD)
2.
3.
4.
Enter the Accounting Year for which you are establishing accounting
periods.
Enter the Number of Periods. A number of fields corresponding to that
number of periods will open in the Period Dates section of the screen.
Enter a Start Date and End Date for each accounting period. To
designate a period as open (currently able to accept transactions), mark
the Open checkbox beside that period.
Note: To create accounting periods that correspond to the months of the
year, select the Defaults button. This also marks every period in
the new year as open.
5.
Accept the Inventory Accounting Periods screen.
A/R Accounting Periods
The A/R Accounting Periods function allows users to establish the beginning
and ending dates for accounting periods within an accounting year.
Accounting Periods are used to determine if a period is open for transaction
entry. When a period is closed, no further transactions can be made for dates
within the period. Also, the periods define how data is collected and updated
in the Customer History Table.
To set accounting periods within a year:
1.
2.
8/9/05
Open the A/R Accounting Periods screen. {Files > General Information >
A/R Accounting Periods}
In the Accounting Year field, enter the year for which you want to
create accounting periods.
109
A/R Accounting Periods (EDTARPD)
3.
4.
Enter the number of accounting periods you want for the specified
accounting year in the Number of Periods field. That number of Period
Dates fields opens below.
Enter a start date and end date in the corresponding fields for each
accounting period.
Note: Select the Defaults button to automatically establish twelve
accounting periods that correspond to the months of the year. The
default setting marks all periods as open.
5.
6.
If an accounting period is open, mark the Period Open checkbox beside
it. This allows entry of transactions in for that period. If the checkbox is
not marked, that period is considered closed, and COMMANDseries will
not accept any new transactions dated within that period.
After setting accounting periods for the year, accept the screen.
G/L Accounting Periods
The G/L Accounting Periods function allows the user to establish beginning
and ending dates for general ledger accounting periods within an accounting
year. These dates control the accounting periods for G/L activity only.
COMMANDseries does not currently have a G/L package. This function is
provided for legacy users of COMMANDfinancials, which is no longer available.
To set up G/L accounting periods:
1.
110
In COMMANDreceivables, go to the G/L Accounting Periods screen. {Files
> General Information > G/L Accounting Periods}
8/9/05
G/L Accounting Periods (EDTGLPD)
2.
3.
4.
5.
6.
Enter the Company code that represents the company to which the
accounting periods apply.
Enter the Accounting Year for which you are establishing accounting
periods.
Enter the Number of Periods. A number of fields corresponding to that
number of periods will open in the Period Dates section of the screen.
In the Budgets Open field, select which of three possible budgets is
open.
Enter a Start Date and End Date for each accounting period. To
designate a period as open (currently able to accept transactions), mark
the Open box beside that period.
Note: To create accounting periods that correspond to the months of the
year, select the Defaults button. This also marks every period as
open.
7.
Accept the G/L Accounting Periods screen.
Bank Codes
The Bank Codes function allows a user to define the codes that represent the
various banks used by your organization. Banks are assigned to Payment
Transaction Batches, indicating the financial institution to which deposits are
made. Bank Codes also define the G/L Booking Code for the deposit.
To set up bank codes:
1.
8/9/05
Open the Bank Codes screen. {Files > General Information > Bank
Codes}
111
Bank Codes (EDTBKCD)
2.
3.
4.
5.
6.
7.
8.
Enter a Bank Code to identify the bank and account.
Enter a description for the bank in the Description field.
Enter an abbreviated description in the Short field.
If a specific company within your organization uses the bank, enter the
Company code in this field. Click on the detail button associated with this
field to select from a list of valid companies.
The Federal Routing Number field is used to specify the Bank's ID
number.
Enter the Bank Account Number.
Accept the Bank Codes screen.
Adjustment Codes
The Adjustment Codes function allows a user to define the codes that
represent the various types of A/R adjustments that your organization uses.
Adjustment Codes are assigned to each A/R adjustment transaction. It defines
the nature of the adjustment and the G/L Booking Code for the transaction.
To set up adjustment codes:
1.
2.
Open the Adjustment Codes screen. { File > General Information >
Adjustment Codes}
Enter an Adjustment Code. This code can be up to three alphanumeric
characters.
Note: Use an abbreviation that is easy to recognize and remember. For
example, BDW for Bad Debt Write-off, or NSF for Insufficient
Funds.
112
8/9/05
Adjustment Codes (EDTAJCD)
3.
4.
5.
Enter a Description of the Adjustment Code. Enter an abbreviated
version of this description in the Short field.
Select the Write off Adjustment box if the code will be used for writeoff adjustments. The Adjustment Recap Report determines which
adjustments are for write-off purposes based on this field.
Accept the Adjustment Codes screen.
Tax Authorities
Tax authorities represent the main groups of taxing entities (i.e. county,
state, province, federal, etc). Up to five tax authorities can be maintained in
the COMMANDseries applications. Tax authorities determine the base upon
which tax is calculated (on taxable sales alone or including some other tax
authority’s tax), whether the taxation point is origination or destination based
and whether there is reciprocity between the two.
Before entering tax authorities information, gather information about the
taxing entities and laws applicable to your business. Remember that the tax
authority order entered during setup determines the order taxes will be
entered throughout the system.
People operating in multiple state should take care to ensure that taxing
authorities are entered to accomodate all areas in which business is done.
To set up tax authorities:
1.
8/9/05
Go to the Tax Authorities screen. {Files > Sales Tax Information > Tax
Authorities}
113
Tax Authorities (EDTTAXA)
2.
3.
4.
5.
6.
7.
8.
9.
Enter a Code to identify the tax authority.
Enter a Description for the tax authority.
Enter a Short description of the tax authority in the Prompt field.
In the Tax Based on field, indicate whether the tax is based on Taxable
sales plus previous authorities’ tax or Taxable sales.
Select whether the Point of Taxation is the Origination, which is the
tax location of the plant, or Destination, which is the tax location of the
site.
Mark the Allow Reciprocation checkbox if you want to allow reciprocal
taxing. Reciprocal taxing means that if the point of taxation is nontaxable, the other location determines the tax authority/location.
Point of
taxation
Is point of
taxation taxable?
Taxes determined by tax
authority/location of:
Origination
Yes
Origination
Destination
Yes
Destination
Origination
No
Destination if this checkbox is
checked and destination point is
taxable, otherwise not taxed
Destination
No
Origination if this checkbox is
checked and origination point is
taxable, otherwise not taxed
Click the Add Occurrence button to add another tax authority.
Accept this screen.
Tax Authority/Locations
The Tax Authority/Locations function allows access to location-specific tax
authority information. Tax authority/locations represent specific entities for
any given tax authority, i.e. State of Alabama, County of Jefferson, City of
Birmingham, etc. Specific tax rates and other information controlling taxation
are maintained at this level.
Tax authorities are maintained on the Tax Authorities screen. {Files > Sales
Tax Information > Tax Authorities} They represent the main groups of taxing
114
8/9/05
entities (i.e. states, provinces, federal, etc.). Up to five tax authorities can be
maintained in the COMMANDseries applications. Tax authorities determine the
base upon which tax is calculated (on taxable sales alone or including some
other tax authority’s tax), whether the taxation point is origination- or
destination-based, and whether there is reciprocity between the two.
Tax codes are maintained in the Tax Codes screen. {Files > Sales Tax
Information >Tax Codes} They provide a single code associated with every
possible taxation point. That is to say that one tax authority/location code, for
each tax authority, is assigned to each tax code. Tax codes are assigned to
plants (the origination taxation point) and to zones/projects/customers (the
destination taxation point). The plant tax code is then assigned to a ticket
record, while the zone/project/customer tax code is assigned to order records.
Before entering tax authority/locations information, gather information about
locations within each tax authority to enter specific tax rates. For example,
some states (and their related counties and cities) have a maximum tax rule.
Such a rule states that taxes are applied on amounts up to a ceiling of taxable
sales. The rules differ from state to state for calculating this total.
To set up tax authority/locations:
1.
Select Files > Sales Tax Information > Tax Authority/Locations.
Tax Authorize / Locations (EDTTAXL)
2.
3.
8/9/05
Select a Tax Authority for the tax location. The tax authority is set up
on the Tax Authorities screen.
Enter a Tax Location for the new tax location. The tax location code
uniquely identifies each tax location for the specified tax authority. This
code, combined with the tax authority, is used to access tax authority/
115
4.
5.
location information in other programs. It is also used to sort reports that
contain tax authority-related information.
Enter a long Description and Short description for the tax location.
In the Tax Calculation section, enter a Current Rate (from 0.000 percent
to 100.000 percent) for this tax location.
Note: If the Current Rate field is left blank or is set to 0.00, then a nontax reason code must be entered.
6.
7.
8.
Enter an Effective Date to specify when this tax rate takes effect. If you
are setting up a new tax authority, enter a t to set the effective date for
today.
If desired, enter the tax’s Previous Rate. (If the Current Rate is
subsequently changes, that value will automatically transfer to the
Previous Rate field.)
Some states (and their related counties and cities) have a maximum tax
rule. The rule states that taxes are applied on amounts up to a ceiling of
taxable sales. If this rule applies in your area, enter the Max Tax
Amount.
Note: This amount is assigned to individual tax authority/locations and is
applied to orders (for CODs) and invoices (for non-CODs).
9.
If a Max Tax Amount is entered, a Non Taxable Reason code field will
appear. This field must be populated if a Max Tax is to be accepted by
the system.
10. If the tax rate applies to all areas of the items including delivery, accept
this screen. If not, set the location as exempt from delivery taxes.
To set a tax location as exempt from delivery taxes:
1.
2.
3.
4.
5.
116
Mark the Delivery Exempt checkbox. If selected, this checkbox
indicates that some portion of the taxable sales amount (related
specifically to ready-mix concrete sold) may be considered non-taxable
because it represents the portion of the price related to the delivery of
the product. In this case, the Non-Taxable, Exemption Type and
Exemption Rate fields specify why and how much of the delivery price is
non-taxed.
Once the Delivery Exempt field is selected, additional fields will display.
Select a Non-Taxable Reason to define the tax exemption.
Select the Exemption Type (Dollar Amount or Percentage) for the tax
exemption. If you are exempting the delivery charge from taxation,
select Dollar Amount.
If the exemption type is Dollar Amount, enter the dollar amount to
exempt from taxation per measured amount (the unit of measure should
match the item).
If the exemption type is Percentage, enter the percentage of the charge
to exempt from taxation.
Accept this screen.
8/9/05
Tax Codes
The tax code unites all of the tax locations and their related authorities and
allows them to be applied, together, to sales amounts. Tax codes provide a
single code associated with every possible taxation point.
Before entering tax code information, gather information about the
combinations of tax authority/locations needed to handle your customers.
Note: If interfacing to a batch panel, numeric tax codes should be utilized;
using alphanumeric codes may cause a problem in batching.
To define a tax code:
1.
Go to the Tax Codes screen. {Files > Sales Tax Information > Tax
Codes}
Tax Codes (EDTTAXC)
2.
3.
4.
5.
6.
Enter a Tax Code to identify this tax configuration.
Enter a long Description and Short description for the tax code.
Select each Tax Authority and the appropriate related Tax Location for
this tax code.
Repeat Step 4 for each tax authority that applies to the tax code you are
defining.
Accept the Tax Code screen to save this tax code.
Note: Alter a current tax code by using the Add Occurrence button to
add a new tax authority/location, or using the Delete button to
delete a tax authority/location.
Each tax code must have an entry for each Tax Authority defined in the
system. To account for areas in which no tax is charged for a specific
authority, you will need to create zero-rate tax locations for each authority.
Credit Codes
Credit codes dictate how orders and tickets can be generated in the
COMMANDseries applications. Credit codes are assigned to customers and
projects to specify the current credit status for the customer or project. When
orders are established and when the first ticket is generated for an order, the
8/9/05
117
credit code for the customer or project is verified. A project credit code will
override a customer credit code.
Any number of credit codes can be established and maintained in the system.
The Credit Type field controls the nature of the credit code and the action
taken regarding orders and tickets. Before entering credit code information,
gather information about the types of credit statuses you will assign to your
customers and projects.
Unless noted otherwise, the features listed below are available to all users.
There are some features that are available only to those users licensed for
Credit Checking.
To enter a new credit code:
1.
In COMMANDconcrete or COMMANDaggregate, go to the Credit Codes
screen. {Files > Customer & Project Information > Credit Codes}
Credit Codes (EDTCRED)
2.
3.
4.
5.
118
Enter a Credit Code to identify the new customer credit classification.
Enter a Description and Short description for the zone.
Select a Credit Type for the credit code. The possible are:
Cash only – only cash may be received from this customer
Charge only – only charge orders are allowed for this customer
Charge or cash – C.O.D. or charge orders may be taken for this
customer
No sale – no orders of any kind can be taken for this customer.
Tickets on existing cannot be generated
The Display Credit Code Description checkbox will be automatically
checked if the Credit Type is anything but Charge Only. If, for some
reason, you also want the Credit Code Description to display for Charge
only customers, check this flag. When an order is created for a
custoemr/project with this credit code, a dialog box will appear displaying
the credit code description. It’s highly unlikely that you will ever need to
set this flag.
8/9/05
To check a customer’s credit:
1.
If you wish to continue to sell to customers with this credit code despite
exceeding the credit limit, enter an Exceed Authorization Code. If an
order is entered for a customer with this credit code, a dialog box will
display in which an authorized credit officer can enter the authorization
code.
Note: As with all passwords, the Credit Code editor encrypts the Exceed
Authorization Code password. The system asks you to Confirm
the password. Type in the password again and accept the screen.
When a new Credit Code is entered with an authorization code, it is also
encrypted on the Data Maintenance screen when the Credit Table is
retrieved. (The Exceed Authorization Code is known as the Credit
Override Authorization on the Data Maintenance screen.) This ensures
that only users with the proper authorization may access the Exceed
Authorization Code.
Data Maintenance (DBAUFLD)
2.
3.
4.
5.
8/9/05
If you have purchased the Credit Check module and would like to verify
the credit limits for customers with this credit code, mark the Verify
Credit Limits checkbox.
The product line field coordinates with the following Do not exceed and
Require Project checkboxes. The field defaults to Concrete; set the
product line as necessary, then proceed to the following checkboxes.
Check the Do not exceed ordered quantity in ticketing checkbox to
ensure the delivered quantity of product does not exceed the ordered/
ticketed quantity of product.
Check the Require Project for all Orders checkbox, if necessary.
119
6.
7.
To modify other product lines, change the product line field to the
appropriate product and repeat steps 4 and 5 above.
Accept the screen to save this credit code and its related information.
Terms Codes
Terms codes dictate when invoices are due and the payment discount, if any,
which can be given if payment is made by the discount date. Terms codes are
assigned at the customer and project level. When orders and tickets for the
customer or project are invoiced, the appropriate terms code is assigned to
the invoice and the due date, discount amount, and discount date are
calculated.
Any number of terms codes can be established and maintained in the system.
The Terms Type field controls the nature of the terms code and the rules for
calculating the dates and discount amount.
Before entering terms code information, gather information about the terms
you assign to your customers for invoicing and statements.
Topics in this section:
Entering Terms Codes--Basic Definitions
Entering Terms Codes--Examples
Entering Terms Codes--Basic Definitions
Enter descriptions and a type:
1.
Go to the Terms Codes screen. {Files > Customer & Project Information
> Terms Codes}
Terms Codes (EDTTRMS)
2.
3.
4.
120
Enter an alphanumeric Terms Code to identify payment terms
associated with this code.
Enter a Description and a Short description for the terms code. The
short description will be used on reports in situations where there is
insufficient room for the full description.
From the field’s list, select a Terms Type for the new terms code. Valid
options are:
Regular Percent – the invoice is due x number of days after the
invoice date. Two discount percents are available.
8/9/05
Prox Percent – the invoice is due on a specific day of the month
following the invoicing month. One discount percent is available on
the specified due date.
Double Prox Percent - this is the same as Prox Percent, but there
are two date ranges (i.e. for invoices dated 1st-15th, or 16th-31st).
Regular Per Unit - this is the same as Regular Percent, but two
discount amounts (i.e. per yard, meter, ton, etc.), not percents, are
available. These two terms calculate the due date and discount date
as a number of days past the invoice date.
Prox Per Unit - this is the same as Prox Percent, but one discount
amount (i.e. per yard, meter, ton, etc.), not percent, is available.
These two terms calculate the discount date as a specific day of the
month following the invoice month.
Double Prox Per Unit - this is the same as Double Prox Percent,
but a discount amount, not a percent, is available.
NEOM Percent - Non End-of-Month (NEOM) Percent allows a prox
term due date for non-end-of-the-month closing. This permits
computing a due date for next month or the month after next,
depending on the range 1 or 2 in which the invoice date falls. A
discount percent is available.
NEOM Per Unit - Non End-of-Month (NEOM) Per Unit is the same
as NEOM , but with a discount amount instead of percent.
Double Prox Percent, Double Prox Per Unit, NEOM Percent, and NEOM Per
Unit all calculate two discount dates, based on the invoice date falling into
two ranges. If the invoice date falls into the first date range, the discount
date is set as a specific date in the same month as the invoice months. If
the invoice date falls into the second date range, the discount date is set
as a specific date in the month following the invoice month.
Entering Terms Codes--Examples
The following three procedures walk you through the remaining steps involved
in setting up a terms code. Locate the procedure for the type you chose in the
Terms Type field and follow its steps to successfully complete the process.
If you chose Regular Percent or Regular Per Unit as the terms type:
1.
8/9/05
This step is dependent upon the term’s type.
If the terms type is Regular Percent:
•
Mark the Delivery Exempt checkbox if necessary. When marked,
this field indicates that, as defined by the Exemption Type and
Exemption Rate fields, a portion of the sales amount is exempt from
the calculation of a discount.
•
Select an Exemption Type from the field’s list.
•
Enter an Exemption Rate for the exemption type.
121
Regular Percent Terms Type
2.
3.
4.
5.
If the terms type is Regular Per Unit, select the Per Unit UOM that
should be applied.
Enter the number of days, or day of month, used to compute the discount
date for this terms code in the Discount Date To Be field.
Enter the Due Date To Be, the number of days from the invoice date to
be used to compute the due date.
This step is dependent upon terms type:
•
If the terms type is Regular Percent, enter the percent to discount
for the terms code in the Discount Percent Is field.
•
For terms type Regular Per Unit, enter the discount amount per
unit for the terms code in the Discount Amount Per Unit Is field.
Accept the Terms Code screen to save the new terms code and its
settings.
If you chose Prox Percent or Prox Per Unit as the terms type:
1.
This step is dependent upon the terms type.
If the terms type is Prox Percent:
•
Mark the Delivery Exempt checkbox if necessary. When marked,
this field indicates that, as defined by the Exemption Type and
Exemption Rate fields, a portion of the sales amount is exempt from
the calculation of a discount.
•
Select an Exemption Type from the field’s list.
•
Enter an Exemption Rate for the exemption type.
Prox Percent Terms Type
122
8/9/05
2.
3.
4.
5.
If the terms type is Prox Per Unit, select the Per Unit UOM that should
be applied.
Enter a value in the field that the follows Discount Date On This Day.
This value defines the specific day used to compute the discount date for
the current terms code.
Enter the Due Date On This Day of the next month.
This step is dependent upon terms type.
•
If the terms type is Prox Percent, enter the percent to discount for
the terms code in the Discount Percent Is field.
•
If the terms type is Prox Per Unit, enter the amount per unit to
discount for the terms code in the Discount Amount Per Unit Is
field.
Accept the Terms Code screen to save the new terms code and its
settings.
If you chose Double Prox Percent, Double Prox Per Unit, NEOM Percent,
or NEOM Per Unit as the terms type:
1.
This step is dependent upon the terms type.
If the terms type is Double Prox Percent or NEOM Percent:
•
Mark the Delivery Exempt checkbox if a portion of the sales
amount will be exempt from the calculation of a discount. The
Exemption Type and Exemption Rate fields define this.
•
Select an Exemption Type from the field’s list.
•
Enter an Exemption Rate for the exemption type.
If the terms type is Double Prox Per Unit or NEOM Per Unit,
select the Per Unit UOM that should be applied.
NEOM Per Unit Terms Type
2.
8/9/05
Enter the starting and ending invoice day for a double prox or non-endof-month terms type in the For Invoice Dated Between These Days
fields.
123
3.
4.
5.
6.
Enter a value in the Discount Date On This Day field. This value defines
the specific day used to compute the discount date for the current terms
code.
Enter the Due Date On This Day of the next month.
This step is dependent upon the terms type.
•
If terms type is Double Prox Percent or NEOM Percent, enter the
percentage of the discount in the Discount Percent Is field.
•
If terms type is Double Prox Per Unit or NEOM Per Unit, enter
the amount of the discount in the Discount Amount Per Unit Is
field.
Accept the Terms Code screen to save the new terms code and its
settings.
Accounting Categories
Accounting categories give you an additional means of organizing and
recording business activity. The Accounting Categories screen allows access to
accounting category records which are assigned to customers and projects
and provide for flexibility in the following areas.
Invoice creation – select customer/project for invoices by accounting
category
Invoice document format – assign customer/project unique document
formats for invoice printing based on accounting category
Invoice numbers – assign customer/project to independent invoice
number ranges based on accounting category
General ledger booking codes – generate customer/project activity by
invoicing and accounts receivable can be accounted for based on
accounting category
Reporting – sort and select reports (i.e. sales analysis, aged trial
balance) based on accounting category
Some customers create a single accounting category for all business activity;
others create one category and one for internal business (material transfers,
on site constructions, etc). Before entering accounting categories information,
gather information about how you want to categorize your customers within
invoicing, financial, and reporting functions.
To enter an accounting category:
1.
124
Go to the Accounting Categories screen. {Files > Customer & Project
Information > Accounting Categories}
8/9/05
Accounting Categories (EDTACAT)
2.
3.
4.
5.
6.
Enter an Accounting Category Code to identify the new accounting
category.
Enter short and long descriptions for the accounting category.
Select document format group codes for all of the Invoices, Credit
Memos, and Debit Memos you will use. Your Command Alkon Project
Manager sets up your document format groups.
Select Next Number Sequence Codes for all necessary categories.
Next numbers are set up on the Next Numbers screen. {Files > General
Information > Next Numbers}
Select the Language that should be printed if different from the system
language. If the field is left blank, the system default will be used.
Note: This seldom-used feature requires the Print-In-Language
document tag attribute be setup. Any tag with this attribute prints.
7.
Accept the Accounting Categories screen to save this category and its
settings.
Sales Analysis Codes
The sales analysis codes give you a means of classifying orders for reporting
purposes. Once the codes have been entered, they can be assigned to
customers and projects. When an order is entered, it will automatically be
assigned the appropriate sales analysis code. If a sales analysis code has not
been assigned to the customer or project, it must be assigned at the order
level. Sales analysis codes can be constructed to identify any type of grouping
of customers and projects based on the business practices of your company.
Before entering sales analysis code information, gather information about how
you want to group customers and projects for analysis purposes.
8/9/05
125
To enter a sales analysis code:
1.
Go to the Sales Analysis Codes screen. {Files > Customer & Project
Information > Sales Analysis Codes}
Sales Analysis Codes (EDTSANL)
2.
3.
4.
126
Enter a Code to identify the sales category or group.
Enter a Description and a Short description for the sales analysis code.
Use the Add Occurrence button, or press <F6> to add another sales
analysis code -or- accept the screen to save the sales analysis codes.
8/9/05
Configuration
The Configuration screen allows access to the configuration records that
define the COMMANDseries items in the following three general categories.
Run-time environment flags – indicate the features turned on and off
Run-time environment parameters – customize your system
Defaults – for fields on other COMMANDseries application screens
0
WARNING: Once changed and accepted, the flags, parameters, and
defaults in the configuration file take effect immediately
or when the COMMANDseries application is restarted.
Some changes may change the manner in which
information is stored. If in doubt, consult a Command
Alkon Customer Service Representative.
Gather information about how you want the system configured. Most
configuration flags are meant to be set once and not to be changed after you
begin using the COMMANDseries applications. For this reason it is important
to understand each field and its affect on the applications.
Note: Some fields and tabs described in this section are controlled by the
user license. Not all fields and tabs may display on your system.
Topics in this section:
Initial System Configuration
Defaults Configuration
Distribution Configuration
Dispatch Configuration
Aggregate Configuration
Signaling Configuration
Invoicing Configuration
Inventory Configuration
Receivables Configuration
Receivables Aging Configuration
Receivables Statements Configuration
Financials Configuration
Projects/Quotes Configuration
Lien Configuration
User Fields Configuration
8/9/05
127
Initial System Configuration
At this point in your COMMANDseries setup it is not necessary to complete the
entire system configuration. However, an initial configuration is necessary to
define some of the main system settings.
To enter the initial configuration:
1.
Select Files > General Information > Configuration.
Configuration – System Tab (EDTCNFXA)
2.
3.
4.
128
Enter the System Name as you want it to appear on reports. This name
should be your company name, corporation name, or the name that best
represents the COMMANDseries data.
The System Name will also display in the title bar if you mark the Show
System Name in Title Bar checkbox on the Preferences screen. {Misc >
Preferences > General}
Select which actions, if any, to audit in the applications from the possible
choices in the Auditing Method. Options are:
•
No audits
•
Audit adds only - only track the creation of new records
•
Audit changes only - only track changes to existing records
•
Audit adds and changes
•
Audit deletes only
•
Audit adds and deletes
•
Audit changes and deletes
•
Audit all types
If you use auditing, marking the Perform During Posting checkbox
signifies that auditing occurs on data transferred (posted) from one data
file to another.
8/9/05
The previous two fields deal with system-level auditing, which is a licensed
option. The Order Audit Log, discussed next, is separate from system
auditing and is available to anyone licensed for concrete or aggregate.
5.
6.
Mark the Order Audit Log checkbox to have the system track orderrelated activity.
If you want to prompt the user to answer customized questions set up
through the Fields button (only visible when the Order Audit Log
checkbox is marked).
Order Audit Log Questions (EDTCNFX1)
7.
The user will be prompted with these questions are asked upon
acceptance of an order. Note the option to make these fields required.
If no specific fields are configured, the system still logs any changes
made to new or changed orders. For example, if you record telephone
conversations for records, you may want to set up a required field such
as phone station to log where the recorded conversation can be found.
The Purge Orders and Tickets function removes the information in the
Order Change Log.
The Archiving Control checkboxes provide the ability to archive paid
transactions for a period of time, instead of purging the paid transactions
and never being able to reference them again. The Purge/Archive A/
R Transactions function {Receivables > Manage > Application
Management > Purge/Archive A/R Transactions} is controlled by these
settings.
Archive Paid Transactions option enables basic archive
functionality. When it is selected, two additional options display.
Archive Sales Tax Distributions for Paid Transactions archives
the STXD table.
Archive General Ledger Distributions for Paid Transactions
archives the GLDT table.
The archive routine creates an identical set of tables for the information
to be archived, decreasing the size of the main tables that are constantly
being accessed.
For example, the ITRN table (Invoice Transactions), the STXD table
(Sales Tax Distribution) and the GLDT table (General Ledger
Distributions) are the tables you access on a daily basis. The ITRN_9,
STXD_9 and GLDT_9 tables store the archived information and are only
accessed when looking up older information.
Note: The ITRN_1 table is not an archive table, but a temporary work
table.
8/9/05
129
8.
The currency used by the system is displayed in the Currency Code
field. Currencies are set up on the Currency screen. {Files > System
Information > Currency}
Note: Once the currency code has been set up during the initial
Configuration, it cannot be changed.
9.
10.
11.
12.
13.
From the Measurement System field’s list, select U.S. Customary or
Metric as the default measurement style for the system. This is only the
system default – the measurement system can be changed in Order
Entry.
Select an option for Tracking Plant Quantities. This value controls how
metric and customary quantities are totaled on the Tracking screen:
Do Not Convert -- If a plant has orders totalling 50 cubic yards and 50
cubic meters, the plant line total will read 100.
Convert to System UOM -- If a plant has orders totalling 50 cubic yards
and 50 cubic meters, the system will convert the non-standard UOM to
the system UOM before totalling.
Mark the Use Multiple Customer Codes to configure the Project file
{Files > Customer & Project Information > Projects} to use a multiple
customer mode. In multiple customer mode, the Customer Code field in
the Projects file is replaced with the Billing Customer field. In addition,
the Shipping Customer and Reference Customer fields are included
at the bottom of the screen.
Two other functions are affected by the Use Multiple Customer Codes
option in COMMANDseries. The customer information in both the Orders
screen and Tickets screen is automatically associated with the shipping
customer that has been defined in the Projects file. On the Edit Orders
and Tickets screen, the customer information is associated with the
billing customer defined in the Projects file.
Specify whether the system is to Use Standard Pricing or Use Content
Pricing (Sack Pricing) in the Pricing Method field. If you select the Use
Standard Pricing option for the pricing method, prices are assigned to
each individual product by pricing plant and/or pricing category.
If you select Use Content Pricing option for the pricing method,
concrete prices are calculated from a base product’s price, based on the
difference in the content factor for the specific product and the base
product. This field will eventually specify which item to use for customary
content in the Customary Content Item Code field and which item to
use for metric content in the Metric Content Item Code field.
Note: These two item code fields are not filled in at this time, as items
have not yet been created. Please see Appendix E for a complete
description of configuring content pricing.
14. Accept the screen to save the system information.
130
8/9/05
Defaults Configuration
The information entered on the Defaults Configuration screen standardizes
your COMMANDseries system. The information entered on this tab serves as
the defaults for various data entry functions, making the process more
efficient.
Topics in this section:
Defaults Configuration Setup
Customer Sales Defaults Setup
Customer Taxing Defaults Setup
Customers Pricing Defaults Setup
Customer Charges Defaults Setup
Customer Accounting Defaults Setup
Customer Invoicing Defaults Setup
Customer Distribution Defaults Setup
Distribution Configuration
Defaults Configuration Setup
To set the defaults configuration:
1.
From the Configuration screen, select the Defaults tab. {Files > General
Information > Configuration > Defaults}
Configuration – Defaults Tab (EDTCNFXB)
The Dispatching Defaults fields allow you to establish “ultimate” defaults for
key dispatching fields. That is, if you specify a Default Schedule Load Size,
8/9/05
131
then the system will use that value only if it cannot find a load size anywhere
else in the system.
2.
3.
4.
5.
6.
7.
8.
Specify the primary dispatching product line for this system in the
Dispatching Defaults Product Line field.
Mark the Copy To All checkbox if the defaults should be applied to all
items in the specified product line.
The Product Price field is not currently used. Functionality for this field
will be added in future version of COMMANDseries.
Enter the default Scheduled Load Size to use in the Truck Types
screen’s Load Size field when entering new truck types in the system.
Select a default Scheduled Plant Code to assign to any new projects,
non-project orders, or tickets. To facilitate initial setup of the
configuration file, this field allows you to enter a plant code that does not
exist in the plant code file. If this is the case, make sure that you
subsequently enter the plant code on the Plants screen. {Files > Plant &
Delivery Information > Plants}
Specify the default color for the Tracking Truck Color field on the
Trucks screen for use in truck tracking. This is the default color when
entering new trucks. Plant colors take precedence over truck colors. If
Plant 1 has green trucks, a blue truck from Plant 2 turns green if clocked
in at Plant 1. This occurs only if the plant has a specified color.
Set the default value for the Tracking Truck Flag field on the Trucks
screen. The flag set for the truck is used on the Truck Tracking screen
when displaying the truck.
Masterfile settings control basic Data I/O functions.
9.
Specify the Master File Data In Defaults to set the error message
logging. Use these defaults to validate certain fields representing foreign
keys to COMMANDseries tables.
When an invalid field is encountered, the Configuration Customer Default
value is used. If the Configuration Default value is invalid, the Data In
record is rejected. A log of all substitutions and rejections is added to the
existing log of records. An option to write the log to a Database table
(instead of a Log Report) is available using the pull-down menu.
10. Set the default Language to use in the system. This can be overridden at
the user level on the Users screen {Files > System Information > Users}
or from the Preferences screen {Miscellaneous > Preferences}.
11. Select the Date Format for dates to display throughout the
COMMANDseries applications.
12. Select Month before day or Day before month in the Date Order
field.
Customer Defaults
The buttons along the bottom of the Defaults form allow you to establish
defaults for new customers. These option cover the majority of the fields in
132
8/9/05
the customer record, so that establishing the defaults will save a great deal of
time during data entry.
Customer Sales Defaults Setup
To configure customer sales defaults:
1.
From the Customers Defaults section at the bottom of the Defaults tab,
select the Sales button. {Files > General Information > Configuration >
Defaults > Sales}
Customer Sales Defaults (EDTCNFX3)
2.
3.
4.
5.
Select a Concrete or Aggregate from the Product Line field’s list.
Mark the Copy To All checkbox if necessary. When marked, this copies
customer sales configuration to all available product lines.
Enter a Sales Analysis Code. This field provides the default value for
the Sales Analysis Code field on the Customers screen when adding a
new customer. {Files > Customer & Project Information > Customers}
Enter a Salesman code. This field provides the default value for the
Salesman field on the Customers screen when adding a new customer.
{Files > Customer & Project Information > Customers}
Customer Taxing Defaults Setup
The Customers Taxing configuration tab allows you to enter the values that
will serve as defaults in the customer files.
To enter customer taxing defaults:
1.
From the Customers Defaults section at the bottom of the Defaults tab,
select the Taxing button. {Files > General Information > Configuration >
Defaults > Taxing}
Customer Taxing Defaults (EDTCNFX4)
2.
3.
8/9/05
Select a Tax Code that best represents the majority of your customers’
tax location. This code is the default tax code for the customer’s file.
From the Taxable field’s list, indicate whether the customer file’s default
is Taxable or Non-taxable.
133
4.
Select a Non Taxable Reason. This should best represent the majority
of your customers who are non taxable.
Customers Pricing Defaults Setup
The Customers Pricing configuration button allows the privileged user access
to fields in the configuration file that deal with the COMMANDreceivables
application. These fields provide a means of customizing
COMMANDreceivables without requiring changes to the program.
To enter customer pricing defaults:
1.
From the Customers Defaults section at the bottom of the Defaults tab,
select the Pricing button. {Files > General Information > Configuration
> Defaults > Sales}
Customer Pricing Defaults (EDTCNFX5)
Note: This graphic combines elements from concrete and aggregate
pricing screens.
2.
3.
4.
5.
134
From the Product Type field’s list, select Concrete or Aggregate.
Select a Price Category. This field provides the default value for the
Price Category field on the Customers screen when adding a new
customer. {Files > Customer & Project Information > Customers}
Select a Pricing Plant Code. This field provides the default value for the
Sales Analysis Code field on the Customers screen when adding a new
customer. {Files > Customer & Project Information > Customers}
If You are configuring aggregate pricing, select a Type Price. The
options are:
•
FOB Price
•
Fix Cartage Delivered Price
•
Fix Mat’l Delivered Price
8/9/05
6.
7.
8.
9.
For an explanation of these different pricing options see the Fixed
Delivered Price section in the Items section of this manual.
Enter a Trade Discount Percent and Trade Discount Amount. These
fields provide the default values for the Trade Discount Percent and
Amount fields, respectively, on the Customers screen when adding a new
customer. {Files > Customer & Project Information > Customers}
Select a Terms Code and a Zone Code. These fields provide the default
values for the Terms Code and Zones Code fields, respectively, on the
Customers screen when adding a new customer. {Files > Customer &
Project Information > Customers}
If the product line is Aggregate, Asphalt, or Block, the Cartage Rate
Table field displays. Enter a code for the cartage rate table to use in
pricing.
Several customer-pricing options are set up using the checkboxes at the
bottom of the screen. Mark all checkboxes necessary to configure
defaults according to your preference. They are as follows:
•
Apply Zone Charges (concrete only)
•
Print Prices on Ticket
•
Allow Price Change in O/E?
•
Restrict Orders to Customer Products
•
Apply Minimum Haul Charges (aggregate only)
•
Allow Automatic Price Adjustments
Customer Charges Defaults Setup
To enter customer charges defaults:
1.
From the Customer Pricing screen, select the Charges button. {Files >
General Information > Configuration > Defaults > Pricing > Charges}
Customer Charges Defaults (EDTCNFX6)
2.
3.
8/9/05
From the Product Type field’s list, select Concrete or Aggregate. Set
the Copy to All flag if desired.
Select the Minimum Load, Seasonal, and Unloading Charges as
needed.
135
4.
Mark the Apply Minimum Load Charges, Apply Seasonal Charges,
and/or Apply Unloading Charges checkboxes if you want to apply the
charge tables specified in the fields above.
Note: The minimum load options only display if the product line is
Concrete.
5.
6.
7.
Mark the Create Separate Invoice if desired. When marked, this
checkbox causes minimum load charges to be printed on separate
invoices.
Mark the Seasonal and Unloading Charges on Separate Invoices
checkboxes if you want to apply the charges on a separate invoice.
Accept the Customer Charges Defaults screen to save the charges
defaults information.
Customer Accounting Defaults Setup
The information on this tab serves as default information for the
corresponding customer file fields.
To enter customer accounting defaults:
1.
From the Customer Defaults tab, select the Accounting button. {Files >
General Information > Configuration > Customers > Accounting}
Customer Accounting Defaults (EDTCNFX7)
2.
3.
4.
5.
6.
136
Enter the default Statement Cycle and Accounting Category.
Mark the Apply Finance Charges checkbox if necessary. When marked,
this checkbox causes the automatic application of finance charges.
Mark the Print Statements checkbox if necessary. When marked, this
checkbox causes statements to print automatically.
Select a Credit Code and a Credit Limit to default for all customers.
Mark the Purchase Order and Job Number checkboxes if necessary.
When marked, these checkboxes cause a purchase order and/or job
number, respectively, to be required in Order Entry.
8/9/05
7.
Select a Suspend Order Reason Code. This code is helpful if billing
preparation begins at the plant and is completed at a billing office. In this
situation, the order condition of being suspended or released may be
used as a signal to the next department that some stage of billing
preparation has been completed. The Suspend Order Reason Code serves
as the default for all new customers entered.
Customer Invoicing Defaults Setup
The information on this screen serves as default information for the
corresponding fields in the customer editor.
To enter customer invoicing defaults:
1.
From the Customer Defaults section at the bottom of the Defaults tab,
select the Invoicing button. {Files > General Information >
Configuration > Defaults > Invoicing}
Customer Invoicing Defaults (EDTCNFX8)
2.
3.
4.
5.
6.
7.
From the Print One Invoice Per field’s list, select the print option to
default into the customer files.
From the Print Products/Tickets field’s list, select either detail or
Summary for the default format for printing of products/tickets.
From the Invoice Frequency field’s list, select Daily, Weekly, or
Monthly as the default frequency for invoicing.
From the Haul Charges field’s list, select to print haul charges as a
separate line item or to combine them with the material price.
From the Minimum Haul Charges field’s list, indicate whether to print
the total minimum haul charge or to separate the actual and incremental
haul charge.
Mark the Separate Invoices by Product Line if you want invoices to be
separated by product line.
Customer Distribution Defaults Setup
The information on this screen serves as default information for the
corresponding fields in the customer editor. These fields carry over to
individual orders.
8/9/05
137
To enter customer distribution defaults:
1.
From the Customer Defaults section of the Defaults tab, select the
Distribution button. {Files > General Information > Configuration >
Customers > Distribution}
Customer Distribution Defaults (EDTCNFX9)
2.
3.
4.
5.
6.
From the Product Type field’s list, select Concrete or Aggregate.
Mark the Copy To All checkbox if necessary. When marked, this copies
the customer distribution configuration.
Select a default Tracking Order Color.
Mark the Print Mix Weights on Tickets checkbox if necessary. When
marked, this checkbox causes mix weights print on the tickets.
Select a default Order Measurement System from the field’s list. The
options are Customary Only, Metric Only, or Customary or Metric.
Distribution Configuration
This form enables feature customization of several COMMANDseries functions,
to setup customer distribution defaults.
To enter distribution configuration:
1.
138
Select Files > General Information > Configuration > Distribution.
8/9/05
Configuration – Distribution Tab (EDTCNFXD)
2.
3.
4.
5.
6.
8/9/05
In the Days To Save Detail field, enter the number of days that detailed
information on orders and tickets should be saved. The value entered
here is used by the Purge Expired Orders and Tickets screen to determine
the effective purge date. Value here range from 180-720 (6 months to
two years).
In the Number of Days Back To Allow Dispatch field, indicate how
many days, prior to the current date, dispatching can take place.
Dispatching includes entering orders, typing tickets, etc. To allow
dispatching only for the current and future days, enter zero (0). If you
regularly deliver after midnight, this value should be set to one (1).
The Change Signaling Unit Field is used to manage a truck’s
autosignaling comm manager assignment.
•
Select With Inbound Messages to have the system update the
truck’s comm manager whenever an inbound message is recieved.
This option is generally used in a central dispatch environment.
•
Select With Current Plant to have the system change the signaling
unit’s comm manager only when it’s current plant value changes.
This option is generally used in local dispatch setting, in which each
plant has a commmanager located at the plant.
•
Select Never to never automatically change the comm assignment.
This option is generally used if there os only one comm manager.
Use the Cartage Frequency field to select the frequency that cartage
payments are calculated.
The Default Schedule Adjustment Type field sets a default value for
the Schedule Adjustment Type field on the Order Schedule screen. This
139
field establishes if/how the system will recalculate a delivery schedule
when a ticket is printed early or late.
7. The Require Order Qty on Non-primary Products for Orders allows
you to prohibit zero order quantities on extra and associated products.
8. The Default Schedule Adjustment Type determines what happens to the
schedule for the remaining loads for an order. It has no impact on the
current ticket, however. The soon-to-be-renamed Apply Schedule
Adjustment Type determines what happens to the ticket times for the
current ticket.
•
Use Schedule Adjustment Type--if a ticket is printed early, the
ticket time sent to batch panel is the current time. Depending on the
batch panel configuration, this setting can cause problems for
customers who pre-ticket, because the ticket time reflects an
updated schedule--the ticket is going to be batched at the originally
scheduled time, you’re just stacking it in advance.
•
Don’t Use Schedule Adjustment Type--The relevant ticket times
that print on the ticket will reflect the original schedule, not an
updated one.
9. Select Dynamic Fleet Size to allow for changed in the fleet size during
the course of business day.
10. Allow Dispatch to Activate Quotes enables users running the dispatch
software to activate and ship based on quote records. They system will
generate a corresponding project.
11. Select the Use Shipping Address checkbox if you want to get a
Shipping Address form instead of a generic zoom box when detailing on
the Delivery Address field of an order form.
Note: Because the Shipping Address form, unlike the standard Delivery
Address field, employs fixed-width fields, it is more appropriate for
certain data export needs. Command Alkon recommends that all
users activate this setting. Customers using the MapPoint
interface must activate this flag.
12. Select Tax FOB Shipments based on the Shipping Plant’s Tax Code
to tax FOB orders as origination taxing even if your tax codes are
configured for destination taxing.
13. If Use Shipping Address is selected, Require Postal Code will be
enabled. If this flag is set, then orders cannot be saved without a valid
entry in the Postal Code field.
14. Enable Update Scheduled Qty Based on Ordered Qty if you want Order
Entry to update associated Schedule Quantities whenever the Order
Quantity is reduced.
Note: If a newly entered Order Quantity is greater than the Schedule
quantity, the Schedule Quantity will always be increased,
regardless of this setting.
The next three fields configure Automatic Travel Time Posting (see page
102 for a detailed explanation.)
140
8/9/05
15.
16.
17.
18.
Enter the Travel Time Post Tolerance.
Enter the Acceptable Travel Time Load Percentage.
Enter the Total Travel Time Loads.
If you will be using Order-level Mix Design, select the Allow Order Level
Mix Design checkbox. Two additional fields will appear.
19. Default Mix Design Approval Status, either Mix Design Not
Approved or Mix Design Approved. This identifies the mix as usable or
not usable by Quality Control.
Note: Once enabled at the system level, use Order-level Mix design must
be enabled for individual users. See the Users section for more
information.
20. If you are using the Mix Design screen, enter a Mix Design Document
Format to print out mix designs.
21. If you are using an encryption equation to provide security for your QC
connection to COMMANDseries, press the QC Encryption button.
Batch Code Encryption Equation (EDTCNFX2)
Enter the encryption equation and Accept the screen.
22. If you are licensed for the Material Manager, the Material Manager button
will display. Press the button to call the Material Manager Configuration
screen.
Material Manager Configuration (EDTCNFY1)
23. Enter the System Lab Location for Material Manager.
24. Enter appropriate Conversion constants.
25. Accept the screen to return to the Distribution tab.
8/9/05
141
26. Proceed to the Dispatch tab.
Dispatch Configuration
The Dispatch Configuration tab allows customization of the dispatching
features of several of the COMMANDseries functions.
To enter dispatch configuration:
1.
Select the Dispatch tab from the Configuration screen. {Files > General
Information > Configuration > Dispatch}
Configuration – Dispatch Tab (EDTCNFXE)
2.
3.
4.
Select Concrete or Aggregate from the Product Line field’s list.
Mark the Copy To All checkbox if necessary. When marked, this
checkbox copies the configuration settings that are specific to this
product line to all other product lines.
From the Truck Tracking First Status field’s list, select Printed or
Load. This option identifies the status that causes a ticket to be
displayed on the Truck Tracking screen.
Note: If tickets are typed well in advance of being loaded on a truck
(pre-ticketed), use Load as the first truck tracking status.
Note: This field displays only if Concrete is the specified product line.
5.
6.
142
In the Truck Tracking Orders-To-Load Lead Time field, specify the
number of minutes prior to an order’s scheduled start time the order will
appear on the display on the Truck Tracking screen. A low value keeps
the on-screen data to a minimum, while a higher value keeps more
orders on the Tracking screen, allowing for easier access. Typical values
are 120 to 240 (2-4 hours).
Specify the type(s) of Truck Tracking Messages Allowed to display in
the Message Area of the Truck Tracking screen from the field’s list. The
options are: Messages Only, Statuses Only, Messages and Statues.
8/9/05
7.
8.
9.
In the Earliest pre-ticket status field, select a status from the list. This
status is the earliest status from which a truck can be pre-ticketed.
Mark the Allow P.O. Change on Ticket checkbox if necessary. If
marked, this checkbox allows the Purchase Order field, as entered on
the Orders screen, to be changed on the Tickets screen. The feature
allows tickets to have different purchase order numbers than their orders.
Mark the Default Pricing Plant from Scheduled Plant checkbox if
necessary.
If you do not use delivery methods, zone codes, or map pages, you can elect
to eliminate them from the Order screens to prevent confusion.
10. Mark the Show Delivery Methods in Orders/Tickets checkbox if
necessary. Many concrete companies do not use delivery methods, and
eliminating the field form the order form simplifies order entry.
11. Select an option in the Show Map Page in Orders/Tickets field. The
options are:
•
No – The field will not be displayed.
•
Yes – The field will be displayed.
•
Required – The field will be displayed, and an entry will be
required.
12. Select an option in the Show Zone Code in Orders/Tickets field. The
options are the same as described in the previous field.
13. The Order Schedule screen has a button that specifies whether the
Ticketing screen should take the load size from the truck or the schedule.
The Default Schedule Load Size From field establishes the system
default for that button.
14. If you are printing barcode cards from COMMANDseries, you will need to
specify a Truck Barcode Ticket Format.
15. If you are printing barcode cards from COMMANDseries, you will need to
specify a Truck Barcode Ticket Sequence. You can create a dummy
ticket sequence that the system will use to generate barcodes.
The final two fields control how totals are diplayed on the Tracking screen.
16. The Truck Tracking Plant Line Quantity allows you to display either
the Ordered Quantity or the Scheduled Quantity on the Plant Summary
Line.
17. The Truck Tracking Order Line Quantity allows you to display either
the Ordered Quantity or the Scheduled Quantity on the Order Line.
18. Accept this screen to save these configuration settings.
Aggregate Configuration
The Aggregate Configuration screen allows the privileged user access to
customization options specific to COMMANDaggregate.
8/9/05
143
To enter aggregate configuration information:
1.
From the Configuration screen, select the Aggregate tab. {Files >
General Information > Configuration > Aggregate}
Configuration – Aggregate Tab (EDTCNFXF)
2.
Mark the Allow Manual Weights checkbox if necessary. This checkbox
enables the user to enter weights in aggregate ticketing instead of
allowing the scale interface to default weights.
3. Mark the Allow Ticketing Overloaded Trucks checkbox if necessary.
This checkbox allows ticketing of trucks whose max load quantity is less
than the load quantity on the ticket.
4. Mark the Weigh Trailers Separately checkbox if necessary. When
marked, this checkbox allows trailers to be weighed separately from the
truck.
5. Mark the Tare Each Load checkbox if necessary.
6. Mark the Exceed Ordered Quantities checkbox if necessary. When
marked, this checkbox allows aggregate orders to exceed the quantity
specified by the customer.
7. In the Overhead Load Out Prompt for Load Deviation % field, enter
the maximum percentage by which the target net weight can differ from
the actual net weight. If the value is exceeded, the dispatcher will be
prompted for confirmation.
8. In the Overhead Load Out Drop Information, select how you wish to
control individual drops. The options are Edit Tons Per Drop and Edit
Percent Drop.
9. If the Show Truck Underloaded Prompt option is enabled, then the
system will display a confirmation prompt if you attempt to ticket a truck
with a load size less than the minimum load size specified in the Truck
file.
10. Mark the Display PO Number, Zone, and/or Cartage Rate on Front
Screen of Aggregate Ticketing checkboxes if necessary. These
144
8/9/05
checkboxes allow you to remove unwanted fields from the Ticketing
screen.
When a truck comes in to be dispatched, the system tries to determine the
last order the truck hauled. If that order date is outside the range permitted
by the Days Back to Allow Dispatch field, the system can resolve the conflict
by useing the old order, or copying the old order to a new one. The next three
fields address how certain dispatch and ticketing functions handle
information.
Note: These fields are discusses in a different order from their on-screen
order.
11. Select an option from the Aggregate Ticketing Order Copy Option
field:
•
Do not copy any orders--The user must manually specify an
order.
•
Copy standing orders--If the truck last hauled on a standing
order, and that order is still active, that standing order will be copied
and the truck ticketed on that copy. If there is no active standing
order, the user will have to manually assign an order code.
•
Copy all orders--The system will automatically copy the last order
the truck hauled, and dispatch/ticket the truck to that order.
This field addresses auto-ticketing functionality. The previous field
addresses manual dispatch/ticketing.
12. If some of your plants are configured for auto-ticketing, you may want a
different order copy rule in place for them. Select the option (from the
same choices) in the Auto Ticketing Order Copy Option field.
13. If the Enhanced Order Suggestion in Aggregate Ticketing field is set
to Disable, then the system will copy/not copy based on the value of the
Aggregate Ticketing Order Copy Option field.
If the field is set to Enable, then the system will display a message box
prompting the dispatcher/weighmaster to select an appropriate option.
14. When an auto-ticketing lane is configured as a tare/gross lane, the
system must be able to distinguish between a loaded truck (to be
ticketed) and an empty one (to be tared). This is accomplished through
the Truck Minimum Weight over Tare for Gross field. Enter a value
(the default UOM is tons; that can be changed by detailing on the field).
Let’s say that you entered 1000. When a truck drives onto the scales,
COMMANDseries gets the weight and compares it to the tare weight in
the truck record. If the scale weight is greater than the truck tare weight
+ 1000, the system concludes that the truck is loaded and tickets it using
the weight as a gross weight. Otherwise, the truck is tared at the new
weight.
15. Accept this tab to save the Aggregate Configuration settings, or select
another tab to configure more information.
8/9/05
145
Signaling Configuration
The Signaling tab allows to establish system-level settings for the Mobile and
Auto-Signaling systems.
Configuration -- Signaling Tab (EDTCNFXQ)
1.
Default GPS Radius establishes the standard radius used by AutoSignaling to determine if a truck has reached a given destination.
Note: The UOM for this field is meters; that UOM cannot be changed.
2.
The Tracking screen uses the GPS Indication Symbol to designate
addresses with valid GPS coordinates. The symbol is displayed at the
beginning of the Delivery Address on the Tracking screen.
If the field is left blank, an asterisk (“*”) will default.
3.
The Map Interface Type field has three options:
•
MapPoint 2001/2002
•
Thomas Bros.
•
Generic
The generic interface was initially identical to the MapPoint interface. As
additional features are added to the MapPoint interface, the generic
interface will be left unchanged, to provide map support for additional
map programs.
Currently, only the Tracer NET map program has been tested with the
generic interface.
Note: While COMMANDseries does nominally support MapPoint 2001, the
most recent version of COMMANDmap was written specifically for
MapPoint 2002.
The remaining fields address the issue of updating job coordinates. When a
GPS-enabled truck sends a Pour status back to base, COMMANDseries will
automatically poll the unit for updated coordinates. This feature is initially
configured using the following fields.
4.
146
Truck Poll Type--This drop-down setting determines what trucks will be
polled. The options are:
•
Do Not Poll
•
Poll First Truck
•
Poll Every Truck
8/9/05
Note: A corresponding field in order and project records is set based on
this value, allowing you to modify these values on a smaller scale.
Once polling returns updated coordinates, information is updated based on
three checkbox settings:
5.
Update Coordinates for Trucks in Progress--Updates trucks en route
to the site. Updated coordinates are sent to the truck and updated in the
ticket record (TICK).
6.
Default Update Project Map Coordinates--If this box is checked, then
the Update Project Map Coordinates field on all new projects will be
set to True.
Default Update Order Map Coordinates--If this box is checked, then
the Update Order Map Coordinates field on all new Updates coordinate
records in the order file. All subsequent tickets on the order will receive
the updated coordinates.
7.
Invoicing Configuration
The Invoicing Configuration screen allows the privileged user access to fields
in the configuration file that deal with the COMMANDinvoicing application.
These fields provide a means of customizing COMMANDinvoicing without
requiring changes to the program.
To enter invoicing configuration information:
1.
Select Files > General Information > Configuration > Invoicing tab.
Configuration – Invoicing Tab (EDTCNFXG)
2.
8/9/05
Enter the Invoice Format Group Code. This field is used to specify the
code that represents the desired document layout for generating
invoices.
147
3.
4.
5.
6.
7.
8.
9.
10.
11.
12.
13.
14.
From the Invoice by Order or Ticket Date field’s list, select Order Date
or Ticket Date.
Indicate whether the Terms Discount Calculation Method should be to
Compute pre-tax discountable amount or Compute pre-tax
discountable amount plus tax amount.
If the Terms Discount Calculations field is set to Compute pre-tax
discountable amount, the Compute Tax on Discount Amount
checkbox will be activated. When marked, this checkbox causes the tax
effect of any discount offered on an invoice to be calculated and stored
for the invoice.
Mark the Separate/Suspend Credit and Debit Memos checkbox if
necessary. When marked, this checkbox allows the authorization of credit
memos before they are posted to Accounts Receivable.
Mark the Use Plant Level Terms Code checkbox if necessary.
Mark the Use Product Level Terms Code Discount Overrides
checkbox if necessary. The terms code determines the discount date. The
actual discount amount or percent is assigned at the item/product level,
as a default, which can be overridden by either a customer/product or
project/product. This allows for each product to be discounted at a unique
rate, which can vary by plant, as well.
Mark the Store and Report Sales Tax By Shipping Plant checkbox if
necessary. When marked, this checkbox causes tax to be computed
according to the tax at the plant shipping the materials.
Mark the Book Sales Tax Payable to G/L By Shipping Plant checkbox
if necessary (only available if the Compute Tax By Shipping Plant
checkbox is marked). When marked, this checkbox causes sales tax
payable to be recorded to the General Ledger by shipping plant instead of
pricing plant.
Select a Tax Location Non Taxable Reason. If a reason code is
entered here, it will be the default reason code for any applicable nontaxable sales.
Select Concrete or Aggregate from the Product Line field’s list. Mark
the Copy To All checkbox to copy these configuration settings to all
other product lines.
Select a Credit/Debit Memo Reason Code. The reason code allows you
to more effectively track credit and debit memos.
Proceed to the Inventory tab.
Inventory Configuration
The Inventory Configuration option allows the privileged user access to fields
in the configuration file that deal with the COMMANDinventory application.
These fields provide a means of customizing COMMANDinventory without
requiring changes to the program.
148
8/9/05
To enter inventory configuration information:
1.
From the Configuration screen, select the Inventory tab. {Files > General
Information > Configuration > Inventory}
Configuration – Inventory Tab (EDTCNFXH)
2.
3.
Select a G/L Source Code.
From the Costing Method field’s list, select Standard, Average, or
Replacement Cost. This field designates the costing method used for
items maintained in COMMANDinventory. Once established, a change in
the costing method is a change in accounting principle.
The checkboxes configure inventory GL updates. The Inventory routine
creates inventory information, but does not create inventory transactions
(usages). A separate routine creates the usages, which are then posted.
4.
5.
6.
Select the Automatically Create GL Entries box (the last checkbox) if you
want GL entries to be created when usages are posted.
If the Create Gl Entries flag is enabled, the system will create entries for
all of the inventory transaction type checked in the remaining fields.
Proceed to the Receivables tab.
Receivables Configuration
The Receivables Configuration screen allows the privileged user access to
fields in the configuration file that deal with the COMMANDreceivables
application. These fields provide a means of customizing
COMMANDreceivables without requiring changes to the program.
To enter receivables configuration information:
1.
8/9/05
From the Configuration screen, select the Receivables tab. {Files >
General Information > Configuration > Receivables}
149
Configuration – Receivables Tab (EDTCNFXI)
2.
3.
4.
5.
6.
7.
8.
Enter the number of Discount Grace Days and select a default
Discount Method. The discount method can be changed at the
customer, project, and order level.
Enter a Chargeback Adjustment Code for invalid discounts.
Select a G/L Source Code and Quantity G/L Source Code to indicate
the source code to be used when a COMMANDfinancials transaction batch
is created for COMMANDreceivables activity and quantity activity,
respectively.
Select a Tax on Discount Non-tax Reason Code. This field indicates
the non-tax reason code to assign to sales tax adjustments made when a
tax on discount is applied on the COMMANDreceivables Payments screen.
{Transactions > Payments}
Select a Receipts Format Group Code. This field is used to print an AR
receipt for payments and void payments.
Select a Receipts Next Number Sequence Code. This field indicates
the numbering system to be used for the receipts. The options of this
field are set up on the Next Numbers screen.
If you have multiple companies, you may want to maintain customer
credit ratings by company. If the Maintain Credit by Company box is
checked, then when customer credit information is entered (on the
Customer-Accounting tab), you will be able to enter separate Credit
Codes for each company.
Note: This option must be activated before any customers are entered.
Once customer information has been entered in the Customer
Credit table (CUCO), the field will be deactivated.
150
8/9/05
9.
10.
11.
12.
13.
14.
15.
If you are maintaining credit by company, you may need to restrict
customer lookups by company. You can do this by returning to the Users
editor and assigned users to companies on the Options tab.
Mark the Use Cutoff Date for Subtransactions checkbox if necessary.
When checked, and a date is entered in the Ending Cutoff Date field,
only those subtransactions (payments, adjustments, credit/debit memos,
etc.), that are dated on or before the cutoff date, are considered when
computing the invoice’s outstanding balance for the payment being
entered.
Enter the Summary Report Line Spacing. This field indicates the
number of blank lines to be printed between each customer on the
Summary Report option when running the Aged Trial Balance. {Reports >
Aged Trial Balance}
Mark the Print Discount Available checkbox if necessary. When
marked, this checkbox causes the total discount available to be printed
when running the Detail Report Option on the Aged Trial Balance.
{Reports > Aged Trial Balance}
Mark the Print Zero Items checkbox if necessary. When marked, this
checkbox causes transactions with a zero balance to be printed when
running the Detail Report Option on the Aged Trial Balance. {Reports >
Aged Trial Balance} Otherwise, they will be excluded from the report.
In the Net Revenue section, select Transaction Date or Aging Date as the
Post Date Code.
Using the checkboxes, select which transaction types update the Net
Revenue field in the customer history file. If selected, the amount of the
transaction for the transaction type is posted to the Net Revenue field
when the Post Transactions routine is performed. The Net Revenue field
is used on the Percentage Outstanding Report option when calculating
the percentage of an outstanding balance to its original revenue amount.
{Reports > Percentage Outstanding}
Please note that you need to use the scrollbar to see all available
transaction types.
Accept this screen, or select another tab to configure more information.
Receivables Aging Configuration
The Receivables Aging Configuration screen allows the privileged user access
to fields in the configuration file that deal with the COMMANDreceivables
application. These fields provide a means of customizing
COMMANDreceivables without requiring changes to the program.
To enter receivables aging configuration information:
1.
8/9/05
From the Configuration screen, select the Aging tab. {Files > General
Information > Configuration > Aging}
151
Configuration – Aging Tab (EDTCNFXJ)
2.
3.
4.
5.
6.
7.
Select an Aging Method from the field’s list. This field determines how
aging is performed on all report options on the Aged Trial Balance Report
screen and the Inquiry Report. {Reports > Aged Trial Balance} and
{Credit > Inquiry Report}
Select an Aging by Date Code from the field’s list. This field determines
the date to be used when aging each transaction balance on all report
options on the Aged Trial Balance Report screen and the Inquiry Report.
{Reports > Aged Trial Balance} and {Credit > Inquiry Report}
Enter an Aging Prox Day. This field is used to specify the day of the
month used when By Prox Date is chosen for the Aging Method field on
this screen.
From the Aging Buckets fields’ lists, identify the group of aged balances
to appear in each of the aging buckets on all report options on the Aged
Trial Balance Report screen and the Inquiry Report. {Reports > Aged
Trial Balance} and {Credit > Inquiry Report}
The available options in these fields are determined by the selected Aging
Method.
Enter the Description, or label, is to be printed in conjunction with the
corresponding aging bucket on all report options on the Aged Trial
Balance Report screen and the Inquiry Report. {Reports > Aged Trial
Balance} and {Credit > Inquiry Report}
Proceed to the Statements tab.
Receivables Statements Configuration
The Receivables Statements Configuration screen grants access to fields in
the configuration file that deal with the COMMANDreceivables application,
provided the user has the prerequistie priviledges. These fields allow
customization of COMMANDreceivables without requiring changes to the
program.
152
8/9/05
To enter receivables statements configuration information:
1.
From the Configuration screen, select the Statements tab. {Files >
General Information > Configuration > Statements}
Configuration – Statements Tab (EDTCNFXK)
2.
3.
4.
5.
6.
In the Statement Option field, select the manner in which A/R
statements are to be formatted with respect to customers and
companies.
Enter a Discount Day, the default day of the month that discounts are
due.
Mark all desired checkboxes to define how the system groups and totals
transactions for printed forms.
Select Statement Aging Message Codes for all of the necessary Aging
Categories to be printed on statements. (See “Message Text” on
page 69.)
Select a Statement Format Group Code to define the statement’s
layout. These codes are set up on the Document Format Group Codes
screen. {Files > General Information > Documents > Document Format
Group Codes}
Financials Configuration
The Financials Configuration screen allows the privileged user access to fields
in the configuration file that deal with the COMMANDfinancials application.
These fields provide a means of customizing COMMANDfinancials without
requiring changes to the program.
8/9/05
153
The code length fields, which are used by COMMANDinvoicing and
COMMANDreceivables were set earlier in the File Build process. If you need to
adjust these lengths after your G/L information structure has been entered,
you will need to use the Realign Accounts and Cost Centers function (See
the System Management manual for additional information).
The remaining fields (Number of Budgets, Budgets Round to, and
Multiple Companies) relate to a financials package no longer supported by
Command Alkon, and should be ignored for new systems.
Configuration – Financials Tab (EDTCNFXL)
Projects/Quotes Configuration
The Projects/Quotes Configuration option allows the privileged user access to
fields in the configuration file that deal with projects and COMMANDquote.
To enter projects/quotes configuration:
1.
From the Configuration screen, select the Projects/Quotes tab. {Files >
General Information > Configuration > Projects/Quotes}
Configuration – Projects/Quotes Tab (EDTCNFXM)
154
8/9/05
2.
3.
4.
5.
If desired, enter a Next Project Sequence Code. This options allows
users to establish a formal next numbers sequence for new project codes.
Enter a Default Quote Document name. This should be the path and
filename of the default document template to be used when printing
quotes in Microsoft™ Word®.
Select a Next Quote Code Sequence Code. This field determines the
number sequence for the assignment of quote codes.
The four checkboxes on this tab determine how the COMMANDseries
calculates the product price at the project or quote level.
For example, a customer gets a $2 per cubic yard trade discount on a
particular mix. If the "Use Project/Product Trade Discount..."
checkbox is marked, when a mix is entered on the project product tab,
the price displayed will reflect the list price minus the trade discount.
Mark or clear the following option checkboxes, as necessary:
•
Use Project/Product Trade Discount Rules to Calculate
Suggested Price for Project Products
•
Use Project/Zone Zone Charge Rules to Calculate Suggested
Price for Project Products
•
Use Quote/Product Trade Discount Rules to Calculate
Suggested Price for Quote Products
•
Use Quote/Zone Zone Charge Rules to Calculate Suggested
Price for Quote Products
Lien Configuration
Lien configuration has a wide array of options. In addition, lien configuration
is dependent on the lien laws in the states in which the user does business. As
a result, it is recommended that Lien configuration be done separately from
the File Build.
For instructions regarding the configuration of the Lien application, please
refer to the Configuration section of the COMMANDlien User’s Manual.
User Fields Configuration
The User Fields Configuration option allows the privileged user the ability to
configure custom fields in COMMANDseries. These fields provide a means of
customizing COMMANDseries without requiring changes to the program.
To enter user-defined fields configuration:
1.
8/9/05
From the Configuration screen, select the User Fields tab. {Files >
General Information > Configuration > User Fields}
155
Configuration – User Fields Tab (EDTCNFXO)
2.
3.
4.
In the Field Prompt fields, enter the desired title of the prompt. This is
the label that will display next to the field.
Associate the field with a file group in the Field Types fields. When the
screens in the Field Types field are accepted during every day use of the
application, the question in the Field Prompt field is asked of Orders user.
For example, in the screen capture example above, when the Orders
screen is accessed, fields for Usage Code and Customer Spec are
added to the Other Order Information screen.
The third question, QC Approval, does not display because it is not set
at the Items level.
Accept the User Fields Configuration screen to save the new user fields.
Optimization Configuration
Concrete Optimization is a licensed option in COMMANDseries that interfaces
with the ORTEC's Conactive Management Optimizer through the creation of
XML records for orders, tickets, truck statuses, and the truck and plant's
availability.
The Optimization Configuration fields are used to configure system defaults
for the COMMANDseries Optimization system. These defaults can then be
modified as needed at the Customer, Project, or Order level.
To enter optimization configuration:
1.
From the Configuration screen, select the Optimization tab. {Files >
General Information > Configuration > Optimization}
Configuration-Optimization screen (EDTCNFXR)
2.
3.
156
Enter the Default Maximum Load Size. This value will be used as a
default during order entry.
Enter the Default Priority. This value establishes a default scheduling
priority for orders. 1 is the lowest priority, 9 is the highest. 0 or [null] will
be interpreted as 9.
8/9/05
4.
8/9/05
Accept the screen.
157
Plant & Delivery Information
The following section address entry of basic plant and delivery information.
By entering this information, you are, in effect, laying the foundation for your
company’s dispatching operations.
Topics in this section:
Locations
Plants
Haulers
Truck Types
Trucks
Trailers
Delivery Methods
Pouring Methods
Job Cost Phases & Jobs
Zones
Map Pages
Deadhead Setup
Task Codes
Condition Codes
Driver Overtime Tables
Locations
The Locations screen allows the user (with appropriate system security)
access to add, edit, or delete locations. Locations are used to identify sites
where inventory items are maintained, such as a plant’s inventory or a central
warehouse’s inventory. In some cases, multiple plants may be assigned to a
single inventory location.
To add a new location:
1.
158
Go to the Locations screen. {Files > Item Information > Locations}
8/9/05
Locations (EDTLOCN)
2.
3.
4.
5.
6.
7.
Enter a number for the new Location Code.
Enter a Name and Short Name to describe the location.
Enter address information in the Address Line 1, Address Line 2, City,
State, Country, and Postal Code fields.
Enter phone number information in the Phone Number 1 and Phone
Number 2 fields.
Enter a Company code. This field represents the company or business
entity to which the location belongs. A company is uniquely identified by
a company code, which is edited on the Company screen.
Accept the screen.
Plants
Plants represent the physical sites from which items can be shipped and prices
can be set. Plants are used in a variety of ways throughout COMMANDseries
applications.
•
•
•
•
•
•
8/9/05
Items are assigned to individual plants to indicate item availability at the
plant.
Pricing, cost, inventory, batching, and other information can be set at the
plant level for each item.
Plants are assigned to trucks and drivers indicating the default home
base for each.
Plants are assigned to customers, projects, and eventually orders as
billing plants, indicating that the plant controls the prices charged and the
company to which the order and its subsequent invoice are assigned.
Plants are assigned to projects and eventually to orders as scheduled
plants, which control the plant from which order schedules are developed.
Plants are assigned to tickets as shipping plants, indicating the plant from
where the items are delivered.
159
•
Plants play a critical role in the process of charging sales tax in that they
are assigned a tax code indicating the tax authority/locations used for
point of origination taxing.
The Main tab provides basic information about plants. Through separate tabs
you can access communication, batching, scheduling, and costing information
about the plant. In addition, tabbed screens for plants, scales, bins,
constituent order, and user fields are available.
Before entering plant information, gather information about plant locations
from which you ship items including the batching capabilities of the plants and
item availability at each plant.
Topics in this section:
Plant Setup
Plant Main Tab Setup
Plant Communication Setup
Communications Port Setup
Plant Batching Setup
Plant Scheduling Setup
Plant Costs Setup
Plant Plants Setup
Plant Scale Setup
Plant Bins Setup
Constituent Order Setup
Plant User Fields
Plant Setup
To set up a new plant:
1.
Go to the Plants screen. {Files > Plant & Delivery Information > Plants}
Plant header
2.
3.
4.
160
Enter a code to define the new Plant.
Enter a Name and Short Name to identify the plant.
Select the tab that represents the type of information that you want to
set up.
8/9/05
Plant Main Tab Setup
The Main tab is used to set up basic information about the plant such as
address, tax code, zone code, inventory location, etc.
To set up main information:
1.
Select the Main tab on the Plants screen. {Files > Plant & Delivery
Information > Plants}
Plants – Main Tab (EDTPLNT1)
2.
3.
4.
Enter an Address on the three lines provided.
Enter a Phone Number for the plant.
Select the Company that owns the plant. Companies are defined on the
Companies screen in the General Information section. {Files > General
Information > Companies}
5. Select the primary Weighmaster for this plant. Weighmasters are
defined on the Employees screen. {Files > General Information >
Employees}
6. Select the Tax Code that applies to the plant’s location. Tax codes are
defined on the Tax Code screen in the Sales Tax Information section.
{Files > Sales Tax Information > Tax Code}
7. Select the Map Page on which the plant is located. The system uses this
information to estimate deadhead travel time between plants.
8. Select the Zone Code that indicates where the plant is located. Zones
codes are maintained on the Zones screen. {Files > Plant & Delivery
Information > Zones}
9. Select an Inventory Location. Inventory locations are defined on the
Locations screen. {Files > Item Information > Locations}
10. If you are using database replication, enter any unique number (that is,
do not use the same number as a Replication Target Number for any
8/9/05
161
11.
12.
13.
14.
15.
other replicating plant) to serve as the Replication Target Number. This
number represents the manager number that COMMANDreplicator uses
to communicate.
Select Next Number Sequences for the Order Code, Ticket Code, and
Invoice Code. Next number sequences are set up on the Next Numbers
screen. {Files > General Information > Next Numbers}
Mark the Tracking checkbox if the trucks based at this plant are tracked
on the Tracking and Scheduling screen.
Mark the Scheduling checkbox if the trucks based at this plant are
available on the Tracking and Scheduling screen.
If you would like to change the default Tracking or Order Truck Color
for this plant, select a new color.
Accept the screen to save the main plant information.
Plant Communication Setup
The Communications tab allows the privileged user access to communications
information for the plant. This includes information specific to the remote
printing and distribution of tickets, including those sent via the
COMMANDcomm interface.
To set up plant communication information:
1.
From the Plants screen, select the Communication tab to go to the Plant
Communication Information screen. {Files > Plant & Delivery Information
> Plants > Communication}
Plants – Communication Tab (EDTPLNT2)
2.
3.
4.
5.
162
Select a Device Type from the list for the plant’s ticket. This field
specifies if the tickets are passed to a printer or a batch panel.
Mark the Print Dispatch Copy if you want a copy of a ticket for this
plant to print at the dispatch office.
Mark the Allow Order Printing box if you want a copy of an order for
this plant to print to the plant specified on the Orders screen.
Mark the Allow Report Printing box if you to print reports to this plant.
8/9/05
6.
Click on the Setup button (the upper button of the two) for each active
form of plant communication in the Device Type field. The Plant
Communication Setup screen appears.
Note: If a specialized interface, such as a SmartPass, is specified as the
Device Type, the setup screen will be different. Please refer to the
documentation for the interface in question for more information.
Plant Communication Setup (EDTPLNTA)
7.
8.
Enter a Manager Number to specify the COMMANDcomm manager
number to be used when printing an order.
Enter an LPT or COM Port Name or select the proper printer from the
field’s list. In the case that a COM port is entered in the first field, the
second field becomes the Port button. See the following section for more
information.
Note: The Communication Port Setup screen requires that the settings
match the configuration of the printer or modem.
If you wish to print orders to a device that has already been set up within
Windows, select that device from the list. The Prompt option can also be
selected if you wish to allow the user to select the device at each print
command.
9. Enter a Selective Address. This field specifies the selective address
code to use when printing an order through a multi-drop phone line
where more than one output device exists.
10. If necessary, set the appropriate type of Document Format.
11. Mark the Auto Dial Flag if COMMANDcomm will use the information in
the Modem Phone Number and Modem Code fields to send data to a
remote printer.
12. Accept the screen.
Communications Port Setup
The Communications Port Setup screen allows you to define information about
the port.
To set up communications information for the port:
1.
8/9/05
Go to the Communications tab on the Plants screen. {Files > Plant &
Delivery Information > Plants > Communication}
163
2.
3.
4.
5.
Configure each of the Device Types, as necessary, using the Device
Type Setup button.
Click the lower Setup button, located in the Allow Report Printing section.
The Plant Communication Setup screen displays.
Enter a Manager Number and a Port Name (1 - 4). The Prompt field
changes to a Port button.
Click the Port button on the Plant Communications Setup screen. The
Communication Port Setup screen displays.
Communication Port Setup (EDTPLNTD)
6.
In the Baud Rate field, select the number that represents the bits of
data that the port can transfer per second.
7. In the Data Bits field, enter the number of bits that comprise a unit
(byte) of data.
8. In the Parity field, select the type of parity that is used to check for
errors during transmission. The options are Even, Odd, None, Mark, or
Space.
9. In the Stop Bits field, select the number of bits that indicate a byte has
been transmitted.
10. In the Flow Control field, select the process used to control the flow of
information. The options are as follows.
None – no flow control method is used.
XON/XOFF – the receiving port sends an XOFF signal when the
buffer (a temporary storage area) is full; the port stops sending
data; the receiving port sends an XON signal when it is ready to
receive more data.
Hardware – flow control is determined by the hardware
11. Accept the screen to return to the Plant Communications Setup screen.
Plant Batching Setup
To set up plant batching information:
1.
164
From the Plants screen, select the Batching tab. {Files > Plant &
Delivery Information > Plants > Batching}
8/9/05
Plants – Batching Tab (EDTPLNT3)
2.
3.
4.
5.
6.
7.
8.
Select a Maximum Batch Size. This is the maximum size allowed for
any single batch of ready-mix concrete product at the plant.
Enter the Mixer Time. This is the time, in seconds, to allow for the
plant’s mixer drum operation, per one yard or meter of ready-mix
concrete.
Enter the Batch Interface Polling Sleep Time, in minutes, which the
COMMANDcomm process sleeps, or waits, before polling the batching
computer for actual weight information.
Mark the Upload Weights From Batch Interface checkbox if
necessary. When marked, this checkbox causes the batching system to
update, or send back, actual weights for each ticket produced. You must
have a two-way batch interface in order to use this feature.
Mark the Update Batchwatch to enable coping batch weight information
to ConAd. This field will not be active unless ConAd is in the system
license.
Mark the Adjust Mix by Ticket checkbox if necessary. When marked,
this checkbox causes weights for constituent products to be sent with
each ticket that is sent to the batching system.
Enter the default Trim Percent information for the Accelerator, Hot
Water, Air, and Super Plasticizer. Each field specifies the trim percentage
for each category of admixtures, for the plant, when interfacing to a
batching computer.
Plant Scheduling Setup
To set up plant scheduling information:
1.
8/9/05
From the Plants screen, select the Scheduling tab. {Files > Plant &
Delivery Information > Plants > Scheduling}
165
Plants – Scheduling Tab (EDTPLNT4)
2.
3.
4.
5.
6.
7.
8.
Enter the plant’s Times. The times specify the following.
Driver Lead Time – the average time, in minutes, a driver needs
prior to loading the first ticket of the day at this plant
Pre-Load Time – the average time, in minutes, that the driver
needs to get his truck into loading position
Load Time – the average time, in minutes, required to load a truck
and be ready to load the next truck
Post-Load Time – the average time, in minutes, needed by a
driver after the truck is loaded before leaving the plant
The Orders screen and the Tracking and Scheduling screen to create
default scheduling information for orders and tickets use the information
in Times.
From the Load Time Usage field’s list, select how the load status is to be
treated in all scheduling functions for this plant. Loading indicates that
the load status time is from when the loading was started; Loaded
indicates that the load status time is from when the loading was finished.
Enter the On Job Wash Time to indicate the average time, in minutes,
required to wash the truck.
Enter the Default Number of Trucks. This field designates the number
of trucks, or fleet size, assigned to this plant. It is used to default the
fleet size on a daily basis for scheduling purposes on the Orders and
Tracking & Scheduling screens for orders and tickets.
Enter the Specified Plant Capacity to indicate the maximum cubic
meters that can be batched per hour.
Enter the Current Plant Capacity to indicate the number of cubic
meters actually being batched per hour.
Plant Costs Setup
Plant costs information is used by the COMMANDexecutive reporting module
to generate contribution and gross margin reports.
166
8/9/05
To set up plant costs information:
1.
From the Plants screen, select the Costs tab. {Files > Plant & Delivery
Information > Plants > Costs}
Plants – Costs Tab (EDTPLNT5)
2.
3.
4.
5.
6.
7.
8/9/05
Enter the Administration Cost Per Quantities specifying the estimated
administrative cost per yard or meter to use in the calculation of
projected costs for profit reporting. This value is multiplied by the number
of yards or meters to determine the estimated administrative cost per
ticket.
Enter the Sales Cost Per Quantities specifying the estimated sales cost
per quantity to use in the calculation of projected costs for profit
reporting. This value is multiplied by the number of yards or meters to
determine the estimated sales cost per ticket.
Enter the Dispatch Cost Per Quantities specifying the estimated
dispatch cost per quantity to use in the calculation of projected costs for
profit reporting. This value is multiplied by the number of yards or meters
to determine the estimated dispatch cost per ticket.
Enter the Plant Cost Per Quantities specifying the estimated plant cost
per quantity to use in the calculation of projected costs for profit
reporting. This value is multiplied by the number of yards or meters to
determine the estimated plant cost per ticket.
Enter the Fixed Truck Per Quantities specifying the fixed truck cost per
quantity to use in the calculation of projected costs for profit reporting.
Fixed trucking costs are those costs that do not vary significantly with the
number of hours of operation of the vehicle. This includes depreciation,
insurance, licenses, etc.
Enter the Variable Truck Cost Per Hour specifying the variable truck
cost, such as expenses for labor, fuel, oil, maintenance, and tires, per
quantity to use in the calculation of projected costs for profit reporting.
The total round trip time is calculated on each ticket and multiplied by
this rate to determine variable trucking for profit reporting.
167
8.
Enter the Yearly Interest Rate specifying the estimated yearly interest
rate in order to calculate the cost of carrying receivables, based on the
customer's normal payment time.
9. Enter the Truck Productive Factor specifying the estimated truck
productivity factor, which is multiplied by the fixed trucking cost to add
the cost of non-productive time.
10. Enter the Desired Profit Per Quantity specifying the desired profit per
quantity, which is added to the cost to show the projected selling price.
Plant Plants Setup
The Plants Plant tab allows to specify what product lines are available at this
plant.
To establish a plant’s product lines:
1.
From the Plants screen, select the Plants tab. {Files > Plant & Delivery
Information > Plants > Plants}
Plants – Plants Tab (EDTPLNTF)
2.
Select the appropriate checkboxes.
Plant Scale Setup
To set up plant scale information:
1.
From the Plants screen, select the Scales tab. {Files > Plant & Delivery
Information > Plants > Scales}
Plants – Scales Tab (EDTPLNT6)
2.
168
Enter a Scale Number to identify the scale you are defining.
8/9/05
3.
4.
Enter a Description and a Short description for the scale.
Select a Scale Type, or detail on the field to select from a list of available
scale types.
5. Select a Weighmaster. A complete list of possible weighmasters is
available through this field’s detail button.
6. Enter a Port Name. This name represents the logical port that
COMMANDcomm uses when producing plant or dispatch copies of the
ticket, order, or report.
7. Enter a Selective Address for the specific plant output device to use
when sending a ticket, order, or report through a multi-drop phone line.
8. Enter the Scale Manufacturer, Model, and Serial Number.
9. Enter the scale’s Weight Division and Capacity according the scale’s
specifications.
10. Mark the Manual Weight checkbox if necessary. When marked, this
checkbox allows the weighmaster to enter weights manually.
11. Click the Communication button to go to the Scale Communication
Information screen.
Scale Communication Information (EDTPLNTC)
12. Select a Device Type for the Primary, Secondary, and Temporary
Ticketing Device from the fields’ list.
13. Click the Primary Ticketing Device Setup button to go to the Plant
Communication Setup screen.
Plant Communication Setup (EDTPLNTA)
14. Enter a Manager Number to represent the manager number that
COMMANDcomm will use to communicate. The manager number can be
8/9/05
169
found in the properties file of COMMANDcomm (highlight the
COMMANDcomm icon and press <Alt+Enter>).
15. Enter an LPT or COM Port Name or select the proper printer from the
field’s list. If a COM port is entered in the first field, the second field
becomes the Port button. Select the button to setup the printer or
modem that COMMANDcomm will use to print orders.
Communication Port Setup (EDTPLNTD)
Note: The Communication Port Setup screen requires that the settings
match the configuration of the printer or modem.
16.
17.
18.
19.
20.
21.
If you wish to print orders to a device that has already been set up within
Windows select that device from the pull-down menu. The Prompt option
can also be selected if you wish to allow the user to select the device at
each print command.
Enter a Selective Address specifying the selective address code to use
when printing an order through a multi-drop phone line where more than
one output device exists.
Enter a Document Format specifying the format in which the document
will print.
Mark the Auto Dial Flag checkbox if necessary. When marked, this
checkbox specifies that COMMANDcomm will use the information in the
Modem Phone Number and Modem Code fields to send data to a
remote printer.
Accept the Plant Communication Setup screen.
Repeat steps 14 through 20 for the Secondary Ticketing and Temporary
Ticketing devices, as needed.
Accept the Scale Communication Information screens.
Plant Bins Setup
Depending on your plant setup, you may need to create and configure loading
bins.
To configure bins:
1.
170
From the Plants screen, select the Bins tab. {Files > Plant & Delivery
Information > Plants > Bins}
8/9/05
Plants – Bins Tab (EDTPLNT7)
2.
3.
4.
5.
6.
Enter a Bin code.
Select a Dispensing Type. The options are: Cement, Aggregate,
Admixture Bottle, Water Meter/Bin.
Enter a Description of the bin.
Enter a Short description of the bin.
Press the Add Occurrence button to enter another bin, if necessary.
Constituent Order Setup
By default, COMMANDseries will batch constituents in the order in which they
appear in the mix design. If constituents must be added in a specific order for
the plant, enter that order on this tab, and the settings will override the order
in the Item record.
To set up plant constituent order information:
1.
Click on the Constituent Order tab. {Files > Plant & Delivery
Information > Plants > Constituent Order}
Plants – Constituent Order Tab (EDTPLNT8)
2.
Enter one or more constituent Product Codes for the plant in order of
how they should be sent to the batch plant.
Note: The up and down arrows allow you to change the order of the
products.
3.
8/9/05
Enter the Bin number that is required for COMMANDseries to store and
include for each constituent sent in the adjusted mix ticket.
171
Plant User Fields
If your system has been configured for plant-specific user fields, you may edit
those fields on the User Field tab. For information about user fields, see the
system Configuration section.
Haulers
The Haulers screen allows access to hauler records that identify people or
companies outside of your organization who are assigned to tickets and
deliver items in their own truck. If you plan to use haulers, it is necessary for
you to set up a hauler code for your company. Name this hauler “Company
Truck”, and assign it to all trucks your company owns when setting up the
actual trucks.
Before entering hauler information, gather information about the people or
companies that you contract with to deliver your items.
To add a new hauler:
1.
Go to the Haulers screen. {Files > Plant & Delivery Information}
Haulers (EDTHLER)
2.
3.
4.
5.
6.
7.
8.
172
Enter a Hauler Code to identify the new hauler.
Enter the Name of the hauler or hauling service, such as Acme Trucking.
If possible, enter a Contact name for reference with the hauling service
name.
Enter a Phone Number to accompany the hauling service name and
contact.
Identify the Company for which the hauler normally works. If the hauler
does not work primarily for a specific company or if your system contains
only one company, leave this field blank.
Enter the Insurance Carrier Name and Insurance Expiration Date.
Accept the Haulers screen to save the new hauler information.
8/9/05
Truck Types
A truck type specifies a user-definable grouping of trucks by function,
materials carried, and/or capacity. For example, truck types could be defined
for the following trucks.
•
•
•
Nine-cubic-yard capacity rear-discharging ready-mix truck
Eight-cubic-yard capacity rear-discharging ready-mix truck
Nine-cubic-yard capacity front-discharging ready-mix truck
Each of these trucks normally has its own truck type. Various reports and
screens use the truck type grouping. In addition, when scheduling an order,
you have the option of specifying a specific truck type.
Before entering truck type information, gather information about the types of
trucks you own or use for the delivery of items.
To define a new truck type:
1.
Go to the Truck Types screen. {Files > Plant & Delivery Information >
Truck Types}
Truck Types (EDTTTYP)
2.
3.
4.
5.
8/9/05
Enter a Truck Type Code to identify the new truck type.
Enter a Description and Short description for the truck type.
Specify the default Maximum Load Size (maximum amount the truck
can carry) for this type of truck. If necessary, use the detail button to
select a unit of measure.
Specify the default Scheduled Load Size (amount the truck usually
carries) for this type of truck. If necessary, use the detail button to select
a unit of measure.
173
6.
Enter an average Job Wash Time for this type of truck. This value
determines the amount of time after the end unloading time status and
the to plant time status.
7. Enter the Truck Tarp Time specifying the default job washdown time, in
minutes, for this truck type. This estimate is used when scheduling an
order using this truck type. It determines the amount of time after the
end unloading time status and the to plant time status.
8. Enter the Unload Time. This field specifies the default unload time (for a
full load), in minutes, for this truck type. This estimate is used when
scheduling an order using this truck type if an unloading rate is not
specified.
9. If the truck is an aggregate truck in an overhead loadout environment,
you can use the Number of Drops field to achieve greater control over
truck loading. Enter the number of drops (maximum of 6) necessary to
fully load the truck. An equal number of Percent Drop fields will activate
immediately below. Spread the lad across the loads as necessary. These
values will be sent to the loading interface when the truck is ticketed.
10. Accept this screen to store the Truck Type data.
Trucks
Information regarding trucks, including assigned drivers, assigned plants, and
truck tracking defaults, etc., is assigned to trucks in the Trucks editor. These
assignments act as defaults for tickets using this truck.
Before entering truck information, gather information about the size and type
of trucks you use. You will also need to know who is driving each truck and
which plant each is scheduled out of at the beginning of each day.
Topics in this section:
Entering a New Truck
Truck Scheduling Setup
Truck Tracking Setup
Overhead Load Out
User Fields
Entering a New Truck
To enter a new truck:
1.
174
Go to the Trucks screen. {Files > Plant & Delivery Information > Trucks}
8/9/05
Trucks (EDTTRUC1)
2.
Enter a Truck Code to identify the new truck.
Note: If using an Eagle interface, numeric truck codes should be used.
The Eagle ignores alphanumeric truck codes.
3.
4.
If the truck has a unique owner, assign an Owner Name to the truck.
Enter a Description and Short description of the truck. Include, for
example, the make, model, and year of the truck.
5. On the Main tab, enter the License Number of the truck and the
license’s Expiration Date.
6. Assign a Hauler Code to the truck. If your company owns the truck, set
the hauler code to Company Truck.
7. Enter the Driver Code of the person who usually drives this truck. If no
employee is the normal driver of this truck, leave the field blank.
8. Select the Plant Code for the plant to which the truck is assigned or from
which it normally operates. If the truck does not have a plant from which
it typically operates, leave this field blank.
9. Enter the code(s) for the trailer(s) usually associated with this truck in
the Trailer Code 1 and 2 fields if necessary.
10. Enter the Insurance Carrier Name and the Insurance Expiration
Date for this truck.
11. Enter t in the Setup Date field to indicate today as the day the truck is
added to the file.
Truck Scheduling Setup
To set up truck scheduling:
1.
8/9/05
On the Trucks screen, select the Scheduling tab.
175
Trucks (EDTTRUC2)
2.
3.
4.
5.
6.
7.
8.
9.
Specify the Truck Type. This field assigns a type code to the truck and is
used to categorize your trucks. This is helpful when choosing a truck to
assign to an order or ticket when the order or ticket requires a specific
type of truck.
Truck types are uniquely identified by a truck type code. This code is set
up on the Truck Types screen. {Files > Plant & Delivery Information >
Truck Types}
Select a Product Line from the field’s list.
Enter a Minimum Load Size. This field represents the smallest load size
that the truck normally carries. Trucks that carry a load below this size
may be assessed a minimum load charge, depending on how the
customer, project, order, and/or ticket are flagged for minimum load
charges.
Enter a Scheduled Load Size to represent the optimum load size for the
truck. When truck-based scheduling is used, such as for aggregate
scheduling, this load size is defaulted for scheduling this truck.
Enter a Maximum Gross to represent the largest load size that the truck
should carry. The maximum load size is used in ticketing to display a
warning message when a load size is entered that exceeds the maximum
load size.
Enter Tare Weight information including the Date, Time, Days Tare is
Valid, and the Tare Type.
Enter a Delivery Method to indicate whether the truck is a company
truck, a hauler truck, an F.O.B. truck, etc.
Mark the F.O.B. Truck checkbox if necessary. When marked, this
checkbox marks this as a freight-on-board truck and haul charges do not
apply.
Truck Tracking Setup
To set up truck tracking information:
1.
176
Select the Tracking tab on the Trucks screen. {Files > Plant & Delivery
Information > Trucks > Tracking}
8/9/05
Trucks – Tracking Tab (EDTTRUC3)
2.
3.
Enter a character in the Flag field. The flag identifies the character to be
displayed for this truck on the Tracking and Scheduling screen {Dispatch
> Tracking & Scheduling}. For example, a $ could be printed with a truck
that needs to collect money. This character prints to the left of the truck
code on the tracking display.
Select a truck Color to be used for this truck on the Tracking and
Scheduling screen.
Note: As a general rule, you will leave the two previous fields blank and
use system defaults, changing colors and flags on a case-by-case
basis.
4.
5.
6.
7.
Select a Permanent Color for the truck. The Color may change during
the course of a day’s business, at the end of the day the truck Color will
be reset to the Permanent Color.
Enter the Badge/Card Number of the truck. This number may be
retrieved through auto-ticketing from a barcode on the truck.
Select a Signaling Unit, if necessary, to assign one to the current truck.
Select a Radio Code. This field identifies the radio truck code for this
truck (which may be different than the entry in the Truck Code field) sent
to the COMMANDconcrete application the mobile signaling system in use.
Note: Detailing displays a list of non-printable characters (CR, LF, etc.)
which can be acknowledged as part the truck identification
received from the mobile signaling system.
8.
9.
Mark the Automatic Signaling checkbox if necessary. When marked,
this checkbox causes that this truck to be moved automatically from one
time status to the next, based on the time factors in the appropriate
order and plant records.
Accept the Trucks Information screen to save the new truck information.
Overhead Loadout
To configure a truck for Overhead Loadout:
1.
8/9/05
Select the Tracking tab on the Trucks screen. {Files > Plant & Delivery
Information > Trucks > Tracking}
177
Overhead Loadout (EDTTRUC7)
2.
3.
4.
Enter the Number of Drops it should take to load the truck.
The corresponding number of Percent Drop fields will become active. By
default, the percentage for each will be roughly the same; the distribution
can be edited manually.
Accept the screen.
Note:The Overhead LoadOut tab will only appear if Overhead Load Out is in
the system license.
Truck User Fields
If your system has been configured for truck-specific user fields, you may edit
those fields on the User Field tab. For information about user fields, see the
system Configuration section.
Trailers
The Trailers screen allows users to enter codes and important information for
the trailers they use to deliver aggregate products. Trailers are used in the
COMMANDaggregate system as attachments to trucks or independently with a
hauling truck.
Before entering trailer information, gather information about the trailer
including owner, hauler, and license information.
Topics in this section:
Trailer Setup
Trailers Scheduling Setup
Trailer Tare Setup
178
8/9/05
Trailer Setup
To enter a new trailer:
1.
Go to the Trailers screen. {Files > Plant & Delivery Information >
Trailers}
Trailers (EDTTRLR1)
2.
Enter a Trailer Code to uniquely identify the new trailer. This code is
used to access truck information in other programs. It is also used to sort
reports that contain truck-related information.
Note: To insure that proper sorting takes place in lookup windows and
reports, make ALL trailer codes either all numbers, all letters, or
all numbers and letters; do not make some codes all numbers and
other codes all letters, etc. Make all codes the same length; that
is, put the same number of characters in each code.
3.
4.
5.
6.
Enter the Owner Name, Address, City, State, and Zip information if
applicable. This information prints on trailer listings only.
On the Hauler tab, select a Hauler Code to assign a hauler to the
trailer. If this is a company trailer, assign the hauler code setup for
company trucks. {Files > Plant & Delivery Information > Haulers}
Enter the License Number found on the trailer’s license plate.
Enter the License Expiration Date found on the trailer’s license plate.
Trailers Scheduling Setup
To enter hauler scheduling information:
1.
8/9/05
Select the Scheduling tab on the Trailers screen. {Files > Plant &
Delivery Information > Trailers > Scheduling}
179
Trailers (EDTTRLR2)
2.
3.
Specify Minimum Load Size, Scheduled Load Size, and Maximum
Gross information for use in the Scheduling screen.
In an Overhead Loadout environment, enter the Number of Drops
normally required to fill the truck.
Trailer Tare Setup
To enter trailer tare information:
1.
Select the Tare tab on the Trailers screen. {Files > Plant & Delivery
Information > Trailers > Tare}
Trailers – Tare Tab (EDTTRLR3)
2.
3.
4.
5.
6.
Enter the Tare Weight of the trailer. If necessary, use the detail button
to select the appropriate unit of measure.
Enter the date and time the tare weight was taken in the Tare Date and
Time fields.
Enter the Days Tare Valid.
Select the Tare Type: Apply Manually or Apply Automatically.
Accept the Trailers screen to save the new trailer information.
Trailer Overhead Loadout Setup
To enter trailer overhead loadout information:
1.
180
Select the Overhead Loadout tab on the Trailers screen. {Files > Plant &
Delivery Information > Trailers > Overhead Loadout}
8/9/05
Trailers - Overhead Loadout tab (EDTTRLR4)
2.
3.
4.
Enter the Number of Drops generally needed to fill the trailer.
The corresponding number of Percent Drop fields will become active.
By default, the percentage for each will be roughly the same; the
distribution can be edited manually.
Accept the screen.
Delivery Methods
The Delivery Methods function allows users to define multiple methods of
aggregate product delivery for use in the COMMANDaggregate Ticketing
functions. Aggregate companies typically support F.O.B. orders, when the
customer picks up the aggregate product(s). The Delivery Methods function
allows user defined detail for variations of these two scenarios.
To set up delivery methods:
1.
In COMMANDaggregate, open the Delivery Methods screen. {Files > Plant
& Delivery Information > Delivery Methods}
Delivery Methods (EDTDLMT)
2.
3.
4.
5.
6.
7.
8/9/05
Under the Code field, enter the code that represents the delivery method
you are entering.
Under the Description field, enter a description for the delivery method.
Under the Short field, enter an abbreviated description for the delivery
method.
Under the Delivery Type field, select the delivery type associated with
the delivery method. The options are Delivered, F.O.B., or Both.
Select the Add Occurrence button to enter another delivery method.
When you are finished, accept the Delivery Methods screen.
181
Pouring Methods
Pouring methods allow for more standardization in the use of pouring
methods, by allowing you to establish a number of common pouring methods
and linking them to an appropriate unloading time. Having these values
available prevents the order taker from having to estimate unloading rates
while talking to the customer.
Pouring Methods are entered into the system in the Files > Plant & Delivery
Information menu. Some examples of possible Pouring Method options are:
Pouring Method
Rate/CY
Comment
Standard
5 min
A baseline rate, particularly useful if all the
company’s trucks are the same type
Pump
2 min
We’re going for volume here, not neatness
Curb
15 min
Curbs take time to do properly.
Wheel barrow
10 min
In some cases, mix must be poured into a
wheelbarrow and transported to its destination.
Front loader
4 min
If the you have different truck types, you might
need separate pouring methods for each.
There are two basic ways of setting up pouring methods:
•
•
Based on method of delivery (front loader, pump, etc.)
Based on the type of construction being made (slab, sidewalk, etc.).
It’s not an either/or proposition, however; you can set them up any way you
want.
Once a Pouring Method has been established, it can be used by entering its
assigned code in the Pouring Method field on the main Scheduling screen.
In addition to considering what pouring methods are needed, customers
might also want to consider if their unloading charge practices should mirror
their pouring rates. If a company can let you know ahead of time that more
pouring time is necessary, do you want to charge him the same as another
customer that cannot supply advance notice?
You might end up with one or two unloading charge tables for each pouring
method.
Pouring methods cannot be set at the project level.
To enter pouring methods:
1.
182
Open the Pouring Methods screen. {Files > Plant & Delivery Information
> Pouring Methods}
8/9/05
Pouring Methods (EDTPMET)
2.
3.
4.
5.
6.
Enter a Pouring Method code to identify the entry. The code can be
alphanumeric, up to four characters in length.
Enter a Description of the method.
Enter a Short description of the method.
Enter an Unload Rate per Hour. Detail on this field to select a rate
UOM (the default will be cubic yards).
Press Add Occurrence to add another pouring method, or accept the
screen.
Job Cost Phases & Jobs
You may have a construction job of you own, whether it is building a new
plant or expanding a current one. In such cases, it can be useful to track your
material expenditures on the project. COMMANDseries allows you to do this
through establishing Job Cost tracking information.
This feature operates through two components:
Job Cost Phases identifies different stages in the job cycle: bed, flatwork,
foundation, walls, etc.
Job Cost Jobs identifies a specific job/project.
Once these records are created, they can be used whenever you ship material
to an internal job. By selecting the order type, Job Transfer, you indicate
material to be used for internal work. The job Cost/Phase fields then appear
on the order screen.
This feature provides two benefits: Better tracking of a job through its stages,
and reduced invoicing costs (Job Transfer orders will not be invoiced).
Note: To enter Job Cost Phases or Jobs, you must
•
•
Have aggregate in the system license
Be in Aggregate, Invoicing, or Receivables
To enter a Job Cost Phase:
1.
8/9/05
Go to the Job Cost Phase screen {Files > General Information > Job Cost
Phases}.
183
Job Cost Phase (EDTPHSE)
2.
3.
4.
5.
Enter a Job Cost Phase code. This code is a character string of up to 16
characters.
Enter a Description (40 characters).
Enter a Short Description (8 characters).
Select the Add Occurrence button to enter another phase, or Accept the
screen.
Creating a Job Cost Job is a matter of creating a job code, and then assigning
specific Job Cost Phases to that code. Once that is done, the job can be
tracked within COMMANDseries.
To enter a Job Cost Job:
1.
Go to the Job Cost Job screen {Files > General Information > Job Cost
Job}.
Job Cost Jobs (EDTJCJB)
2.
3.
4.
5.
6.
184
Enter a Job Cost Job code, or detail on the field to select from a list.
Enter a Description of the Job.
Enter a Short Description.
Enter a Job Cost Phase or detail on the field to select from a list.
Select the Add Occurrence button to enter another phase or Accept the
screen.
8/9/05
Zones
The Zones screen allows access to zone records that represent the large,
geographical areas into which deliveries are made. Characteristics can be
assigned to a zone, such as its tax code (for destination-based taxing), its
assigned pricing plant code, and its scheduled plant code. Also, you can
establish relationships between a zone and plants for computing and applying
price adjustment amounts, by price category, for deliveries from the plant to
the zone.
Zones are assigned to customers, projects, and eventually to orders to
identify the zone to which deliveries are made.
The geographical layout of zones is wholely up to a customer. Some
customers match zones to map pages, and others divide the delivery area into
very broad regions. Customers with a single plant, or two plants close
together, may set up the zones as a series of concentric circles surrounding
the plant.
Before entering zone information, gather geographical information about your
company’s delivery area. Also, you need to determine how this area is
divided for tax and plant purposes.
To enter a zone:
1.
Go to the Zones screen. {Files > Plant & Delivery Information > Zones}
Zones (EDTZONE)
2.
3.
4.
5.
6.
7.
8/9/05
Enter a Zone Code to identify the new zone.
Enter a long Description and Short description for the zone.
Select a plant to use as the default Scheduled Plant Code for nonproject orders using this zone.
Select a Tax Code associated with this zone.
Select the Price Adjustment UOM for all price adjustment amounts.
Enter a Plant Code to identify standard price adjustment amounts for
this zone and associate price category adjustments for deliveries to this
zone. Entering # sets the price adjustment(s) for all plants.
185
8. Enter the Price Category for this zone. The default (blank field) is All.
9. Enter your zone travelling charge in the Price Adjust field.
10. Use the Effective Date to set a time for the new rate to apply, or enter t
(for today) to immediately apply the price adjustment.
11. Enter the Previous Price Adjustment for reference purposes if desired.
12. Continue setting price adjustments for a specific plant(s). Set price
adjustments for the price categories you have defined. {Files > Item
Information > Price Categories}
13. Repeat Steps 7 - 12 as necessary for other plants from which you deliver.
14. Accept the Zone screen to save the zone and any price adjustments.
Note: When entering zones for cartage, you do not need to enter plant and
rate information. Just create the zones. The rates will be set in the
cartage tables.
Map Pages
Map pages provide a travel time system that incorporates locations, dictated
by their map page, and plants with a dynamic timing system that accounts for
varying travel times throughout the day and the changes to the travel time
throughout the day. Through communications with COMMANDcomm, the
travel times dynamically account for the actual time spent traveling to a map
page from a specific plant at a specific time of day.
Before setting up map pages, you must enter map page time periods {Files >
General Information > Map Page Time Periods}. These time periods reflect
the periods during the day when travel times to a map page from a plant are
affected by traffic, rush hour, lunch hour, etc.
Topics in this section:
Map Page Time Periods Setup
Map Pages Setup
Map Pages Zones Setup
Map Pages Coordinates
Automatic Travel Time Posting
Map Page Time Periods Setup
The Map Page Time Periods screen allows users to define periods of the day
when travel times are consistently unique. Users can setup a separate time
classification for all possible travel times, according to the time of day. For
example, a separate time period should exist for morning rush hour, average
morning traffic, lunch traffic, normal afternoon traffic, evening rush hour, etc.
To enter map page time periods:
1.
186
Go to the Map Page Time Periods screen. {Files > General Information >
Map Page Time Periods}
8/9/05
Map Page Time Periods (EDTMAPP)
2.
3.
For each Code, enter the Start Time and End Time for the specific time
period you wish to define. The times you enter here determine what is
displayed on the Map Pages screen to distinguish the time periods.
Accept the screen to save the map page time periods.
Map Pages Setup
To enter map pages:
1.
Go to the Map Pages screen. {Files > Plant & Delivery Information > Map
Pages}
Map Pages (EDTMAPS1)
2.
3.
8/9/05
Enter a Map Page code. The actual page number is generally used for
this code.
Enter a Description and a Short description of the page.
187
Travel Times Setup
1.
On the Travel Times tab, select a Plant Code to assign a distance and
travel times to the current map page from the selected plant. Plants are
set up on the Plants screen. {Files > Plant & Delivery Information >
Plants}
Note: The Add Occurrence button at the bottom of the screen allows
assigning multiple plants to a map page.
2.
3.
4.
5.
6.
Enter the estimated Distance between the selected plant and a central
area in the current map page. When scheduling an order to this map
page from this plant, the distance will default into the Order Schedule
screen.
The Change Percentage fields give you a means to simplify initial entry
of map page times. In the screen shot above, the 100 represents the
base time, during the early morning hours when traffic isn’t a problem.
From 6:00—8:59, you have to deal with rush hour traffic. The 115 tells
the system to multiply the travel time value in the first field by 115% to
get an adjusted value for rush hour. The subsequent fields allow for
adjustments during the other map page time periods, allowing for the
ebb and flow of traffic.
Specify a From Date, or a beginning date, for the travel times from the
plant to the map page to apply. Multiple dates may be entered to account
for changing travel times throughout the year.
Specify a Thru Date, or an ending date, coordinating with the From
Date, for the travel times from the plant to the map page to apply.
Multiple dates may be entered to account for changing travel times
throughout the year; however, the entire year must be accounted for
with assigned travel times.
Enter estimated To Job travel times for travel from the specified plant to
the map page during the time period set up on the Map Page Time
Periods screen {Files > General Information > Map Page Time Periods}.
If Change Percentages have been entered, then when a value is entered
in the first field, the rest of the fields on that line will be automatically
calculated.
Note: These times do not have to be exact because the dynamic travel
time system incorporated in COMMANDseries statistically finds the
average travel time to this map page from the specified plant
during specific time periods. The average times calculated by the
system are displayed on the Calc’ed line.
7.
Enter estimated To Plant travel times for travel from the job site back to
the plant. Theoretically, drivers already know where the plant is, so the
To Plant time may be a little less than the To Job time.
8. Use the inner Add Occurrence button to add a new date Range.
9. Use the outer Add Occurrence button to add travel times for another
plant.
10. Accept the screen to save the map page.
188
8/9/05
Map Pages Zones Setup
To enter map pages zones information:
1.
Select the Zones tab on the Map Pages screen. {Files > Plant & Delivery
Information > Map Pages > Zones}
Map Pages (EDTMAPS2)
Note: Remember, zones are not associated with travel times; they are
strictly used for applying travel surcharges.
2.
Select a Zone Code to associate with the current map page. The zone
allows users to apply travel surcharges to orders during order entry and
can be set up on the Zones screen. {Files > Plants & Delivery Information
> Zones}
Note: Click the Add Occurrence button to set up multiple zone codes.
Map Pages Coordinates
To set up map pages coordinates:
1.
Select the Coordinates tab on the Map Pages screen. {Files > Plant &
Delivery Information > Map Pages > Coordinates}
Map Pages (EDTMAPS3)
2.
Accept the Map Pages screen to save the new map page information.
Automatic Travel Time Posting
The initial travel times are generally estimates. Once map page travel times
have been entered and the trucks start rolling, COMMANDseries can monitor
the travel times and update them based on the actual travel times.
Establishing this functionality takes two steps:
•
•
8/9/05
Configure COMMANDseries with rules for time posting and processing.
Create a COMMANDcomm manager to process the time posting.
189
Travel Time Posting Configuration
COMMANDseries averages the travel times based on three fields in the
Configuration file:
Note: These fields are discussed in reverse order compared to their order on
the screen.
Total Travel Time Loads—This value represents the maximum number of
loads to be used in calculating the travel time for any given map page/travel
time/date range/plant combination. Each Map Page Travel Time record has
fields to maintain a running total for travel time--total travel time and number
of loads. When the update routine runs, it scans tickets created during a
specified interval for any that are assigned to a map page. When such a ticket
is found, the travel times are added to the totals, and the load count is
increased by one. The system then averages to the travel time totals and
uses the result to update the travel time.
The Total Travel Time Loads field prevents the running totals from growing to
the point that the average is effectively static-if you are averaging 10,000
loads, it will take a lot of tickets to effect a change. At the other end of the
spectrum, if you are averaging only 10 loads, the travel time will bounce all
over the place. 100 loads is the suggested value.
Acceptable Travel Time Load Percentage—This field might be better
described as “Travel Time Load Reduction Rate.” At some point, the number
of stored loads will exceed the amount specified by the Total Travel Time
Loads field. When that happens, the total load time and the number of loads
in the affected map page travel time record will be reduced by the specfied
percentage.
For example, If you have Total Travel Time Loads set to 100 and an
Acceptable Travel Time Load Percentage value of 40, then if you have 100
loads totaling 1460 minutes, then when another load is processed, the system
will:
1.
2.
Reduce to 60 loads with a total time of 876.
Process the new load.
Travel Time Post Tolerance—The goal of the update process is to maintain
accurate travel times. One thing that can disrupt that goal are travel times
that are extrended due to external factors (truck breakdown, traffic jam,
etc.). This field is used to identify and discard travel times that are so
anomalous that using them would disrupt the accuracy of the average.
190
8/9/05
The value entered is a percentage. When evaluating a travel time, the system
validates the new time to see if it is within the specified percentage of the
current travel time.
New
Travel
Time
Acceptable
Current
Travel Time
Travel Time Load %
Allowable
Range
Accepted
Y/N
30
20
50
10-30
Y
30
20
25
15-25
N
Some users will start with this value set relatively high (75-100), and slowly
reduce the value down to 50 as more live ticket data becomes available.
To configure COMMANDseries with rules for time posting & processing:
1.
Go to the Distribution Configuration screen. {Files > General Information
> Configuration > Distribution}
Configuration – Distribution Tab (EDTCNFXD)
2.
3.
4.
5.
Enter the Travel Time Post Tolerance.
Enter the Acceptable Travel Time Load Percentage.
Enter the Total Travel Time Loads.
Accept the screen.
Time Posting Comm Manager
Smaller companies can run the COMMANDcomm manager on their system’s
COMMANDcomm server. However, time posting can be a processor-intensive
task. Larger companies may need a dedicated workstation to handle this
function.
8/9/05
191
To create a COMMANDcomm manager to process time posting:
1.
2.
3.
4.
5.
6.
Start by creating a Windows shortcut. Right-click in an empty space on
the Windows desktop.
Select New > Shortcut.
The correct path is:
C:/cmdserie/bin/cmdserie.exe cmdserie /a=cx /M=n /t=mm
cx — COMMANDcomm
n — Any unique manager number
mm — Polling interval (in minutes); a good starting point is 60, so that
travel times are posted every hour.
Change the Start in to C:/CMDSERIE/CLIENTS.
Select OK to save the shortcut.
Double-click the shortcut to start the COMMANDcomm manager. You can
place the shortcut in the Windows Startup folder so that it will launch
automatically.
Process Flow
When the comm manager activates, it will do the following:
1.
2.
3.
4.
5.
6.
7.
Identify completed tickets whose trucks have clocked in since the last
update (or since the comm manager was started).
Sort tickets by map page.
Validate the travel times using the Travel Time Post Tolerance value.
Tickets with excessive times are discarded.
Validate the number of new tickets for each map page/travel time/date/
plant combination against the existing number of loads. If the new loads
will exceed the specified Total Travel Time Loads, the load count and total
time for that map page will be reduced by the precentage specified in the
Acceptable Travel Time Load Percentage field.
Add new load times to the running total and the load count field is
incremented accordingly.
Divide the total load times by the number of loads to get averages.
Update the travel times on the map page with the new averages.
Deadhead Setup
COMMANDseries now supports deadheading in the Tracking & Scheduling
system. Deadheading support is provided through several different functions:
•
•
•
Tasks
Conditions
Driver Overtime
Details on configuring each of these features are provided immediately after
this section
192
8/9/05
To set up deadheading:
1.
2.
3.
4.
Load the Task Codes { Files > Plant and Delivery Information > Task
Codes } and edit, add, or subtract from them as necessary. Accept the
form (your data will not be saved unless you accept the form). For
detailed instructions on this step, refer to the Task Codes section of this
document.
Load the Condition Codes { Files > Plant and Delivery Information >
Condition Codes } and edit, add, or subtract from them as necessary.
Confirm the Deadhead condition color and flag match customer
preference. Accept the form (your data will not be saved unless you
accept the form). For detailed instructions on this step, refer to the
Condition Codes section of this document.
Set up a Driver Overtime Code { Files > General Information > Driver
Overtime }. You must provide the Description and Short Description, but
the Calculate section is optional. For detailed instructions on this step,
see the Driver Overtime Tables section of this document.
Add the Driver Overtime Code to the employee code record for each
driver. { Files > General Information > Employees }
Task Codes
COMMANDseries uses Task Codes to more accurately track driver times.
Tasks not only give you a clearer idea of what the driver is doing; in addition,
because you have a better idea of a driver’s work at any given time, it is
easier to avoid having to pay driver overtime.
A default set of task codes is provided on system install. These initial settings
cannot be deleted; however, they can be modified, and additional tasks can
be added as needed. As you become more proficient with the system, it may
be advantageous to modify the task configuration.
To set up a new task code:
1.
Open the Task Codes screen {Files > Plant & Delivery Information > Task
Codes}.
Task Codes (EDTETSK)
2.
8/9/05
Press the Add Occurrence button, or press <F6>. A new line will appear
on the form.
193
3.
Enter a Code for the new task. This code can be comprised of
alphanumeric characters and can be up to 5 characters in length. This
code will be used internally to track the task.
Note: Codes for the default Tasks cannot be edited.
4.
5.
6.
7.
8.
Enter a Description of the task. The description can be up to forty
characters in length; practically, however, a maximum of twelve is
recommended.
Select a Task Type to determine if the task applies to a Truck, a Driver,
or Both. If teh field is left blank, the system will read it as Both.
Enter a Short description of the task. This will generally be the same as
the task Code, but does not have to be. This description will be used in
reports in areas where the full description will not fit.
Classify the task with regard to Truck Times. Each task can be flagged
as Clock or Productive time. These flags control automatic time logging.
For example, if In Service is a task that is flagged as Clock time, then
any time an Out of Service truck has its task changed to In Service,
the system will check its clock status. If the truck is not currently clocked
in, the system will automatically clock it in.
Classify the task with regard to Driver Times. The concept here is the
same as with Truck Times; however, there is an additional field: DOT.
Driver time associated with tasks flagged as DOT will be tallied and
monitored independently of Clock time. And given task can be classified
as both Clock and DOT time.
Clock Time is used to calculate both daily and weekly overtime; DOT
Time is used to calculate rolling overtime.
Note: The Productive Time flag is currently not used by
COMMANDseries; functionality using these flags will be
implemented in future releases.
9.
Double-click in the Condition field to associate an existing Condition with
this task. Assigning a condition to a task allows you to monitor that task
on the Tracking & Scheduling screen.
Note: You cannot edit the Conditions associated to the default tasks.
10. Accept the screen to save the new task.
Condition Codes
Condition Codes are used to display certain truck and/or driver conditions on
the graphic Tracking & Scheduling screen. Doing so provides dispatchers with
a much more accurate picture of overall fleet status. Condition codes can also
be associated with Task Codes to provide even more real time information to
dispatchers.
The primary use of conditions is to allow real-time monitoring of driver
overtime. When a driver’s on-road hours reach a specified limit, the system
will attach a warning condition to the driver; that condition can result in the
194
8/9/05
truck token to which the driver is assigned turning a warning color, such as
orange, to alert the dispatcher that the driver’s hours are getting close to the
limit for overtime, and should not be used again unless absolutely necessary.
A default set of conditions is provided when the system is installed. These
conditions can be edited to a degree, but they cannot be deleted.
To edit a condition code:
1.
Open the Condition Codes screen. {Files > Plant & Delivery Information >
Condition Codes}
Condition Codes (EDTTCND)
2.
3.
4.
5.
6.
8/9/05
The Code is used internally to track the condition. These codes cannot be
changed.
Edit the Description of the condition if necessary. The description can be
up to forty characters in length; practically, however, a maximum of
twelve is recommended.
Edit the Short description of the condition. This description will generally
be the same as the Condition Code, or an abbreviation of the Description.
This short description is used in reports in areas where the full description
will not fit.
The Estimated Minutes field is currently unused. In future releases of
COMMANDseries, it will enable users to link default time values to certain
conditions and tasks. For example, when a driver punches his Lunch Out
button on the signaling unit, not only would the truck token change color
to reflect that the driver is on lunch, but the token’s timer will
automatically be set to the number of minutes allowed for lunch—making
it easier for the dispatcher to predict when the driver should be available
again.
For the default conditions, only Lunch allows the user to enter an
Estimated Minutes value. That field will be available on all user-created
conditions.
Select a Color code, or press <Enter> in the Color field to get a list of
available colors. Select the color you wish to be associated with a
condition.
The Tracking & Scheduling screen is limited to sixteen colors. Be judicious
195
7.
in selecting conditions for color tagging. Moreover, very dark colors result
in truck tokens that are illegible.
If so desired, enter a Flag for the condition. The selected flag will be
displayed on the Tracking and Scheduling screen at the far right of the
truck token.
The flag character will be right next to the truck code. Take care to select
flags that will not confuse the dispatchers. If, for example, your truck
codes are numeric, avoid numeric flags, as the result would be very
confusing for the dispatcher.
If the truck codes are all numeric, then avoid numeric flags. If codes use
both numbers and letters, it is recommended to use special characters
(!@#$%^, etc.) to avoid confusion.
Tip:
8.
9.
It is not necessary to employ both a color and a flag on every
condition. Users might want to use flags for lower priority
conditions, and colors for higher priority conditions. For example, if
your truck codes are numeric, you might use a D flag to indicate a
Daily Overtime Warning. If the driver’s hours exceed the daily
limit, you could then combine the D flag with a warning color. Such
an approach gives you more flexibility in assigning flags and codes.
Assign the condition a Priority rating, 1 being the highest priority.
Priority ratings are used to resolve conflicts in condition displays. That is,
if a truck ends up being in two conditions at once, for example,
Deadhead and Hourly Warning, then the condition that is displayed on
the screen will be the condition with the highest priority. In the event that
both conditions have the same priority, then the system will display the
most recent condition.
Accept the screen to save the condition.
Driver Overtime Tables
COMMANDseries allows users to keep better track of drivers’ on-clock time,
particularly as they approach the necessary number of hours for different
times of overtime pay. It does so through the use of conditions (discussed
earlier) and Driver Overtime Tables. As a driver accrues on-road hours, the
system compares the amounts with values in the driver’s assigned overtime
table. If a certain plateau has been reached, the driver is set to an appropriate
condition. Daily Warning, for example, is the condition that denotes that the
driver is approaching the number of hours necessary for daily overtime pay.
The condition can also trigger a change in the appearance of the driver’s
assigned truck token on the Tracking & Scheduling screen. The change in
appearance alerts the dispatcher as to the driver’s overtime status, and can
make a note to avoid using the driver for the remainder of that day if at all
possible.
Because of the differences in state and federal transportation regulations,
along with union rules, COMMANDseries supports track for three different
types of overtime: Daily, Weekly, Rolling.
196
8/9/05
Rolling overtime totals the time for a specified number of previous days, and
is used, to an extent, as a safety device, to help prevent a driver from logging
too many hours during a seven-day period.
To set up a new Driver Overtime Table:
1.
Open the Driver Overtime Table screen. {Files > General Information >
Driver Overtime}
Driver Overtime (EDTDROT)
2.
3.
4.
5.
6.
7.
8.
Enter a Driver Overtime Code of up to four characters.
Enter a Description of the table.
Enter a Short description of the table. This short description will print on
reports in areas that are too small for the full description.
Select the day of the week on which your scheduling Week Begins. This
information is used to calculate if current hours approach the limit for
weekly overtime.
Select Daily if you want the table to flag daily hours. There are two fields
associated with daily overtime. Alert Hours represents the number of
hours at which you want to be warned that a driver is approaching the
limit for daily overtime. The warning allows you to get the driver off the
road and out of service before overtime kicks in. Overtime Hours
indicates the point at which the driver is actually accruing overtime.
Select Weekly if you want to flag weekly overtime limits. Enter the
appropriate Alert Hours and Overtime Hours.
Select Rolling if you want to track rolling overtime (based on DOT
regulations). Enter in the Rolling Days field the number of days back
you wish to track hours for. If you enter 7 in this field, then hours toward
Rolling Overtime at any given point will be comprised of the current day’s
hours along with the previous six days. Enter the appropriate Alert Hours
and Overtime Hours.
Note: Rolling Overtime is based on time values flagged as DOT Time in
the Tasks file; Daily and weekly overtime are based on time values
flagged as Clock Time.
8/9/05
197
9.
198
Accept the screen to save the table. Users can create multiple overtime
tables as needed. A driver’s assigned overtime table is specified in the
Driver’s Employee file.
8/9/05
Items and Pricing
The following section addresses entry of basic Item information. This
information controls item entry, pricing, and additional charges.
Of particular note is the information on Units of Measure (UOM). Units of
Measure determine how material is measured for ordering, pricing, reporting,
etc.; accordingly, establishing UOMs may well be the most critical part of the
File Build process. Please read the introductory UOM material carefully before
attempting to enter items or item categories.
Topics in this section:
Price Categories
Usage Codes
Units of Measure (UOM)
UOM Related Fields
Item Categories
Items
Minimum Load Charge Tables
Seasonal Charges
Unloading Charges
Sundry Charges
Vendors
Freight Methods
Price Categories
Price categories provide for tiers, or groups, of prices that are assigned at the
item level. This provides greater flexibility in pricing: An Item can be priced
at the Project or Customer level, or they can be priced at the Item level,
based on Price Category.
Price categories are also used as a sorting option for many reports. Before
entering price category information, gather information about how you will
categorize prices for reporting purposes.
To enter a new price category:
1.
8/9/05
Go to the Price Categories screen. {Files > Item Information > Price
Categories}
199
Price Categories (EDTPRCC)
2.
3.
4.
5.
Enter a Code for the new price category.
Enter a Description and Short description for the price category.
To enter another price category, click on the Insert Occurrence button
or press <Shift+F6>.
Accept this screen to save the price categories.
Usage Codes
Usage codes indicate how the type of construction for which a given concrete
mix was designed. Usage code are assigned to mixes at the Item level, but
the usage code assigned to an item can be overridden in the Orders screen.
{Dispatch > Orders}
The usage code helps make sure that the proper item is sold for the
requirement. It is also used as part of the sales and profit analysis reporting
system.
Before entering usage code information, gather information about the uses of
the items you use or sell.
Usage Code Setup
To enter a new usage code:
1.
Go to the Usage Codes screen. {Files > Item Information > Usage
Codes}
Usage Codes (EDTUSGE)
200
8/9/05
2.
3.
4.
5.
Enter a Code for the new usage.
Enter a Description and Short description for the usage code as
desired.
To enter another usage code, click on the Add Occurrence button or
press <Shift+F6>.
Accept this screen to save the usage codes.
Units of Measure (UOM)
In a program such as COMMANDseries, in which many different things get
measured and calculated in many different ways, it is important to have a
mechanism to ensure that items, prices, and amounts get measured correctly.
Complicating things further, certain items get measured differently in different
parts of the business process. Cement, for example, is often measured in
pounds for batching, but measured in tons for inventory. And of course, some
customers may purchase material in US Customary measurements, while
others require metric amounts.
COMMANDseries controls how items are measured by assigning each item
several of Unit of Measure (UOM) codes. This section provides an overview of
the different UOM options and how they impact the system. This information
will be used in entering both Item Categories and Items.
0
WARNING: It is critical that you understand how Units of Measure
work before proceeding to Item Category and Item setup.
Incorrectly configured UOMs can cause serious errors in
product and price calculations.
The UOM selection screen is invoked in different ways, depending upon the
screen from which you are calling the UOM selector. Regardless of how the
UOM screen is accessed, it will always look the same:
UOM Selection screen (FNDUOMS)
8/9/05
201
To use the UOM Selection screen:
1.
2.
3.
Select the UOM type with the radio buttons on the bottom of the screen.
The groups are self-evident with two exceptions:
Strength lets you select from pounds per square inch (psi),
Newtons per square millimeter (N/mm2), or Megapascals (MPa)
Other contains a number of UOMs that do not fit into a clear
category, such as Each, Per Load, and Dosage.
Scroll through the list until you find the correct UOM.
Double-click on the UOM code to close the UOM screen and apply the
UOM setting.
UOM Related Fields
When creating Items and Item Categories, there is more than just a single
UOM to be entered. The screen below shows the UOM settings for a typical
aggregate constituent.
Item editor (EDTIMST2)
There are seven different UOM settings. In addition, there are three
Quantity Extension Codes, which determine how various totals are
represented.
Topics in this section:
Ordered Quantity
Delivered Quantity
Price Quantity
Batch Quantity
Inventory/Cost Quantity
Purchase Quantity
Reporting Quantity
202
8/9/05
Ordered Quantity
The Ordered Quantity defines how the item is measured at Order Entry.
When an order taker enters 3 for the amount of pea gravel ordered by the
customer, the Ordered Quantity UOM determines if that 3 designates three
pounds, three tons, three cubic yards, three metric tons, etc.
The Ordered Quantity value is extended to three different fields. The value
extended to each of these fields may differ depending upon your needs. The
three fields are: Delivered Quantity, Ticket Quantity, Pricing Quantity.
The Ordered Quantity has an assigned Order Quantity Extension Code that
determines how the Delivered Quantity will be calculated. These extensions
are preset within the application and calculate the Delivered Quantity as
follows:
Per Unit -- Delivered Quantity = Ordered Quantity.
Per Mix Cubic Quantity -- Delivered Quantity = Ordered Quantity * Mix
Ordered Quantity. Note that this extension should only be used for
associated products.
Per Load -- Delivered Quantity = Ordered Quantity. Note that this
extension differs from the Per Unit extension in that the delivered
quantity will be calculated for each load. The Per Unit extension will not
continue to calculate a delivered quantity once the ordered quantity has
been met or exceeded.
Per Weight of Cement -- Delivered Quantity = Quantity of Cement in
the mix product divided by the divisor indicated in the adjacent field.
Note that the adjacent divisor field is only displayed if a “per weight” type
extension code is selected. If the Ordered Quantity unit of measure is set
to dosage a separate field will be displayed which allows the user to
define the dosage quantity per weight. This extension should only be
used for associated products.
Per Weight of Cementitious Material -- Delivered Quantity = Quantity
of Cementitious materials in the mix product divided by the divisor
indicated in the adjacent field. Note that this extension code will include
all cement and cementitious (fly ash) products in the mix. The adjacent
divisor field is only displayed if a per weight type extension code is
selected. If the Ordered Quantity unit of measure is set to Dosage, a
separate field will be displayed which allows the user to define the dosage
quantity per weight. This extension should only be used for items
associated to a mix product, i.e. associated products.
Delivered Quantity
This value, based on the Order Quantity Extension Code, is calculated at the
time of ticketing. The calculated value is stored in the DELV_QTY field of the
TKTL or TLAP tables. This value is also accumulated in the DELV_QTY field of
the ORDL or OLAP tables. The value in these fields (from the ticket tables) is
printed on the delivery ticket using the document format tag LOADQY. The
delivered quantity will be subsequently used to for calculating cost and for
8/9/05
203
posting to inventory. The delivered quantity may be converted to a different
inventory unit of measure.
The Delivered Quantity has a Ticket Quantity Extension Code that
determines how the Ticket Quantity value will be printed. The ticket quantity
value is stored in the TKT_QTY field of the TKTL or TLAP tables. The value in
these fields is printed using the document format tag TKTQTY. The ticket
quantity is only used for display purposes. The quantity can be displayed on
the ticket or ticket data out forms. These extensions are preset within the
application and calculate the ticket quantity as follows:
Delivered Quantity -- Ticket Quantity = Delivered Quantity
Delivered Quantity per Mix Cubic Quantity -- Ticket Quantity =
Delivered Quantity / Mix Ticket Quantity
Dosage Per Mix Cubic Quantity -- Ticket Quantity = Ordered Quantity
* Order Dosage Quantity
Doses Per Load -- Ticket Quantity = Ordered Quantity * Mix Ticketed
Quantity
Ordered Quantity -- Ticket Quantity = Ordered Quantity
Blank Quantity -- Ticket Quantity = null value. Note that this extension
will set the ticket quantity to a blank value and prevent the printing of a
ticket quantity.
Price Quantity
This setting defines the amount of material for which the customer will be
charged. Under normal circumstances, the value for the Price Quantity will be
the same as the Delivered quantity. But if you want to give a customer a
reduced price to compensate for poor service, you could accomplish this task
during invoice prep by reducing the Price Quantity. This way, the customer is
not charged full price, but because the Delivered Quantity is not changed,
your inventory records remain accurate.
The Price Quantity has a Price Quantity Extension Code that determines
how the Price Quantity will be calculated. The Price Quantity value is stored in
the PRICE_QTY field of the TKTL or TLAP tables. The value in these fields is
printed using the document format tag PRCQTY. These extensions are preset
within the application and calculate the price quantity as follows:
Delivered Quantity -- Price Quantity = Delivered Quantity
Mix Delivered Quantity -- Price Quantity = Mix Ticketed Quantity
Ordered Quantity -- Ticket Quantity = Ordered Quantity
One (Per Load) -- Price Quantity = One
Doses Per Load -- Price Quantity = Ordered Quantity * Mix Ticketed
Quantity
Batch Quantity
This setting specifies how the item is measured by the batch computer.
Aggregate may be ordered by the ton, but it is batched by the pound.
204
8/9/05
Inventory/Cost Quantity
This setting specifies how the material is to be measured for purposes of
inventory and cost calculation. An aggregate may be batched by the pound,
but inventoried and costed by the ton.
Purchase Quantity
This setting specifies how the material is to be measured when purchased
from vendors.
Reporting Quantity
This setting specifies how the material is to be measured on COMMANDseries
reports. When you set up a dispatching report, you will see a checkbox
labeled Use Reporting Units of Measure. If that checkbox is selected, all
items will be reported using each item’s Reporting Quantity UOM. If the
checkbox is not selected, the report will print the Delivered Quantity.
Item Categories
Item Categories are used to classify items according to general use and
function for reporting and analysis. Examples include:
•
•
•
•
Ready-mix concrete
Aggregate
Admixture
Extra charges
Unit of measure and other information associated with each category defaults
into the corresponding fields on the Items screen when a new item is created
and assigned a particular category {Files > Item Information > Items}.
Before entering Item Category information, gather information about the
items that you use and decide how you want them organized for lookup and
reporting purposes.
Topics in this section:
Item
Item
Item
Item
Item
Types
Categories
Categories
Categories
Categories
Setup
UOM Setup
Mix Defaults Setup
Tax Override Setup
Item Types
An important part of creating an Item Category is assigning the category an
Item Type. The Item types correspond to general product classifications:
Cement, ready mix, coarse aggregate, etc., and provide an underlying layer
8/9/05
205
of consistency to the item setup process, which in turn allows for greater
flexibility in setting up Item Categories.
Item Types can only be assigned at the Item Category level. They cannot be
assigned at the Item level.
Selecting an Item Type has a number of effects:
•
•
The Item Type defaults a base set of UOM entries. These entries can be
edited at either the Item Category or Item level.
The Item Type affects the appearance of the Item Category and Item
screens. For example, the Mix Defaults tab only appears on the Item
Category screen if the Item Type is either asphalt or concrete.
Similarly, there are a number of tabs, such as Batch Codes and
Constituents, that only appear on the Items screen if the item belongs to
an Item Category with an Item Type of asphalt or concrete.
Item Categories Setup
To enter a new item category:
1.
2.
Go to the Item Categories screen. {Files > Item Information > Item
Categories}
Enter an Item Category code.
Item Categories (aggregate) – UOM Tab (EDTICAT)
3.
4.
5.
6.
206
Enter a Description and Short description for the item category as
desired.
From the list, select an Item Type to assign to this item category.
Generic UOM settings will default for certain Item Types.
Select a Taxable status (taxable or non-taxable) for the category.
Proceed to the UOM tab.
8/9/05
Item Categories UOM Setup
Items are assigned units of measure (UOM) and quantity extension codes to
determine the method for converting the value the user enters in the Ordered
Quantity field on the Item Units of Measure screen. {Files > Item Information
> Items > UOM} The Ordered Quantity value, which may differ depending
upon the user’s needs, is extended to three fields:
Delivered Quantity
Ticket Quantity
Pricing Quantity
To define UOM information:
1.
Select the UOM tab.
Item Category (concrete) UOM (EDTICAT1)
2.
3.
4.
5.
8/9/05
In the Ordered Quantity field, enter the code that represents the unit of
measure for an ordered quantity of the item. You can detail on the field
to call the UOM Selection screen.
Select an Ordered Quantity Extension Code from the list. This field
determines how the delivered quantity is calculated. Possible choices,
preset within the application, are as follows.
•
Per Unit
•
Per Mix Cubic Quantity
•
Per Load
•
Per Weight of Cement
•
Per Weight of Cementitious Materials
•
Percent of Weight of Cement
•
Percent of Weight of Cementitious Materials
•
Per Weighted Item(s) Quantity
In the Delivered Quantity field, enter the code that represents the unit
of measure for a delivered quantity of the item. You can detail on the
field to call the UOM Selection screen.
Select a Ticket Quantity Extension Code from the list. This code
determines how the ticket quantity value is printed and then stored in the
database. Possible choices, which are preset within the application, are
as follows:
207
•
Delivered Quantity
•
Delivered Quantity Per Mix Cubic Quantity
•
Ordered Quantity
•
Mix Delivered Quantity
•
Print Nothing for the Ticket Quantity
•
Per Pricing Content
6. In the Price Quantity field, enter the code that represents the unit of
measure for the price quantity of the item.
7. Select a Price Quantity Extension Code from the list. Possible choices,
which are preset within the application, are as follows:
•
Delivered Quantity
•
Mix Delivered Quantity
•
One
•
Ordered Quantity
•
Per Pricing Content
8. In the Batch field, enter the code that represents the unit of measure for
batching.
9. In the Inventory/Cost field, enter the code that represents the unit of
measure for inventory and cost.
10. In the Reporting field, enter the code that represents the unit of
measure for reporting.
11. Accept this screen to save UOM information.
Item Categories Mix Defaults Setup
Note: This tab only appears if the Item Type is Concrete or Asphalt.
To define mix defaults information:
1.
Select the Mix Defaults tab to access and adjust fields specifically
applicable to concrete and asphalt mix item type categories. {Files >
Items > Item Categories > Mix Defaults}
Item Categories – Mix Defaults Tab (EDTICAT2)
2.
208
Enter a default Strength value. This value is used as the default for the
strength when items, using the concrete/asphalt mix item category, are
added on the Item Ready Mix/Asphalt Information screen, respectively.
{Files > Items > Mix}
This fields is of particular use if you have so many mixes that you need to
sort them by strength.
8/9/05
Note: You may click on the detail button associated with this field to
select from a list of valid units of measure for the strength.
3.
4.
Enter a default Slump value. This value is used as the default for the
slump when concrete mix items, using this item category, are added on
the Item Ready Mix Information screen. {Files > Items > Mix}
Proceed to the Tax Override tab, or accept the screen.
Item Categories Tax Override Setup
The Item Categories Tax Override screen allows you to specify tax-related
information for the specific item category that will override the taxability and/
or tax rate of the general order. For example, a tax override may be used
when a user is shipping between states when the material is taxable in one
state but not in the other. These settings will apply to all items belonging to
the item category unless specific overrides are assigned to an item.
To enter tax override information:
1.
Select the Tax Override tab on the Item Categories screen. {Files >
Items > Item Categories > Tax Override}
Item Categories – Tax Override Tab (EDTICAT3)
2.
3.
4.
5.
Select the Tax Authority and Tax Location. When the item is in this tax
authority/location, the override takes effect.
Select the Override Taxable Status. This status – taxable or nontaxable – takes effect when the item is taxed under the selected tax
authority/location.
Select the Override Tax Rate Location. This location’s rate is used as
an override when the item is taxed under the selected tax authority/
location.
Accept the Item Categories screen to save the new information.
Items
Items can be added, changed, deleted, or listed, depending on user privilege
and system license settings. Items represent the goods and/or services that
are sold to customers. To facilitate the proper setup of each item record, the
8/9/05
209
Items screen is organized using tabs. Refer to the table below to learn each
tab’s function.
Tab
Function
Main
Is the item salable or a constituent (or both)? The Item
Category is also assigned on this tab.
UOM
Assign Units of Measure and extension codes. These default
from the Item category, but can be edited at the Item level.
Conversions
Establish non-standard conversions. For example, converting
a cubic yard of a mix to a specific number of blocks.
Sales
Tax and discount information
Tax Override Use to override tax information entered on the Sales tab
Mix
Only available if the Item Type is concrete or asphalt. This
tab holds reference and batching information about the mix:
strength, slump, aggregate size, etc. for concrete; strenght,
asphaltic cement type, minimum temperature, etc. for
asphalt.
User Fields
Enter information in item-specific user-defined fields. The
specific fields must first be created on the Configuration-User
Fields tab.
Locations
Specify which locations have the item. A plant cannot ship an
item if the item does not exist at the location(s) associated
with the plant.
Costs
plant-level cost information
Prices
Record price information for the item at each plant
Inventory
Record inventory information for the item at each plant
Batching
Record batching information at each plant
Constituents Record cost information about constituent products
Batch Codes
Record batch codes for each plant
Automatic
Products
Item-level associated products
Information can be recorded for customers and/or items. When orders are
placed for a customer or project for a specific item, the customer/project
specific item information is used in lieu of the generic item information. Before
entering item information, gather information about the items you will be
shipping and the constituents that make up some of those items.
Topics in this section:
Initial Item Entry
Item Entry
Item Main Tab Setup
Item UOM Setup
210
8/9/05
Item Conversions Setup
Item Sales Setup
Item Tax Override Setup
Item Mix Setup
Item User Fields Setup
Item Locations Setup
Item Costs Setup
Item Prices Setup
Item Inventory Setup
Item Batching Setup
Item Constituent Setup
Item Batch Codes Setup
Hints for Entering Items
Initial Item Entry
When entering items for the first time, it is important to realize that these files
must be built like a tower, from the bottom up. So, to effectively enter your
company’s mixes as items, you must first enter all the constituents (sand,
water, cementitious material, admixes, etc.) in each mix as an item. Once
the constituents have been entered, you can go back and enter the mixes.
Note: On each Item tab, not all options will display at all times. The fields
that display are dependent on the Item Type, assigned via the Item
Category.
Item Entry
To enter an item:
1.
Go to the Items screen. {Files > Item Information > Items}
Items – Main Tab (EDTIMST)
2.
3.
4.
8/9/05
Enter an Item Code. This entry is user-defined, but it may be helpful to
group the item codes by type, such as water, aggregate, cement,
admixes, etc.
Enter a Description and Short Description for the item.
Select an Item Category for the item. {Files > Item Information > Item
Categories} The Item Type associated with the selected Item Category
determines what tabs and fields are available.
211
Item Main Tab Setup
The Main tab is used to enter general information about the item. The image
below shows all fields. The fields available for a given item are determined by
the Item Type (specified via the Item Category).
Items-Main tab (EDTIMST1)
To enter information on the Main tab:
1.
2.
3.
4.
5.
Select the Main tab.
If you are entering multiple versions of a single item (water in gallons
and water in liters, for example), you can enter the item code to be used
for inventory purposes. If metric water was Item Code 1 and standard
water was Item Code 2, you could enter 2 as the Inventory Item Code for
both items to combine the inventory totals.
Mark Keep in Inventory if this item is to be tracked for Inventory
purposes.
If the Item Category cooresponds to the Kit or Pipe Item Types, the
Serial Number field will display.
Mark the Saleable Item checkbox if the item is saleable. The value will
initially default from the selected Item Category.
Note: Items not marked as salable will not be available in order entry.
6.
If the Saleable Item field is flagged, the Do not allow ticketing flag
becomes available. COMMANDseries allows users to assign price by item
category. This modification is effected by creating a dummy item record
for a item category. If you are creating an item category item for this
purpose, select the Do Not Allow Ticketing flag.
Note: Additional information on this field can be found in the appendices.
7.
Mark Use Lot Number if the item is to be tracking using Lot Numbers.
This flag is often used for block products.
Note: This field will not be available if the Serial Number flag is set.
212
8/9/05
8.
Mark Constituent Items if the item is a mix constituent. When you
later enter mixes, you will fill out a mix Constituents tab. Only items
flagged as Constituent Items will be available on that tab.
Note: The next three fields relate to Materials Manager. If it is not in the
license, these fields will not display.
9.
Mark Admixture As Part Of Volume Calculation if the material is
added to a mix in volumes sufficient to significantly afffect yield
calculations.
10. Mark Allow Minimum Cement Content Override to enable a Materials
Manager user to reduce the cement content less than the specified
minimum. This box is unchecked by default.
11. Mark Allow Constituent Substitution to allow Materials Managers to
substitute constituents.
Item UOM Setup
The UOM tab is used to enter unit of measure information that is specific to
the item. This is different from the UOM tab on the Item Categories screen in
that information on the Item Categories UOM tab is defined for a category and
information on the Items UOM tab is defined for an item.
To define UOM information:
1.
Select the UOM tab.
Items – UOM Tab (EDTIMST2)
2.
The UOM information defaults from the Item Categories file. Make any
necessary changes.
Note: If you need help making changes, refer to the Item Categories
section in this manual.
Item Conversions Setup
The Conversions tab is used to enter information about converting from one
unit of measure to another. For example, in order to use the Volume
8/9/05
213
Calculator effectively with aggregate products, the system must be able to
convert a given aggregate from weight to volume.
To define conversions information:
1.
Select the Conversions tab.
Items – Conversions Tab (EDTIMST3)
2.
To convert the unit of measure, enter the UOM code in the Convert
From UOM field or select <Enter> to display the Possible Standard
Units-of-Measure screen.
Possible Standard UOM (FNDUOMS)
3.
4.
5.
Select a code from this screen, then press <Enter> to return to the UOM
tab. The code will display in the Convert From UOM field.
Repeat steps 2 and 3 from the Convert To UOM field.
In the Multiplier field, enter a number (factor) to be used to convert the
UOM.
Item Sales Setup
The Sales tab is used to enter information about the item such as tax status,
terms, trade discounts, and usage.
To define sales information:
1.
214
Select the Sales tab.
8/9/05
Items – Sales Tab (EDTIMST4)
2.
3.
4.
5.
6.
Indicate the Taxable status of the item: Non-taxable, Taxable, or Always
Taxable.
If the item is non-taxable indicate the reason in the Non Taxable
Reason field. If the item is marked as taxable, this field will not display.
In the Discountable section, indicate if the item is eligible for Trade and
Terms discounts by marking the applicable checkbox. If a customer who
has a standard discount orders an item that is not discountable, the
system will not discount the item.
In the Usage Code field, enter the code that represents the primary
usage for the item. If you do not know the code, detail on the field to
select from a list.
If this item will be available for a limited time only, enter the Expiration
Date. The system will not allow a customer to order an expired item. If
you do not want the item to expire, leave the field blank.
Item Tax Override Setup
Tax laws can get complex. In some cases, certain types of items get taxed
differently than others. The Tax Override tab is used to further define the
taxability information entered on the Sales tab.
To define tax override information:
1.
Select the Tax Override tab.
Items – Tax Override Tab (EDTIMST5)
2.
8/9/05
In the Tax Authority field, enter a code that represents the tax authority
for which taxable status is being changed. If you do not know the code,
215
3.
4.
5.
6.
press <Enter> to select a code from the Choices (Tax Authorities/
Locations File) screen.
The location code associated with the tax authority automatically displays
in the Tax Location field.
In the Override Taxable Status field, indicate if the item is Nontaxable, Taxable, or Always Taxable for this tax authority/location.
The purpose of this field is to override the status entered on the Sales
tab in the event that the status is not applicable to this tax authority/
location.
If the status is non-taxable, indicate the reason in the Non Taxable
Reason field.
In the Override Tax Rate Location field, enter a code that represents
the tax rate location, or press <Enter> to select a code from the Choices
(Tax Authorities > Locations File) screen.
Click the Add Occurrence button to repeat this procedure for other tax
authorities, or accept the screen.
Item Mix Setup
The Mix tab is used to enter information about how the item is batched. This
tab will only be available if the Item Type is asphalt or concrete.
To define mix information for asphalt:
1.
Select the Mix tab.
Items – Mix Tab (Asphalt) (EDTIMST6)
2.
3.
4.
5.
6.
216
Enter the Strength of the mix. This field represents the average design
strength of the mix product.
Enter the Asphaltic Cement Type of the mix.
Enter the mix’s Aggregate Size. This is the maximum size of the
aggregate filler in the mix.
Enter the Minimum Temperature required in batching the asphalt.
The mix’s Percent Recycle value represents the percentage of recycled
asphalt included in the mix.
8/9/05
To define mix information for concrete:
1.
Select the Mix tab.
Items – Mix Tab (Concrete) (EDTIMST6)
2.
Enter the Strength of the mix. This field represents the average design
strength of the mix product.
3. Enter the Slump of the mix. The slump is a measure of the cohesion,
plasticity, water content, and solidity of the mix.
4. Enter the mix’s Water/Cement Ratio. This ratio represents the amount
of water in the cement. It can be printed on the ticket by specifying the
document format field on the Document Formats screen. {Files >
Document Formats}
5. Enter the mix’s Aggregate Size. This is the maximum size of the
individual particles of aggregate filler in the mix.
6. Enter the Cement Type. This field identifies the type of cement in the
mix product.
7. Enter the mix’s Days to Strength. This field specifies the number of
days of hydration required for the mix to reach the strength specified in
the Strength field.
8. Enter the Maximum Water that the mix can contain. When the mix is
batched, the actual batched water amount can be subtracted from this
amount and printed on the ticket as the maximum amount of water that
can be added on site.
9. Enter the Percent Air contained in the mix.
10. If the mix contains lightweight aggregates, enter the Lightweight Cu Ft.
11. Enter the Minimum Cement Content in the mix.
12. Enter the Water Holdback in the mix.
Item User Fields Setup
The fields on this tab are configured on the Configuration screen. {Files >
General Information > Configuration} If there are no user-defined fields
flagged for item-level display, this tab will not display.
8/9/05
217
To enter user fields information:
1.
Select the User Fields tab.
Items – User Fields Tab (EDTIMST8)
2.
Enter the appropriate information.
Item Locations Setup
The Locations tab is used to indicate which locations carry the item in
inventory.
To define locations information:
1.
Select the Locations tab.
Items – Locations Tab (EDTIMST9)
2.
3.
4.
218
Mark the checkbox next to the plant that carries the item in its inventory.
The subsequent tabs on the Item editor allow separate entries for each
location. Mark the Set all functions to copy to all checkbox if you want
a change to a field on one location to be copied to the corresponding field
for all other selected locations.
The Copy button allows a one-time copy of information between
locations. When the button is pressed, the Item Location Copy screen
appears.
8/9/05
Item Location Copy (EDTIMSTG)
5.
6.
Select the location from which you want to copy information in the Copy
From Loc drop-down field.
Select the checkboxes to indicate the locations to which the information is
to be copied. Select the All button to select/deselect all the locations.
Note: This screen will only display those locations that are already
flagged on the Item-Locations screen.
7.
Accept the screen.
Item Costs Setup
The Costs tab is used to enter standard cost and cost extension information
about the item. This information is used in generating gross margin
information.
To define costs information:
1.
Select the Costs tab.
Items – Costs Tab (aggregate) (EDTIMSTA-agg)
8/9/05
219
2.
3.
4.
5.
6.
7.
Enter the Standard Cost for the item at the plant specified in the
Location field.
In the Cost Extension field, select the quantity for which the standard
cost is applied from the drop-down list.
Enter the Standard Cost Effective date. This date represents when the
standard cost becomes effective.
If you change the standard cost, the original value will be automatically
transferred to the Previous Standard Cost field.
If you change the cost extension, the original value will be automatically
transferred to the Previous Cost Extension field.
If you want the cost or extension change to be applied to all locations,
mark the Copy to All checkbox.
If the item is a mix, then cost information will be calculated based on the
entered cost information of the constituents. Cost information is displayed,
but cannot be edited.
Items – Costs Tab (mix) (EDTIMSTA-mix)
Item Prices Setup
The Prices tab is used to enter price information about the item such as
current and previous price and current and previous price extension.
To define price information:
1.
Select the Prices tab.
Items – Prices Tab (EDTIMSTB)
220
8/9/05
2.
3.
4.
5.
6.
7.
8.
Enter a code for the Price Category or press <Enter> to select a code
from the Choices (Price Category File) screen. If you enter a pound sign
(#) for the Price Category, the system will use that as a wild card.
If there is one price line, and “#” (the system wildcard) is entered in the
Price Category Fields, then the entered price will be applied to all Price
Categories. If there are entries for some price categories as well as a
wildcard price, then the wildcard price will be used for any price
categories without an individual entry.
Under the Price field, enter the current price of the item.
Under the first Price Extension field, enter the current extension.
Under the Effective field, enter the date on which this price becomes
effective.
The last price of the item is displayed under the Previous field.
The last price extension of the item is displayed under the second Price
Extension field.
If the Use Product Level Terms Code Discount Overrides flag is set
on the Configuration-Invoicing tab, three fields display that allow you to
override customer or project discounts.
Select the Override Terms Code Discount to override standard terms
discounts established in customer or project files. When the box is
selected, the Discount Rate Type and the Discount fields appear.
Note: To make an item immune from any terms discounts, set the
override amount to zero.
9.
Mark the Copy to All checkbox to make this change effective at all
locations, or enter pricing information for the other locations.
Item Inventory Setup
The Inventory tab is used to enter inventory information for a specific
location. These fields do not contain the current inventory amount for an
item, but specify the parameters needed to track and manage the inventory.
To define inventory information:
1.
8/9/05
Select the Inventory tab.
221
Items – Inventory Tab (EDTIMSTC)
2.
3.
4.
5.
6.
7.
8.
In the Storage Location field, enter the plant where the item is stored.
In some cases, the item may be sold from one location and stored at
another.
Enter the Maximum Quantity of the item that can be stored at this
location.
Enter the Minimum Quantity of the item that should be stored.
In the Reorder Quantity field, enter the amount that should be
reordered when the reorder point is reached.
Enter the minimum quantity of the item that can be reached before
reordering in the Reorder Point field.
Indicate the number of days in advance of expected need that the item
should be ordered in the Lead Time in Days field.
Mark the Copy to All checkbox to copy this information to all locations.
Item Batching Setup
The Batching tab is used to enter information about the batching systems
used at your plants, to ensure that the mix is batched properly at all locations.
Options on this tab depend on the type of item you are entering.
To define batching information for a mix:
1.
222
Select the Batching tab.
8/9/05
Items – Batching Tab (mix) (EDTIMSTD)
2.
3.
4.
5.
6.
Enter the Maximum Batch Size for the location.
Enter the minimum amount of Mixer Time required for this mix.
If you want to download the information to the batch system, mark the
Download to Batch System checkbox.
In the Batch System UOM field, enter the code for the system’s UOM or
press <Enter> to select from a list of codes.
Mark the Copy to All checkbox if you want to copy this information to all
locations.
To define batching information for aggregate:
1.
Select the Batching tab.
Items – Batching Tab (agg) (EDTIMSTD)
2.
3.
4.
8/9/05
Enter the Specific Gravity of the aggregate. This value is used by the
Materials Manager to convert between weight and volume.
Enter the standard Moisture Percent for the item.
In the Batch System UOM field, enter the code for the system’s UOM or
press <Enter> to select from a list of codes.
223
5.
Select Download to Batch Systems is you want COMMANDseries to
transmit this information to the batch computer during a mix download.
Mark the Copy to All checkbox if you want to copy this information to all
locations.
Item Batch Codes Setup
The Batch Codes tab is used to enter batch codes and batch code descriptions.
To define batch code information:
1.
Select the Batch tab.
Items – Batch Codes Tab (EDTIMSTF)
2.
In the Batch Code field, enter a code that you want to represent the
item.
Note: When interfacing with an Eagle, batch codes can be no longer than
eight alphanumeric characters.
3.
4.
5.
6.
7.
The second line batch code is used as a reserve code. For example, if
dispatch sends one batch code and the batcher has none in inventory, the
batcher will use the reserve code and send this information back to
dispatch. Dispatch will always send the primary code but it will accept
either the primary or reserve code.
In the Description field, enter text that describes the batch code.
Enter an abbreviated description in the Short Description field.
Mark the Copy to All checkbox to copy this information to all locations.
Accept the screen or proceed to the next tab.
Item Constituent Setup
The Constituents tab is used to enter information about the quantity of
constituent products at each location. The tab is only available for concrete
and asphalt item types.
224
8/9/05
To define constituents information:
1.
2.
Select the Constituents tab.
The Cost Display Option drop-down field defaults to Cost to This
Product. As each constituent is added, the system will calculate the cost
of that constituent, based on the entered quantity. The system maintains
a running total of the cost of all constituents in the Total Mix Cost field.
The other cost display option, changes the column to display the cost per
order quantity.
Items – Constituents Tab (EDTIMSTE)
3.
4.
5.
6.
7.
In the field at the top right of the screen, indicate whether this is a
Constituent Product or a Cost to This Product.
Under the Constituent Product field, enter a code for the product or
press <Enter> to select a code from the Possible Items screen.
Enter the Quantity held in inventory at the indicated location.
Select the Copy to All button if you want to copy this information to all
locations.
Accept the screen or proceed to the next tab.
Caution: Copying constituent information to all locations will overwrite the
information currently stored in the other locations.
Note: If any of the constituents are not available at every location, you are
notified of the relevant constituent(s) and which location(s).
Automatic Products
The Automatic Products function allows you to configure items to be added
automatically. Previously, this functionality was accomplished through
customer- or project-level associated products. This feature extends that
ability to the Item Level.
You can have an admixture automatically added to a given mix, or have a
delivery charge automatically attach to an item. In each case, the automatic
item will be displayed separately on the order and ticket.
8/9/05
225
The Automatic Products tab will only display for primary products and extra
charges.
To add an automatic product to an item:
1.
Select the Auto Products tab.
Automatic Products (EDTIMSTH)
1.
2.
3.
4.
5.
Select the required Location (or select the Copy to All button).
Enter the Auto Product code or detail on the field to select from a list.
The Description will default from the Item file. This description can be
edited. If it is edited, the edited description will only be used when the
item is added to an order via the Auto Product function.
Enter the Quantity to be added.
Accept the screen.
Hints for Entering Items
For quick entry of multiple mixes:
•
•
Open an existing mix and click on the Save As button. This clears the
item code, while retaining the rest of the mix’s information.
Enter a new item code and change the price, strength, constituents, and
other necessary fields accordingly.
To set up a mix with a non-taxable haul charge:
•
•
•
•
•
226
Include the haul charge on all mixes as usual.
Setup a new tax location for the existing tax location (create two identical
tax locations).
Set the new tax rate as exempt and the exemption amount for your haul
charge.
Select new tax rate for customers who receive tax-free hauling.
If zone charges are included, the zone charges are taxed, but the amount
is minimal.
8/9/05
Do not worry too much about the pricing. When entering prices for items,
remember that these prices can be customized for each customer and project,
allowing you freedom in making bids and rewarding loyal customers with
better prices for items.
Minimum Load Charge Tables
A minimum load (or short load) is a load that falls on or below the size
specified on the Truck screen as the minimum load size for the truck.
Minimum load charges are assessed on the Orders and/or Ticketing screen(s)
to make up for the fact that such loads are not an efficient or cost-effective
use of a truck and driver's time. These charges are added to an order and/or
ticket by adding a specific minimum load charge item (acting like a service
charge) to the order.
Before entering minimum load charge information, gather information about
your company’s policy regarding minimum load charges.
Minimum Load Charge Table Setup
It is useful to have more than one minimum load charge table for different
levels of charges. If you do both customary and metric work, you will need at
least one charge table for each measurement system.
Note: Before you can create a minimum load charge table, you must set up
an item for small load charges.
To set up a minimum load charge table:
1.
Go to the Minimum Load Charges screen. {Files > Item Information >
Minimum Load Charges}
Minimum Load Charges (EDTMCHG)
8/9/05
227
2.
3.
4.
5.
Enter a Minimum Load Charge Table code to identify the new
minimum load charge table.
Enter a Description and Short description for the table as desired.
Enter the Item Code for the small load charge item, or detail on the field
to select from a list. Minimum load charges are added to a order/ticket
just like any other associated item. Adding this item code to an order/
ticket attaches this minimum load charge table.
Select a Unit of Measure for the table. This dictates the unit of measure
for the Load Qty fields.
The next three fields allow you to set up parameters to provide exmptions for
large orders.
6.
7.
8.
Enter the Minimum Quantity (based on the Order Delivered Quantity)
required to be shipped before any minimum load charge exempt loads
are allowed on an order.
Enter the Minimum Loads required to be shipped before any minimum
load charge exempt loads are allowed on an order.
In the Price Exempt Loads field, enter the number of loads to be
exempt from minimum load charges after the targets in either the
Minimum Quantity or Minimum Loads fields have been met.
The rest of the form allows you to specify the various charges. As the image
shows, you can break the charges down to small increments. Most people,
however, have a much smaller number of charge ranges.
9.
Enter a Load Qty and a corresponding monetary Charge. This amount is
added to loads that fall on the load amount or between the load amount
and the previous amount.
10. Accept the Minimum Load Charges screen to store this minimum load
charge table.
Seasonal Charges
The Seasonal Charges screen allows users to assign price increases according
to a season. Seasons are defined by specific dates, and the price increase
associated with the season can be applied to single products or all products.
After defining a seasonal charge, the Orders screen allows users to apply the
charge according to the order. {Dispatch > Orders > Pricing} Also, customers
can be set up with default seasonal charges as a default by marking the Apply
Seasonal Charge checkbox in the Customer File. {Files > Customer & Project
Information > Customers > Pricing}
Seasonal charges can also be assigned using Sundry Charges.
To enter a new seasonal charge:
1.
228
Go to the Seasonal Charges screen. {Files > Item Information >
Seasonal Charges}
8/9/05
Seasonal Charges (EDTSCHG)
2.
3.
4.
5.
6.
7.
8.
Enter a Seasonal Charge Table code to identify the new seasonal
charge table.
Enter information in the Description and Short description fields to
describe the seasonal charge table.
Enter a range of dates for this seasonal charge to apply in the Active
Range fields.
Select a Product Code to which the seasonal charge applies. If applying
the charge to all products, enter # in the field.
Select the Unit of Measure to use when applying the seasonal charge.
The UOM applies the seasonal charge per the specified unit.
Specify the amount of the seasonal charge in the Price field. When
applied, this amount is added to each measured unit of the order. Using
the above screen shot as an example, a 12.50-cubic-yard order ticketed
between November 15 and April 30 would have Item Code 292 added to
the order. The charges on the tickets would total $75.00.
Accept this screen to store the new seasonal charge information.
Unloading Charges
The Unloading Charges screen is used to set up additional unloading charges
(or wait charges) and to edit unloading charges already in existence.
Seasonal, sundry, and minimum load charges are all created when an
applicable load is ticketed. Unloading charges, however, cannot be calculated
until the materials has been delivered. They are generally calculated as part
of the invoice prep process.
To enter a new unloading charge:
1.
8/9/05
Go to the Unloading Charge Table screen. {Files > Item Information >
Unloading Charge Table}
229
Unloading Charge Table (EDTUCHG)
2.
3.
4.
5.
6.
Enter a Unloading Charge Table code to identify the new unloading
charge table.
Enter information in the Description and Short description fields to
describe the unloading charge table.
From the Beginning Tracking Statuses and Ending Tracking
Statuses fields’ lists, select the points between which the unloading
times should be calculated.
In the Allowance Per Load field, specify the amount of time to be
allowed on a per load basis.
In the Allowance Per Unit field, specify the amount of time to be
allowed on a per unit basis if necessary. This field’s detail button allows
you to change the unit upon which the allowance is based.
Note: If values are placed in both of the previous two fields, the allowance will
be accumulated. For example, 20 minutes per load with an additional 5
minutes per yard.
7.
In the Minimum Allowance Per Load field, specify the minimum
amount of time to be allowed for any ticket using this charge table.
8. From the Calculation Method field’s list, select whether the charges
should be based on the ticket, order, or project.
9. Determine how the delivered quantity, in units, should be rounded, if
necessary, from the Round Delivered Quantity field’s list. The quantity
can be rounded up, down, or left as the actual amount.
10. If desired, enter an amount of time in the Writeoff Per Charge field.
This field represents a grace period during which excess charges will not
230
8/9/05
be applied.If the grace period is exceeded, though, the customer is
charged for the full amount.
11. Specify the number of minutes that make one unit (for charging
purposes) in the Unloading Charge Increment field.
12. Determine how the unloading charge should be rounded, if necessary,
from the Round Unloading Charge field’s list. The charge can be
rounded up, down, or left as the actual amount.
13. Enter the unloading charge item code in the Item Code field. Use this
code to print descriptions on invoices, reports, and general ledger entries.
Select the detail button to list unloading charge item codes. New items
can be entered on the Items screen. {Files > Item Information > Items}
Possible Items (FNDIMST)
14. From the Create Unloading Charge On field’s list, select the ticket to
include the unloading charges in a multiple-ticket.
Note: This field will not display if Calculation Method is set to Ticket.
15. Specify a price per unit in the Price field.
16. Accept the screen to save the new unloading charge information.
Sundry Charges
Sundry charges are additional charges associated with the sale or delivery of
a product, such as extra hours, environmental, and Saturday/Sunday
charges. These charges are based on charge types (per unit, flat amount,
percent of ticket, or minimum ticket) with time and day constraints
established for each sundry charge. Sundry charges can be flagged to appear
on the first load only, or they can be flagged to automatically appear on all
loads. Any automatic sundry charges default into the order, without the
8/9/05
231
needtor setting up the charge on the customer or project. This prevents the
billing departments from having to set up these charges manually and
reduces the chance of billing errors.
Prices for sundry charges can be entered on a number of different levels, so it
is important to understand the hierarchy used when pricing sundry charges:
1.
2.
3.
4.
5.
6.
7.
The system checks for an order-level sundry charge override (on the
Order Pricing screen). This value, if present, takes precedence over any
other setting or override.
Next, the system looks for a project-level override on the charge table
(Project-Pricing).
Customer-level override on the charge table (Customer-Pricing).
Project-level price for the sundry charge item (Project-Products)
Customer-level price for the sundry charge Item (Customer-Products)
The Item Master File. Only here are Price Categories considered.
If no pricing exists at any of the prior levels, then the price is set from the
charge table itself.
Note: “No price” means that the field must be null (empty); the system will
process a zero price as a valid price.
To enter a new sundry charge:
1.
Go to the Sundry Charges screen. {Files > Item Information > Sundry
Charges}
Sundry Charges (EDTPCHG)
2.
232
In the Sundry Charge field, enter the sundry charge table code.
8/9/05
3.
4.
5.
6.
7.
8.
9.
8/9/05
Enter a Description and Short description.
Enter the Item Code to which you are assigning this sundry charge.
Select a Charge Type from the list. The charge types to be applied to
this sundry charge are:
•
Per Unit
•
Flat Amount
•
Percent of Ticket
•
Minimum Ticket.
•
Minimum Product
You can control whether the charge appears as a separate line item on
anticket/invoice, or if the charge is to be added to another price. Select a
Combine with Material option from the field’s list. Valid options follow.
Do not Include (default) – the sundry charge and the material
price appear separately on the ticket, invoice, and data out.
Combine on Ticket, Invoice, and Data Out – combines the
extended material price and the sundry charge on the ticket,
invoice, and data out; if customers wish to combine charges, this is
the most common choice.
Combine on Ticket and Invoice – combines the extended
material price and the sundry charge on the ticket and invoice; they
are separated on the data out.
Combine on Ticket and Data Out – combines the extended
material price and the sundry charge on the ticket and data out;
they are separated on the invoice.
Combine on Invoice and Data Out – combines the extended
material price and the sundry charge on the invoice and data out;
they are separated on the ticket.
Combine on Ticket – combines the extended material price and
the sundry charge on the ticket; they are separated on the invoice
and data out.
Combine on Invoice – combines the extended material price and
the sundry charge on the invoice; they are separated on the ticket
and data out.
Combine on Data Out – combines the extended material price and
the sundry charge on the data out; they are separated on the ticket
and invoice.
Select the Target Unit of Measure when a charge type of Per Unit is
selected.
Select Scheduled Load Time or Ticket Typed Time from the list in the
Time to Use field.
Enter the Start Time and End Time. These fields automatically display
the default times of 00:00 to 23:59 for all sundry charges. Based upon
the selection for Time to Use, sundry charges are applied for each ticket if
that ticket’s Scheduled Load Time and Ticket Typed Time are within these
ranges.
233
10. Check the Days to Apply Charge. Depending upon the days of the week
the sundry charge is to apply, check the day when these charges are to
be applied to the tickets. If the checkbox for All is flagged, the
checkboxes for all days are marked.
11. Enter the Current Amount/Percent/Minimum Ticket. This is the
dollar amount of the sundry charge if the charge type is either Per Unit or
Flat Amount. If the sundry charge type is Percent of Ticket, enter the
percentage rate (i.e. 10 percent, 12.5 percent). If the charge type is
Minimum Ticket, enter the total minimum ticket dollar amount. Do not
enter a percent rate for a Per Unit, Flat Amount, or Minimum Ticket
Charge Type.
12. Enter the Effective Date for the amount, percent, or minimum ticket
values entered above to take effect on current day orders and tickets.
13. The Previous Amount/Percent/Minimum Ticket field displays any
changes made to Current Amount/Percent/Minimum Ticket for reference
purposes only.
14. Mark the Apply to the first Load Only checkbox to indicate that the
sundry charge is to be calculated and appear on the first load only. Any
succeeding loads will not have this charge.
15. If the Apply Automatically to all Orders checkbox is checked, this
sundry charge would appear on every ticket for every order if the ticket’s
scheduled or typed time meets the requirements for Begin Time and End
Time and Days to Apply Charge.
16. The Concrete, Aggregate, Asphalt, and Block checkboxes only appear
when the Apply Automatically to all Orders checkbox is selected. Check
the product line(s) to which this automatic charge is to be applied.
17. The Item Categories button only appears for the Percent of Ticket
Charge Type. The Item Categories screen displays all item categories
currently established with a checkbox beside each item category. Select
the item categories for which a Percent of Ticket Sundry Charge applies
by marking the checkboxes. Only those items for the item categories
selected are charged a Percent of Ticket Sundry Charge.
18. Accept this screen.
Vendors
A vendor is any company from which your company purchases materials.
Records for these vendors are created, added, or edited on the Vendors
screen. Before new vendors can be added, however, vendor types must be
defined.
Note: You must be in COMMANDinventory for Vendor and Vendor Types to
display as menu options.
Vendor Types Setup
The Vendor Types screen allows the user to create and edit vendor types.
234
8/9/05
To create a vendor type:
1.
In COMMANDinventory, go to the Vendor Types screen.
{COMMANDinventory > Files > Item Information > Vendor Types}
Vendor Types (EDTVNTY)
2.
3.
4.
5.
6.
Enter an alphanumeric code in the Type field. This code uniquely
identifies this vendor type in the COMMANDinventory system.
Enter a Description for this vendor type. Enter an abbreviated version of
this description in the Short field.
Select a Vendor Class for this type.
Material Vendor – the vendor sells you material.
Haul Vendor – the vendor transports material.
Material & Haul Vendor – the vendor transports material for you
and sells material to you.
To enter another vendor type, select the Add Occurrence button.
When you finish entering types, accept the Vendor Types screen.
Vendor Setup
The Vendors screen allows the user (with appropriate system priviledges) to
add, change, or delete vendor records.
To enter a vendor:
1.
8/9/05
In COMMANDinventory, go to the Vendors screen. {COMMANDinventory
> Files > Item Information > Vendors}
235
Vendors (EDTVNDR)
2.
3.
4.
5.
6.
7.
8.
Enter an alphanumeric Vendor Code. This code uniquely identifies the
vendor in COMMANDinventory.
Enter a Sort Name for the vendor. This name is used to select or sort
vendors on COMMANDseries reports.
Enter the vendor’s Name as it should appear on purchase orders, checks,
reports, etc.
Enter Address, Phone Number, and Contact information for the
vendor.
Indicate the type of vendor by selecting from the Vendor Type field’s
list.
Enter the Location Code for the vendor. Note that this field is not
required. If you select a location code, this vendor is not able to deliver to
any of your other locations. If the field is left blank, the vendor is able to
deliver to any of your locations.
Accept the Vendors screen.
Freight Methods
This screen allows you to edit freight methods already in existence and create
new freight methods.
To set up freight methods:
1.
236
Go to the Freight Methods screen. {COMMANDinventory > Files > Item
Information > Freight Methods}
8/9/05
Freight Methods (EDTFRMT)
2.
3.
4.
5.
8/9/05
Enter the Type, a numeric code that corresponds to the freight method.
Enter a Description for this freight type. Enter an abbreviated version of
this description in the Short field.
Choose the Freight Class. This field specifies the numeric code that
corresponds to the freight method. There are three freight methods
supported by COMMANDseries.
Truck – The truck is owned by your company.
Haul – The truck is owned by another company that has been hired
to do one of your jobs.
Other – The truck is neither owned by your company nor hired from
another company.
Accept the Freight Methods screen.
237
Cartage & Delivery Information
The following topics address the entry of cartage and additional delivery
information.
Topics in this section:
Cartage Accounting Periods
Cartage Rate Codes
Cartage Surcharge Codes
Quoted Cartage Pay
Hauler/Truck Information
Deduction Codes
Quoted Deductions
Cartage Accounting Periods
Cartage accounting periods correspond to the frequency with which you pay
your haulers, and should not be confused with your regular A/R accounting
periods. Cartage Accounting Periods are required for hauler pay.
To set cartage accounting periods within a year:
1.
238
In the Accounting Year field, enter the year for which you want to
create accounting periods.
8/9/05
Cartage Accounting Periods (EDTCTPQ)
2.
3.
4.
To create an accounting period for each month, press the Defaults
button. Otherwise, rnter the number of accounting periods you want for
the specified accounting year in the Number of Periods field. That
number of Period Dates fields appears below.
Enter a start date and end date in the corresponding fields for each
accounting period.
If a period is open, mark the Period Open box beside that period. This
allows entry of transactions for that period. If the checkbox is not
marked, that period is considered closed and will not accept any new
transactions.
Cartage Rate Codes
Users define cartage rate codes for haul charges and hauler pay using the
Cartage Rate Tables screen. Cartage rates are later applied to orders, along
with the detailed information specified during the cartage rate setup. A
cartage rate code may be assigned to an order when the order is taken; it
may also be assigned at the Customer or Project level, so that the appropriate
cartage rate table is used whenever a specific Customer places an order.
The system currently supports seven types of cartage rates:
Hourly Productive – Cartage rate is calculated at an hourly rate for the
time the truck/driver is productive.
Hourly Clock – Cartage rate is calculated at an hourly rate for the time
the truck/driver is punched in. The table is available for hauler pay only.
8/9/05
239
Load – Driver is paid a flat cartage rate per load.
Quantity/Distance – Quantity and Distance are calculated with a base
rate and additional charges based on the distance traveled. Rates may be
multiplied by the quantity or quantity/distance.
Plant/Zone – Cartage rate is determined by a rate table using the plant,
zone, and truck type.
Quantity – Cartage rate is calculated according to the rate multiplied by
the quantity of the load or load size.
Custom – The user constructs the calculation equation to use with a set
of pre-defined variables. This table is available for hauler pay only.
Before entering cartage rate codes, you need to gather information about
each type of cartage rate you pay. You may enter as many different cartage
rate tables as desired.
Topics in this section:
Hourly Cartage Rates
Per Load Cartage Rates
Quantity/Distance Cartage Rates
Plant/Zone Cartage Rates
Quantity Cartage Rates
Setting up a Custom Cartage Rate Table w/ Equation
Hourly Cartage Rates
If paying for truck usage by the hour, use Hourly Cartage Rates. Hourly
cartage rates can be calculated as Productive or Clock, and do not
necessarily include travel time or distance. Hourly productive cartage rates
calculate cartage rates by the hour according to the time the driver or truck is
actually productive, meaning the truck is involved in loading, delivering, or
returning from a load. The formula for calculating hourly cartage rates is:
CARTAGE = TIME x RATE
Hourly clock rates are based on the entire time the driver or truck is on the
clock, regardless of whether any of that time is nonproductive.
To enter a new hourly productive or clock cartage rate:
1.
2.
3.
4.
240
Go to the Cartage Rate Codes screen. {Files > Cartage Information >
Cartage Rate Codes}
Enter a Cartage Rate Table to identify the new cartage rate.
If the table is intended for a single customer or project, enter the
appropriate Customer and Project Codes.
If a cartage table is assigned to a specific customer/project, the table can
only be assigned to orders for that customer/project. The table will not
show up in a cartage lookup for other customer/projects.
Enter a Description and Short description for the cartage rate.
8/9/05
Cartage Rate Tables (EDTCTRT1)
5.
6.
7.
8.
Select Hourly (productive) or Hourly (Clock) as the Rate Type.
Enter the Default Rate for the table. The date of the change will default.
If you change an existing rate, the old rate will move to the Previous
Rate field.
The Rate UOM will default to 80001 -- each, and cannot be changed.
Set the Cartage Type as:
Payment if the cartage fee is directly paid to the hauler
Charge if the cartage fee is to be charged to the customer
Both if the cartage fee is sometimes paid and sometimes charged
Note: Setting the cartage type to Both (for any rate type) does not mean that
the table will automatically be used for both payment and charge, but
that it can be used for both payment and charge.
9.
Select a haul charge Item Code. This code will appear on the customer
invoice; it is used to define the taxability of the cartage rate table and for
determining where to book GL entries. The Item Code must be set up
prior to setting up the Cartage Rate Table.
10. Select a Minimum Charge Option. This field gives you a number of
options to establish a minimum haul charge, regardless of load size or
clock time. The options are:
No Minimum Charge
Minimum Charge Amount
Truck’s Minimum Load Size times Charge Rate
Truck’s Schedule Load Size times Charge Rate
11. Select a Minimum Pay Option. This field gives you a number of options
to establish a minimum payment, regardless of load size or clock time.
The options are:
8/9/05
241
12.
13.
14.
15.
16.
No Minimum Charge
Minimum Pay Amount
Truck’s Minimum Load Size times Pay Rate
Truck’s Schedule Load Size times Pay Rate
If either of the two previous fields is set to a minimum amount, the
Minimum Charge/Pay field displays. This value will be used to calculate
minimum charges and payments, based on the above two settings.
If either of the minimum charge/pay option fields is set to Minimum
Quantity, the Minimum Quanitity and Maximum Quantity fields
display. The Minimum Quantity indicates the smallest cartage chage
that will be calculated.
If desired, you can also enter a Maximum Quantity to set a cap on
cartage changes for the table.
Enter an amount in the Additional Per Load Amount if an additional
charge applies. This amount will be added to the charge/pay amount.
Accept this screen to save the cartage rate table.
Per Load Cartage Rates
To pay haulers a flat rate per load, use a cartage rate table that charges on a
per load basis. Per load cartage rates are calculated using the following
method:
CARTAGE = RATE
To enter a new per load cartage rate:
1.
2.
3.
4.
5.
242
Go to the Cartage Rate Codes screen.
Enter a Cartage Rate Code to identify the new cartage rate.
If the table is intended for a single customer or project, enter the
appropriate Customer and Project Codes.
If a cartage table is assigned to a specific customer/project, then when
attempting to assign a cartage table to an order on another customer or
project, the dedicated rate table will not display in the table lookup
screen.
Enter a Description and Short description for the cartage rate.
Select Load as the Rate Type.
8/9/05
Per Load options (EDTCTRT1)
6.
Enter the Default Rate for the table. The date of the change will default.
If you change an existing rate, the old rate will move to the Previous
Rate field.
7. Set the Rate UOM to 80001 (each) or 80002 (per load).
8. Set the Cartage Type as:
Payment if the cartage fee is directly paid to the hauler
Charge if the cartage fee is to be charged to the customer
Both if the cartage fee is sometimes paid and sometimes charged
9. Select a haul charge Item Code. This code will appear on the customer
invoice; it is used to define the taxability of the cartage rate table and for
determining where to book GL entries. The Item Code must be set up
prior to setting up the Cartage Rate Table.
10. Accept this screen to save the cartage rate and related information.
Quantity/Distance Cartage Rates
Cartage may be charged to the customer based on the quantity and/or
quantity/distance of the materials hauled, or based on the distance the
materials will be hauled. Cartage charges on a quantity/distance cartage rate
table are based on the quantity or distance of the haul, and include ranges
that are summed or not summed, meaning that the rate can be calculated
four different ways. Each example is based on the delivery of 10 tons to a
location 24 miles away using the following rate range table:
Note: Your last range should extend to 9999 to be certain to cover all
distances.
•
•
8/9/05
Quantity Based, ranges are not summed
BASE RATE + DISTANCE RATE = RATE PER UOM;
RATE PER TON x UNITS HAULED = TOTAL CARTAGE
Example:
$2.00 + $0.20 = $2.20/ton
$2.20/ton x 10 tons = $22.00
Quantity Based, ranges are summed
BASE RATE + DISTANCE RATE + ABOVE RANGE RATES = RATE PER UOM;
RATE PER UOM x UNITS HAULED = TOTAL CARTAGE
Example:
243
•
•
$2.00 + $0.20 + $0.25 = $2.45/ton
$2.45/ton x 10 tons = $24.50
Distance Based, ranges are not summed
(TOTAL MILES - BASE MILES) x DISTANCE RATE = NEW RATE;
BASE RATE + NEW RATE = RATE PER UOM;
RATE PER UOM x UNITS HAULED = TOTAL CARTAGE
Example:
(24 - 10) x $0.20 = $2.80
$2.00 + $2.80 = $4.80/ton
$4.80/ton x 10 tons = $48.00
Distance Based, ranges are summed
BASE = BASE RATE +
(# OF MILES IN RANGE 1 x RANGE 1 RATE) +
(# OF MILES IN RANGE 2 x RANGE 2 RATE) +
(# OF MILES IN RANGE 3 x RANGE 3 RATE) +
This pattern continues until the total miles from the schedule file is
reached.
Example:
$2.00 + (10 x $0.25) + (4 x $0.20)
$2.00 + ($2.50) + ($0.80) = $5.30/ton
$5.30/ton x 10 tons = $53.00
To enter a new quantity/distance cartage rate:
1.
2.
3.
4.
Go to the Cartage Rate Code screen.
Enter a Cartage Rate Table to identify the new cartage rate.
Enter a Description and Short description for the cartage rate.
Select Quantity/Distance as the Rate Type.
Quantity/Distance options (EDTCTRT1)
5.
6.
7.
244
Enter Rate UOM for the rate table. (The rates are entered on the Range
tab.)
Set the Cartage Type as:
Payment if the cartage fee is directly paid to the hauler
Charge if the cartage fee is to be charged to the customer
Both if the cartage fee is sometimes paid and sometimes charged
Select a haul charge Item Code. This code will appear on the customer
invoice; it is used to define the taxability of the cartage rate table and to
8/9/05
determine where to book GL entries. The Item Code must be set up prior
to setting up the Cartage Rate Table.
8. Select a Minimum Charge Option. This field gives you a number of
options to establish a minimum haul charge, regardless of load size or
clock time. The options are:
No Minimum Charge
Minimum Charge Amount
Truck’s Minimum Load Size times Charge Rate
Truck’s Schedule Load Size times Charge Rate
Minimum Quantity
9. If the Minimum Charge Option is Minimum Charge Amount, the
Minimum Charge/Pay field displays. This value will be used to calculate
minimum charges and payments, based on the above two settings.
10. If either of the minimum charge/pay option fields is set to Minimum
Quantity, the Minimum Quanitity and Maximum Quantity fields
display. The Minimum Quantity indicates the smallest cartage chage
that will be calculated.
11. If desired, you can also enter a Maximum Quantity to set a cap on
cartage changes for the table.
Note: To establish a pure per mile rate, set both the Minimum and Maximum
Quantity to 1.
12. Enter an amount in the Additional Per Load Amount if an additional
charge applies.
13. Select the Range tab to develop a rate table based on quantity or
distance.
Quantity/Distance-based Cartage (EDTCTRT2)
14. Enter your Base rate information.
15. Select a Rate Type from the drop down menu.
16. Select the Sum Range Rate to Base Rate checkbox if necessary. If this
checkbox is checked, the cartage rate will be the sum of all applicable
ranges.
Minimum and maximum quantities can be specified for each distance
band.
17. Accept this screen to save the cartage rate and related information.
8/9/05
245
Plant/Zone Cartage Rates
Cartage can be paid based on the location of the plant, the truck type, or
delivery zone. Occasionally, zones may overlap; it is critical that the zone and
plant match. Do not use a zone code not associated with the plant in question.
Charges will not be calculated correctly.
Plant/zone cartage rates are determined by (1) the destination zone, (2) the
shipping plant, and (3) the truck type. Values for these three factors are set
up on the Zones tab.
The rate is then multiplied by the quantity:
CARTAGE = RATE x QUANTITY
For example, truck type A from plant 5, shipping to zone 1000, carries 15
tons of pea gravel. The haul charge is calculated as follows:
$5.00/ton x 15 tons = $75.00
Hauler pay is calculated as follows:
$4.15/ton x 15 tons = $62.25
To enter a new plant/zone cartage rate:
1.
2.
3.
4.
Go to the Cartage Rate Codes screen.
Enter a Cartage Rate Table to identify the new cartage rate.
Enter a Description and Short description for the cartage rate.
Select Plant/Zone as the Rate Type.
Plant/Zone Cartage (EDTCTRT1)
5.
6.
7.
246
Enter the Rate UOM for the rate table.
Set the Cartage Type as:
Payment if the cartage fee is directly paid to the hauler
Charge if the cartage fee is to be charged to the customer
Both if the cartage fee is sometimes paid and sometimes charged
Select a haul charge Item Code. This code will appear on the customer
invoice; it is used to define the taxability of the cartage rate table and for
determining where to book GL entries. The Item Code must be set up
prior to setting up the Cartage Rate Table.
8/9/05
8.
9.
10.
11.
12.
13.
14.
15.
Select a Minimum Charge Option. This field gives you a number of
options to establish a minimum haul charge, regardless of load size or
clock time. The options are:
No Minimum Charge
Minimum Charge Amount
Truck’s Minimum Load Size times Charge Rate
Truck’s Schedule Load Size times Charge Rate
Selected Minimum Charge from Cartage Zone
Minimum Quantity
Select a Minimum Pay Option. This field gives you a number of options
to establish a minimum payment, regardless of load size or clock time.
The options are:
No Minimum Charge
Minimum Pay Amount
Truck’s Minimum Load Size times Pay Rate
Truck’s Schedule Load Size times Pay Rate
Selected Minimum Pay from Cartage Zone
Minimum Quantity
If the Minimum Charge Option is Minimum Charge Amount, the
Minimum Charge/Pay field displays. This value will be used to calculate
minimum charges and payments, based on the above two settings.
If either of the minimum charge/pay option fields is set to Minimum
Quantity, the Minimum Quanitity and Maximum Quantity fields
display. The Minimum Quantity indicates the smallest cartage chage
that will be calculated.
If desired, you can also enter a Maximum Quantity to set a cap on
cartage changes for the table.
Enter an amount in the Additional Per Load Amount if an additional
charge applies.
Mark the Calculate Unloading Charge checkbox if necessary. This
checkbox indicates that the customer will be charged the rate per hour
that you specify for unloading the truck. A rate/hour field will appear
when the checkbox is checked.
Select the Zones tab to specify prices according to the destination zone
and plant of origin. Cartage rates can be assigned to a zone, from a plant,
or to a zone from a specific plant.
Cartage Rate Tables (EDTCTRT3)
8/9/05
247
16. Select a destination Zone to which a cartage rate should be assigned.
17. Select an origin plant to which a cartage rate should be assigned {Files >
Plant & Delivery Information > Plants}. To apply the rate to all plants,
<Tab> through this field; a # will appear in the field—this is a wildcard
indicating all plants.
18. Select the truck type to which this rate should be applied {Files > Plant &
Delivery Information > Truck Types}. To apply the rate to all truck types,
<Tab> through this field; a # wildcard will appear in the field.
Tip:
Use the system wildcard to simplify data entry. For example, if you
have one rate for Plant 1 and another rate for all of your other
plants, Enter one rate for Plant #, and another for Plant 1.
19. Enter the cartage rate for hauler pay and haul charges.
20. If the Minimum Charge Option on the Main tab is Selected Minimum
Charge from Cartage Zone, the Minimum Charge field will be active,
allowing you to assign a minimum cartage charge for individual plant/
zone combinations.
21. If the Minimum Pay Option on the Main tab is Selected Minimum Pay
from Cartage Zone, the Minimum Pay field will be active, allowing you
to assign a minimum cartage pay for individual plant/zone combinations.
22. Accept the Cartage Plant/Zone Information and Cartage Rate Tables
screens to save the cartage rate and related information.
Quantity Cartage Rates
Cartage may be charged based on the quantity of the materials being hauled.
Quantity cartage rates can be determined simply by multiplying the cartage
rate by the load size:
CARTAGE = RATE x LOAD SIZE
For example, with a load size of 18.24 tons at a rate of $2.00/ton, the total
cartage would be $36.48. Additional charges and minimum quantities can also
be included as factors.
To enter a new quantity cartage rate:
1.
2.
3.
4.
248
Go to the Cartage Rate Code screen.
Enter a Cartage Rate Table to identify the new cartage rate.
Enter a Description and a Short description for the cartage rate.
Select Quantity as the Rate Type.
8/9/05
Cartage Rate Tables (EDTCTRT1-quantity)
5.
6.
7.
8.
9.
10.
11.
12.
13.
8/9/05
Enter the Default Rate for the table. The date of the change will default.
If you change an existing rate, the old rate will move to the Previous
Rate field.
Enter Rate UOM for the rate table.
Set the Cartage Type as:
Payment if the cartage fee is directly paid to the hauler
Charge if the cartage fee is to be charged to the customer
Both if the cartage fee is sometimes paid and sometimes charged
Select a haul charge Item Code. This code will appear on the customer
invoice; it is used to define the taxability of the cartage rate table and for
determining where to book GL entries. The Item Code must be set up
prior to setting up the Cartage Rate Table.
Select a Minimum Charge Option. This field gives you a number of
options to establish a minimum haul charge, regardless of load size or
clock time. The options are:
No Minimum Charge
Minimum Charge Amount
Truck’s Minimum Load Size times Charge Rate
Truck’s Schedule Load Size times Charge Rate
Select a Minimum Pay Option. This field gives you a number of options
to establish a minimum payment, regardless of load size or clock time.
The options are:
No Minimum Charge
Minimum Pay Amount
Truck’s Minimum Load Size times Pay Rate
Truck’s Schedule Load Size times Pay Rate
If either of the two previous fields is set to a minimum amount, the
Minimum Charge/Pay field displays. This value will be used to calculate
minimum charges and payments, based on the above two settings.
If either of the minimum charge/pay option fields is set to Minimum
Quantity, the Minimum Quanitity and Maximum Quantity fields
display. The Minimum Quantity indicates the smallest cartage chage
that will be calculated.
If desired, you can also enter a Maximum Quantity to set a cap on
cartage changes for the table.
249
14. Enter an amount in the Additional Per Load Amount if an additional
charge applies.
15. Accept the Cartage Rate Tables screen to save the cartage table or
proceed to the Range tab.
Setting up a Custom Cartage Rate Table w/ Equation
Users can create custom cartage tables that use equations to calculate the
cartage amount. The custom rate can be set up as a simple per quantity
equation, or it can be set up to calculate based on a set of ranges. Custom
cartage tables are used for hauler pay only.
To enter a new cartage rate equation:
1.
2.
3.
4.
Go to the Cartage Rate Tables screen.
Enter a Cartage Rate Code to identify the new cartage rate.
Enter a Description and Short description for the cartage rate.
Select Custom (user defined) from the Rate Type field’s pull-down
menu.
Custom Setup (EDTCTRT1)
5.
6.
7.
Caution: While other options are present, custom cartage rates are only
supported for hauler pay.
8.
9.
250
Enter the Default Rate for the table. The date of the change will default.
If you change an existing rate, the old rate will move to the Previous
Rate field.
The rate can be incorporated into the equation.
Enter the Rate UOM for the rate table.
Set the Cartage Type as Payment.
Select a haul charge Item Code. This code will appear on the customer
invoice; it is used to define the taxability of the cartage rate table and for
determining where to book GL entries. The Item Code must be set up
prior to setting up the Cartage Rate Table.
If the Cartage Type is either Payment or Both, the Minimum Pay Option
field will display. This field gives you a number of options to establish a
minimum payment, regardless of load size or clock time. The options are:
8/9/05
10.
11.
12.
13.
14.
No Minimum Charge
Minimum Pay Amount
Truck’s Minimum Load Size times Pay Rate
Truck’s Schedule Load Size times Pay Rate
If the Minimum Pay Option is set to Minimum Amount, the Minimum
Charge/Pay field displays. This field is the minimum pay allowable with
this table.
If the Minimum Pay Option is set to Minimum Quantity, the Minimum
Quanitity and Maximum Quantity fields display. The Minimum
Quantity indicates the smallest cartage chage that will be calculated.
If desired, you can also enter a Maximum Quantity to set a cap on
cartage changes for the table.
If desired, go to the Range tab. The Range tab is configured just like a
standard range-based cartage table. The various rates listed on the range
tab can be incorporated into the equation.
Select the Equation tab to enter a user-defined equation for determining
the cartage rate.
Equation Tab
15. To enter equations, type in any numbers and mathematical symbols that
you need.
To enter field information into the equation, select the field from the
Field List drop-down list, then select Insert.
In the table above, $0.85 is the Default Rate, the Rate UOM is US tons
(meaning that the rate is per ton), and the equation is
2*<distance>*<def rate>.
If a load of 15 tons was hauled to a site 30 miles from the plant, the
cartage would be calculated as follows:
2 x 30 = 60 miles (round trip distance)
60 x $0.85 = $51.00 (per ton rate)
15 x $51.00 = $765 (total cartage for the load)
16. Accept this screen to save the cartage rate and related information.
Cartage Surcharge Codes
The Cartage Surcharge Codes represent additional payments applied to a
cartage transaction. Such charges, called surcharges, are common in
8/9/05
251
situations where environmental charges, fuel, labor, or truck expenses are
required for a certain load.
To enter a cartage surcharge code:
1.
2.
Go to the Surcharge Code screen. {Files > Cartage Information >
Cartage Surcharge Codes}
Enter a Surcharge Code to identify the new cartage rate.
Cartage Surcharge Codes (EDTCTSG)
3.
4.
5.
6.
Enter a Description and Short description explaining the cartage
surcharge.
Set the Cartage Type as:
Payment if the cartage fee is directly paid to the hauler
Charge if the cartage fee is to be charged to the customer
Both if the cartage fee is sometimes paid and sometimes charged
Select a surcharge Product Code. This code will appear on the customer
ticket and/or invoice; it is used to define the taxability of the surcharge
and for determining where to book GL entries. The Product Code must be
set up prior to using the surcharge.
Select a Rate Type to specify the way the surcharge is applied. In the
example above, the environmental surcharge is assigned per load.
Note: The appearance and values of certain fields on this screen may
change depending on what Rate Type is selected.
7.
8.
Enter a Rate to apply as the surcharge amount. If the Rate is a Percent
of the haul charge, mark the checkbox.
Select the Rate Unit of Measure according to the rate type. The UOM
for a Per Load or Hourly rate type should be set to Each; a Per Quantity
or Per Each rate type should be set to a weight UOM.
Note: The Rate Unit of Measure will default for certain Rate Types.
252
8/9/05
9.
Select the First Load Only checkbox if the charge should only be applied
to the first load of the order delivered. If this box is left unmarked, the
surcharge will be applied to each ticket.
10. Select the Print Charge Separately checkbox if you wish to print
surcharges separately on an invoice and ticket. If this box is left
unmarked, surcharges will be included on the invoice and ticket under
Haul.
Note: The ticket and invoice must be formatted accordingly.
11. Select the Use scheduled load as minimum checkbox if necessary.
Note: This field only appears if the Rate Type is per quantity.
12. Select the Auto Assign checkbox if you want to automatically apply the
charges to every order and/or ticket. Surcharges can be applied to COD
orders only or to a range of products, product categories, or truck types.
A pull-down menu allows you to assign those charges more specifically:
General - applies the surcharge to all tickets.
Product - applies the surcharge to any tickets that include the
product specified.
Product Category - applies the surcharge to any tickets that
include any product belonging to the product category specified.
Truck Type - applies the surcharge to any tickets delivered by the
truck type specified.
13. After an assignment has been made, click the Apply button and specify
the necessary codes for the surcharge.
14. Accept this screen to save the cartage surcharge and related information.
Repeat these steps for all possible surcharges.
Quoted Cartage Pay
The Quoted Cartage Pay screen allows users to assign cartage pay along with
associated information— such as waiting charges and premium charges— to
customers, projects, haulers, trucks, or drivers for the purpose of paying
haulers. Quoted cartage pay is used to override default cartage pay rates set
up on the hauler/truck information screen (below). Either the hauler/truck
information or the quoted cartage is required.
To enter quoted cartage pay:
1.
2.
8/9/05
Click Files > Cartage Information > Quoted Cartage Pay.
Enter a Customer Code, Project Code, Hauler Code, Truck Code,
and/or Driver Code that you want to associate with the cartage rate.
You can enter any one field or combination of fields you choose. If a field
is left blank, the system will assume a wildcard for that field.
253
Quoted Cartage Pay (EDTCTJB)
3.
4.
In the Cartage Rate Table field, assign a cartage code to the hauler or
truck to define the rate for all cartage transactions completed with this
hauler/truck/customer/project/driver combination.
Enter a cartage Rate to be associated with the cartage code or leave
blank to let the rate table calculate the rate. If necessary, enter an
Effective Date. If you do not enter a date manually, the current date will
default.
The three tabs allow you to assign Cartage Surcharges at three different
levels: Products, Item Categories, and Truck Types.
5.
6.
7.
8.
Select the Products tab to enter surcharges or increased rates for
certain products.
Select the Categories tab to apply a cartage surcharge to entire product
categories.
Select the Truck Types tab to apply a cartage surcharge to entire truck
types.
Accept the Quoted Cartage Rates screen.
Hauler/Truck Information
The Hauler/Truck Information screen allows you to specify a cartage table for
a hauler, truck, or driver. Haulers, trucks, and drivers are defined during the
initial COMMANDseries system setup. This information must be set up for
hauler pay.
To enter hauler/truck information:
1.
2.
254
Go to the Hauler/Truck Information. {Files > Cartage Information >
Hauler/Truck Information}
Enter a Hauler Code, Truck Code, Driver Code, or any combination
thereof. If for example, you only enter a Hauler Code, then the cartage
tble selected below will be applied to all trucks and drivers hauling for the
specified company.
8/9/05
Hauler / Truck Information (EDTCTHT)
3.
4.
5.
6.
Enter the Name, Address, and Phone Number information associated
with the Hauler, Truck, and/or Driver.
Enter a Vendor Code associated with the vendor or truck for use in an
external accounts payable system. If desired, enter a Payroll code.
In the Cartage Rate Table field, assign a cartage code to the hauler or
truck to define a rate for all cartage transactions completed with this
hauler or truck.
Accept the Hauler/Truck Information screen.
Deduction Codes
Once the system has calculated the revenue a hauler has earned, it can adjust
that amount through the use of Deduction Codes. Deduction Codes allow
users to identify and implement organized deductions from the earned
revenue of a hauler, truck, and/or driver. It allows systematic deductions for
loans, penalties, fuel, or other items purchased from your company. It can
also be used to levy administration fees against a hauler.
To enter deduction codes:
1.
2.
8/9/05
Go to the Deduction Codes screen. {Files > Cartage Information >
Deduction Codes}
Enter a new type of Deduction code or select an already existing
Deduction code to edit or display its information.
255
Deduction Codes (EDTCTDE)
3.
4.
5.
6.
7.
Enter a Description of the deduction code. Enter an abbreviated version
of that description in the Short field.
Select a Reason Code for the deduction.
In the Default Maximum field, enter the maximum allowable amount
for this deduction.
Enter the Default Amount for all deductions with this deduction type.
Accept the Deduction Codes screen.
Quoted Deductions
The standard deductions are applied as needed. But just as you can quote
prices to a customer, you can also quote deductions to haulers. The Quoted
Deductions screen allows users to establish “quoted deductions”, deductions
to be applied to the cartage transactions of a hauler, truck or driver over time.
To enter quoted deductions:
1.
Go to the Quoted Deductions screen. {Files > Cartage Information >
Quoted Deductions}
Quoted Deductions (EDTCTDT)
2.
3.
4.
256
Enter a Hauler Code, Truck Code, Driver Code, or any combination
thereof.
Select a Deduction Code for the transaction.
The Rate/Period defaults from the Default Amount field in the deduction
record. The Maximum Amt also defaults from the deduction record.
Both fields can be adjusted as needed.
8/9/05
5.
6.
7.
8.
9.
8/9/05
If you are editing a deduction rate and want to enter it as a percentage of
the balance, mark the Percent checkbox.
Enter the total Balance to deduct from the hauler, truck, or driver. This
is the target amount for the quoted deduction.
In the Current Balance field, enter the total amount of deductions
remaining for the hauler, truck, or driver. This field will be updated as
cartage charges and payments are processed.
Select the Add Occurrence button to add another row of deduction
information.
When finished, accept the Quoted Deductions screen.
257
Customers and Projects
This section provides information on entering customer and project
information.
Topics in this section:
Sales Analysis Codes
Customers
Projects
Fixed Delivery Pricing
Payment Forms
Sales Analysis Codes
The sales analysis codes give you a means of classifying orders for reporting
purposes. Once the codes have been entered, they can be assigned to
customers and projects. When an order is entered, it will automatically be
assigned the appropriate sales analysis code. If a sales analysis code has not
been assigned to the customer or project, it must be assigned at the order
level. Sales analysis codes can be constructed to identify any type of grouping
of customers and projects based on the business practices of your company.
Before entering sales analysis code information, gather information about how
you want to group customers and projects for analysis purposes.
To enter a sales analysis code:
1.
Go to the Sales Analysis Codes screen. {Files > Customer & Project
Information > Sales Analysis Codes}
Sales Analysis Codes (EDTSANL)
2.
3.
4.
258
Enter a Code to identify the sales category or group.
Enter a Description and a Short description for the sales analysis code.
Use the Add Occurrence button, or press <F6> to add another sales
analysis code -or- accept the screen to save the sales analysis codes.
8/9/05
Customers
Customers represent the people or businesses to which items are sold. To
facilitate the proper setup of each customer record, the Customers screen is
split into several screens that can be accessed by clicking on the related tab.
Before entering customer data, gather information about each customer to be
entered in the system including basic information, such as addresses and
phone numbers, as well as sales, taxing, pricing, accounting, etc.
Topics in this section:
Customer Main Tab Setup – basic information about each customer
Customer Address Setup - invoice and statement address information
Customer Sales Setup - information for customer sales analysis
Customer Taxing Setup - information to properly tax the customer
Customer Pricing Setup - information relative to item pricing
Customer Charges Setup - information related to charges
Customer Accounting Setup - information about credit and receivables
Customer Invoicing Setup - information relative to invoicing
Customer Distribution Setup - customer distribution information
Customer User Fields Setup - enter user-defined fields
Customer Products Setup - information related to products
Customer Notes - record notes about the customer
Customer Main Tab Setup
To enter basic customer information:
1.
Select Files > Customer & Project Information > Customers.
Customers (EDTCUST)
2.
3.
4.
Enter a Customer Code to identify the customer in reports and customer
lookup screens.
Enter the customer’s full name in the Name field.
Enter a Sort Name by which to identify the customer.
The Main tab allows you to enter information such as address, contact person,
and phone number.
8/9/05
259
To set up main information:
1.
From the Customers screen, select the Main tab.
Customers – Addresses Tab (EDTCUSTA)
2.
3.
4.
5.
6.
Enter the customer’s Address, City, State, Country, and Postal (ZIP)
Code.
Enter the name of a Contact person for this customer.
Use the Phone Number 1-4 fields to enter the customer’s phone
number and any other related numbers, such as fax, cellular, or e-mail.
Enter t in the Setup Date field to specify today as the creation date for
this customer.
Accept the screen to save the information entered on the Main tab.
Customer Address Setup
The Addresses tab allows you to enter address information related to the
customer’s invoices and statements.
When COMMANDseries generates an invoice or a statement, it checks the
customer record to see if there is an specified address for statements/
invoices. If there is no address, the system will use the address from the
Main tab.
To define customer address information:
1.
2.
3.
260
From the Customers screen, select the Addresses tab. {Files >
Customer & Project Information > Customers > Addresses}
Enter the Name and mailing Address information specific to the
customer’s invoices.
Enter the Name and mailing Address information specific to the
customer’s statements.
8/9/05
Customers – Addresses Tab (EDTCUSTB)
4.
Proceed to the next tab, or accept the screen to save the customer
information.
Customer Sales Setup
Select the Sales tab to enter customer specific sales information. Specify the
types of items that the customer primarily buys, along with a sales analysis
code and a regular salesperson (if applicable).
To define customer sales information:
1.
From the Customers screen, select the Sales tab. {Files > Customer &
Project Information > Customers > Sales}
Customers – Sales Tab (EDTCUSTC)
2.
3.
4.
5.
6.
8/9/05
Select a Product Line from the field’s list.
Mark the Copy To All checkbox, if necessary, to copy information
entered for one product type to all other product types.
Select a Sales Analysis Code. This code is used to group sales for one
customer with sales for other customers with the same sales analysis
code. Sales reports can then be produced by sales analysis code.
Select a Salesman. This field identifies the salesman assigned to the
customer. Sales reports and some COMMANDreceivables reports can be
grouped by salesman.
Proceed to the next tab, or accept the screen to save the customer
information.
261
Customer Taxing Setup
The Taxing tab allows you to enter the customer’s tax information.
To define customer tax information:
1.
From the Customers screen, select the Taxing tab. {Files > Customer &
Project Information > Customers > Taxing}
Customers – Taxing Tab (EDTCUSTD)
2.
3.
4.
5.
6.
Select a Tax Code for the customer.
Specify if the customer is Taxable or Non-taxable in the Taxable field.
If the customer is non-taxable, select a Non Taxable Reason. The field
will not display if the customer is taxable.
Enter the Tax ID Code and use the Tax Exempt ID to record the taxexempt ID or certificate number for each tax authority level.
Accept the screen.
Customer Pricing Setup
The Pricing tab includes information related to trade discounting, terms code
assignment for payment discounts, plant and price category assignment that
control aspects of pricing, and flags that control automatic pricing charges.
Customer pricing can be set by product line. Certain options available to one
product line may not be available for others.
To define customer pricing information:
1.
2.
3.
4.
5.
262
From the Customers screen, select the Pricing tab. {Files > Customer &
Project Information > Customers > Pricing}
Select a Product Line from the field’s list.
Mark the Copy To All checkbox, if necessary, to copy the selected
product type to all files associated with the customer.
Select a Price Category. This field designates a price category for the
customer. It is used in the COMMANDconcrete pricing procedure when a
price is derived from the product record. Prices are assigned to products
on a plant and price category basis.
Select a Pricing Plant Code. This field designates a pricing plant for the
customer. The pricing plant is used in COMMANDconcrete pricing logic
8/9/05
6.
when a price is derived from the product record, not the customer or
project record.
Select a Trade Discount Percent or a Trade Discount Amount, if
necessary. These fields establish a trade discount percent/amount for the
customer.
A Trade Discount is a discount that will always be applied to the
customer’s orders. It differs from a Terms Discount, which is dependent
on the customer paying in a timely manner.
Customers – Pricing Tab (EDTCUSTE)
7.
8.
9.
10.
11.
12.
13.
14.
15.
8/9/05
Select a Terms Code. The terms code dictates the discount date, due
date, and discount amount assigned to invoices.
Select a Zone Code. This field identifies the zone where deliveries are
normally made to the customer. If the majority of the customer's
deliveries are not made to a single zone, leave this field blank.
Select a Cartage Rate Table and a Surcharge Code if the product line
for this item is aggregate.
Enter an Override Charge Rate. This charge will be used instead of the
normal charge.
Enter the date this charge will be effective in the Override Charge
Effective Date field.
When the Override Charge Rate is changed, the old rate is automatically
transferred to the Previous Rate field.
Select a code from the list in the Surcharge Code field.
In the Rate field, enter the rate for the surcharge.
Mark the Apply Zone Charges checkbox if necessary. When marked,
this checkbox causes the selected zone charge table to be included with
the customer’s orders.
263
Note: This field is only available when concrete is the selected product
line.
16. Mark the Print Prices on Tickets checkbox if necessary. When marked,
this checkbox causes prices to be printed on all delivery tickets for the
customer. Prices for C.O.D. or cash delivery tickets are always printed.
Prices for charge delivery tickets are only printed when this checkbox is
selected.
This field is also used to determine access to non-COD prices during
Order Entry. (See Non-COD Price Changes for additional information.)
17. Mark the Allow Price Change in O/E? checkbox if necessary. This field
is used to determine access to non-COD prices during Order Entry. (See
Non-COD Price Changes for additional information.)
18. Mark the Restrict Orders to Customer Products checkbox if
necessary. When marked, this checkbox causes the Orders screen, for
non-project based orders, to allow only those products that are entered
as customer-specific products. Products cannot be added to the order
from the product file.
19. Mark the Apply Minimum Haul Charges checkbox if necessary When
marked, this checkbox causes the minimum haul charge to be applied to
this customer if the calculated haul charge is less than the calculated
minimum haul charge. A charge table is assigned to each aggregate
order; each charge table has an associated minimum haul charge.
Note: This checkbox is only displayed when Aggregate is the selected
product line.
20. Mark the Allow Automatic Price Adjustments checkbox if necessary.
This checkbox sets the default Allow Automatic Price Adjustments
value for any new items added to the customer record. Changing this
field has no effect on items previously entered.
21. Click the Quoted Cartage button to go to the Quoted Cartage Rates
screen. See the Quoted Cartage Rates section of this manual for more
information.
22. Proceed to the next tab, or accept the screen to save the customer
information.
Customer Charges Setup
The Charges tab allows you to define certain charges to be billed to the
customer.
Some customers prefer to have non-material charges billed on a separate
invoice. To accommodate this need, each charge has a flag that indicates that
it should be billed separately. If needed, run the Create Orders & Tickets for
Separate Invoices routine during invoice prep. It will identify charges flagged
for separate invoicing, and move those charges to new orders, which can then
be invoiced separately.
264
8/9/05
To define customer charge information:
1.
From the Customers, select the Charges tab. {Files > Customer &
Project Information > Customers > Charges}
Customers – Charges Tab (EDTCUSTF)
2.
3.
4.
Select a Product Line against which specified charges apply for this
customer.
If you want your selections for one product line to be copied to the other
product lines, set the Copy to All flag.
Enter Minimum Load, Seasonal, and/or Unloading Charge Table
codes, if necessary, to specify the table(s) to be used, in each situation,
to calculate total charges.
Note: The Minimum Load Charge line will only display if the product line
is Concrete.
5.
6.
7.
8.
Mark the Create Separate Invoice for each charge table to indicate that
a separate invoice should be created for each table.
There is a single Create Separate Invoice flag for all automatic Sundry
charges that you may have configured.
If you wish to add additional charges, detail on a Sundry Charge field and
select from the list of available charges.
If you wish to use a different sundry charge rate than that specified in the
sundry charge table, press the Pricing button, to display the Customer
Sundry Charge Pricing screen.
Customer Sundry Charge Pricing screen (EDTCUST5)
9.
8/9/05
Enter the customer-specific charge rates, and accept the screen to return
to the Customer-Charges tab.
Proceed to the next tab, or accept the screen to save the customer
information.
265
Customer Accounting Setup
The Accounting tab allows you to enter accounting information for the
customer.
To enter customer accounting information:
1.
From the Customers screen, select the Accounting tab. {Files >
Customer & Project Information > Customers > Accounting}
Customers – Accounting Tab (EDTCUSTG)
2.
3.
4.
5.
6.
7.
8.
266
Enter a Statement Cycle. This is the cycle code for the printing of
customer statements. Statement cycle codes can be Weekly, Bi-weekly,
Semi-monthly, or Monthly.
Enter an Accounting Category. This field is used to specify a code that
groups customers/projects together.
Mark the Apply Finance Charges checkbox if necessary. If marked, the
Create Finance Charges routine in COMMANDreceivables will process this
customer’s account to see if finance charges are warranted.
Mark the Print Statements checkbox if necessary. When marked, the
Statement Print function will include this customer when statemetns are
run for all customers or for a range of customers (when that range
includes the current customer). If the customer is not included in normal
statement printing, it must be requested individually on the Statements
screen.
Enter all necessary Credit Card Information.
If the system is configured to maintain credit at the company level, you
will be able to enter separate credit information for each company.
Otherwise, the system wildcard, #, will default as the Company Code.
Enter a Credit Code. This field assigns a credit code to the customer for
the current company. The credit code controls how orders can be taken
and shipped for the customer.
8/9/05
9.
10.
11.
12.
13.
Enter the Credit Limit. This is the dollar amount of credit established for
the customer.
Enter the High Balance. This field represents the highest balance a
customer has attained for the current company. This amount can be
entered when setting up customers. This field is automatically updated
when
Enter a Credit Person. This field is used to assign one of your employees
as the person responsible for credit matters with the customer.
Mark the Purchase Order checkbox if necessary. When marked, this
checkbox causes a customer purchase order number to be required on
the Orders screen. {Dispatch > Orders} This information is required for
an order to be taken for this customer. Some customers (or your
company) may require that a P.O. number be associated with any work
done for the customer.
Mark the Customer Job checkbox if necessary. When marked, this
checkbox causes a customer job number to be required on the Orders
screen. {Dispatch > Orders} This job number is assigned and used by the
customer to track and account for the business. Some customers (or your
company) may require that a job number be associated with any work
done for the customer.
Note: The following two steps are only needed if you are licensed for
COMMANDlien.
14. Select a Pre-Lien Calculation method from the drop-down list. The
options are:
•
Number of Days After Pre-Lien Compare Date (default)
•
Specific Day of 1st Month Following Pre-Lien Compare Date
•
Specific Day of 2nd Month Following Pre-Lien Compare Date
•
Specific Day of 3rd Month Following Pre-Lien Compare Date
The first option is by far the most common. The other options allow for
“prox” dates, which are required in certain states.
This setting is used in conjunction with the Days/Day of Month for
Preliminary Notice Required field, found on the Configuration screen
{Lien > Pre-Lien Rules}.
15. Select a Lien Required option. These options determine how how the
system will respond when a new order is created without an assigned lien
location.
•
Not Required denotes that the creation of a lien location is not
required for orders for this customer.
•
Required (Man) denotes that the creation of lien locations is
required at all times, but must be created manually. Note that this
selection is rarely used because dispatch is slowed greatly by having
to create the lien locations.
•
Required (Auto) denotes that the creation of lien locations is
required at all times, but takes place automatically.
8/9/05
267
•
Required (Auto, Exempt) denotes that the creation of lien
locations is automatic, but the lien locations are automatically
marked exempt.
This option is useful for storing lien location information for
customers that do not necessarily warrant lien locations in the
preliminary stages. If the need arises to issue lien notices, the
correct data will have been maintained for implementing preliminary
and lien notices.
See the COMMANDlien User’s Manual for additional information regarding
lien configuration.
16. Select the External Liens flag if liens for this customer will be handled
outside of COMMANDseries.
17. When a valid reason code is entered in the Suspend Order Reason
Code field and saved, all new non-project orders entered for the
customer default to a suspended state. If no reason code is entered, new
non-project orders should default to a released state.
This option is useful if the customer’s pricing varies substantially from
week to week, so that you always want to make sure the prices are fully
reviewed prior to invoicing.
18. Proceed to the next tab, or accept the screen to save the customer
information.
Customer Invoicing Setup
Customer invoicing information is used when invoices are created to
determine the following aspects of invoicing.
•
•
•
•
•
Number of orders and tickets are included on a single invoice
Sub-totals to be printed on the invoice
Level of detail printed for items and tickets
Business for single or multiple days on a single invoice
Customers included in the invoice run, based on assigned frequency code
Please keep in mind that for the various formatting options, you must both set
the option on this screen and create a document group & format that will
support it.
To enter customer invoicing information:
1.
268
From the Customers screen, select the Invoicing tab. {Files > Customer
& Project Information > Customers > Invoicing}
8/9/05
Customers – Invoicing Tab (EDTCUSTH)
2.
3.
4.
5.
6.
7.
8.
9.
8/9/05
From the Print One Invoice Per… field’s list, define the contents of
printed invoices. This field selects and groups tickets and orders into a
single invoice for the customer.
Depending on your selection in the Print One Invoice Per… field, the
following three fields appear or disappear. Please select the settings
based on these values.
Sort and Sub Total By – the criteria by which the invoices are
sorted and sub totaled
Print Products/Tickets – tickets and products listed on an invoice
print, Detail or Summary
Days on One Invoice – invoices are created for single days or for
multiple days
From the Invoice Frequency field’s list, select the cycle code for the
printing of customer invoices. Options are:
•
Daily
•
Weekly
•
Monthly
When you print invoices, you can specify when frequency’s to run.
If you need more than one copy of this customer’s invoices to print, enter
the number of Copies to Print.
From the Haul Charges field’s list, select the method for printing haul
charges, Print haul charges as a separate line item or Combine
haul charges with material price.
From the Minimum Haul Charges field’s list, select the method for printing
minimum haul charges, Print total minimum haul charge or Separate
actual and incremental haul charge.
Mark the Separate Invoices by Product Line checkbox if necessary.
When marked, this checkbox causes each product included on the invoice
to be displayed as a separate line.
Proceed to the next tab, or accept the screen to save the customer
information.
269
Customer Distribution Setup
The Distribution tab allows access to miscellaneous dispatching information
for the customer. This information is used as a default to the corresponding
fields on projects, orders, and tickets subsequently created for the customer.
To define customer distribution information:
1.
From the Customers screen, select the Distribution tab. {Files >
Customer & Project Information > Customers > Distribution}
Customers – Distribution Tab (EDTCUSTI)
2.
3.
4.
5.
6.
Select a Product Line against which specified charges apply for this
customer.
If you want the same selections for all product lines, select the Copy to
All checkbox.
Select the Tracking Order Color. This field designates the color code to
be used when displaying orders for this customer on the Tracking and
Scheduling screen.
Mark the Print Mix Weights on Tickets checkbox if necessary. When
marked, this checkbox causes the weight of each component (ingredient
or constituent) of any ready-mix product on an order for this customer to
be printed on each delivery ticket.
Proceed to the next tab, or accept the screen to save the customer
information.
Customer User Fields Setup
The user fields feature allows you to store and communicate different types of
information on different aspects of your day-to-day business.
Note: The User Fields tab will not display on the Customers form unless you
have configured user fields on the system Configuration screen {Files >
General Information > Configuration > User Fields}. Any user fields
entered into the User Fields tab of the Configuration screen will
display on the User Fields tab on the Customer screen. On this screen,
you can enter information into the user fields.
To enter information in customer user fields:
1.
270
From the Customers screen, select the User Fields tab. {Files >
Customer & Project Information > Customers > User Fields}
8/9/05
Customers – User Fields Tab (EDTCUSTJ)
2.
3.
Enter the field information, based on your own company policies.
Proceed to the next tab, or accept the screen to save the customer
information.
Customer Products Setup
The Products tab allows you to set up mix and aggregate products for the
customer.
To define customer products:
1.
From the Customer screen, select the Products tab. {Files > Customer &
Project Information > Customers > Products}
Customers – Products Tab (EDTCUSTK)
Product Entry Format field
Associated Products line
2.
3.
8/9/05
Select a Plant from the field’s list. This field is used to determine the
products displayed on the screen. If All plants are indicated, then all
products, regardless of their plant assignment, are displayed. If a specific
plant is entered, then only those products assigned to that specific plant
are displayed below.
Select a Product Entry Format from the field’s list. The product options
are as follows.
•
Ready Mix Products – displays mix products, along with each
mix’s associated products, in one section, and extra products in a
separate section
271
•
4.
5.
6.
Summary Ready Mix Products – displays mix products with a
button to access the mix’s associated products in one section, and
extra products in a separate section
•
Aggregate Products – displays all non-mix products in a single
section
Enter a Product for the Mix Products line. This code identifies each mix
product assigned to a customer. The same mix product can be assigned
multiple times to a customer, when varying groups of associated
products are combined with each entry of the mix.
Select a Mix Products Plant from the field’s list. This field identifies the
plant from which this product can be sold. If the product is available at all
plants, choose the All plants option.
Click on the Pricing button to go to the Customer Product Pricing
Information screen.
Customer Product Pricing Information-concrete (EDTCUST1)
7.
Enter the Estimated Quantity of the product. This field contains the
estimated quantity the customer intends to buy for this product. You may
click on the detail button associated with this field to select a unit of
measure to assign to the estimated quantity.
8. Enter the product Default Load Quantity, as well as the Price, Price
Extension, Effective Date, Previous Price, and Price Extension.
9. Mark the Allow Automatic Price Adjustments field if you plan to
adjust this item’s price using the Calculate Price Change function.
10. Select the Override Terms Discount Code field to adjust customer
trade discounts for this item. When this field is selected, the Discount
Rate Type and the Discount Rate fields will display.
272
8/9/05
11. Define the Product Line, Surcharge Code, and Surcharge Rate at the
bottom of the screen.
12. Accept the Customer Product Pricing Information screen.
13. Select the Ready Mix button to enter the Batch Code and Slump for the
mix product, and accept the Customer Product Ready Mix screen.
Customer Product Ready Mix Information (EDTCUST2)
14. Enter a Product for the Associated Products line. This code uniquely
identifies each associated product assigned to each customer specific mix
product.
Note: Associated products are so closely related to the shipment of the
mix product, in that they are automatically included on orders and
tickets with the mix. The best example of an associated product is
an admixture that is to be batched with the mix product but is not
included in the mix product’s list of constituent products.
15. Select the Associated Products Pricing button, if available, and define
customer product pricing information.
Customer Associated Product Information (EDTCUST3)
16. Enter any necessary Extra Products. This code uniquely identifies each
extra product assigned to a customer. More than one extra product can
be assigned to a customer. Extra products are not specific to any one mix
product assigned to a customer and can be added to any order for the
customer.
17. Accept the screen.
Pricing options for Associated and Extra Products
The Customer Product Pricing information will have some additional fields if
the item in question is an associated or extra product.
8/9/05
273
Customer Product Pricing Information - associated product (EDTCUST1)
•
•
The Print on Separate Invoice allows users to flag an item to be
invoiced separately from the main order.
If the Price Included in Mix Price is selected, then the price of the
admixture will not be added to the mix price. This field is only available if
trhe product in question is an associated product.
Projects
Projects represent specific jobs for customers, and contain delivery, product,
and pricing information that assists the user in delivering materials and billing
the customer. To ensure that projects created through the quote module are
consistent with those entered manually, the Job and Quotes screens have
been patterned after the main Projects screen. The Projects screen is divided
into several screens that can be accessed by clicking on the related tab.
The level of detail provided for each project is user-defined. Before entering
project information, gather information about specific jobs for customers to be
entered as projects.
Note: Fields on the Projects screen that are duplicated from the Jobs and/or
Quotes screen are populated with information from those screens. The
Projects screen contains many fields that are not available on either of
those screens, however, and should be edited carefully. These
additional fields, specific to the Projects screen, allow you to customize
information to better define the project for the specific customer.
Topics in this section:
Project Initial Setup - Entering primary project information
Entering Project Main Tab Information - project information
Entering Project Address Information - invoice and statement
addresses
Entering Project Pricing Information - to properly price the project
274
8/9/05
Entering Project Accounting Information - credit and receivables
Entering Project Invoicing Information - relative to project invoicing
Entering Project Distribution Information - COMMANDseries
distribution
Entering Project User Fields Information Entering Project Distances Information - relative to project distances
Entering Project Products Information - record project specific
products
Fixed Delivery Pricing - Quoting fixed prices to customer
Entering Project Forecasting Information - material delivery times
Project Initial Setup
General information about the project defaults from the Quotes screen. Any
default information can be edited to customize this project for this specific
customer’s requirements.
To enter basic project information:
1.
2.
Go to the Projects screen. {Quotes > Quotes > Projects > New / Detail}
or {Files > Customer & Project Information > Projects}
If the Projects screen is accessed from the Quotes screen, the Customer
Code will default from the Quote file; if the Projects screen is accessed
directly, a Customer Code must be entered manually.
Projects – Main Tab (EDTPROJ)
8/9/05
275
3.
4.
Enter a Project Code to identify the project in reports and project lookup
screens. If a Project Next Number sequence has been created, Tab
through the Project Code field and a code will be automatically assigned.
Enter a Name to identify the project.
Entering Project Main Tab Information
The Main tab on the Project screen allows you to enter information such as the
project’s address, contact person, and setup date.
To define main information:
1.
2.
3.
Select the Main tab on the Projects screen. {Quotes > Quotes > Projects
> New / Detail > Main} or {Files > Customer & Project Information >
Projects > Main}
The Delivery Address will default from the quote; edit it if necessary.
If your system is configured to Use Shipping Address, detailing on the
Delivery Address field will display the Shipping Address Information
screen. (The Shipping Address can also be entered on the Addresses
tab.)
Shipping Address (EDTSADR)
4.
5.
6.
7.
If the shipping address option is not active, detailing on the field will
display a simple text entry box.
If necessary, enter specific delivery Instructions to be included on all
orders assigned to this project. These instructions are frequently
directions.
If the customer uses purchase order numbers, enter the Purchase
Order code.
If the customer uses a job number, enter one in the Customer Job field.
Select the Measurement System to Use for this project. The system
default will default here.
Note: The use of the measurement system must be consistent. If a
project is created as a metric order, the system will not allow any
non-metric items to be ordered against the project.
8.
276
Enter the name of the Contact for this project. Because the project
contact is usually different from the initial bidding contact, quote or job
information will not default into this field.
8/9/05
9.
Use the Phone Number 1-4 fields to enter a project-specific phone
number and any other related numbers, such as fax or cellular. Append a
single letter suffix to each number to indicate what type of number it is;
for example, you might enter 205-234-5436 F to indicate a fax number.
10. The date the project was created will default into the Setup Date field.
11. Enter a Begin Date and an Expiration Date to establish a time frame
for the project. The system will not accept project orders outside an
established date range. If no dates are entered, the system will accept
orders on the project regardless of the date.
12. Accept the screen to save the project, or proceed to the Addresses tab.
Entering Project Address Information
The Addresses tab allows you to enter address information related to the
customer’s invoices and statements for this project. The system allows for
four different project addresses:
Delivery Address (on the Main tab) — The default address for the
project. The system will use this address if more specific addresses are
not available.
Invoice — Prints out on all invoices for this project.
Statement — Prints out on all statements printed for this project
Shipping — The shipping/delivery address for all project orders. The
data is populated from the Job Address information from the Quote file.
To define project address information:
1.
From the Projects screen, select the Addresses tab. {Quotes > Quotes >
Projects > New / Detail > Addresses} or {Files > Customer & Project
Information > Projects > Addresses}
Projects – Addresses Tab (EDTPROJB)
2.
8/9/05
Enter the Name and mailing Address information specific to the
customer’s invoices.
277
3.
4.
5.
Enter the Name and mailing Address information specific to the
customer’s statements.
Enter the Name and mailing Address information specific to this
customer’s shipping location.
Accept the screen to save the project, or proceed to the Pricing tab.
Initially only the Invoice and Statement addresses are visible. Use the scroll
bar to display the shipping address.
Entering Project Pricing Information
The Pricing tab includes information related to trade discounting, terms code
assignments for payment discounts, plant and price category assignments
that control aspects of pricing, and flags that control automatic charges
related to pricing.
Pricing settings are an integral part of the quote process; accordingly, all of
the settings on this tab will default from the quote file. They can be
subsequently edited as needed.
To define project pricing information:
1.
From the Projects screen, select the Pricing tab. {Quotes > Quotes >
Projects > New / Detail > Pricing} or {Files > Customer & Project
Information > Projects > Pricing}
Project Pricing Information tab (EDTPROJF)
2.
Select a Product Line from the field’s pull-down list; you can also move
from product line to product line by using the scroll bar on the far right
side of the screen.
Note: Your system license determines the available product lines.
3.
278
If you want to use the same selections for all product lines, mark the
Copy To All checkbox.
8/9/05
4.
5.
6.
7.
8.
9.
10.
11.
12.
13.
14.
15.
16.
17.
8/9/05
Switch between available product lines using either the drop down field or
the scroll bar.
Enter the Salesman responsible for this project. This field is required.
Enter a Sales Analysis Code. COMMANDexecutive uses this field for
sales reporting purposes. This field is required, even if you are not
licensed for COMMANDexecutive.
Select a Pricing Plant Code. If a plant code is entered here, all project
orders will be priced as though they were shipped from this plant,
regardless of what plant they actually shipped from. If the field is blank,
the pricing plant will be determined by system settings.
Select a Price Category. Price categories allow users to establish
different pricing tiers (for example, residential sales versus commercial
sales); product pricing can be assigned based on shipping plant/price
category.
Select a Trade Discount Percent or a Trade Discount Amount. A
trade discount is one that is given to the customer automatically.
Detail on the Trade Discount Amount field to select a UOM for the
discount.
Select a Discount Terms Code or detail on the field to select from a list.
The terms discount code dictates the discount date, due date, and
discount amount assigned to invoices.
Select a Zone Code or detail on the field to select from a list. This field
identifies the zone which contains the project delivery address, and can
identify applicable tax authorities as well as zone-specific charges.
If necessary, select a Minimum Load Charge table. This field will only
be visible when the Product Line is Concrete.
If necessary, select a Seasonal Charge Table. Seasonal charges will be
applied to customer’s orders based on the settings in the specified charge
table.
If necessary, select an Unloading Charge Table. Unloading charges
will be applied to customer’s orders based on the settings in the specified
charge table.
Checkboxes next to each of the previous three charges give you the
option to flag a charge to be billed on a Separate Invoice. An invoice
prep routine, Create Orders for Separate Invoices, creates new orders
and transfers the charges to them.
If necessary, select a Sundry Charge. To modify the charge amount,
press the $ button. If additional sundry charges are needed, select the
Add Occurrence button to the immediate right of the Sundry Charge field.
If necessary, select a Preferred Hauler (Aggregate only).
If necessary, select a Cartage Pay Table if the product line for this item
is aggregate. This code specifies the cartage fees that will be paid to the
hauler. The Apply Minimum Haul Pay checkbox to the right denotes, if
checked, that the project order will be subject to at least the minimum
charge specified in the cartage table.
279
18. If necessary, select a Charge Cartage Table (Aggregate only). This
code specifies the cartage fees that will charged to the customer. The
Apply Minimum Haul Charges checkbox to the right denotes, if
checked, that the project order will be subject to at least the minimum
charge specified in the cartage table.
19. Enter an Override Charge Rate if necessary. This rate will supplant the
rate specified in the selected charge table.
20. If necessary, select a Surcharge Code field (Aggregate only). If
additional sundry charges are needed, select the Add Occurrence button
to the immediate right of the Surcharge Code field.
21. Mark the Apply Zone Charges checkbox if necessary (Concrete only).
When marked, this checkbox causes the selected zone’s charge table to
be levied against the customer’s orders.
22. Mark the Allow Price Change in O/E? field if necessary. This field
determines access to non-COD prices during Order Entry. (See Non-COD
Price Changes for additional information.)
23. Mark the Print Prices on Tickets checkbox if necessary. When marked,
this checkbox causes prices to be printed on all delivery tickets for the
customer. Prices for C.O.D. or cash delivery tickets are always printed.
Prices for charge delivery tickets are only printed when this checkbox is
selected. This field is also used to determine access to non-COD prices
during Order Entry. (See Non-COD Price Changes for additional
information.)
24. Mark the Restrict Orders to Project Products checkbox if necessary.
When marked, this checkbox causes the Orders screen to allow only
those products that are entered on the Project-Products tab.
25. Mark the Apply Minimum Haul Charges checkbox if necessary
(Aggregate only). When marked, this checkbox causes the minimum
haul charge to be applied to this customer if the calculated haul charge is
less than the calculated minimum haul charge. A charge table is assigned
to each aggregate order; each charge table has an associated minimum
haul charge.
26. Mark the Allow Automatic Price Adjustments checkbox if necessary.
This checkbox established the default value for the Allow Automatic
Price Adjustments field on any items added to the project. Changing
this field will not effect any items already entered in the project. {Manage
> Application Management > Calculate Price Change}
27. Click the Quoted Pay button; the Quoted Cartage Rates screen appears.
See the Quoted Cartage Rates section for more information.
28. Select a Tax Code for the project.
29. Specify if the project is Taxable or Non-taxable in the Taxable field.
30. If the project is non-taxable, select the Details button To display the
Project Taxing Details screen.
280
8/9/05
Project Taxing Detail screen (EDTPROJ9)
•
•
Pick a Non Taxable Reason.
Enter the Tax Exempt ID to record the tax-exempt ID or certificate
number for each tax authority level.
•
Accept the Project Taxing Details screen.
31. Select the Compute Max Tax based on Life of Project if neccessary.
The system default is to calculate max tax (established at the Tax
Authority/Location) by invoice.
32. Accept the screen to save the project or proceed to the Distribution tab.
Entering Project Accounting Information
The Accounting tab allows you to enter accounting information for the project.
To enter project accounting information:
1.
From the Projects screen, select the Accounting tab. {Quotes > Quotes
> Projects > New / Detail > Accounting} or {Files > Customer & Project
Information > Projects > Accounting}
Projects – Accounting Tab (EDTPROJH)
2.
8/9/05
Enter an Accounting Category. This field is used to specify a code that
groups customers/projects together. It is commonly used to distinguish
internal jobs from trade customers.
281
3.
4.
5.
Enter necessary credit card information, including Credit Card Name,
Credit Card Number, Responsible Name, and Expiration Date. This
information is used for reference only; the system will not automatically
call in credit card charges.
Enter a Credit Code. This field assigns a credit code to the customer for
the current company. The credit code establishes how reliable you
consider the customer or project. You can limit the project to Cash Only
sales, for example.
Enter the date the credit code takes effect in the Credit Effective Date
field. The current date will default.
Note: The following five steps are only needed if you are licensed for
COMMANDlien.
6.
7.
8.
282
Select a Pre-Lien Calculation method from the drop-down list. The
options are:
•
Number of Days After Pre-Lien Compare Date (default)
•
Specific Day of 1st Month Following Pre-Lien Compare Date
•
Specific Day of 2nd Month Following Pre-Lien Compare Date
•
Specific Day of 3rd Month Following Pre-Lien Compare Date
The first option is by for the most commonly used. The other options
allow for “prox” dates, which are required in certain states.
This setting is used in conjunction with the Days/Day of Month for
Preliminary Notice Required field, found on the Configuration screen
{Lien > Pre-Lien Rules}.
In the Lien Required field, select one of the following.
Not Required denotes that the creation of a lien location is note
required for orders on this project.
Required (Man) denotes that the creation of lien locations is
required at all times, but must be created manually. Note that this
selection is rarely used because dispatch is slowed greatly by having
to create the lien locations.
Required (Auto) denotes that the creation of lien locations is
required at all times, but takes place automatically.
Required (Auto, Exempt) denotes that the creation of lien
locations is automatic, but the lien locations are automatically
marked exempt.
This option is useful for storing lien location information for customers
that do not necessarily warrant lien locations in the preliminary stages. If
the need arises to issue lien notices, the correct data will have been
maintained for implementing preliminary and lien notices.
To enter lien location information for this project, select the Lien
Locations button to access the Lien Location Manager screen. This
screen is available only if you have a COMMANDlien license. For
instructions on how to use the screen, see the COMMANDlien User’s
Manual.
8/9/05
9.
10.
11.
12.
13.
Mark the Allow Multiple Lien Locations checkbox to allow more than
one lien location for this project.
Mark the External Liens checkbox to allow externally managed liens.
Mark the Purchase Order and/or Customer Job checkbox if these
items are required in order entry for this project. If selected, the system
will not accept an order against the project unless the required
information has been entered. The system will shade the field to indicate
that the field is required.
When a valid reason code is entered in the Suspend Order Reason
Code field and saved, all new entered for the project default to a
suspended state. If no reason code is entered, new project orders default
to a released state.
When an order is suspended, it is essentially removed from the invoicing
process, thus providing an opportunity to review the order and make sure
that all information is correct. Please consult the COMMANDinvoicing
manual for additional information regarding suspending and releasing
orders.
Accept the screen to save the project, or proceed to the Invoicing tab.
Entering Project Invoicing Information
Project invoicing information is used when invoices are created to determine
the following aspects of invoicing:
•
•
•
•
•
Number of orders and tickets included on a single invoice.
Sub-totals to be printed on the invoice.
Level of detail printed for items and tickets.
Business for single or multiple days on a single invoice.
Customers included in the invoice run, based on assigned frequency
code.
To enter project invoicing information:
1.
8/9/05
From the Project screen, select the Invoicing tab. {Quotes > Quotes >
Projects > New / Detail > Invoicing} or {Files > Customer & Project
Information > Projects > Invoicing}
283
Projects – Invoicing Tab (EDTPROJI)
2.
3.
4.
5.
6.
7.
8.
9.
284
From the Print One Invoice Per field’s list, define the contents of
printed invoices. This field selects and groups tickets and orders into a
single invoice for the project.
Depending on your selection in the Print One Invoice Per field, the
following three fields appear or disappear. Select the settings based on
these values.
Sort and Sub Total By allows you to select the criteria by which
the invoices are sorted and sub totaled.
Print Products/Tickets allows you to select whether products and
tickets listed on an invoice print in Detail or Summary.
Days on One Invoice allows you to choose whether invoices are
created for single days or for multiple days.
If available, select the cycle code for the printing of customer invoices for
this project from the Invoice Frequency field.
If you want the system to automatically print more than one copy of
invoices for this project, enter the appropriate number in the Copies to
Print field.
From the Haul Charges field, select the method for printing haul
charges: Print haul charges as a separate line item or Combine haul
charges with material price.
From the Minimum Haul Charges field, select the method for printing
minimum haul charges: Print total minimum haul charge or Separate
actual and incremental haul charge.
Mark the Separate Invoices by Product Line checkbox if necessary.
When marked, this checkbox causes each product included on the invoice
to be displayed as a separate line.
Accept the screen to save the project or proceed to the Distribution tab.
Caution: Selecting options on this screen in and of itself will not produce a
specific invoice layout. The options selected must also be reflected
in the Invoice Document Group/Formats.
8/9/05
Entering Project Distribution Information
The Distribution tab allows access to miscellaneous dispatching information
for the project. This information is used as a default to the corresponding
fields on customers, orders, and tickets subsequently created for the project.
To define project distribution information:
1.
From the Projects screen, select the Distribution tab. {Quotes > Quotes
> Projects > New / Detail > Distribution} -or- {Files > Customer &
Project Information > Projects > Distribution}
Projects – Distribution Tab (EDTPROJJ)
2.
3.
4.
The Project Type and Stage fields are not currently used; functionality
for these fields will be added in future releases of COMMANDseries.
If necessary, enter the Map Page on which the delivery address is
located. This code can be printed on the delivery ticket so that the driver
can look up the specified page in the map book.
Enter an Estimated Travel Time to use as a default for scheduling all
orders associated with this project.
Note: If a project has both estimated travel times and a map page with
travel times, then when an order is entered the Order Schedule
Information screen will use the Map Page travel times.
The next three fields relate to Mobile Signaling.
5.
8/9/05
Select a Truck Polling Type. The options are:
•
Do Not Poll--The system will not ask for updated coordinates from
GPS-enabled trucks.
•
Poll First Truck--When the first truck on an order signals Pouring
status, the system will poll the truck for updated GPS coordinates.
•
Poll Every Truck--Every truck will be polled when it enters Pouring
status.
285
6.
7.
If Update Project Map Coordinates is selected, the project will be
updated with new coordinates.
If Update Order Map Coordinates is selected, the order will be updated
with new coordinates.
The rest of the screen has information for different project lines. Use the
Product Line drop down field or the scroll bar to select individual product
lines, or select Copy to All to have the settings for one product line copied to
the others.
8.
Enter the Scheduled Plant Code. This will become the default plant
from which materials for the project are delivered.
9. If the customer needs a specific Truck Type, enter the appropriate code.
10. Indicate the default Delivery Method to be used for this project.
11. If desired, select the Tracking Order Color. This field designates the
color code to be used to display orders for this project on the Tracking
and Scheduling screen.
Note: In practical terms, it is best not to assign a specific color to project
orders; the Tracking screen becomes harder to read. Assigning
project colors should be the exception rather than the rule.
12. Mark the Print Mix Weights on Tickets checkbox if necessary. When
this checkbox is checked, all delivery tickets for the project will include
constituent weights.
13. Accept the screen, or proceed to the User Fields tab.
Entering Project User Fields Information
The User Fields tab allows you to enter information for the project in your
system’s user-defined fields. User Fields are created and configured for the
entire system through the User Fields tab on the main Configuration screen.
{Files > General Information > Configuration} User fields can be restricted to
specific uses: Customers, Orders, Tickets, etc. For a user field to appear on
the project screen, it must be created with a Field Type of Project. If the field
is created with Field Types of Project and Orders, then the field can be used to
communicate between order entry/dispatch personnel and account
management personnel.
If there are no user-defined fields flagged as project-related, the User Fields
tab will not be displayed.
To enter project user field information:
1.
286
From the Projects screen, select the User Fields tab. {Quotes > Quotes
> Projects > New / Detail > User Fields} or {Files > Customer & Project
Information > Projects > User Fields}
8/9/05
Projects – User Fields Tab (EDTPROJK)
2.
3.
Enter the information required by the user field. If the text of the
message is longer than the field, you can press <Enter> or select the
Zoom button to the left of the field to open a larger text box.
Accept the screen, or proceed to the Distances tab.
Entering Project Distances Information
The Distances tab allows you to record the distances from various plants to
the project site. If entered, this information will default into the Order
Scheduling screen, speeding up order entry and making scheduling more
accurate, particularly if Map Pages are not used.
To define project distances:
1.
From the Projects screen, select the Distances tab. {Quotes > Quotes >
Projects > New / Detail > Distances} or {Files > Customer & Project
Information > Projects > Distances}
Projects – Distances Tab (EDTPROJL)
2.
3.
4.
5.
Enter the Plant code.
Enter the Distance between this plant and the project site.
Enter the Estimated Travel Time, in minutes, between this plant and
the project site.
Press the Add Occurrence button to enter another plant, or accept the
screen to save the project, or proceed to the Products tab.
Entering Project Products Information
The Products tab allows you to set up mix and aggregate products for the
project.
To define project products:
1.
8/9/05
From the Projects screen, select the Products tab. {Quotes > Quotes >
Projects > New / Detail > Products} or {Files > Customer & Project
Information > Projects > Products}
287
2.
Select a Plant from the field’s list. This field is used to determine the
products to be displayed in the screen areas below. If All plants are
indicated, then all products, regardless of their plant assignment, are
displayed. If a specific plant is entered, then only those products
assigned to that specific plant are displayed.
There are three different product entry screens in the Project editor, each with
specific functions. The three screens are:
•
•
•
Ready Mix Products
Summary Ready Mix Products
Aggregate Products
To use the Ready Mix Product entry screen:
1.
Select Ready Mix Products in the unlabeled product entry format field.
The Ready Mix Products screen displays.
Projects – Products Tab (EDTPROJM-mix)
2.
Aggregate Products displays all non-mix products in a single section.
There is a different product entry screen for aggregate products,
documented below in the section entitled Fixed Delivery Pricing.
Enter a Product for the Mix Products line. This code identifies each mix
product assigned to a customer. The same mix product can be assigned
multiple times to a customer when varying groups of associated products
are combined with each entry of the mix. When the Product code is
entered, the product’s Description is retrieved from the item master file.
Note: Detailing on a the description fields will bring up the Project
Product Description information screen.
288
8/9/05
Project Product Description Information (EDTPROJ4)
3.
4.
This screen allows you to make project-specific changes to the product’s
descriptions and usage code.
Select a Mix Products Plant from the field’s list. This field identifies the
plant from which this product can be sold to this project. If the product is
available at all plants, choose the All plants option.
Click on the Pricing button to go to the Project Product Pricing
Information screen.
Project Product Pricing Information (EDTPROJ1)
5.
Enter the Estimated Quantity of the product that the customer intends
to buy.
Note: You can click on the detail button associated with this field to
select a unit of measure to assign to the estimated quantity.
Enter the product Price as well as the Price Extension, and Effective
date. Whenever the price is changed, the old price and price extension
will be automatically moved into the Previous Price and Price
Extension fields.
8/9/05
289
6.
7.
8.
Project prices will override pricing information from the item master file
and customer file whenever this product is ordered for this project.
Mark the Allow Automatic Price Adjustments field you plan to adjust
this price using the Calculate Price Change function.
Enter any Sundry Charges applicable to this project.
If necessary, select the Project Sundry Charge Pricing button to override
the standard pricing for the sundry charge.
Sundry Charge Pricing (EDTPROJ5)
9.
10.
11.
12.
13.
14.
15.
16.
17.
18.
Mark the Create Separate Invoice checkbox if you want the sundry
charge to be billed separately.
Accept the screen when your are done.
Additional sundry charges can be added by pressing the Add Occurrence
button.
Enter Any Surcharge Codes applicable to this project (Aggregate only).
If a Surcharge is specified, a field will apear that will allow you to override
the surcharge Rate.
If necessary, set the Override Terms Discount flag. The box is
selected, two additional fields display.
The Discount Rate Type lets you select between a discount amount and
a discount percentage.
The Discount Rate is the override rate.
Accept the Project Product Pricing Information screen.
Select the Ready Mix button to enter the Batch Code and Slump for
the mix product, and accept the Project Product Ready Mix screen.
Project Product Ready Mix Information (EDTPROJ2)
19. If necessary, enter a Product for the Associated Products line (the
single-field line below the Mix Products line). This code uniquely identifies
each associated product assigned to each project-specific mix product.
Note: If an admixture is entered as an associated product in a project
file, then whenever the relevant mix is placed on a product order,
290
8/9/05
the associated product(s) will automatically be added to the order.
To simply give the customer a specific price for an inconsistentlyused admixture, then enter the admixture in the project as an
extra product—doing so will give the customer the preferential
pricing, but will not automatically put the admixture into a mix.
20. Press the associated product Pricing button to enter pricing information
for this item on this project.
21. If necessary, press Add Occurrence to add more associated products.
22. Enter any necessary Extra Products. This code uniquely identifies each
extra product assigned to a customer. More than one extra product can
be assigned to a customer. Extra products are not specific to any one mix
product assigned to a customer and can be added to any order for the
customer.
23. Select a Plant from which the extra product may be ordered.
24. Enter project-specific pricing for the extra product by pressing the
Pricing button.
25. Accept the screen to save the project, or proceed to the Forecast tab.
To enter products using the Ready Mix Summary Products screen:
1.
Select Summary Ready Mix Products in the product entry format field.
Projects-Products tab (Summary Ready-Mix-EDTPROJN)
2.
3.
4.
5.
6.
7.
8.
8/9/05
Enter the Product code or detail on the field to select from a list.
Select a Plant from the drop-down list.
The product Description and Category will default from the Product file.
The Price will default from the product file. Edit the price for the project
as needed.
Press the Pricing button to display the Project Product Pricing screen.
Edit the information as necessary.
Press the Assoc Prods button to add an associated product to the mix.
Press the Ready Mix button to display the Project Product Ready Mix
Information screen. Edit the information as necessary.
291
9.
10.
11.
12.
13.
14.
15.
Press Add Occurrence to add another mix, or proceed to the Extra
Products section of the screen.
Enter the Extra Products item code or detail on the field to select from a
list.
Select a Plant from the drop-down menu.
The extra product Description and Category will default from the
Product file.
The Price will default from the product file. Edit the price for the project
as needed.
Press the Pricing button to display the Project Product Pricing screen.
Edit the information as necessary.
Press Add Occurrence to add another mix, or accept the screen.
Because the third product entry screen, Aggregate Products, is linked to an
aggregate-specific pricing option, that screen is discussed in the next section.
Fixed Delivery Pricing
COMMANDaggregate users need the ability to quote a fixed delivered price to
customers. Once the price is fixed, either the cartage rate or the material
price is adjusted to achieve the quoted price.
You have three pricing options for aggregate products. These options are
selected with the Price Type field:
FOB Pricing - The material price plus the cartage rate equals the
delivered price. The delivered price can vary from load to load.
Fixed Cartage Delivered Pricing - The delivered price minus the
cartage (calculated or specified) equals the material price
Fixed Material Delivered Pricing - The delivered price minus the
material price equals the cartage.
Fixed delivered pricing can be established as the Job, Quote, or Project level.
When you go to the Products tab of the Projects screen, you have the
option to select a Product Format Type. If you select Aggregate
Products, the screen changes:
Projects-Products tab (Aggregate Products-EDTPROJO)
To establish aggregate pricing:
1.
292
Select a Default Price Type for the project. This selection simply
specifies the project default. Pricing options can be changed at the
product level.
8/9/05
Note: Changing the Default Price Type for an existing project does not
affect products already entered. The change will only affect new
products added to the project.
2.
3.
/
Enter a Product Code, or detail on the field to select from a list.
Enter the Plant from which the customer will order the product. To
select all plants, enter ALL or #.
Tip:
4.
5.
6.
7.
If the same product is entered once for all plants and once for a
specific plant, the specific plant setting will have precedence.
The product Description will default from the product file.
Enter the Quantity of the product that the customer expects to buy
during the course of the project. This value is entered for reference only.
Enter the preferred Truck Type, or detail on the field to select from a
list. To select all truck types, enter #.
The function of the next four fields depends upon the Default Price Type.
The image below illustrates the different options.
Project-Product Pricing (Fixed Delivery-EDTPROJO-detail)
1 FOB (Standard)
Pricing
Enter the Material Price (or accept the default from the
Item file) and assign a Cartage Table and Rate. If the
cartage table is a straight per quantity charge, the
Delivered Price will be calculated as the Material Price
plus the Cartage Rate. If cartage is charged using
another method, the Material Price will default as the
Delivered Price.
2 Fixed Material
Enter the Cartage Table and the quoted Delivered
Price. The cartage Rate will be calculated and
displayed.
3 Fixed Cartage
Enter the Cartage Table and the quoted Delivered
Price. The Material Price will be calculated and
displayed.
Note: Pricing calculations can only be done on this screen if the Cartage
Rate Type is quantity-based. If another type of cartage, such as
per load or per hour, is being used, then the default values will
display. Pricing adjustments for the fixed delivered price will be
made during ticketing.
8.
8/9/05
Press the Add Occurrence button to add another product, or accept the
screen.
293
Adjusting Cartage Rates
For many people, the settings on the initial Projects-Products tab is sufficient.
Some people need additional flexibility in configuring cartage charges at the
product level.
To adjust cartage charges for a single product on a project:
1.
Press the dollar sign button
on the product line. The Project Product
Cartage Charges screen will display. The Cartage Table and Plant are
displayed in the upper left of the screen. These values cannot be edited.
Project Product Cartage Charges (EDTPROJ7)
2.
3.
4.
5.
6.
7.
If necessary, enter a new Truck Type, or detail on the field to select
from a list.
If necessary, enter a new Cartage Rate.
Enter an Effective Date. The current date will default.
If you have changed the Cartage Rate, the existing rate will be
automatically transferred to the Previous Rate field.
The Delivered Price will be calculated based on existing pricing settings.
Press the Add Occurrence button to add another entry, or accept the
screen.
Note: If the product is being priced using Fixed Material pricing, you
cannot access this screen.
Changing Price Types
The Default Price Type field established the default pricing for all
subsequently entered products. If the default price type is changed, it will
have no effect on existing products.
To change a product’s Price Type:
1.
294
Press the detail button
on the product line. The Project Product
Pricing Information screen displays.
8/9/05
(EDTPROJ1-detail)
2.
3.
Change the Price Type as needed.
If other information on the screen has changes, change it as well.
4.
Accept the screen.
Entering Project Forecasting Information
The Forecast tab allows you to predict not only how much of a product a
customer will be ordering during the life of a project, but also how those
deliveries will be spread out over time. Once project forecasting information
has been entered, the Sales Forecast Display will provide projection forecast
information for quantities and gross revenues.
Note: Project Begin and Project Expiration dates must be entered accurately
on the Projects Main tab for forecasting to function properly.
To enter project forecasting information:
1.
From the Projects screen, select the Forecast tab. {Quotes > Quotes >
Projects > New / Detail > Forecast} or {Files > Customer & Project
Information > Projects > Forecast}
Projects – Forecast Tab (EDTPROJP)
2.
3.
4.
8/9/05
Select a Product Line from the drop-down list. Your selection will
determine what products will be available for display.
Enter a primary product, or detail on the Product field to select from
project products. The product’s Short Description and assigned Plant will
default in automatically.
The Estimated amount will display for reference purposes. Enter a
Forecasted amount. This amount can be the entire estimated amount,
or you could do forecasting for just the first month or so, then adjust the
forecast once you have a better idea of actual material demand.
295
5.
6.
If the Auto Spread checkbox is selected, the system will automatically
distribute the forecast amount evenly across the forecasting periods.
These amounts can be adjusted as needed.
Press the Add Occurrence button to add another product to the display,
or accept the screen to save the project.
Payment Forms
Payment forms allows you to define the forms of payment accepted by your
company. These forms are then assigned to individual orders, allowing you to
accurately determine how customers are paying.
If you establish multiple COD payment forms, you can run a COD Recap
report at the end of the day to reconcile cash, checks, and credit slips
collected.
COMMANDseries is installed with four default payment forms (see screen shot
below). If you are installing COMMANDseries for the first time, and are
installing V5.53.17 or greater, then you may edit or delete these defaults as
needed. If you are upgrading from any version prior to V5.53.17, Command
Alkon recommends that you retain the defaults and add whatever forms are
required.
Each Payment form is assigned a Payment Method. The available payment
methods are:
•
•
•
•
Charge
Cash
Check
Credit Card
To enter a payment form:
1.
Open the Payment Forms screen. {Files > Customer >Payment Forms}
The payment forms editor appears.
Payment Forms (EDTPMTF)
2.
3.
4.
5.
296
Use the Add Occurrence command to create a new line.
Enter a Code for the new payment form.
Enter a Description for the new form.
Enter a Short description of the new form.
8/9/05
6.
7.
8/9/05
Assign the new form to a Payment Method. The Payment method
determines what payment forms will display during order entry (based on
the customer’s (or project’s) credit), and what payment forms can be
reported on the COD Recap Report.
Use the Add Occurrence command to add a new line, or accept the screen
to save your changes.
297
General Ledger Setup
This sections covers the setup of your General Ledger (GL) information. The
information will control how COMMANDseries sorts, records and balances all
financial and inventory transactions in the system.
It is important to have clean and current printouts of your current GL
information before entering this information. If you are considering making
changes to your account structure, it is best to do so before entering the
information in the system. While you can modify your account structure from
within COMMANDseries, it will be much easier if changes are made before
business activity begins in COMMANDseries.
Topics in this section:
Account Types
Source Codes
Cost Centers
Account Codes
G/L Booking Codes
Account Types
The Account Types screen records account types, which are used to organize
account codes into logical groups. For each group, you can classify the
account type and all account codes assigned to it. This classification can be
balance sheet, profit & loss or statistical.
To enter a new account type:
1.
2.
3.
4.
298
Select Files > GL Information > Account Types.
Enter an alphanumeric account code in the Account Type field. This
code is used to access account type information in other programs. It is
also used to sort various reports that contain account type information.
To insure that proper sorting takes place in lookup windows and reports,
always follow the guidelines described below:
Make ALL account types either all numbers, all letters, or all numbers
and letters; don't make some codes all numbers and other codes all
letters, etc.
If your codes contain any letters, make ALL codes the same length; that
is, put the same number of characters in each code
8/9/05
Account Types (EDTACTY)
5.
6.
7.
8/9/05
Enter a brief Description of the account type. This field fully describes,
or names the account type. Where space permits, it is used on screens
and reports when the account type is referenced.
The Account Class field is used to specify one of the three account
classes that can be assigned to account types. The account class can be
one of the three following choices:
•
Balance Sheet
•
Profit & Loss
•
Statistical
Account classes define how the account codes belonging to an account
type are treated with respect to the following functions:
Recording the Net Profit effect of a journal entry - for accounts
belonging to an account type with a Profit & Loss account class, all
journal entries are recorded in the company’s Net Profit account and cost
center, as designated by the Net Profit Account field in the Companies
function. {Files > General Information > Companies}
Establishment of beginning balances for new accounting years accounts belonging to an account type with a Balance Sheet account
class have beginning balances established equal to the ending balance of
the accounting year being closed; accounts belonging to an account type
with a Profit & Loss account class have a zero (0) beginning balance
established.
Handling of statistical data separate from financial data - accounts
belonging to an account type with a Statistical account class are
separated from the other accounts, that are financial in nature. This
separation is evident on various reports, as well as in the Journal
Transactions function.
The most common set of account types, and their account class
assignments, are:
Account Type
Account Class
Assets
Balance Sheet
Liabilities & Equity
Balance Sheet
Sales & Revenue
Profit & Loss
Costs & Expenses
Profit & Loss
Quantities
Statistical Data
299
8.
9.
To add another account type, select the Add Occurrence button at the
end of the last line.
When you are finished entering account types, accept the screen to save
the information.
Source Codes
The Source Codes form allows you to set up source codes that identify the
accounting area, or sub-ledger, from which G/L transactions originated.
The source code is printed on the detail Trial Balance Report for each
transaction.
To set up a new source code:
1.
2.
Open the Source Codes screen. {Files > GL Information > Source
Codes}
Enter a Source Code to identify the G/L transaction source. This code is
used to access source code information in other programs. It is also used
to sort various reports that contain source code information.
The source code is alphanumeric. To insure that proper sorting takes
place in lookup windows and reports, always follow the guidelines
described below:
•
Make ALL source code either all numbers, all letters, or all
numbers and letters; don't make some codes all numbers and other
codes all letters, etc.
•
If your codes contain any letters, make all codes the same length;
that is, put the same number of characters in each code.
Source Codes (EDTSRCD)
3.
4.
300
Enter a Description of the accounting area that the source code
represents (such as Accounts Payable or Payroll). Where space permits, it
is used on screens and reports when the source code is referenced. Enter
an abbreviated version of that description in the Short field that is used
on screens and reports where the Description will not fit.
Mark the Force Balance checkbox if debits and credits must balance
before the batches using this source code can be posted. It is highly
recommended that you use the Force Balance feature, as it greatly
8/9/05
5.
6.
7.
reduces the number of errors that make their way into the general
ledger.
Mark the Maintain Quantity checkbox if data from this source will
contain quantity (statistical) values rather than financial or monetary
values.
To add another source code, select the Add or Insert Occurrence
button at the end of the last line.
When you’re finished entering information, accept the screen to save the
source codes.
Cost Centers
Cost Centers identify the locations within your business where accounting
activity takes place. For example, you can create cost centers that represent
such entities as plants, pits, the maintenance shop, the main office, etc. Cost
centers can be grouped together on financial reports in any fashion to
accommodate divisional, regional or company totals.
To set up a cost center:
1.
2.
8/9/05
Open the Cost Centers screen. {Files > GL Information > Cost Centers}
Enter a Cost Center number. This code is used to access cost center
information in other programs. It is also used to sort various reports that
contain cost center information. Note the following:
•
The cost center is alphanumeric. The required length of cost centers
is defined with the Cost Center Length field in the Financials
Configuration screen {Files > General Information > Configuration
> Financials}.
•
The required length of the company code is defined with the
Company Code Length field in the Financials Configuration screen
{Files > General Information > Configuration > Financials}.
Caution: Cost centers should be assigned to a single company, to avoid
problems in balancing your data. Command Alkon recommends
that you use an established company code {Files > General
Information > Companies} as the first characters of the cost
center code. This will serve as an aid in ensuring you don’t
assign a cost center to the wrong company.
301
Cost Centers (EDTCOST)
3.
Enter an Abbreviation for the cost center. This field is used to specify a
free form, short name of the cost center being defined. If desired, this
abbreviation can be used in place of the cost center code when specifying
the desired cost center on system screens.
Tip:
4.
5.
6.
Use abbreviations that are easy to remember. If you forget the
cost center code on system screens, you can enter the
abbreviation instead.
Enter a Description for the cost center.
To add another cost center, select the Add Occurrence button.
When you are finished entering information, accept the screen.
Account Codes
The Account Codes function defines the general ledger accounts used by
COMMANDreceivables. Use the Account Codes screen to edit general ledger
accounts to suit the needs of your business.
To enter a new account code:
1.
2.
302
Select Files > GL Information > Account Codes.
Enter a unique account code in the Account field.
8/9/05
Account Codes (EDTACCT)
3.
4.
Enter a Description of the account (i.e., Sales - Ready Mix or Cash in
Central Bank). Enter an abbreviation of this description in the Short
field.
Select a GL Summarize Flag. The summarize flag causes multiple detail
transactions from the COMMANDreceivables application to be recorded in
your general ledger at the chosen level of summarization. Without a
summarization, the account records and prints all of the details of each
transaction.
Caution: If you are using the COMMANDseries G/L Distribution Data Out
routine, make sure that your summarization option is relfected
in your Data Out document format.
5.
6.
7.
Select an Account Type (see Account Types for more information).
Enter either a plus sign or a minus sign in the Normal Sign field based
on whether the account normally has a debit ( + ) or a credit ( - )
balance.
In the Source Codes fields, enter the sources that can be used to post
transactions to this general ledger account. Press <Enter> in each field to
open a list of possible source codes.
Note: This field restricts the COMMANDseries functions that can post to a
given account.
8.
Select a summarization code for each source code that you enter. Press
<Enter> in the field that appears beside the source code field to open a
list of possible summarization codes.
9. Mark the Limit Cost Centers checkbox if you want only specific cost
centers to enter and post transactions to this account. When the box is
marked, fields appear below allowing entry of applicable cost center
numbers. Add new cost center fields by selecting on the Add
Occurrence button at the end of each line.
10. Accept the Account Code screen to record the current data and clear the
form, allowing entry of another account code.
8/9/05
303
G/L Booking Codes
The G/L booking file assigns a specific account code and cost center to each
type of transaction supported within COMMANDreceivables. The General
Ledger Booking Codes screen lists a series of detail levels for each type of G/L
entry. These detail levels get more specific from top to bottom, left to right
across the screen. You can assign account codes and cost centers among
these levels of detail in the manner that best suits your general ledger
system.
Each selected radio button displays a detail screen that allows for the entry of
account codes and/or cost centers. When you make a G/L entry, the system
searches for account codes and cost centers up through the various detail
levels, from most specific to least specific. As soon as it finds both an account
code and cost center for an entry, it terminates the search.
Note: See the appendix for sample GL Booking Codes.
To set up G/L booking codes:
1.
2.
3.
Select Files > GL Information > GL Booking Codes.
Enter a code in the Type of Entry field.
Choose a radio button from the list that appears below the Type of Entry
field to specify the detail level of account code and cost center
assignment. The detail levels get more specific from top to bottom, left
to right across the screen.
Note: Remember that you can assign an account code for one type of entry to
a certain detail level and the cost center for the same type of entry to
another detail level. (For example, for Charge Sales, you could list the
account codes under the Product Category detail level and the cost
centers under the Plant Code detail level.)
G/L Booking Codes (EDTGLCD)
304
8/9/05
4.
On the detail sheet that appears, select a category to configure and enter
an account code, sub-account code, and/or a cost center for that
category. To open a blank line, select the Add Occurrence button.
G/L Booking Codes (EDTGLCDA)
5.
6.
8/9/05
When you finish configuring the detail level, accept the detail screen.
Repeat the process, selecting one or more radio buttons for each type of
entry you want to format, then accept the GL Booking Codes screen.
305
User Preferences
This section demonstrates how to set user-specific preferences. These
settings are stored at the workstation-level; they do not follow the
username.
Functionality Preferences
The Preferences screen allows you to change aspects of application
functionality, including the following:
•
•
•
User preferences, such as language, date display options, and print
model options that are set initially by your username
Initialization preferences that control On-line Help display, order entry
functions, and the initial display of the application logo
Sounds, colors, fonts, keys, toolbar and network options
Except where noted, changes on this screen affect the current workstation.
When you accept this screen you are prompted to restart COMMANDseries.
Language, date format and order, and sound changes take effect
immediately; color changes only take effect when and you log out and back
into the application.
Topics in this section:
General Preferences Setup
User Preferences Setup
Sound Preferences Setup
Color Preferences Setup
Tracking Preferences Setup
Font Preferences Setup
Keys Preferences Setup
Toolbar Preferences Setup
General Preferences Setup
To define general preferences:
1.
306
Go to the General tab. {Misc > Preferences > General}
8/9/05
Preferences – General Tab (SYSPREF1)
2.
In the Logo Time field, enter the number of seconds the application logo
is to be displayed when you log into any application. To keep the
application logo from displaying, enter zero.
3. The field to the right of the Logo Time allows users to select an alternate
splash screen. Currently only one pre-defined splash screen ships with
COMMANDseries.
If you wish to design and display your own splash screen, create a 16 or
256 color bitmap and change the LOGO16 parameter in the [application]
section of USYS72.INI to LOGO16=@x:\dir\<name>.bmp. Be sure to fully
qualify the location of the bitmap to be displayed and precede it with an
"at" (@) character.
4. Mark the Simplified Orders checkbox to make the Simplified Orders
screen the default orders screen.
5. Mark the Use Order Prefix Screen checkbox if necessary. When
selected, this checkbox causes the Customer > Project-Order > Lookup
screen (CPOL screen) to displayed as the first screen on the Orders
screen. {Dispatch > Orders} This screen allows for a fast access to
customers, projects, and existing orders, at the initial setup in of new
orders.
6. Mark the Use Toolbar checkbox to enable the COMMANDseries toolbar.
7. Mark the Show System Name in Title Bar checkbox to cause the
system name (Entered on the Configuration - System tab) to display on
the COMMANDseries title bar. This feature is particularly useful in
environments with multiple COMMANDseries databases.
8. Mark the Clear Message Frame Frequently (Conserve Memory)
checkbox, if necessary. When marked this checkbox instructs
COMMANDseries to clear the Message Frame whenever a new form is
started. This prevents the message frame from building up a very large
amount of data and consuming the available memory on the system.
9. Select a Default Order Lookup from the list. The options are: Use
Order File, Use Standing Order File, Use Order/Schedule File.
10. Accept this screen to confirm the general preferences.
8/9/05
307
User Preferences Setup
The User preferences tab allows you to define COMMANDseries preferences
specific to a username.
To define user preferences:
1.
Click Misc > Preferences > User.
Preferences – User Tab (SYSPREF2)
2.
3.
The User name established the default user name for this workstation. If
COMMANDseries Security is enabled, then when the login screen appears
this username will already be entered.
If you are using COMMANDseries security, the Password field displays.
This field allows you to change the password for the current user.
Note: There is no direct link between the User and Password fields.
4.
5.
6.
7.
8.
9.
308
Enter the Language to be used in the COMMANDseries system or click
on the field to reveal a drop-down list with the following options: English,
Dutch, French, German, Greek, Italian, Spanish, Canadian French,
Norwegian.
Enter the Date Format to be used to display dates throughout the
COMMANDseries system or click on the field to select from a list of
acceptable date formats.
Enter a Date Order or click on the field to select from a list of acceptable
date orders.
Enter a Century Date Cutoff or scroll to select a number. The number
entered in this field determines whether the system recognizes a twodigit year as 19xx or 20xx. For example, if the number 70 is entered, the
system will recognize a year entry of 69 as 2069, and it recognizes a
year entry of 71 as 1971.
If you are using GPS tracking, you may need to select a Coordinate
Format. Consult with your Command Alkon project manager to
determine of what setting is appropriate for your needs.
If necessary, select a default Print Model. This feature is particularly
useful in systems witha large number of print models.
8/9/05
10. Select the Only Allow This Print Model to restrict the user to the
default model.
11. The Dispatching Assigns Truck to Loading Status flag determines
whether dispatching a truck will change its status.
12. The Limit Aggregate Ticketing to Dispatch Only flag enables an
aggregate operation to restrict a dispatcher to dispatch functions only.
This option allows the company to use just the Aggregate Ticketing
screen.
13. Proceed to the next tab, or accept the screen.
Sound Preferences Setup
This tab allows users to configure COMMANDseries to play Windows sound
files (.WAV files) at certain COMMANDseries events.
To define sound preferences:
1.
Click Misc > Preferences > Sounds.
Preferences – Sounds Tab (SYSPREF3)
2.
3.
8/9/05
Select a sound file for all desired COMMANDseries events. Available
events are as follows.
Startup File – the sound that plays when COMMANDseries initiates
Shutdown File – the sound that plays when COMMANDseries is
exited
Help File – the sound that plays when COMMANDseries On-line
Help is activated
Message File – the sound that plays when a message dialog box
appears
Mail File – the sound that plays when a message is received from
another COMMANDseries application
Click on the Test button to listen to the selected sound.
309
Color Preferences Setup
The Colors Preferences tab allows you to change the colors that are used to
display the various parts of the screen in your COMMANDseries applications,
such as windows, available and unavailable screen fields, bright fields, and
invisible fields. Also, user-defined colors, tracking colors, and scheduling
colors can be set, each on separate screens.
Note: To reset color defaults, go to the Options menu from this screen, and
select Defaults.
To define color preferences:
1.
Go to the Colors tab on the Preferences screen. {Misc > Preferences >
Colors}
Preferences – Colors Tab (SYSPREF4)
2.
3.
310
For each listed field (Label, User, etc.) select a display color by clicking
on the Colors button. You will be prompted for two colors:
Foreground Color—The color of the text
Background Color—The background color
Select a display color for each button display (Normal, Unavailable, and
Bright). You can toggle through the color options by clicking on the
buttons. Each time the button is clicked, it changes to the next color.
8/9/05
Tracking Preferences Setup
The Truck Tracking Preferences tab allows you to distinguish trucks from each
other by assigning a specific color to each truck in Tracking and Scheduling.
Note: To reset color defaults, go to the Options menu from this screen, and
select Defaults.
To define tracking preferences:
1.
Go to the Tracking preferences tab. {Misc > Preferences > Tracking}
Preferences – Tracking Tab (SYSPREF5)
2.
Select a Screen Background color to be used for the Tracking and
Scheduling screens.
When you select an item, you are prompted to select both a foreground and
background color.
3.
4.
5.
8/9/05
Select colors for each item on the Tracking screen.
Select colors for each item on the Scheduling screen.
Proceed to the next tab, or accept this screen.
311
Font Preferences Setup
The Font Preferences tab allows the fonts (type styles) used in various
portions of the system to be changed including the following.
•
•
The font used in workspace areas of the system.
The font used to display labels for buttons.
Note: For the previoius two groups, be very careful when changing fonts,
particularly font sizes. If a font is set too large, it will not display
properly.
•
•
The font used on Tracking and Scheduling screens. Only the
CMDtracking fonts should be used.
The font used to display reports on screen. The default, Lucida Console
Regular, 7 point, will enable an etire report page to fir on the screen. But
unless that screen is a 20-inch monitor, it’s won’t be very legible. Font
sizes around 9 work well.
Note: To reset font defaults, go to the Options menu from this screen, and
select Defaults.
To define font preferences:
1.
Go to the Fonts tab on the Preferences screen. {Misc > Preferences >
Fonts}
Preferences – Fonts Tab (SYSPREF6)
2.
3.
4.
312
Select each font detail button to define the user-specific font preferences.
From the Case Manipulation on Edit Fields drop-down list, select one
of the following options: Case Accepted as Entered, Uppercase on
Short Fields Only, Uppercase All Fields.
From the Data Manipulation on Edit Fields drop-down list, select one
of the following: Auto Select Text when Focusing Fields, Erase on
First Input in Field.
8/9/05
5.
Proceed to the next tab, or accept the screen.
Note: To reset font defaults, go to the Options menu from this screen,
and select Defaults.
Keys Preferences Setup
The Keys preferences function allows you to assign forms within the
COMMANDseries applications to <Alt> or <Alt+Shift> function key
combinations, so that the form runs by entering the assigned keystroke. This
functionality exists even when you are in another form. Thus, the speed by
which the desired form can be accessed is greatly increased.
To define key preferences:
1.
Go to the Keys tab on the Preferences screen. {Misc > Preferences >
Keys}
Preferences – Keys Tab (SYSPREF7)
2.
3.
8/9/05
Enter a system Function for which you want to assign a shortcut key. This
field is used to enter the form name to be assigned to a keystroke. For
example, the form name for the Orders screen is EDTORDR. The easiest
way to accomplish the task is to right-click on the field to reveal the
actual application menu options and select the desired function.
From the Key field’s drop-down list, select the function key that displays
the function.
313
Toolbar Preferences Setup
The Toolbar Preferences tab allows you to assign toolbar buttons to appear on
the COMMANDseries toolbar. Each screen that is run automatically provides
screen specific action buttons (i.e. accept, Clear, Exit, etc.). This screen
allows you to determine other buttons that are always present on the toolbar,
regardless of the form currently in use. The buttons that can be displayed fall
into three groups.
•
•
•
Screen and Field Edit Options (i.e. Add Occurrence, detail, Cut, etc.)
Menu Options (i.e. Orders, Tickets, Customers, COMMANDinvoicing, etc.)
Program Manager Options (i.e. MS Word, File Manager, MS-DOS, etc.)
To define toolbar preferences:
1.
Go to the Toolbar preferences tab. {Misc > Preferences > Toolbar}
Preferences – Toolbar Tab (SYSPREF8)
2.
3.
4.
314
In the Standard Options section, mark the checkboxes of all standard
options you want placed on the toolbar. The arrow buttons to the right of
the checkboxes allow the order of the button options to be changed.
In the Edit Options section, mark the checkboxes of the editing options
you want placed on the toolbar.
Enter a system Menu Option for which you want to assign a toolbar
button. You can do this in two ways:
•
Right-click on the blank field. The COMMANDseries menu will
appear in the context menu. Navigate to the screen you want to
include on the menu.
•
Enter a specific form name.
8/9/05
Caution: Do not enter a sub-form in this field. (EDTORDR is the main Orders
form. EDTORDR4 is the Scheduling screen, and, as the form name
suggests, is a subform of the Orders screen). For a subform to work
properly, it must be called from its parent form.
Program Manager Options--The next three fields allow you to create a
toolbar button that will launch an external windows programn, such as
Microsoft Word.
5.
6.
7.
Enter the Description of an external application or program to which you
wish to assign a toolbar button. This can be the description, as it would
be entered if run from the Windows Program Manager.
Enter the Command Line of an external application or program to which
you wish to assign a toolbar button. This can be the command line, as it
would be entered if run from the Windows Program Manager.
Enter the Working Directory of an external application or program to
which you wish to assign a toolbar button. This can be the working
directory, as it would be entered if run from the Windows Program
Manager.
Additional Toolbar Options
8.
Mark the Display Language List on Toolbar checkbox, if desired, to
display the language list on the toolbar.
9. Mark Display Help on Toolbar checkbox, if desired, to display the help
options on the toolbar.
10. Accept this screen to confirm the changes.
8/9/05
315
COMMANDexecutive
COMMANDexecutive is a sales reporting module that can help you analyze
how your business is performing. If you are licensed for COMMANDexecutive,
you will need to enter two key components.
Topics in this section:
Sales Data Periods
Sales Data Configuration
Sales Data Periods
Sales Data Periods are user-defined periods that dictate time periods used as
a grouping segment for information stored in the Data Warehouse tables. In
addition, Sales Data Periods are used during the Compress Sales Data
operation, creating one record for each period compressed. The Sales Data
Periods setting is a one-time, initial setting that should not be changed
following the implementation of COMMANDexecutive. Sales Data Periods are
completely independent of A/R and G/L Accounting Periods.
The Sales Data Periods screen allows users to control the sales data posting
routine. To post sales data to the data warehouse, the sales data period must
be marked as open.
To set sales data periods:
1.
Go to the Sales Data Periods screen. {Reporting > Sales Data Periods}
Sales Data Periods (EDTSLSP)
316
8/9/05
2.
3.
4.
5.
Enter the Accounting Year associated with the sales data periods you
are defining.
At this time you may select the Defaults button to set 12 periods with
dates beginning on the first day and ending on the last day of each
month, and accept the screen.
-orEnter the Number of Periods (maximum of 13) you wish to create for
the specified accounting year. Typically the number of periods is dictated
by months of the year, quarters, or other standard accounting periods.
However, remember that the Sales Data Periods settings are independent
of any other COMMANDseries system accounting or GL period settings.
Enter a Start Date and End Date for each of the periods created by the
Number of Periods value. To post sales data for a given period, ensure
that the Open checkbox adjacent to the dates is marked. By default all
newly created sales periods will be open.
Accept the screen to save the new sales data period information.
Sales Periods may be closed to prevent any additional sales from being posted
to the period. Closing Sales Periods has no impact on A/R Accounting Periods.
Similarly, closing A/R Accounting Periods, whether manually or by the Period
End Processing routine in COMMANDreceivables, has no effect on any Sales
Data Periods. Attempting to post sales data to a closed period will result in an
error message.
To close sales data periods:
1.
2.
3.
4.
Go to the Sales Data Periods screen. {Reporting > Sales Data Periods}
Enter the Accounting Year associated with the sales data period(s) you
wish to close.
Unmark the Open checkbox(s) next to the period(s) you wish to close.
Accept the screen to close the fields and exit the screen.
If necessary, closed periods may be re-opened by opening the Sales Data
Periods screen, marking the checkbox associated with the sales period(s) you
wish to open, and accepting the screen.
Sales Data Configuration
The Sales Data Configuration screen allows users to define the layout of the
database tables used for COMMANDexecutive reports. When sales data is
posted, the data is written to the data warehouse according to the field
combinations specified in the sales data configuration. Reports then can be
generated by these levels and separated into sections according to differences
in the levels. Therefore, the sales data configuration dictates how Sales
Reports, Gross Margin Reports and Contribution Reports may be designed.
When entering sales data configurations, it is helpful to understand the effect
they have on a report. Sales data configurations determine the available
settings to sort reporting data in the various report selections screens. The
last entry in the configuration is the entry that the related report will
8/9/05
317
generate. However, designing reports and their related sorting options
operates from the top down, so multiple reports with varying levels of detail
may be created from a single configuration.
For example, imagine a sales data configuration is set with the following
levels: 1) Company Code, 2) Plant Code, 3) Customer Code, 4) Project Code,
5) Product Code. There are many different report options with this
configuration, including a product sales listing sorted by company, plant,
customer and project, or a project listing sorted by company, plant and
customer.
Available Configuration Fields
Accounting Category Code
Customer Code
Delivery Address
Delivery Method Code
Delivery Type
Driver Employee Code
Hauler Code
Item Category
Item Code
Lien Location Code
Map Page
Pricing Company Code
Pricing Plant Code
Project Code
Quote Code
Reference Customer Code
Sales Analysis Code
Salesman Employee Code
Shipping Company Code
Shipping Customer Code
Shipping Plant Code
Truck Code
Truck Type
Usage Code
Zone Code
Important Notes
•
•
•
Remember: configuration settings allow reports with top-down sorting
options. You cannot create a report from a configuration and skip a
setting in the middle; a different configuration is required.
Configurations may be added at any time, but all existing sales data must
be re-summarized after changing the sales data configuration.
All Sales Data Configuration entries for Contribution Reports must have
Delivery Type as the first option.
To set the sales data configuration:
1.
318
Go to the Sales Data Configuration screen. {Reporting > Sales Data
Configuration}
8/9/05
Sales Configuration Data (EDTSLSC)
2.
3.
4.
5.
6.
7.
8/9/05
Enter a unique Code for the configuration. For example, you may start
with the number one (1) and increase by one.
From the drop-down Field Name list, select the first field variable you
wish to use to sort and select a report. This list is limited to significant
fields from order and ticket files.
Use the Add or Insert Occurrence button next to the Field Name list to
add the next field variable.
Continue adding field variables (up to five) until all desired variables are
present.
Use the Add or Insert Occurrence button at the bottom of the
configuration list to define another configuration.
When finished entering configurations, accept the screen to save the
Sales Data Configuration settings.
319
COMMANDquote Setup
If you are licensed for COMMANDquote, there are some Quote-specific data
that must be entered.
Topics in this section:
Job Types
Job Source Codes
Contacts
Setting Up Quote Printing
Job Types
Job Types indicate the type of work to be performed in the prospective job.
Job Types are user-defined; you can set them up in whatever manner will be
the most useful for your company.
To enter job types:
1.
Go to the Job Types screen. {Files > General Information > Job Types}
Job Types (EDTJBTY)
2.
3.
4.
5.
Enter a Job Type code. The code can be one or two alphanumeric
characters.
Enter a Description of the job type.
Enter a Short description. This abbreviation will be used on reports when
there is not sufficient room to include the complete description.
Press the Add Occurrence button to enter another job type, or accept
the screen.
Job Source Codes
Job Source Codes are used to indicate the initial resource for this job. A
company can learn of a job from an internal employee such as a salesman, or
320
8/9/05
from an external source such as Dodge Reports®. Job source codes can be
created or edited at any time, but ideally they are set up at the time of
installation.
To enter a new job source code:
1.
Go to the Job Sources screen. {Files > General Information > Job
Sources}
Job Sources (EDTJBSC)
2.
3.
4.
5.
6.
Enter a Source code to identify the job source.
Enter a Description of the job source.
Enter a Short description of the job source.
Click the Insert Occurrence button, if necessary, to add another job
source.
Accept the screen to save the job sources.
Contacts
Contacts are people that are associated with a job or a quote in some
fashion—they may be architects, contractors, owners, even bank loan
managers. The primary reason to enter anyone in the system as a contact is
because he or she may be able to provide that little bit of additional
information that will allow you to make the most attractive bid possible.
Setting Up Contact Types
Contact Types are categories of contacts. Establishing Contact Type Codes
allows you to save time during Contact entry by simply entering a contact
code on the Contacts tab. Contact Types should be established at the time of
installation.
Note: Contacts and Contact Types are available through the Files > Contact
Information menu. This menu is only available if you are in the
COMMANDquote module.
To enter contact types:
1.
8/9/05
Go to the Contact Type Codes screen. {Files > Contact Information >
Contact Types}
321
Contact Type Codes (EDTCTTY)
2.
3.
4.
5.
The screen displays all contact types entered in your system. You can
enter new codes or edit codes already in existence.
Enter a Code to represent the contact type.
Enter a Description for the contact type.
Click the Add Occurrence button, if necessary, to add another contact
type.
Accept the screen to save the new contact type information.
Setting Up Contacts
Contacts can be entered at any time. Data entered in the Contact Information
screen is available to you on the Contacts tab of the Jobs screen.
To enter a new contact:
1.
Go to the Contact Information screen. {Files > Contact Information >
Contacts}
Contact Information (EDTCTCT)
322
8/9/05
2.
3.
4.
Enter a Customer Code to associate this contact with an existing
customer.
Enter a Contact Code to identify the new contact. You can also use this
screen to edit an existing contact code. To view a list of existing codes,
click the detail button.
Enter information for the contact including Name, Address, City, State,
Postal Code, Phone Number(s) and E-mail Address.
Tip:
5.
6.
You may want to make a note in each phone number field as to
what type of number it is: (205) 555-1212 F for a fax number, for
example.
Enter a Contact Type, or detail on the field to display a list of available
contact types.
Accept the screen to save the new contact information.
Setting Up Quote Printing
Quote Print allows you to print quote information into a Microsoft Word 2000/
2003 document, allowing users the greater formatting flexibility of the word
processor. Depending on your quoting practices, you can have one template
document that you modify for each quote, or you can have a set of quote
templates from which you can select.
There are a number of steps involved in configuring Quote Print to run on your
system:
•
•
•
•
Install the Microsoft Data Access libraries
Modify the COMMANDseries assignment file
Create/Modify a Microsoft Word document template
Configure COMMANDquote
Installing Microsoft Data Access libraries
The Microsoft Data Access libraries enable Microsoft Word to access the Oracle
database to extract the quote information. These files need to be installed on
any workstation that will print quotes to Microsoft Word. The library
installation file, MDAC_TYP.EXE, is typically located in the directory
X:\CMDSERIES\UTILS, where X is the mapped drive to the COMMANDseries
server. Simply double-click on the installation file to install the libraries.
Editing the Assignment File
The COMMANDseries assignment file CMDSERIE.ASN installs with the
COMMANDseries application. It is usually located in the CMDSERIE\CLIENTS
directory. This file controls the database locations and the paths for
associated applications. It is necessary to edit the cmdserie.asn file for the
quote print function to include the paths to Microsoft Word documents and
templates, and also the path to the COMMANDseries application that allows
the interface between Word and COMMANDquote.
8/9/05
323
To edit the CMDSERIE.ASN file:
1.
Using Explorer, locate the CMDSERIE.ASN file in the CMDSERIE\CLIENTS
directory.
Note: This directory path may be different if COMMANDseries was
installed somewhere other than the default directory.
2.
3.
4.
5.
0
Double-click the file to open it for editing.
It may be necessary to associate the file with an application before
editing it. If so, the Open With program selection dialog box
automatically appears. Select Notepad to view the CMDSERIE.ASN file.
Enter *.dot= and the path for Microsoft Word templates.
COMMANDseries will automatically create a \DOC folder in the
COMMANDseries root directory, and will create a number of sample quote
templates there. Example:
*.dot=x:\cmdserie\doc
Enter *.exe= and the path for the CADocPrint executable application.
Example:
*.exe=x:\cmdserie\bin
WARNING: As is the case for all .ASN file entries, be certain that
all spelling is correct.
Note: These settings can also be entered through the Assignment File
Wizard, which can be invoked from the COMMANDseries Program
menu.
6.
Save and close the assignment file.
Creating Document Templates
The Word Quote templates are standard Microsoft Word templates that
contain special formatting to control the placement of database fields and
tables. The SAMPLEQUOTEALL.DOT file contains all the fields and tables
available for placement in a word quote template. You can copy and paste
from this template to your own template to create a customized quote
template. This template may contain company logos, headers and footers.
There are three parts to formatting a document template:
•
•
•
General Document Layout
Formatting for non Table-Related fields
Formatting for Table-Related fields
General Document Layout
Quote layouts are set up according to the standard procedures for Microsoft
Word. Adjust margins, select fonts, insert company logos—anything you want
to do to give your quote a more professional appearance. For specific
formatting instructions, consult your Microsoft Word manual.
324
8/9/05
Formatting for Non-table Related Fields
The Quote Print function operates by the use of the Search and Replace
function. Once the template is loaded and the database accessed, each field
variable listed in the template is replaced with its corresponding value from
the database. Each field in the database is noted in the template by the
format: ~TBLE_field_name~
•
•
•
TBLE is the quote system database table that contains the field
field_name is field in the database table.
Tildes (~) are placed at each end to ensure that only the field variables
get replaced.
Note: There are zero spaces within the field layout.
Ex: ~YMCH_Min_Loads~
For a list of all available table/field combination see the SAMPLEQUOTEALL.DOT
template. The font type or size you assign to the field format will use for the
information in that field.
Formatting Minimum Load, Cartage Zone, and Cartage Range Table
Bringing data in from the various COMMANDseries tables requires special
formatting considerations. Remember these rules:
1.
2.
Each table requires a minimum of 2 rows.
The first row contains the name of the table in the first column.
Sample Min Load table format with generic column headers:
~MinLoadTable~
~YMCH_Load_Size~~YMCH_Price~
Because no column headers have been supplied, Quote Print will
automatically insert column headers based on the table field descriptions.
Sample Min Load table format with custom column headers:
~MinLoadTable~
Load SizePrice
~YMCH_Load_Size~~YMCH_Price~
Row 1, Column 1 contains the table name. This row will be deleted during the
population of the template. This is required to populate the table.
If there are only 2 rows in the table then the table will be populated with
column headers before the data is inserted into the table. See above sample.
Setup/Troubleshooting Tips
General
•
8/9/05
If you encounter problems running QuotePrint after updating MDAC, you
may need to re-register Microsoft Word. From a dos window, type the
following:
325
C:\WINNT\REGTLIB.EXE "C:\Program Files\Microsoft
Office\Office\MSWORD9.OLB"
The above path is for Microsoft Word 2000. The path and number on the
MSWORD#.OLB may be slightly different for more recent versions.
SQL Server Setup
•
•
•
REGTOOL5.DLL needs to be among Command Series DLLs and needs to
be registered on the client workstation. To register, run the following
commands from the start/run menu option on the client workstation:
regsvr32 regtool5.dll
The DSN used for Command Series needs to be a system DSN.
Windows NT/ Windows 2000/Windows XP users need to have privilege to
read registry. To verify if the user has the Read access to the Registry
Run regedt32 and choose the Security option.
SQL Server Troubleshooting
•
•
•
•
326
"ActiveX component can't create object" error when printing a quote.
A reason for the error is missing or unregistered regtool5.dll. A resolution
is to add/register regtool5.dll.
"Table or view does not exist " error.
A reason for the error is a missing Quote print view. Run the Create Views
option of the Database Updates and check the message frame for
dberror() after "create view" statements associated with the Quote Print
views.
The Quote Print views are as follows:
YQHD, YQPR, YCRG, YCTR, YCZN, YMCH, YQPC, YUCH.
An additional view in CmdSeries Plus is YQPP.
"Invalid object name…" error.
A reason for the error is that the view specified in the error message does
not exist. Run the Create Views option of the Database Updates and
check the message frame for dberror() after the "create view" statement
associated with the view.
You can run this statement using SQL + as well. The "create view" scripts
are saved as MSG_Q…. messages in the Uniface application.
MSG_QORA0.. are for the Oracle scripts, MSG_QMSS0.. - for the MSS
SQL.
Certain quotes don't show some information in the Quote document.
A reason is missing records in the view. Make sure that the tables
referenced in the "create view…" script have information needed to
populate the view.
Example:
create or replace view yqpc as
select
8/9/05
qprd.quote_code,
qprd.rev_num,
qprd.unique_line_num,
qprd.item_code,
qprd.prod_descr item_description,
decode(qprd.price_plant_code,'#','Any',
qprd.price_plant_code) plant,
to_char(qprd.matl_price,'$999.99') item_price,
to_char(qprd.price,'$999.99') delivered_price,
qprd.est_qty,
uoms.short_descr uom_desc,
qpct.truck_type,
to_char(qpct.chrg_cart_rate,'$999.99') Cartage_Rate
from qprd, qpct, uoms
where (qprd.quote_code = qpct.quote_code(+) and
qprd.rev_num = qpct.rev_num and
qprd.unique_line_num = qpct.unique_line_num and
qprd.order_qty_uom = uoms.uom(+))
If QPCT or UOMS that satisfy the where clause are missing, the occurrence of
YQPC for the quote_code.qprd will not be created.
•
8/9/05
"Method '~' " error.
A reason for the error is a mistake in the Quote Print template. Make
sure that all tables in the template have "~" around their names and
fields have the following structure: ~viewname_fieldname~.
327
328
8/9/05
8/9/05
329
Message Text
106 Message Text
Message Text
Document format Document
groups
format groups
Document
formats
95
Document
formats
Document
formats
Document
formats
Next numbers
Modem codes
(rarely used)
Reason codes
Employees
Companies
Currency
Printers
Users
Licensing
Cartage
Message Text
Document
formats
Document Tags Document Tags
89
Document Tags
Document
Tags
85
Document Tags
Next numbers
Next numbers Next numbers
Signaling units
Modem codes
(rarely used)
Reason codes
Employees
Companies
Set Company
Code Length
Currency
Printers
83
Document Tags
Modem codes
(rarely used)
Currency
Printers
Users
Licensing
Aggregate
Scale types
Next numbers
Modem codes
(rarely used)
Reason codes
Employees
Companies
Set Company
Code Length
Currency
Printers
Users
Licensing
Executive
77
Signaling units
70
Modem codes
(rarely used)
Reason codes
Employees
Companies
Set Company
Code Length
Currency
Printers
Users
Licensing
Inventory
Auto-ticketing
units
Modem codes
(rarely used)
68
Reason codes
Employees
Companies
Printers
Users
Licensing
Receivables
76
Reason codes
66
Set Company
Code Length
Employees
Currency
60
65
Set Company
Code Length
Printers
53
Companies
Currency
Users
41
61
Licensing
Licensing
35
Users
Invoicing
P# Concrete
Note: There may be slight variances in page numbers.
Setting Up the System Quick Reference
Appendix A: Quick Reference Guide
8/9/05
330
Trailers
Delivery methods
178 Trailers
181
Pouring
Methods
182 Pouring
Methods
196 Driver
Overtime
Tables
Task Codes
193 Task Codes
Delivery
methods
Trailers
Trucks
Condition Codes
Trucks
194 Condition
Codes
Driver Overtime
Tables
Trucks
Truck types
174 Trucks
Truck types
Truck types
Plants
173 Truck types
Haulers
Plants
Locations
Configuration
Haulers
Plants
Locations
Configuration
Haulers
Plants
159 Plants
Locations
Configuration
Tax codes
authority/
locations
Tax
Tax authorities
Aggregate
172 Haulers
Locations
158 Locations
Configuration
Executive
Map Pages
Configuration
127 Configuration
Tax codes
Inventory
accounting
periods
Inventory
104 Map Pages
Tax codes
authority/
locations
authority/
locations
117 Tax codes
Tax
Tax authorities
113 Tax authorities Tax authorities
Tax
Adjustment
codes
112
114 Tax authority/
locations
Bank codes
111
A/R accounting
periods
Receivables
G/L accounting
periods
A/R accounting
periods
Invoicing
110
109
108
P# Concrete
Trailers
Trucks
Truck types
Haulers
Plants
Configuration
Tax codes
Tax authority/
locations
Tax authorities
Cartage
8/9/05
331
Employees
(revisit to set up
defaults for
plant, truck,
driver OT)
65
Item categories
Item categories
Items
Minimum load
charges
Seasonal charges Seasonal
charges
Unloading
charges
Sundry Charges
205 Item
categories
209 Items
227 Minimum load
charges
228 Seasonal
charges
229 Unloading
charges
231 Sundry
Charges
Zones
Zones
Plants (revisit to
place default
zone)
185 Zones
84
Plants (revisit to Plants (revisit to
place default
place default
zone)
zone)
Freight methods
236
Plants (revisit
to place
default zone)
Vendors
Items
Item categories
Usage codes
Price categories
234
Zones
Unloading
charges
Minimum load
charges
Items
Usage codes
Usage codes
200 Usage codes
Price categories
Price categories
199 Price
categories
Employees
Employees
(revisit to set up (revisit to set up
defaults for
defaults for
plant, truck,
plant, truck,
driver OT)
driver OT)
Map pages
Map pages
187 Map pages
Employees
(revisit to set
up defaults for
plant, truck,
driver OT)
Map page time
periods
Map page time
periods
186 Map page time Map page time
periods
periods
Employees
(revisit to set
up defaults for
plant and truck
Map pages
Map page time
periods
Cartage
Usage codes
Zones
Items
Plants (revisit
Plants (revisit
to place default to place defaul
zone)
zone)
Zones
Unloading
charges
Seasonal
charges
Minimum load
charges
Items
Item categories Item categorie
Usage codes
Price categories Price categorie
Employees
(revisit to set
up defaults for
plant and truck)
Map pages
Auto-ticketing
units
Aggregate
77
Executive
Job Cost Jobs
Inventory
183
Receivables
Job Cost Phases
Invoicing
183
P# Concrete
8/9/05
332
Cartage
surcharge codes
Quoted cartage
rates
Credit codes
Terms codes
Accounting
categories
Sales analysis
codes
Source codes
Customers
Projects
Account types
Cost centers
Account codes
G/L booking
codes
251
253
120 Credit codes
120 Terms codes
124 Accounting
categories
258 Sales analysis
codes
300
258 Customers
274 Projects
298
301
302
304
Cartage rate
codes
Cartage
316
Quoted
deductions
256
Projects
Customers
Deduction
codes
Projects
Customers
Sales analysis
codes
Accounting
categories
Terms codes
Credit codes
Quoted cartage Quoted cartage
rates
rates
Cartage
Cartage
surcharge codes surcharge code
Cartage rate
codes
Aggregate
255
Sales data
periods
Executive
Hauler/truck
information
G/L booking
codes
Account codes
Cost centers
Account types
Source codes
Inventory
254
G/L booking
codes
Account codes
Cost centers
Account types
Projects
Customers
Source codes
Accounting
categories
Terms codes
Credit codes
Quoted cartage
rates
Cartage
surcharge codes
Cartage rate
codes
Cartage rate
codes
239
Receivables
Cartage
Accounting
Periods
Invoicing
238
P# Concrete
8/9/05
333
317
P# Concrete
Invoicing
Receivables
Inventory
Sales data
configuration
Executive
Aggregate
Cartage
8/9/05
334
8/9/05
335
8/9/05
336
8/9/05
337
Appendix B: Field Level Security
Field-Level Security Worksheet
The following list indicates which screens allow you to set field-level security.
You can make copies of this section and use the worksheet to record your site
access policies for the different screens.
Topics in this section:
Processing Forms (DBA)
Edit Forms (EDT)
Find or Lookup Forms (FND)
Selection Forms (SEL)
System Forms (SYS)
Note: The appearance of “N/A” in the Configuration column (or there is no
Configuration column in the table) indicates screens that do not permit
field-level security configuration.
Processing Forms (DBA)
Purge, Post, Data Out/In
Form Name
DBAAUDT
DBACNOT
DBACRPS
DBACTPD
DBACTTK
DBAEXOR
DBAEXPR
DBAFCHG
DBAIMOR
DBAIMPR
DBAINIT
DBAJBQU
DBALNLI
DBALNSU
DBALNUP
DBALOCK
DBAORDR
338
Screen Name
Audit Purge
Purge Customer Notes
Post Transactions
Update Period Deductions
Update Cartage Tickets
Export Orders and Tickets
Export Data
Calculate Finance Charges
Import Orders and Tickets
Import Data
Initialize/Analyze Files
Purge Closed Jobs & Quotes
Lien Legacy Invoice Manager
Lien Location Substitution
Lien Locations Update
Database Locks
Purge Expired Orders and Tickets
Configuration
N/A
N/A
N/A
N/A
N/A
N/A
N/A
N/A
N/A
N/A
N/A
N/A
N/A
N/A
8/9/05
Form Name
DBAPDWN
DBAPROJ
DBAQUEF
DBAQUOT
DBAREAL
DBARSSD
DBASIGM
DBASLSF
DBASLSP
DBASLSS
DBASQLW
DBASSPQ
DBATSOP
- DBATSOPA
- DBATSOPB
- DBATSOPC
- DBATSOPD
- DBATSOPE
- DBATSOPF
- DBATSOPG
- DBATSOPH
- DBATSOPI
- DBATSOPJ
- DBATSOPK
- DBATSOPL
DBAUFLD
DBAVOUT
Screen Name
Mix Design Interface
Purge Expired Projects
Queue Entries
Quote
Realign Accounts & Cost Centers
Resummarize Sales Data
Signaling Operations
Sales Forecast Display
Compress Sales Data
Post Sales Data
Database SQL Worksheet
Database Stored Procedure Interface
Tracking & Scheduling Operations
Change Truck Status Tab
Change Truck Info Tab
Change Order Status Tab
Change Plant Info Tab
Punch In/Out Truck Tab
Punch In/Out Driver Tab
Reset Trucks Tab
Display Trucks Tab
Display Loads Tab
Display Trip Profile Tab
Change Task Tab
Driver Overtime Tab
Data Maintenance
G/L Distribution Data Out
Configuration
N/A
N/A
N/A
N/A
N/A
N/A
N/A
N/A
N/A
N/A
N/A
N/A
N/A
N/A
N/A
N/A
N/A
N/A
N/A
N/A
Edit Forms (EDT)
Master file editors, order, or transaction entry.
Form Name
EDTACAT
EDTACCT
EDTACTY
EDTADIO
EDTADJC
EDTADJH
- EDTADJH1
8/9/05
Screen Name
Accounting Categories
Accounts Codes
Account Types
Automated Data In/Out
Cost Adjustments
Adjustments Batch Information
Adjustment Transactions Detail
Configuration
N/A
N/A
339
Form Name
- EDTADJH2
- EDTADJH3
EDTADJQ
EDTAJCD
EDTARPD
EDTARTB
EDTASNH
- EDTASNH1
EDTATKD
EDTATKF
- EDTATKFB
EDTATKO
- EDTATKO1
EDTATKS
- EDTATKS1
EDTAUDT
EDTAUPR
EDTAUTK
EDTBEGI
EDTBKCD
EDTBWDH
- EDTBWDH1
EDTCCEA
EDTCNFX
- EDTCNFXA
- EDTCNFXB
- EDTCNFXC
- EDTCNFXD
- EDTCNFXE
- EDTCNFXF
- EDTCNFXG
- EDTCNFXH
- EDTCNFXI
- EDTCNFXJ
- EDTCNFXK
- EDTCNFXL
- EDTCNFXM
- EDTCNFXN
- EDTCNFXO
- EDTCNFXP
- EDTCNFX1
340
Screen Name
Invoice and Tax Adjustments
Open Adjustments
Quantity Adjustments
Adjustment Codes
A/R Accounting Period
Customer Invoice
Assignment Batch Information
Assignment Transactions Detail
Dispatch Truck
Full Scale Ticketing
Truck & Trailer Information
Overhead Load Out
Other Information
Aggregate Ticketing
Other Information
Audit Records
Audit Profile
Auto-Ticketing Units
Beginning Inventory
Bank Codes
Balance Forward Batch Information
Balance Forward Transactions Detail
Enter Cartage Values
Configuration
System Configuration
Defaults Configuration
Customer Defaults Configuration
Distribution Configuration
Dispatch Configuration
Aggregate Configuration
Invoicing Configuration
Inventory Configuration
Receivables Configuration
Aging Configuration
Statements Configuration
Financials Configuration
Project / Quotes Configuration
Lien Configuration
User-Defined Fields Configuration
Koller Tax Breakout
Order Audit Log Fields Configuration
Configuration
N/A
N/A
N/A
N/A
N/A
N/A
N/A
N/A
N/A
N/A
N/A
N/A
N/A
N/A
N/A
N/A
N/A
8/9/05
Form Name
- EDTCNFX2
- EDTCNFX3
- EDTCNFX4
- EDTCNFX5
- EDTCNFX6
- EDTCNFX7
- EDTCNFX8
- EDTCNFX9
- EDTCNFZA
- EDTCNFZB
- EDTCNFZC
- EDTCNFZD
- EDTCNFZE
- EDTCNFZF
- EDTCNFZG
- EDTCNFZH
- EDTCNFZI
- EDTCNFZJ
- EDTCNFZK
- EDTCNFZL
EDTCNOT
- EDTCNOT1
- EDTCNOT2
- EDTCNOT3
EDTCOMP
- EDTCOMP1
- EDTCOMP2
EDTCONV
EDTCOST
EDTCRED
EDTCRIN
- EDTCRIN0
- EDTCRIN1
- EDTCRIN2
- EDTCRIN3
- EDTCRIN4
- EDTCRIN5
- EDTCRIN6
- EDTCRIN7
- EDTCRIN8
- EDTCRIN9
8/9/05
Screen Name
Batch Code Encryption Equation
Customer Sales Defaults
Customer Taxing Defaults
Customer Pricing Defaults
Customer Charges Defaults
Customer Accounting Defaults
Customer Invoicing Defaults
Customer Distribution Defaults
Lien General Configuration
Lien Notices Configuration
Lien Releases Configuration
Lien Events Configuration
Lien Locations Configuration
Lien Owners Configuration
Lien Lenders Configuration
Lien Contractors Configuration
Lien Trusts Configuration
Lien Locations Configuration
Lien Prelien Rules Configuration
Lien Rules Configuration
Addition/Selection of Notes
Customer Notes
Apply Projects
Customer Notes
Companies
Company Cost Centers Tab
Company Finance Charges Tab
Item Conversions
Cost Centers
Credit Codes
Customer Inquiry Display
Transaction Balances
Customer Balances
Transaction Balances
Transaction Details
Payment Details
Ticket Details
Ticket Summary
Product Details
Customer Credit History Display
Customer Credit Aging
Configuration
N/A
N/A
N/A
N/A
N/A
N/A
N/A
N/A
N/A
N/A
N/A
N/A
N/A
N/A
N/A
N/A
N/A
N/A
N/A
N/A
N/A
N/A
341
Form Name
EDTCTCT
EDTCTDE
EDTCTDT
EDTCTHT
EDTCTJB
- EDTCTJB1
- EDTCTJB2
- EDTCTJB3
EDTCTKF
- EDTCTKF1
- EDTCTKF2
- EDTCTKF3
- EDTCTKF9
- EDTCTKFA
- EDTCTKFB
- EDTCTKFC
- EDTCTKFD
- EDTCTKFE
- EDTCTKFF
- EDTCTKFG
EDTCTPD
EDTCTPQ
EDTCTRT
- EDTCTRT1
- EDTCTRT2
- EDTCTRT3
- EDTCTRT4
EDTCTSG
- EDTCTSG1
EDTCTTK
- EDTCTTK1
EDTCTTY
EDTCUHS
EDTCURR
EDTCUST
- EDTCUST1
- EDTCUST2
- EDTCUST3
- EDTCUST4
- EDTCUST5
- EDTCUST6
342
Screen Name
Contact Information
Cartage Deduction Codes
Cartage Hauler (Quoted) Deductions
Cartage Hauler / Truck Information
Quoted Cartage Pay
Products Cartage Information
Categories Cartage Information
Truck Type Cartage Informatio
Concrete Tickets
Other Ticket Information
Ticket Time Information
Ticket Line Associated Products
Dumped / Reused Concrete
Remove Reason Code
Test Ticket Print
Next Ticket Code
Loads
Retrieve Ticket
External File Lookups
Lot Numbers
Cartage Period Deduction
Cartage Accounting Period
Cartage Rate Table (Codes)
Main Tab
Range Tab
Plant/Zone Tab
User-Defined Fields Tab
Cartage Surcharge Codes
Automatic Surcharges - By Product
Cartage Ticket Edit
Cartage Surcharges
Contact Type Codes
Customer History
Currency
Customers
Product Pricing Information
Product Ready-Mix Information
Associated Products Information
Product Description Information
Sundry Charge Pricing
UOM / Quantity Extensions
Configuration
N/A
N/A
N/A
N/A
N/A
N/A
N/A
N/A
N/A
N/A
N/A
N/A
N/A
N/A
8/9/05
Form Name
- EDTCUSTA
- EDTCUSTB
- EDTCUSTC
- EDTCUSTD
- EDTCUSTE
- EDTCUSTF
- EDTCUSTG
- EDTCUSTH
- EDTCUSTI
- EDTCUSTK
- EDTCUSTL
- EDTCUSTM
EDTDLMT
EDTDOCG
- EDTDOCG1
- EDTDOCG2
- EDTDOCG3
- EDTDOCG4
- EDTDOCG5
- EDTDOCG6
EDTDOCS
- EDTDOCS1
- EDTDOCS2
EDTDOCT
- EDTDOCT1
- EDTDOCT2
- EDTDOCT3
- EDTDOCT4
EDTDROT
EDTEMPL
EDTETSK
EDTFINH
- EDTFINH1
EDTFRMT
EDTGLCD
EDTGLPD
EDTHLER
EDTHLPV
EDTICAT
- EDTICAT1
- EDTICAT2
8/9/05
Screen Name
Main Tab
Addresses Tab
Sales Tab
Taxing Tab
Pricing Tab
Charges Tab
Accounting Tab
Invoicing Tab
Distribution Tab
Ready-Mix Tab
Ready-Mix Tab
Aggregate Tab
Delivery Methods
Document Format Groups
Invoice Format Codes
Statement Format Codes
Project Quote Format Codes
Receipt Format Codes
Invoice Out Format Codes
Ticket Overflow Format Codes
Document Formats
Document Format Fields
Document Fields
Document Tags
Document Field Tag Setup
Document Lookup Tag Setup
Document Calcualtion Tag Setup
Document Code List Tag Setup
Driver Overtime
Employees
Task Codes
Finance Charges Batch Information
Finance Charge Transactions Detail
Freight Methods
G/L Booking Codes
G/L Accounting Periods
Haulers
Cartage/Plant Zone Information
Item Categories
UOM Tab
Concrete Mix Defaults
Configuration
N/A
N/A
N/A
N/A
N/A
N/A
N/A
N/A
343
Form Name
- EDTICAT3
- EDTICAT4
EDTIMST
- EDTIMST1
- EDTIMST2
- EDTIMST3
- EDTIMST4
- EDTIMST5
- EDTIMST6
- EDTIMST7
- EDTIMST8
- EDTIMST9
- EDTIMSTA
- EDTIMSTB
- EDTIMSTC
- EDTIMSTD
- EDTIMSTE
- EDTIMSTF
- EDTIMSTG
EDTISUB
EDTIVPD
EDTJBSC
EDTJBTY
EDTJCJB
EDTJOBS
- EDTJOBS1
- EDTJOBS2
- EDTJOBS3
- EDTJOBS4
- EDTJOBS5
- EDTJOBS6
- EDTJOBS7
EDTLCIN
- EDTLCIN1
- EDTLCIN4
- EDTLCIN5
- EDTLCIN7
EDTLICN
- EDTLICNA
- EDTLICNB
- EDTLICNC
344
Screen Name
Aggregate Mix Defaults
Sales Tax Override Tab
Items
Main Information Tab
Units of Measure Tab
UOM Conversions Tab
Sales Information Tab
Sales Tax Override Tab
Concrete Mix Tab
Asphalt Mix Tab
User-Defined Fields Tab
Locations Tab
Location Costs Tab
Location Pricing Tab
Location Inventory Tab
Location Batching Tab
Location Constituents Tab
Location Batch Codes Tab
Location Copy Tab
Item Substitution
Inventory Accounting Periods
Job Sources
Job Types
Job Cost Jobs/Phases
Jobs
Main Tab
Sales Information Tab
Contacts Information Tab
Action Information Tab
Status Information Tab
Products Information Tab
Quotes Tab
Item Inquiries
Location
Serial Numbers On Hand
Lot Numbers On Hand
Item Inquiries
Licenses
Concrete License Limits
Aggregate License Limits
Asphalt License Limits
Configuration
N/A
N/A
N/A
N/A
N/A
N/A
N/A
N/A
N/A
8/9/05
Form Name
- EDTLICNE
- EDTLICNF
- EDTLICNG
- EDTLICNH
- EDTLICNI
- EDTLICNJ
- EDTLICNK
- EDTLICNL
- EDTLICNZ
- EDTLICN1
EDTLNCO
EDTLNHD
- EDTLNHD1
- EDTLNHD3
- EDTLNHD4
- EDTLNHD5
EDTLNLE
EDTLNOW
EDTLNQH
- EDTLNQH1
- EDTLNQH2
EDTLNTR
EDTLOCN
EDTMAPP
EDTMAPS
- EDTMAPS1
- EDTMAPS2
- EDTMAPS3
EDTMCHG
EDTMDSN
EDTMODM
EDTMTMG
EDTMTXT
EDTNEXT
EDTORDR
- EDTORDR0
- EDTORDR1
- EDTORDR2
- EDTORDR3
- EDTORDR4
- EDTORDR5
8/9/05
Screen Name
Tracking License Limit
Scheduling License Limits
Pricing & Prep License Limits
Invoicing License Limits
Batch Console License Limits
Signaling Unit License Limits
Flat Scale License Limits
Overhead Loadout License Limits
Options
Temporary License Options
Lien Contractors
Lien Locations
Lien Dates
Notice Returns Receipts
Lien Addresses
Filed Lien Information
Lien Lenders
Lien Owners
Lien Queries
Lien Query Flags
Lien Query Dates
Lien Trusts
Locations
Map Page Time Periods
Map Pages
Map Page Travel Times
Map Page Zones
Map Page Coordinates
Minimum Load Charges
Mix Design
Modem Codes
Material Manager
Message Text
Next Numbers
Orders
Customer-Project-Order Lookup
Order Haul Information
Order Pricing Information
Other Order Information
Order Line Schedule Information
Other Order Line Information
Configuration
N/A
N/A
N/A
N/A
N/A
N/A
N/A
N/A
N/A
N/A
N/A
N/A
N/A
N/A
N/A
N/A
345
Form Name
- EDTORDR6
- EDTORDR7
- EDTORDR8
- EDTORDR9
- EDTORDRA
- EDTORDRB
- EDTORDRC
- EDTORDRD
- EDTORDRE
- EDTORDRF
- EDTORDRG
- EDTORDRH
- EDTORDRI
- EDTORDRJ
- EDTORDRK
- EDTORDRL
- EDTORDRN
- EDTORDRO
- EDTORDRP
- EDTORDRQ
- EDTORDRR
- EDTORDRS
- EDTORDRU
- EDTORDRV
- EDTORDRX
EDTPCHG
EDTPHSE
EDTPLNT
- EDTPLNT1
- EDTPLNT2
- EDTPLNT3
- EDTPLNT4
- EDTPLNT5
- EDTPLNT6
- EDTPLNT7
- EDTPLNT8
- EDTPLNT9
- EDTPLNTA
- EDTPLNTB
- EDTPLNTC
- EDTPLNTD
346
Screen Name
Order Line Associated Products
Order Line Cartage Charge Info.
Order Line Scheduled Loads
Associated Product Other Information
Product Description
Order COD Calculation
Remove Order Reason Code
Scheduling Screen
Test Order Print
Suspend Order Reason Information
Standing File Order Lookup
Order Truck Rostering
Order Sales Tax Distribution
UOM / Quantity Extensions
Order Audit Log Information
Order Audit Log History
Common Order Functions
Sundry Charge Distribution
Order Line Mix Design
Suggested Shipping Plants
Lot Numbers
Associated Products Information
Round Trip Trucks
Clear Round Trip Trucks
Order Payment Information
Sundry Charges
Job Cost Phases
Plants
Main Tab
Communication Tab
Batching Tab
Scheduling Tab
Costing Tab
Scales Tab
Batching Bins Tab
Constituent Order Tab
User-Defined Fields Tab
Plant Communication Setup
Check Plant License
Scale Communication Information
Communication Port Setup
Configuration
N/A
N/A
N/A
N/A
N/A
N/A
N/A
N/A
N/A
8/9/05
Form Name
- EDTPLNTE
- EDTPLNTF
EDTPLTV
EDTPMET
EDTPMTH
- EDTPMTH1
- EDTPMTH2
- EDTPMTH3
- EDTPMTH4
- EDTPMTH5
- EDTPMTH6
- EDTPMTH7
- EDTPMTH8
- EDTPMTH9
- EDTPMTHA
- EDTPMTHB
EDTPOHD
EDTPORC
EDTPRCC
EDTPREP
- EDTPREP1
- EDTPREP2
- EDTPREP3
- EDTPREP4
- EDTPREP5
- EDTPREP7
- EDTPREP8
- EDTPREPA
- EDTPREPB
- EDTPREPC
- EDTPREPD
- EDTPREPE
- EDTPREPF
- EDTPREPG
- EDTPREPH
- EDTPREPI
- EDTPREPJ
- EDTPREPK
- EDTPREPL
- EDTPREPN
- EDTPREPO
8/9/05
Screen Name
Plant Scale Bins
Plant Flags Tab
Plant Unavailability
Pouring Methods
Payment Method (Batch Information)
Payment Transactions Detail
Invoice Details
Open Payments
Find Duplicate Check Information
Find Duplicate Invoice Information
Invoice and Tax
Miscellaneous Payments
Payment Discount Information
Filter Options
Possible Tickets
Check/Credit Card Information
Purchase Order Information
Purchase Order Receipts
Price Categories
Edit Orders & Tickets
Order Haul Information
Order Pricing Information
Other Order Information
Other Order Line Information
Order Line Associated Products
Edit Ticket Information
Edit Aggregate Ticket Information
Product Descriptions
Reason Code
Edit Ticket Times
Other Associated Product Information
Ticket Extra Products
Ticket Time Information
Other Ticket Information
Ticket Associated Products
Possible Products
Ticket Charges
Order Sales Tax Information
Remove Order/Ticket Remove
Other Lookups
Suspend Product
Configuration
N/A
N/A
N/A
N/A
N/A
N/A
N/A
N/A
N/A
N/A
N/A
N/A
N/A
N/A
N/A
N/A
347
Form Name
- EDTPREPP
- EDTPREPQ
- EDTPREPR
- EDTPREPS
- EDTPREPT
- EDTPREPU
- EDTPREPV
- EDTPREPZ
EDTPRJX
EDTPROJ
- EDTPROJ1
- EDTPROJ2
- EDTPROJ3
- EDTPROJ4
- EDTPROJ5
- EDTPROJ6
- EDTPR OJ7
- EDTPR OJ8
- EDTPR OJ9
- EDTPROJA
- EDTPROJB
- EDTPROJC
- EDTPROJD
- EDTPROJE
- EDTPROJF
- EDTPROJG
- EDTPROJH
- EDTPROJI
- EDTPROJJ
- EDTPROJK
- EDTPROJL
- EDTPROJM
- EDTPROJO
EDTQUOT
- EDTQUOT1
- EDTQUOT2
- EDTQUOT3
- EDTQUOT4
- EDTQUOT5
- EDTQUOT6
- EDTQUOT7
348
Screen Name
Ticket Status
Order Line Cartage Charge Info.
Product Cartage Charges
Order Haul Charges
UOM/Quantity Extensions
Order Credit/Debit Memo Information
Order Line Credit/Debit Information
Edit Suspended Tickets
Edit Project Expiration Information
Projects
Product Pricing Information
Product Ready Mix Information
Associated Products
Product Description Information
Sundry Charge Information
UOM/Quantity Extensions
Product Cartage Information
Item Unit of Measure Information
Taxing Details
Main Tab
Addresses Tab
Sales Information Tab
Sales Schedule Information Tab
Taxing Information Tab
Pricing Tab
Charge Information Tab
Accounting Tab
Invoicing Tab
Distribution Tab
User Field Tab
Plant Distances Tab
Ready-Mix Information Tab
Aggregate Products Information Tab
Quotes
Address/Contact Information
Sales Information
Taxing Information
Pricing Information
Distribution Information
Products Information
Action Items Information
Configuration
N/A
N/A
N/A
N/A
N/A
N/A
N/A
N/A
N/A
N/A
N/A
N/A
N/A
N/A
8/9/05
Form Name
- EDTQUOT8
- EDTQUOTB
- EDTQUOTC
- EDTQUOTD
- EDTQUOTE
- EDTQUOTF
- EDTQUOTG
- EDTQUOTH
- EDTQUOTI
- EDTQUOTK
EDTQUTK
EDTRCPC
EDTRCPT
EDTRELN
EDTREPL
EDTREPR
EDTROST
EDTRSNC
EDTSANL
EDTSCHD
EDTSCHG
EDTSCTY
EDTSIGU
- EDTSIGU1
- EDTSIGU2
- EDTSIGU3
- EDTSIGU4
EDTSLSC
EDTSLSH
- EDTSLSH1
- EDTSLSH2
- EDTSLSH3
EDTSLSP
EDTSORD
EDTSRCD
EDTTAXA
- EDTTAXC
- EDTTAXL
EDTTCND
EDTTEXT
EDTTMGR
8/9/05
Screen Name
Status
Sales Schedule Information
Charges Information
Product Pricing
Product Description
UOM/Quantities Extensions
Accepted Quote Update
Quote Copy
Print Option
Quotes Taxing Details
Batch Interface Queued Tickets
Receipts / Cost Updates
Raw Material Receipts
Release Notes
Replication Servers
Reprint Tickets
Truck Rostering
Reason Codes
Sales Analysis Codes
Schedule Standing Orders
Seasonal Charges
Scale Types
Signaling Units
Options Tab
Incoming Tab
Outgoing Tab
Statuses Tab
Sales Data Configuration
Sales Batch Information
Sales Transactions Detail
Sales Transactions Misc. Information
Sales Transactions Terms Information
Sales Data Periods
Simplified Orders
Source Codes
Tax Authorities
Tax Codes
Tax Authorities / Locations
Condition Codes
Language Text
Time & Task Manager
Configuration
N/A
N/A
N/A
N/A
N/A
N/A
N/A
N/A
N/A
N/A
N/A
N/A
N/A
N/A
N/A
N/A
N/A
N/A
N/A
N/A
N/A
349
Form Name
- EDTTMGRA
- EDTTMGRB
- EDTTMGRC
EDTTRFS
EDTTRKV
EDTTRLR
- EDTTRLR1
- EDTTRLR2
- EDTTRLR3
EDTTRMS
EDTTRUC
- EDTTRUC1
- EDTTRUC2
- EDTTRUC3
- EDTTRUC4
- EDTTRUC5
- EDTTRUC6
EDTTSHD
- EDTTSHD1
- EDTTSHD2
- EDTTSHD3
- EDTTSHDA
- EDTTSHDB
- EDTTSHDC
EDTTTYP
EDTUCHG
EDTUFIL
EDTUFLD
EDTUOMS
- EDTUOMS1
- EDTUOMS2
EDTUPRT
EDTUSAG
EDTUSGE
EDTUSNM
- EDTUSNM1
- EDTUSNM2
- EDTUSNM3
- EDTUSNM4
- EDTUSNM5
- EDTUSNM6
350
Screen Name
Ticket Times Tab
Truck Times Tab
Driver Times Tab
Transfers
Truck Unavailability
Trailers
Trailer Hauler Information
Trailer Scheduling Information
Trailer Tare Information
Terms Codes
Trucks
Main Tab
Scheduling Tab
Tracking Tab
User-Defined Fields Tab
Truck Unavailable Tab
Truck Optimizer Tab
Tracking & Scheduling Setup
Tracking Setup
Scheduling Setup
Rostering Setup
Plant Setup
Truck Type Setup
Product Line Setup
Truck Types
Unloading Charges
Files Listing
Fields Function
Standard Units of Measure
Unit of Measure Options
Unit of Measure Conversions
Print Models
Usages
Usage Codes
User Names
Preferences Tab
Licenses Tab
Privileges Tab
Cost Centers Tab
Order Printers Tab
Options Tab
Configuration
N/A
N/A
N/A
N/A
N/A
N/A
N/A
N/A
N/A
N/A
N/A
N/A
8/9/05
Form Name
- EDTUSNM7
- EDTUSNM8
- EDTUSNMA
- EDTUSNMB
- EDTUSNMC
- EDTUSNMD
EDTVDPH
- EDTVDPH1
EDTVNDR
EDTVNTY
EDTZONE
Screen Name
Plants Tab
GIM Manager Tab
User Privilege Field List
User Order Printer Setup
User Confirm
Communications Port Setup
Void Payments Batch Information
Void Payment Transactions Detail
Vendors
Vendor Types
Zones
Configuration
N/A
N/A
N/A
N/A
N/A
N/A
N/A
N/A
N/A
Find or Lookup Forms (FND)
Form Name
FNDBPRC
- FNDBPRC1
- FNDBPRC2
- FNDBPRC3
- FNDBPRC4
FNDDATE
FNDLNCO
FNDLNHD
FNDLNLE
FNDLNLG
FNDLNOW
FNDLNQH
FNDLNTR
FNDOTRE
FNDVOLM
- FNDVOLM1
- FNDVOLM2
- FNDVOLM3
- FNDVOLM4
- FNDVOLM5
- FNDVOLMA
8/9/05
Screen Name
Bid Price Calculator
Calculator Tab
Material Costs Tab
Overhead Costs Tab
Delivery Costs Tab
Calendar
Lien Contractors
Lien Header (Location Manager)
Lien Lender Manager
Lien Event Log
Lien Owner Manager
Lien Query Header (Manager)
Lien Trusts Manager
Order Tree
Volume Calculator
Columns
Slabs, Footing, Walls
Steps on a Level Grade
Integral Footings
Stairs
Calculator UOM
351
Selection Forms (SEL)
Form Name
SELADJW
SELARIN
SELATBR
SELAUDT
SELBATC
SELBATT
SELBCMP
SELCCST
SELCNOT
SELCONT
SELCRCH
SELCRGL
SELCRIN
SELCRLM
SELCRPC
SELCRPT
SELCRSI
SELCSTU
SELCTAJ
SELCUHS
SELDPTR
SELDRVC
SELDSPS
SELEXCP
SELFNCH
SELFOUT
SELGLDS
SELGRSM
SELHREV
SELHSET
SELIGLD
SELINVC
SELINVF
SELINVP
SELIOUT
SELIVBL
SELIVCF
SELIVPS
352
Screen Name
Adjustment Recap Report
A/R Invoices
Aged Trial Balance Report
Audit Report
Batch Code Generator
Batch Totals Report
Batching Comparison
Calculate Cost
Customer Notes
Contribution Report
Credit Status Change Report
Create G/L Entries
Customer Inquiry Report
Credit Limit Report
Period End Processing
Purge Transactions
Creating Orders for Separate Invoices
Cost Update Registers
Deduction Report
Credit History Report
Deposit Register
Driver Call Out Report
Dispatch Sheet Report
Exception Reports Selection
Finance Charge Trial Balance
Master File Data Out
G/L Distribution Report
Gross Margin Report
Hauler Revenue Report
Hauler Settlement Sheet
Inventory G/L Distribution
Invoice Print
Final Invoice Register
Preliminary Invoice Register
Invoice Data Out
Inventory Balance Report
Update COMMANDfinancials
Post Inventory Transactions
8/9/05
Form Name
SELIVPT
SELIVTR
SELJOBS
SELLNCM
SELLNEV
- SELLNEV1
SELLNRP
SELMATR
SELMFIN
SELMIST
SELONTM
SELOOUT
SELORDR
SELOSCH
SELOSNP
SELOTIN
SELOVTM
SELPCHG
- SELPCHG1
- SELPCHG2
- SELPCHG3
SELPCOS
SELPCUP
SELPLTL
SELPLTP
SELPORG
SELPSLS
SELQTPR
SELQUOT
SELRCAP
SELRCTC
SELRECP
SELROST
SELSLBK
SELSLSS
- SELSLSS1
SELSTMT
SELSTXD
SELTICK
SELTIMA
SELTIME
8/9/05
Screen Name
Purge Inventory Transactions
Inventory Analysis Report
Jobs Listing
Certified Mail Report Selection
Lien Event
Lien Event Handler
Lien Report
Raw Material Requirements Report
Master File Data In
Missing Time Report
On Time Delivery Report
Order Data Out
Concrete Order Report
Order Schedule Report
Order Snapshot Report
Order and Ticket Data In
Overtime Report
Calculate Price Change (Sundry Charges)
- for Specific Products
- for Specific Product Categories
- for Specific Product Types
Percentage Outstanding Report
Update Orders / Tickets with Cost
Plant Loading Report
Plant Production (Scales Bin / Product)
Purchase Order Register
Product Sales Usage Report
Quote Print
Quote Listing
Order Recap Report
Receipts / Cost Updates
Receipts Print
Truck Roster Report
Quote Sales Backlog Report
Sales Analysis Summary Report
Summary by Data Range
Statements
Sales Tax Distribution
Ticket Report
Time Analysis Report
Time Analysis Report (Executive)
353
Form Name
SELTOUT
SELTRCP
SELTRKG
SELTRNI
SELTRNR
SELTROR
SELTRPT
SELUCHG
SELUSEX
SELVERS
SELVOUT
Screen Name
Ticket Data Out
Transactions Recap Report
Truck Demand Graph
Inventory Transaction Registers
Receivables Transactions Registers
Transfer Orders Register
Transactions Reports
Calculating Unloading Charges
Item Usage Exception Report
Database Updates
Inventory Data Out
System Forms (SYS)
Form Name
SYSFORM
SYSMSGS
SYSPREF
- SYSPREF1
- SYSPREF2
- SYSPREF3
- SYSPREF4
- SYSPREF5
- SYSPREF6
- SYSPREF7
- SYSPREF8
- SYSPREF9
- SYSPREFA
SYSPRNT
SYSSVCC
SYSTAIL
SYSTASK
354
Screen Name
Run Form
Message Display
Preferences
General Tab
User Tab
Sounds Tab
Colors Tab
Tracking Tab
Fonts Tab
Keys Tab
Toolbar Tab
Forms Tab
Confirm
Print Screen
Service Control
Tailor Screen
Task List
Configuration
N/A
N/A
N/A
N/A
N/A
N/A
N/A
N/A
8/9/05
Appendix C: UOM Examples
Item Units of Measure Examples
The following screen captures are examples of how item units of measure can
be set up and billed in your system. Please note that these are simply the
most common examples and may vary according to your operation’s needs.
Concrete Per Cubic Yard (US)
Mix UOM (EDTIMST2)
Mixes have a simple UOM configuration, because they are almost always
measured in cubic yards or cubic meters. It is in constituents that you see
variation.
8/9/05
355
Expansion Joint (Extra Product)
Extra Product UOM
Extra products such as expansion joints and gloves also generally have a
straightforward UOM configuration, primarily because the amounts are not
affected by the amount of primary product being purchased.
Cement
Cement UOM (EDT)
Cement is usually measured in tons (or tonnes) for all cases except batching.
In this example, the cement is measured in pounds for Inventory/Cost, but
that is not always the case.
356
8/9/05
Calcium
Admix UOM
Admixtures generally have the most complicated UOM settings, because the
amounts needed are dependant on the amount of mix ordered. The primary
values for this example will be calculated as follows:
Note: These settings only take effect if the admix is ordered as an associated
product. If the admixture is part of the mix design, then values will be
calculated based on the information in the mix item file.
Ordered Quantity -- The Dosage setting allows you to better control the
proportions of an admixture to a mix. In the above example, the defined
dosage is ten ounces per hundredweight of cementitious materials. Entering
a dosage prevents having to manually calculate the amount of admixture
needed.
Delivered Quantity -- When the system prepares to send target ticket
weights for a specific load, it will calculate the target amount as follows:
1.
2.
3.
4.
8/9/05
Get the per yard weight of cementitious materials (cement and flyash) in
the mix design.
Multiply that amount by the load amount to get the total amount of
cementitious materials in the load.
Divide that amount by 100 (the dosage is per 100-weight ).
Multiply the result by ten ounces to get the target Ticket Quantity.
357
Water (gallons)
Water UOM Tab
If you also need to handle water by weight, you may need to set up a
separate item, Water (lbs).
Fiber
Fiber UOM
Fiber can be set up in different ways. In this case, it has a UOM setting similar
to an admixture. It can also be set up like an extra product, so that you could
order it by the bag.
358
8/9/05
8/9/05
359
Accounts
Receivable
Charge Sales
Quantities
To record the total entry to accounts
receivable
To record the quantities of the Product Line
main product
Plant
Company
Sales Tax Payable Company
If taxable, to record the Sales Tax Payable
Plant
Cost
Center
Charge Sales
GLBC
Type Entry
To record the sale of each product shipped
from each plant
Transaction
(Credit amounts reversed)
Charge Invoice, Debit Memo and Credit Memo
COMMANDinvoicing
COMMANDinvoicing
COMMANDreceivables
COMMANDinventory GL Entries
Topics in this section:
Prod Cat
Company
Tax A/L
Prod Cat
Account/
Subaccount
100.00
5500.00
Debit
Amount
500.00
5000.00
Credit
Amount
Following are some samples of GL booking code configurations for different AR activity. These samples are provided as
reference samples only.
Appendix D: GL Booking Code Samples
8/9/05
360
COD Offset
COD Sales
Quantities
To record the total entry to accounts
receivable
To record the quantities of the Product Line
main product
Plant
Company
Sales Tax Payable Company
If taxable, to record the Sales Tax Payable
Plant
Cost
Center
COD Sales
GLBC
Type Entry
To record the sale of each product shipped
from each plant
Transaction
COD Invoice
Prod Cat
Company
Tax A/L
Prod Cat
Account/
Subaccount
100.00
5500.00
Debit
Amount
500.00
5000.00
Credit
Amount
8/9/05
361
Accounts
Receivable
Discounts Taken
Accounts
Receivable
To record the reduction to Accounts
Receivable
To record a discount taken
To record the effect of the Discount on
Accounts Receivable
Reverse the entries made for the original payment.
Void Payments
Intercompany A/R
Company B
Company B
To record an Intercomany A/R for Co B from
Co A
Accounts
Receivable
To record the reduction in Company B’s A/R
Company A
Company A
Accounts
Receivable
To record the reduction in Company A’s A/R
Company A
Company
Company
Company
Company
Cost
Center
To record an Intercompany A/P for Co A to Co Intercompany A/P
B
Cash Received
To record the receipt of cash deposited by
Company A
If a payment is received and deposited by
Company A for a Company B invoice
Cash Received
GLBC
Type Entry
To record the receipt of cash deposited to a
bank
Transaction
Payments
COMMANDreceivables
Company A
Company B
Company B
Company A
Bank
Company
Company
Company
Bank
Account/
Subaccount
2000.00
10000.00
100.00
5500.00
Debit
Amount
2000.00
2000.00
8000.00
100.00
5500.00
Credit
Amount
8/9/05
362
GLBC
Type Entry
Accounts
Receivable
Accounts
Receivable
Transaction
To record the assignment of a Co A negative
balance to Co B
To record the assignment of a Co A negative
balance to Co B
GLBC
Type Entry
Finance Charges
Accounts
Receivable
Transaction
To record a finance charge
To record the effect on Accounts Receivable
Finance Charges
GLBC
Type Entry
Assignments
Accounts
Receivable
To record the effect to Accounts Receivable
Company
Company
Cost
Center
Company B
Company A
Cost
Center
Company
Sales Tax Payable Company
Plant
To record a positive Sales Tax Adjustment to
an invoice
To record a positive Invoice Adjustment to an AR Adjustments
invoice
Accounts
Receivable
To record the effect to Accounts Receivable
Company
Sales Tax Payable Company
Plant
Cost
Center
To record a negative Sales Tax Adjustment to
an invoice
To record a negative Invoice Adjustment to an AR Adjustments
invoice
Transaction
Adjustments
Company
Company
Account/
Subaccount
Company B
Company A
Account/
Subaccount
Company
Tax A/L
Adj Code
Company
Tax A/L
Adj Code
Account/
Subaccount
100.00
Debit
Amount
100.00
Debit
Amount
110.00
10.00
100.00
Debit
Amount
100.00
Credit
Amount
100.00
Credit
Amount
10.00
100.00
110.00
Credit
Amount
8/9/05
363
Material Price
Variance
Plant
Plant
Using Standard Cost IVM:To record any
difference in the total received cost and the
standard cost
To record the increase to inventory at
Standard Cost
Company
Inventory Raw
Materials
Transaction
Cost
Center
To record the offset to the inventory
Inventory Offset
transaction at Received Cost (Material + Haul)
GLBC
Type Entry
Received 10 @5.00 material and @1.00 haul; standard cost 7.50
Receipts Example:
Material Price
Variance
Plant
Plant
Using Standard Cost IVM:To record any
difference in the total received cost and the
standard cost
To record the increase to inventory at
Standard Cost
Company
Inventory Raw
Materials
Transaction
Cost
Center
To record the offset to the inventory
Inventory Offset
transaction at Received Cost (Material + Haul)
GLBC
Type Entry
Received 10 @10.00; standard cost 7.50
Receipts Example:
(Based on the Standard Cost Inventory Valuation Method)
COMMANDinventory GL Entries
Prod Cat
Company
Prod Cat
Account/
Subaccount
Prod Cat
Company
Prod Cat
Account/
Subaccount
75.00
Debit
Amount
25.00
75.00
Debit
Amount
15.00
60.00
Credit
Amount
100.00
Credit
Amount
8/9/05
364
Inventory Usages
– Sales
To record the cost of inventory sold
Inventory Raw
Materials
Inventory Usages
– Constituents
To record the decrease to inventory
To record the cost of inventory used
Transaction
GLBC
Type Entry
Used as a constituent 10 units; standard cost 7.50
Usages Example:
Inventory Raw
Materials
GLBC
Type Entry
To record the decrease to inventory
Transaction
Sold 10 units; standard cost 7.50
Usages Example:
Plant
Plant
Cost
Center
Plant
Plant
Cost
Center
Prod Cat
Prod Cat
Account/
Subaccount
Prod Cat
Prod Cat
Account/
Subaccount
75.00
Debit
Amount
75.00
Debit
Amount
75.00
Credit
Amount
75.00
Credit
Amount
8/9/05
365
Inventory Material Plant
Price Variance
To record the difference in the total transfer
cost and the standard cost at the ‘transfer to’
plant
Company
Plant
Inventory Usages
– Constituent
Inventory Raw
Materials
Company
To record the Inventory Transfer offset for the
‘transfer to’ plant
Standard Cost (at ‘transfer to’ Plant)
To record the increase to inventory for the
‘transfer to’ plant:
Transfer To Entries:
Inventory
Transfer
To record the Inventory Transfer offset for the
‘transfer from’ plant (
Plant
Inventory
Transfer Haul
Cost
To record the transfer haul cost for the
‘transfer from’ plant
Plant
Inventory Markup Plant
Inventory Raw
Materials
Cost
Center
To record the markup for the ‘transfer from
plant’
Standard Cost (at ‘transfer from’ Plant)
To record the decrease to inventory for the
‘transfer from’ plant:
Transfer From Entries:
Transaction
GLBC
Type Entry
Prod Cat
Prod Cat
Prod Cat
Prod Cat
Prod Cat
Prod Cat
Prod Cat
Account/
Subaccount
7.50
85.00
92.50
Debit
Amount
92.50
10.00
7.50
75.00
Credit
Amount
Transfer 10 units from Loc 1; 10% Markup; Standard Cost 7.50, Haul 1.00 per unit To Loc 3; Standard Cost 8.50
Transfers Example:
8/9/05
366
GLBC
Type Entry
Inventory Raw
Materials
Inventory
Adjustments
Transaction
To record the decrease to inventory for the
adjustment quantity at Standard Cost
To record the Inventory Adjustment offset
Plant
Plant
Cost
Center
Inventory Material Plant
Price Variance
Adjustment to Inventory –10 units; standard cost 7.50
Adjustments Example:
To record the difference in the total
‘conversion from’ cost and the standard cost
for the ‘conversion to’ product
To record the increase to inventory for Product Inventory Raw
3 at Standard Cost
Materials
Plant
Plant
To record the Conversion Labor
Inventory
Conversion Labor
Plant
To record the decrease to inventory for Product Inventory Raw
2 at Standard Cost
Materials
Cost
Center
Plant
GLBC
Type Entry
To record the decrease to inventory for Product Inventory Raw
1 at Standard Cost
Materials
Transaction
Convert to:
Product 3 – 100 units; Standard Cost 1.00
Product 1 – 10 units; Standard Cost 7.50
Product 2 – 10 units; Standard Cost 5.00
Labor - $25.00
Conversions Example: Convert from:
Prod Cat
Prod Cat
Account/
Subaccount
Prod Cat
Prod Cat
Prod Cat
Prod Cat
Prod Cat
Account/
Subaccount
75.00
Debit
Amount
55.00
100.00
Debit
Amount
75.00
Credit
Amount
30.00
50.00
75.00
Credit
Amount
8/9/05
367
GLBC
Type Entry
Inventory Raw
Materials
Inventory
Adjustments
Transaction
To record the increase to inventory for the
adjustment quantity at Standard Cost
To record the Inventory Adjustment offset
Adjustment to Inventory +20 units; standard cost 7.50
Adjustments Example:
Plant
Plant
Cost
Center
Prod Cat
Prod Cat
Account/
Subaccount
150.00
Debit
Amount
150.00
Credit
Amount
368
8/9/05
Appendix E - Content Pricing
Content pricing (sometimes called "five sack pricing") uses a base price per
unit which can be increased or decreased depending on the mix's cement
content. In contrast, standard pricing uses a standard unit price which stays
the same regardless of whether more or less units are used.
Sales involving a project or a customer with a quoted content item price do
not include zone charges, discounts or admix charges. Quoted items for a
customer or project use standard pricing.
•
•
•
Zone charges are calculated the same way they are when using standard
pricing. If zone charges are enabled in the system but are not to be
charged, they must be manually disabled in the customer's and project's
file.
Discounts will apply if the customer or project is set up and the product is
eligible. Discounts do not apply to quoted prices on customers or
projects.
Admix charges are the total price of the admixes in the mix.
The formula for non-quoted orders is:
Base Price +/- Up/Down Factor + Admix Charges +/- Zone Charge - Discount
Setting Up Content Pricing
The initial setup for content pricing has several steps. Because of certain
database triggers that must be set, you must move back and forth between
the Configuration and Item editors to complete the configuration:
•
•
•
•
•
Set Configuration flag
Create Base mix item
Specify Base mix in Configuration
Set up/down modifiers in Base mix
Configure other mixes
To set the Configuration flag:
1.
Open the Configuration - System screen The Configuration screen
displays. {Files > General Information >Configuration}
Appendix E - Content Pricing
369
Configuration-System (EDCNFXA)
2.
3.
In the Pricing Method field, select Use Content Pricing. Two
additional fields will display: Customary Content Item Code and
Metric Content Item Code. You will come back to these fields later.
Save the configuration screen.
To create the base item:
4.
5.
6.
7.
Open the Items editor {Files > Item Information > Items}
Enter an Item Code
Enter the rest of the mix information (including price).
On the Mix tab, enter the base cement content in the Pricing Cement
Content field.
Item Mix (EDTIMST6)
8.
Save the new mix.
If you do work on two measurement systems, you will need to create two
separate mixes.
Note: The checkbox under Pricing Information is a Version 4 artifact and
should be ignored.
370
Appendix E - Content Pricing
To specify the base mix in Configuration:
9. Return to the Configuration-System screen.
10. Enter the base mixes in the appropriate Content Item Code field.
Caution: The system will return an error if you attempt to enter an item
that does not exist, is not a mix, or that does not have a Pricing
Cement Content value.
11. Accept the screen.
To set the up/down modifiers in the Base mix:
12. Open the base item in the Items editor.
13. Go to the Mix tab. Two additional fields will display:
Content Pricing-Base Mix
14. Enter Price Up & Price Down modifiers.
15. Accept the screen.
To set content for subsequent mixes:
Enter the Pricing Cement Content for the mix. COMMANDseries will use that
value to calculate the price of the mix.
Caution: Do not enter a standard mix price for any mix that is to be subject
to content pricing. An entered price will be added to content pricing.
Base Mix Pricing Cement Content:
5
Base Mix Price
$65
Base Mix Price Up modifier
$6
Base Mix Price Down modifier
$4
If you have a mix with a cement content of 6, the price will be $65 + (1*$6) =
$71.
If you have a mix with a cement content of 4.5, the price will be $65 (.5*$4)=$63.
Appendix E - Content Pricing
371
Admixtures & Content Pricing
To insure correct pricing for admixtures, create the admixtures with batching
UOMs as dosages based on the amount of cement, and price based on the
batched quantity.
A second option for admixtures is to give each mix a price that reflects the
standard cost of the admixtures in that design. If you have a mix for which
you want to charge an additional $8/unit due to the admixture content, enter
$8 as the unit price for the mix. If the mix has a cement content of 6, its price
will be calculated as $65 + (1*$6) + $8= $79.
Projects
You can establish project-level content pricing simply by adding the base item
to the Project-Product screen. When you do, you can set project pricing for all
mixes:
To create project-level content pricing:
1.
2.
Add your system’s base item to the project.
Press the Pricing button to display the Project Product Pricing Information
screen for the base item.
Project Pricing-Content Pricing
3.
4.
5.
372
Enter a Price. If the field is left blank, the system will use the price from
the item master.
Enter Price Up/Down modifiers.
Accept the screen and the project.
Appendix E - Content Pricing
Index
A
A/R Accounting Periods 109
Account Codes 302
Account Types 298
Accounting Categories 124
Adjusting Cartage Rates 294
Adjustment Codes 112
Assigning a User and Password 43
Auto-Ticketing Interface 75
Auto-Ticketing Units 77
Auto-Ticketing Units Communication 78, 79
Setting Up Auto-Ticketing Units 77
Setting Up the Libra Asphalt Interface 80
Setting Up the XCI LC20K Interface 79
Stop Light Setup 80
B
Bank Codes 111
C
Cartage & Delivery Information 238
Cartage Rate Codes 239
Custom Rate Table with Equation 250
Hourly Rates 240
Per Load Rates 242
Plant/Zone Rates 246
Quantity Rates 248
Quantity/Distance Rates 243
Cartage Surcharge Codes 251
Changing Price Types 294
Code Lengths 61
COMMANDcartage
Cartage Accounting Periods 238
COMMANDcartage Setup
Cartage Rate Codes 239
Deduction Codes 255
Hauler/Truck Information 254
Haulers 172
Quoted Cartage Pay 253
Quoted Deductions 256
Trucks 174
COMMANDexecutive 316
COMMANDquote Setup 320
COMMANDseries
Accepting or Saving a Screen 29
Accessing Help 27
Add or Insert Occurrence 31
Calendar Function 28
Detailing on a Field 30
8/9/05
373
Entering Codes 22
Entering File Information 26
Exiting COMMANDseries 26
Logging into COMMANDseries 25
Lookup Screens 27
Setting Up the System 24
Smart Lookup 32
Starting COMMANDseries 25
Using the Tab Key 29
COMMANDseries Licensing 35
Companies 62
Company Setup 63
Cost Centers Setup 64
Finance Charges Setup 64
Condition Codes 194
Configuration 127
Aggregate Configuration 143
Customer Accounting Defaults 136
Customer Charges Defaults 135
Customer Distribution Defaults 137
Customer Invoicing Defaults 137
Customer Pricing Defaults 134
Customer Sales Defaults 133
Customer Taxing Defaults 133
Defaults Configuration 131
Defaults Configuration Setup 131
Dispatch Configuration 142
Distribution Configuration 138
Financials Configuration 153
Initial Configuration 128
Inventory Configuration 148
Invoicing Configuration 147
Lien Configuration 155
Quotes Configuration 154
Receivables Aging Configuration 151
Receivables Configuration 149
Receivables Statements 152
Signaling Configuration 146
User Fields 155, 156
Contacts 321
Cost Centers 301
Credit Codes 117
Currency 60
Customers 259
Accounting Setup 266
Address Information 260
Charge Setup 264
Distribution Setup 270
Invoicing Setup 268
Main Tab Setup 259
Pricing Setup 262
Products Setup 271
Sales Information 261
Taxing Setup 262
374
8/9/05
User Fields Setup 270
Customers and Projects 258
D
Deadhead Setup 192
Delivery Methods 181
Document Format Groups 95
Document Format Group Setup 96
File Import/Export Format Codes Setup 103
Invoice Format Codes Setup 97
Invoice Out Format Codes Setup 102
Project Quote Format Codes Setup 100
Receipt Format Codes Setup 101
Statement Format Codes Setup 98
Ticket Overflow Format Codes Setup 102
Document Formats 89
Adjusting Formats using Display Screen 91
Adjusting Formats using Document Fields Screen 91
Data Out and Data In 89
Entering Document Formats 90
Invoices, Statements, Quotes 90
Mask Characters 94
Tickets 89
Document Formatting 104
Document Tags 85
Document Tags Setup 86
Driver Overtime Tables 196
E
Employees 65
Employee Files 65
F
Field-Level Security Worksheet 338
Fixed Delivery Pricing 292
Freight Methods 236
Functionality Preferences 306
G
G/L Accounting Periods 110
G/L Booking Codes 304
Gathering Information 11
General Ledger Setup 298
Generic Print Formatting 57
I
Initial Accounting Information 108
Initial System Files 34
Inventory Accounting Periods 108
Item
Batching Setup 222
Item Categories 205
Item Category Setup 206
Mix Defaults Setup 208
Tax Override Setup 209
UOM Setup 207
8/9/05
375
Item Types 205
Items 209
Automatic Products 225
Batch Code Setup 224
Constituent Setup 224
Conversions Setup 213
Costs Information 219
Hints for Entering Items 226
Initial Item Entry 211
Inventory Setup 221
Item Entry 211
Item Main Tab Setup 212
Location Setup 218
Mix Setup 216
Price Setup 220
Sales Setup 214
Tax Override Setup 215
UOM Setup 213
User Fields 217
Items and Pricing 199
J
Job Cost Phases & Jobs 183
Job Source Codes 320
Job Types 320
L
Licensing
Entering a New License 36
Making a Backup 35
Restoring an Old License 39
Temporary 38
Locations 158
M
Map Pages 186
Automatic Travel Times 189
Entering Map Pages 187
Map Page Time Periods 186
Map Pages Coordinates 189
Map Pages Zones 189
Message Text 106
Message Text Setup 107
Minimum Load Charge Tables 227
Modem Codes 68
Modem Setup 68
N
Next Numbers 83
Non-COD Price Change 54
P
Payment Forms 296
Plant & Delivery Information 158
Plant Costs Setup 166
Plants 159
376
8/9/05
Bins Setup 170
Communications Port Setup 163
Constituent Order Setup 171
Plant Batching Setup 164
Plant Communication Setup 162
Plant Costs Information Setup 166
Plant Scale Setup 168
Plant Scheduling Setup 165
Plant Setup 160
Plants Setup 168
Setting Up the Plant’s Main Tab 161
User Fields 172, 178
Pouring Methods 182
Preferences
Color Preferences Setup 310
Font Preferences Setup 312
General Preferences Setup 306
Keys Preferences Setup 313
Sound Preferences Setup 309
Toolbar Preferences Setup 314
Tracking Preferences Setup 311
User Preferences Setup 308
Pre-Ticketing Setup 81
Price Categories 199
Print Models 58
Printer Setup 55
Projects 274
Accounting Tab 281
Address Tab 277
Distances Tab 287
Distribution Tab 285
Forecasting Tab 295
Initial Setup 275
Invoicing Tab 283
Main Tab 276
Pricing Tab 278
Products Tab 287
User Fields Tab 286
R
Reason Codes 66
S
Sales Analysis Codes 125, 258
Sales Data Configuration 317
Sales Data Periods 316
Scale Types 81
Seasonal Charges 228
Security
Field-Level Worksheet 338
Setting Up Quote Printing 323
Signaling Unit Incoming Messages 73
Signaling Unit Options 72
Signaling Unit Outgoing Messages 74
Signaling Unit Statuses 75
8/9/05
377
Signaling Units 70
Signaling Units Setup 71
Source Codes 300
Sundry Charges 231
T
Task Codes 193
Tax Authorities 113
Tax Authority/Locations 114
Tax Codes 117
Terms Codes 120
Testing Ticket Printers in COMMANDseries 59
Trailers 178
Trailer Overhead Loadout Setup 180
Trailer Scheduling Setup 179
Trailer Setup 179
Trailer Tare Setup 180
Truck Types 173
Trucks 174
Entering a New Truck 174
Truck Scheduling Setup 175
Truck Tracking Setup 176
U
Unloading Charges 229
UOM
Batch Quantity 204
Delivered Quantity 203
Inventory/Cost Quantity 205
Ordered Quantity 203
Price Quantity 204
Purchase Quantity 205
Reporting Quantity 205
Units of Measure 201
UOM Related Fields 202
Usage Codes 200
User Preferences 306
Users
Communications Port Setup 50
Cost Centers 53
Licenses 45
Options 50
Order Printers 48
Plants 52
Privileges 46
User Preferences 44
Users Configuration 41
V
Vendors 234
Vendor Setup 235
Vendor Types Setup 234
Z
Zones 185
378
8/9/05