1
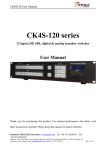
CK4L3000B(S)
Full color LED video
processor
User Manual
V1.0
SHENZHEN CREATEK ELECTRONIC CO.,LTD
http://www.ckdz.com/
Note: Please read the User Manual carefully before using the products, and keep the
manual properly for future reference.
CK4L3000B(S) User Manual
TABLE OF CONTENTS
TABLE OF CONTENTS ......................................................................................................................... I
1. SAFETY NOTICE .............................................................................................................................. 1
2. HARDWARE STRUCTURE ............................................................................................................. 2
2.1 PRODUCT ELEVATION ..................................................................................................................... 2
2.2 REAR PANEL DIAGRAM .................................................................................................................... 2
2.3 FRONT PANEL DIAGRAM .................................................................................................................. 3
3. BUTTON OPERATION ..................................................................................................................... 3
3.1 BUTTONS OPERATION ..................................................................................................................... 3
3.2 FUNCTION SETTING ........................................................................................................................ 5
4. BUILT-IN SENDING CARD ............................................................................................................ 10
5. INTRODUCTION OF LED CONTROL SOFTWARE ................................................................. 10
5.1 HOW TO INSTALL THE CONTROL SOFTWARE ................................................................................ 10
5.2 HOW TO OPEN THE CONTROL SOFTWARE .................................................................................... 11
5.3 HOW TO OPERATE CONTROL SOFTWARE ..................................................................................... 12
5.3.1 Connect and disconnect ................................................................................................ 12
5.3.2 Size/Capture ...................................................................................................................... 12
5.3.3 IP control Setting ............................................................................................................. 13
5.3.4 Output resolution ............................................................................................................. 14
5.3.5 Coordinate operation ...................................................................................................... 15
5.3.6 Window operation and setting ..................................................................................... 15
5.3.7 Saving mode operation .................................................................................................. 18
6. TECHNICAL SPECIFICATION...................................................................................................... 20
6.1 INPUT SIGNAL TECHNICAL SPECIFICATIONS TABLE: ...................................................................... 20
6.2 OUTPUT SIGNALS TECHNICAL SPECIFICATIONS ........................................................................... 21
6.3 OTHER TECHNICAL SPECIFICATIONS TABLE: ................................................................................ 21
7. TROUBLE SHOOTING AND MAINTENANCE .......................................................................... 21
-i-
CK4L3000B(S) User Manual
1. SAFETY NOTICE
Dangerous
There’s high voltage in processor. To avoid danger, please do not open rear cap without
authorization.
Warning
1.
Do not allow liquid, small particles or other objects to get into the device;
2.
Do not place the system near fire and water;
3.
Do not block any vents. To keep good ventilation, please place the system at least 20
4.
cm away from a wall surface;
5.
If any noise、smoke、smell, please cut off the power at once and contact your local
suppliers;
6.
Do not disconnect DVI signal cable when the power is on.
Attention
1.
Read the manual carefully before using the system, and keep it safely;
2.
Check the packing list to confirm if there is any missing .If there is, please contact the
local supplier.
3.
Cut off the power if thunder or the machine is not used for long term ;
4.
You should be well trained before operating the system;
5.
Do not slip anything from vent to prevent broken or electric shock;
6.
Do not place the device near liquid or moisture;
7.
Do not put the device near heat sink or high temperature environment;
8.
Keep the power cable properly;
9.
If the following situations happen, please cut off the power and for maintenance
1)
Liquid splash to device;
2)
Device fall down or the cabinet is broken;
3)
Any abnormality or malfunction in the system.
10. Shenzhen Createk Co., LTD. has the copyright of the manual and reserves the right
of final explanation. Any enterprises or individuals shall not infringe the right without
the agreement of the company. Once found, the company will investigate for relevant
legal responsibility.
-1-
CK4L3000B(S) User Manual
2. Hardware structure
2.1 Product elevation
Fig.2.1 Product elevation
2.2 Rear panel diagram
6
1
2
8
7
3
4
9
5
10
14
15
11 12 13
Fig. 2.2 Rear panel diagram
16
Interface specification:
1、Ground;
2、DVI I: 1 channel DVI signal input;
3、DVI LOOP OUT: 1 channel DVI signal loop out (only for the DVI input signal);
4、VGA IN: 1 channel VGA analog signal input
5、HDMI IN: 1channel HDMI HD digital signal input
6、SDI/HD-SDI IN、SDI/HD-SDI OUT: 1 channel digital video signal input/output (Optional)
7、V1、V2、V3: 3 channel PAL/NTSC composite video inputs;
8、YPbPr: 1 channel HD video component signal input;
9、DVI2 OUT: 1 DVI digital output can connect with built-in sending cards, it can also
connect to computer display.
10、DVI1/VGA OUT: 1 DVI digital signal output can be connected to sending cards or
converted to analog VGA signal for monitor
11、RS232 IN : Serial communication port input, to control equipment.
12、LAN: Ethernet control: Ethernet communication input (RJ45 LAN control port), for
future use (Optional).
-2-
CK4L3000B(S) User Manual
13、Status indicator light: ACTIVE1, ACTIVE2, it blinks in normal working condition;
POWER: it stays lit after power on.
14、Power supply switch
15、Power interface: AC100-240 v 50Hz
16、Sending card: Can built-in two sending cards (optional)
2.3 Front panel diagram
1
2
3
Fig. 2.3 Front panel diagram
1、Status display: Display the working status and operation menu;
2、Equipment status indicator and IR Receiver:
POWER: it stays lit after power on
ACTIVE: it blinks in normal working condition
CONTROL: it blinks when sending command
IR: IR Receiver;
3、Front panel button: Input selection and other setting;
3. Button Operation
The layout of the front panel is as follows:
Fig. 3.1 front panel push buttons
The video processor has 20 push buttons on the front panel; all the buttons are
operational after the device is power on. Their functions are listed as below.
3.1 Buttons operation
1)、【V1、V2、V3】: Select V1、V2、V3、via BNC connector;
2)、【YPbPr】:Select HD components video signal input;
-3-
CK4L3000B(S) User Manual
3)、【VGA】:Select computer analog VGA signal input;
4)、【DVI】:Select DVI computer digital signal input;
5)、【HDMI】: Select HDMI high definition digital signals input;
6)、【SDI/STP】:Select SDI digital video signal input or press the button to change step
value among 1/10/100 after you enter the setting option.
Note: When signal input button is pushed, the status display will display the【Main Screen】and
【PIP Screen】on the first line; while on the second line will display the input source for main screen and
PIP screen respectively; the information will prompt in a cycle of 5 seconds.
7)、【BRT +】:Increase the brightness of output image, highest to 100.
8)、【BRT -】:Decrease the brightness of output image, lowest to 0.
Note: The video processor has 100 levels of output brightness, “0” is the lowest, and “100” is
the highest. To achieve the optimal output signal in grayscale, the normal setting is
recommended to be 50.
9)、【Auto】:The “Auto” button is only effective when selected input is VGA IN, press this
button to auto-adjust the signal parameters in order to obtain an optimal picture quality.
The auto adjustment will only be executed when connecting a new VGA signal. The time
for auto adjustment is variable depending the quality of VGA signal, the process will not
excess 30 seconds. Sometimes, the system will take several times of auto adjustment
until an optimal picture is obtained.
10)、
【Info】:Pressing the【Info】button can show the current setting and information of the
system. Press the【Info】button again to show the next items.
11)、【Part/PIP】:Fast switch in PIP Display mode for PIP Screen (sub-window) input
source, when switched to “PIP” menu item, PIP Screen signal will superimpose above the
Main Screen signal; If switched to “Full“ menu item, PIP Screen signal will be enlarged to
full screen of LED display.
12)、
【Full/Main】:Fast switch in Main Display mode for Main Screen (main window) input
source, when switched to “Part” menu item, VGA/DVI/HDMI will not be enlarged, if
switched to “Full” menu item, the VGA/DVI/HDMI will be enlarged to full screen of LED
display.
-4-
CK4L3000B(S) User Manual
13)、【↑/Save】:After entering setup menu, press this to go back to previous item.
Or: Push the button to save current mode into memory.
14)、【↓/Load】:: After entering setup menu, press the button to go to next item.
Or: to recall the saving modes.
15)、【←/Main】:Decrease the sequence number of saving modes (range from 1~16)
Or: Press the button before switching input source for main window;
16)、【→/PIP】:Increase the sequence number of saving modes(range from1~16);
Or: Press the button before switching input source for sub window;
17)、【Enter】:Ok button, press the button to confirm the saving mode, or to recall the
saving mode.
Note: Because V1、V2、V3、YPbPr、VGA、HDMI inputs exist in the main window and
sub-window at the same time, when you switch these signals, you have to confirm to select the
main windows or sub-window by Main/PIP selection button.
18)、【Setup】:Setting option, the video processor offers total 16 submenus in 6 main
menus, as followings:
Main Menu
1
2
3
4
5
6
Sub-Menu
1
Language 中文(Chinese)
2
OutputHstart
3
OutputWidth
4
OutputVstart
5
OutputHeight
6
Resolution out
7
Brightness
8
Contrast/
9
Saturation
10
PIP output Width
11
PIP output Height
12
PIP output Hstart (Horizontal)
13
PIP output Vstart (Vertical)
Audio On/Off
14
Buzzer
Sub-window On/off
15
PIP Display On/Off
ESC
16
Setting completed
Language
Output setup
Brightness/Contrast/Saturation
Input image setting
Fig. 3.2 setting menu overview
3.2 Function setting
-5-
CK4L3000B(S) User Manual
Note: This part requires professional skill on LED video processor; all the settings have been configured
before shipment. It is not recommended to make function setting unless you have got training course
from our company.
1) Setup menu
Double-press【Setup】, status display will prompt “*SETUP?”, press【Enter】to move into
the first sub-menu item which is “language selection” and at the same time, the system will
enter mode-setting status. In the setting mode, the functions of buttons (upper part on the
right side of front panel) will be re-defined as follows:
Button
Function
Stp
Adjust the step value, press the button to switch values among:1、10 or
100
↑
Switch to the previous item
↓
Switch to the next item
←
Decrease value or select the previous value
→
Increase value or select the next value
Enter
Confirm and save the setting
Setup
Enter or exit the settings mode
Fig. 3.3 Buttons definition of front panel
When the system is in setting mode, the following information will be shown on the status
display:
Fig. 3.4 Status display example in setup menu
As shown above, status display is divided into five areas.
Area
Description
1
Show the current item number
2
3
?: Are you sure to save the new setting or not?
!:New setting has been saved
Adjusted Value
4
Adjustable step value(1/10/100)
5
Name of current setting item
Fig. 3.5 Status display setup menu description
2) Language
Item #1:【Language】, The video processor offers Chinese and English version for status
display menu, press【→/PIP】or【←/Main】to choose the desired one, then press【Enter】
-6-
CK4L3000B(S) User Manual
to take effect.
3) Output image setting
The video processor outputs the images through DVI OUT and DVI/VGA OUT connectors.
The system can support various resolution outputs and you can go into item #6
(Resolution Out) to select the settings the output format as shown below:
Model
LED video processor
1
1024×768_60Hz
2
1280×1024_60Hz
3
1366×768_60Hz
4
1400×1050_60Hz
5
1280×720_60Hz
6
1600×1200_60Hz
7
1920×1080_60Hz
8
2048×768_60Hz
9
1920×1200_60Hz
10
1920×1080_50Hz
11
1920×1200_50Hz
12
1024×768_50Hz
13
1366×768_50 Hz
Fig. 3.6 Selectable output resolution
Item #6 (Resolution output), press【→/PIP】or【←/Main】to choose one from the list, and
then press【Enter】to save the setting. For example, if selecting 【1024×768_60】,the
current out resolution will be: 1024*768 and frequency is at 60Hz. However, LED screen
pixel may be not 1024*768. When the pixels of LED screen are lower than 1024*768, we
could adjust the output resolution closer to pixels in wide and height of LED screen to
achieve an optimal image, as the following demonstration:
Fig. 3.7 configuration illustration for full screen display of LED screen
In Fig. 3.7, the size and location of output image is defined by 4 parameters and they are
-7-
CK4L3000B(S) User Manual
shown in below table.
Name
Item Name
Parameters
2
OutputHstart
Hor_Str
3
OutputWidth
Hor_Width
4
OutputVstart
Vert_Str
5
OutputHeight
Vert_Height
Fig. 3.8 Correspondence table
The initial coordinate (0,0) is defined from the top left corner. According to the size of LED
screen (Horizontal pixels and Vertical pixels), you can calculate the start and end
coordinate of outputs image. The size of output image can be adjusted by changing the
value of the parameters shown on above table. Press 【↑/Save】or【↓/Load】to select the
mode and【→/PIP】 or【←/Main】to increase/reduce the values of parameters, then press
【Enter】to save the setting.
4) Brightness/Contrast/Color Setup
Item #7:【Brightness】supports 100 levels of output brightness, “0” is the lowest and “100”
is the highest. Press【→/PIP】or【←/Main】to adjust the brightness and press【Enter】
to save the setting. The default setting is 50 to ensure the optimal image grayscale.
Item #8:【Contrast】supports 100 levels of output brightness, “0” is the lowest and “100” is
the highest. Press【→/PIP】or【←/Main】to adjust the brightness and press 【Enter】to
save the setting. The default setting is 50 to ensure the optimized image gray scale.
Item #9:【Saturation】Color saturation of video inputs such as V1、V2、V3、YPbPr and
HDMI can be set. The setting value is in between 0 – 100. “0” represents the lowest color
saturation and “100” represents the highest color saturation. Press【→/PIP】or【←/Main】
to change the color value and press【Enter】to save the setting. The default setting is 50.
5) Output setting for sub-window
The video processor supports different kinds of input resolutions, and the resolution of
video output can be adjusted according to the resolution of video input source. According
to the size and resolution of LED screen, the size and position of main window source can
be set, also the users can set the size and position for PIP picture (Sub-window).
Sub-window could be enlarged or scaled in equal proportion according the need.
-8-
CK4L3000B(S) User Manual
For example: If video Input/Output resolutions are both set at 1024*768 but in fact that the
resolution of LED panel is 384*288, we can set the below parameters to scale the
1024*768 picture to 384*288 area in order to obtain full-screen display on the LED screen.
Item Name
Function
10
PIP OutputWidth
11
PIP OutputHeight
12
PIP OutputHstart
13
PIP OutputVstart
Fig. 3.9 Correspondence table for PIP sub-window configuration
Item#10:【PIP OutputWidth】The initial coordinate (0,0) is defined from the top left corner,
Set the PIP Output width at 384,the width of PIP sub-window can be accurately enlarged
or scaled pixel by pixel to fit the size of LED screen. Press【→/PIP】or【←/Main】to adjust
the value and press【Enter】to save the setting.
Item#11:【PIP OutputHeight】The height of selected video picture can be increased or
decreased to fit the size of LED screen, Press【→/PIP】or【←/Main】to adjust the value at
288, the value setting can be more convenient if using together with【Stp】button, and
press【Enter】to save the setting.
Item#12:【PIP OutputHstart】The horizontal start point of selected video picture is set from
the coordinate (0,0) which is on the top left hand corner. Press【→/PIP】or【←/Main】to
adjust the value and press【Enter】to save the setting.
Item#13:【PIP OutputVstart】Press【→/PIP】or【←/Main】to adjust the value , the value
setting can be more convenient if using together with【Stp】button, and press【Enter】to
save the setting.
6) Other setup
Item #14:【Buzz】, used to switch off the buzzer, press【→/PIP】or【←/Main】button to
select “on/off”, push【Enter】to take effect.
Item #15:【PIP Display】: To enable or disable the Sub-window; press【→/PIP】or【←/Main】
button to choose【On】or【Off】 press【Enter】to take effect.
Item #16:【ESC】Press【→/PIP】or【←/Main】to select ” Enter” or “Cancel”, then press
【Enter】to confirm.
-9-
CK4L3000B(S) User Manual
Note: Pressing【Setup】under any setting process will lead to jump to the item#16.
4. Built-in Sending card
Loose the screw and take out the metal plate. Connect the sending card to the interface of
the metal plate and insert it back to the case.
Notice: make sure the sending card is connected to the PCI slot (white in color) which inside
the case tightly. If the sending card needs the internal voltage supply, just connect to the power
socket provided inside the case. If the sending card needs an external voltage supply, a 5V
power outlet is provided inside the case.
Fig. 4.1 Sending card installation
5. Introduction of LED control software
5.1 How to install the control software
The video processor control software adopts user-friendly design. Its control software
requires no installation and the volume is small. The root folder includes following files,
you can copy it to any place of the control computer and then double-click it to execute file
program. It saves tedious software installation steps and time. Even computer entry-level
users can operate it quickly and easily.
Fig. 5.1 Folders of control software system
Program operating environment:
CPU: more than P4;
Memory: more than 512M;
- 10 -
CK4L3000B(S) User Manual
Hard disk: more than 40G.
(1) 【en-US】sub-file: “Full color LED image processor. resources.dll”, lack of the file will
not be able to use English language;
(2) 【dmdll.dll】:Application configuration file
(3) 【dmdll_multi.dll】:Application configuration file
(4) 【InSid Mode. mode】: This is a mode storage file with 16 presets memory.
(5) 【3000B.exe】: Double click the file to operate control software.
(6) 【3000B.exe.config】: Some necessary configurations for software control.
Attention: the above six files are all necessary to guarantee the control software operation, and
they all need to be in the same file .please do not alter the file, Otherwise it will cause software
abnormal use.
5.2 How to open the control software
1) Open the software and connect
Double-click “3000B.exe”, you can select “COM”(communication port ) and ”Baud” (Baud
rate), as shown in the figure below:
Fig. 5.2 serial port connection
As the picture above shows ,select serial port number and baud rate , then click the
【connect】button. If the serial port is already occupied or the connection in abnormal
condition, it would pop-up prompt message as shown in the picture below:
Fig. 5.3 Prompt of abnormal connection
2) Launch of software
- 11 -
CK4L3000B(S) User Manual
You will see the main interface as below after the successful launch of software.
Fig 5.4 Control software interface
5.3 How to operate control software
5.3.1 Connect and disconnect
Click
(disconnect) button in software connection area, and the communication
between processor and control device will disconnect instantly.
Fig. 5.5 Device connection area
5.3.2 Size/Capture
The video processor control software interface has the window image capture area. Click
button【1】in "Size/Capture" area.
- 12 -
CK4L3000B(S) User Manual
Fig. 5.7 Picture capture
Move the mouse to the bottom right corner, there will appear a cursor as shown on above
picture. Users can drag and drop the box to define the captured area by changing window
location and size. Double click the captured box to make the captured content fully stretch
on the whole LED screen. Click
button to exit the current operation,.
5.3.3 IP control Setting
Fig. 5.8 TCP/IP control
1、Click 【IP】to open the window, which includes settings of IP address and device port.
As shown in the figure below:
The software can automatically search the connected IP address, and click the
【connect 】button to realize communication with LED video processor. Click【search】
and【connect 】 button to connect the software with the device.
- 13 -
CK4L3000B(S) User Manual
Fig 5.9 IP setting for device
When there is no connected device or occurs abnormal connection, it will pop up the
following prompt message:
Fig. 5.10 Failure prompt
2、Click
to open the window as shown in figure below, here user can make the
TCP/IP communication setting manually or automatically. Click the【Set】to take effect.
Fig. 5.11 IP Setting Dialog
5.3.4 Output resolution
- 14 -
CK4L3000B(S) User Manual
Fig. 6.12 Output resolution selection
As shown, the video processor offers 13 kinds of output resolution; users can choose to fit
the size of LED display.
5.3.5 Coordinate operation
Manual input window size, position coordinate or capture picture size, coordinate value,
and click【send】.
Fig.5.11 Coordinate of (captured) window
Fig 5.14 Accurate coordinate of normal window
Fig 5.15 Accurate coordinate of
capture window
5.3.6 Window operation and setting
5.3.6.1 Layouts
Fig.6.16 layout selection button
- 15 -
CK4L3000B(S) User Manual
There are total five options for layouts, the effects are as followings:
Fig. 6.17 Layout effects
5.3.6.2 Adjustment of the window position and size
Left click the mouse, and then drag it to the size you want; moving the mouse to the
window’s right /bottom or right-bottom corner, you can adjust the window size when the
mouse changes to a two-way arrow. In addition, you still can input accurate value in
【coordinates】(coordinates operation)
Above operation can also be applied to sub-window.
Fig 5.18 Illustration of adjustment
5.3.6.3 Switching signals
- 16 -
CK4L3000B(S) User Manual
Fig 5.19 Input signal selection
Click the right mouse button and select input signal in the secondary menu of【signal
select】(signal selection);
5.3.6.4 Image parameters
Selecting【Image Property】(Image parameters)in right-mouse menu, it will pops up
adjustment options. The system has three kinds of options: Brightness, contrast,
Saturation. Users can customize parameters as desired. Click “Default” button to reset the
values.
Fig. 5.20 Image parameters adjustment
5.3.6.5 Automatic Adjustment
Right click source box and select the secondary menu【Auto Geometry】, the device will
adjust the image by itself. Please use this function only when the video window loses parts
or is not normally displayed in LED screen.
Right click source box and select the secondary menu【Auto ADC】, the device will adjust
the image by itself. Please use this function only when the color of VGA signal is not
normally displayed in LED screen.
- 17 -
CK4L3000B(S) User Manual
5.3.6.6 Shut or add window
Right click source box and select the secondary menu【Shut this window】, the device will
close the current video window.
Right click source box and select the secondary menu【Add window】, the device will add
one more window as sub-window to the current main window. Note: This model can
support two video windows at most.
5.3.7 Saving mode operation
Fig 5.21 saving modes setting area
5.3.7.1 Mode recall
Click a number from 1~16, and it will directly recall the window mode that has been preset.
If you have not preset any mode before, when you click a number button and it would
appear prompt message as shown in picture below:
Fig. 5.22 Prompt of modes do not saved and recalled
5.3.7.2 Mode save
Pressing on 【Ctrl】button in keyboard , then use the mouse to click a number from 1 ~ 16
in number area . And the current window mode has saved in the number button.
If a number button does not preset or has saved a mode, you click the button and it would
appear prompt message as shown in picture below:
Fig. 5.23 Prompt of mode saving
Click【Yes】to accept saving, click【No】to cancel the saving.
5.3.7.3 Mode cycle
- 18 -
CK4L3000B(S) User Manual
Selecting【Mode cycle】 in【Menu 】, and it would pop-up a dialog box, as the picture
shows below:
Fig. 5.24 Mode setting
The 【Save Mode 】list all saved modes. Double click a mode to add it to cycle list, and
then set cycle interval time. Finally clicking【start】button, and it would begin mode cycle.
The
button will change into
terminate the cycle.
5.3.7.4 Other useful mode setting
Fig. 5.25 Other useful mode setting
- 19 -
button; click this button to
CK4L3000B(S) User Manual
As shown in above picture, right click on the correspondent mode, an option list will pop
out, choose the desired options: Rename, Add to cycle, Remove.
6. Technical Specification
6.1 Input signal technical specifications table:
3×Composite
1×YPbPr/YUV/YCbCr
Type/Quantity
1×VGA(RGBHV)
1×DVI
1×HDMI
1×SDI/HD-SDI
Video standard
Composite Video
PAL/NTSC
1V (p_p)/ 75Ω
Amplitude/Impedance
800×600@60Hz
1024×768@60Hz、1024×768@50Hz
1280×720@60Hz
VGA/ HDMI(DVI)
1280×1024@60Hz
1366×768@60Hz、1366×768@50Hz
1400×1050@60HZ、1920×1200@60Hz
1600×1200@60Hz、1920×1200@50Hz
1920×1080@60Hz、1920×1080@50Hz
VGA Amplitude/
R、G、B = 0.7 V(p_p)/ 75Ω
Impedance
720×[email protected]/60Hz
720×[email protected]/60Hz
720×576i@50Hz
YPbPr
720×576p@50Hz
1280×720p@50Hz/59.94Hz/60Hz
1920×1080p@50Hz/59.94Hz/60Hz
1920×1080i@50Hz/59.94Hz/60Hz
YPbPr Amplitude/
Impedance
Y= -0.3V ~ +0.7V
Pb= -0.35V ~ +0.35V
(p_p)/ 75Ω
(p_p)/ 75Ω
Pr= -0.35V ~ +0.35V (p_p)/ 75Ω
720×[email protected]/60Hz
SDI/HD-SDI (Optional)
720×576i@50Hz
1280×720p@50Hz/59.94Hz/60Hz
1920×1080i@50Hz/59.94Hz/60Hz
VGA:15pin D_Sub(Female)
Connectors
DVI:24+1 DVI_D,24+5 DVI_I
HDMI:HDMI type A
YPbPr: BNC×3
- 20 -
CK4L3000B(S) User Manual
Composite:BNC
SDI/ HDSDI:BNC
Fig. 6.1 Input signals technical specifications
6.2 Output signals technical specifications
1×DVI LOOP OUT
Type/Quantity
1×DVI/VGA OUT
1×DVI2 OUT
1×SDI/HD-SDI
1024×768@60Hz、1024×768@50Hz
1280×720@60Hz、
1366×768@60Hz、1366×768@50Hz
VGA/DVI
Resolution
1280×1024@60Hz
1400×1050@60Hz、1920×1200@60Hz
1600×1200@60Hz、1920×1200@50Hz
1920×1080@60Hz、1920×1080@50Hz
2048×768@60Hz
VGA Impedance
R、G、B = 0.7 V (p_p)/ 75Ω
DVI LOOP OUT:24+5 DVI_I
Connectors
DVI/VGA OUT:24+1 DVI_D
DVI2 OUT:24+1 DVI_D,24+5 DVI_I
SDI/ HD SDI:BNC
Fig. 6.2 Output signal technical specifications
6.3 Other technical specifications table:
Control
Front panel, RS 232
Power supply
AC 100-240V 50/60Hz
Consumption
15W
Temperature
-20℃ ~60 ℃
Humidity
5-95%
Dimensions
483mm(L)×310mm(W)×44.5mm(H)
Weight
4.5Kg(including accessories)
Net weight 2.6Kg
Fig. 6.3 other technical specifications table
7. Trouble shooting and maintenance
1)
Cannot operate “3000B.exe” application
Possible reason: Operating system software that control the computer without a
corresponding program.
Solutions: Download and install Microsoft’s related program” dotNetFX35setup.exe”.
Notice: To download the program in Microsoft's official website, or install the program from CD
in processor. CD installation procedures are as follows:
①
Open the relevant software file, and double click "dotnetfx35.Exe" to operate.
- 21 -
CK4L3000B(S) User Manual
Fig.7.1 Open the “dotNetFX35. Exe “installation program in CD
Fig. 7.2 Installation program start to install
②
Select "I have read and accept the terms in the license agreements", and then click
“installation";
Fig. 7.3 select agree and install
③
If the computer is connected to the Internet, the program will download installation data
from the network automatically, as shown in the following figure
- 22 -
CK4L3000B(S) User Manual
Fig.7.4 the data needed for download installation
④
After the download is complete, the program starts to install. As shown in the picture
below:
Fig. 7.5 Download all and start to install
⑤
To exit after the program installation is complete, as shown in the picture below:
- 23 -
CK4L3000B(S) User Manual
Fig. 7.6 Exit installation
2) Serial port operation failure, can not to control processor
Possible reasons:
A、LED Control software doesn't open serial port;
B、Serial port has been damaged;
C、The serial port that adopts USB switch to RS232 is not installed
properly;
Solutions:
A、Check the serial port connection status;
B、Change serial port connection cable or main control device;
C、Install device (USB switch to RS232) properly;
3) Picture without display
Possible reasons:
A、No signal input;
B、Signal channel switching errors, such as input VGA signal, but the
channel selects AV;
C、Reversed connection of VGA input and VGA output;
D、The display device do not adjust input channel. Need to adjust the
mode to VGA or DVI;
E、Black screen mode has been opened;
F、Output VGA or DVI line has been damaged.
Solutions:
- 24 -
CK4L3000B(S) User Manual
A、To check whether the input signal source is normal; (To detect by
connecting the input signal source to the display device directly)
B、To confirm whether AV/VGA/DVI/YPbPr channel input are normal;
Using control software or front panel buttons to detect channel switching;
C、To confirm the output of the processor connected to the display
device properly, and the input signal is connected properly.
D、To adjust status of display device, for more specific operations
please refer to display device specification;
E、To adjust the content of the output signal, and suggest adopts
dynamic picture for output rather than monochrome picture;
F、To confirm whether the black screen mode has been opened;
G、Using good quality VGA line or DVI line to ensures image stability
and quality.
4) The picture displays partial color
Possible reasons:
A、VGA or DVI port not connected well, bad contacts;
B、VGA or DVI line has been damaged;
C、Color adjustment is not correct;
D、Excessive toning by control software;
Solutions:
A、After VGA or DVI line is connected, please tightening the fixed bolt
of joint to prevent the loose result of pulling;
B、Replace good quality VGA or DVI line;
C、Please refer to specification to adjust color balance;
D、Via the control software to readjustment color and white balance;
E、If the input signal is VGA, please do ADC correction for it; The
operation method has been listed in previous chapter 5.3.6.4.
5) The picture doesn't display completely, and appears black border phenomenon
Possible reasons:
A、Mosaic display device do back-end excision for the signal;
B、Excessive image position adjustment;
C、Output resolutions of display units are different;
D、The video card setting method is not correct;
E、The resolution of computer input signal is not standard;
Solutions:
A、Please refer to the instruction to do an automatic adjustment;
B、Via the control software to readjust image position;
C、Enter into the "Setting of input parameters ", then click "Auto";
Enter into the "Setting of output parameters ", and then select the output resolution;
- 25 -
CK4L3000B(S) User Manual
D、Enter into display card advanced menu, then change the scanning
mode to overscan.
E、Change the computer input signal to appropriate resolution;
Attentions:
1 The above listed is the common failure in after-sales maintenance. If you find the device
failure phenomena are not in above range. Please notify the suppliers to solve as soon as
possible. Please do not open the case without authorization, so as not to expand the fault or
cause unnecessary safety accidents.
2 Our company reiterates: without the permission, you who take device apart will bear all
the responsibilities that it may bring.
- 26 -
SHENZHEN CREATEK ELECTRONIC CO.,LTD
Address:3/4 F, Block 4, Honghui Industrial Park, Liuxian
2nd Rd., Xin'an Street, Bao'an District, Shenzhen, China
Postalcode:518000
Tel:0755-26643017
Fax:0755-26644342
Website:http://www.ckdz.com
Service Hotline:400-039-0399