1
FactoryLink 7
Installation Guide
•
•
•
•
•
•
•
•
•
•
•
•
•
•
•
•
•
•
•
•
•
•
•
•
•
•
•
•
Version 7.0
•
•
•
•
© Copyright 2000 United States Data Corporation. All rights reserved.
NOTICE:
The information contained in this document (and other media provided herewith) constitutes
confidential information of United States Data Corporation ("USDATA") and is protected by
copyright laws and international copyright treaties, as well as other intellectual property laws
and treaties. Such information is not to be disclosed, used or copied by, or transferred to, any
individual, corporation, company or other entity, in any form, by any means or for any
purpose, without the express written permission of USDATA.
The information contained in this document and related media constitutes documentation
relating to a software product and is being provided solely for use with such software product.
The software product was provided pursuant to a separate license or other agreement and such
information is subject to the restrictions and other terms and conditions of such license or other
agreement.
The information contained in this document and related media is subject to change without
notice and does not represent a commitment on the part of USDATA. Except for warranties, if
any, set forth in the separate license or other agreement relating to the applicable software
product, USDATA makes no warranty, express or implied, with respect to such information or
such software product.
USDATA and FactoryLink are registered trademarks of United States Data Corporation in the
United States and/or other countries. Open Software Bus is a registered trademark licensed to
United States Data Corporation. All other brand or product names are trademarks or registered
trademarks of their respective holders.
2 / FactoryLink / Installation Guide
Contents
Preface
...................................................................................................................... 5
Structure of the FactoryLink Installation Guide ................................................................... 5
Using This Guide .................................................................................................................. 6
Getting Help ......................................................................................................................... 6
Chapter 1
Installation Requirements ........................................................................ 7
Hardware and Software Requirements .................................................................................
Microsoft System Files ................................................................................................
FactoryLink Installation CDs ...............................................................................................
Client and Server CD ...................................................................................................
Device Interfaces and Value-Added Products CD .......................................................
Microsoft SQL Server 7.0 CD .....................................................................................
Chapter 2
7
7
9
9
9
9
Installing FactoryLink 7.0 ..................................................................... 11
Installation Procedure ......................................................................................................... 11
FactoryLink Icons ...................................................................................................... 30
FactoryLink Shared Directories ................................................................................. 30
Chapter 3
Installing Monitor Pro Add-Ons ............................................................ 31
Installation Procedure ......................................................................................................... 31
Chapter 4
Installing Device Interfaces ................................................................... 39
Installation Procedure ......................................................................................................... 39
Chapter 5
Authorizing and Maintaining FactoryLink Installation ......................... 49
Authorizing FactoryLink .................................................................................................... 50
Obtaining the Registration Code ............................................................................... 50
FactoryLink / Installation Guide / 3
Obtaining the Authorization Code over the Internet .................................................
Authorizing FactoryLink ...........................................................................................
Uninstalling FactoryLink ...................................................................................................
Disabling FactoryLink License ..........................................................................................
Reinstalling and Reauthorizing FactoryLink .....................................................................
Chapter 6
Additional Information and Procedures ................................................ 71
Setting up Memory Size for Microsoft SQL Server 7.0 .....................................................
Setting up the DCOM Security ..........................................................................................
DCOMCNFG.EXE ....................................................................................................
DCOM Configuration Values ....................................................................................
Microsoft Windows NT Cross-Domain Issue ............................................................
Chapter 7
72
75
75
76
83
License Manager .................................................................................... 85
License Utility ....................................................................................................................
Functions ............................................................................................................................
NT Service ..........................................................................................................................
Grace Period .......................................................................................................................
Demo Mode ........................................................................................................................
Installing the License File on a Shared Drive ....................................................................
Chapter 8
52
57
61
68
70
86
87
89
89
90
91
Error Messages ...................................................................................... 95
Appendix A: Installing Microsoft SQL Server 7.0 .................................................... 103
Index .................................................................................................... 113
4 / FactoryLink / Installation Guide
•
•
•
•
•
•
•
•
•
•
•
•
•
•
•
•
•
•
•
•
•
•
•
•
•
•
•
•
•
•
Preface
The FactoryLink Installation Guide provides installation requirements and step-by-step
instructions on how to install FactoryLink Client and Server, Device Interfaces, and Monitor
Pro Add-Ons on the Microsoft Windows NT and Windows 2000 platforms. It gives an
overview of the new FactoryLink License Manager and contains a list of error messages that
you might encounter during installation.
A UDIENCE
The major audience of this guide is those involved in the FactoryLink 7.0 installation.
This manual, and many others, are available in French and German in PDF format. These files
are located on the FactoryLink “Client and Server” CD under the Documentation directory.
Ce manuel, et beaucoup d'autres, sont disponibles en français et en allemand dans le format
pdf. Ces fichiers se trouvent sur le CD de “Client et Serveur” de FactoryLink dans le répertoire
de Documentation.
Dieses Handbuch und viele andere, sind auf Französisch und Deutsch im pdf-Format
vorhanden. Diese Dateien sind auf der FactoryLink- „Klient und Server” CD unter dem
„Unterlagen” Verzeichnis aufgeführt.
S TRUCTURE
OF THE
F ACTORY L INK I NSTALLATION G UIDE
The FactoryLink Installation Guide contains eight chapters and an appendix:
• Chapter 1, “Installation Requirements”
• Chapter 2, “Installing FactoryLink 7.0”
• Chapter 3, “Installing Monitor Pro Add-Ons”
• Chapter 4, “Installing Device Interfaces”
• Chapter 5, “Authorizing and Maintaining FactoryLink Installation”
• Chapter 6, “Additional Information and Procedures”
• Chapter 7, “License Manager”
• Chapter 8, “Error Messages”
• Appendix A, “Installing Microsoft SQL Server 7.0”
FactoryLink / Installation Guide / 5
•
•
Using This Guide
•
•
U SING T HIS G UIDE
The material in this guide is presented sequentially in performance order. We recommend you
read the entire guide to familiarize yourself with all the information before you install
FactoryLink 7.0.
G ETTING H ELP
For help, contact your USDATA Tier One Partner (TOP) or visit the USDATA Web site
(www.usdata.com) to locate a TOP in your region.
6 / FactoryLink / Installation Guide
•
•
•
•
Chapter 1
Installation Requirements
This chapter describes the minimum hardware and software requirements for the installation of
FactoryLink 7.0 on the Microsoft Windows NT and Windows 2000 platforms. It also lists the
content of the three CDs in the FactoryLink 7.0 package.
H ARDWARE
AND
S OFTWARE R EQUIREMENTS
Before installing FactoryLink 7.0, you need to make sure that you meet the following
minimum hardware and software requirements:
• CPU: Pentium 233
• CD_ROM drive
• 128 MB RAM
• Monitor and SVGA (1024 X 768)
• Keyboard and Windows NT-compatible mouse
• Operating System:
- Microsoft NT 4.0, Service Pack 4 or
- Microsoft Windows 2000
• Internet Explorer 4.01
You can go to the following Web sites to install the required versions of service packs:
• Microsoft Windows NT: http://www.microsoft.com/NTServer/all/downloads.asp
• Internet Explorer:
http://www.microsoft.com/NTServer/all/downloads.asp
Microsoft System Files
The FactoryLink 7.0 installation program automatically installs the following Microsoft
system files:
• Microsoft Active Directory Service, version 4.1
• Microsoft Data Access Components, version 2.1, Service Pack 2
• Microsoft Visual Studio Component DLLs
FactoryLink / Installation Guide / 7
•
INSTALLATION REQUIREMENTS
•
Hardware and Software Requirements
•
•
Before beginning the installation process, verify that your system’s functioning will not be
adversely affected by the installation of or updates to these system files.
8 / FactoryLink / Installation Guide
INSTALLATION REQUIREMENTS
FactoryLink Installation CDs
F ACTORY L INK I NSTALLATION CD S
Your FactoryLink 7.0 package contains three CDs:
• Client and Server
• Device Interfaces and Value-Added Products
• Microsoft SQL Server 7.0
Client and Server CD
The Client/Server CD contains the following items:
• FactoryLink 7.0 Client and Sever installation program
• FactoryLink 7.0 Release Notes
• Adobe Acrobat Reader (in English, French, and German)
• FactoryLink 7.0 documentation
• Monitor Pro Add-Ons
• OPC Factory Server (Schneider Automation)
Device Interfaces and Value-Added Products CD
The Device Interfaces and Value-Added Products CD contains over 40 drivers that work with
FactoryLink 7.0, which are purchased as options separately from the FactoryLink standard
package. It also contains the documentation for the value-added products. The drivers are
purchased as options separately from the FactoryLink standard package. For a list of the
drivers, refer to Chapter 4, “Installing Device Interfaces.”
Microsoft SQL Server 7.0 CD
FactoryLink 7.0 installation includes the option of installing Microsoft SQL Server 7.0 for the
Starter Application. If you select this option, use the SQL Server CD for installation. Install the
SQL Server before installing FactoryLink.
Note: When you install the Microsoft SQL Server, you can install either
the Desktop Edition for Windows NT Workstation or Windows 2000
Professional, or the Standard Edition, which has be to installed on a
Windows NT Server or Windows 2000 Server. However, if you choose
to install the Enterprise edition, you need to obtain a license key from
Microsoft.
The SQL Server CD contains an installation program provided by Microsoft. For installation
instructions, refer to Appendix A: Installing Microsoft SQL Server in this guide.
FactoryLink / Installation Guide / 9
•
INSTALLATION REQUIREMENTS
•
FactoryLink Installation CDs
•
•
10 / FactoryLink / Installation Guide
•
•
•
•
Chapter 2
Installing FactoryLink 7.0
This chapter provides step-by-step instructions on how to use the Client and Server CD to
install the FactoryLink 7.0 software on the Microsoft Windows NT or Windows 2000
platform.
Install Microsoft SQL Server 7.0 before installing FactoryLink 7.0, if you will use the SQL
Server for the Starter Application.
Note: If you want to keep an existing FactoryLink 6.x.x version in your
machine, you can install 7.0 in a different directory. However, before
installing 7.0, make sure to delete all the existing FactoryLink
environment variables including from the path.
I NSTALLATION P ROCEDURE
Perform the following steps to install FactoryLink 7.0:
1 Close all applications that are running. If any other application is running, the install program
will not start properly.
2 Insert the FactoryLink 7.0 Client and Server CD into the CD-ROM drive.
3 If AutoRun is turned on, the Setup runs automatically. If AutoRun is turned off, click
Start>Run in the Windows taskbar to run the Setup from the CD.
Note: The AutoRun feature will not work for the installation of
FactoryLink on the Terminal Server. You need to go to the Control Panel
and use Add/Remove to run the installation program.
FactoryLink / Installation Guide / 11
•
INSTALLING FACTORYLINK 7.0
•
Installation Procedure
•
•
4 In the Choose Setup Language dialog box, select a language from the drop-down list:
English, French (standard), or German (see Figure 2-1). Click OK.
Figure 2-1 Choose Setup Language Dialog Box
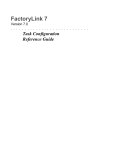
5 Wait for FactoryLink 7.0 Setup to finish preparing the InstallShield Wizard (see Figure 2-2).
Figure 2-2 InstallShield Wizard Dialog Box
12 / FactoryLink / Installation Guide
INSTALLING FACTORYLINK 7.0
Installation Procedure
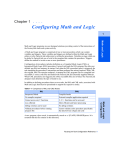
6 In the Welcome to the Installshield Wizard for USDATA FactoryLink 7.0 dialog box, click
Next (see Figure 2-3).
Figure 2-3 Welcome to the InstallShield Wizard for USDATA FactoryLink 7.0 Dialog Box
FactoryLink / Installation Guide / 13
•
INSTALLING FACTORYLINK 7.0
•
Installation Procedure
•
•
7 In the Choose License Files Location dialog box, accept the default folder for the license
files or use the browse button to choose another one (see Figure 2-4). Click Next.
Figure 2-4 Choose License Files Location Dialog Box
8 In the License Configuration dialog box, enter your serial number and configuration sequence
in “Exhibit A” of your FactoryLink shipping document (see Figure 2-5). Click Next.
Once you have entered the correct serial number and configuration sequence, both of which
are case-insensitive, a registration code is generated automatically. Make a note of this code
and contact USDATA to authorize your FactoryLink in one of the following three ways:
• Go to www.usdata.com (select “services”)
• Call USDATA:
972-497-0300
• Fax USDATA:
972-669-1428
For more information. refer to Chapter 5, “Authorizing and Maintaining FactoryLink
Installation.”
14 / FactoryLink / Installation Guide
INSTALLING FACTORYLINK 7.0
Installation Procedure
Figure 2-5 License Configuration Dialog Box
9 In the License Agreement dialog box, read through the License Agreement by using the
Page Down key (see Figure 2-6). Click Yes.
Figure 2-6 License Agreement Dialog Box
FactoryLink / Installation Guide / 15
•
INSTALLING FACTORYLINK 7.0
•
Installation Procedure
•
•
10 In the Update System Components dialog box, click Next to install the required system
components (see Figure 2-7).
The following system files are required for the FactoryLink installation:
• Microsoft Active Directory Service V4.1
• Microsoft Data Access Components 2.1.2
• Microsoft Visual Studio Component DLLs
Make sure that your system’s functioning will not be adversely affected by the installation of
or updates to the required versions of these components.
Figure 2-7 Update System Components Dialog Box
16 / FactoryLink / Installation Guide
INSTALLING FACTORYLINK 7.0
Installation Procedure
11 Wait for the installation of the system components to finish (see Figure 2-8).
Figure 2-8 Installing System Components
12 In the InstallShield Wizard Complete dialog box, select Yes, I want to restart my computer
now, and click finish (see Figure 2-9).
Figure 2-9 InstallShield Wizard Complete Dialog Box
13 Restart the machine.
Do not take the current FactoryLink Server and Client CD out of the CD-ROM drive.
IMPORTANT: You have to restart your machine to continue the installation process.
FactoryLink / Installation Guide / 17
•
INSTALLING FACTORYLINK 7.0
•
Installation Procedure
•
•
14 In the Choose Setup Language dialog box, select a language from the drop-down list:
English, French (standard), or German (see Figure 2-10). Click OK.
Note: This dialog box may not appear. In this case, the install will default
to the initial language selection.
Figure 2-10 Choose Setup Language Dialog Box
15 Wait for the FactoryLink 7.0 Setup to finish preparing the InstallShield Wizard (see Figure
2-11).
Figure 2-11 InstallShield Wizard Dialog Box
18 / FactoryLink / Installation Guide
INSTALLING FACTORYLINK 7.0
Installation Procedure
16 In the Choose Destination Location dialog box, accept the default folder for the FactoryLink
7.0 files or use the browser to select another one (see Figure 2-12). Click Next.
Figure 2-12 Choose Destination Location Dialog Box
17 In the Select Products dialog box (see Figure 2-13), accept the default or uncheck the
FactoryLink products you do not want to install. Click Next.
Click any product to view the description of the product and a list of its components. Click any
component to view its description.
Only licensed FactoryLink products for the following will appear on the screen:
• FactoryLink Server
• FactoryLink Client
• FactoryLink Device Interfaces
• Documentation
You can install both the server and the client on one machine, or you can install the server on
one machine and the client on another. For every FactoryLink package you purchase, you
should have at least one server, but multiple clients, if you have purchased multiple licenses.
Install the Device Interface products and Starter Application on the server machine only.
FactoryLink / Installation Guide / 19
•
INSTALLING FACTORYLINK 7.0
•
Installation Procedure
•
•
Figure 2-13 Select FactoryLink Products Dialog Box
Table 2-1 provides a description of all the FactoryLink products.
Table 2-1 FactoryLink Products
FactoryLink
Products
Description
FactoryLink Server
The real-time database; the run-time components,
such as executable files and supporting utilities to
run applications, the standard FactoryLink tasks,
Application Objects, and USDATA Namespace
FactoryLink Client
Configuration and visualization tools:
Configuration Explorer, Client Builder, Starter
Project, WebClient, Application Editor, and Client
Builder Clipart
Device Interfaces
External device interfaces and drivers, which are
purchased separately from the FactoryLink package
20 / FactoryLink / Installation Guide
INSTALLING FACTORYLINK 7.0
Installation Procedure
Table 2-1 FactoryLink Products
FactoryLink
Products
Documentation
Description
A set of FactoryLink 7.0 manuals in PDF format
that provide details for configuring and running
FactoryLink
18 Click FactoryLink Server to choose the server components (see Figure 2-13). Uncheck the
components you do not want to install. Click OK.
Table 2-2 provides a description of all the server components.
Note: Except for the OPC Server and the Starter Application, all these
server components are optional and need to be purchased separately from
the standard FactoryLink package.
Table 2-2 Server Components
Server Components
Description
Compiled Math & Logic
(CML)
A combination of utilities and libraries that, at run
time, create binary executable files from the
program files you specified to run in the compiled
mode. Microsoft Visual C++ compiler Version 6 is
the recommended compiler to use with the
FactoryLink CML processing.
Programmer’s Access
Kit (PAK)
A collection of optional FactoryLink software tools
for use in design and implementation of
FactoryLink-compatible tasks
Power Statistical Process A management tool that monitors the quality level
Control (PowerSPC)
of a manufacturing process. It measures, inspects,
and evaluates the quality of products based on
predefined criteria.
OPC Server
Uses the OPC open standard interface to access tags
in the FactoryLink real-time database
FactoryLink / Installation Guide / 21
•
INSTALLING FACTORYLINK 7.0
•
Installation Procedure
•
•
Table 2-2 Server Components
Server Components
Description
PowerSQL
A Historian-client task that communicates with
Historian through mailbox tags to send and receive
historical information stored in an external database
using SQL
Native Sybase Interface
Needed if you use Sybase as a relational database in
your application. Provides a direct interface to the
Sybase database for improved performance.
Native Oracle Interface
Needed if you use Oracle as a relational database in
your application. Provides a direct interface to the
Oracle database for improved performance.
Starter Application
A basic application that you can use to build your
own application
19 Click FactoryLink Client to choose the client components (see Figure 2-14). Uncheck the
components you do not want to install. Click Next.
Figure 2-14 Select Client Components Dialog Box
22 / FactoryLink / Installation Guide
INSTALLING FACTORYLINK 7.0
Installation Procedure
Note: Client Builder is always installed if the Starter Project is selected.
Configuration Explorer is always installed if the Application Editor is
selected.
Table 2-3 provides a description of all the client components.
Table 2-3 Client Components
Client Components
Description
Starter Project
Client Builder project files related to the Starter
Application. Requires the installation of Client
Builder.
Client Builder
A graphics tool to build and design client
applications, which can be used in the place of
Application Editor in FactoryLink pre-7.0 versions.
In addition to the same basic graphics-animation
capabilities as supported by the pre-7.0 graphics
product, Client Builder includes ActiveX controls
for viewing alarm and trend data and for browsing
database information. Client Builder can host
WebClient control and other ActiveX controls.
Application Editor
An object-oriented drawing package with tools used
to graphically illustrate user interface screens in
FactoryLink applications. Users of pre-7.0 versions
can continue to use this legacy graphics tool in
FactoryLink 7.0. (Refer to the FactoryLink ECS
Application Editor Guide.)
WebClient
A client feature that allows remote access to
Application Editor graphics. It can be hosted in
Client Builder and Configuration Explorer. (Refer
to the FactoryLink ECS WebClient User Guide.)
Configuration Explorer
A management tool that centralizes control and
administration of FactoryLink applications. A
replacement of the Configuration Manager in
FactoryLink pre-7.0 versions. (Refer to the
FactoryLink Configuration Explorer User Guide.)
Clipart Shared Libraries
A clipart library for use in Client Builder graphics.
FactoryLink / Installation Guide / 23
•
INSTALLING FACTORYLINK 7.0
•
Installation Procedure
•
•
20 In the Choose Starter Application Location dialog box, accept the default directory or use the
browser to select another one (see Figure 2-15). Click Next.
If you did not select Starter Application as a server component, go to Step 22.
Figure 2-15 Choose Starter Application Location Dialog Box
24 / FactoryLink / Installation Guide
INSTALLING FACTORYLINK 7.0
Installation Procedure
21 In the Select Starter Application dialog box, select Starter Application for dBase IV or
Microsoft SQL Server (see Figure 2-16). Click Next.
Figure 2-16 Select Starter Application Dialog Box
FactoryLink / Installation Guide / 25
•
INSTALLING FACTORYLINK 7.0
•
Installation Procedure
•
•
22 In the Start Copying Files dialog box, click Next (see Figure 2-17).
Figure 2-17 Start Copying Files Dialog Box
23 Wait for the copying progress meter to reach 100% (see Figure 2-18).
Figure 2-18 Copying Files
26 / FactoryLink / Installation Guide
INSTALLING FACTORYLINK 7.0
Installation Procedure
24 In the FactoryLink Licensing Utility dialog box, accept the default, which is the name of the
local machine, for the License Manager Node Name or IP Address (see Figure 2-19) or click
the Browse button to select another computer where FactoryLink server is installed (see
Figure 2-20).
Note: If you want to put in an IP address, you need to type it in manually.
Figure 2-19 FactoryLink Licensing Utility Dialog Box
If you have selected a valid License Manager (a computer where FactoryLink is installed), you
will see a message in the Browse for Computer dialog box: “(Your selection) is a valid license
manager,” as shown in Figure 2-20. If you have selected an invalid License Manager, the
message becomes: “Your selection is not a valid license manager!”
The OK button stays dimmed until you make a correct selection. Click OK to go back to the
FactoryLink Licensing Utility dialog box.
Figure 2-20 Browse for Computer Dialog Box
FactoryLink / Installation Guide / 27
•
INSTALLING FACTORYLINK 7.0
•
Installation Procedure
•
•
25 In the FactoryLink Licensing Utility dialog box, set the TCP Connection Port (see Figure
2-21). Click OK.
Figure 2-21 FactoryLink Licensing Utility Dialog Box
By default, the TCP Connection Port is set at 8000. If you decide to set a different TCP port
for licensing connections, make sure that both the server and the client machines use the same
port number. If you are unsure about which port numbers are available for use, consult your
network administrator.
The Auto Start Local License Manager on Bootup is checked by default. This feature applies
ONLY to a local machine. If you want the License Manager NT service to start up manually,
uncheck this option.
For more information on the License Manager, refer to Chapter 7, “License Manager.”
26 Setup starts installing the Starter Application by displaying the following message (see Figure
2-22). This process may take several minutes.
Figure 2-22 Installing Starter Application
28 / FactoryLink / Installation Guide
INSTALLING FACTORYLINK 7.0
Installation Procedure
27 In the Starter Application DSN Setup dialog box, browse to select a machine that has the
Microsoft SQL Server installed (see Figure 2-23). Click OK.
Figure 2-23 Starter Application DSN Setup
Note: If you have already installed the SQL Server locally or chosen
dBase IV for the Starter Application, this screen will not appear.
28 In the InstallShield Wizard Complete dialog box, select Yes, I want to restart my computer
now (see Figure 2-24). Click Finish.
Note: If the setup program fails to restart automatically, run Setup.exe
to cause the program to complete the installation process.
Figure 2-24 InstallShield Wizard Complete
FactoryLink / Installation Guide / 29
•
INSTALLING FACTORYLINK 7.0
•
Installation Procedure
•
•
FactoryLink Icons
The installation program creates five icons for the following components on your desktop as
well as in the FactoryLink program group (see Figure 2-25):
• Client Builder
• Client Builder Runtime
• Configuration Explorer
• FL License Utility
• Namespace Wizard
Figure 2-25 FactoryLink Program Group
After the installation program is completed, invoke any of these components by clicking its
icon from your desktop or the FactoryLink Program Group on the Start menu.
FactoryLink Shared Directories
The FactoryLink installation program creates five SHARED directories:
• Application Objects: A directory for Application Objects
• Projects: A directory for Client Builder Starter Projects
• FactoryLink: A directory for FactoryLink Server {Flink}
• Namespace: A directory for USDATA Namespace
• Starter Application: A directory for FactoryLink Starter Application
30 / FactoryLink / Installation Guide
•
•
•
•
Chapter 3
Installing Monitor Pro
Add-Ons
Monitor Pro Add-Ons are optional products manufactured by Schneider Automation, which
can be purchased from USDATA. If you have not purchased these products, you can skip this
chapter.
This chapter provides step-by-step instructions on how to install the Monitor Pro Add-Ons on
the Microsoft Windows NT or Windows 2000 platform.
I NSTALLATION P ROCEDURE
Perform the following steps to install the Monitor Pro Add-Ons:
1 In the Choose Setup Language dialog box, use the drop-down list to select one language:
English, French (standard), or German (see Figure 3-1). Click OK.
Note: This dialog box may not appear. In this case, the install will default
to the initial language selection.
Figure 3-1 Choose Setup Language Dialog Box
FactoryLink / Installation Guide / 31
•
INSTALLING MONITOR PRO ADD-ONS
•
Installation Procedure
•
•
2 Wait for FactoryLink 7.0 Setup to finish preparing the InstallShield Wizard (see Figure 3-2).
Click Cancel if you want to stop the setup process.
Figure 3-2 InstallShield Wizard Dialog Box
3 Wait for Monitor Pro Add-Ons Setup to finish preparing the InstallShield Wizard (see Figure
3-3). Click Cancel if you want to stop the setup process.
Figure 3-3 InstallShield Wizard Dialog Box
4 In the Information dialog box, click OK (see Figure 3-4).
Figure 3-4 Information Dialog Box
32 / FactoryLink / Installation Guide
INSTALLING MONITOR PRO ADD-ONS
Installation Procedure
5 In the Monitor Pro Add-Ons dialog box, select Monitor Pro Add-Ons (see Figure 3-5). Click
the Change button.
Figure 3-5 Monitor Pro Add-Ons Dialog Box
6 In the Select Sub-components dialog box, select the components you want to install (see
Figure 3-6). Click Continue.
Figure 3-6 Select Subcomponents Dialog Box
FactoryLink / Installation Guide / 33
•
INSTALLING MONITOR PRO ADD-ONS
•
Installation Procedure
•
•
Table 3-1provides a list of all the Monitor Pro Add-Ons.
Table 3-1 Monitor Pro Add-Ons
Add-Ons
Description
Client Builder
Powerpack Objects
Provides various static objects in Client Builder
symbol format.
DiagViewer
DiagViewer
Application
documentation
DOCAUTO
Generates a Monitor Pro application documentation
Trending Power Pack
Object
Allows running six historical trending pens (chosen
from ten available tags) with a single file import
Action multiplexing
Allows triggering several actions on tags (with or
without conditions) using a single trigger
Symbol database linker
Configures automatically the communication
configuration tables of an application using the
symbol definitions provided in a PLC application
Static Powerpack
Objects
Provides various static objects in Power Pack
format. See readme file in <flink>
\AddOns\Sta_Gpx folder.
7 In the Monitor Pro Add-Ons dialog box, select the Monitor Pro Add-Ons Documentation
(see Figure 3-5). Click Change.
Note: You need Adobe Acrobat Reader to view the documentation.
Adobe Acrobat 4.0 is provided on the FactoryLink Client and Server CD.
34 / FactoryLink / Installation Guide
INSTALLING MONITOR PRO ADD-ONS
Installation Procedure
8 In the Select Sub-components dialog box, select the components you want to install (see
Figure 3-7). Click Continue.
Figure 3-7 Select Documentation Subcomponents Dialog Box
Table 3-2 provides a list of the documents.
Table 3-2 Monitor Pro Add-Ons Documentation
Document
Monitor Pro Add-Ons
User’s Manual
Description
A manual for Monitor Pro Add-Ons users
FactoryLink / Installation Guide / 35
•
INSTALLING MONITOR PRO ADD-ONS
•
Installation Procedure
•
•
9 In the Choose the Language for the Monitor Pro dialog box, select a language for the
Monitor Pro documentation (see Figure 3-8). Click Next.
Note: Make sure to select the same language for documentation as the
one for the Monitor Pro.
Figure 3-8 Choose the Language for the Monitor Pro Dialog Box
36 / FactoryLink / Installation Guide
INSTALLING MONITOR PRO ADD-ONS
Installation Procedure
10 In the Select Program Folder for Monitor Pro documentation dialog box, select one folder
from the existing folders or type in a new folder name (see Figure 3-9). Click Next.
Figure 3-9 Select a Program Folder for Monitor Pro Documentation Dialog Box
FactoryLink / Installation Guide / 37
•
INSTALLING MONITOR PRO ADD-ONS
•
Installation Procedure
•
•
11 In the Start Copying Files dialog box, click Next to start copying files (see Figure 3-10).
Figure 3-10 Start Copying Files Dialog Box
12 Wait for the setup progress meter to reach 100% (see Figure 3-11). The install is completed.
Figure 3-11 Setup Status Dialog Box
38 / FactoryLink / Installation Guide
•
•
•
•
Chapter 4
Installing Device Interfaces
If you want to install the FactoryLink Device Interfaces (DI), make sure to select this option
when you install the FactoryLink Server and Client. If you install the FactoryLink Server and
Client on different machines, install DI on the server machine.
The DI installation is started after the FactoryLink Server and Client and Monitor Pro Add-Ons
(if selected) are installed.
I NSTALLATION P ROCEDURE
Perform the following steps to install the FactoryLink Device Interfaces:
1 Insert the Device Interfaces and Value-Added Products CD into the CD-ROM drive.
2 In the Choose Setup Language dialog box, select a language from the drop-down list:
English, French (standard), or German (see Figure 4-1). Click OK.
Note: Make sure to select the same language that you selected for the
FactoryLink Server and Client installation.
This dialog box may not appear. In this case, the install will default to the
initial language selection.
Figure 4-1 Choose Setup Language Dialog Box
FactoryLink / Installation Guide / 39
•
INSTALLING DEVICE INTERFACES
•
Installation Procedure
•
•
3 Wait for FactoryLink 7.0 Setup to finish preparing the InstallShield Wizard (see Figure 4-2).
Click Cancel if you want to stop the setup process.
Figure 4-2 InstallShield Wizard Dialog Box
4 In the Welcome to the InstallShield Wizard for USDATA FactoryLink Device Interface
dialog box, click Next (see Figure 4-3).
Figure 4-3 Welcome Dialog Box
40 / FactoryLink / Installation Guide
INSTALLING DEVICE INTERFACES
Installation Procedure
5 In the Choose Setup Type dialog box, select Custom to install selected licensed drivers or
Full to install all licensed drivers available (see Figure 4-4). Click Next.
If you selected the Full install, go to Step 6 to continue.
If you selected Custom, go to Step 8 to continue.
Figure 4-4 Choose Setup Type Dialog Box
FactoryLink / Installation Guide / 41
•
INSTALLING DEVICE INTERFACES
•
Installation Procedure
•
•
6 In the Start Copying Files dialog box, click Next if you are satisfied with the settings (see
Figure 4-5). Click Back to change the settings.
Figure 4-5 Start Copying Files Dialog Box
42 / FactoryLink / Installation Guide
INSTALLING DEVICE INTERFACES
Installation Procedure
7 Wait for the copying progress meter to reach 100% (see Figure 4-6).
Figure 4-6 Setup Status Dialog Box
FactoryLink / Installation Guide / 43
•
INSTALLING DEVICE INTERFACES
•
Installation Procedure
•
•
8 If you selected Custom install, in the Select Components dialog box, select the group of
drivers on the left side of the window and the individual drivers on the right (see Figure 4-7).
Click Next.
Figure 4-7 Select Components Dialog Box
Table 4-1 provides a list of all the components.
Table 4-1 DI/VAP Components
Components
Description
Base files
Base components required by all drivers
EDI drivers
EDI drivers
Net DTL/KTDL drivers
Net DTL/KTDL drivers
RAPD drivers
RAPD drivers
SECS (HSMS) Ethernet
drivers
SECS/FLGEM drivers with GW libraries
Telemecanique drivers
Ethway Communication task for April(R) Series
1000 PLCs. Available in English and French.
44 / FactoryLink / Installation Guide
INSTALLING DEVICE INTERFACES
Installation Procedure
Table 4-2 provides a list of all the drivers.
Table 4-2 Drivers
Driver Group
Drivers
EDI
Allen Bradley Async Driver, Bailey Net90 Driver,
Bristol Babcock Driver, Comm Wizard, Daniels
2500 Driver, Eagle Signal Driver, Fisher ROC
Driver, GE Fanuc Driver, GEC Gem 80 Driver, GPI
(Asyn) Driver, Leeds and Northrop Driver, Modbus
Driver, Modbus Plus Driver, Moore Products
Driver, Omron Driver, Omron V600 Driver,
OPTO-22 Optomux Driver, OPTO Mistic Brick
Driver, Reliance Driver, Siemens CP 525, Siemens
Sinec H1 Driver, Square D Driver, Steeplechase
VLC Driver, TCS/SSD Driver, Texas Instruments
Driver, TI Series 300/400 Driver
Net DTL/KTDL
Allen Bradley Net DTL/KTDL
RAPD
Allen Bradley RSLinx Driver, DL Profibus RAPD
Driver, Dl Siemens 3946R Driver, DL Siemens
RAPD H1 Driver, Modbus Ethernet Driver
SECS (HSMS) Ethernet
FLGEM Driver, SECS Serial Driver, SECS
(HSMS) Ether Driver
Telemecanique
Ethway for Series 1000, JBUS Interface Driver, KS
Functions on RS232, Modnet 1/SFB Interface,
TE_DRQ Direct Reques, TE_LOAD Fiel Transfer,
TE_COM Drivers
FactoryLink / Installation Guide / 45
•
INSTALLING DEVICE INTERFACES
•
Installation Procedure
•
•
9 In the Start Copying Files dialog box, click Next to start copying files (see Figure 4-8).
Figure 4-8 Start Copying Files Dialog Box
46 / FactoryLink / Installation Guide
INSTALLING DEVICE INTERFACES
Installation Procedure
10 Wait for the copying progress meter to reach 100% (see Figure 4-9).
Figure 4-9 Setup Status Dialog Box
FactoryLink / Installation Guide / 47
•
INSTALLING DEVICE INTERFACES
•
Installation Procedure
•
•
11 In the InstallShield Wizard Complete dialog box, click Finish (see Figure 4-10).
Figure 4-10 InstallShield Wizard Complete Dialog Box
Note: You are not required to reboot after the DI/VAP installation is
completed.
48 / FactoryLink / Installation Guide
•
•
•
•
Chapter 5
Authorizing and
Maintaining FactoryLink
Installation
This chapter discusses the following topics on authorizing and maintaining FactoryLink
installation:
• Authorizing FactoryLink
• Uninstalling FactoryLink
• Disabling FactoryLink Licensing
• Reinstalling and Reauthorizing FactoryLink
FactoryLink / Installation Guide / 49
•
AUTHORIZING AND MAINTAINING FACTORYLINK INSTALLATION
•
Authorizing FactoryLink
•
•
A UTHORIZING F ACTORY L INK
FactoryLink runs for 10 days without authorization. For the FactoryLink software to continue
to operate, perform the following tasks to have your FactoryLink 7.0 authorized:
• Obtain the registration code
• Obtain the authorization code
• Authorizing your FactoryLink
Obtaining the Registration Code
Perform the following steps to obtain your FactoryLink registration code:
1 Perform the installation Steps 1 to 7 as described in Chapter 2, “Installing FactoryLink 7.0.”
2 In the License Configuration dialog box, enter your serial number and configuration sequence
in “Exhibit A” of your FactoryLink shipping document (see Figure 5-1).
Note: Both the serial number and the configuration sequence are
case-insensitive.
Figure 5-1 License Configuration Dialog Box
50 / FactoryLink / Installation Guide
AUTHORIZING AND MAINTAINING FACTORYLINK INSTALLATION
Authorizing FactoryLink
3 Make a note of the registration code, which is generated automatically once the correct serial
number and configuration sequence are entered.
4 Go to the USDATA Web site, http://www.usdata.com, to obtain your authorization code.
Note: If you have purchased Monitor Pro products, refer to Exhibit A for
information on authorizing your system.
If you do not have access to the Internet, call or send a fax to USDATA Customer Support
(phone: 972-497-0300; fax: 972-669-1428).
FactoryLink / Installation Guide / 51
•
AUTHORIZING AND MAINTAINING FACTORYLINK INSTALLATION
•
Authorizing FactoryLink
•
•
Obtaining the Authorization Code over the Internet
Using the Internet is the fastest way to obtain your authorization code.
Perform the following steps to obtain your authorization code:
1 Open the USDATA Web site at http://www.usdata.com (see Figure 5-2). Click Services.
Figure 5-2 USDATA Web Site
2 In the Services group, click authorization (see Figure 5-3).
Figure 5-3 Selecting Services
52 / FactoryLink / Installation Guide
AUTHORIZING AND MAINTAINING FACTORYLINK INSTALLATION
Authorizing FactoryLink
3 From the FactoryLink Product Authorization page, click authorize your product (see Figure
5-4).
Figure 5-4 FactoryLink Product Authorization Dialog Box
4 From the USDATA Software Registration and Authorization page, enter your Serial Number
and Registration Number (see Figure 5-5). Click Continue.
Figure 5-5 Software Registration and Authorization Dialog Box
FactoryLink / Installation Guide / 53
•
AUTHORIZING AND MAINTAINING FACTORYLINK INSTALLATION
•
Authorizing FactoryLink
•
•
5 If you are registering/authorizing FactoryLink for the first time, this dialog box will not appear
(see Figure 5-6). Go to Step 6.
If you are reregistering/reauthorizing the FactoryLink software, in the Software Registration
and Authorization dialog box, select a reason. Click Continue.
Figure 5-6 Software Registration and Authorization Dialog Box
54 / FactoryLink / Installation Guide
AUTHORIZING AND MAINTAINING FACTORYLINK INSTALLATION
Authorizing FactoryLink
6 In the Registration and Authorization dialog box, fill in the required information about your
company (see Figure 5-7). Click Continue.
Figure 5-7 Registration and Authorization Dialog Box
FactoryLink / Installation Guide / 55
•
AUTHORIZING AND MAINTAINING FACTORYLINK INSTALLATION
•
Authorizing FactoryLink
•
•
7 The next Software and Authorization screen summarizes your company’s purchase and
registration/authorization information (see Figure 5-8).
Note: USDATA grants Customer a nonexclusive license to use the
FactoryLink Software Program on a single computer for the point and tag
counts and the number of Client Access License (CAL) connections
defined above. Please refer to the FactoryLink Software Agreement for
complete software license terms and conditions.
Figure 5-8 Software Registration and Authorization
8 Make a note of the authorization code and continue with the authorization process as described
in the next subsection.
56 / FactoryLink / Installation Guide
AUTHORIZING AND MAINTAINING FACTORYLINK INSTALLATION
Authorizing FactoryLink
Authorizing FactoryLink
Perform the following steps to authorize your FactoryLink:
1 From the Windows Start menu, select Settings>Control Panel (see Figure 5-9).
Figure 5-9 Start Menu
2 In the Control Panel, click Add/Remove Programs (see Figure 5-10).
Figure 5-10 Control Panel
FactoryLink / Installation Guide / 57
•
AUTHORIZING AND MAINTAINING FACTORYLINK INSTALLATION
•
Authorizing FactoryLink
•
•
3 In the Choose Setup Language dialog box, select a language from the drop-down list:
English, French (standard), or German (see Figure 5-11). Click OK.
Note: Make sure to select the same language that you selected for the
FactoryLink Server and Client installation.
Figure 5-11 Choose Setup Language Dialog Box
4 Wait for FactoryLink 7.0 Setup to finish preparing the InstallShield Wizard (see Figure 5-12).
Figure 5-12 InstallShield Wizard Dialog Box
58 / FactoryLink / Installation Guide
AUTHORIZING AND MAINTAINING FACTORYLINK INSTALLATION
Authorizing FactoryLink
5 In the Welcome dialog box, select Authorize License (see Figure 5-13). Click Next.
Figure 5-13 Welcome Dialog Box
FactoryLink / Installation Guide / 59
•
AUTHORIZING AND MAINTAINING FACTORYLINK INSTALLATION
•
Authorizing FactoryLink
•
•
6 In the License Configuration dialog box, enter your authorization code (see Figure 5-14).
Click Next.
Figure 5-14 License Configuration Dialog Box
7 Follow the prompts to complete the authorization process.
60 / FactoryLink / Installation Guide
AUTHORIZING AND MAINTAINING FACTORYLINK INSTALLATION
Uninstalling FactoryLink
U NINSTALLING F ACTORY L INK
Perform the following steps to uninstall FactoryLink 7.0:
1 From the Windows Start menu, select Settings>Control Panel (see Figure 5-15).
Figure 5-15 Start Menu
2 In the Control Panel, double-click Add/Remove Programs (see Figure 5-16).
Figure 5-16 Control Panel
FactoryLink / Installation Guide / 61
•
AUTHORIZING AND MAINTAINING FACTORYLINK INSTALLATION
•
Uninstalling FactoryLink
•
•
3 In the Add/Remove Programs Properties dialog box, select the FactoryLink component you
want to remove (see Figure 5-17). Click Add/Remove.
Figure 5-17 Add/Remove Programs Properties Dialog Box
4 In the Choose Setup Language dialog box, select a language for the removal of the product
(see Figure 5-18). Click OK.
Note: Make sure to select the same language that you selected for the
installation.
Figure 5-18 Choose Setup Language Dialog Box
62 / FactoryLink / Installation Guide
AUTHORIZING AND MAINTAINING FACTORYLINK INSTALLATION
Uninstalling FactoryLink
5 Wait for FactoryLink 7.0 Setup to finish preparing the InstallShield Wizard (see Figure 5-19).
Figure 5-19 InstallShield Wizard Dialog Box
6 In the Welcome dialog box, select Remove (see Figure 5-20). Click Next.
Figure 5-20 Welcome Dialog Box
Note: Removing FactoryLink automatically removes Device Interfaces
and Monitor Pro Add-Ons, if they are installed. However, removing the
Device Interfaces or Monitor Pro Add-Ons does not automatically
remove FactoryLink.
FactoryLink / Installation Guide / 63
•
AUTHORIZING AND MAINTAINING FACTORYLINK INSTALLATION
•
Uninstalling FactoryLink
•
•
7 If you installed the Device Interfaces, in the Information dialog box, click OK (see Figure
5-21). Otherwise, go to Step 10.
Figure 5-21 Information Dialog Box
8 In the Confirm File Deletion dialog box, click OK (see Figure 5-22).
Figure 5-22 Confirm File Deletion Dialog Box
9 Wait for the Setup meter to reach 100% (see Figure 5-23).
Figure 5-23 Setup Status Dialog Box
64 / FactoryLink / Installation Guide
AUTHORIZING AND MAINTAINING FACTORYLINK INSTALLATION
Uninstalling FactoryLink
10 If you installed Monitor Pro Add-Ons, in the Information dialog box, click OK (see Figure
5-24). Otherwise, go to Step 13.
Figure 5-24 Information Dialog Box
11 In the Confirm File Deletion dialog box, click OK (see Figure 5-25).
Figure 5-25 Confirm File Deletion Dialog Box
12 In the Setup Status dialog box, wait for the progress meter to reach 100% (see Figure 5-26).
Figure 5-26 Setup Status Dialog Box
FactoryLink / Installation Guide / 65
•
AUTHORIZING AND MAINTAINING FACTORYLINK INSTALLATION
•
Uninstalling FactoryLink
•
•
13 In the Maintenance Complete dialog box, click Finish (see Figure 5-27).
Figure 5-27 Maintenance Complete Dialog Box
14 Wait for the remove progress meter to reach 100% (see Figure 5-28).
Figure 5-28 Remove Progress Meter
66 / FactoryLink / Installation Guide
AUTHORIZING AND MAINTAINING FACTORYLINK INSTALLATION
Uninstalling FactoryLink
15 In the InstallShield Wizard Complete dialog box, select Yes, I want to restart my computer
now (see Figure 5-29). Click Finish to restart your machine.
Figure 5-29 InstallShield Wizard Complete Dialog Box
USDATA recommends that you go to the directory where you installed the FactoryLink
product, for example, C:\Program Files\USDATA\FactoryLink\FactoryLink, and remove the
corresponding folders for the components of the product.
FactoryLink / Installation Guide / 67
•
AUTHORIZING AND MAINTAINING FACTORYLINK INSTALLATION
•
Disabling FactoryLink License
•
•
D ISABLING F ACTORY L INK L ICENSE
You can use the deinstall utility to remove the existing FactoryLink license information to
facilitate the following:
• Upgrading operating system version
• Changing hard drives
• Changing processors
• Moving to new systems
• Changing the Network Interface Card (NIC)
Deinstall does not delete the FactoryLink files; it merely removes the license information. This
disables the FactoryLink files. To enable the files again, simply obtain a new registration
number. Do not reinstall FactoryLink.
Perform the following steps to disable the FactoryLink license:
1 Enter the following command at the prompt to initiate deinstall:
deinstal
The system issues a warning that FactoryLink license disables and prompts for confirmation as
shown below.
- W A R N I N G This will de-install FactoryLink from your system. Are
you sure you want to de-install FactoryLink? (Y/N)
2 Enter Y to continue the process. The deinstall utility removes the license information and
issues the following statement:
FactoryLink successfully de-installed.
A deinstallation number is displayed on the screen.
De-installation number: XXXX XXXX XXXX XXXX XXXX XXXX XX
68 / FactoryLink / Installation Guide
AUTHORIZING AND MAINTAINING FACTORYLINK INSTALLATION
Disabling FactoryLink License
3 Write down the deinstallation number. You need this number to enable the license when you
are ready to use FactoryLink again.
4 Contact the USDATA Authorization Desk (Phone: 972-497-0293) and provide the displayed
deinstallation number and the registration number. The USDATA Authorization Desk will
provide you with a new authorization code. Use this code to reenable the FactoryLink license.
FactoryLink / Installation Guide / 69
•
AUTHORIZING AND MAINTAINING FACTORYLINK INSTALLATION
•
Reinstalling and Reauthorizing FactoryLink
•
•
R EINSTALLING
AND
R EAUTHORIZING F ACTORY L INK
To uninstall FactoryLink 7.0 from one computer and install it on another, perform the
following steps:
1 Deinstall FactoryLink from the first computer. (Refer to “Disabling FactoryLink License” on
page 68)
2 Uninstall FactoryLink 7.0 from the first computer. (Refer to “Uninstalling FactoryLink” on
page 61)
3 Install FactoryLink 7.0 on the new computer. (Refer to Chapter 2, “Installing FactoryLink
7.0.”)
4 Authorize FactoryLink 7.0 again. (Refer to “Authorizing FactoryLink” on page 50).
Unfortunately, there is no shortcut.
70 / FactoryLink / Installation Guide
•
•
•
•
Chapter 6
Additional Information and
Procedures
After you have installed FactoryLink as described in Chapter 2, “Installing FactoryLink 7.0,”
you may need to perform additional installation tasks depending on your FactoryLink
installation needs. This chapter provides step-by-step instructions on performing the following
procedures:
• Setting up memory size for Microsoft SQL Server 7.0
• Setting up DCOM security
FactoryLink / Installation Guide / 71
•
ADDITIONAL INFORMATION AND PROCEDURES
•
Setting up Memory Size for Microsoft SQL Server 7.0
•
•
S ETTING
UP
M EMORY S IZE
FOR
M ICROSOFT SQL S ERVER 7.0
After you have installed FactoryLink 7.0 and the Microsoft SQL Server 7.0, you need to set up
a maximum memory limit on the SQL Server. The setup will prevent the SQL Server from
consuming all the memory available to it and ensure the operation and speed of FactoryLink
tasks.
Perform the following steps to set up the memory size for the SQL Server:
1 From the Windows Start menu, select Programs>Microsoft SQL Server 7.0 (see Figure 6-1).
Figure 6-1 Start Menu
2 From the Microsoft SQL Server 7.0 menu, select Enterprise Manager (see Figure 6-2).
Figure 6-2 Select Enterprise Manager
72 / FactoryLink / Installation Guide
ADDITIONAL INFORMATION AND PROCEDURES
Setting up Memory Size for Microsoft SQL Server 7.0
3 In the Console Root/Microsoft SQL Servers window, from the Console Root folder, select
Microsoft SQL Servers>SQL Server Group (see Figure 6-3).
Figure 6-3 Selecting SQL Server Group
4 From the SQL Server Group, right-click the Host Name (Windows NT) and select Properties
in the pop-up menu (see Figure 6-4).
Figure 6-4 Selecting Properties
FactoryLink / Installation Guide / 73
•
ADDITIONAL INFORMATION AND PROCEDURES
•
Setting up Memory Size for Microsoft SQL Server 7.0
•
•
5 In the SQL Server Properties dialog box, click the Memory tab (see Figure 6-5).
Figure 6-5 Setting Memory Properties
6 Change the default setting Dynamically configure SQL Server memory to Use a fixed
memory size (MB).
7 Use the lever to set the memory size in the range of 40 to 80 MB, as recommended by
Microsoft, depending on your system’s RAM size and virtual memory size.
8 Click Apply. Then click OK.
9 Close the Console Root/Microsoft SQL Servers window.
The memory size for your SQL Server is now set up.
74 / FactoryLink / Installation Guide
ADDITIONAL INFORMATION AND PROCEDURES
Setting up the DCOM Security
S ETTING
UP THE
DCOM S ECURITY
This section provides guidelines about setting up the Microsoft Distributed Component Object
Model (DCOM) security for FactoryLink 7.0. For general information about the DCOM setup,
refer to the OPC DCOM White Paper, Revision 2—Thursday, April 9, 1998, which can be
accessed at the OPC Foundation Web site, http://www.opcfoundation.org.
DCOM is a protocol that enables software components to communicate directly over a
network in a reliable, secure, and efficient manner. Previously called “Network OLE,” DCOM
is designed for use across multiple network transports, including Internet protocols such as
HTTP.
The FactoryLink 7.0 DCOM security authenticates and authorizes the client during its attempt
to access the server. If the client does not meet with the security requirement, the access will be
denied.
When the event notification or call-back mechanism is used between the server and the DCOM
client, the server becomes the client (caller), and the client becomes the server (callee). That is
why sometimes a client can successfully connect to a server, but attempts to use asynchronous
updates fail. Other terms that refer to this mechanism are “connection points” and “event
notification.”
DCOMCNFG.EXE
DCOMCNFG.EXE is an offline tool that makes modifications to the DCOM configuration keys
stored in the registry. The system reads DCOM configuration from the registry at the
application startup time.
Use the DCOMCNFG.EXE tool to configure the two security configuration settings that affect
application (client or server) calls in DCOM:
• Specific application setting, using the AppId
• Default setting for all applications that do not rely on specific settings or/and do not have an
AppId
FactoryLink / Installation Guide / 75
•
ADDITIONAL INFORMATION AND PROCEDURES
•
Setting up the DCOM Security
•
•
DCOM Configuration Values
Set up the DCOM security in both the client and the server machines. If the client and server
machines are members of an NT domain, use the values in Table 6-1 for the DCOM
configuration.
Table 6-1 DCOM Configuration Values
Configuration
Properties
Client Machine
Server Machine
Authentication Level
Call
Connect
Impersonation Level
Identify
Impersonate
Access Permission
Lists of users defined using the
DCOMCNFG tool
List of users defined using the
DCOMCNFG tool
+ Interactive
+ Network
+ System
Launch Permission
N/A
List of users defined using the
DCOMCNFG tool
+ Interactive
+ System
If the client and server machines are not members of an NT domain, you need to create users
on both the server and the client machines with identical user names and passwords.
Using the DCOM Configuration Tool
Perform the following steps to set up an application to utilize an established user account:
1 From the Start menu, select Run and type in DCOMCONFG (see Figure 6-6). Click OK.
Figure 6-6 Running DCOMCONFG
76 / FactoryLink / Installation Guide
ADDITIONAL INFORMATION AND PROCEDURES
Setting up the DCOM Security
2 In the Distributed COM Configuration Properties dialog box, select FLUtilityLauncher from
the list and click Properties (see Figure 6-7).
Figure 6-7 Distributed COM Configuration Properties
FactoryLink / Installation Guide / 77
•
ADDITIONAL INFORMATION AND PROCEDURES
•
Setting up the DCOM Security
•
•
3 In the FLUtilityLauncher Properties dialog box, click the Identity tab (see Figure 6-8).
Figure 6-8 FLUtilityLauncher Properties
4 In the Identity dialog box, click the Browse button to select a user. Click Add.
Note: USDATA recommends that you create a single user account for
the following five components:
•
USDATA Trend Database Server
•
USDATA OPC Development Server
•
USDATA OPC Server
•
FLUtilityLauncher
•
USDATA FactoryLink OLE Server
78 / FactoryLink / Installation Guide
ADDITIONAL INFORMATION AND PROCEDURES
Setting up the DCOM Security
5 In the Identity dialog box, the User name is filled in automatically after Step 4 was taken (see
Figure 6-9). Fill in the Password and Confirm Password. Click OK.
Figure 6-9 FLUtilityLauncher Properties - Identity
FactoryLink / Installation Guide / 79
•
ADDITIONAL INFORMATION AND PROCEDURES
•
Setting up the DCOM Security
•
•
Configuring the User Manager
Perform the following steps to configure the User Manager:
1 From the Start menu, select Programs>Administrative Tools (Common). Click User
Manager (see Figure 6-10).
Figure 6-10 Programs Menu
80 / FactoryLink / Installation Guide
ADDITIONAL INFORMATION AND PROCEDURES
Setting up the DCOM Security
2 In the User Manager screen, from the Policies menu, select User Rights (see Figure 6-11).
Figure 6-11 User Manager Screen
3 In the User Rights Policy dialog box, check Show Advanced User Rights (see Figure 6-12).
Figure 6-12 User Rights Policy Dialog Box
FactoryLink / Installation Guide / 81
•
ADDITIONAL INFORMATION AND PROCEDURES
•
Setting up the DCOM Security
•
•
4 In the Right drop-down list, select Log on as a batch job. Click Add (see Figure 6-13).
Figure 6-13 User Rights Policy
5 In the Add Users and Groups dialog box, click Show Users.
Figure 6-14 Add Users and Group Dialog Box
6 Select a user account that has been set up by the DCOM configuration tool. Click Add. Then
click OK.
7 In the User Rights Policy dialog box, click OK. Your User Manager is set up.
82 / FactoryLink / Installation Guide
ADDITIONAL INFORMATION AND PROCEDURES
Setting up the DCOM Security
Microsoft Windows NT Cross-Domain Issue
For the clients and servers to exist in different domains, the network administrator must
establish a mutual trust relationship in between. A trust relationship is a link between two
domains that enables a user with an account in one domain to have access to the resources of
another domain.
For more information, refer to the Microsoft Windows NT manual or search the Microsoft
Web site at http://www.msdn.microsoft.com/library.
FactoryLink / Installation Guide / 83
•
ADDITIONAL INFORMATION AND PROCEDURES
•
Setting up the DCOM Security
•
•
84 / FactoryLink / Installation Guide
•
•
•
•
Chapter 7
License Manager
In versions prior to FactoryLink 7.0, licensing to protect FactoryLink tasks was on the server
side. It became effective through registration and authorization of the software.
In FactoryLink 7.0, the server-side licensing is still intact. In addition, the 7.0 version
introduces a License Manager on the client side to control the run-time instances and
connection of five client products to a FactoryLink Server:
• Client Builder
The License Manager controls Client Builder’s run-time instances and connection to the
FactoryLink Server. It requires a pair of licenses for Client Builder to run successfully: one
for connection and one for run-time instance. If one of the licenses is missing, Client Builder
will not be able to start.
• Configuration Explorer
The License Manager controls Configuration Explorer’s connection to the FactoryLink
Server. Without a connection license from the License Manager, Configuration Explorer
will shut down upon startup.
• WebClient
The Licence Manager controls WebClient’s connection to the FactoryLink Server. If
WebClient does not have a connection license from the License Manager, the WebClient
graphics will not display.
• Graph
The License Manager controls the startup of the local Graph task. If the Graph task cannot
obtain a connection license from the License Manager, no local graphics will be displayed,
although the other FactoryLink tasks can still be started.
• Third-party OPC Clients
Connection licensing only applies to third-party (non-USDATA) OPC clients. USDATA
OPC clients, namely USDATA OPC Client, Client Builder, and Configuration Explorer, do
not require the use of a connection license. When a third-party OPC client attempts to
connect to the FactoryLink OPC Server, the server will attempt to obtain a connection
license from the License Manager. If no license is available, the FactoryLink OPC server
will refuse a connection to the third-party OPC Client.
IMPORTANT: FactoryLink licensing uses windows socket services to communicate between
client products and the License Manager. Therefore, you must install Microsoft TCP/IP
services on the machine for the License Manager to run.
FactoryLink / Installation Guide / 85
•
LICENSE MANAGER
•
License Utility
•
•
L ICENSE U TILITY
The FactoryLink 7.0 installation program installs the license utility, FLLicenseUtility.exe, on
the FactoryLink Server. For installation information on the license utility, refer to Chapter 2,
“Installing FactoryLink 7.0.”
Figure 7-1 shows the license utility screen during the installation program.
Figure 7-1 FactoryLink Licensing Utility Dialog Box
The installation program also creates a desktop icon for the license utility, which you can
invoke any time after installation (see Figure 7-2).
Figure 7-2 FL License Utility Icon
86 / FactoryLink / Installation Guide
LICENSE MANAGER
Functions
F UNCTIONS
The license utility has three basic functions:
• Find and select a License Manager on the network.
By default, the License Manager service is installed on a machine where the FactoryLink
server products have been installed. The license utility provides the option to designate a
License Manager on any other known FactoryLink Server on the network. The License
Manager has a browse feature to identify these machines that contain a License Manager
(see Figure 7-3).
Figure 7-3 Browse for Computer Dialog Box
FactoryLink / Installation Guide / 87
•
LICENSE MANAGER
•
Functions
•
•
• Set the local TCP/IP port.
TCP/IP is the connection mechanism between the client products and the License Manager.
To successfully communicate with the FactoryLink server, the client products must use the
same port number as the License Manager. If you are unsure about which port numbers are
available for use, consult your network administrator.
The license utility is the only means to define the TCP/IP port. By default, the License
Manager uses port 8000 (see Figure 7-4).
Figure 7-4 Defining TCP/IP Connection Port
If a client product fails to get a license and you have verified that the license is available,
check the services file in C:\WINNT\System32\Drivers\ETC\Services for possible port
conflict. Make sure that the port you use for the License Manager is not used by another NT
service or program.
You can change the TCP/IP port number after installation by performing the following steps:
1) Shut down the License Manager and the client product you are running.
2) Invoke the License Utility by clicking the icon on your desktop.
3) Restart the License Manger and the client product to apply the changes.
• Select auto-start for the local License Manager upon the machine startup.
Auto-start is the default setting. To change the setting, you can uncheck this option in the
License Utility dialog box.
To set it back to auto-start after installation, you can go to the Control Panel, select
Services, and then set FactoryLink License Manager to auto-start.
88 / FactoryLink / Installation Guide
LICENSE MANAGER
NT Service
NT S ERVICE
The FactoryLink License Manager is installed as an NT service. The executable is
usdlicenseserver.exe (located in the FactoryLink bin directory). By default, the License
Manager starts up automatically upon a reboot of the machine.
The NT service must be running for licensing to work properly. If it is not running, any
licensing request will fail.
G RACE P ERIOD
Should a License Manager become unavailable, a client product can still be started repeatedly
for a three-day grace period. The grace period starts from the time the license was successfully
allocated. If the License Manager is unavailable on the fourth day, the product will not be able
to start or run. To get another new license, it requires a running License Manager.
FactoryLink / Installation Guide / 89
•
LICENSE MANAGER
•
Demo Mode
•
•
D EMO M ODE
The License Manager can detect whether your FactoryLink server installation is a demo
version or a fully authorized version. If you use a demo version, a pop-up message box appears
every 15 minutes after Configuration Explorer, Client Builder, or WebClient starts up. The
message urges you to contact USDATA or your reseller to purchase the FactoryLink product
(see Figure 7-5).
Figure 7-5 Configuration Explorer Demo Message
Note: This message does not appear for OPC Client connections.
If you are running multiple instances of any of the four client products, the product will
generate multiple pop-up messages for that product, because each connection to the License
Manager is unique.
If the FactoryLink Server is running in a demo mode, it shuts down in one hour from start, the
same as in previous versions of FactoryLink. The server shutdown does not stop Configuration
Explorer, Client Builder, and WebClient from running remotely, but their data connection to
the FactoryLink Server will be terminated.
90 / FactoryLink / Installation Guide
LICENSE MANAGER
Installing the License File on a Shared Drive
I NSTALLING
THE
L ICENSE F ILE
ON A
S HARED D RIVE
During the installation program, you have the option of installing the license file to the default
directory USDATA\FactoryLink\FactoryLink\Opt. If you did not take the default setting and
installed the license file to a shared directory, perform the following steps to set up the
FactoryLink License Manager:
1 From the Start menu, select Settings>Control Panel (see Figure 7-6).
Figure 7-6 Start Menu
FactoryLink / Installation Guide / 91
•
LICENSE MANAGER
•
Installing the License File on a Shared Drive
•
•
2 In the Control Panel, select Services (see Figure 7-7).
Figure 7-7 Control Panel
3 In the Services dialog box, select FactoryLink License Manager, click Stop, and then
double-click FactoryLink License Manager (see Figure 7-8).
Figure 7-8 Services Dialog Box
92 / FactoryLink / Installation Guide
LICENSE MANAGER
Installing the License File on a Shared Drive
4 In the Service dialog box for the FactoryLink License Manager, change the default for Log On
As from System Account to This Account (see Figure 7-9).
Figure 7-9 Service Dialog Box
5 Browse to whichever account has the access to the shared drive.
6 Type in the password for this account. Confirm the password. Click OK.
FactoryLink / Installation Guide / 93
•
LICENSE MANAGER
•
Installing the License File on a Shared Drive
•
•
7 In the Services dialog box, select FactoryLink License Manager (see Figure 7-10). Click
Start.
Figure 7-10 Services Dialog Box
94 / FactoryLink / Installation Guide
•
•
•
•
Chapter 8
Error Messages
An error message appears on screen if you encounter a problem during the FactoryLink 7.0
installation. This chapter lists all the messages that can occur during the installation process,
describes their possible causes, and provides corrective actions.
The USDFLInstall.log file is located in the root directory of the C: drive.
A component could not be registered.
Component: <COM component filename>
Note: The symbol < > indicates the text that comes up during run-time
operation.
Action:
The most likely cause is either that the component file is missing, or that a
dependent component file is missing or is not on the system PATH.
Action:
You can try registering manually.
A component could not be unregistered.
Cause:
During uninstall, a file cannot be removed from the registry.
Action:
No action needed; however, some unused data will be left in the registry.
An error occurred during the move data process.
Cause:
InstallShield internal problem.
Action:
Contact USDATA Customer Support and report the error code.
An unknown error has been encountered in the Destination Directories dialog.
The installation will be aborted.
Cause:
While the installation script was able to create the Destination Directories
dialog, an unknown error is preventing the dialog from operating correctly.
Action:
Contact USDATA FactoryLink support.
FactoryLink / Installation Guide / 95
•
ERROR MESSAGES
•
•
•
An unknown error has been encountered in the License Configuration dialog.
The installation will be aborted.
Cause:
While the installation script was able to create the License Configuration
dialog, an unknown error is preventing the dialog from operating correctly.
Action:
Contact USDATA FactoryLink support.
An unknown error has been encountered in the Show Document dialog.
The installation will be aborted.
Cause:
While the installation script was able to create the Show Document dialog,
an unknown error is preventing the dialog from operating correctly.
Action:
Contact USDATA FactoryLink support.
ComponentError returned the following data transfer error. Setup will now abort.
Media Name: %s
Component: %s
File Group: %s
File: %s
Error Number: %ld
Cause:
InstallShield internal problem.
Action:
Contact USDTA Customer Support and report the error message.
ComponentError returned the following data transfer error.
Setup will now abort.
Media Name: <CAB file being accessed.>
Component: <installation component being accessed.>
File Group: <group being accessed.>
File: <file being accessed.>
Error Number: <InstallShield error value.>
Cause:
Unknown.
Action:
Contact USDATA FactoryLink support.
Could not add a new key to the registry.
Cause:
Most likely the currently logged-on user does not have sufficient rights to
the FactoryLink product.
Action:
The user must log on using an account that has Administrator rights before
starting the installation.
96 / FactoryLink / Installation Guide
ERROR MESSAGES
Could not add the \n\n“%s”\n\ndirectory to the system path.
Cause:
The user does not have the privileges to add to the system environment.
Action:
Make sure the user has administrative privileges.
Could not copy a file
Source file: <source filename>
Destination file: <destination filename>
Cause:
Either the source or destination filename is invalid. The most likely cause
is that the user choose an invalid installation directory name (such as one
that can’t be created).
Action:
Restart the installation and check the validity of each install destination
directory.
Could not create a new directory.
Directory: <directory >
Cause:
The most likely cause is that the user chose an invalid installation directory
name (such as one that can’t be created).
Action:
Restart the installation and check the validity of the related installation
directory.
Could not create the following USDATA FactoryLink registry set.
The installation will be aborted.
Cause:
The most likely cause is that the user does not have Administrator rights to
install the FactoryLink product.
Action:
The user must log on using an account that has Administrator rights before
starting the installation.
Could not load helper module.
Module: <module filename>
Cause:
For unknown reasons the specified DLL installation helper module could
not be initialized. It is possible that either it or one of its dependent
modules are corrupted or cannot be found.
Action:
Contact USDATA FactoryLink support.
FactoryLink / Installation Guide / 97
•
ERROR MESSAGES
•
•
•
Could not open the FLBuild.ID file to retrieve the version information.
Cause:
The FLBuild.ID file is missing or corrupted.
Action:
Contact USDATA FactoryLink support.
Could not open installation log file.
[InstallShield error message text]
Cause:
The installation log file could not be opened for the above reason.
Action:
Contact USDATA FactoryLink support.
Could not register <file> because the file does not exist.
Cause:
Install could not find the specified file to register.
Action:
Contact USDATA FactoryLink support.
Could not retrieve a registry value.
Key: <key name>
ValueName: <value name>
Cause:
The most likely cause of this error is that the currently logged on user does
not have sufficient rights to install the FactoryLink product.
Action:
The user must log on using an account that has Administrator rights before
starting the installation.
Could not retrieve a value from the environment.
Env: <environment value name>
Cause:
The value expected to be in the environment is not yet there. The cause is
unknown.
Action:
Contact USDATA FactoryLink support.
Could not set a new value into the environment.
Env: %s
Value: %s
Cause:
The most likely cause is that the user does not have Administrator rights to
install the FactoryLink product.
Action:
The user must log on using an account that has Administrator rights before
starting the installation.
98 / FactoryLink / Installation Guide
ERROR MESSAGES
Could not set DCOM permissions.
<DCOM permission string>
Cause:
The most likely cause is that the user does not have Administrator rights to
install the FactoryLink product.
Action:
The user must log on using an account that has Administrator rights before
starting the installation.
Could not set a registry value.
Key: <key name>
ValueName: <value name>
Value: <value >
Cause:
The most likely cause of this error is that the currently logged on user does
not have sufficient rights to install the FactoryLink product.
Action:
The user must log on using an account that has Administrator rights before
starting the installation.
Could not set up DSN.
Cause:
Internal database error.
Action:
Contact USDATA FactoryLink support.
Could not start a Windows NT service.
Service: <NT service filename>
Cause:
The most likely cause is either that the component file is missing, or that a
dependent component file is missing or is not on the system PATH.
Action:
Contact USDATA FactoryLink support.
Could not write an entry to the installation log file.
Logoff: <installation log filename>
Entry: <entry that was being added to the log file>
Cause:
An unknown problem is interfering with the process of writing to the
installation log file.
Action:
Contact USDATA FactoryLink support.
FactoryLink / Installation Guide / 99
•
ERROR MESSAGES
•
•
•
Could not write the initial installation information into the registry.
The installation will be aborted.
Cause:
The most likely cause of this error is that the currently logged on user does
not have sufficient rights to install the FactoryLink product.
Action:
The user must log on using an account that has Administrator rights before
starting the installation.
Ikernel error
Cause:
The user does not have administrator privileges.
Action:
The user needs to install with administrator privileges.
The current user does not have administrator privileges.
The installation will be aborted.
Cause:
The user must have Administrator rights to install the FactoryLink product.
Action:
The user must log on using an account that has Administrator rights before
starting the installation.
The directory does not exist:\n\nDirectory: %s.
Cause:
Internal database error.
Action:
Contact USDATA FactoryLink support.
The installation was aborted.
Cause:
An unrecoverable error was encountered. (In the vast majority of the cases,
a preceding message box will already have been presented to the user.)
Action:
Contact USDATA FactoryLink support.
The source disk is not the FactoryLink DI/VAP installation CD.
Cause:
The installation script was expecting the DI/VAP CD to be inserted, but
another CD was inserted instead.
Action:
Remove whatever CD is in the CD drive and insert the DI/VAP CD.
100 / FactoryLink / Installation Guide
ERROR MESSAGES
The source disk is not the Microsoft SQL 7 installation CD.
Cause:
The installation script was expecting the Microsoft SQL Server CD to be
inserted, but another CD was inserted instead.
Action:
Remove whatever CD is in the CD drive and insert the Microsoft SQL
Server CD.
The version number file could not be found.
The installation will be aborted.
Cause:
While the installation script was able to find and read the FLBuild.ID file,
the FactoryLink version number could not be determined.
Action:
Contact USDATA FactoryLink support.
This product may be installed only on Windows NT or Windows 2000. The
installation will be aborted.
Cause:
The system on which the user is attempting to install FactoryLink is not
Windows NT 4.0 or Windows NT 2000.
Action:
FactoryLink may be installed only on a system running Windows NT 4.0
or Windows NT 2000.
This program requires VGA resolution of 1024 x 768 or better
Cause:
The display resolution is set to values smaller than either 1024 pixels
horizontally or 768 pixels vertically, or both.
Action:
Set display resolution at 1024 x 768 or better.
Unable to create or display the License Configuration dialog box.
The installation will be aborted.
Cause:
The resource containing the License Configuration dialog has been
corrupted or is missing.
Action:
Contact USDATA FactoryLink support.
Unable to create or display the Show Document dialog box.
The installation will be aborted.
Cause:
The resource containing the Show Document dialog has been corrupted or
is missing.
Action:
Contact USDATA FactoryLink support.
FactoryLink / Installation Guide / 101
•
ERROR MESSAGES
•
•
•
102 / FactoryLink / Installation Guide
•
•
•
•
Appendix A
Installing Microsoft SQL
Server 7.0
USDATA provides Microsoft SQL Server 7.0 and Service Pack 2 (SP2) on CD 3 in the
standard FactoryLink package. Please note that SP2 is in two parts: Database Components and
OLAP Services Components. FactoryLink requires the installation of Database Components.
The minimum requirement for Windows 2000 Server is Microsoft SQL Server 7.0.
For foreign language considerations and for loading with Windows NT, you must load the
proper code-page and language support from the Custom Install option.
Perform the following steps to install Microsoft SQL Server 7.0:
1 Insert the Microsoft SQL 7.0 CD into the CD-ROM drive.
1 Read the Release Notes, especially if a previous 6.5 installation exists.
2 Click Install SQL Server 7.0 Components.
3 In the Install SQL Server 7.0 Components dialog box, click Database Server - Standard
Edition.
Note: You can also install the Desktop Edition.
FactoryLink / Installation Guide / 103
•
INSTALLING MICROSOFT SQL SERVER 7.0
•
•
•
4 In the Select Install Method dialog box, click Local Install and click Next (see Figure 8-1).
Figure 8-1 Select Install Method Dialog Box
5 In the Welcome dialog box, click Next (see Figure 8-2).
Figure 8-2 Welcome Dialog Box.
104 / FactoryLink / Installation Guide
INSTALLING MICROSOFT SQL SERVER 7.0
6 In the Software License Agreement dialog box, scroll down to read the Licensing Agreement
(see Figure 8-3). Click Yes.
Figure 8-3 Software License Agreement Dialog Box
7 In the User Information dialog box, enter Name, Company (optional), and click Next (see
Figure 8-4).
Figure 8-4 . User Information Dialog Box
FactoryLink / Installation Guide / 105
•
INSTALLING MICROSOFT SQL SERVER 7.0
•
•
•
8 In the Setup dialog box, enter the CD Key: 325-4199113 (see Figure 8-5). Click OK.
Figure 8-5 Setup Dialog Box
9 In the next Setup dialog box, the Product ID appears (see Figure 8-6). Click OK.
Figure 8-6 Setup Dialog Box
106 / FactoryLink / Installation Guide
INSTALLING MICROSOFT SQL SERVER 7.0
10 In the Setup Type dialog box, select Typical and click Next (see Figure 8-7).
Figure 8-7 Setup Type Dialog Box.
FactoryLink / Installation Guide / 107
•
INSTALLING MICROSOFT SQL SERVER 7.0
•
•
•
11 In the Services Accounts dialog box, select Use the Same Account for Each Service (see
Figure 8-8). Under Service Settings, select Use a Domain User Account. Type the
Username, Password, and Domain. Click Next.
Figure 8-8 Services Accounts Dialog Box
12 In the Start Copying Files dialog box, click Next (see Figure 8-9).
Figure 8-9 Start Copying Files Dialog Box
108 / FactoryLink / Installation Guide
INSTALLING MICROSOFT SQL SERVER 7.0
13 In the Choose Licensing Mode dialog box, select Per Server and click Add Licenses (see
Figure 8-10). Click Continue.
Figure 8-10 Choose Licensing Mode Dialog Box
14 14 In the New Client Access License dialog box, enter the number of purchased FactoryLink
7.0 Client Access Licenses (CALs) and click OK (see Figure 8-11).
Figure 8-11 New Client Access License Dialog Box
FactoryLink / Installation Guide / 109
•
INSTALLING MICROSOFT SQL SERVER 7.0
•
•
•
15 In the Per Server Licensing dialog box, select I agree that and click OK (see Figure 8-12).
Figure 8-12 Per Server Licensing Dialog Box
16 In the Choose licensing Mode dialog box, click Continue.
17 In the Setup Complete dialog box, click Finish to complete the installation (see Figure 8-13).
Figure 8-13 Setup Complete Dialog Box
110 / FactoryLink / Installation Guide
INSTALLING MICROSOFT SQL SERVER 7.0
18 Reboot the computer.
19 Execute the installation of the SQL Server, Service Pack 2, from the Service Pack 2 directory
of CD 3.
FactoryLink / Installation Guide / 111
•
INSTALLING MICROSOFT SQL SERVER 7.0
•
•
•
112 / FactoryLink / Installation Guide
Index
A
I
Authorizing FactoryLink software 75
Installation procedure 11, 31
Installation requirements 7
C
Client and Server CD 9
D
DCOM security setup 61
DCOM configuration values 50, 76
DCOMCNFG.EXE 75
DI/VAP CD 9
L
License agreement 15
Licensing Utility dialog box 27
license manager node name or IP address 27
TCP Connection Port 28
M
Error messages 95
Microsoft SQL Server CD 9
Microsoft system files 7
Microsoft Windows NT cross-domain issue 83
F
O
FactoryLink 7.0 installation 11, 31, 39
FactoryLink Licensing
license utility 86
FactoryLink licensing
demo mode 90
Grace Period 89
license utility
NT service 89
FLOCX 50, 72
Obtaining the authorization code 52
Obtaining the registration code 50
E
H
Hardware and software requirements 7
R
Reinstalling and Reauthorizing FactoryLink 70
S
Select FactoryLink components
FactoryLink components table 20
U
Uninstalling FactoryLink 61
FactoryLink / Installation Guide / 113