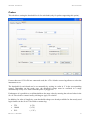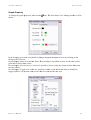
1
Active Technologies S.r.l.
www.activetechnologies.it
AT-LA500
USB Logic Analyzer
USER MANUAL
RELEASE 3.3 – MAY 2009
1
AT-LA500 – USER MANUAL
CONTENTS
Contents
ACTIVE TECHNOLOGIES S.R.L. ............................................................................................................................... 1
USB LOGIC ANALYZER ............................................................................................................................................... 1
INTRODUCTION ............................................................................................................................................................ 5
OVERVIEW ...................................................................................................................................................................... 5
OPERATING PRINCIPLES .................................................................................................................................................. 5
GETTING STARTED ...................................................................................................................................................... 6
HARDWARE REQUIREMENTS ........................................................................................................................................... 6
Minimum system requirements .................................................................................................................................. 6
Suggested requirements ............................................................................................................................................ 6
INSTRUMENT DESCRIPTION ............................................................................................................................................. 7
PROBES DESCRIPTION ..................................................................................................................................................... 9
INSTRUMENT DISCONNECTION ...................................................................................................................................... 10
PROBE CONNECTION ..................................................................................................................................................... 10
SOFTWARE LOADING .................................................................................................................................................... 11
GUIDE TO THE FIRST ACQUISITION ................................................................................................................................ 12
Probe connection .................................................................................................................................................... 12
Software loading ..................................................................................................................................................... 12
Create a Workspace ................................................................................................................................................ 12
AT-LA500 SOFTWARE ................................................................................................................................................ 16
MENU BAR .................................................................................................................................................................... 17
File .......................................................................................................................................................................... 17
View......................................................................................................................................................................... 17
Tools ........................................................................................................................................................................ 17
Window ................................................................................................................................................................... 17
Help ......................................................................................................................................................................... 17
STATUS BAR ................................................................................................................................................................. 17
TOOL BAR ..................................................................................................................................................................... 18
SOLUTION EXPLORER ................................................................................................................................................... 19
SIGNAL DEFINITION ...................................................................................................................................................... 19
Adding a signal ....................................................................................................................................................... 20
Adding a bus............................................................................................................................................................ 20
Removing a signal or a bus ..................................................................................................................................... 20
Editing a signal or bus name................................................................................................................................... 20
SETTINGS ...................................................................................................................................................................... 20
SAMPLING..................................................................................................................................................................... 20
Normal Timing Analysis .......................................................................................................................................... 21
State Analysis .......................................................................................................................................................... 22
NORMAL AND STATE ANALYSIS TRIGGER .................................................................................................................... 24
Trigger Levels ......................................................................................................................................................... 24
Edges and Levels ..................................................................................................................................................... 25
Conditions on edges ................................................................................................................................................ 25
Conditions on logic levels ....................................................................................................................................... 25
Relationship between trigger conditions ................................................................................................................. 26
Pretrigger, PretriggerHS and DelayHS .................................................................................................................. 26
I2C TRIGGER ................................................................................................................................................................. 27
Address .................................................................................................................................................................... 27
Address&Data ......................................................................................................................................................... 29
Pretrigger ................................................................................................................................................................ 30
SPI/µWIRE TRIGGER ..................................................................................................................................................... 31
SPI Trigger Options ................................................................................................................................................ 32
Pretrigger ................................................................................................................................................................ 32
UART/RS232 TRIGGER................................................................................................................................................ 33
UART Trigger Options ............................................................................................................................................ 34
Pretrigger ................................................................................................................................................................ 34
RELEASE 3.3 – MAY 2009
3
AT-LA500 – USER MANUAL
CONTENTS
PROBES ......................................................................................................................................................................... 35
DATA ACQUISITION ................................................................................................................................................... 37
CHANNEL STATUS ........................................................................................................................................................ 37
Signal Definition Values ......................................................................................................................................... 37
Pod Status ............................................................................................................................................................... 37
START A DATA ACQUISITION ......................................................................................................................................... 38
STOPPING THE ACQUISITION ......................................................................................................................................... 38
TIPS FOR A GOOD ACQUISITION ..................................................................................................................................... 38
DATA VISUALIZATION.............................................................................................................................................. 40
MIXED SIGNAL DISPLAY MODE .................................................................................................................................... 40
Analog-Digital Delay Alignement window.............................................................................................................. 40
WAVEFORM VIEW ........................................................................................................................................................ 41
Create a Waveform View window ........................................................................................................................... 41
Zoom ....................................................................................................................................................................... 43
Graph Property ....................................................................................................................................................... 44
Cursors .................................................................................................................................................................... 45
Go To a Selected Target .......................................................................................................................................... 46
Search ..................................................................................................................................................................... 47
Serial Protocol Interpreter ...................................................................................................................................... 49
STATE LISTING ............................................................................................................................................................. 50
Create a State Listing window ................................................................................................................................ 50
Cursors .................................................................................................................................................................... 51
Browse the State Listing window and export data .................................................................................................. 52
Search ..................................................................................................................................................................... 53
Serial Protocol Interpreter ...................................................................................................................................... 54
AT-XSS EXPANSION BUS ........................................................................................................................................... 54
RELEASE 3.3 – MAY 2009
4
AT-LA500 – USER MANUAL
INTRODUCTION
Introduction
Overview
AT-LA is an instrument able to acquire digital data through 36 channels, divided in 4 banks of 9
channels each and to visualize their time behavior thanks to the dedicated software.
AT-LA is available in different configurations, depending on the maximum available memory
(varying from 2M to 4M samples).
AT-LA is connected to the system under test by means of probes with different electrical
characteristics, depending on the signals to be acquired. Each probe supports 18 channels, divided
in two banks of 9 channels each. Each probe is hot pluggable and is automatically recognized. Four
independent and programmable thresholds are available (one for each bank of 9 channels) and used
by active probes to discriminate between low and high levels.
Data acquisition starts when a triggering event is detected by the instrument. The trigger can be
configured by the user by selecting the suitable conditions on signal edges or on the input signal
levels. Furthermore, it is possible to generate internally a trigger event so that data acquisition is
independent of applied signals and it is performed automatically (free acquisition) or enabled by the
user (manual acquisition).
AT-LA can also trigger on events occurring on many serial protocols (i.e. I2C, SPI, RS232) and
then analyze the packets of data transferred.
Once data acquisition is terminated, data are transferred to the PC through a USB 2.0 or a USB 1.1
connection and then visualized as waveforms or values.
AT-LA can sample input signals by using an internal clock signal (Time Analysis), whose
frequency can be reduced on the basis of the signal to be acquired, or it can synchronize signal
sampling to a signal clock provided by the system under test (State Analysis).
Operating principles
Digital signals acquisition means: i) to sample input signals, ii) to convert this values in logic values
(0 and 1), iii) to organize these values in a set of waveforms.
To establish the logic value of a sampled signal, it is necessary to compare the input value to a
reference voltage, called threshold, that can assume a fixed value or can be varied depending on the
used probe. If the input value is greater then the threshold, it will be converted to a high logic state
(1), otherwise it will be converted to a low logic state (0).
RELEASE 3.3 – MAY 2009
5
AT-LA500 – USER MANUAL
INTRODUCTION
To detect the trigger event starting data acquisition the signal status must be monitored
continuously. The operating principle of a Logic Analyzer can then be schematically represented as:
Note: This manual refers to a single AT Logic Analyzer. However, since up to 8 AT-LA can be
connected together to increase the number of examined channels up to 288.
Getting started
Hardware requirements
Minimum system requirements
•
•
•
•
•
•
Microsoft™ Windows® 2000 or XP operating system;
Pentium® III processor;
128 MBytes RAM;
100 MBytes available on hard disk for software installation;
800x600 video resolution;
USB 1.1 connection.
Suggested requirements
•
•
•
•
•
Microsoft™ Windows® XP operating system;
Pentium® IV processor;
512 MBytes RAM;
1024x768 video resolution;
USB 2.0 connection.
RELEASE 3.3 – MAY 2009
6
AT-LA500 – USER MANUAL
AT-LA NAVIGATOR
Instrument description
AT-LA500
Ch. 35 - 18
5 0 0 MS/s USB Logic A na ly zer
Ch. 17 - 0
Status
Pod B
Pod A
AT-LA500 – Front view
O
I
TRIGGER OUT
AT EXPANSION BUS
TRIGGER IN
USB
POWER
DC IN
AT-LA500 – Rear view
RELEASE 3.3 – MAY 2009
7
AT-LA500 – USER MANUAL
•
•
•
•
•
•
•
AT-LA NAVIGATOR
Pods A and B: probe connectors;
Power led: it indicates whether the instrument is ON;
Status led: it indicates the instrument status as further specified;
Power connector: connector for the external power supply
Power-on switch;
USB connector;
AT expansion bus connector: connector for the AT-expansion bus, a dedicated cable used
to connect several instruments and also to connect an external device, like an oscilloscope,
(with optionally AT-scope card);
Status Led
The status led may be: ON, OFF, or blinking and it indicates different operating conditions.
The status led is ON when:
• The instrument is ON, it is connected to the PC and its drivers have been correctly installed.
The status led is OFF when:
• The instrument is switched on but is not connected to the PC;
• The instrument is switched on and it is connected to the PC but its drivers have not been
installed;
• The instrument has been disconnected following the procedure described in the Remove an
AT Logic Analyzer paragraph.
The status led is blinking when:
• The instrument is reconfiguring;
RELEASE 3.3 – MAY 2009
8
AT-LA500 – USER MANUAL
AT-LA NAVIGATOR
Probes description
Probes have to be connected to the testing board by means of opportune connectors. Regarding the
probes connected to the Pod A the correspondence between the pins and the number of channels is
reported in the following tables:
Bank 0 (Ch. 8..0):
Ch.8
Ch.7
Ch.6
Ch.5
Ch.4
Ch.3
Ch.2
Ch.1
Ch.0
n.c.
GND
n.c.
GND
n.c.
GND
n.c.
GND
n.c.
n.c.
n.c.
Bank 1 (Ch 17..9):
Ch.17 Ch.16 Ch.15 Ch.14 Ch.13 Ch.12
n.c.
GND
n.c.
GND
n.c.
Ch.11
Ch.10
Ch.9
n.c.
GND
n.c.
GND
n.c.
n.c.
Regarding the probes connected to the Pod B the correspondence between the pins and the number
of channels is reported in the following tables:
Bank 2 (Ch. 26..18):
Ch.26 Ch.25 Ch.24 Ch.23 Ch.22 Ch.21
n.c.
GND
n.c.
GND
n.c.
Ch.20
Ch.19
Ch.18
n.c.
GND
n.c.
Ch.29
Ch.28
Ch.27
n.c.
GND
n.c.
GND
n.c.
n.c.
Bank 3 (Ch. 35..27):
Ch.35 Ch.34 Ch.33 Ch.32 Ch.31 Ch.30
n.c.
RELEASE 3.3 – MAY 2009
GND
n.c.
GND
n.c.
GND
n.c.
n.c.
9
AT-LA500 – USER
S
MANUAL
AT
T-LA NAVIGATOR
R
The correspondence between
b
the channels annd the pod cables
c
colouurs is the foollowing:
Ch
hannels
Colours
Black
Brown
Red
Orange
Yellow
Green
Blue
Purple
Gray
Pod A
P
Bank 0
Bank 1
0
9
1
10
2
11
3
12
4
13
5
14
6
15
7
16
8
17
Pod B
Bank 2 Bank 3
18
27
19
28
20
29
21
30
22
31
23
32
24
33
25
34
26
35
All white cables
c
are ground connnected.
Instrum
ment disconnectio
on
Before discconnecting or switchinng OFF an AT-LA500,
A
, it must be disabled byy clicking with
w the leftt
mouse buttton on the
icon onn the appliccation bar and
a by seleccting “Safelly remove USB
U
Logicc
Analyzer”..
a instrumennt that has not
n been dissabled is sw
witched off or
o disconneected, its sof
oftware mayy
Note: If an
nott work propeerly.
c
on
Probe connectio
Data acquiisition requires at leastt one probe connected to the instrrument. Proobes can be plugged-inn
or removedd even whenn the instrum
ment is on and
a the softtware is undder executioon. Any time a probe iss
connected or removed, the softw
ware notifiees the even
nt and conssequently ennables or disables
d
thee
setup param
meters.
Note: Nevver remove a probe durring data accquisition: acquired daata may nott be coheren
nt.
m
of thhe provided connectorss, followingg
Probes muust be conneected to the system undder test by means
the correspponding enuumeration for
f signals and ground
ds. Signals present on a probe co
onnected too
Pod A corrrespond to channels
c
0..17, while those
t
presen
nt on a probbe connected to Pod B correspondd
to channelss 18..35
a electricaally conneccted. A wroong connecction may cause
c
shortt
Note: All ground coonnectors are
circcuits and daamage the system
sy
undeer test.
RELEASE 3.3 – MAY
M
2009
100
AT-LA500 – USER MANUAL
AT-LA NAVIGATOR
Software loading
Note: Before loading the AT-LA500 control software it is necessary that the instrument is switched
ON and connected to the PC and that the drivers have been correctly installed. If the Logic
Analyzer is switched OFF or if it is non connected to the PC, the software DEMO version
will be loaded.
Once the software has been loaded, the AT-LA Start Page window appears. At this point a new
project can be created, or an existing project can be opened. If available, the list of the recent
projects appears on the left of the main window. If an Internet connection is available, the Active
Technologies website news are shown in the Start Page.
RELEASE 3.3 – MAY 2009
11
AT-LA500 – USER
S
MANUAL
AT
T-LA NAVIGATOR
R
Guide to
o the firs
st acquis
sition
The proceddure requireed to perform
m a data acqquisition is here described step-byy-step.
Probe co
onnection
n
•
•
•
Connnect a probbe to Pod A;
A
Connnect channnel 0 of thee probe to a signal sou
urce of the system undder test (forr instance a
signnal clock) whose
w
amplitude does not
n exceed the
t probe limit;
Connnect the prrobe round to
t the signaal ground;
Software
e loading
•
•
Cheeck whether the instrum
ment is connnected to th
he PC and that
t is switcched ON. Drivers
D
mustt
havve been corrrectly installled;
Lauunch AT-LA
A software;
Create a Workspa
ace
•
Click on Creatte Workspacce on the Getting
G
Startted box on the
t left of thhe main win
ndow.
•
In the
t New Woorkspace wiindow, you can insert the
t desired name for thhe project, and
a the
foldder path whhere the acquuired and seettings data will be storred. Insert rrequired datta then
preess OK;
•
On the left of the
t main wiindow will appear
a
the project
p
tree column;
•
Douuble click on
o the Signaal Definitionn icon
•
Entter a name of
o a signal in
i the Bus or Signal Na
ame box, i.ee. CLOCK, tthen click on
o the
buttton to add it
i to the list of the signaals;
RELEASE 3.3 – MAY
M
2009
: the Signal Definition
D
w
window willl appear;
122
AT-LA500 – USER
S
MANUAL
AT
T-LA NAVIGATOR
R
•
Douuble click the Ch0 roow on the channel lisst availablee on the rigght. This will
w set thee
corrrespondencce of the chaannel 0 of the
t AT-LA5
500 with thhe signal “C
CLOCK” defined at thee
preevious pointt. Click OK to close thee Signals Deefinition wiindow.
•
Douuble click on
o the Settinng icon
RELEASE 3.3 – MAY
M
2009
: the Setting
gs window will
w appear;
133
AT-LA500 – USER MANUAL
•
AT-LA NAVIGATOR
In the Sampling tab, choose the better Sample Rate (i.e. 5x the frequency of the signal to
acquire);
RELEASE 3.3 – MAY 2009
14
AT-LA500 – USER
S
MANUAL
AT
T-LA NAVIGATOR
R
•
t Triggeriing tab, clicck on CondditionA bran
nch of the Level0
L
tree;; click on th
he Ch0 row
w
In the
(it now
n
containns also the signal nam
me: CLOCK
K); click on the “both eedges” icon
. Now
w
the condition A of the triggger level 0 is verified on every evvent occurriing on the channel
c
0 off
the AT-LA5000;
•
In the
t Probes tab you cann set the thhreshold of the logic leevels detectted by the AT-LA500.
A
.
Thiis options iss available only
o
for actiive probes. Press OK too close the w
window;
•
Preess the Starrt button
on the tooolbar to staart the acquuisition. Att the first edge
e
on thee
chaannel 0, the instrumentt will trigger, then a Signal Selectiion window
w will appeaar. Click onn
the Add All button
, then clicck OK. No
ow you cann examine acquired data
d
on thee
Waaveform View. Click on the Go to
buttton on the toolbar to center the Waveform
m
winndow on thee trigger eveent.
RELEASE 3.3 – MAY
M
2009
155
AT-LA500 – USER MANUAL
AT-LA NAVIGATOR
AT-LA500 Software
AT-LA Software allows controlling all settings related to the instrument and to the open acquisition
windows. Closing the AT-LA Navigator means to exit from the instrument control program.
RELEASE 3.3 – MAY 2009
16
AT-LA500 – USER MANUAL
AT-LA NAVIGATOR
Menu bar
The following menu are available on the menu bar:
File
•
•
•
•
•
•
•
•
•
•
•
•
New Workspace: it allows creating a new workspace, by specifying its name and its work
directory;
Open Workspace…: it allows opening an already existing project;
Open Settings…: it allows loading settings already saved;
Open Signal Definition… : it allows loading signal definitions already saved;
Save Settings As…: it allows saving current settings with another name;
Save Context: it allows saving current project;
Save Acqisition As...: it allows saving current acquisition data with another name
Save Signal Definition As…: it allows saving current signal definition with another name;
Import Acquisition…: it allows loading acquisitions data previously saved;
Close Current Window: Closes the window currently selected;
Close All Window: Closes all the windows in the project;
Exit: it allows closing the program.
View
•
•
AT-LA Solution Explorer: it shows the project explorer tree;
AT-LA Start Page: it shows the Start Page, with the recent projects list.
Tools
•
•
•
Pod Status…: it opens the Pod Status Reader window, that shows the current logic status of
all the inputs;
Options: it allows changing the default projects folder;
Analog Delay...: it opens the Analog Delay window, that allows aligning correctly digital
and analog data in the Mixed Signal Display Mode (see Analog-Digital Delay Alignement
window chapter for details)
Window
•
Lists the name of the project windows and allow showing the one which is selected.
Help
•
About…: it shows the information related to the current software release.
Status bar
The status bar on the bottom side of the main window shows the status of the AT-LA500. It also
notify the insertion or removal of a probe.
RELEASE 3.3 – MAY 2009
17
AT-LA500 – USER
S
MANUAL
AT
T-LA NAVIGATOR
R
Tool barr
Following controls annd indicatorss are availabble on the main
m tool baar:
It allows creaating a new project;
p
ning an exissting projectt;
It allows open
It allows savin
ng the curreent project;
It allows savin
ng the curreent acquisitiion: all paraameters
wiill be stored
d and the savved acquisittion will be added to
thee Solution Explorer
E
treee;
It shows the Solution
S
Expplorer;
It allows visu
ualizing the status of inpputs in real time;
It allows choo
osing betweeen Single oor Continuou
us
acquisitions;
It starts the daata acquisitiion;
It stops the daata acquisitiion;
It forces the trrigger eventt;
It shows the current
c
statuus of the acqquisition.
i selected, the AT-LA5
500 will peerform only one acquissition whenn
Note: Wheen Single accquisition is
the
button is pressed; when
w
Conttinuous acquisition iss selected, the AT-L
LA500 willl
a
every acquisition until the
automaticaally restart after
RELEASE 3.3 – MAY
M
2009
button iss pressed.
188
AT-LA500 – USER MANUAL
AT-LA NAVIGATOR
Solution Explorer
This area contains a list of shortcuts to open the Waveform View, the State Listing, the Settings
window and the Signal Definition window. It also contains user saved acquisitions. By double
clicking with the left mouse button on the Waveform View icon, on the State Listing icon, on the
Settings icon or on the Signal Definition icon, the corresponding window will be opened or created.
Signal Definition
This panel allows defining a list of signals or bus and choosing their correspondence to the
channels of the AT-LA500. Only the signals defined in this panel can be viewed in the Waveform
View or State Listing windows. The right table shows all the AT-LA500 channels and the colors of
the correspondent wires.
RELEASE 3.3 – MAY 2009
19
AT-LA500 – USER
S
MANUAL
AT
T-LA NAVIGATOR
R
Note: Wheen a signal protocol
p
triigger is seleected, their standard siignals are aautomaticallly added too
2
the projectts (i.e. for thhe I C the SCL
S and SDA
A signals).
Adding a signal
To add a signal
s
to thee list, write the desiredd name in th
he Bus or Signal
S
Namee box and click
c
on ,
then doublle click on the desiredd channel roow of the riight table too set the coorresponden
nce betweenn
signal nam
me and channnel. You caan also selecct the desireed channel row
r and clicck on <
. Both thesee
methods caan be used also
a to channge any prevviously defiined corresppondence.
Adding a bus
To add a bus
b to the lisst, write thee desired nam
me in the Bus
B or Signaal Name boxx and click on , thenn
select the rows
r
of thee channels that
t
will form the bus in the righht table. Cliick on <
to add alll
selected siggnals to thee bus.
Note: To chose
c
more than one chhannel keepp pressed th
he Ctrl key and
a click onn the desired channels.
To chose a group of consecutivee channels, click on th
he first one,, keep presssed the Shifft key, thenn
click on thee last one. All
A the channnels betweeen the first and
a the lastt will be seleected.
Removin
ng a signa
al or a bu
us
To removee a signal orr a bus, select it then cliick on
.
Editing a signal or
o bus name
To change the name of
o a signal, select it, chhange its naame in the Bus
B or Signaal Name bo
ox and clickk
on .
Setting
gs
The Settin
ngs panel alllows configguring AT-L
LA500 for a correct accquisition. IIt is divided
d in severall
tabs: Samppling, Trigggering, and Probes.
P
Thee Sampling tab and Triiggering tabb change deepending onn
the selectedd Samplingg Method.
Samplin
ng
Within thee Sampling tab it is poossible to seet the clock
k source, thee sampling method, th
he samplingg
frequency and the AT
T-XSS Bus master
m
if avvailable. Furrthermore, the acquisitiion time is shown.
s
Five samplling modes are available within thhe Sampling
g Method meenu ring:
• Norrmal Timinng
• Staate Analysiss
• I2C
• SPII/µWire
• UA
ART/RS232
RELEASE 3.3 – MAY
M
2009
200
AT-LA500 – USER MANUAL
AT-LA NAVIGATOR
If more than one instrument are connected together by means of the AT-XSS Expansion Bus, the
user can select the instrument where to set the trigger by using the menu ring AT-XSS Bus Master.
Using the radio buttons Logic Analyzer Trigger Master and Oscilloscope Trigger Master it’s
possible to select the trigger signal source, if an oscilloscope is present and connected; all the ATLA500 instruments connected together, can be triggered by the oscilloscope.
Note: The trigger event will be always generated evaluating only one of the connected instruments.
For a better acquisition is suggested to set the trigger settings on a middle positioned Logic
Analyzer.
Normal Timing Analysis
When this sampling mode is selected, data acquisition is performed by AT-LA500 by using an
internal clock. The sampling frequency can be selected by means of the Sample Rate [S/s] menu
ring. In addition, when configured in Normal Timing Analysis, the AT-LA500 also acquires data at
1.5GS/s. This is useful to detect glitches or skew between signals. These data are identified with the
“HS” (High Speed) prefix. The High Speed sample rate is fixed, and the correspondent memory
depth is 1kSample for each channel. However, it is possible to set a pretrigger and a delay specific
for the HS acquisition data.
Note: For a correct acquisition, the sampling frequency should be at least 4 or 5 times higher than
the maximum frequency of the signals to be acquired.
RELEASE 3.3 – MAY 2009
21
AT-LA500 – USER MANUAL
AT-LA NAVIGATOR
State Analysis
When this sampling mode is selected, data acquisition is triggered by a specific event. If a clock
signal is present in the system under test, this sampling mode allows synchronizing the data
acquired by AT-LA500.
In the Expected Clock Frequency [Hz] control the clock frequency applied to the instrument can be
entered. This feature allows dimensioning correctly the time bars in the visualization windows.
Signals determining the clocks are divided in 4 groups of 4 signals, one for each bank. The division
is the following:
Clock
0
1
2
3
Channel
0, 9, 18, 27
1, 10, 19, 28
2, 11, 20, 29
3, 12, 21, 30
For each clock it is possible to select one channel among four available. This feature allows using
all the programmable thresholds with the maximum flexibility.
RELEASE 3.3 – MAY 2009
22
AT-LA500 – USER
S
MANUAL
AT
T-LA NAVIGATOR
R
For each cllock it is poossible to seelect the eveent triggerin
ng data acquuisition. Thee possible choices are:
Don’t caree (the signall will be ignnored);
High logicc value;
Low logic value;
Rising edgge;
Falling edgge;
Any edge.
Each sampple will be acquired
a
whhen at least one
o conditio
on is verifieed on the signal edges and at leastt
one condittion on the signal leveels. The Ressulting Clock Equationn indicator summarizees the logicc
condition that
t has beeen set.
Note: At leeast one conndition on an
a edge of at least one clock
c
must be
b set.
Note: Befo
fore commuuting to an external clock,
c
the instrument
i
requires ann initializattion phase.
Samples accquired durring this phaase are meaaningless.
RELEASE 3.3 – MAY
M
2009
233
AT-LA500 – USER
S
MANUAL
AT
T-LA NAVIGATOR
R
Normal and Statte Analys
sis Trigg
ger
All triggerr levels and conditions necessariess for data accquisition can be set inn this tab. The
T controlss
and the nam
me of this taab changes depending on the Sam
mpling Method selected.
Trigger Levels
L
AT-LA5000 permits too edit up to 31 trigger levels,
l
whicch are represented withh the symbo
ol
in thee
tree positiooned on the left side off this tab.
To add a trrigger level click on : a new triggger level will
w be addeed at the endd of the list.
To removee a trigger leevel click onn
: this command
c
will
w remove the last leveel from the list.
To clear alll the triggerr settings annd to get thee default trig
gger conditiions click oon .
Each trigger level hass 2 trigger condition
c
“A
A” and “B””. Selectingg one of the conditions A or B onn
the tree, thhe corresponndent settinngs pattern will be auttomatically updated onn controls/in
ndicators att
the right siide of this taab. For eachh condition the user, by
y using the menu ring A
Action, can
n also set upp
the action to
t do when the conditioon appears. The possib
ble actions are:
a
•
•
None
Trigger
•
Jump to Leevel n
Thhe conditionn happening
g will be iggnored (Nevver Trigger));
Thhe conditionn happening
g leads to a Trigger eveent;
Thhe conditionn happening
g leads to a jump at triggger Level n,
n
w
where
n is thhe number of
o one of thee present triggger levels..
Note: Wheenever the acquisition
a
s
starts
the Loogic Analyzer waits forr the conditiions at Leveel0.
RELEASE 3.3 – MAY
M
2009
244
AT-LA500 – USER
S
MANUAL
AT
T-LA NAVIGATOR
R
Edges and Levels
s
In order too set the conndition “A”” or “B” thee user must properly seet the state of the Logiic Analyzerr
channels. Each
E
channeel state can assume thee following attribute:
.
Doon’t care (thhe signal wiill be ignoreed);
Hiigh logic levvel;
Loow logic levvel;
Riising edge;
Faalling edge;
Anny edge;
Va
Seets the valuee entered inn the near coontrol box to
o a bus.
To set it on
o a channel, first selecct the condiition A or B of the desired level, then click on the row
w
corresponddent to the channel
c
to set in the tabble on the riight side of the window
w (note that the columnn
Signal Nam
mes containns the user defined
d
nam
mes for the signals to acquire).
a
Too set a cond
dition, clickk
on the desiired button on the top. If more thaan one signaal are selectted, the sam
me level or edge
e
settingg
will be appplied to all selected
s
siggnals. Also, it is possib
ble to set a level settingg to all seleccted signalss
by writing its value inn hexadecim
mal format thhen clicking
g the Va buttton.
Note: Som
me channels can’t also be availabble if they are
a used as Clock sourrces on Sta
ate Analysiss
mode.
Conditio
ons on ed
dges
For each signal it is possible
p
to indicate
i
whhether the trrigger condiition must bbe detected on a risingg
edge, on a falling edgge or for anny of the tw
wo edges. When
W
the triigger condittions have been
b
set onn
edges of several
s
signnals, the triggger event will be dettermined byy the occurrrence of att least onee
condition. If no triggeer conditionns on edgess have been
n set for anyy signals, trrigger eventts on edgess
will never occur.
Conditio
ons on log
gic levels
s
For each siignal it is possible to inndicate wheether the trigger condittion must bee detected on
o a high orr
a low logicc level. Whhen the triggger conditioons have beeen set on loogic levels of several signals, thee
trigger eveent will be determined
d
b the occuurrence of alll conditionss simultaneoously.
by
If no triggeer conditionns on logic levels havee been set for
fo any signal, the triggger conditio
ons on logicc
levels are always
a
conssidered as verified.
v
The triggeer conditionn set on loggic levels iss useful wh
hen the triggger event m
must be dettected for a
specific paattern.
By using thhe Level Coondition: meenu ring it is
i possible to
t select am
mong several conditionss for triggerr
events on logic
l
levels.
•
Triggerr when EQU
UAL:
RELEASE 3.3 – MAY
M
2009
The triggger event occurs whhen the staate of the evaluated
signals is
i equal to the specifiedd pattern;
255
AT-LA500 – USER MANUAL
AT-LA NAVIGATOR
•
Trigger when NOT EQUAL:
The trigger event occurs when the state of the evaluated
signals is different from the specified pattern;
•
Trigger when CHANGED:
The signals selected for a trigger event on logic levels are
examined when data acquisition starts. These sampled values
will constitute the reference pattern. The trigger event occurs
when the state of the selected signals is different from the
reference pattern.
The conditions chosen by the user on logic levels are ignored.
AT-LA500 will simply use the information related to which
channels are to be examined for trigger detection.
Relationship between trigger conditions
A relationship between trigger conditions on edges and trigger conditions on logic levels can be set
by the user, by using the Trigger condition menu ring. Several options are available:
•
Edge OR Level:
A trigger condition occurs when one between an edge condition or a
logic level condition is detected;
•
Edge AND Level:
•
Edge BEFORE Level:
•
Edge AFTER Level:
•
ALWAYS:
•
NEVER:
A trigger condition occurs when an edge condition and a logic level
condition are satisfied simultaneously;
A trigger condition occurs when an edge condition has been detected
at least once before that on logic levels;
A trigger condition occurs when an edge condition has been detected
at least once after that on logic levels;
A trigger condition occurs automatically when data acquisition starts.
Any setting on edges or on logic levels will be ignored;
Trigger is inhibited. Any setting on edges or on logic levels will be
ignored. A trigger event, however, can be activated manually during
data acquisition.
Note: The trigger event is detected in an asynchronous way, independently of the sampling
frequency. If this frequency is too low or an external clock is used, the trigger event, even if
correctly detected, may not be visualized in the Waveform or Data Windows.
Pretrigger, PretriggerHS and DelayHS
The Pretrigger control allows specifying the position in which the trigger event will be located with
respect to the AT-LA500 memory. If the most meaningful data must be sampled after the trigger
detection, low pretrigger percentage must be selected. On the contrary, if signal evolutions before
trigger event must be analyzed, a high pretrigger percentage is more suitable.
The High Speed data have a dedicated PretriggerHS control to set the trigger position respect to the
1kSample HS memory.
It is also possible to insert a programmable delay to shift the High Speed data acquisition to help to
focus the event to examine if this is far from the trigger instant.
Note: The PretriggerHS can only assume values in the range 10% - 90%.
RELEASE 3.3 – MAY 2009
26
AT-LA500 – USER MANUAL
AT-LA NAVIGATOR
I2C Trigger
In this mode, the AT-LA500 can trigger when a selected event occurs on a I2C (Inter Integrated
Circuit) bus. Furthermore, the acquired data are decoded and shown in the Waveform View and
State Listing windows.
To set up the AT-LA500 for an I2C acquisition, the following steps are required:
• Connect a Passive Probe or a High-Z Probe to the pod A. In this case you also have to
correctly set the threshold voltage in the Probes tab of the Settings window;
• Connect at least one grounded pin (white wires) to the ground of the board to test;
• Connect the Channel 0 (black wire) to the SDA line of the I2C bus to test;
• Connect the Channel 1 (brown wire) to the SCL line of the I2C bus to test.
Note: It is not possible to use a Low-C Probe to analyze an I2C bus: this could prevent the system
under test to work properly.
The I2C trigger has 2 different options: Address and Address&Data. These options are selectable by
using the I2C Trigger Type control.
Address
In this mode, the AT-LA500 can trigger when the I2C bus addresses one or more peripheral.
In the Trigger On control, it is possible to choose which operation has to be triggered. The available
options are:
•
•
•
•
•
•
•
•
•
Read or Write: trigger on every operation on the bus;
Read: trigger when the bus is performing a read operation, ignoring the ACK bit;
Write: trigger when the bus is performing a write operation, ignoring the ACK bit;
ACK R/W: trigger on every acknowledged operation on the bus;
ACK Read: trigger on an acknowledged read operation on the bus;
ACK Write: trigger on an acknowledged write operation on the bus;
NACK R/W: trigger on every not acknowledged operation on the bus;
NACK Read: trigger on a not acknowledged read operation on the bus;
NACK Write: trigger on a not acknowledged write operation on the bus;
RELEASE 3.3 – MAY 2009
27
AT-LA500 – USER
S
MANUAL
AT
T-LA NAVIGATOR
R
In the Adddress Value control it is possible to
t insert thee 7-bit binarry value of the addresss to trigger,,
leaving X on the donn’t care bits.. Furthermoore, it is possible to chhoose if thee inserted vaalue shouldd
n match thhe one to triggger on.
match or not
It is possibble to add other
o
addresss conditionns (up to 15
5) in the Addditional Coonditions frrame on thee
bottom sidde of the winndow. The controls
c
havve the same meaning of the ones juust describeed.
To add a coondition, filll the controols on the Additional Conditions
C
fr
frame,
then cclick on .
To removee a conditionn, select thee corresponddent row in the table, thhen click onn .
To edit a condition, double cliick on the correspond
dent row inn the table,, modify th
he requiredd
parameterss, then clickk on
to apply
a
them..
C
Operator ccontrol is enabled,
e
byy
When morre than onee address condition arre set, the Conditions
which is poossible to chhoose betweeen:
• Seq
quence: thee AT-LA5000 triggers when
w
all the entered adddress condittions are verrified in thee
speecified orderr;
• OR
R: the AT-L
LA500 triggeers when att least one of
o the entereed address cconditions iss verified.
RELEASE 3.3 – MAY
M
2009
288
AT-LA500 – USER
S
MANUAL
AT
T-LA NAVIGATOR
R
Address
s&Data
When this option is selected,
s
thhe AT-LA5000 triggers when a onn the bus iss detected the
t selectedd
address folllowed by one
o or more data bytes.
The controols related to
t the addrress have thhe same meeaning of thhe Address trigger typ
pe case justt
described.
To set the data, it is neecessary to fill the Datta Value con
ntrols by wrriting the 8--bit binary value
v
of thee
data byte to
t trigger onn, and chooose if this vaalue should
d match or not
n match thhe one deteected on thee
bus. Furtheermore, withh the And control, it is possible to choose betw
ween:
• AC
CK or NAC
CK: the acknnowledge biit is ignored
d;
• AC
CK: trigger on
o an acknoowledged data;
• NA
ACK: triggeer on a not acknowledg
a
ged data.
It is possibble to add other data conditions (up to 15) in the Addditional Coonditions fraame on thee
bottom sidde of the winndow. The controls
c
havve the same meaning of the ones juust describeed.
To add a coondition, filll the controols on the Additional Conditions
C
fr
frame,
then cclick on .
To removee a conditionn, select thee corresponddent row in the table, thhen click onn .
To edit a condition, double cliick on the correspond
dent row inn the table,, modify th
he requiredd
parameterss, then clickk on
to apply
a
them..
When morre than one data
d conditiion are set, the Conditiions Operattor control iis enabled, by
b which iss
possible too choose bettween:
RELEASE 3.3 – MAY
M
2009
299
AT-LA500 – USER MANUAL
•
•
AT-LA NAVIGATOR
Sequence: the AT-LA500 triggers when the address condition and all the entered data
conditions are verified in the specified order;
OR: the AT-LA500 triggers when the address condition and at least one of the entered data
conditions are verified.
Pretrigger
The Pretrigger control on the bottom side allows specifying the position in which the trigger event
will be located with respect to the AT-LA500 memory. If the most meaningful data must be
sampled after the trigger detection, low pretrigger percentage must be selected. On the contrary, if
signal evolutions before trigger event must be analyzed, a high pretrigger percentage is more
suitable.
RELEASE 3.3 – MAY 2009
30
AT-LA500 – USER MANUAL
AT-LA NAVIGATOR
SPI/µWire Trigger
In this mode, the AT-LA500 can trigger when a selected event occurs on a SPI (Serial Peripheral
Interface) or µWire bus. The AT-LA500 can trigger on SPI operations addressing up to 8 different
peripherals by monitoring the related SSn (Slave Select) signals. Furthermore, the acquired data are
decoded and shown in the Waveform View and State Listing windows.
The Protocol control allows to select between SPI and µWire protocol. When the µWire protocol is
selected, some controls are disabled. The following description refers to the more general SPI
protocol trigger settings options.
To set up the AT-LA500 for a SPI acquisition, the following steps are required:
• Connect a probe to the pod A of the AT-LA500;
• Connect at least one grounded pin (white wires) to the ground of the board to test;
• Connect the Channel 0 (black wire) to the SCLK line of the SPI bus to test.
• Connect the Channel 1 (brown wire) to the MOSI line of the SPI bus to test;
• Connect the Channel 2 (red wire) to the MISO line of the SPI bus to test.
• Optionally, connect Channels 3 to 10 to the SSn lines of the SPI peripherals of the board
under test;
RELEASE 3.3 – MAY 2009
31
AT-LA500 – USER
S
MANUAL
AT
T-LA NAVIGATOR
R
SPI Trigg
ger Optio
ons
The AT-L
LA500 can trigger on SPI eventss occurring on the MO
OSI or on the MISO lines. Thee
Trigger Onn control alllows to seleect between these two options.
o
SPI periphherals havee 2 configuuration bits to allow 4 working modes, deppending on
n the clockk
polarity (C
CPOL) and phase
p
(CPH
HA). The fouur mode aree:
•
•
•
•
L = 0; CPH
HA = 0;
Moode 0: CPOL
Moode 1: CPOL
L = 0; CPH
HA = 1;
Moode 2: CPOL
L = 1; CPH
HA = 0;
Moode 3: CPOL
L = 1; CPH
HA = 1;
The Clock Polarity annd Clock Phhase controlls allows to select betw
ween these m
modes.
Since every SPI perippheral has itts own SSn enable sign
nal, it is posssible to connnect these lines to thee
channels 3 to 10 of thhe AT-LA5000 and to select which
h ones should be evaluated during
g the triggerr
he ones thatt
detection. The Enableed Slave Seelect frame lists all thee SSn available signalss. Check th
have to be enabled. Foor example,, if the SSn11 and SSn2 box are cheecked, the A
AT-LA500 will triggerr
v
on the SPI peeripheral whose
w
SSn ssignal is co
onnected too
when the selected coondition is verified
channel 3 or on the one
o whose SSn
S signal is connecteed to channnel 4. If nonne of the SS
Sn boxes iss
select, all these
t
lines will
w be ignoored.
To set the data to triigger on, it is necessarry to fill th
he Data Vaalue controlls by writin
ng the 8-bitt
binary valuue of the daata byte, leavving X on thhe don’t carre bits, and choose if thhis value sh
hould matchh
or not matcch the one detected
d
on the bus.
It is possibble to add other data conditions (up to 15) in the Addditional Coonditions fraame on thee
bottom sidde of the winndow. The controls
c
havve the same meaning of the ones juust describeed.
To add a coondition, filll the controols on the Additional Conditions
C
fr
frame,
then cclick on .
To removee a conditionn, select thee corresponddent row in the table, thhen click onn .
To edit a condition, double cliick on the correspond
dent row inn the table,, modify th
he requiredd
parameterss, then clickk on
to apply
a
them..
d conditiion are set, the Conditiions Operattor control iis enabled, by
b which iss
When morre than one data
possible too choose bettween:
• Seq
quence: thee AT-LA5000 triggers when the address coondition andd all the en
ntered dataa
connditions are verified in the specifieed order;
• OR
R: the AT-L
LA500 trigggers when thhe address condition
c
annd at least oone of the entered
e
dataa
connditions are verified.
Pretrigge
er
The Pretrig
igger controol on the boottom side allows
a
speciifying the position
p
in w
which the trrigger eventt
will be located with respect to the AT-LA
A500 mem
mory. If thee most meaaningful data must bee
sampled affter the triggger detectioon, low preetrigger perccentage muust be selectted. On the contrary, iff
signal evoolutions beffore triggerr event must be analy
yzed, a higgh pretriggeer percentag
ge is moree
suitable.
RELEASE 3.3 – MAY
M
2009
322
AT-LA500 – USER MANUAL
AT-LA NAVIGATOR
UART/RS232 Trigger
In this mode, the AT-LA500 can trigger when a selected event occurs on a UART (Universal
Asynchronous Receiver and Transmitter) bus. Furthermore, the acquired data are decoded and
shown in the Waveform View and State Listing windows.
To set up the AT-LA500 for an UART acquisition, the following steps are required:
• Connect a High-Z Probe to the pod A. In this case you also have to correctly set the threshold
voltage in the Probes tab of the Settings window;
• Connect at least one grounded pin (white wires) to the ground of the board to test;
• Connect the Channel 0 (black wire) to the RxD line of the UART bus to test;
• Connect the Channel 1 (brown wire) to the TxD line of the UART bus to test.
Note: It is not possible to use a Low-C Probe or a Passive Probe to analyze a RS232 bus: this could
prevent the system under test to work properly and damage the probes.
RELEASE 3.3 – MAY 2009
33
AT-LA500 – USER
S
MANUAL
AT
T-LA NAVIGATOR
R
UART Trrigger Op
ptions
The AT-L
LA500 can trigger on UART eveents occurriing on the RxD or onn the TxD lines. Thee
Trigger Onn control alllows to seleect between these two options.
o
The Polariity control allows
a
to sellect the polaarity of the UART signnal to analyzze.
The Parityy control alloows to chooose the paritty bit type to
t trigger onn. The optioons are:
• None: use thiss option if thhe parity bitt is not present in the protocol;
g the triggerr detection;
• Don’t care: thhe parity bit will be ignnored during
• Eveen: trigger on
o data followed by evven parity biit;
• Od
dd: trigger on
o data folloowed by oddd parity bit;;
• Maark: trigger on data followed by a mark bit;
• Spaace: trigger on data folllowed by a space bit.
The Packeet Size contrrol selects the
t number of data bits for every transfer onn the bus. The
T range iss
from 5 bitss to 9 bits.
The Baud Rate controol represents the data rate
r of the UART
U
bus. The availabble values are
a 75, 150,,
1
2400, 4800, 96000, 19200, 388400, 57600
0, 76800, 1115200, 1280000 and 153
3600 bps.
300, 600, 1200,
D
Value controls byy writing th
he 5 to 9 bitt
To set the data to triggger on, it iss necessary to fill the Data
binary valuue of the daata byte, leavving X on thhe don’t carre bits, and choose if thhis value sh
hould matchh
or not matcch the one detected
d
on the bus.
It is possibble to add other data conditions (up to 15) in the Addditional Coonditions fraame on thee
bottom sidde of the winndow. The controls
c
havve the same meaning of the ones juust describeed.
To add a coondition, filll the controols on the Additional Conditions
C
fr
frame,
then cclick on .
To removee a conditionn, select thee corresponddent row in the table, thhen click onn .
To edit a condition, double cliick on the correspond
dent row inn the table,, modify th
he requiredd
parameterss, then clickk on
to apply
a
them..
When morre than one data
d conditiion are set, the Conditiions Operattor control iis enabled, by
b which iss
possible too choose bettween:
• Seq
quence: thee AT-LA5000 triggers when the address coondition andd all the en
ntered dataa
connditions are verified in the specifieed order;
• OR
R: the AT-L
LA500 trigggers when thhe address condition
c
annd at least oone of the entered
e
dataa
connditions are verified.
Pretrigge
er
The Pretrig
igger controol on the boottom side allows
a
speciifying the position
p
in w
which the trrigger eventt
will be located with respect to the AT-LA
A500 mem
mory. If thee most meaaningful data must bee
sampled affter the triggger detectioon, low preetrigger perccentage muust be selectted. On the contrary, iff
signal evoolutions beffore triggerr event must be analy
yzed, a higgh pretriggeer percentag
ge is moree
suitable.
RELEASE 3.3 – MAY
M
2009
344
AT-LA500 – USER MANUAL
AT-LA NAVIGATOR
Probes
This tab allows setting the threshold levels for each bank (only for probes supporting this option).
If more than one AT-LA500 are connected used, the AT-LA Number menu ring allows to select the
instrument to set.
The threshold for each bank can be set manually by writing its value in V in the corresponding
control. Depending on the probe type, the threshold voltage must be confined in a range
automatically set by AT-LA500 when the probe is plugged-in.
Furthermore it is possible to set all thresholds to the same value by entering the selected value in the
Set All Thresholds to control and by clicking on Apply Thresholds.
In addition, for sake of simplicity, some threshold voltages are already available for the mostly used
logic families in the Set All Thresholds to menu ring:
•
•
•
TTL
CMOS
ECL
RELEASE 3.3 – MAY 2009
(1.5V)
(2.5V)
(-1.3V)
35
AT-LA500 – USER MANUAL
•
•
•
•
•
•
•
PECL
LVPECL
LVCMOS 1,5
LVCMOS 1,8
LVCMOS 2,5
LVCMOS 3,3
LVDS
AT-LA NAVIGATOR
(3.7V)
(2V)
(750mV)
(900mV)
(1.25V)
(1.65V)
(100mV)
The appropriate value can be selected by means of the Threshold Presets menu ring and then the Set
all key must be pressed.
Note: If an active probe is not connected to a Pod, it is not possible to set a specific threshold
voltage for the corresponding banks.
RELEASE 3.3 – MAY 2009
36
AT-LA500 – USER
S
MANUAL
AT
T-LA NAVIGATOR
R
Data Acquisitiion
Channe
el Status
Once one or
o more proobes have beeen connectted to the sy
ystem underr test, the loogic level off each inputt
can be exaamined in reeal time. Thhis feature is
i activated by clickingg on the
key in the tool bar orr
from the Tools
T
menu, Pod Status… commaand.
The openedd panel is foormed by tw
wo tables: Signal
S
Defin
nitions Valuues and Pod Status
Signal Definition
D
Values
If signals have
h
been associated
a
t the channnels, they will
to
w be reprresented in the Signal Definition
n
table. Thiss option is useful,
u
for innstance, to detect the values
v
of buus signals, ssince every signal andd
bus are reppresented with its own value.
v
Pod Stattus
In the Pod
d Status fraame the staatus of eachh channel iss representeed in real time by meaans of threee
symbols:
It inndicates thaat a voltage below the threshold
t
vaalue is preseent on the correspondin
ng
chaannel;
It inndicates thaat a commuttation is preesent on thee correspondding channeel (rising or falling
edgge);
It inndicates thaat a voltage above the threshold
t
vaalue is preseent on the coorrespondin
ng channel.
RELEASE 3.3 – MAY
M
2009
377
AT-LA500 – USER
S
MANUAL
AT
T-LA NAVIGATOR
R
Start a data
d
acq
quisition
Once AT-L
LA500 hass been set correctly,
c
d
data
acquisittion can bee started byy clicking on
o the
button of thhe tool bar.
The status box on the tool bar shoows the acqquisition stattus. The posssible optioons are:
•
Readyy
•
•
Waitinng for triggger at Level n
Waitinng for Exterrnal Triggerr
•
Waitinng for Seriaal Protocol Trigger
T
•
Triggeer Detectedd - Filling Memories
M
•
Readiing Acquisittion Data
•
Acquiisition Dataa Ready
The projeect has beeen loaded aand the AT-LA500 is
ready to acquire;
a
AT-LA50
00 is waitingg for the triggger event at
a Level n;
AT-LA50
00 is waitinng for an eexternal trig
gger event
(AT-scop
pe card is neeeded);
AT-LA50
00 is waitiing for a ttrigger eveent on the
selected serial
s
protoccol;
AT-LA50
00 detected a trigger evvent and it iss sampling
data;
Data acquisition is terminaated and data are
transferrin
ng to the PC
C;
Data acqu
uisition is terminated and data have been
transferreed to the PC
C.
Note: If the sampling frequency
f
i extremelyy high, these messages may appeaar only for few
is
f instantss
or they may
ay even not appear.
a
If the triggger event dooes not occuur, it can bee forced maanually by clicking
c
on the
bu
utton duringg
data acquissition.
If the samppling frequeency is veryy low or if an external clock is used
u
whose trigger cond
dition is noo
longer verified, data acquisition may stop or
o it can prroceed veryy slowly annd the messsage Fillingg
Memories may remainns visualized for a longg time.
Stoppin
ng the ac
cquisition
n
Data acquiisition may be stopped at any timee by clicking
g on the
button.
If the
d
acquissition is au
utomaticallyy
button is pressed before a triggger event occurred, data
terminatedd.
If the
button is pressed
p
afterr a trigger event
e
occurrred (for insttance to aboort a too slo
ow memoryy
filling), data already acquired
a
willl be transfeerred to the PC for theirr visualizatiion and/or storage.
s
Tips forr a good acquisittion
Some tips allow improoving data acquisition:
a
•
•
•
Eleectrical conttacts must be
b checked when
w
conneecting probees;
Connnect as maany groundds as possibble to the sy
ystem underr test. All ggrounds aree connectedd
toggether, thereefore it is im
mportant to check
c
all grround conneections to avvoid short circuits;
c
Oncce probes have
h
been coonnected, check
c
the in
nput status on
o the Channnels Status window too
verrify that the visualized behavior
b
coorresponds to
t the expeccted one;
RELEASE 3.3 – MAY
M
2009
388
AT-LA500 – USER MANUAL
•
•
•
AT-LA NAVIGATOR
When active probes are used, set the threshold level to a value suitable to the signal nature;
If data acquisition is performed in the State Analysis mode, it is convenient to use active
probes for signal clocks. In this case a correct setting of threshold values allows using the
clock signal with the correct duty-cycle. Signal clocks, furthermore, must be (if possible...)
not affected by noise or disturbs that may activate erroneous acquisitions. Depending on
clock signal frequencies, it could be necessary to invert the trigger setting on edge
conditions to get a better acquisition;
If data acquisition is performed in the Timing Analysis mode or in the serial protocol
analysis, select the most suitable sampling frequency. If the sampling frequency is too low,
acquired data may be not coherent, while a too high frequency can evidence spikes or
propagation delays, furthermore reducing the useful acquisition time window.
RELEASE 3.3 – MAY 2009
39
AT-LA500 – USER MANUAL
AT-LA NAVIGATOR
Data Visualization
Two different window types are available to visualize the acquired data: Waveform View and State
Listing. It is also possible to visualize digital signals and analog data (acquired by an external
device) together. This feature is called Mixed Signal Display Mode.
Mixed Signal Display Mode
The Mixed Signal Display Mode allows the user to visualize digital and analog data in the same
window. To acquire Analog data the AT-LA500 software can be installed on a PC based
oscilloscope connected to the AT-LA500 by means of the TriggerIN and TriggerOUT rear
connectors (use 1m length BNC cable) and the USB 2.0 connection.
The AT-LA500 TriggerIN input must be connected to the oscilloscope TriggerOUT, and the ATLA500 TriggerOUT output to the oscilloscope TriggerIN.
The Mixed Signal Display Mode is available for Normal Timing and Serial Protocol Analysis
acquisition modes. In Normal Timing mode, the AT-LA500 can send/ receive the Trigger pulse
to/from the oscilloscope. For Protocol Analysis AT-LA500 can only send the trigger pulse to the
oscilloscope through the TriggerOUT output.
If the AT-LA500 is set to receive the Trigger pulse from the oscilloscope, the Trigger condition
must be set manually, if AT-LA500 is the Trigger master, the oscilloscope settings will be set by
the AT-LA500 software automatically.
Note: The analog data visualized on the Waveform View are the same shown by the oscilloscope.
Thus, only the channels of the oscilloscope that are turned on will be visualized in the Waveform
View.
The names associated with the analog data are Analog Ch0, Analog Ch1, Analog Ch2, Analog Ch3.
The analog data properties can be changed as for any digital data.
Analog-Digital Delay Alignement window
To open the Analog-Digital Delay Alignement window, click on the Analog Delay item of the
Tools menu on the menu bar.
The Analog Samples Delay(ns) box allows to change (if it’s necessary), the delay between digital
and analog signals, to obtain the correct alignement. For example, if in the Waveform Window,
analog and digital signals are affected by a delay of 3ns, Analog Samples Delay(ns) value must be
changed by 3ns.
RELEASE 3.3 – MAY 2009
40
AT-LA500 – USER MANUAL
AT-LA NAVIGATOR
Waveform View
Create a Waveform View window
To open the Waveform view, double click on the
icon in the Solution Explorer.
When a new acquisition is complete, and the Waveform View window is not yet open, a Signal
Selection window will appear to select which signals or groups of signals among those that have
been acquired are to be visualized, then the Waveform View window will be shown.
Note: The High Speed signals acquired will appear with the user defined name and the “HS”
prefix. Analog data will not be shown in this list: they will be automatically added to the Waveform
View.
RELEASE 3.3 – MAY 2009
41
AT-LA500 – USER
S
MANUAL
AT
T-LA NAVIGATOR
R
To add a signal
s
or a bus
b to the liist of the onnes that willl be shownn in the Wavveform Vieew window,,
select it onn the left sidde table and click on .
To add all signals at a time, just click
c
on .
To removee a signal froom the visuualization lisst, select it on
o the right side table aand click on
n .
To removee all signal at
a a time, juust click on .
w window aat any time by clickingg
Note: Signnals can be added in (rremoved froom) the Wavveform View
on the
i
icon
in the Waveform View windoow toolbar.
Note: When the triggger is set on a serrial protoccol mode, the signal protocol names aree
automaticaally shown. They can’t be removedd from the Waveform
W
V
View
window
w.
The Waveeform Winddow allows analyzing acquired daata in a graaph containiing digital and analogg
waveformss. Single siggnals are vissualized as digital sign
nals, while grouped
g
signnals are rep
presented ass
buses.
Note: Wavveform View
w window caan be openeed only afterr the first daata acquisittion.
In the Wavveform View
w, a bus is indicated
i
byy a
icon on the left.. Double cliick on it to open a bus..
The icon of
o an openedd bus becom
mes . Douuble click on
n it to closee a bus.
It is possibble to drag and drop thhe waveform
ms and chan
nge their orrder, to helpp the user to
t focus thee
time relatioonship betw
ween edges. To do this, click on a signal nam
me and drag it in the neew position..
RELEASE 3.3 – MAY
M
2009
422
AT-LA500 – USER
S
MANUAL
AT
T-LA NAVIGATOR
R
In the sam
me way, it iss also possiible to inserrt a signal into
i
an openned bus or to extract a waveform
m
from it.
To resize the signals amplitude,
a
just drag thee line betweeen signals name.
n
On the rigght of everyy signal orr bus name,, a numberr indicates the value tthat this sig
gnal or buss
assumes at
a the time position of the masteer cursor (tthe cursorss propertiess are descriibed in thee
Cursors chhapter).
By clickinng with the right mouse button onn the signall name coluumn, a shorrtcut menu will appearr
with these options:
•
Add samples scale
s
•
•
move samples scale
Rem
Analog mode display
d
•
Add-Remove signals
s
•
Waaveform Vieew Settings
•
MS
SB on top
•
LSB
B on top
Select thhis option to
o add a signnal, indicatedd by a
iccon, with a
series off interval thaat representts the numbeer of samplees.
Select thhis option to
o remove thee selected sample scalee.
This opttion (availab
ble only forr the buses)) will repreesent a bus
as an annalog wavefform. This is
i useful for example if
i an ADC
or a DAC
C has to be tested.
This opttion allows to add or remove
r
signnals to the Waveform
W
View.
Select thhis option to
t open thee The Wavveform View
w Settings
window (see Graph
h Property chapter
c
for ddetails)
This opttion (availab
ble only forr the buses)) will repreesent a bus
with the most signifficative signnal displayeed as first;
This opttion (availab
ble only forr the buses)) will repreesent a bus
with the less significative signaal displayedd as first;
Zoom
To move along
a
the waaveforms annd to zoom, the Wavefo
orm View window
w
provides many
y
instrumentts, placed onn the upper side toolbarr:
Selectiion tool
Hand tool.
t
Use thhe hand tool to pan the acquisition.
a
.
Click and
a drag to move it.
m in.
Zoom In auto. Cliick to zoom
C
to zoom
m out.
Zoom Out auto. Click
Zoom Manual. Seelect this too
ol to manuaally select thhe
t Wavefoorm
area too zoom. Clicck in the staart point of the
View and
a drag thee cursor to the
t end poinnt keeping tthe
left moouse button pressed.
Zoom All. Click to
t fit the vissualization to
t view all tthe
acquisition time.
Analogg Zoom in. Click to zoom in the seelected anallog
wavefoorm (if pressent)
Analogg Zoom outt. Click to zoom out thee selected
analogg waveform (if present))
Analogg Autoscalee. Click to fit
fi the selectted analog
wavefoorm amplituude in the
RELEASE 3.3 – MAY
M
2009
433
AT-LA500 – USER
S
MANUAL
AT
T-LA NAVIGATOR
R
Graph Property
To change the graph properties,
p
c
click
on thee
shown.
icon. The
T Waveforrm View Seettings wind
dow will bee
In the Grapph propertyy tab it is poossible to chhange the grraph backgrround color by clicking
g on the
Backgrounnd Color box.
By clickingg the Majorr Grid and the
t Minor Grid
G switchees it is possiible to show
w or hide thee vertical
grids and to choose thheir colors.
i
By clickingg the Cursoor Position switch it is possible to show or hide the cursoor position indication
near the cuursors.
By clickingg the Triggeer Line swittch it is possible to sho
ow or hide a line that allways identiify the
trigger possition: it is possible
p
alsoo to select thhe line colo
or and the linnr style.
RELEASE 3.3 – MAY
M
2009
444
AT-LA500 – USER
S
MANUAL
AT
T-LA NAVIGATOR
R
In the Signnals Propertty tab it is possible
p
to change
c
the color
c
of a siingle signall, the representation of
the value of
o a bus, thee transition visualizatio
v
n mode, thee space betw
ween signalss and the heeight of all
signals.
A Signals Height
H
valuee is 4.
Note: The minimum All
Cursors
Cursors (aalso called markers) are
a useful to
t identify and enlighhten data thhat, thereforre, may bee
recognizedd or found easier.
e
In addition cursoors can be used
u
to meassure and to analyze acq
quired data.
By clickinng on Markkers label inn the Waveeform View
w toolbar, itt is possiblee to show or hide thee
marker winndow. In thhe Waveforrm View toolbar are allso availablle indicatorrs that show
w the activee
cursor (thaat is, the Idd of the currsor currenttly selected
d), and the Absolute aand Relativee Positions,,
whose meaans are desccribed below
w.
w are listedd all cursorrs present in
n the Waveeform View
w window. The
T masterr
In the marrker window
cursor is iddentified byy the
icoon. All relatiive position
ns will be caalculated respected to the
t positionn
of the masster cursor. Furthermorre, the master cursor is
i moved auutomaticallyy during a data searchh
operation to
t show resuults. To chaange the maaster cursor,, select the new
n cursor in the mark
ker window
w
and click on
o the
icon in the Waveform
W
V
View
toolbarr.
Note: In thhe Waveforrm View wiindow, the master
m
curssor is draw
wn in blue; all others cursors
c
aree
drawn in yellow.
y
mns of the marker wiindow show
w the progressive currsor identifi
fier, the abssolute timee
The colum
position (tthe time disstance betw
ween the cuursor positio
on and the start of the acquisitio
on) and thee
relative tim
me position (the time distance betw
ween the cu
ursor and thee master cuursor). Any time
t
one off
the cursorss is moved, all the valuues are autom
matically up
pdated and shown.
s
•
To addd a cursor:
•
To rem
move a curssor:
•
To moove a cursorr:
Cliick on the
key off the Waveform View
w window. A new
currsor will be added to th
he visualizattion area.
Sellect the currsor to be reemoved in the
t marker window an
nd click
on the
key.
ursor. By dragging
d
thhe cursor do
ot it is
Drrag on the selected cu
posssible to moove the curssor position indication:
•
To rem
move all cuursors:
RELEASE 3.3 – MAY
M
2009
Cliick on the
.
key of the
t Waveforrm View wiindow.
455
AT-LA500 – USER
S
MANUAL
AT
T-LA NAVIGATOR
R
It is also possible
p
to add or rem
move cursorrs and set the master by
b clicking with the right
r
mousee
button in the
t marker windows and
a by seleccting the deesired optioon in the shhortcut men
nu that willl
appear.
t remove all
a the curssors but on
ne. The useer, howeverr, can creatte as manyy
Note: It iss possible to
cursors as needed.
Go To a Selected
d Target
The Go to menu ringg allows selecting the position
p
wh
here the maaster cursor is going to
o be movedd
within the visualizatioon area. Thee possible opptions in the Go to mennu ring are:
•
Goo to trigger:
•
Goo to time:
•
Goo to normal samples staart:
•
Goo to normal samples ennd:
•
Goo to Gigavieew start:
•
Goo to Gigavieew end:
•
Goo to Analogg samples start:
•
Goo to Analogg samples ennd:
•
Cuursor n:
the master cursor is movved to the ttrigger even
nt and the
visuualization arrea is centerred on it;
the master
m
cursor is movedd to the timee position sp
pecified in
the box
b near thee control;
m
cursor is movedd at the acqquisition beg
gin and the
the master
visuualization arrea starts wiith the acquiisition begin
n;
the master
m
curssor is moveed at the accquisition en
nd and the
visuualization arrea starts wiith the acquiisition begin
n;
the master
m
curssor is movedd at the beggin of the High
H
Speed
acquuisition and the visualizzation area is centered on it;
the master
m
curssor is moveed at the ennd of the High
H
Speed
acquuisition and the visualizzation area is centered on it;
t analog
the master currsor is movved at the begin of the
acquuisition and the visualizzation area is centered on it. This
optioon is availab
ble only with oscillosccope integraation;
the master currsor is mooved at thee end of the
t
analog
acquuisition and the visualizzation area is centered on it. This
optioon is availab
ble only with oscillosccope integraation;
The visualizatio
on area is ceentered on tthe cursor n.
n
The Go to button musst be presseed to activatte this operaation (it shoows the iconn selected in
n the Go too
menu ring))
To move thhe selected cursor to thhe middle off the curren
nt visualizatiion, click onn the
ico
on.
RELEASE 3.3 – MAY
M
2009
466
AT-LA500 – USER
S
MANUAL
AT
T-LA NAVIGATOR
R
Search
In the Wavveform View
w it is possiible to searcch a value related to a bus
b or, for a single sign
nal, a risingg
edge or a falling
f
edge.
To activatee the searchh option, click on the Search
S
Settin
ngs
will be opeened, and seearch criteriia can be enntered.
keyy and the Seearch Settin
ngs window
w
In the Searrch list, all defined
d
signnals and buus (also the High
H
Speedd signals) arre shown. Itt is possiblee
to select thhe signal or bus where to
t search a specified
s
vaalue.
In the Valuue box, the value
v
or thee edge to seaarch can be entered.
The menu ring allowss selecting thhe start locaation for seaarching. Posssible options are:
•
•
•
•
•
•
From Start:
From End:
From Trigger:
S
From Gigaview Start:
From Gigaview End:
E
Cursoor n;
Seaarch starts frrom the acqu
uisition beggin;
Seaarch starts frrom the acqu
uisition endd;
Seaarch starts frrom the trigger positionn;
Seaarch starts frrom the Hig
gh Speed acqquisition beegin;
gh Speed acqquisition ennd;
Seaarch starts frrom the Hig
Seaarch starts frrom the curssor n locatioon;
t Search list, the Coompare andd the Value menu ringg
Dependingg on the siggnal type seelected in the
contains diifferent optiions.
If a single signal is sellected, the Value
V
box can
c assume these values:
•
•
•
•
•
•
RELEASE 3.3 – MAY
M
2009
0
1
HiZ
Rise
Fall
Changge
Searrch for a log
gic 0;
Searrch for a log
gic 1;
Searrch for a High
H
Impeddance (onlyy for
Patttern Generattor Mode);
Searrch for a rissing edge;
Searrch for a fallling edge;
Searrch for any edge;
477
AT-LA500 – USER
S
MANUAL
AT
T-LA NAVIGATOR
R
The Compaare menu riing allows to
t select bettween the seearch optionn:
•
•
•
=
!=
>
•
<
•
HiZ
Finnd if equal;
Finnd if not equual;
Finnd greater values (en
nabled only if a buus is
sellected);
Finnd minor values (en
nabled onlyy if a buus is
sellected);
Higgh Impedaance (only
y for Patttern Generrator
Moode);
To make active
a
the seelected criteria, click the
t OK buttton and thee Search Seettings wind
dow will bee
closed.
In the visuualization window,
w
clicck on the Search
S
Forw
ward
key. The master
m
cursoor will movee to the nextt found valu
ue.
RELEASE 3.3 – MAY
M
2009
keyy or on thee Search Ba
ackward
488
AT-LA500 – USER MANUAL
AT-LA NAVIGATOR
Serial Protocol Interpreter
When a Serial Protocol trigger is selected, the serial bus acquired data are visualized and their
interpretation is indicated in the Waveform View window: coloured rectangles will show where the
bus operations begin and end; a string will specify which operation is represented.
The following table indicates the information that are shown for every protocol:
Protocol
Interpreted operations
I2C
START: Start bus condition detected;
Addr: Hexadecimal indication of the I2C address;
R: Read operation;
W: Write operation;
ACK: Acknowledged operation;
NACK: Not acknowledged operation;
Data: Hexadecimal indication of the I2C data;
STOP: Stop bus condition detected.
SPI
START: Start bus condition detected;
MOSI: Hexadecimal indication of the data transferred on the MOSI line;
MISO: Hexadecimal indication of the data transferred on the MISO line;
STOP: Stop bus condition detected.
UART
RELEASE 3.3 – MAY 2009
TxD: Hexadecimal indication of the data transferred on the TxD line. If
possible, an ASCII representation is also shown;
RxD: Hexadecimal indication of the data transferred on the RxD line. If
possible, an ASCII representation is also shown.
49
AT-LA500 – USER
S
MANUAL
AT
T-LA NAVIGATOR
R
State Liisting
In the Staate Listing window acquired
a
daata are visu
ualized num
merically inn columns,, each onee
representinng a signal or
o a group of
o signals.
Additionall columns indicate thhe sample number (S
Samples collumn), the absolute time
t
(Timee
column) annd the interrpretation of the serial protocol bu
us operationns, if this trrigger optio
on has beenn
selected.
Create a State Lis
sting window
To open thhe State Listting window
w, double cllick on the
icon in the
t Solutionn Explorer. If the Statee
Listing winndow is noot yet open, a Signal Selection
S
wiindow will appear to sselect which
h signals orr
groups of signals amoong those thhat have beeen acquired
d are to be visualized, then the Sttate Listingg
window wiill be shownn.
Note: The High Speeed signals acquired
a
w appear with the usser definedd name and
will
d the “HS”
”
prefix.
To add a siignal or a bus
b to the lisst of the onees that will be shown inn the State L
Listing win
ndow, selectt
it on the left side tablee and click on
o
.
To add all signals at a time, just click
c
on .
To removee a signal froom the visuualization lisst, select it on
o the right side table aand click on
n .
To removee all signal at
a a time, juust click on .
If some High Speed data
d are addded, the Statte Listing will
w be split in
i two indeppendent secctions.
RELEASE 3.3 – MAY
M
2009
500
AT-LA500 – USER
S
MANUAL
AT
T-LA NAVIGATOR
R
Note: Signnals can be added in (rremoved froom) the Statte Listing window
w
at aany time by clicking onn
the
iconn in the Staate Listing window
w
toollbar.
Note: When the triggger is set on a serrial protoccol mode, the signal protocol names aree
automaticaally shown. They can’t be removedd from the State
S
Listingg window.
In the Statee Listing, a bus is indicated by a
icon on the left of its
i name. It is possible to click onn
it to open a bus. The icon of an oppened bus becomes
b
. Click on it
i to close a bus.
The Samplles column contains
c
thee progressivve number of
o the acquiired sampless. It is indiccated by thee
icon.
The Time column
c
conntains the prrogressive absolute
a
tim
me of every sample. It is indicated
d by the
icon.
To resize the columnss amplitude,, just drag thhe line betw
ween signalss name.
Cursors
Cursors (aalso called markers) are
a useful to
t identify and enlighhten data thhat, thereforre, may bee
recognizedd or found easier.
e
In addition cursoors can be used
u
to meassure and to analyze acq
quired data.
On the left
ft side of thhe State Lissting window are listed
d all availabble cursors. The masteer cursor iss
identified by
b the
i
icon.
All reelative posittions will be
b calculatedd respectedd to the position of thee
RELEASE 3.3 – MAY
M
2009
511
AT-LA500 – USER MANUAL
AT-LA NAVIGATOR
master cursor. Furthermore, the master cursor is moved automatically during a data search
operation to show results.
It is possible to operate with cursors by clicking with the right mouse button on the cursor list and
select one of these options in the shortcut menu that will appear:
•
Add marker
•
•
•
•
Delete marker
Set master
Clear marker list
Go to this marker
•
Representation…
Add a cursor to the State Listing
Window;
Remove the selected cursor;
Set the selected cursor as the master;
Delete all cursors but one;
Move the State Listing list to show
the position of the selected cursor;
Allows to select the Absolute and
Relative Position representation. It is
possible to choose between Time and
Samples.
Note: It is possible to remove all the cursors but one. The user, however, can create as many
cursors as needed.
The markers are indicated by the string Mn in the first column of the State Listing, where n is the
progressive identification number.
Browse the State Listing window and export data
To jump quickly to the desired position of the State Listing list, it is possible to click with the right
mouse button on the data and to select one of these options in the shortcut menu that will appear:
•
•
•
•
•
•
•
•
Add a cursor in the selected point of
the State Listing window;
Places the selected cursor to the
Move selected marker here
specified position of the State
Listing;
Show this sample on Waveform Center the Waveform View on the
selected sample (only if the
View
Waveform View is already open);
Move the State Listing list to show
Go to selected marker
the position of the selected cursor;
Move the State Listing list to show
Go to trigger
the trigger position;
Move the State Listing list to show
Go to samples…
the samples which number is
specified in the Go to sample…
window that will appear;
Move the State Listing list to show
Go to time…
the samples which absolute time is
specified in the Go to time…
window that will appear;
Allows to export data in text file. A
Save to txt file…
window will appear to select which
rows and column have to be
Add marker
RELEASE 3.3 – MAY 2009
52
AT-LA500 – USER
S
MANUAL
AT
T-LA NAVIGATOR
R
exported.
Note: Expoorting the entire acquissition may require
r
a long time to be
b completeed.
Search
In the Statte Listing window,
w
as in
i the Waveeform View
w, it is possiible to searrch a value related to a
bus or, for a single siggnal, a risingg edge or a falling edgee.
To activatee the searchh option, click on the Search
S
Settin
ngs
will be opeened, and seearch criteriia can be enntered.
keyy and the Seearch Settin
ngs window
w
In the Searrch list, all defined
d
signnals and buus (also the High
H
Speedd signals) arre shown. Itt is possiblee
to select thhe signal or bus where to
t search a specified
s
vaalue.
In the Valuue box, the value
v
or thee edge to seaarch can be entered.
The menu ring allowss selecting thhe start locaation for seaarching. Posssible options are:
•
•
•
•
Seaarch starts frrom the acqu
uisition beggin;
Seaarch starts frrom the acqu
uisition endd;
Seaarch starts frrom the trigger positionn;
Seaarch starts frrom the masster market;;
From Start:
From End:
From Trigger:
Masteer Marker:
Dependingg on the siggnal type seelected in the
t Search list, the Coompare andd the Value menu ringg
contains diifferent optiions.
If a single signal is sellected, the Value
V
box can
c assume these values:
•
•
•
•
•
•
RELEASE 3.3 – MAY
M
2009
0
1
HiZ
Rise
Fall
Changge
Searrch for a log
gic 0;
Searrch for a log
gic 1;
Searrch for a High
H
Impeddance (onlyy for
Patttern Generattor Mode);
Searrch for a rissing edge;
Searrch for a fallling edge;
Searrch for any edge;
533
AT-LA500 – USER
S
MANUAL
AT
T-LA NAVIGATOR
R
The Compaare menu riing allows to
t select bettween the seearch optionn:
•
•
•
=
!=
>
•
<
•
HiZ
Finnd if equal;
Finnd if not equual;
Finnd greater values (en
nabled only if a buus is
sellected);
Finnd minor values (en
nabled onlyy if a buus is
sellected);
y for Patttern Generrator
Higgh Impedaance (only
Moode);
To make active
a
the seelected criteria, click the
t OK buttton and thee Search Seettings wind
dow will bee
closed.
w
clicck on the Search
S
Forw
ward
In the visuualization window,
key. The master
m
cursoor will movee to the nextt found valu
ue.
keyy or on thee Search Ba
ackward
Serial Prrotocol In
nterpreterr
When a Seerial Protocool trigger is selected, thhe serial buss acquired data
d are inteerpreted and
d visualizedd
in a Comm
mand colum
mn of the State Listing window
w: colouredd cells will show wheere the buss
operations begin and end;
e
a stringg will specify which op
peration is represented.
r
.
AT-XSS
S Expan
nsion BUS
To increasse the num
mber of avvailable chaannels with
hout degraading perfo
formance orr samplingg
frequency, up to 8 AT
T-LA500 caan be conneected by usin
ng the AT-X
XSS Expannsion bus wh
hich allowss
synchronizzing and conntrolling alll AT-LA5000.
A500 withouut any addittional operaation by thee user. The presence
p
off
The softwaare controlss all AT-LA
AT-XSS connection
c
is automaatically recoognized by
y the contrrol softwaree which manages
m
alll
connected AT-LA5000 as a singlee Logic Anaalyzer with a higher chaannel number.
AT-XSS Expansion
E
b allows also synchrronizing an
bus
nd controllinng an exterrnal device. A specificc
driver and the AT-scoope card arre needed too perform this operatioons. For example, it’s possible too
connect AT
T-LA500 with
w a oscillooscope, set the trigger on it (the loogic analyzeer will wait an externall
trigger), trransfer anallog data too the pc whhen the trigger event occurs onn the oscillo
oscope andd
visualize digital
d
and analog
a
waveeforms on thhe Waveform
m View winndow.
Note: Wheen a data acquisition
a
is performeed using seeveral AT-LA
LA500 connected togetther via thee
AT-XSS exxpansion caable, it is convenient to use thee same proobe type foor each insstrument too
minimize propagation
p
n skews amoong the diffeerent AT-LA
A500.
Note: For a better accquisition itt is suggestted to conneect all AT-L
LA500 in coonsecutive slots of thee
AT-XSS exp
xpansion buus and to seet the triggeer event on an AT-LA5500 positionned in an in
ntermediatee
location.
RELEASE 3.3 – MAY
M
2009
544
AT-LA500 – USER MANUAL
RELEASE 3.3 – MAY 2009
AT-LA NAVIGATOR
55