1
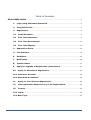
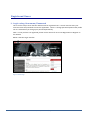
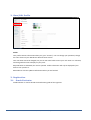
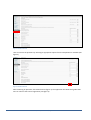
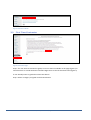
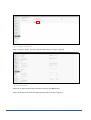
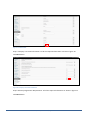
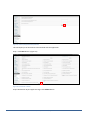
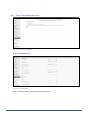
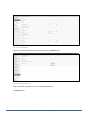
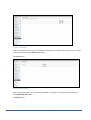
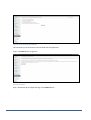
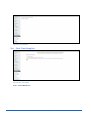
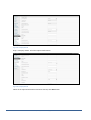
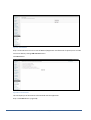
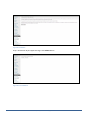
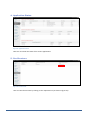
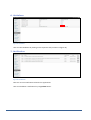
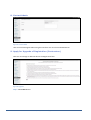
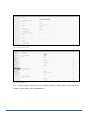
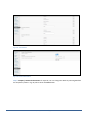
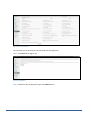
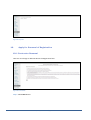
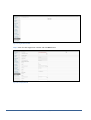
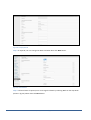
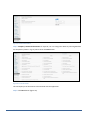
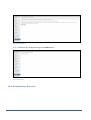
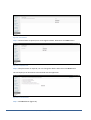
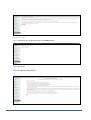
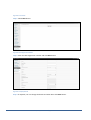
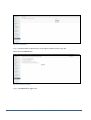
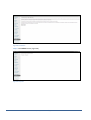
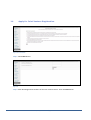
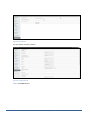
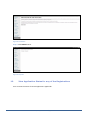
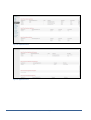
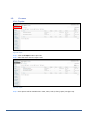
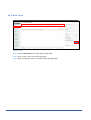
NATIONAL COUNCIL FOR CONSTRUCTION WEBSITE USER GUIDE FOR REGISTERED USERS NATIONAL COUNCILFOR CONSTRUCTION, PLOT NO. 1609/1625, SHEKI SHEKI ROAD, P.O. BOX 39548, Tel: +260 211 247185/240386 Fax: +260 211 243115/247264 DECEMBER 2013 Table of Contents REGISTERED USERS ................................................................................................................................. 3 1. Login using Username/Password ................................................................................ 3 2. View/Edit Profile .................................................................................................................. 4 3. Registration............................................................................................................................. 4 3.1 Grade Evaluator ................................................................................................................. 4 3.2 First Time Contractor ...................................................................................................... 6 3.3 First Time Manufacturer .............................................................................................. 11 3.4 First Time Supplier ......................................................................................................... 15 4. Application Status .............................................................................................................. 19 5. Fee Structure ........................................................................................................................ 19 6. Guidelines .............................................................................................................................. 20 7. Notification ............................................................................................................................ 20 8. Contact Admin...................................................................................................................... 21 9. Apply for Upgrade of Registration (Contractors) .............................................. 21 10. Apply for Renewal of Registration ......................................................................... 26 10.1 Contractor Renewal ........................................................................................................ 26 10.2 Manufacturer Renewal .................................................................................................. 30 11. Apply for Joint Venture Registration .................................................................... 38 12. View Application Status for any of the Registrations .................................. 40 13. Forums ................................................................................................................................. 42 13.1 Topics ..................................................................................................................................... 42 13.2 New Topic ............................................................................................................................ 43 Proprietary & Confidential Page 2 of 43 Registered Users 1. Login using Username/Password This is the first step to enter the NCC website area for registered users. You will need to enter your exact username and password to enter the application. There is a change password option under profile tab. It is advised that you change your password periodically. Note: In case you have not registered, please use the section for First Time Registration to Register on the website. Below is the NCC Login interface. Figure 1: Home Page Proprietary & Confidential Page 3 of 43 2. View/Edit Profile Figure 2: Profile Profile Your profile contains information about you (your “account”). You can change your password; change the color scheme of your WordPress administration screens. Your username cannot be changed, but you can use other fields to enter your real name or a nickname, and change which name to display on your posts. Required fields are indicated; the rest are optional. Profile information will only be displayed if your theme is set up to do so. Remember to click the Update Profile button when you are finished. 3. Registration 3.1 Grade Evaluator Grade Evaluator is used to decide the classification grade of the registrant. Proprietary & Confidential Page 4 of 43 Figure 3: Grade Evaluator User can answer the questions by selecting an appropriate option from the drop down list available (see figure 3). Figure 4: Grade Evaluator After answering all questions click Submit button (figure 4). The application will show what grades that user can select at the time of registration (see figure 5). Proprietary & Confidential Page 5 of 43 Figure 5: Selection of Grade 3.2 First Time Contractor Figure 6: Instructions page Step 1: If a user wants to evaluate his grade, he can use the link available on this page (figure 5) or otherwise there is a Grade Evaluator tab under Registration on the left hand side menu (figure 5). If user already knows his grade then select Next button. Step 2: Select a Category and grade and click Next button. Proprietary & Confidential Page 6 of 43 Figure 7: Category of Application Step 3: Company Details. Fill all the required information as shown in figure 8. Figure 8: Company Details When all the required information has been entered, click Next button. Step 4: Technical Data. Fill all the required information as shown in figure 9 Proprietary & Confidential Page 7 of 43 Figure 9: Technical Data Step 5: Company’s Financial Information. Fill all the required information as shown in figure 10. Click Next button Figure 10: Company’s Financial Information Step 6: Statutory Registration Requirements. Fill all the required information as shown in figure 11. Click Next button Proprietary & Confidential Page 8 of 43 Figure 11: Statutory Registration Requirements This will display list of documents to be attached with the application. Step 7: Click Next button. (figure 12) Figure 12: Documents to attach Step 8: Declaration By The Applicant Page. Click Submit button Proprietary & Confidential Page 9 of 43 Figure 13: Declaration by the Applicant Step 9: Payment Figure 14: Form Submitted Proprietary & Confidential Page 10 of 43 3.3 First Time Manufacturer Figure 15: First Time Manufacturer Step 1: Select Next button. Figure 16: Company Details Step 2: Company Details. Fill all the required information. Proprietary & Confidential Page 11 of 43 Figure 17: Company Details When all the required information has been entered, click Next button. Figure 18: Technical Employees Step 3: Technical Employees. Fill all the required information. Click Next button. Proprietary & Confidential Page 12 of 43 Figure 19: Technical Data Step 4: Technical Data. Fill in the name of Material/Equipment manufactured. If required, user can add some more data by clicking Add new row button. Click Next button. Figure 20: Compliance Data Step 5: Compliance Data. Fill in the name of Standard. If required, user can add some more data by clicking Add new row button. Click Next button. Proprietary & Confidential Page 13 of 43 Figure 21: List of documents to be attached This will display list of documents to be attached with the application. Step 6: Click Next button. (Figure 21) Figure 22: Declaration Step 7: Declaration By The Applicant Page. Click Submit button Proprietary & Confidential Page 14 of 43 Figure 23: Form submitted 3.4 First Time Supplier Figure 24: First Time Supplier Step 1: Select Next button. Proprietary & Confidential Page 15 of 43 Figure 25: Company Details Step 2: Company Details. Fill all the required information. Figure 26: Company Details When all the required information has been entered, click Next button. Proprietary & Confidential Page 16 of 43 Figure 27: Technical Data Step 3: Technical Data. Fill in the name of Material/Equipment manufactured. If required, user can add some more data by clicking Add new row button. Click Next button. Figure 28: List of Documents This will display list of documents to be attached with the application. Step 4: Click Next button. (Figure 28) Proprietary & Confidential Page 17 of 43 Figure 29: Declaration Step 5: Declaration By The Applicant Page. Click Submit button Figure 30: Form submitted Proprietary & Confidential Page 18 of 43 4. Application Status Figure 31: Application Status Here user can check the status of his various applications. 5. Fee Structure Figure 32: Fee Structure User can view fee structure by clicking on the respective link (as shown in figure 32). Proprietary & Confidential Page 19 of 43 6. Guidelines Figure 33: Guidelines User can view Guidelines by clicking on the respective link (as shown in figure 33). 7. Notification Figure 34: Notification Here user can see notifications related to his applications User can also delete a notification by using Delete button. Proprietary & Confidential Page 20 of 43 8. Contact Admin Figure 35: Contact Admin User can send message to Admin using this interface. User can also send attachments. 9. Apply for Upgrade of Registration (Contractors) Here user can change or add new data to the Registration form. Figure 36: Upgrade Step 1: Select Next button. Proprietary & Confidential Page 21 of 43 Figure 37: NCC Registration Number Step 2: Enter the NCC Registration number and click Next button Figure 38: Registration Form Step 3: If required, user can change the details and when done click Next button. Proprietary & Confidential Page 22 of 43 Figure 39: Registration Form Figure 40: Technical Data Step 4: Technical Data: If required, user can change the details by selecting Yes from the drop down (shown in fig. 40). When done click Next button. Proprietary & Confidential Page 23 of 43 Figure 41: Technical Data Figure 42: Financial Information Step 5: Company’s Financial Information: If required, user can change the details by selecting Yes from the drop down (shown in fig. 42). When done click Next button. Proprietary & Confidential Page 24 of 43 Figure 43: List of Documents This will display list of documents to be attached with the application. Step 6: Click Next button (figure 43). Figure 44: Declaration Step 7: Declaration By The Applicant Page. Click Submit button Proprietary & Confidential Page 25 of 43 Figure 45: Payment 10. Apply for Renewal of Registration 10.1 Contractor Renewal Here user can change or add new data to the Registration form. Figure 46: Instructions Step 1: Select Next button. Proprietary & Confidential Page 26 of 43 Figure 47: Registration Number Step 2: Enter the NCC Registration number and click Next button Figure 48: Company Details Proprietary & Confidential Page 27 of 43 Figure 49: Company Details Step 3: If required, user can change the details and when done click Next button. Figure 50: Technical Data Step 4: Technical Data: If required, user can change the details by selecting Yes from the drop down (shown in fig. 50). When done click Next button. Proprietary & Confidential Page 28 of 43 Figure 51: Financial Information Step 5: Company’s Financial Information: If required, user can change the details by selecting Yes from the drop down (shown in fig. 51). When done click Next button. Figure 52: List of documents This will display list of documents to be attached with the application. Step 6: Click Next button (figure 52). Proprietary & Confidential Page 29 of 43 Figure 53: Declaration Step 7: Declaration By The Applicant Page. Click Submit button Figure 54: Payment 10.2 Manufacturer Renewal Proprietary & Confidential Page 30 of 43 Figure 55: Instructions Step 1: Click Next button. Figure 56: NCC Registration Number Step 2: Enter the NCC Registration number and click Next button Proprietary & Confidential Page 31 of 43 Figure 57: Company Details Step 3: Company Details: If required, user can change / add new details and when done click Next button. Figure 58: Technical Employees Step 4: Technical Employees: If required, user can change the details (shown in fig. 58). When done click Next button. Proprietary & Confidential Page 32 of 43 Figure 59: Technical Data Step 5: Technical Data: If required, user can change the details. When done click Next button. Figure 60: Compliance Data Step 6: Compliance Data: If required, user can change the details. When done click Next button. This will display list of documents to be attached with the application. Figure 61: List of Documents Step 7: Click Next button (figure 61). Proprietary & Confidential Page 33 of 43 Figure 62: Declaration Step 8: Declaration By The Applicant Page. Click Submit button Step 9: Payments 10.2 Supplier Renewal Proprietary & Confidential Page 34 of 43 Figure 63: Instructions Step 1: Select Next button. Figure 64: NCC Registration Number Step 2: Enter the NCC Registration number and click Next button Figure 65: Company Details Step 3: If required, user can change the details and when done click Next button. Proprietary & Confidential Page 35 of 43 Figure 66: Technical Data Step 4: Technical Data: If required, user can change the details (shown in fig. 66). When done click Next button. Figure 67: Documents to Attach Step 5: Click Next button (figure 67). Proprietary & Confidential Page 36 of 43 Figure 68: Declaration Step 6: Click Submit button (figure 68). Figure 69: Payment Proprietary & Confidential Page 37 of 43 11. Apply for Joint Venture Registration Figure 70: Instructions Step 1: Select Next button. Figure 71 Step 2: Enter NCC Registration Numbers of the Joint Venture Parties. Then click Next button. Proprietary & Confidential Page 38 of 43 Figure 72: Enter details This will display company’s details. Figure 73: Company Details Step 3: Click Next button. Proprietary & Confidential Page 39 of 43 Figure 74: Declaration Step 3: Click Submit button. Figure 75: Payment 12. View Application Status for any of the Registrations User can view the status of various applications applied for. Proprietary & Confidential Page 40 of 43 Figure 76: Application Status Figure 77: Application Status Proprietary & Confidential Page 41 of 43 13. Forums 13.1 Topics Figure 78: Topics Step 1: Click on All Topics under Topics Tab. Step 2: Place the cursor over the Topic name. Figure 79: Topics Step 3: Four options will be available there: View, Close, stick (to front), Spam (see figure 79). Proprietary & Confidential Page 42 of 43 13.2 New Topic Figure 80: Topics Step 1: Click on New Topic under Topics Tab (see figure 80). Step 2: Enter a Title in the Title box (See figure 80). Step 3: When all editing is done, click Publish button (See figure 80). Proprietary & Confidential Page 43 of 43