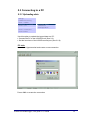
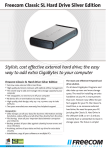
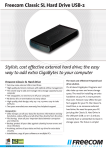
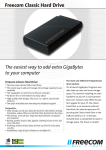
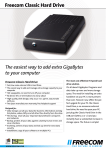
1
iLOGPlus
Internet enabled RTU/data logger
User guide
ILOGPLUS
Internet enabled RTU/data logger
User guide
This manual refers to three variants of the iLOGPlusPlus RTU/data logger:
1. iLOGPlusPlus-LAN: 10BaseT Ethernet port.
2. iLOGPlusPlus-EDM: Serial port for external dial-up or wireless modems.
3. iLOGPlusPlus-GSM: Internal EGSM/GPRS modem (900/1800 MHz or 850/1900
MHz)
Manual version: 1.3, 7/2009
Product versions: Hardware: 4.1, Firmware: 4.2
Disclaimer
• While every effort has been made to ensure that the information in this guide is
accurate and complete, no liability can be accepted for any errors or ommissions.
• Infinite Ltd reserves the right to change the specifications of the hardware and
software described in this guide at any time without prior notice.
• No part of this guide may be reproduced, transmitted, stored in fixed or removable
media or translated into any language in any form without the prior written
permission of Infinite Ltd.
• Infinite makes no warranties for damages resulting from corrupted or lost data
due to malfunction of the hardware or the software.
Copyright © 2005 - 2008 – Infinite Ltd
All rights reserved.
ILOGPlus RTU/data logger, User guide V1.0, 2/2008
2
Contents
1. Introduction
5
1.1 System block diagram
1.2 iLOGPlusPlus units
1.3 Technical characteristics
1.3.1 Absolute maximum ratings
1.3.1 Measurement section
1.3.2 Communication
2. Installation
12
2.1 Mounting
2.2 Wiring using the SCT-04E adaptor
2.2.1 Power supply
2.2.2 Analog inputs
2.2.3 Digital inputs
2.2.4 Digital outputs
2.3 Internet communications interface
2.3.1 10BaseT Ethernet port (iLOGPlus-LAN)
2.3.2 Modem port (iLOGPlus-EDM)
2.3.3 GSM antenna (iLOGPlus-GSM)
2.4 Connecting to a host computer
2.5 Connecting a GSM modem
2.6 Quick setup
2.6 Power on
3. Setup
25
3.1 Entering the menus
3.2 Unit identity
3.2.1 Unit name
3.2.2 Unit description
3.3 Logging parameters
3.3.1 Logging mode
3.3.2 Channel selection
3.3.3 Logging value selection
3.3.4 Logging rate
3.4 Measurement
3.4.1 Analog channels
3.4.2 Pulse counting channels
3.4.3 Digital inputs
3.5 Alarm parameters
3.5.1 Alarm mode
3.5.2 Prealarm limit
3.5.3 Alarm deadband
3.5.4 Alarm delay (Analog channels)
3.5.4 Alarm delay (Digital inputs)
3.6 Communication
3.6.1 Send rate
3.6.2 FIFO send mode
3.6.3 Data send mode
3.6.4 Alarm send mode
3.6.5 TCP/IP parameters
3.6.6 Email parameters
3.6.7 FTP parameters
3.6.8 GSM parameters
3.6.9 Send time synchronisation
ILOGPlus RTU/data logger, User guide V1.0, 2/2008
3
3.6.10 Internet connect
3.6.11 Power save
3.6.12 Serial port configuration
3.7 Web page
3.7.1 Web page password
3.8 Digital outputs
3.9 Decimal separator
4. General settings and commissioning
60
4.1 Setting date and time
4.2 Starting the web server
4.3 Clear FIFO
4.4 Clear alarm log
4.5 Clear event log
4.6 Clear counter
4.7 Counter preset
4.8 Factory settings
4.9 Firmware upgrade
5. Operation
66
5.1 Main screen & key functions
5.2 Diagnostics
5.2.1 Testing communication
5.2.2 Viewing I/O values and states
5.2.3 Viewing the totalizer values
5.2.4 Viewing the logged data
5.2.5 Viewing the alarm log
5.2.6 Viewing the event log
5.2.7 Viewing the IP address
5.3 Connecting to a PC
5.3.1 Uploading data
5.4 Hardware test procedures
5.5 Remote control
5.5.1 TCP commands
5.5.2 SMS commands
6. Specifications
79
7. Troubleshooting
83
8. Appendix
84
8.1 Data transfer formats
8.1.1 File name
8.1.2 File format
8.1.3 Alarm annunciation
8.2 Parameter default values
8.3 Analog measurements
8.3.1 Signal conditioning circuits
8.3.2 Applications
8.4 TCP & SMS commands
8.4.1 Viewing system parameters
8.4.2 Commissioning commands
8.5 Firmware upgrade procedure
8.6 Communication errors
8.7 iLOGPlus EDM: Connectors layout
8.8 Internal web page
8.9 RS232 connector pin layout (COM2, SCT-04E-x)
8.10 Wiring the I/O expansion modules
ILOGPlus RTU/data logger, User guide V1.0, 2/2008
4
1. Introduction
1.1. System block diagram
Figure 1.1, Block diagram
ILOGPlus RTU/data logger, User guide V1.0, 2/2008
5
1.2 iLOGPlus units
iLOGPlus is a powerful RTU/data logger with full internet connectivity. Areas of
application are telemetry and factory data acquisition. The main unit is
equipped with 4 high resolution analog inputs, 4 digital inputs and 2 digital
outputs. I/O can be expanded to 16 analog inputs, 16 digital inputs and 8 digital
outputs using DIN-rail mount I/O expansion modules.
Measurement data is stored in a FIFO structured power fail safe memory. The
device is equipped with an LCD display and a membrane keyboard to facilitate
data display and on site commissioning.
ILOGPLUS is available in three variants, differing in the physical Internet
communication interface:
1. iLOGPlus-LAN: 10BaseT Ethernet port.
2. iLOGPlus-EDM: Serial port for external dial-up or wireless modems.
3. iLOGPlus-GSM: Internal EGSM/GPRS modem (900/1800 MHz or 850/1900
MHz)
Ethernet port
(10BaseT)
IRDA interface
(optional)
4 line x 20
character display
with backlight
15 key membrane
keyboard
Power supply,
COM2 & signal
connections
Figure 1.2, ILOGPLUS-LAN unit
ILOGPlus RTU/data logger, User guide V1.0, 2/2008
6
Modem port
External modem
supply control
4 line x 20
character display
with backlight
15 key membrane
keyboard
Power supply,
COM2 & signal
connections
Figure 1.3, ILOGPLUS-EDM unit
ILOGPlus RTU/data logger, User guide V1.0, 2/2008
7
GSM antenna
SIM card drawer
GSM modem state
LED
4 line x 20
character display
with backlight
15 key membrane
keyboard
Power supply,
COM2 & signal
connections
Figure 1.4, iLOGPlus-GSM unit
ILOGPlus RTU/data logger, User guide V1.0, 2/2008
8
1.3 Technical characteristics
1.3.1 Absolute maximum ratings
General conditions
Analog input signal
Recommended operation
conditions
Maximum rating
A+ to A- (Differential voltage,
signal floating, no GND
reference)
0 – 1V
-10V … +10V
A- to GND (Signal floating,
common mode voltage)
inexistent or 0V
-10V … +10V
A+ to GND (A- connected to
GND)
0 – 1V
-10V … +10V
iLOGPlus + SCT-04E-12
Signal
Power supply voltage Vcc
0-20/4-20mA range
0-1V range
Digital inputs
Digital outputs (relay)
Normal range
12V … 15 VDC
0-20mA
0-1V
GND / open
12-60V DC, 0.5A,
12V-250V AC, 5A
Maximum rating
18VDC
-70mA …. +70 mA
-10V …+10V
-30V … +30V
110V DC, 0.5
250V AC1, 10A
Normal range
24 … 28 VDC
0-20mA
0-1V
GND / open
12-60V DC, 0.5A,
12V-250V AC, 5A
Maximum rating
30 VDC
-70mA …. +70 mA
-10V …+10V
-30V … +30V
110V DC, 0.5A
250V AC1, 10A
iLOGPlus + SCT-04E-24
Signal
Power supply voltage Vcc
0-20/4-20mA range
0-1V range
Digital inputs
Digital outputs (relay)
Stresses above those listed under Absolute Maximum Ratings may
cause permanent damage to the device. Exposure to absolute
maximum rating conditions for extended periods may affect device
reliability. Only one absolute maximum rating may be applied at any
one time.
ILOGPlus RTU/data logger, User guide V1.0, 2/2008
9
1.3.2 Measurement section
iLOGPlus features 4 analog inputs (Channel 1-4) with 12 bit resolution. A
variety of signal ranges is supported in conjunction with the SCT-04E adaptor.
iLOGPlus features an internal signal conditioning circuit with switchable gain for
channels 1, 2 and a 12 bit A/D converter. The A/D converter has an output
range of 0-4096 corresponding to an 0-4096 mV input range (See Appendix xx
for details).
The following table contains typical signal ranges and sensor types for each
analog channel.
Channel Gain
Low
Low
1, 2
Low
High
Low
Low
3, 4
Low
Low
Low
Low
Sensor
RTD
AD592*)
AD590*)
AD592*)
AD590*)
Physical range Resolution
0-1V
0.255 mV/bit
0 - 20 mA
5.11 µA/bit
4 - 20 mA
5.11 µA/bit
-100..600°C
0.081 Ω/bit
-25..105°C
0.094 °C/bit
-55..110°C
0.094 °C/bit
0-1V
0.255 mV/bit
0 - 20 mA
5.11 µA/bit
4 - 20 mA
5.11 µA/bit
-25..105°C
0.094 °C/bit
-55..110°C
0.094 °C/bit
Table 1
*) AD592, AD590 are popular, linear temperature sensors (Analog Devices).
The following table contains typical signal ranges and sensor types for each
analog channel of the analog input expansion module GE-AI-4 (AIx1- AIx4).
Channel Sensor
1, 2, 3, 4
RTD
Physical range Resolution
0-1V
0.255 mV/bit
0 - 20 mA
5.11 µA/bit
4 - 20 mA
5.11 µA/bit
-100..600°C
0.157 Ω/bit
Digital inputs (D1-4) have several functions:
1. The input signal state can be used as condition for logging the
corresponding analog channel (1-4).
2. They can act as common inputs for monitoring and logging digital signals.
3. Input 3, 4 can be configured as counter inputs with following functions:
•
Totalizer function with preset and clear.
•
Frequency measurement with two range options (0-32.000Hz and 03200.0 Hz).
The frequency measurements can be logged as virtual analog channels 5
and 6.
ILOGPlus RTU/data logger, User guide V1.0, 2/2008
10
Digital inputs of the GE-DIO-modules 42 (Dx1-x4) have following functions:
1. The input signal state can be used as condition for logging the
corresponding analog channel (1-4).
2. They can act as common inputs for monitoring and logging digital signals.
Digital outputs (DO 1-2) can have two functions:
1. Prealarm and alarm monitoring.
2. Remote controlled digital outputs.
Digital outputs of the GE-DIO-modules 42 (DO x1-x2) can have only one
function:
1. Remote controlled digital outputs.
1.3.3 Communication
iLOGPlus-LAN features a 10BaseT Ethernet port (COM1) and an auxilliary
serial port (COM2).
iLOGPlus-EDM features a main serial port (Modem port, COM1) and an
auxilliary serial port (COM2).
iLOGPlus-GSM has an internal GSM/GPRS modem (COM1) and an auxilliary
serial port (COM2).
All units support TCP/IP connectivity with following transfer capabilities:
1. FTP file transfer of the logged data.
2. Sending email with attachement of the logged data.
3. Sending email on alarm events.
4. Publishing the internal web server for observing real time measurements
and changing parameters using a web browser.
5. Sending SMS on alarm events (iLOGPlus-GSM, iLOGPlus-LAN, EDM with
external wireless modem).
6. Receiving SMS commands and answering with SMS containing
measurement data and parameter values.
Both fixed IP and dynamic IP connections are supported from all units.
The auxilliary serial port (all units) can be used for the following purposes:
1. Uploading the logged data to a host computer using the XMODEM protocol.
2. Alarm annunciation via SMS using an external GSM modem (iLOGPlusLAN).
3. Firmware upgrade of the unit.
The serial port has no Internet support.
The local serial connection functionality is internally switchable between the
RS232 port and the optional infared port, if the unit incorporates the irDA
option.
ILOGPlus RTU/data logger, User guide V1.0, 2/2008
11
2. Installation
2.1 Mounting
A wall suspension element with snap in lock is used to mount the unit.
2.2 Wiring using the SCT-04E-xx adaptor
Adaptor SCT-04E snaps on a DIN rail.
Digital inputs 1-4
RRS232 port (COM2)
Digital Outputs 1, 2
I/O expansion port
Jumper for supplying I/O
expansion units over the
SCT-04E.
Jumpered: Internal supply
Open: External supply
25 pin FCC to
iLOGPlus
1A Fuse
Analog input
conficuration jumpers
Analog input connections 1-4
Power supply
connection
The 25 pin D-plug to the iLOGPlus unit is not hot pluggable!
Plugging or unplugging this connector, during power up, can stress
the sensitive analog circuits of the device and lead to permanent
hardware failure!
ILOGPlus RTU/data logger, User guide V1.0, 2/2008
12
2.2.1 Power supply
Jumper 14 for internal
expansion module
12/24/V supply
- +
SCT-04-12: 12-15V DC
SCT-04-24: 24-27V DC
Put a jumper on ‘Jumper 14’ to supply expansion modules from the internal
12/24V power supply.
The communications section of the device is always in power on state in case
of iLOGPlus LAN (Default settings: Internet connect parameter = on).
iLOGPlus-GSM and iLOGPlus-EDM start with the communications section in
power off state (Default settings: Internet connect parameter = off).
Power supply requirements (Typical ratings)
SCT-04E-12, at 12VDC
Operation state
Normal operation (logging)
Display Backlight = off
Power save param = ON
Normal operation (logging)
Display Backlight = off
Power save param = OFF
Internet connection
Display Backlight = off
Setup
Display Backlight = on
iLOGPlusLAN
95 mA
iLOGPlus-GSM
50 mA
iLOGPlusEDM *)
50 mA
95 mA
100 mA
80 mA
95 mA
200 mA
(2A peak)
120mA
80 mA
130 mA
120mA
Display backlight current draw: ~40 mA
*) Without external modem
iLOGPlus-GSM can draw up to 2A, in short periods (bursts) during
data transmission. A power supply with current limitation under 2A is
not suitable for proper device operation.
ILOGPlus RTU/data logger, User guide V1.0, 2/2008
13
2.2.2 Analog inputs
Main unit analog inputs 1, 2:
Connecting 0-1V:
Inproper jumper settings can
damage the signal source
and/or the SCT-04E input
current sense resistors!
(See Appendix 8.3)
Connecting 0-20mA, 4-20mA:
Connecting an RTD sensor:
ILOGPlus RTU/data logger, User guide V1.0, 2/2008
14
Connecting a AD592 sensor:
Main unit analog inputs 3, 4:
Connecting 0-1V:
Connecting 0-20mA, 4-20mA:
Connecting a AD592 sensor:
ILOGPlus RTU/data logger, User guide V1.0, 2/2008
15
GE-AI-4 analog inputs 1, 2, 3, 4:
Connecting 0-1V:
Connecting 0-20mA, 4-20mA:
Connecting an RTD sensor:
ILOGPlus RTU/data logger, User guide V1.0, 2/2008
16
Connecting a AD592 sensor:
Digital inputs (Main unit & GE-DIO-42)
Main unit digital outputs
In case of DC power supply and inductive loads, use a freewheel diode
parallel to the load.
ILOGPlus RTU/data logger, User guide V1.0, 2/2008
17
GE-DIO-42 digital outputs
2.3 I/O Expansion
iLOGPlus main unit accepts I/O expansion by means of analog and digital I/O
modules on a serial bus.
Analog input module GE-AI4 containing 4 analog inputs can be applied for
analog input expansion. GE-DIO-4 digital I/O module containing 4 digital inputs
and 2 digital outputs can be used for digital I/O expansion.
The serial expansion bus plugs on the SCT-04E expansion connector (6 pin
modular connector).
Following I/O are recognized by the iLOGPlus CPU according to the modules
DIP switch settings:
Analog IN expansion No.1:
AI 11 – AI 14
Analog IN expansion No.2:
AI 21 – AI 24
Analog IN expansion No.3:
AI 31 – AI 34
ILOGPlus RTU/data logger, User guide V1.0, 2/2008
18
Digital IN expansion No.1:
Digital IN expansion No.2:
Digital IN expansion No.3:
DI 11 – DI 14
DI 21 – DI 24
DI 31 – DI 34
Internet communications interface
2.3.1 10BaseT Ethernet port (iLOGPlus-LAN)
The Ethernet hub must support 10BaseT (10 Mbit) Ethernet
connection.
2.3.2 Modem port (iLOGPlus-EDM)
ILOGPlus RTU/data logger, User guide V1.0, 2/2008
19
A common modem cable can be used for the external modem connection.
Supported modems are:
• PSTN modems with AT command set.
• GSM modems (GSM 07.07, GSM 07.05).
iLOGPlus-EDM (Hardware version > 3.2) provides an internal relay contact for
the the external modem power supply control, in order to ensure continuous
and reliable modem operation and enable power saving. The limitations for the
modem supply switch are:
Modem supply voltage: 50V max
Modem supply current: 0.5A max.
2.3.3 GSM network (iLOGPlus-GSM)
GSM modem state
LED
Do not insert or remove the SIM card during device operation!
The GSM modem state LED indicates the following states:
LED is off: Modem and communications section is powered off.
LED is on: Modem and communications section is powered on.
LED flashes slowly: iLOGPlus device is connected to the GSM provider
network.
LED flashes fast: iLOGPlus device is connected to internet.
ILOGPlus RTU/data logger, User guide V1.0, 2/2008
20
2.4 Connecting to a host computer
RS232 port
A standard D9 serial cable (straight through) can be used to connect the
auxilliary serial port with a host computer.
2.5 Connecting a GSM modem to COM2
A GSM modem can be connected to the auxilliary serial port for alarm
annunciation via SMS (iLOGPlus-LAN). Use a standard modem cable or see
the COM2 port pin layout in Appendix 8.3 to prepare the proper cable.
ILOGPlus RTU/data logger, User guide V1.0, 2/2008
21
2.6 Quick setup
Prepare mounting and wiring
according to section 2.
Set the real time clock (See
4.2)
Initialize the unit by executing
the factory settings procedure .
(See 4.8)
If the case of an iLOG-LAN unit
disable internet access
temporarily by setting the
corresponding parameter to ‘off’
(See 3.6.10)
Select logging mode and active
measurement channels (See
3.3)
Set the measurement
parameters for the active
channels (See 3.4)
Set the alarm parameters for
the active channels (See 3.5)
ILOGPlus RTU/data logger, User guide V1.0, 2/2008
22
Set the data transfer
parameters: Send rate, FIFO
send mode, etc. (See 3.6.13.6.4)
Set the TCP/IP parameters
(See 3.6.5)
Set the Email, FTP and SMS
parameters according to the
reporting requirements (See
3.6.6-3.6.8)
Select operation mode for the
iLOG outputs (See 3.8)
If the case of an iLOG-LAN unit
enable internet access by
setting the corresponding
parameter to ‘on’ (See 3.6.10)
ILOGPlus RTU/data logger, User guide V1.0, 2/2008
23
2.7 Power on
iLOGPlus is powered on as soon as it is connected with power. After running
the parameter loading procedure, the main sceen appears.
Deep freezer No 17
C1=-21 oC
L=-28.0
H=-10.0
01/11/03
17:09:30
The main screen displays real time measurement and alarm limits for every
analog channel, the current date and time. Use the function keys F1 to F6 to
view a specific channel.
After a little while the web server is automatically launched (only iLOGPlusLAN).
Start Web server...
After the first power up, the unit has default parameters as they are set in the
factory settings (see Appendix 8.5). Press <MAIN> to enter the menus and
proceed with setup.
ILOGPlus RTU/data logger, User guide V1.0, 2/2008
24
3. Setup
2.4 Entering the menus
Change
parameter
value
Enter
Arrow keys
Shift
Backspace
Escape
Go to
main menu
Picture 3.1, Keyboard layout
To access the iLOGPlus menus press <MAIN>. Enter the password and press
<OK> or press <ESC> to exit.
Application Settings
Password:****
ESC:Return
Main
>Setup
Commissioning
Test comms
The cursor symbol >, points to the menu option you can select by pressing
<OK>. To exit the current menu option and return to the previous option without
saving any changes press <ESC>. To return directly to the main display press
the button <MAIN>.
Symbols v and ^, on the right of the display, indicate the presence of more
menu options below or above the visible screen. Use the arrow keys (ST) to
move up and down through the menu options.
ILOGPlus RTU/data logger, User guide V1.0, 2/2008
25
To erase a character use the backspace button <A>.
For negative numbers enter the minus character by pressing <T> <F8>.
To enter characters from the menu press the appropriate number as many
times as is needed until the character appears on the display.
List of available characters:
Button
1
2
3
4
5
6
7
8
9
0
Characters
1.@\/:-_+&=,<space>,#,*,”,‘
2abc(ABC)
3def(DEF)
4ghi(GHI)
5jkl(JKL)
6mno(MNO)
7pqrs(PQRS)
8tuv(TUV)
9wxyz(WXYZ)
0
Table 2
Backslash character ‘\’ may appear on some unit display as ‘¥”.
Uppercase/Lowercase switch keys: up arrow (S), down arrow (T).
ILOGPlus RTU/data logger, User guide V1.0, 2/2008
26
3.2 Unit identity
3.2.1 Unit name
Setup
Unit name
Unit description
Log
You can set or change the unit name, which is used to identify the unit in all
report transmissions and on the web page.
Unit Name
ILOGPLUS_01
OK-Save
ESC-Back
Use the keyboard to enter the unit name. Maximum length is 15 characters. To
save the change press <OK>. To exit, without saving, press <ESC>.
Default Unit name is: iLOGPlus01
3.2.2 Unit description
Setup
Unit name
Unit description
Log
Unit Description
Deep freezer #1
You can set an optional description of the unit, for better idendification.
Description maximum length is 60 characters. It can be viewed in reports and
also on the web page.
To save the change press <OK>. To exit, without saving, press <ESC>.
Default: iLOGPlus telemetry unit
ILOGPlus RTU/data logger, User guide V1.0, 2/2008
27
3.3 Logging parameters
3.3.1 Logging mode
Setup
Unit description
Log
Measurements
Alarm
Logging mode
Log channels
Log value
With this option, you can choose the logging format of data in the FIFO
memory.
Channels: Separately
Alarms : Yes
DI
: Yes
F1-Change
OK-Next
The following settings exist:
To change an option press <F1>, to move to next option press <OK>.
Channels
Available options: ‘Separately’, ‘All’.
Option ‘Separately’ adds a record for the measurement data of each channel
in the FIFO memory. Option ‘All’ adds a record with the measurement data of
all channels. The first option saves memory if only a subset of the channels is
used by the application (one or two) and gives the advantage of conditional
logging (see 3.3.2). The second option is preferable, if most or all channels are
used and conditional logging is not necessary.
Default: ‘All’
Alarms
Available options: ‘Yes’ or ‘No’.
You can choose to log the alarm states or not.
DI (Digital Inputs).
Available options: ‘Yes’ or ‘No’.
You can choose to log digital input states or not.
After pressing <OK> to the last option the following screen appears:
WARNING!
ALL RECORDS WILL
BE DELETED!
OK-Save
ESC-Back
The message warns that all existing records in the FIFO memory will be
deleted and the memory will be formatted with the new format.
Press <OK> to accept the changes and enable formatting or press <ESC> to
cancel and exit.
ILOGPlus RTU/data logger, User guide V1.0, 2/2008
28
3.3.4 Logging rate
Setup
Unit description
Log
Measurements
Alarm
Logging mode
Log channels
Log value
Logging rate
With this option, you can set the time period between two subsequent logs.
Range: 2 – 65535 sec
Log Rate (seconds)
00900
OK-Save
ESC-Back
Default value: 900 (15 minutes).
To save the change press <OK>. To exit, without saving, press <ESC>.
ILOGPlus RTU/data logger, User guide V1.0, 2/2008
29
3.4 Measurements
3.4.1 Analog channels
Setup
Unit description
Log
Measurements
Alarm
Communication
Analog IN
Pulse IN
Digital IN
Use this option to set parameters for the analog inputs channels 1-4 of the
main unit and x1.-x4 of the expansion units, as also the virtual analog channels
5-6 of the pulse counting digital inputs (see 3.4.2).
Select AI
1
OK-Confirm ESC-Back
Select a channel by giving the channel number (1-8) and press <OK>.
To return to previous menu press <ESC>.
The convention for numbering the analog channels is the following:
Main unit:
A1- A4
Analog input expansion #1:
A11-A14
Analog input expansion #2:
A21-A24
Analog input expansion #3:
A31-A34
Virtual analog channel on DI3: A201
Virtual analog channel on DI4: A202
Power supply voltage monitor: A203
The “Analog IN” menu item provides access to the following parameters:
Description, Enabled, Logged, Validated, Unit, Log value, Alarm mode,
Scale Lo, Scale Hi, Alarm Lo, Alarm Hi, Sensor Lo, Sensor Hi, Scheduled,
Calibration, Conditioning, RTD supply, Gain, Excitation.
Description
The channel description permits channel naming. The channel name is used in
the reports and on the web page.
Default value: Channel + input number, e.g. ‘Channel 21’
Channel description maximum length is 20 characters.
Enabled
This parameter enables or disables reading of the analog input. Only enabled
channels can be logged or used for alarming.
Default value: ‘YES’ for analog inputs A1-4 of the main unit. All other channels
are disabled.
ILOGPlus RTU/data logger, User guide V1.0, 2/2008
30
Logged
This parameter enables or disables logging of the analog input measurement.
Default value: ‘YES’ for analog inputs A1-4 of the main unit. All other channels
are disabled.
Validated
This parameter selects between continuous and conditional logging of the
analog input measurement.
Available selections are: Yes, No
The selection ‘YES’ is possible only if the logging mode is set to ‘Separately’.
If the channel is enabled, you can choose whether the measurements of
channels will be logged continuously (‘No’) or conditionally (‘Yes’).
Continuously (-) means that the measurements are logged according to the
logging time rate.
Conditionally (V) means that the measurements for the relevant channel will be
logged according to logging time rate, but only if the respective digital input is
set (DI1 for AI1, DI2 for AI2, D11 for A11, D21 for A21 and so on).
Default value: ‘No’ (continuously).
Unit
Permits selection of the measurement physical unit.
Channel 1 Unit
°C
Use arrows to select
OK-Save
ESC-Back
Selectable units are:
Symbol
%
°C
°K
°F
mm
cm
m
km
ft
m2
ft2
m3
lt
ft3
kg
g
N
lb
dyn
kp
Pa
bar
Unit
Step
Percentage
degree Celsius
degree Kelvin
degree Fahrenheit
Milimeter
Centimeter
Meter
kilometer
foot
square meter
square foot
cubic meter
litre
foot cubed
kiLOGPlusram
gram
newton
pound
dyne
kilopond
pascal
bar
Measurement
A/D
Humidity
Temperature
Temperature
Temperature
Displacement
Displacement
Displacement
Displacement
Displacement
Area
Area
Volume
volume
volume
mass
mass
force
force
force
force
pressure
pressure
ILOGPlus RTU/data logger, User guide V1.0, 2/2008
31
At
m/s
ft/s
m/s2
g
cd
lm
J
Wh
kWh
erg
W
hp
kW
MW
Hz
kHz
MHz
GHz
A
kA
V
kV
S
cal
kcal
Btu
<Custom>
atmosphere
meter/sec
feet/sec
meter per second squared
gravity
candela
lumen
joule
watt hour
kilowatt hour
erg
watt
horsepower
kilowatt
megawatt
hertz
kilohertz
megahertz
gigahertz
ampere
kilo ampere
volt
kilo volt
siemens
calorie
kilocalorie
British thermal unit
User defined
pressure
velocity
velocity
acceleration
acceleration
luminous intensity
luminous flux
energy
energy
energy
energy
power
power
power
power
frequency
frequency
frequency
frequency
current
current
voltage
voltage
conductance
heat
heat
heat
Table 3
A custom unit (up to 5 characters) can be defined by the user.
Log value
With this option, you can select the internal measurement value processing of
the channel measurements during logging.
Available options are: Average, Maximum, Minimum, Instant
Default value: Average
Alarm mode
Use this option, to select between instant and delayed alarm for the analog
channel. Instant alarm is annunciated immediately when the conditions for
alarm for the corresponding channel are met. Delayed alarm is annunciated
after the ellapsing of a predefined alarm delay (see 3.5.3).
Available options are: I (instant), D (delayed)
Default value: D (delayed)
ILOGPlus RTU/data logger, User guide V1.0, 2/2008
32
Scale Lo
Use this option to set the minimal scale value.
Default value: 0
Range:
-32768..32767
Ch 1 Scale Low
-273
OK-Save
ESC-Back
If the Scale Lo value is changed the existing offset calibration is cancelled.
Scale Hi
Use this option to set the maximal scale value.
Default value: 4095
Range:
-32768 .. 32767
Ch 1 Scale High
50
OK-Save
ESC-Back
If the Scale Hi value is changed the existing offset calibration is cancelled.
Alarm Lo
Use this option to set the alarm low limit.
Default value: 0
Range:
Scale low .. Scale high
Ch 1 Alarm Low
-10.0
OK-Save
ESC-Back
Alarm Hi
Use this option to set the alarm low limit. Enter the appropriate value and press
<OK>. To exit without saving, press <ESC>.
Default value: 0
Range:
Scale Low .. Scale High
Ch 1 Alarm High
30.0
OK-Save
ESC-Back
ILOGPlus RTU/data logger, User guide V1.0, 2/2008
33
Sensor Lo
Sensor Low represents the raw A/D reading at Scale low.
The following example explains the setting of this value. A 4-20mA sensor is
used in this example. The 0-20mA scale corresponds to a range of 0-3921
when digitized by the iLOGPlus A/D. The Sensor Lo value is calculated as
follows:
Sensor Lo=3921*Scale low/Scale high=3921*4/20=784
Another way is to set the default Scale Lo and Hi values (0, 4095) connect a
current source and adjust the 4 mA low limit. Read the digitized value on the
display under menu selection ‘View I/O’ (see 5.4) and adjust ‘Sensor Lo’ to this
value (See 8.3 for details).
Default value: 0
Range:
0 .. 4095
Ch 1 Sensor Low
784
OK-Save
ESC-Back
If the Sensor Lo value is changed the existing offset calibration is cancelled.
Sensor Hi
Sensor Low represents the raw A/D reading at Scale High.
Default value: 4095
Range:
0 .. 4095
In the example of the 4-20mA sensor, this value is 3921.
Ch 1 Sensor High
4095
OK-Save
ESC-Back
If the Sensor Hi value is changed the existing offset calibration is cancelled.
See Appendix 8.3 for more information on these settings.
Scheduled
Analog inputs can be read and logged continuously or according to a sensor
power up schedule (see 3.4.2).
By setting this parameter to ‘Yes’, the respective analog input will be read and
recorded only during the sensor power up intervall.
Available values: ‘Yes’, ‘No’
Default value: ‘No’
ILOGPlus RTU/data logger, User guide V1.0, 2/2008
34
Offset calibration
Calibration setting permits correction of small offset deviations of the
measuring sensor. The calibration range is given as a percent of the total scale.
For example: suppose that the Scale Lo is –50 and Scale Hi is 50, then the
total scale is: 100. The calibration range will be: from -5% of Total Scale to 5%
of Total Scale, which means from -5 to +5.
Use the arrow keys to adjust the calibration value in 0.1% steps.
To save the value press <OK>. To exit without saving, press <ESC>.
Ch1 Calibration
0.7
OK-Save
ESC-Back
Whenever Scale High, Scale Low, Sensor High, Sensor Low are
changed the current calibration is reset to 0.
Conditioning
Use this option to select special conditioning (processing) of the raw
measurement as for example to compensate deviations caused by nonlinear
sensors.
Available options: none, PT100
Default: none
RTD excitation (only channels 1, 2)
Use this option to declare the use of the internal current source (S+, S- on
SCT-04E) for RTD sensor excitation.
Available options:
OFF, ON
Default:
OFF
Gain (only channels 1, 2)
Use this option to adjust input signal gain.
Avalable options: low (3.92) and high (10).
Select Low gain for the following ranges: 0-1V, 0-20/4-20mA, AD592
Select High gain for the following ranges: RTD and input voltage signals under
400 mV.
See Appendix 8.3 for more information on this setting.
Channel 1 Gain
Low (3.92)
Use arrows to select
OK-Save
ESC-Back
ILOGPlus RTU/data logger, User guide V1.0, 2/2008
35
3.4.2 Special main unit parameters
Gain (Channels AI 1, AI 2 only)
Use this option to adjust input signal gain.
Available options: low (3.92), high (10).
Default: low
Select Low gain for the ranges: 0-1V, 0-20/4-20mA, AD592
Select High gain for the ranges: RTD and input voltage signals under 400 mV.
RTD excitation (Channels AI 1, AI 2 only)
Use this option to declare the use of the internal current source (S+, S- on
SCT-04) for RTD sensor excitation.
Available options are: OFF, ON
Default: OFF
Sensor power up interval (Schedule)
Use this option to set a time interval in [min] for powering up external sensors
through the main unit output O1. This options refers to analog channels with
the option ‘Scheduled’ enabled.
Default value: 15
Range:
0 .. xxx
3.4.3 Pulse counting channels
Setup
Unit description
Log
Measurements
Alarm
Communication
Analog IN
Pulse IN
Digital IN
Pulse IN
>Counting mode
Counter scale
Counting mode
This option enables the counting function for digital inputs DI3 and DI4. The
option applies only for inputs that are not used for conditional logging (see
3.3.2). Available options are:
L: For low frequency signals in the range of 0.001 to 32 Hz.
H: For higher frequency signals in the range of 10 to 3200 Hz.
C: Counter function.
T: Totalizer function.
- : Pulse counting disabled (default).
ILOGPlus RTU/data logger, User guide V1.0, 2/2008
36
The counter and totalizer functions establish a 4 byte counter with preset and
clear for the corresponding digital input. By the totalizer function is logging
disabled. See 4.5 and 4.6 for setting preset value and clearing the totalizer.
The selection of options L or H generates a corresponding virtual analog
channel (5 or 6).
Option L: raw scale is 0..32000 for 0-32 Hz with 0.001 Hz resolution.
Option H: raw scale is 0-32000 for 0-3200.0 Hz. with 0.1Hz resolution
(Counting period is 10 sec).
Options L and H generate the virtual channels AI5 for DI3 and AI6 for DI4. See
3.4.1 for setting scale and alarm limits.
Option C generates virtual channels AI7 for DI3 and AI8 for DI4.
Channels generated with the H, L, C options are automatically logged in the
FIFO. Logging is disabled for option T.
Pulse counting
DI3 DI4
Mode: H
C
Arr-Select F1-Change
If a logged channel is generated, the following screen appears:
WARNING!
ALL RECORDS WILL
BE DELETED!
OK-Save
ESC-Back
Press <OK> to accept the changes and enable FIFO formatting or press
<ESC> to cancel and exit.
If you select the counter or the totalizer function you can set a corresponding
preset value for alarm as described in 3.7.6.
Counter scale factor (DI3, DI4)
This option is relevant, only for pulse inputs with counting mode C and T.
The pulse count is multiplied with this factor.
Default: 1, Range: 0.0000..1
Counter DI3 Sc Fact
0.0456
OK-Confirm ESC-Back
. To save the change press <OK>. To exit, without saving, press <ESC>.
ILOGPlus RTU/data logger, User guide V1.0, 2/2008
37
3.4.4 Digital inputs
Setup
Unit description
Log
Measurements
Alarm
Communication
Analog IN
Pulse IN
Digital IN
Use this option to set parameters for the digital input channels 1-4 of the main
unit and x1-x4 of the expansion units.
Select DI
1
OK-Confirm ESC-Back
The convention for numbering the digital channels is the following:
Main unit:
D1- D4
Analog input expansion #1:
D11-D14
Analog input expansion #2:
D21-D24
Analog input expansion #3:
D31-D34
The “Digital IN” menu option provides access to the following parameters:
Description, Enabled, Logged, Function, Alarm mode.
Description
Use this option to name a digital input. The name is used in the reports and on
the web page.
Select DI
1
OK-Confirm ESC-Back
Default value: ‘DI ’ + input number, e.g. ‘DI 21’
Channel description maximum length is 20 characters.
Enabled
This parameter enables or disables reading of the digital input. Only enabled
channels can be logged or used for alarming.
Default value: ‘YES’ for analog inputs A1-4 of the main unit. All other channels
are disabled.
Logged
This parameter enables or disables logging of the digital input state.
Default value: ‘NO’
ILOGPlus RTU/data logger, User guide V1.0, 2/2008
38
Function
Use this option to set the use of the digital input.
Available options are:
Not used (N): Alarm disabled (Default)
U: Alarm on the 0 to 1 transition
D: Alarm on the 1 to 0 transition
B: Alarm on both transitions
Function selection of DI channels that are used for valaidation or for counting
purposes cannot be changed.
Alarm mode
Use this option, to select between instant and delayed alarm for the digital
channel. Instant alarm is annunciated immediately when the conditions for
alarm for the corresponding channel are met. Delayed alarm is annunciated
after the ellapsing of a predefined alarm delay (see xxx).
Available options are: I (instant), D (delayed)
Default value: D (delayed)
ILOGPlus RTU/data logger, User guide V1.0, 2/2008
39
3.5 Alarm parameters
3.5.1 PreAlarm limit
Setup
Unit description
Log
Measurements
Alarm
Communication
Alarm mode
Prealarm
Alarm deadband
Alarm delay
Use this to set the prealarm low and high limits for the analog channels. The
prealarm range is given as a 10% percent of the total scale. For example: If
Scale Lo is –50 and Scale Hi is 50, then total Scale is: 100. Assuming that
Alarm Hi value is 30 and Alarm Lo value is –30 for the specific channel and the
prealarm limit is set to 3%, then the prealarm will occur at:
Prealarm high:
(Alarm Hi)-(3% of total scale) = 30 – 3 = 27.
Prealarm low:
(Alarm Low)+ (3% of Total Scale) = -30 + 3 = -27.
Default: 0.0, Range: 0.0..19.9
Pre Alarm (%)
3.0
OK-Save
ESC-Back
Enter the appropriate value using the keyboard. To save the change press
<OK>. To exit without saving, press <ESC>.
ILOGPlus RTU/data logger, User guide V1.0, 2/2008
40
3.5.2 Alarm deadband
Setup
Unit description
Log
Measurements
Alarm
Communication
Alarm mode
Prealarm
Alarm deadband
Alarm delay
Use this option to set the alarm deadband (hysteresis) for the analog channels.
Alarm deadband is small range of total scalewhere the alarm state remains
indifferent, by holding its last value in order to avoid output relay bouncing.
The Alarm deadband is given as a percent of the total scale.
Default: 0.3, Range: 0.0.. 9.9
To select the desired value use the keyboard. To save the value press <OK>.
To exit without saving, press <ESC>.
Alarm Dead Band (%)
2.3
OK-Save
ESC-Back
The Alarm Dead Band applies only for the alarm limits and not for
prealarm.
3.5.3 Alarm delay (Analog channels)
Setup
Unit description
Log
Measurements
Alarm
Communication
Alarm mode
Prealarm
Alarm deadband
Alarm delay
AI Channels
Digital IN
Use this option to set delay time of alarm annunciation for the analog channels.
The values are entered in minutes.
Default: 000, Range: 000…999
To save the values press <OK>. To exit without saving, press <ESC>.
Alarm Delay AI (min)
015
OK-Save
ESC-Back
ILOGPlus RTU/data logger, User guide V1.0, 2/2008
41
The Alarm delay applies only for Alarm annunciation and not for
Prealarm.
3.5.4 Alarm delay (Digital inputs)
Setup
Unit description
Log
Measurements
Alarm
Communication
Alarm mode
Prealarm
Alarm deadband
Alarm delay
AI Channels
Digital IN
Use this option to set delay time of alarm annunciation for the digital inputs.
The values are entered in seconds.
Default: 000, Range: 000…999
To save the values press <OK>. To exit without saving, press <ESC>.
Alarm Delay DI (sec)
010
OK-Save
ESC-Back
The Alarm delay applies only for Alarm annunciation and not for
Prealarm.
ILOGPlus RTU/data logger, User guide V1.0, 2/2008
42
3.6 Communication
3.6.1 Send rate
Setup
Alarm
Communication
Web page
Digital outputs
Send rate
FIFO send mode
Data send mode
Alarm send mode
Internet param
Use this opton to set the rate of sending the logged records. After ellapsing of
the time period defined in the Send rate, the unit sends the logged data to the
defined recipients and clears the data FIFO.
Default: 043200, Range: 000000…999999
Send Rate (minutes)
00003
OK-Save
ESC-Back
To save the changes press <OK>. To exit, without saving, press <ESC>.
3.6.2 FIFO Send mode
Setup
Alarm
Communication
Web page
Digital outputs
Send rate
FIFO send mode
Data send mode
Alarm send mode
Internet param
Use this opton to set the mode for sending FIFO records. Available options are:
Latest/Keep (default): The new records logged after the last data transmission
are included in the send file. Transmitted records are
kept in the FIFO memory.
All/Keep: All FIFO records are included in the send file. Transmitted records
are kept in the FIFO memory.
All/Clear: All FIFO records are included in the send file and then cleared.
FIFO send mode
Latest/Keep
Use arrows to select
OK-Save
ESC-Back
To save the changes press <OK>. To exit, without saving, press <ESC>.
ILOGPlus RTU/data logger, User guide V1.0, 2/2008
43
3.6.3 Data send mode
Setup
Alarm
Communication
Web page
Digital outputs
Send rate
FIFO send mode
Data send mode
Alarm send mode
Internet param
Use this option to set the type of communications that will be used to send the
logged data.
Available options are: E-mail, FTP
Data Send Mode
EMAIL
FTP
*
Arr-Select F1-Change
Default: Both off
Use the arrows to select an option. To change the state of the options, press
<F1>. You can choose one option, both or none.
Press <OK> to save the setting or <ESC> to cancel.
3.6.4 Alarm Send Mode
Setup
Alarm
Communication
Web page
Digital outputs
Send rate
FIFO send mode
Data send mode
Alarm send mode
Internet param
Use this option to set the type of communications that will be used to send the
alarm messages.
Available options are: E-mail, SMS
Alarm Send Mode
EMAIL
SMS
*
*
Arr-Select F1-Change
Default: Both off
Use the arrows to select an option. To change the state of the options, press
<F1>. You can choose one option, both or none. Press <OK> to save the
setting or <ESC> to cancel.
ILOGPlus RTU/data logger, User guide V1.0, 2/2008
44
3.6.5 TCP/IP parameters
ILOGPLUS-LAN
Setup
Alarm
Communication
Web page
Digital outputs
Send rate
Data send mode
Alarm send mode
TCP/IP param
e-mail
Use this option to set the parameters for the TCP/IP protocol.
The option includes following settings:
IP Address, DNS, Gateway, Subnet Mask
IP Address
Defines an IP Address for the unit.
Default: 192.168.1.45
IP Address
111.222.3.44
OK-Save
ESC-Back
To save the setting press <OK>. To exit, without saving, press <ESC>.
DNS
Defines the IP address of the Domain Name Server (DNS) in the TCP/IP
network.
Default: 0.0.0.0
Domain Name Server
111.222.3.45
OK-Save
ESC-Back
To save the setting press <OK>. To exit, without saving, press <ESC>.
Gateway
Defines the IP address of the Gateway to Internet, in the TCP/IP network.
Default: 0.0.0.0
Gateway
111.222.3.46
OK-Save
ESC-Back
To save the setting press <OK>. To exit, without saving, press <ESC>.
ILOGPlus RTU/data logger, User guide V1.0, 2/2008
45
Subnet Mask
Defines the Subnet mask.
Default: 255.255.255.0
Subnet Mask
255.255.255.0
OK-Save
ESC-Back
To save the setting press <OK>. To exit, without saving, press <ESC>.
iLOGPlus-EDM & iLOGPlus-GSM
Setup
Alarm
Communication
Web page
Digital outputs
Send rate
Data send mode
Alarm send mode
TCP/IP param
e-mail
Use this option to set the parameters for the TCP/IP protocol.
The option includes following settings:
Modem type, ISP Username, ISP Password, Modem Init String, View IP
address.
Modem Type
Use this option to select a modem type.
Modem Type
Hayes
Use arrows to select
Default value: Hayes (iLOGPlus-EDM), GSM (iLOGPlus-GSM)
Available options are:
iLOGPlus-EDM: Hayes, GSM P1, GSM P2 and CDMA, default: Hayes
iLOGPlus-GSM: GSM P2 fixed
Select:
GSM P1 for General GSM and Siemens GSM modems.
GSM P2 for Wavecom GSM & CDMA modems.
Use the arrows to select the modem type. To save the change press <OK>. To
exit, without saving, press <ESC>.
ISP Phone no
Use this option to can set the ISP (Internet Service Provider) phone number.
Default: ISP Phone Number
2310812576
OK-Save
ESC-Back
ILOGPlus RTU/data logger, User guide V1.0, 2/2008
46
Press <OK> to save the setting or <ESC> to cancel.
ISP Username
Use this option to set the ISP account user name.
Default: ISP Username
frigo
OK-Save
ESC-Back
In case of a GPRS connection the ISP User name is commonly fixed to:
*99***1# (Ask the GSM provider for the proper ISP User name).
To save the setting press <OK>. To exit, without saving, press <ESC>.
ISP Password
Use this option to set the ISP account password.
Default: ISP Password
****
OK-Save
ESC-Back
To save the setting press <OK>. To exit, without saving, press <ESC>.
During password entry you see the characters typed in. During normal
menu browsing, the password is invisible.
Modem Init String
Use this option to set the a initialization string for the external or internal
modemmodem.
Modem Init String
AT&FE0X0L3
ESC-Back
To save the setting press <OK>. To exit, without saving, press <ESC>.
Modem type
Hayes
GSM
GPRS
Common initialization string
AT&FE0X0L3 (default)
AT+CGDCONT=1,\”IP\”,\”APN\”
Common value for APN is ‘internet’.
Ask your GSM provider for the proper APN.
ILOGPlus RTU/data logger, User guide V1.0, 2/2008
47
3.6.6 Email parameters
Setup
Alarm
Communication
Web page
Digital outputs
Send rate
Data send mode
Alarm send mode
TCP/IP param
e-mail
Use this option to set parameters for sending e-mail. The option includes
following settings: e-mail SMTP, e-mail POP3, e-mail Username, e-mail
Password, e-mail Receivers.
E-mail SMTP
Defines the e-mail SMTP server (outgoing mail server).
Default: e-mail SMTP
mail.link-systems.gr
OK-Save
ESC-Back
To save the setting press <OK>. To exit, without saving, press <ESC>.
E-mail POP3
Defines the e-mail POP3 server (incoming mail server).
Default: e-mail POP3
mail.link-systems.gr
OK-Save
ESC-Back
To save the setting press <OK>. To exit, without saving, press <ESC>.
E-mail Username
Defines the e-mail user name of the mail account.
Default: e-mail Username
[email protected]
OK-Save
ESC-Back
It is important that you enter the complete e-mail address.
To save the setting press <OK>. To exit, without saving, press <ESC>.
ILOGPlus RTU/data logger, User guide V1.0, 2/2008
48
E-mail Password
Defines the the mail account password. The maximum password length is 20
characters.
e-mail password
*****
OK-Save
ESC-Back
To save the setting press <OK>. To exit, without saving, press <ESC>.
During password entry you see the characters typed in. During normal
menu browsing, the password is invisible.
SMTP authentication
Some SMTP servers require an authetication procedure involving an additional
username and password.
Default: No
Use SMTP Auth
Yes
Use arrows to select
OK-Save
ESC-Back
To save the setting press <OK>. To exit, without saving, press <ESC>.
Select the respective submenus and type in the additional username and
password, if they differ from the defaults.
POP3 authentication
Some SMTP servers require a POP3 authetication procedure involving in some
cases an additional username.
Default: No
Use POP3 Auth
Yes
Use arrows to select
OK-Save
ESC-Back
To save the setting press <OK>. To exit, without saving, press <ESC>.
Select the respective submenus and type in an additional username, if a
different username from the default one is required.
ILOGPlus RTU/data logger, User guide V1.0, 2/2008
49
E-mail Receivers
You can set up to five email recipients.
e-mail Receivers
>e-mail Receiver 1
e-mail Receiver 2
e-mail Receiver 3 v
Use the arrow keys to see all options. To select an option press <OK>.
For example for e-mail Receiver 1:
e-mail Receiver 1
[email protected]
OK-Save
ESC-Back
To save the setting press <OK>. To exit, without saving, press <ESC>.
ILOGPlus RTU/data logger, User guide V1.0, 2/2008
50
3.6.7 FTP parameters
Setup
Alarm
Communication
Web page
Digital outputs
e-mail
FTP
SMS
Synchr time
Use this option to set parameters for FTP file transfer of the logged data.
You can define up to 2 FTP servers. Only the first server is an active recipient.
The second server is used if the connection to server 1 has failed.
FTP Parameters
>FTP Server 1
FTP Server 2
FTP Server 1
Use this option to set parameters for FTP Server 1.
FTP Server 1
>Server 1 Address
User Name
User Password
Press <OK> to select an option, or <ESC> to exit.
Server 1 Address
Defines the IP address of the main FTP Server.
FTP Server address 1
ftp.hypernet.gr
OK-Save
ESC-Back
To save the setting press <OK>. To exit, without saving, press <ESC>.
ILOGPlus RTU/data logger, User guide V1.0, 2/2008
51
User Name
Defines the user name for FTP Server 1.
FTP User Name 1
administrator
OK-Save
ESC-Back
To save the setting press <OK>. To exit, without saving, press <ESC>.
User Password
Defines the user password for FTP Server 1.
FTP Password 1
****
OK-Save
ESC-Back
To save the setting press <OK>. To exit, without saving, press <ESC>.
During password entry you see the characters typed in. During normal
menu browsing, the password is invisible.
FTP Port number
Defines the port number for FTP Server 1. Default value is 21.
FTP Port 1
21
OK-Save
ESC-Back
To save the setting press <OK>. To exit, without saving, press <ESC>.
If a second FTP server is available, apply the same procedure as above to
provide parameters for the auxilliary server.
FTP Path
Defines a path for FTP Server 1. Default value is ‘.’ (ftp root directory). The path
name can be maximal 30 characters.
FTP Path 1
iLOG\iLOG15
OK-Save
ESC-Back
To save the setting press <OK>. To exit, without saving, press <ESC>.
If a second FTP server is available, apply the same procedure as above to
provide parameters for the auxilliary server.
ILOGPlus RTU/data logger, User guide V1.0, 2/2008
52
Use Passive Mode
In active mode FTP (default) the client connects to the FTP server's command
port, port 21. The server will then connect back to the client's specified data
port. In passive mode FTP the client initiates both connections to the server. If
passive mode is required, check this option.
Default: No
Server 1 Use Passive
Yes
OK-Save
ESC-Back
To save the setting press <OK>. To exit, without saving, press <ESC>.
If a second FTP server is available, apply the same procedure as above to
provide parameters for the auxilliary server.
3.6.8 GSM
Setup
Alarm
Communication
Web page
Digital outputs
e-mail
FTP
SMS
Synchr time
Use this option to set parameters for a GSM modem connected to one of the
serial ports (COM1,COM2). The option includes following settings: GSM Port,
GSM Pin, GSM Baud, SMS Center, SMS Receivers.
GSM Port
Defines the port used by the GSM modem.
GSM Port
COM2
Use Arrows to select
Use the arrows to select an option:
iLOGPlus-LAN: None (default), COM2.
iLOGPlus-EDM, iLOGPlus-GSM: none, COM1 (internal modem for iLOGPlusGSM), COM2.
To save the setting press <OK>. To exit, without saving, press <ESC>.
GSM Baud
Defines the port baud rate for the communication with the GSM modem.
Acceptable values are: 4800, 9600, 19200, 38400
Default: 38400
GSM Modem Baud
19200
Use arrows to select
OK-Save
ESC-Back
ILOGPlus RTU/data logger, User guide V1.0, 2/2008
53
Use the arrow keys to select a value.
To save the setting press <OK>. To exit, without saving, press <ESC>.
GSM PIN
Defines the GSM pin number (password).
GSM Pin
****
OK-Save
ESC-Back
To save the setting press <OK>. To exit, without saving, press <ESC>.
During pin number entry you see the characters typed in. During
normal menu browsing, the pin number is invisible.
SMS Center
Defines the number for the SMS center.
SMS Center
+306976240001
OK-Save
ESC-Back
To save the setting press <OK>. To exit, without saving, press <ESC>.
SMS Receivers
You can set up to five SMS recipients for alarm annunciation. Alarm SMS are
sent to all recipients.
SMS Receivers
>SMS Receiver 1
SMS Receiver 2
SMS Receiver 3 v
Use the arrow keys to select an option. To select an option press <OK>.
For example for SMS Receiver 1:
SMS Receiver 1
+306946567893
OK-Save
ESC-Back
To save the setting press <OK>. To exit, without saving, press <ESC>.
ILOGPlus RTU/data logger, User guide V1.0, 2/2008
54
3.6.9 Send time synchronization
Setup
Alarm
Communication
Web page
Digital outputs
e-mail
FTP
SMS
Synchr time
Use this option to define a day time mark, which is used to synchronize the
send rate of logged data in the day period.
Example:
If you set the send rate (see 3.6.1) to half day (720 min) and ‘Synchr time’ to
11:30, then one data transmission will occur at 11:30, the following at 23:30
and so on.
Default value: 00:00
Synchronization Time
11:30
OK-Save
ESC-Back
To save the setting press <OK>. To exit, without saving, press <ESC>.
3.6.10 Internet connect
Setup
Alarm
Communication
Web page
Digital outputs
e-mail
FTP
SMS
Synchr time
Internet connect
Use this option to enable or disable connection to Internet at start up.
Available options: On, Off
Default settings:
iLOGPlus-LAN:
On
iLOGPlus-EDM, GSM:
Off
Use the arrow keys to select an option.
Internet connection
On
Use arrows to select
OK-Save
ESC-Back
To save the setting press <OK>. To exit, without saving, press <ESC>.
ILOGPlus RTU/data logger, User guide V1.0, 2/2008
55
3.6.11 Power save
Setup
Alarm
Communication
Web page
Digital outputs
FTP
GSM
Synchr time
Internet connect
Power save
iLOGPlus-EDM and iLOGPlus-GSM control the power supply of the
communication section, including the internal or external modem in order to
save power for battery operation (Power save=’ON’). The communication
section is powered up only during data or SMS transmission and once every
hour to look for incoming SMS. Use this option to set the preferred supply
mode. This parameter should be set to ‘OFF’ state to enable instant SMS
receiving.
Default: ON
Power save
OFF
Use arrows to select
OK-Save
ESC-Back
Use the arrow keys to select a value.
To save the setting press <OK>. To exit, without saving, press <ESC>.
3.6.12 Serial port configuration
Setup
Alarm
Communication
Web page
Digital outputs
GSM
Synchr time
Internet connect
Power save
Serial port
Use this option to define parameters for the auxilliary serial port (COM 2).
Serial Port
>Baud rate
Set XM Null Char
Use the arrow keys to select an option. To select an option press <OK>.
ILOGPlus RTU/data logger, User guide V1.0, 2/2008
56
Baud rate
Use this option to define baud rate for the serial port 2, in case of uploading
logged data to a host computer. All other settings are fixed as follows:
Data: 8 bit, parity: none, Stop: 1 bit
Available values are: 4800, 9600, 19200, 38400
Port 2 Baud
19200
Use arrows to select
OK-Save
ESC-Back
Use the arrow keys to select a value.
To save the setting press <OK>. To exit, without saving, press <ESC>.
Set XM Null Char
Use this option to set the XModem protocol null char for local communications
(ASCII value).
Value range: 0 - 255.
Default:
26
Use the arrows to select the appropriate value.
XModem Null Char
26
Use arrows to select
OK-Save
ESC-Back
To save the setting press <OK>. To exit, without saving, press <ESC>.
ILOGPlus RTU/data logger, User guide V1.0, 2/2008
57
3.7 Web Page
3.7.1 Web page password
Setup
Alarm
Communication
Web page
Digital outputs
Web Page Pwd
Use this option to set a remote user password for the Web Page.
Web Page Password
**********
OK-Save
ESC-Back
To save the setting press <OK>. To exit, without saving, press <ESC>.
During password entry you see the characters typed in. During normal
menu browsing, the password is invisible.
3.8 Digital Outputs
3.8.1 Digital output mode
Setup
Alarm
Communication
Web page
Digital outputs
DO Mode
Use this option to select the function mode for digital outputs DO1, DO2. Digital
Output Mode.
Available options: System (Alarm/PreAl), User
Default: System
System (Alarm/PreAl): The outputs are used by the system to monitor
prealarm and alarm using a lamp on DO1 and a sirene on DO2.
User: The output state of each output is user selectable and can be set
remotely over the web page, TCP or SMS command.
Use the arrow keys to select an option.
Digital Outputs Mode
System (Alarm/PreAl)
Use arrows to select
OK-Save
ESC-Back
To save the setting press <OK>. To exit, without saving, press <ESC>.
ILOGPlus RTU/data logger, User guide V1.0, 2/2008
58
3.9 Decimal separator
Setup
Communication
Web page
Digital outputs
Decimal separator
Use this option to select the character for the decimal number separator to be
used in the measurements data file (See section 8.1).
Available options: Period(.), Comma (,)
Default: Period(.)
Use the arrow keys to select an option.
Decimal separator
Comma (,)
Use arrows to select
OK-Save
ESC-Back
To save the setting press <OK>. To exit, without saving, press <ESC>.
ILOGPlus RTU/data logger, User guide V1.0, 2/2008
59
4. General settings and commissioning
4.1 Setting date and time
Setup
Commissioning
Test comms
Connect to host
View I/O
View counters
View FIFO
Test comms
Set RTC
Start web server
Clear FIFO
Clear event log
Clear counter
Counter preset
Factory settings
Firmware upgade
Use this option to preset date and time.
Set RTC Time
4 04/01/01 05:19:37
OK-Save
ESC-Back
The first number indicates the day of the week, as follows:
1: Sunday
2: Monday
3: Tuesday
4: Wednesday
5: Thursday
6: Friday
7: Saturday
The date format is day/month/year (DD/MM/YY) and the time format
hour:minutes:seconds (HH:MM:SS).
Use the up arrow to move the cursor to the right or the down arrow to move
the cursor to the left. The cursor is blinking to show its position.
Set the current time and press <OK> to preset the clock or press <ESC> to
leave it unchanged and exit.
ILOGPlus RTU/data logger, User guide V1.0, 2/2008
60
4.2 Starting the web server
Setup
Commissioning
Test comms
Connect to host
View I/O
View counters
View FIFO
Set RTC
Start web server
Clear FIFO
Clear event log
Clear counter
Counter preset
Factory settings
Firmware upgade
Use this option to start the web server manually. If the ‘Internet connect’
parameter (see 3.6.10) is off, it is set to on.
Start Web Server
OK-Confirm ESC-Back
To start the web server press <OK>. To exit, without saving, press <ESC>.
The following message appears on the display during launching:
Start Web Server
Please Wait..
OK-Confirm ESC-Back
4.3 Clear FIFO
Setup
Commissioning
Test comms
Connect to host
View I/O
View counters
View FIFO
Set RTC
Start web server
Clear FIFO
Clear event log
Clear counter
Counter preset
Factory settings
Firmware upgade
This option deletes existing logged data and formats the FIFO memory.
Clear FIFO
OK-Confirm ESC-Back
ILOGPlus RTU/data logger, User guide V1.0, 2/2008
61
To start FIFO formatting press <OK>. To cancel, press <ESC>.
Format FIFO
319 KB
Please wait..
4.4 Clear alarm log
Setup
Commissioning
Test comms
Connect to host
View I/O
View counters
View FIFO
Set RTC
Start web server
Clear FIFO
Clear alarm log
Clear event log
Clear counter
Counter preset
Factory settings
Firmware upgade
The unit keeps an alarm log file.
This option empties the alarm log.
Clear Alarm Log
OK-Confirm ESC-Back
Press <OK> to delete existing alarm records. To cancel, press <ESC>.
4.5 Clear event log
Setup
Commissioning
Test comms
Connect to host
View I/O
View counters
View FIFO
Set RTC
Start web server
Clear FIFO
Clear alarm log
Clear event log
Clear counter
Counter preset
Factory settings
Firmware upgade
The unit keeps an event log file containing start up date/time marks,
communication errors and related events.
This option empties the event log.
ILOGPlus RTU/data logger, User guide V1.0, 2/2008
62
Clear Event Log
OK-Confirm ESC-Back
Press <OK> to delete existing event records. To cancel, press <ESC>.
4.6 Clear counter
Setup
Commissioning
Test comms
Connect to host
View I/O
View counters
View FIFO
Set RTC
Start web server
Clear FIFO
Clear event log
Clear counter
Counter preset
Factory settings
Firmware upgade
Use this option to clear a counter or totalizer (see 3.4.2). Use the arrow keys
to select the totalizer.
Clear counter
> DI3
DI4
Press <OK> to clear the totalizer. To cancel the entry, press <ESC>.
4.7 Counter preset
Setup
Commissioning
Test Test comms
Connect to host
View I/O
View counters
View FIFO
Set RTC
Start web server
Clear FIFO
Clear event log
Clear counter
Counter preset
Factory settings
Firmware upgade
Use this option to set a starting value for a counter or totalizer (see 3.4.2). Use
the arrow keys to select the counter or totalizer. The current preset value
appears below. Type in the new value.
ILOGPlus RTU/data logger, User guide V1.0, 2/2008
63
Counter preset
>DI3
DI4
Select counter and press <OK. To cancel, press <ESC>.
Counter preset DI3
156800
OK-Save
ESC-Back
To save the preset value press <OK>. To exit, without saving, press <ESC>.
4.8 Factory settings
Setup
Commissioning
Test comms
Connect to host
View I/O
View counters
View FIFO
Set RTC
Start web server
Clear FIFO
Clear event log
Clear counter
Counter preset
Factory settings
Firmware upgade
Use this option to restore all parameters and settings with their default values.
All logged data will be erased and the FIFO memory will be formatted.
WARNING!
ALL RECORDS WILL
BE DELETED!
OK-Confirm ESC-Back
Press <OK> to confirm or <ESC> to cancel.
Format FIFO
100 KB
Please Wait …
Table 3 contains the default values of all parameters (see Appendix 8.5).
ILOGPlus RTU/data logger, User guide V1.0, 2/2008
64
4.9 Firmware upgrade
Setup
Commissioning
Test comms
Connect to host
View I/O
View counters
View FIFO
Set RTC
Start web server
Clear FIFO
Clear event log
Clear counter
Counter preset
Factory settings
Firmware upgade
Use this option to download new firmware to the unit using a PC connected to
the serial port.
Firmware Upgrade
OK-Confirm ESC-Back
The firmware upgrade is described in Appendix 8.4.
ILOGPlus RTU/data logger, User guide V1.0, 2/2008
65
5. Operation
5.1 Main screen & key functions
The main sceen displays the channel values.
Deep freezer No 17
C1=-21 oC
L=-28.0
H=-10.0
01/11/03
17:09:30
Available key functions
F1..F8
Arrow keys
MAIN
ESC
F8
Switch the display to channel 1..8 respectively.
Switch the diplay to the next (previous) channel
Enters the main menu
View IP address
Alarm acknowledge. After acknowledging, DO2 goes low (Alarm
sirene function), while DO1 remains high (Alarm lamp function),
see 3.8.1.
5.2 Diagnostics
5.2.1 Testing communication
E-mail
Commissioning
Test comms
Connect to host
View I/O
View counters
View FIFO
email
Alarm email
FTP
SMS
Technical
Use this option to test e-mail transfer by sending a test e-mail with the logged
data to the selected recipients.
Test Email
OK-Confirm ESC-Back
ILOGPlus RTU/data logger, User guide V1.0, 2/2008
66
Press <OK> to confirm.
Test Email
Please wait…
OK-Confirm ESC-Back
If the transfer has been completed successfully:
Test Email
OK
OK-Confirm ESC-Back
If the transfer has not suceeded:
Test Email
Comm error -106
OK-Confirm ESC-Back
See Appendix 8.7 for details on communication errors.
Alarm e-mail
Commissioning
Test comms
Connect to host
View I/O
View counters
View FIFO
email
Alarm email
FTP
SMS
Technical
Use this option to test e-mail transfer by sending a test e-mail with the current
alarms to the selected recipients.
Test Alarm email
OK-Confirm ESC-Back
Press <OK> to confirm.
Test Alarm email
Please wait…
OK-Confirm ESC-Back
ILOGPlus RTU/data logger, User guide V1.0, 2/2008
67
If the transfer has been completed successfully:
Test Alarm email
OK
OK-Confirm ESC-Back
If the transfer has not suceeded:
Test Alarm email
Comm error -106
OK-Confirm ESC-Back
See Appendix 8.7 for details on communication errors.
FTP
Setup
Commissioning
Test comms
Connect to host
View I/O
View counters
View FIFO
email
Alarm email
FTP
SMS
Technical
Use this option to test FTP transfer by connecting to the selected FTP server
and sending a file with the logged data.
Test FTP
OK-Confirm ESC-Back
Press <OK> to confirm.
Test FTP
Please wait…
OK-Confirm ESC-Back
If the transfer has been completed successfully:
Test FTP
OK
OK-Confirm ESC-Back
ILOGPlus RTU/data logger, User guide V1.0, 2/2008
68
If the transfer has not suceeded:
Test FTP
Comm error -1003
OK-Confirm ESC-Back
See Appendix 8.7 for details on communication errors.
SMS
Setup
Commissioning
Test comms
Connect to host
View I/O
View counters
View FIFO
email
Alarm email
FTP
SMS
Technical
Use this option to test FTP transfer by connecting to the selected FTP server
and sending a file with the logged data.
Send Test SMS
OK-Confirm ESC-Back
Press <OK> to confirm.
Send Test SMS
Setting params…
OK-Confirm ESC-Back
If the transfer has been completed successfully:
Send Test SMS
OK
OK-Confirm ESC-Back
ILOGPlus RTU/data logger, User guide V1.0, 2/2008
69
If the transfer has not suceeded:
Send Test SMS
Comm error -1000
OK-Confirm ESC-Back
See Appendix 8.7 for details on communication errors.
Technical
Setup
Commissioning
Test comms
Connect to host
View I/O
View counters
View FIFO
email
Alarm email
FTP
SMS
Technical
This option is intended for service purposes. Do not use it.
5.2.2 Viewing I/O values and states
Setup
Commissioning
Test comms
Connect to host
View I/O
View counters
View FIFO
View alarm log
Use this option to view the raw analog values after digitizing and digital I/O
states.
Analog raw values of channels 1-6 are displayed:
C1-2:
C3-4:
C5-6:
Press
0475 1585
4095 0001
0000 0000
any key..
Press <ESC> to exit or any key to view digital I/O states.
DI1-4: 0
DO1-2: 1
0
1
0
0
Press any key..
ILOGPlus RTU/data logger, User guide V1.0, 2/2008
70
5.2.3 Viewing the totalizer values
Setup
Commissioning
Test comms
Connect to host
View I/O
View counters
View FIFO
View alarm log
Use this option to view the totalizer values if any configured using the option
3.4.2.
TDI3: TDI4: 168501
Press any key..
5.2.4 Viewing the logged data
Commissioning
Test comms
Connect to host
View I/O
View counters
View FIFO
View alarm log
View event log
Use this option to view the logged records.
Select Channel
1
OK-Confirm ESC-Back
Select a channel by giving the channel number (1-6) and press <OK>.
To return to previous menu press <ESC>. Use the arrow keys to browse to
next or previous record.
Channel 1
Record:00001/01515
21/11/2003 16:00:06
C1=-19.3 °C
ILOGPlus RTU/data logger, User guide V1.0, 2/2008
71
Press <ESC> to quit.
5.2.5 Viewing the alarm log
Setup
Commissioning
Test comms
Connect to host
View I/O
View counters
View FIFO
View alarm log
Use this option to view the logged records in the system alarm log.
In case of no alarm records:
0001 20/11/03 11:28
No alarms logged
Press any key...
In case of existing alarm records.
20/11/03
15:51
Channel 1
High alarm
ESC-Back Anykey-Next
Press any key to view the next record.
20/11/03
11:22
Channel 2
Low alarm
ESC-Back Anykey-Next
Press <ESC> to quit.
ILOGPlus RTU/data logger, User guide V1.0, 2/2008
72
5.2.6 Viewing the event log
View
View
View
View
counters
FIFO
event log
IP address
Use this option to view the logged records in the system event log.
0001 20/11/03 11:28
Factory Settings
ESC-Back Anykey-Next
Press any key to view the next record.
0002 20/11/03 15:51
Startup
ESC-Back Anykey-Next
0003 20/11/03 06:17
FTP Error
ESC-Back Anykey-Next
0003 20/11/03 06:17
e-mail Error
ESC-Back Anykey-Next
Press <ESC> to quit.
5.2.9 View IP address
View
View
View
View
Test
counters
FIFO
event log
IP address
H/W
Use this option to view the IP address (dynamic or static.
IP Address
111.222.3.44
Press any key..
ILOGPlus RTU/data logger, User guide V1.0, 2/2008
73
5.3 Connecting to a PC
5.3.1 Uploading data
Setup
Commissioning
Test comms
Connect to host
View I/O
Upload FIFO
iLOGPlus
Transporter
View counters
View FIFO
Use this option to upload the logged data to a PC.
• Connect the PC to the iLOGPlus unit (See 2.4).
• Set the baud rate of the iLOGPlus serial port (See 3.6.9)
PC side:
Launch the Hyperterminal and create a new connection.
Press <OK> to create the connection
ILOGPlus RTU/data logger, User guide V1.0, 2/2008
74
Select connection type ‘Direct to COMx’ and press <OK>.
Set the proper parameters for the selected serial port.
Bits per second:
38400
Data bits:
8
Parity:
none
Stop bits:
1
Flow control:
None
ILOGPlus RTU/data logger, User guide V1.0, 2/2008
75
Press <OK> to proceed. From the Hyperterminal menus, select the ‘Transfer
Receive File…’ option.
Set the protocol option to ‘XMODEM’. Specify a path for the data file and the
file name.
ILOGPlus RTU/data logger, User guide V1.0, 2/2008
76
The uploading screen appears:
iLOGPlus side:
Connect to Host
>Upload FIFO
Press <OK> to select the menu.
Waiting for receiver
Init TimeOuts..
Retries: 001
ILOGPlus RTU/data logger, User guide V1.0, 2/2008
77
PC side:
Hyperterminal expects data packets with the CRC error checking option. After a
while it switches automatically to the checksum option which is the error
checking mode for iLOGPlus. Uploading begins:
iLOGPlus side:
During uploading:
Uploading Data
Packs sent:001
Curr Pack Err:000
If the connection fails:
Uploading failed..
Press any key..
ILOGPlus RTU/data logger, User guide V1.0, 2/2008
78
5.3.2 Using iLOGPlus Transporter for exchanging
parameters
Setup
Commissioning
Test comms
Connect to host
View I/O
Upload FIFO
iLOGPlus
Transporter
View counters
View FIFO
Use this option to connect to the iLOGPlus Transporter application (Firmware >
2.0 is required!). iLOGPlus Transporter supports:
• Reading of the current device configuration.
• Uploading a user configurated parameter file to the iLOGPlus device.
• Downloading the FIFO data in a PC file.
• Archiving configurations in a data base file and reporting.
5.4 Hardware test procedures
View
View
View
View
Test
counters
FIFO
event log
IP address
H/W
This option is intended for service purposes and requires special test
equipment. Do not use it!
ILOGPlus RTU/data logger, User guide V1.0, 2/2008
79
5.5 Remote control
There are two ways to control the iLOGPlus unit remotely:
• Using the TCP commands
• Using SMS commands
5.5.1 TCP commands
TCP (SOAP) commands can be used to communicate on-line with the
iLOGPlus unit by means of TCP packets after opening a socket connection.
The unit should have a static IP address and be connected to the internet (see
3.6.10), for using this option. Section 8.5 contains a table with the available
TCP commands.
5.5.2 SMS commands
SMS commands can be applied if the hardware meets the requirements and
the respective settings are selected. Section 8.5 contains a table with the
available SMS commands.
ILOGPLUS-GSM supports SMS receiving through the internal GSM modem.
iLOGPlus-EDM supports SMS receiving with a GSM modem attached on one
of the two serial ports (COM1 or COM2).
ILOGPLUS-LAN supports SMS receiving with a GSM modem attached on the
auxilliary serial port (COM2).
Following settings must be made to enable SMS receiving:
• Setup/Communication/GSM: Set the parameters GSM port, GSM
Baud, GSM PIN, SMS center, SMS recipients (See 3.6.8). Only GSM
port must be set for iLOGPlus-GSM (COM1). iLOGPlus accepts SMS
commands only from users listed in the SMS recipients list!
• Setup/Communication/Power save: The Power Save parameter
must be set to ‘Off’ to enable instant SMS receiving (See 3.6.11). If
Power save is ‘ON’, incoming SMS are served once every hour.
SMS receiving is enabled one minute after power up. All received SMS
messages, during this startup period, are deleted.
ILOGPlus RTU/data logger, User guide V1.0, 2/2008
80
6. Specifications
Protection
IP40
Temperature range
-10°C, +55°C, operating
Dimensions
154 x 84 x 38 mm
Weight
0.3 kg
Display
LCD 4x20 characters, backlight
Keyboard
membrane, 15 buttons
Mounting
Suspension element with snap-in locking device, Optional DIN
rail mounting kit.
Supply voltage
iLOGPlus unit
SCT-04E-12
SCT-04E-24
Supply current
ILOGPLUS unit
SCT-04E-12
SCT-04E-24
Analog inputs
ILOGPLUS unit
SCT-04E
12 .. 30 VDC
12 .. 15 VDC
24 .. 27 VDC
LAN: 110 mA (150 max), EDM : 50 mA (110 max),
GSM : 50mA (2 A max)
10 mA (100 mA max)
10 mA (100 mA max)
4, resolution 12 bit
AI 1, 2
Gain: 3.917 (low), 10 (High)
AI 3, 4
Gain: 3.917
0-20mA /4-20mA: Input resistance = 50Ω
AD592: Input resistance = 2.7 KΩ
Digital inputs
4, pull, GND..Vcc
Digital outputs
ILOGPLUS unit
SCT-04E-0-x
2, open collector, 30V/100mA
2, relay, 250V, 10A
Serial port (COM2)
Baud rate: 4800 to 38400 bps
Protocols: XMODEM (Checksum), SMS
Main communication
port (COM1)
ILOGPLUS-LAN: Ethernet LAN, 10BaseT
ILOGPLUS-EDM: RS232 serial port
ILOGPLUS-GSM: GSM/GPRS modem internally connected to
COM1
Protocols: General Internet Protocols (IP, TCP, DNS, POP3,
HTTP, FTP, Web server)
Interfaces
iLOGPlus-LAN: RJ45 Ethernet connector (COM1)
iLOGPlus-EDM: 9 pin D-connector (COM1), 6 pin mini Western
socket (Modem power supply control)
iLOGPlus-GSM: SMA connector for GSM antenna
Power, I/O, COM2: 25 pin D-connector
Log Memory
FIFO, approx. 10000 records (512K SRAM), power fail safe
Pulse counting
2 (DI3, DI4), 100Hz, 4 byte
• Frequency measurement in the range of 0-32 Hz (L).
• Frequency measurement in the range of 0-3.2 KHz (H).
• Totalizing function up to 4,294,967,295 with preset and clear
ILOGPlus RTU/data logger, User guide V1.0, 2/2008
81
SMS communication
Alarm messaging in GSM Text Format in conjunction with
external GSM modem (iLOGPlus-LAN)
Web server
HTML pages (32 KB max)
GSM Features
(iLOGPlus-GSM)
Output power: Class 4 (2W at 850, 900 MHz) Class 1 (1W at
1800, 1900 MHz)
GPRS: Compliant with SMG32 (R97)
Table 4
ILOGPlus RTU/data logger, User guide V1.0, 2/2008
82
7. Troubleshooting
Display remains black after power on
•
•
•
•
After power on DO1, DO2 outputs get
high.
• Press <SHIFT-F8> to acknowledge alarm.
• Set the appropriate alarm limits and alarm
modes for the analog channels and digital
inputs (see chapter 3.4.1, 3.4.3, 3.5)
The analog values seem not to be
correct.
• Check sensor cabling and jumper settings for
the corresponding channel on the SCT-04E
adaptor (see 2.2.2)
• Set the correct analog channel measurement
parameters (see 3.4.1).
• Use the calibration option to correct sensor
deviations (see 3.4.1)
No records are logged.
• Channel loggings are probably disabled.
• Check and set parameters for logging (See
3.3.2, 3.3.1)
E-mail or FTP transfer fail when using
the according test option (See 5.1.1,
5.1.2, 5.1.3).
• Check the cable connection to Ethernet (see
2.3).
• Check and set the internet parameters (see
3.6.4)
• For automatic data transfer set the
parameters in 3.6.1, 3.6.2, 3.6.3 and 3.6.8.
Alarm SMS fail when using the
according test option (See 5.1.4).
• Check the GSM modem cabling and the
GSM antenna (see chapter 2.5)
• Check the GSM parameters (see chapter
3.6.7)
Cannot select digital input DI3 or DI4
for counting.
• The input is probably used for conditional
logging of the corresponding analog channel
(see 3.3.2)
Alarm annunciation switches
frequently between on and off state.
• Find the alarm source by viewing the current
channel values.
• Disable alarm annunciation for unused
channels.
• Set a higher alarm deadband value for a
specific analog cahannel (see 3.5.3)
Check power connection
Check for reverse polarity
Check fuse (1A) on SCT-04E adaptor.
Read chapter 2.2.1
Table 5
ILOGPlus RTU/data logger, User guide V1.0, 2/2008
83
8. Appendix
8.1 Data transfer formats
8.1.1 File name
The files are named according to the following convention:
Station Name_MMDD_hhmm
MM: month, DD: day, hh: hour, mm: minute
Example: iLOGPlus01_0424_1222.xls
8.1.2 File format
The TSV format (Tab separated format) is used for data file transfer.
Two channels logged in one record
Station
iLOGPlus01
AI1
AI2
Temp 1
Temp 2
DI1
DI4
Chiller1
Chiller4
DATE
TIME
24/4/2004
11:15:00
24/4/2004
11:30:00
24/4/2004
11:45:00
24/4/2004
12:00:00
24/4/2004
12:15:00
4.1
AI1
-3.1
-2.9
-3.0
-2.8
-3.2
AI2
-4.6
-4.2
-4.7
-4.5
-4.6
ALARM1
ALARM2
DI1
0
0
0
0
0
DI2
0
0
0
0
0
DI3
0
0
0
0
0
ALARM LIST
DATE
TIME
24/4/2004
24/4/2004
CHANNE
L
TYPE
12:15:56
DI4
L
12:17:26
DI1
H
24/4/2004
24/4/2004
24/4/2004
24/4/2004
24/4/2004
24/4/2004
24/4/2004
24/4/2004
24/4/2004
24/4/2004
12:18:30
12:18:34
12:19:24
12:19:24
12:19:24
12:19:24
12:20:00
12:20:00
12:20:54
12:20:54
AI1
AI2
AI1
AI2
DI1
DI4
DI1
DI4
DI1
DI4
H
H
A
A
A
A
H
L
A
A
ILOGPlus RTU/data logger, User guide V1.0, 2/2008
84
DI4
1
1
1
1
1
Separated logging
Station
iLOGPlus01
AI1
AI2
Temp 1
Temp 2
DI1
DI4
Chiller1
Chiller2
DATE
TIME
24/4/2004 13:15:00
24/4/2004 13:15:00
24/4/2004 13:30:00
24/4/2004 13:30:00
24/4/2004 14:00:00
24/4/2004 14:00:00
4.1
CHANNEL
1
2
1
2
1
2
ALARM LIST
DATE
TIME
CHANNEL
24/4/2004
13:15:56
DI4
24/4/2004
13:17:26
DI1
24/4/2004
13:18:30
AI1
24/4/2004
13:19:24
AI1
24/4/2004
13:19:24
DI1
24/4/2004
13:19:24
DI4
24/4/2004
13:20:00
DI1
24/4/2004
13:20:00
DI4
24/4/2004
13:20:54
DI1
24/4/2004
13:20:54
DI4
VALUE
-4.2
-8.4
-3.8
-9.2
-3.9
-6.8
ALARM
H
DI1
0
0
0
0
0
0
DI2 DI3
0
0
0
0
0
0
0
0
0
0
0
0
TYPE
L
H
H
A
A
A
H
L
A
A
8.1.3 Alarm annunciation
Alarm message (e-mail body, SMS)
iLOGPlus-Test Channel 2 High Alarm
Alarm aknowledgment report message (e-mail body, SMS)
iLOGPlus-Test 3 alarms acknowledged (channels: 1, 2, 3)
ILOGPlus RTU/data logger, User guide V1.0, 2/2008
85
DI4
1
1
1
1
1
1
8.2 Parameter default values
Parameter
Default Value
Unit Name
Unit Description
Channel x Description
Unit
Scale Low
Scale High
Alarm Low
Alarm High
Calibration
Gain
Counting mode
Alarm mode
Prealarm
Alarm Dead Band
Alarm Delay
Logging Mode
Log Channels
Log Value
Logging Rate
Sending Rate
Sending Mode
Alarm send mode
IP Address (LAN)
DNS, Gateway (iLOGPlus-LAN)
Subnet Mask (LAN)
Modem type
ISP Phone No (EDM, GSM)
ISP Username, Password
Modem Init string (Hayes only)
e-mail SMTP, POP3
e-mail User Name, Password
e-mail Receivers
SMTP Auth
POP3 Auth
FTP Server x Address
FTP User Name, Password, x
FTP Port x
Use Passive Mode x
Synchronization time
Power save
GSM port
GSM Baud (COM1)
Other SMS parameters
Web Sever mode
COM2 baud rate
XM Null Char
Menu password
Firmware upgrade password
iLOGPlus01
iLOGPlus telemetry unit
Channel x
(none)
0
4095
0
4095
0
Low
- (disabled)
Delayed (all channels)
0
0.5
0
All
All enabled
Average
900 (15 minutes)
1440 minutes (24 hours)
E-mail and FTP disabled
E-mail and SMS disabled
192.168.1.45
0.0.0.0
255.255.255.0
iLOGPlus-EDM: Hayes, iLOGPlus-GSM: GSM P2
AT&FE0X0L3
No
No
21
No
00:00
ON
none
38400 (Fixed by iLOGPlus-GSM)
iLOGPlus-LAN: Always on, iLOGPlus-EDM, GSM: Off
38400
26
2466 (fixed)
13579 (fixed)
Table 7
ILOGPlus RTU/data logger, User guide V1.0, 2/2008
86
8.3 Analog measurements
8.3.1 Signal conditioning circuits
Channels 1, 2
Vin
Analog channels 1, 2 feature switchable gain and a current source (S+, S-) for
driving current through variable resistance sensors (RTD, strain gauges, etc.)
The A/D converter uses a voltage reference of 4.096V.
High gain (H switches closed, L switches open)
The ADC input voltage is calclulated by the formula:
Vadc=Vin * R5/R2= Vin * 10
Low gain (L switches closed, H switches open)
The ADC input voltage is calclulated by the formula:
Vadc=Vin * R5/R1= Vin * 3.917
Example:
Vin= 243.5 mV, Gain= High
Vadc= 2.435 V, Raw digital value= 2435
The current driven by the current source is calculated by the formula:
Is=Vref/R7=1.24 mA
ILOGPlus RTU/data logger, User guide V1.0, 2/2008
87
Channels 3, 4
Vin
Analog channels 3, 4 feature fixed gain.
The ADC input voltage is calclulated by the formula:
Vadc=Vin * R4/R1= Vin * 3.917
Example:
Vin= 612.3 mV, Gain= High
Vadc= 2.398 V, Converted value= 2398
8.3.2 Applications
Connecting a PT100 temperature sensor (-50..595 °C)
Channel setup for the main unit:
PT100 is a resistive sensor with almost linear characteristic in the range of -30
to 120 °C. Measurement is accomplished by driving a current of 1.24 mA
through the sensor and measuring the voltage drop across it. The internal
current source is used for the sensor supply.
The PT100 resistance is 100Ω at 0 °C and 138.5 Ω at 100 °C. The resistance
change in this almost linear section is 0.385 Ω /°C. Using this scaling factor and
assuming an overall linear characteristic:
ILOGPlus RTU/data logger, User guide V1.0, 2/2008
88
The input voltage drop at -50 °C is:
Vin= (100-0.385*50) Ω * 0.00124 A = 0.1001 V
Vadc = 100.1 mV * Gain = 100.1 mV * 10 = 1001 mV
The converted value is 1001. Set the Sensor low parameter to this value.
The voltage drop at 595 °C is:
Vin= (100+0.385*595) Ω * 0.00124 A = 0.408053 V
Vadc = 408.1 mV * Gain = 408.1 mV * 10 = 4081 mV
The converted value is 4081. Set the Sensor high parameter to this value.
Scale low
-50 °C
Scale high
595 °C
Sensor low
1001
Sensor high
4081
Gain
High
Linearization
PT100
RTD Excitation
ON
Channel setup for the GE-AI-4 expansion unit:
The excitation current of the internal current source is 2 mA.
The input voltage drop at -50 °C is:
Vin= (100-0.385*50) Ω * 0.002 A = 0.1615 V
Vadc = 161.5 mV * Gain = 161.5 mV * 3.931 = 635 mV
The converted value is 635. Set the Sensor low parameter to this value.
The voltage drop at 595 °C is:
Vin= (100+0.385*595) Ω * 0.002 A = 0.658 V
Vadc = 658 mV * Gain = 658 mV * 3.931 = 2587 mV
The converted value is 2587. Set the Sensor high parameter to this value.
Scale low
-50 °C
Scale high
595 °C
Sensor low
635
Sensor high
2587
Gain
High
Linearization
PT100
RTD Excitation
-
ILOGPlus RTU/data logger, User guide V1.0, 2/2008
89
Connecting a AD592 temperature sensor
Channel setup for the main unit:
The AD592 is an integrated circuit temperature transducer that provides an
output current proportional to absolute temperature. For a wide range of supply
voltages the transducer acts as a high impedance temperature dependent
current source of 1 µA/K.
The AD592 delivers 248 µΑ at –25 °C. The jumper settings on SCT-04E drive
this current through the 2.7K (R8) resistor. The voltage drop at –25 °C is:
Vin= 0.000248 A * 2700 Ω = 669.6 mV
Vadc = 669.6 mV * Gain = 669.6 mV * 3.917 = 2623 mV
The converted value is 2623. Set the Sensor low parameter to this value.
The sensor delivers 378 µΑ at 105 °C. The voltage drop at 105 °C is:
Vin= 0.000378 A * 2700 Ω = 1020.6 mV
Vadc = 1020.6 mV * Gain = 1020.6 mV * 3.917 = 3.997.7 mV
The converted value is 3998. Set the Sensor high parameter to this value.
Scale low
-25°C
Scale high
105 °C
Sensor low
2623
Sensor high
3998
Gain
Low
Linearization
none
Channel setup for the GE-AI-4 expansion unit:
With a 2K7 external resistor (recommended):
The AD592 delivers 248 µΑ at –25 °C.
Vin= 0.000248 A * 2700 Ω = 669.6 mV
Vadc = 669.6 mV * Gain = 669.6 mV * 3.931 = 2632 mV
The converted value is 2632. Set the Sensor low parameter to this value.
The sensor delivers 378 µΑ at 105 °C.
Vin= 0.000378 A * 2700 Ω = 1020.6 mV
Vadc = 1020.6 mV * Gain = 1020.6 mV * 3.931 = 4012 mV
The converted value is 4012. Set the Sensor high parameter to this value.
Scale low
-25°C
Scale high
105 °C
Sensor low
2632
Sensor high
4012
ILOGPlus RTU/data logger, User guide V1.0, 2/2008
Gain
Low
Linearization
none
90
With a 2K0 external resistor:
The AD592 delivers 248 µΑ at –25 °C.
Vin= 0.000248 A * 2000 Ω = 496 mV
Vadc = 496 mV * Gain = 496 mV * 3.931 = 1950 mV
The converted value is 1950. Set the Sensor low parameter to this value.
The sensor delivers 378 µΑ at 105 °C.
Vin= 0.000378 A * 2000 Ω = 756 mV
Vadc = 756 mV * Gain = 756 mV * 3.931 = 2972 mV
The converted value is 2972. Set the Sensor high parameter to this value.
Scale low
-25°C
Scale high
105 °C
Sensor low
1950
Sensor high
2972
Gain
Low
Linearization
none
Connecting a 4-20mA pressure sensor
Channel setup for the main unit:
The sensor delivers 4 mA at 0 bar and 20 mA at 10 bar. The jumper settings on
SCT-04E drive the current through the 50Ω (R9) resistor. The voltage drop at 0
bar is:
Vin= 0.004 A * 50 Ω = 0.2 V
Vadc = 200 mV * Gain = 200 mV * 3.917 = 783.4 mV
The converted value is 783. Set the Sensor low parameter to this value.
The sensor delivers 20 mA at 10 bar. The voltage drop at 10 bar is:
Vin= 0.020 A * 50 Ω = 1 V
Vadc = 1000 mV * Gain = 1000 mV * 3.917 = 3917 mV
The converted value is 3917. Set the Sensor high parameter to this value.
Scale low
0 bar
Scale high
10 bar
Sensor low
783
Sensor high
3917
Gain
Low
Linearization
none
Channel setup for the GE-AI-4 expansion unit:
Vin= 0.004 A * 50 Ω = 0.2 V
Vadc = 200 mV * Gain = 200 mV * 3.931 = 786.2 mV
ILOGPlus RTU/data logger, User guide V1.0, 2/2008
91
The converted value is 786. Set the Sensor low parameter to this value.
The sensor delivers 20 mA at 10 bar. The voltage drop at 10 bar is:
Vin= 0.020 A * 50 Ω = 1 V
Vadc = 1000 mV * Gain = 1000 mV * 3.931 = 3931 mV
The converted value is 3931. Set the Sensor high parameter to this value.
Scale low
0 bar
Scale high
10 bar
Sensor low
786
Sensor high
3931
ILOGPlus RTU/data logger, User guide V1.0, 2/2008
Gain
Low
Linearization
none
92
8.4 SOAP & SMS commands
SOAP commands can be used to communicate on-line with the iLOGPlus unit
with TCP packets after opening a socket connection.
The SOAP commands are in ASCII format. The command parts are
separated with ‘,’ and terminated with a carriage return (ASCII 13).
Use a TELNET terminal application to verify the use of the SOAP commands.
The TCP port number of iLOGPlus is 14473.
Example: TELNET 192.168.1.45 14473
All SOAP commands, except command 0400, can also be given via SMS
(Firmware Version >1.6)
8.4.1 Viewing system parameters
The general format for reading commands is:
Command ID<CR>
Testing Communications
0000 Echo
Station Characteristics
0001 Get Station Name
0002 Get Station Description
0003 Get Firmware Version
Analog Input Properties
0020 Get AI Channel Usage
0021 Get AI Channel Description
0022 Get AI Channel Unit
0023 Get AI Channel Scale
0024 Get AI Channel Sensor Scale
0025 Get AI Channel Calibration Value
0026 Get AI Channel Gain
0027 Get AI Channel Linearization Method
0028 Get AI Channel Log Value
0029 Get AI Channel Alarm Levels
0030 Get AI Channel Alarm Mode
0020,A
0021,A
0022,A
0023,A
0024,A
0025,A
0026,A
0027,A
0028,A
0029,A
0030,A
Digital Input Properties
0040 Get DI Channel Usage
0041 Get DI Channel Description
0042 Get DI Channel Alarm Mode
0040,D
0041,D
0042,D
Digital Output Properties
0050 Get DO Mode
Logging Parameters
0060 Get Log Mode
0061 Get Log Rate
Alarm Parameters
ILOGPlus RTU/data logger, User guide V1.0, 2/2008
93
0070
0071
0072
0073
Get Alarm Info Mode
Get Alarm Delay
Get Dead Band
Get Prealarm
Counter Parameters
0090 Get Counter Scale Factors
Sending Parameters
0100 Get Logs Sending Mode
0101 Get FIFO Sending Status
0102 Get Send Rate
0103 Get Synchronization DateTime
Connection Parameters (iLOGPlus GSM/EDM)
0110 Get Modem Type
0111 Get ISP Phone
0112 Get ISP UserName
0113 Get Modem Initialization String
Connection Parameters (iLOGPlus LAN)
0110 Get IP Address
0111 Get DNS
0112 Get Gateway
0113 Get Subnet Mask
E-mail Parameters
0130 Get SMTP Server
0131 Get POP3 Server
0132 Get E-mail User
0133 Get E-mail Receivers
0134 Get SMTP Authentication
0135 Get SMTP Authentication User
0136 Get POP3 Authentication
0137 Get POP3 Authentication User
FTP Parameters
0140 Get FTP Servers
0141 Get FTP Users
0142 Get FTP Paths
0143 Get FTP Port Numbers
0144 Get FTP "Use Passive Mode" options
SMS Parameters
0150 Get GSM Port
0151 Get GSM Baud
0152 Get SMSC Phone Number
0153 Get SMS Receivers
Miscellaneous
0190 Get Decimal Separator
0191 Get XModem Null Character
0192 Get Power Supply Voltage
ILOGPlus RTU/data logger, User guide V1.0, 2/2008
94
8.4.2 Commissioning commands
0400
0420
Commands
Set iLog Parameter
Update Web Page Constant Parameters
0500
0501
0505
0510
0511
0515
0520
0521
0530
0531
0532
0540
0541
0542
0550
0551
0560
0561
0562
0570
0571
0580
0581
0582
0583
0584
Read RTC Time
Set RTC Time
Set Synchronization Time
Read Current AI Values
Read Current DI/DO Values
Set/Reset DO
Reset Terminal
Clear FIFO
Get Alarm Log Entries Number
Read Alarm Log Entry
Clear Alarm Logs
Get Event Log Entries Number
Read Event Log Entry
Clear Event Logs
Send Logs Via FTP
Send Logs Via E-mail
Read Counters
Set Counter
Clear Counter
Get RAM Packets Number
Read RAM Packet
Get Next FIFO Record
Get Previous FIFO Record
Get FIFO Records Number
Enter Communication Mode
Exit Communication Mode
0600
Connect to the Internet
0400,B,A,V
0501,W,DD/MM/YY,HH:MN:SS
0505,HH:MN
0510,M
0511,M
0515,O,V
0531,N
0541,N
0561,C,V
0562,C
0571,N
SMS Commands
ILOGPlus RTU/data logger, User guide V1.0, 2/2008
0600,NN
95
8.5 Firmware upgrade procedure
Connect the iLOGPlus serial port to the PC using the proper serial cable.
Be sure to provide secure power supply to the iLOG unit. It is not
possible to repeat the upgrade procedure, if during downloading the
power fails. In such a case, the unit must be serviced!
PC side
Launch the Hyperterminal and create a new connection.
Press <OK> to create the connection.
Select connection type ‘Direct to COMx’ and press <OK>.
ILOGPlus RTU/data logger, User guide V1.0, 2/2008
96
Set the proper parameters for the selected serial port.
Bits per second:
57600
Data bits:
8
Parity:
none
Stop bits:
1
Flow control:
None
Press <OK> to proceed.
ILOGPlus side
Select the Firmware upgrade option:
Setup
Commissioning
Test comms
Connect to host
View I/O
View counters
View FIFO
Set RTC
Start web server
Clear FIFO
Clear event log
Clear counter
Counter preset
Factory settings
Firmware upgade
Firmware Upgrade
OK-Confirm ESC-Back
ILOGPlus RTU/data logger, User guide V1.0, 2/2008
97
Press <OK> to confirm:
Firmware Upgrade
Password:
ESC-Return
Type in the password for firmware upgrade. Following screen appears:
PLEASE WAIT...
After a few seconds the download screen appears:
Receiving Data
Packs Received:0
Curr Pack Err :0
PC side
From the Hyperterminal menus, select the ‘Transfer
Browse and select the Firmware upgrade file.
Send File…’ option.
For protocol option select ‘1K XMODEM’ and press the button ‘Send”.
ILOGPlus RTU/data logger, User guide V1.0, 2/2008
98
The download procedure begins.
iLOGPlus side
Receiving Data
Packs Received:12
Curr Pack Err :0
The download procedure has an approximate duration of 15 minutes. The
following screen appears on completion:
Closing Connection
Total Packets:2964
Close Retries:1
The iLOGPlus unit restarts after a few seconds. The firmware upgrade
procedure is completed.
ILOGPlus RTU/data logger, User guide V1.0, 2/2008
99
8.6 Communication errors
46 DNS expected
57 Error when trying to establish PPP
59 Error when trying to establish POP3
58 Error when trying to establish SMTP
70 Modem failed to respond
71 No dial tone response
72 No carrier modem response
73 Dial failed
74 Connection with ISP lost
75 Access denied to ISP server
76 Unable to locate POP3 server
77 POP3 server timed out
78 Access denied to POP3 server
79 POP3 failed
81 Unable to locate SMTP server
82 SMTP server timed out
83 SMTP failed
104 No DNS defined
105 No POP3 defined
106 No MBX (mailbox) defined
107 No MPWD (mailbox password)
defined
108 No TOA (addressee) defined
109 No REA (return address) defined
110 No SMTP defined
111 Binary email data overflow
200 Socket does not exist
201 Socket empty on receive
202 Socket not in use
203 Socket Down
204 No available sockets
205 Socket receive buffer full
206 PPP open failed for socket
207 Error creating socket
208 Socket send error
209 Socket receive error
210 PPP down for socket
212 Socket flush error
213 Socket pwait no UDP error
214 Socket pwait error
215 Socket no carrier error
401 No IP address
507 FTP server not found
508 Timeout when connecting to FTP
server
509 Failed to login to FTP server (bad
username or password or account)
510 FTP command could not be
completed
511 FTP data socket could not be
opened
512 Failed to send data on FTP data
socket
513 FTP shutdown by remote server
1003: FTP connection failed
1004: Cannot create FTP file
1016: Cannot write FTP file
1032: Closing FTP file failed
1064: Closing FTP connection failed
Table 8
ILOGPlus RTU/data logger, User guide V1.0, 2/2008
100
8.7 iLOGPlus EDM: Connectors layout
8.7.1 COM1 connector
Pin
1
2
3
4
5
6
7
8
9
Acronym
DCD
RxD
TxD
DTR
GND
DSR
RTS
CTS
-
Signal
Data Carrier Detect
Receive Data
Transmit Data
Data Terminal Ready
Signal Ground
Data Set Ready
Request To Send
Clear To Send
-
Table 9
8.7.2 Modem power switch connector
Pin
1
2
3
4
5
6
Acronym
COM
NO
-
Signal
Common
Normal open
Table 10
ILOGPlus RTU/data logger, User guide V1.0, 2/2008
101
8.8 Internal web page
Picture 4: Web page No. 1
The iLOGPlus RTU/data loggers incorporate an internet site with two web
pages.
The first page contains the actual device settings and a table with the on-line
measurements. The second page appears after pressing the ‘Change Settings’
button and facilitates on-line parameter settings.
Picture 5: Web page No. 2
ILOGPlus RTU/data logger, User guide V1.0, 2/2008
102
Following changes can be made:
•
•
•
•
•
•
•
•
•
•
Logging rate
Sending rate
Email recipients
SMS recipients
Syncronization time
Enable/disable of FTP and Email sending
Preset the internal real time clock
Preset the channel alarm limits
Resetting the iLOGPlus device
Clearing the FIFO memory
8.9 RS232 connector pin layout (COM2, SCT-04E-x)
ILOGPlus RTU/data logger, User guide V1.0, 2/2008
103
8.10 I/O expansion modules
8.10.1 GE-DIO-42 digital I/O expansion
The modules can be supplied over the expansion bus by putting a jumper on
J14 of the SCT-04E adaptor (see 2.2) or externally through the module power
supply connector.
Module address
selection
The identification of an expansion module is determined by the triple DIP switch
settings on the rear side of the module. The settings can be derived from the
following table:
Dip switch settings
Module number (m)
DI 1x
DI 2x
DI 3x
ILOGPlus RTU/data logger, User guide V1.0, 2/2008
104
8.10.2 GE-AI-4 analog input expansion
The modules can be supplied over the expansion bus by putting a jumper on
J14 of the SCT-04E adaptor (see 2.2) or externally through the module power
supply connector.
Module
address
selection
Input range selection for AI 1x
OFF: 0-1 V
ON: 0-20/4-20 mA
The identification of an expansion module is determined by the triple DIP switch
settings on the rear side of the module. The settings can be derived from the
following table:
Dip switch settings
Module number (m)
AI 1x
AI 2x
AI 3x
The input range of each analog input can be selected between 0-1V (DSW
OFF) and 0-20mA (DSW ON) by means of the quad dip switch on the rear
panel.
ILOGPlus RTU/data logger, User guide V1.0, 2/2008
105
An internal current source is available (EX+, EX- terminals) for exciting PT100
sensors with 2 mA.
The following table contains the scale and Sensor low/high values for the
common ranges:
Sensor
PT100
Scale
0-1V
0-20mA
4-20mA
-50…595°C
Sensor low
0
0
786
635
ILOGPlus RTU/data logger, User guide V1.0, 2/2008
Sensor high
3931
3931
3931
2587
Gain
3.931
3.931
3.931
3.931
106