1
Vibra LITE 8
CONGRATULATIONS!
You have selected a quality timepiece
that will assist you in remembering
tasks, managing your time and keeping
focused. Perfect for reminders for
medication and medical conditions,
timing presentations or procedures, for
cooking, parking meters and for keeping
on schedule. The uses are endless. Set
the “vibration” feature for alarm settings
and countdown timer when you do not
want to alert or disturb others or when
you cannot hear an audible alarm. This
unique watch has been carefully
designed to give user satisfaction and to
be user friendly. The large display is
easy to read. Prompts are displayed to
assist in easy setting. User options are
easily set. Enjoy the many benefits of
this wonderful watch.
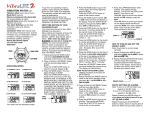
OPERATING MODES:
CALENDAR
CLOCK
ALARM
TIMER
CHRONO
(STOPWATCH)
OPTION
NOTE: To set any watch time, calendar
& timer, the digit(s) that you want to set
MUST BE FLASHING.
When setting Calendar/Clocks, Alarms
or Timer: if a delay of approx. 3 minutes
occurs without buttons being pushed,
digits will stop flashing and watch will
return to Calendar/Clock Mode.
Watch display will automatically return
to Calendar/Clock Mode from Option
Mode when no buttons are pushed in
approx. 3 minutes.
SETTING TIME OF DAY AND
CALENDAR
NOTE: THIS IS TIME ZONE 1 &
MUST BE SET CORRECTLY FOR
THE TIME OF DAY AS THE
ALARMS WILL WORK BASED ON
THIS TIME.
SET HOUR, MINUTE, SECONDS, DAY
OF WEEK, MONTH, DAY OF MONTH,
CHOOSE 12 HOUR (AM/PM Time ) or
24 HOUR TIME (Military Time)
Three Time Zones are available.
Set Time Zone 1 for time of day of your
home location. This is the default Time
and will show on the watch at all times
when it is in the Calendar/Clock mode.
You have the option of setting Time
Zones 2 and 3. Examples: Time Zone 2
could be set for the location traveling to
or at. Time Zone 3 could be set for Zulu
Time (Greenwich Mean Time)
CHOOSE ORDER TO VIEW DATE:
MONTH/DAY OR DAY/MONTH.
* Push MODE button to
rotate to
CALENDAR/CLOCK
MODE
* Push and Hold
LAP/RESET Button.
* HOLD TO SET will
show on display.
Hold for 3 seconds
T-ZONE 1 will show
and 1 will be flashing on
the T-ZONE 1 screen.
* Push MODE Button.
Hour digit will flash.
* Push START/STOP Button to rotate
hour to correct hour for Time 1
setting.
NOTE: IF USING A 12 HR CLOCK
USE A.M OR P.M. (AM and PM
icons are located under the seconds
digits on the display.)
* Push MODE Button again,
Minute digits will flash.
* Push START/STOP Button to rotate
minutes to the correct time.
* Push MODE Button again.
Second digits will flash.
* Push START/STOP Button to rotate
the seconds to the correct time.
* Push MODE Button again
Day of Week digits will flash.
* Push START/STOP Button to rotate
to correct day of the week.
(Example: MO for Monday, TU for
Tuesday, WE for Wednesday, TH for
Thursday, FR for Friday, SA for
Saturday, SU for Sunday)
* Push MODE Button again.
Month digit(s) will flash.
* Push START/STOP Button to rotate
to the correct number of the month.
(Example: 1 for January, 6 for June,
12 for December etc.)
* Push MODE Button again.
Day of the Month digits will flash.
* Push START/STOP Button to rotate
to correct day of the month. (01-31)
* Push MODE Button again.
TIME 12 HR will show
on display with 12
flashing.
* Push START/STOP
Button to change to 24 Hour if 24
hour clock is desired.
* Push MODE Button again.
DATE MM-DD will show on display.
This selection will show the calendar
to read Month and then the Day of the
Month.
* Push START/STOP button to change
to DD-MM if you wish calendar to
read Day of Month and then Month.
* Push MODE Button again. T-ZONE 1
will show in display with 1 flashing.
While 1 is flashing you can continue
to set T-ZONE 2 or T-ZONE 3 if
desired by pushing START/STOP
Button to enter T-ZONE 2 or 3 and
continue to set the time as instructed
for Zone 1. (Using MODE Button to
change to hours, minutes, seconds
and date and using START/STOP
Button to rotate to the desired digit.)
or Push LAP/RESET Button to
complete setting of ZONE 1.
TO SET T-ZONE 2 (OR T-ZONE 3)
AFTER ZONE 1 HAS BEEN SET
AND DIGITS ARE NOT FLASHING
Rotate to the CALENDAR/CLOCK
MODE by pushing the MODE Button.
* Push and Hold LAP/RESET Button.
HOLD TO SET will show on display.
Hold for 3 seconds.
T-ZONE 1 will show on display and
the 1 will be flashing.
* Push START/STOP Button to rotate
to T-ZONE 2 (or T-ZONE 3).
* Push MODE button.
Hour digit will be flashing. Continue
to set hours, minutes, seconds and
date as you did in Time Zone 1.
Note: If T-Zone 1 is set for a 12-hour
clock, Zone 2 & 3 must also be in 12hour clock.
If T-Zone 1 is set for 24-hour clock,
Zone 2 & 3 must also be in 24-hour
clock.
TO VIEW THE TIME YOU HAVE
SET IN TIME ZONE 2 OR 3
While in Calendar/Clock Mode (Time
Zone 1)
* Push START/STOP Button. Time Set
will show for 3 seconds with T2 in
upper left corner of display.
* Push START/STOP Button again
within 3 seconds to view T3.
Display will automatically return to
Time set in Calendar/Clock (Zone1).
SETTING ALARM(S)
Up to 8 Alarms can be preset for daily
repetition. Alarms will activate based on
Time-Zone 1 settings. Alarm activation
is for approx. 20 seconds with automatic
shut off. Alarm may be stopped
manually during the 20 seconds by
pushing any button. When alarm signals,
the numbered icon for that alarm flashes
on the display.
Note: Alarm options (Vibration, Sound
or both) are set in OPTION MODE.
HOURLY ALERT (a reminder every
hour on the hour) is also set in OPTION
MODE. See below for instructions.
SET HOUR & MINUTE FOR EACH
ALARM YOU WANT TO USE.
(MODE and START/STOP Buttons are
used the same as when setting Time of
Day in Calendar/Clock Mode. Digit
must be flashing to change it.)
TO SET ALARM 1
* Push MODE Button. to rotate to
ALARM MODE.
ALARM 1 OFF will
show on display when
an alarm time has not been set or
when the alarm has been turned OFF.
* Push and Hold LAP/RESET Button,
HOLD TO SET will show on display.
Hold 3 seconds until Hours flash.
* Push START/STOP Button to rotate
the hours to correct alarm time.
NOTE: IF USING A 12 HR CLOCK
SET FOR A.M OR P.M. AS
REQUIRED.
* Push MODE Button. Minutes will
flash.
* Push START/STOP Button to rotate
to the minutes to correct alarm time.
* Push LAP/RESET Button when alarm
time is correct. Flashing will stop.
Vibra LITE 8 is a Trademark of GLOBAL ASSISTIVE DEVICES, INC.
Numbered Alarm Icon (1) will
show at bottom of display
screen to show alarm is set.
TO SET ADDITIONAL ALARMS (2-8)
* While in ALARM
MODE, select the alarm
you wish to set by
pushing LAP/RESET
Button to rotate to that Alarm
number. (Rotates 2–8).
* Push & Hold LAP/RESET Button.
HOLD TO SET will show on the
display. Hold until hours flash.
Continue as above to set hours and
minutes by rotating numbers with the
START/STOP Button and changing
from Hours to Minutes with the
MODE Button.
* Push LAP/RESET Button when
correct hour and minute for alarm has
been entered. Numbered Alarm Icon
at the bottom of the display will show
for Alarm Set.
TO CHECK ALARM SETTINGS
* Push MODE Button to rotate to
ALARM MODE. ALARM 1 will
show the alarm set time.
* Push LAP/RESET Button to rotate
through Alarms. (1 thru 8)
TO CHANGE ALARM SETTINGS
* Push MODE Button to rotate to
ALARM MODE. ALARM 1 will
show the alarm set time.
* Push LAP/RESET Button to rotate
through Alarms until you reach the
Alarm that you want to change.
* Push & Hold the LAP/RESET Button.
HOLD TO SET will show on the
display. Hold until hours flash.
Continue as above to set hours and
minutes by rotating numbers with the
START/STOP Button and changing
from Hours to Minutes with the
MODE Button.
* Push LAP/RESET Button when you
have entered the change.
TO TURN OFF/ON ALARM(S)
(Example: OFF for wake up calls on
weekends, days off)
* Push MODE Button to rotate to
ALARM MODE. ALARM 1 will
show the alarm set time.
* Push LAP/RESET Button to rotate to
the number of the Alarm that you
want to turn off.
* Push START/STOP
Button. ALARM will
show OFF on display.
* To turn alarm on push START/STOP
Button again. Original alarm time
will show on display.
Note: When Alarm is ON,
Alarm time shows on display.
When Alarm is turned off,
OFF will show on display.
CHRONO/STOPWATCH
The stopwatch can count up to 23 hours,
59 minutes and 59.99 seconds.
* Push the MODE Button to
rotate to the CHRONO
MODE. Wait 3 seconds.
CHRONO 00’00”00
will then show on the
display.
Page 1
* Push the START/STOP Button to
start the counting up.
The Icon located at the top
left of the display under the
C will flash.
* To Stop the Counting, Press the
START/STOP Button.
* Pushing the START/STOP Button
again will start the stopwatch
counting from where it stopped.
* To reset the stopwatch to zero while
running, push the START/STOP
Button and then push the
LAP/RESET Button. To reset to zero
when stopped, push the LAP/RESET
Button.
Split timing on Stopwatch
* Start the Stopwatch by pushing the
START/STOP Button. The
stopwatch will start counting up.
* Push the LAP/RESET Button. The
watch will continue counting even
though you do not see it on the
display. The Icon at the top of the
display will continue to flash to show
action and that counting continues.
* Push the LAP/RESET Button again
and the display will change and show
the time that has accumulated in total.
* To reset the stopwatch to zero, push
the START/STOP Button and then
push the LAP/RESET Button.
TIMER MODE can be set for
countdown in Hours, Minutes and
Seconds. Timer can be set for any
amount of time up to 23 Hours, 59
minutes and 59 seconds. Note: If hours
or minutes or seconds are not wanted on
countdown, leave at 0 during setting.
A 5 second alert will be activated when
countdown reaches zero. If the time set
is less than 30 seconds, the alert will be
only 1 second.
Having the Countdown Time
Continually Repeating automatically is
an option. .
Having a reminder before zero on the
countdown is an option that can also be
set. The reminder alert is one second.
SETTING TIMER FOR COUNTDOWN
* Push MODE Button to
rotate to TIMER
MODE.
* Push and Hold LAP/
RESET Button.
HOLD TO SET will be show on the
display. Hold for 3 seconds.
Hour digit will flash.
* Push START/STOP Button to rotate
to desired hours of time wanted.
* Push MODE Button. Minutes will
flash.
* Push START/STOP Button to rotate
to desired minutes of time wanted.
* Push MODE Button,
Seconds will flash.
* Push START/STOP Button to rotate
to desired seconds of time wanted.
* While Digits are still flashing,
Push MODE Button.
REPEAT will show on display.
* Push START/STOP Button to select
REPEAT ON or REPEAT OFF.
If you set Repeat ON, the countdown
timer will alert you each time it reaches
zero and automatically reset itself for
the time you originally entered. It will
also give you a count of how many times
it has repeated. (Up to 99 and rolling
over to 0). If you set Repeat OFF, the
timer will countdown to zero and alert
you but will not repeat automatically.
You can however manually reset to the
original time entered by pushing and
holding the LAP/RESET Button.
* Push MODE Button. REMIND will
show on display.
* Push START/STOP Button to select
REMIND ON or REMIND OFF.
With REMIND ON, when the
Countdown is set for more than 5
minutes and less than ten minutes, a
reminder alert will be activated at 5
minutes before zero. When the
countdown is set for more than 10
minutes, a reminder alert will be
activated at 10 minutes and at 5
minutes before zero. Select REMIND
OFF if you do not want reminders
before zero.
* Push LAP /RESET button when
settings are completed. Flashing will
stop.
STARTING/STOPPING
COUNTDOWN TIMER
* While in TIMER MODE
Push START/STOP
Button to start
countdown.
Icon located above seconds
digits will flash indicating
countdown timer is
activated.
* Push START/STOP Button to stop
countdown while it is running or to
continue countdown when it is
stopped.
QUICK RESETTING of
COUNTDOWN TIME (WHILE
COUNTDOWN IS RUNNING OR
STOPPED DURING COUNTDOWN)
* While in TIMER MODE
Push and Hold LAP/RESET Button
HOLD TO RST (Reset)
will show on display.
Hold for 3 seconds.
Original time set for
countdown will automatically reset.
OPTION MODE
Is used to select the alarm preference of
Vibration (VIBRA) Audible (SOUND) or
both.
SET VIBRA ON OR OFF, SOUND ON
OR OFF
SET HOURLY ON OR OFF to alert you
every hour on the hour. A one second
reminder alert (Vibration, Sound or
Both) will occur as set.
* Push the MODE Button
to rotate to the OPTION
MODE. Wait 3 seconds.
VIBRA OFF will then
show on the display.
* Push START/STOP Button to change
to VIBRA ON.
* Pushing START/STOP Button again
will change to VIBRA OFF.
* Push LAP/RESET Button. SOUND
OFF will show on Display.
* Push START/STOP Button to change
to SOUND ON. Pushing
START/STOP Button again will
change to SOUND OFF.
* Push LAP/RESET Button. HOURLY
OFF will show on Display.
* Push START/STOP Button to change
to HOURLY ON. Pushing
START/STOP Button again will
change to HOURLY OFF.
* Push MODE Button to return to
Calendar/Clock Mode.
Icons will show settings selected on
display under date.
VIBRA ICON:
BEEP:
HOURLY:
TO REVIEW OPTION SETTINGS
* Push MODE Button to rotate to
OPTION MODE.
* Push LAP/RESET Button. VIBRA,
SOUND & HOURLY alert setting
will rotate & show what is currently
set.
QUICK CHECK TO CONFIRM
OPTION SETTINGS
Each time the MODE Button is
pressed the Alarm Option that is set
will occur. Example: If VIBRA is set
you will feel the Vibrations with each
press of the MODE Button.
EL LIGHT (Display back light)
* Push the LIGHT Button to turn on the
backlight. Note: Light can be
activated in any Mode.
Light will stay on for 3 seconds and
then automatically turn off if another
button is not pushed.
For watch settings in the dark, Light
will continue to stay on while any
other button is pushed within 3
seconds.
Example: This allows you to set the
countdown timer by rotating through
the steps and having the light on
during the process.
IMPORTANT PRECAUTIONS
VibraLITE watches are not intended
to be worn during swimming, diving
or in the shower.
Do not attempt to open the watch to
replace the battery yourself, or for any
reason, as this operation must be
performed by a qualified technician
under controlled conditions.
We recommend that you retain your
original sales slip as your proof of
purchase date.
BATTERY INFORMATION
Your watch uses a Standard 3 volt
lithium CR2032 or equivalent battery.
Battery life will vary due to how often
the EL back light and vibration
function are used. Batteries must be
replaced by a qualified person to
maintain water resistance.
ONE YEAR LIMITED WARRANTY
Your VibraLITE 8 is warranted to be
free from defects in material or
workmanship for One Year from the
date of purchase.
Vibra LITE 8 is a Trademark of GLOBAL ASSISTIVE DEVICES, INC.
This is a limited warranty and covers
watch functions only. This warranty
does not apply to the battery, band, case
or crystals since such items are subject
to wear and tear of daily use. The
warranty is void if the watch has been
tampered with, altered, abused, or
subjected to extreme conditions for
which it was not designed, or repaired
other than by a qualified service center.
At its option, GLOBAL ASSISTIVE
DEVICES, INC. may select to replace
the unit, rather than repair it. During the
warranty period, return the watch, with
dated proof of purchase, in a secure
package, insured and with shipping
charges prepaid. No C.O.D. packages
will be accepted. Please include a note
describing the service required, your
return address and include $9.95 (check,
money order, Visa, MasterCard,
American Express, or Discover) for
shipping and handling in the USA.
Other Countries please contact us for
pricing.
OUT OF WARRANTY SERVICE
Follow the same procedure for shipping
to us as you would for warranty service.
Be sure to include a description of the
problem. An estimate will be submitted
for your approval for any labor or parts
not covered by the warranty before any
work is performed.
SERVICE
Before sending your watch for service,
have the battery checked and/or try
resetting by pushing all 4 buttons at the
same time and hold until the display
clears and then reset time etc. Qualified
service personnel must service this
watch. Attempt to service the watch by
the user will void the warranty.
Servicing should be referred to:
GLOBAL
ASSISTIVE DEVICES, INC.
1121 East Commercial Boulevard
Oakland Park FL 33334
DISCLAIMER:
In no event shall Global Assistive
Devices, Inc. be held liable for any
special, incidental, indirect or
consequential damages whatsoever
including, but not limited to, damages
for loss of property, personal injury, loss
of privacy, failure to meet any duty,
negligence, and any other loss
whatsoever, however caused, even if
Global has been advised of the
possibility of such damages. This
disclaimer of liability applies to any
damages or injury, including but not
limited to those caused by any failure of
performance of the product.
Responsibility for selection, safety and
suitability of any product rests with the
consumer. Circumstances or
consequences arising out of or in any
way related to the use of or inability to
use our products is the responsibility of
the consumer. Global Assistive Devices,
Inc. cannot be held liable in any way.
Page 2
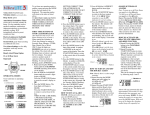
Vibra LITE 8 “Quick Reference” User Guide
HOW TO USE CHRONO/STOPWATCH
* Push MODE Button to rotate to CHRONO
MODE.
counting.
Digits will stop flashing if no buttons are pushed within approximately 3
minutes.
* Push START/STOP Button to start or to stop the
* To reset to zero while running, push
START/STOP Button and then push LAP/RESET Button.
* To reset to zero when stopped, push LAP/RESET Button.
SETTING TIME(S) & CALENDAR
SETTING TIMER FOR COUNTDOWN
Time of Day (Time Zone 1) must be set correctly as the Alarms will work
based on this time.
* Push MODE Button to rotate to TIMER MODE.
* Push and Hold LAP/RESET Button.
HOLD TO
SET will show on display.
Hold for 3
seconds, Hour digit(s) will flash.
* Push START/STOP Button to rotate to the desired Hour.
* Push MODE Button to change to Minutes and START/STOP Button to
rotate to the desired Minutes.
* Push MODE Button to change to Seconds and START/STOP Button to
rotate to the desired seconds.
* While digits are still flashing,
Push MODE Button again. REPEAT will show on display.
* Push START/STOP Button to select REPEAT ON or REPEAT OFF.
(REPEAT ON setting will have the countdown time repeat automatically
every time it reaches zero.)
* Push MODE Button again.REMIND will show on display.
* Push START/STOP Button to select REMIND ON or REMIND OFF.
(REMIND ON setting will have a one second reminder at 5 minutes and 10
minutes before zero.)
* Push LAP/RESET Button when desired time and settings are entered.
* To start or stop countdown, Push START/STOP Button. while in TIMER
MODE.
To SET any watch time, calendar or timer, the DIGIT(S) that you want
to set MUST BE FLASHING.
* Push MODE Button to rotate to
CALENDAR/CLOCK MODE.
* Push and Hold LAP/RESET Button.
HOLD TO SET will show on display.
seconds. T-ZONE 1 will show and 1 will be
Hold for 3
flashing.
* Push MODE Button, Hour digit(s) will be
flashing.
* Push START/STOP Button to rotate to the correct Hour. (use AM
and PM icon when using 12 hour clock)
* Push MODE Button to change to minutes flashing.
* Push START/STOP Button to rotate to correct minute.
* Using the MODE Button and START/STOP Buttons as above,
continue setting seconds, date (day of week, month, day of month)
12Hour or 24 Hour Clock, and DATE viewing order.
T-ZONE 1 will show with 1 flashing.
* While flashing is still on display, you can proceed to set
T-ZONE 2 (or T-ZONE 3) by pushing START/STOP Button to
enter T-ZONE 2 (or 3).
Continue to set the desired time as you did for T-ZONE 1 by using
the MODE Button for changing to hours, minutes, seconds and
date and pushing START/STOP Button to rotate to the desired
digit.
* Push LAP/RESET Button when correct time(s) is entered.
Note: If Time Zone 1 is set for 12 hour clock, Zone 2 & 3 must be in 12
hour clock.
If Time Zone 1 is set for 24 hour clock, Zone 2 & 3 must be in 24 hour
clock.
SETTING ALARM(S)
* Push MODE Button to rotate to ALARM
ALARM 1 will then show on display.
* Push & Hold LAP/RESET Button
HOLD TO SET will show on display.
seconds
be flashing.
MODE.
Hold for 3
Hour digit(s) will
* Push START/STOP Button to rotate to
the correct
Hour. (use AM and PM icon when using 12 hour clock)
* Push MODE Button to change to Minutes and START/STOP Button
to rotate to the correct Minute.
* Push LAP/RESET Button when correct time is entered.
* Continue to set additional alarms by pushing LAP/RESET Button to rotate
ALARM 2 thru ALARM 8.
* When in each desired alarm, push and hold LAP/RESET Button
until Hour Digits Flash.
* Push START/STOP Button to rotate to the desired hour.
* Push the MODE Button to change from hours to minutes and push the
START/STOP Button to rotate to the desired minutes.
To set or change any Alarm,
* Push & Hold LAP/RESET Button while in that alarm.
HOLD TO SET will be displayed and Hour Digit(s) will flash.
HOLD TO
Hold for 3
Original
OPTION MODE:
FOR SETTING VIBRATION, SOUND AND HOURLY ALERT
* Push MODE Button to rotate to OPTION MODE.
Wait 3
seconds.
VIBRA (for
vibration) will show on the display.
* Push START/STOP Button to select VIBRA OFF
or VIBRA ON.
* Push LAP/RESET Button.
SOUND will show on the display.
* Push START/STOP Button to select SOUND OFF or SOUND ON.
* Push LAP/RESET Button.
HOURLY will show on the display.
* Push START/STOP Button to select HOURLY OFF or HOURLY ON.
(HOURLY ON setting will give a one second reminder every hour on the
hour.)
* Push MODE Button to return to the CALENDAR/CLOCK MODE.
HOW TO USE THE EL LIGHT
* Push LIGHT Button to turn on the LIGHT.
Light will stay on for approx 3 seconds if no other button is pushed.
Light will continue to stay on while any other button is pushed within
3 seconds.
Refer to Owner’s Manual for more Detail, Service and
Warranty Information.
To turn OFF any Alarm,
* Push LAP/RESET Button to rotate to the
the Alarm you want to turn Off.
To reset countdown for the original time
(while countdown is running or
when countdown has been stopped).
* Push and Hold the LAP/RESET Button.
RST will show on display.
seconds,
Countdown Time set will reset.
number of
* Push START/STOP Button.
ALARM will
show OFF on display.
* To turn Alarm ON again, push START/STOP Button and Alarm Time
previously set will show.
Note: When Alarm is ON, Alarm time shows on display. When Alarm is turned
OFF, display will show OFF for that Alarm.
Vibra LITE 8 is a Trademark of GLOBAL ASSISTIVE DEVICES, INC.