1
Appliation Note:
Flow Measurements in Sanitary Sewers by Dye Dilution
FOREWORD
Flow in sanitary sewers may be measured to an accuracy of about ±1%, using fluorescent dye dilution techniques. It
is the most cost-effective method for:
-
Quantitating and localizing infiltration.
-
Calibrating any type of existing flow meter.
This monograph, based on extensive experience in the United States and in Canada, is basically a "how to do it"
manual. It complements the more theoretical monograph entitled "A PRACTICAL GUIDE TO FLOW
MEASUREMENT", available at no cost from TURNER DESIGNS.
-
It works in surcharged manholes.
-
There is no need to crawl a manhole.
Because this monograph will anticipate unusual situations, as well as discuss normal situations, the procedure might
at first glance seem complicated. In practice, however, in most instances it is straightforward. Since there is no need
to crawl a manhole, the procedure can be done by one person. An experienced person can carry out the entire
procedure, from preparation of dye to calculation of flow in one manhole, in about 25 minutes. Flows at subsequent
manholes downstream simply involve popping the manhole cover, dropping a can on a string to collect a sample,
and a few minutes for the reading of the sample and the calculation. Samples may be measured on the spot, or if
preferred, may be taken to the office or a lab and measured at your convenience.
DEFINITIONS
Fluorescent Materials. A fluorescent material is one that absorbs light of one color and emits light of a different
color. For practical purposes, the emitted light is always of longer wavelength, i.e., shifted toward the red. The
fluorescent tracer material under discussion, rhodamine WT, absorbs green light and emits red light. By contrast,
brighteners, which are fluorescent materials added to detergents, absorb ultraviolet light and emit blue light.
Sewage Blank. The blank is amount of fluorescent materials occurring naturally in the system, expressed as a
concentration of the fluorescent material being measured. The great value of rhodamine WT lies in the fact that the
wavelengths involved are unusually long. A high concentration of brightener looks like distilled water to the
instrument when it is set up for measuring rhodamine WT. A few naturally occurring materials and some industrial
materials will fluoresce very weakly at the wavelength of rhodamine WT. The highest "blank" we have encountered in
sanitary sewage was equivalent to about 2 parts per billion of the 20% solution of rhodamine WT. Most ranged from
0.4 - 1.5 parts per billion.
It should be noted that fluctuation of blank during a measurement, not the absolute magnitude, is the important
factor. (See DYE INJECTION -- Dye Concentration.)
Sewage Standard. A "standard" is a known concentration of the material of interest. In this case, the standard will
be a known dilution of the dye being injected. The dilution will be made with sewage collected just prior to the start of
dye injection.
Recovery Standard. We will also refer to a "recovery standard", which will be made by diluting the dye being
injected with deionized water (distilled water). The purpose of the "recovery standard" is to see whether the reading
of a given concentration of dye is the same in both clean water and sewage -- in other words, whether the dye is all
"recovered" in sewage.
Dilution Ratio. This is the entire basis of the technique. If you inject dye at a constant rate of 0.01 gpm and
find the sewage dilutes it one-million fold, then the dilution ratio is one million. The flow rate in the sewer
must then be one million times as great as the injection rate, or 10,000 gpm. Note that it is not necessary to
know the absolute concentration of the dye in either the solution injected or in the sewer -- only the dilution
ratio. The instrument will be calibrated with a known dilution of the injected dye solution.
www.turnerdesigns.com
998-5107
Revision A
Page 1 of 17
Appliation Note:
Flow Measurements in Sanitary Sewers by Dye Dilution
PROCEDURE OUTLINE
1.
Collect about one gallon of sewage immediately prior to injecting dye. This will be used for preparing standards.
2.
Add dye to the sewage system at a constant rate. This will be discussed under DYE INJECTION.
3.
Take samples downstream of the point where the dye is added. This will be discussed under SAMPLING.
4.
On rare occasions, a very quick filtration of the sample will be required. Elapsed time will be about five minutes,
and many samples may be filtered at the same time. The filtration equipment is so inexpensive that it is usually
discarded. This will be discussed under FILTRATION.
5.
Measure the dilution ratio of the dye in your samples. This will be discussed under PREPARATION OF
STANDARDS and MEASUREMENT.
6.
Calculate the flow. This will be discussed under FLOW RATE CALCULATION.
7.
Sewage is not all the same -- so, you should run a recovery ratio occasionally. This will tell you whether sample
processing is really necessary and how effective the processing is. This is discussed under PROOF OF
PERFORMANCE.
EQUIPMENT NEEDED
For flow measurements in sanitary sewers, if you are going to be using only the grab sample method in an area
which is reasonably protected from the weather, the laboratory fluorometer will be sufficient. If, however, you want to
use the grab sample method in less favorable weather or if you wish to use a continuous-flow method, you will need
the field fluorometer.
If you are also interested in chlorophyll, nephelometry (turbidity), circulation, effluent dispersion, mixing, or outfall
location, you may wish to contact Turner Designs for the best selection of equipment to meet your overall
requirements.
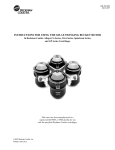
FLUOROMETER
10-AU-005-CE Field Fluorometer
Sample system: 25 mm x 13 mm Discrete Sample Holder Set for grab samples; OR the 10 mm continuous-flow
cuvette system for flow-through measurements
Filters: 10-041 Rhodamine Optical Kit
CASE (select one)
·
10-AU-002 Indoor Case
·
10-AU-022 Watertight Case.
CUVETTES
·
10-031, the 13 mm x 100 mm selected cuvettes (for grab samples)
Other equipment needs are discussed in the sections entitled DYE INJECTION, FILTRATION and PREPARATION
OF STANDARDS.
DYE INJECTION
Successful dye injection involves several factors. Injection must be at a constant concentration, at a constant,
precisely known rate, and without surging or splashing.
Dye Source and Characteristics
Rhodamine WT may be ordered from Crompton & Knowles Corp., P.O. Box 33157, Charlotte, NC 28233-3157.
Telephone: 1-800-323-4383. Turner Designs also supplies the dye in manageable quantities (Part Number 10-108).
Contact Turner Designs for a more complete list of dye suppliers.
www.turnerdesigns.com
998-5107
Revision A
Page 2 of 17
Appliation Note:
Flow Measurements in Sanitary Sewers by Dye Dilution
Rhodamine WT is supplied as a clear, 20% aqueous solution. It is very dark red in color, somewhat viscous, and has
a specific gravity of 1.2. The concentrated dye is extremely irritating to the eyes.
It was specifically developed to have poor "dye" properties, in the conventional sense. This means that is does not
absorb significantly on sediments, which would reduce its value as a tracer. As a bonus, it may be removed from
your hands with soap and water, though it is not easily removed from clothes.
Dye Concentration
Throughout this manual, all guideline concentrations are based on considering the material as purchased to have a
concentration of 100% on a basis of volume.
The fact that the material is supplied as a 20% aqueous solution, with a specific gravity of 1.2 is not significant. It
needs to be mentioned only because much of the technical literature considers dye concentration in terms of active
ingredient.
The concentration of the dye to be injected is governed by three things: injection rate; estimated flow in the system;
and final concentration desired.
As long as the dye injection rate is small compared to the flow being measured, it may be independently specified.
Usually, it will be determined by the injection system which you purchase or build.
We find that injection rates much below 10 ml/minute (0.003 gpm) are difficult to handle.
The size of the dye reservoir may set the upper limit of injection rate. If, for example, you are doing infiltration studies
on sewer systems, where dye injection periods may be several hours long, convenience in handling the reservoir
may limit the maximum injection rate.
Dye concentration in the final sample taken should be high enough so that variability in the blank -- see
DEFINITIONS -- will not affect accuracy. It should be low enough so that readings are linearly related to dye
concentration.
With the 13 mm x 100 mm Cuvette Holder recommended, this final dye concentration should fall between 0.02 and
0.5 parts per million (20 - 500 ppb), for most work.
In extremely large systems, or where multiple measurements are to be made, dye costs may make it worthwhile to
explore blank variability, and aim for a lower final dye concentration.
Take perhaps 10 blank samples over a one hour period and determine the blank variability. If you need only 5%
accuracy, and dye quantity is a factor, then aim for a concentration 20 times the variability of the blank.
In situations where injection will be at one point and sampling at multiple points (as in infiltration studies), the flow
change may be such that you must exceed 0.5 ppm at the early sample points. Up to 4 ppm can be measured with a
multi-point calibration curve. See MEASUREMENT - High Concentration Measurements. Any concentration can be
measured by dilution. Simply make a 10-fold or 100-fold dilution and multiply the answer by 10 or 100. You will
probably dilute with distilled water and must remember that your blank and standards should be diluted with distilled
water in the same ratio.
So, decide on your desired final dye concentration and estimate the flow to be measured. Units, of course, do not
matter if they are consistent. Call your estimated flow Q. The flow-rate of your injector is q, in the same units.
Assuming you desire a final dye concentration of 0.1 ppm, the injected dye concentration should be:
0.1 Q/q, in ppm
For example, if your estimated flow-rate (Q) is 1000 gpm and your injector delivers .01 gpm (q), your initial dye
concentration should be about 10,000 ppm, or 1%. Add 1 part of dye to 100 parts of water.
Two simple guidelines:
1.
We recommend the use of an RB-BG75-2CSY pump for dye injection (see below). When set for maximum flow,
-5
it delivers 48 ml/min., which translates into about 2 x 10 million gallons per day (mgd).
With this injection rate, we recommend that you estimate the flow in mgd, then multiply by 0.005 to get the
desired initial dye concentration. For 0.1 mgd, use 0.05% dye; for 1 mgd, use 0.5% dye; for 10 mgd, use 5%
dye, etc.
This will yield a final concentration of about 0.1 ppm which is normally a good concentration to shoot for. If your
actual flow is one-fifth your estimate, dye concentration will still be in the linear range. If flow is five times higher
www.turnerdesigns.com
998-5107
Revision A
Page 3 of 17
Appliation Note:
Flow Measurements in Sanitary Sewers by Dye Dilution
than estimated, the concentration will still be about 20 times the background normally encountered. This is
conservatively high as a 20% change in background during the run would result in only a 1% error.
2.
The concentration of the dye being injected does not need to be accurate!
As an example, the scintillation vials which we recommend for sample storage (see Sample and Standard
Storage, below) contain about 2/3 ounce, when filled to the bottom of the shoulder. This translates to about
0.005 gallons.
If you have estimated flow to be one mgd, and hence need a 0.5% dye concentration, it is easy to prepare. Fill a
scintillation vial to the bottom of the shoulder with concentrated dye. Pour this into a plastic one-gallon bottle.
Mix and fill with water, to obtain the desired 0.5% dye concentration.
With the pump recommended, the gallon will last about 1.3 hours.
Mixing the Dye
In mixing the dye, there are several things to keep in mind.
1.
If it is not uniformly mixed, the results will be inaccurate!
2.
A completely full container is impossible to mix. Leave at least 20% or more air space.
3.
A container you can pick up and shake is highly recommended.
4.
The dye acts like a detergent; it foams. Never try to add more water or dye after mixing, or you will have red
foam running down the sides.
5.
If the container can be picked up, mix by swirling the solution inside using a rotary motion, then turning it upside
down. Swirl again and right it. Do this 10 times.
For large drums, take a smaller container and use part of the water to pre-dilute the dye 20 - 50 fold. Put the rest
of the water required in the drum. After the foam settles in the pre-diluted dye, pour it into the drum. Seal it, and
if you can't find someone with a drum shaker, you must roll the drum repeatedly around on the floor,
occasionally setting the drum on end to change the flow pattern. You can establish how much mixing is required
by taking samples from several levels, diluting them and reading them in the fluorometer.
Injection Apparatus
The most convenient device is a constant displacement pump. A commercially available pump which appears to be
nearly ideal for field work is the model RP-BG75-2CSY pump made by Fluid Metering, Inc., and available through
Turner Designs. This unit features continuously variable flow rate and is self-priming. Maximum flow rate is 48
-5
ml/min. (0.012 gallons per minute) (2 x 10 mgd). Current drain is between 0.06 and 0.1 amperes from a twelve volt
battery. A very light duty storage battery, or a cigarette lighter adaptor for your vehicle may be used. Eight size "D"
alkaline flashlight batteries (10 ampere-hour @ 1.5 volts per cell) should run the pump for about 100 hours.
The pump which we have used for field demonstration has shown an excellent reproducibility of ±0.1% (at maximum
rate) over a period of 5 years.
CAUTION! These pumps are not explosion proof. The dangers of sewer gas explosion must be taken into account.
A modified chlorine feeder, available from Aerofeed, Inc. (P. O. Box 3203, Chalfont, PA, 18914), may also be used. It
is pressurized in the field with a foot or tire pump. The flow rate is adjustable from 60 to 250 ml/min. (.016 to .066
gallons per minute). It features a self-contained reservoir with a 9 liter (2.4 gallons) capacity.
The flow is controlled by a special pressure regulator, which maintains a constant pressure difference of 5 pounds
per square inch cross a metering valve.
NOTE: We know these devices have been used successfully, but have not tested them in our laboratory.
A device frequently mentioned in the literature, the Mariotte Vessel is described in a companion monograph entitled
"A Practical Guide to Flow Measurement." While much used in stream gaging, it is rarely used in sewer studies. Its
major advantage, the ability to deliver large injection rate without power, is not important in sewers. There are also
numerous precautions and disadvantages (see "A Practical Guide to Flow Measurement"), not the least of which is
that one small enough to be handled easily by one person is tricky to build and subject to plugging.
www.turnerdesigns.com
998-5107
Revision A
Page 4 of 17
Appliation Note:
Flow Measurements in Sanitary Sewers by Dye Dilution
Things We've Learned the Hard Way!
1. Dye should not be allowed to free fall for more than about one or two feet, or splashing and erratic results may
occur.
2. If you are using a small injection system, place reservoir, pump, and battery in a box with a yoke on it, and
suspend it by rope from street level. Tie a knot in the rope, and you can close the manhole for the duration of the
test.
3. Do not attempt to use a long tube, at low flow rates from street level. The dye flow will surge, and the erratic
suction on the pump exhaust line will cause erratic results.
4. In fact, long tubes are to be discouraged from another standpoint. Flexible vinyl tubing (e.g., Tygon©) is
convenient, but it does adsorb dye reversibly. It does have a limited capacity for adsorbing dye and at the
concentrations injected, equilibrium is rapidly achieved. A few feet is no problem. A hundred feet is
unacceptable. Polyethylene, polypropylene, and unplasticized vinyl tubing do not adsorb, but are fairly rigid.
5. If you must inject from street level, use an appropriate length of PVC pipe with a tee on the top. Insert the tube
from your injection pump well down the pipe or allow the stream from your dye injector to fall in the top, clearly
missing the wall until well down. Run water from a hose through the tee. This is a particularly valuable technique
for injecting dye through a pump directly into the bell housing of a pump, or for other situations where the desired
point of injection is not directly below an opening. The PVC pipe is flexible and easily maneuvered. The top is
easily secured to a ladder laid across the manhole, etc.
6. If the amount of water added in injecting the dye is substantial compared to the flow being measured, consider
correcting for the added water. In infiltration studies, it will normally be a constant increase in baseline, and
therefore can be ignored. In calibrating a flow meter, the added flow should be subtracted from the measured
flow for comparison with an upstream flow meter. IF the flow meter is downstream, there will be no correction, as
the flow meter is reading the total flow.
Where Should the Dye be Injected?
The dye injection and dye sampling points must be considered together.
The important considerations are:
1. The dye must be injected sufficiently far from the sampling point so that it is completely mixed with the sewage
before samples are taken.
This may easily be checked. See SAMPLING -- Is Mixing Adequate?
The more turbulent the flow, the better. A pass through a lift pump virtually assures mixing.
Even under relatively smooth flow conditions, expect good mixing 100 to 200 pipe diameters down stream.
Avoid situations where there is a reservoir between the injection and sampling points. It will increase the time
required to make a test.
2. If flow increases downstream, dye dilution techniques measure the total flow at the point where the sample is
taken!
If there is infiltration or a branch entering between the injection and sampling point, you will be measuring the
total flow at the point where the samples are taken.
Exfiltration is a special situation. Assuming complete mixing prior to loss of flow, the flow measured is that
prior to the diversion. To quantitate such situations requires moving the injection site as well as the sample
site.
3. Convenience should be considered, particularly at the sampling point. Certainly, the first time around you will
wish to take a fair number of samples.
www.turnerdesigns.com
998-5107
Revision A
Page 5 of 17
Appliation Note:
Flow Measurements in Sanitary Sewers by Dye Dilution
Calibrating the Injector
The accuracy of your final result depends directly on the accuracy of your knowledge of the rate of flow of the dye.
You will need a stopwatch and a clean, dry volumetric flask whose capacity will depend on the type of injection
system you are using. See PREPARATION OF STANDARDS for information on volumetric flasks.
When dye flow has stabilized, measure the time to fill the volumetric flask, then calculate the flow rate. See FLOW
RATE CALCULATIONS.
We strongly recommend a flow rate check both before and after a run.
When using the Fluid Metering, Inc., pumps, a volumetric flask should be chosen that takes at least four minutes to
fill. This is because the pump makes only 75 strokes per minute. (It is also the reason that we do not recommend the
RP-BG 25 series pumps. They make only 25 strokes per minute and it takes too long to accurately calibrate them.)
Save the dye collected during calibration of the dye injector. See SAMPLING.
SAMPLING
What Samples are Needed?
Collect the following:
1. A sample of the dye being injected. This was collected when the dye injector was calibrated.
This dye sample will be used to prepare standards.
2. A large sample of sewage (1 gallon) to which dye has not been added.
This will be used to determine BLANK (see DEFINITIONS, above).
It will also be used to dilute the dye sample mentioned in 1, above, when preparing the calibration standards.
3. Samples of sewage taken downstream of the injection point. One ounce will be adequate.
4. You may wish to take additional samples upstream of the dye injection point, to check for variability in the
BLANK. See 2, above. One ounce will be adequate.
When Should Samples Be Taken?
If you were to plot dye concentration as a function of time from the start of dye injection, you would find:
1. A delay time. This delay time is almost invariably longer than you would expect from an estimate of velocity. It is
not unusual to find a delay time of 15 - 20 minutes for dye to travel 500 feet.
2. A period during which the dye concentration rises. If the flow is highly turbulent, this period will be short. If flow is
smooth, and particularly if there is a reservoir of any kind between the dye injection point and the sampling point,
this period may be quite long.
3. A period of constant dye concentration (plateau) assuming that flow rate is constant.
4. A fall off in concentration of about the same duration as the rise time, after the injection is discontinued.
The time periods involved are a function of travel time between injection and sample sites. In a reach of 100 yards in
a fast moving stream, a 15-minute injection might show a rise time of 1-2 minutes, a plateau of 11-12 minutes, and a
fall off time of 1-2 minutes. A mile downstream, there might be no plateau at all without longer injection.
A major advantage of the Model 10-AU Fluorometer is that you can take it into the field and power it from your car
battery. Cigarette adapters, available at any auto parts store, will give you instant power.
By using the fluorometer in the field, you can be sure of results. Take samples at regular intervals, typically one
every two minutes, and measure them on site until readings stabilize. These readings may not be used for final flow
measurements, but they will enable you to know when to take the sample for flow calculations.
When the readings are stable, you may take the one-ounce samples required for final flow determination.
www.turnerdesigns.com
998-5107
Revision A
Page 6 of 17
Appliation Note:
Flow Measurements in Sanitary Sewers by Dye Dilution
Is Mixing Adequate?
When readings become constant as a function of time, as described immediately above, take samples across the
stream flow. If these samples read the same, mixing is adequate.
How Many Samples are Needed?
Theoretically, only one sample is needed, taken any time during the plateau period. It is good insurance to take at
least three at 1 minute intervals. It is not at all unusual to accidentally contaminate a sample. If you have only two
samples, and they disagree you won't know which is right. If you have three or more samples and one is wild, you
can discard it with an easy mind.
For very accurate calibration of a flow meter, you may wish to take 10 samples and average the results.
SAMPLE AND STANDARD STORAGE
Your samples and standards are very stable and may be kept for months for recheck if desired. For storage longer
than one day, they should be protected from strong sunlight.
The storage container material is important. A tin can on a rope is fine for collecting, but the samples should not be
stored in metal. Also, some types of ordinary glass jars degrade the sample. This degradation may be a pH effect
due to traces of lime left on the surface of the glass. Rubber and some plastic liners will absorb the dye. Potential
containers should be tested by filling several with a solution of dye (about 0.1 - 0.3 ppm). If the samples are likely to
be jostled in transport, turn the containers upside down so the lid contact and seal will be tested. A few hours later,
compare dye concentration with the original material stored in your volumetric flask.
Materials known to be safe are:
1. Borosilicate glass, such as Pyrex® or Kimax®.
2. Polyethylene, polypropylene, and polystyrene.
3. Polyseal® screw caps (available for narrow mouth bottles). Note: If you have trouble with lids, but not the bottles,
you can always screw the lid on over a piece of Parafilm®.
Clear material such as Saran®, widely used in the kitchen for food storage, should never be used. These
materials adsorb large amounts of the dye.
Containers made of the above materials tend to be more expensive, but are indefinitely reusable.
An inexpensive container of adequate size (about 2/3 oz), which we have tested, is a special low-potassium glass
scintillation vial with Polyseal® caps made by Kimble. They are available from Scientific Products and other
laboratory suppliers.
FILTRATION
The requirement is that the sample be free enough of suspended solids so that accurate measurements of the
fluorescence of the sample may be made.
In most cases, filtration will not be required. Whether filtration is necessary and adequacy of the filtration procedure
may be easily checked. See PROOF OF PERFORMANCE -- Recovery Ratio Test.
The Effect of Turbidity
Your fluorometer shines green light on the dye to be measured, and responds to the red light which the dye emits. If
these two beams of light are partially obscured, then readings will be low.
Note that the effect is a proportional one, not a subtractive one. If 10% of the light is lost due to turbid materials, then
all readings will be reduced by 10%, regardless of whether they are high or low.
Note also that the turbid material must remove light to affect the readings. If the particles present do not absorb light,
but merely deflect it, readings will be only slightly affected. It is the big, dark particles that do the damage.
The "fines", which are often very difficult to remove will cause very little error.
Further, we find that the amount of big, dark particles is quite variable, but the content of "fines" is low and
consistent.
www.turnerdesigns.com
998-5107
Revision A
Page 7 of 17
Appliation Note:
Flow Measurements in Sanitary Sewers by Dye Dilution
There are three methods which may be used to correct or remove errors caused by turbidity:
1. Prepare standards with the water of interest. Assuming turbidity is constant, this automatically corrects for errors.
2. Remove the suspended solids to the point where the error is negligible. If you are in a hurry, filter; if you are not
in a hurry, let them settle.
3. Dilute the samples with clean water to the point where turbidity is negligible and multiply the answers by the
dilution factor. Don't forget that the blank and standards should be similarly diluted.
Preparation of standards with the water of interest is valid at almost any level of turbidity if the turbidity is constant.
Even if 50% of the light is lost, there will be no error. If, however, the turbidity changes by 10% (relative, i.e., from 50
to 45% light loss) you now have a 10% error in your results. There is no way to predict how much light loss can be
tolerated without actually testing the variability in light loss. In a crucial meter calibration, one might collect several
blank samples, prepare standards in them and compare readings; or, simply remove all solids.
In routine measurements in sewers, we normally recommend that you accept up to a 10% loss of light. A 10%
(relative) change in turbidity is only a 1% error. The quick filtration techniques described below, typically reduce
turbidity effects to about 2%. Overnight settling of sewage usually reduces the effect to near zero.
Use of Existing Filtration Equipment
If measurements are to be made in a laboratory equipped for filtration of samples in reasonable volume, then filter.
But there are several things to avoid:
1. Common filter paper should be avoided. Glass fiber filter discs or filters such as the Millipore® type are O.K.
2. Cross-contamination between one sample and the next must be avoided. Rinsing with clear water will not solve
the problem, since residual clear water will dilute your sample and cause errors.
Wash down all the area of the filtration apparatus with a small amount of your sample. Filter it. Swirl the contents
of the vessel which receives the filtered sewage. Discard.
Then, filter and save for measurement.
In extreme cases, you may wish to wash down and discard two or three times, before saving a sample for
measurement.
3. Cross-contamination is easy to check. Wash down with water. Filter some sewage containing dye and save.
Repeat several times, saving each sample.
Then measure, to see how many wash-downs are required.
A Quick Field Filtration Technique
We have developed a rapid filtration technique based on very inexpensive disposable items, which avoids sample
cross-contamination and may be used under field conditions.
The equipment which we use is available through Scientific Products. (See Laboratory Equipment and Supplies in
your telephone directory yellow pages). Equivalent items are available from other major supply houses.
1. Disposable plastic funnels. We have found that Lance, 5.5 cm (2-1/4") polystyrene funnels, manufactured by
Sherwood Medical Industries, Inc., are excellent. They may be rinsed and reused, but are brittle and subject to
cracking.
Polypropylene funnels, though somewhat more expensive are more durable, and a better choice, if you wish to
rinse and reuse them.
2. Pyrex® brand wool filtering fiber, Corning Catalog #3950 or equivalent. A pound will be a lifetime supply.
3. A test tube rack for 13 mm x 100 mm culture tubes, which may be readily immersed in water.
4. A pan which you can place the test tube rack in, deep enough so that when partially filled with water, cuvettes in
place in the test tube rack will be immersed to about 1-1/2" from their tops.
(This is not part of the filtration set-up, but will be required for measurement.)
5. A roll of Parafilm. One 4 inch x 125 foot roll is a lifetime supply.
www.turnerdesigns.com
998-5107
Revision A
Page 8 of 17
Appliation Note:
Flow Measurements in Sanitary Sewers by Dye Dilution
Clear material such as Saran, widely used in the kitchen for food storage should never be used. These materials
adsorb large amounts of the dye.
6. A pair of scissors.
7. A piece of rod about 3/32" in diameter, 3" long. A 3/32" Allen wrench with handle is excellent.
You will need to experiment a little:
1. Working from the large end, force a tightly wadded piece of glass wool into the stem of the funnel, using the
3/32" rod.
The piece should be large enough so that some forcing is required to end up with a plug of packed fiber in the
stem, about 3/8" to 1/2" long. One-eighth inch or more of looser fiber should extend above the stem.
2. Place a 13 mm x 100 mm cuvette in the test tube rack.
Place the funnel, packed with glass fiber in the cuvette.
3. Pour about one ounce of water into the funnel, and time how long it takes to fill the cuvette to the label.
It should take between two and five minutes. Adjust your packing procedure until the filtration rate is correct.
Be prepared in advance! Prepare as many filters as needed before handling dye. Have a similar number of clean,
dry 13 mm x 100 mm cuvettes on hand, labeled to match your sampling schedule.
During the study, always handle the funnels by the outside, near but not at the top. Similarly, do not touch the rims of
the cuvettes. This will minimize the chance of any dye on your hands getting into the samples.
Place the cuvettes in the test tube rack, staggered so that when the funnels are in place, the funnels do not overlap.
Pour the sample in. When the cuvette is filled to the label, remove the funnel and discard. Then, cover the top of the
cuvette with Parafilm. Peel the backing paper from the Parafilm, keeping fingers off the protected surface. Press this
clean surface firmly onto the top of the cuvette and fold the excess over the side.
Your samples are now ready for measurement.
Overnight Settling
On overnight settling, most sewage will settle to a clarity not quite as good as a sub-micron laboratory filtration, but
considerably better than the quick filtration. To be strictly correct, you should prepare your standard dilutions before
allowing the solids to settle. We have never seen a case in sewage where the solids adsorbed the dye, but it could
happen. If, for example, the solids contained activated charcoal, dye would be adsorbed.
In filling your cuvettes from settled samples, gently pour off anything that has floated to the top, then pour the liquid
into clean, dry, labeled cuvettes. Cover with Parafilm.
PREPARATION OF STANDARDS
Standards are required to calibrate the fluorometer precisely in terms of the dye that you injected. Standards must be
prepared for each run, using a small portion of the dye actually injected and using a representative sample of the
sewage taken just prior to the start of dye injection.
For repetitive work, i.e., monthly calibration of a large flowmeter, only one standard and one blank will be required.
When you are just starting up, more standards will be required. To save repetition, the preparation of all standards
that you might conceivably need is discussed. As you become familiar with the technique, you can judge what
simplifications can be made.
Equipment Needed
The following is a list of equipment we have found useful. If you have a chemist available, he or she may well
suggest alternatives immediately available to you.
The equipment which we use was purchased from Scientific Products. Equivalent items are available from all major
laboratory supply houses:
1 ea.
1000 ml volumetric flask
6 ea.
100 ml volumetric flasks
www.turnerdesigns.com
998-5107
Revision A
Page 9 of 17
Appliation Note:
Flow Measurements in Sanitary Sewers by Dye Dilution
2 ea.
Volumetric flasks of adequate capacity to calibrate your injector (see DYE INJECTION - Calibrating the
injector)
1 case
(500) scintillation vials with Polyseal caps (see SAMPLE AND STANDARD STORAGE)
1 ea.
1000 l (1 ml) Eppendorf pipettor (or equivalent) and disposable tips. (They are relatively expensive, but
are worth it in ease and rapidity of use. Under field conditions, they frequently prove to be more accurate
than conventional pipettes.)
While the 1 ml pipettor and the 100 and 1000 ml volumetric flasks will adequately handle all situations, there will be
borderline cases where, though not strictly necessary, it would be nice to have other volumes. The pipettors are
available in adjustable versions.
Care of Glassware
Technically, all glassware should be thoroughly clean and dry before use. Cleanliness is, however, a matter of
definition. What most chemists would consider very bad practice, can be tolerated here. Visible dirty spots, water
marks, finger prints, etc., are not going to cause error unless they contain dye. Your primary interest is to see that all
previous dye is removed and that the equipment delivers or contains the proper volume of water.
Volumetric flasks are designed to contain a volume. They can be used wet, without error, providing all dye has been
rinsed out. Only water above the calibration mark will cause error, and this will be trivial unless heavy beading is
involved.
Beading occurs eventually in all glassware due to oils in the air and in the water. Occasional washing with a warm,
mild detergent usually cures this problem. Resistant cases can sometimes be cured by rinsing with acetone,
followed by washing with detergent. Severe cases may require soaking in acid cleaning solution.
After washing, or after use, all glassware should be rinsed repeatedly with tap water (at least three or four times after
no dye can be seen) followed by one or two rinsings with distilled water. The latter rinse is a precaution against
beading and encrusting with minerals from hard water, if the glassware is to air dry. It is not necessary if you have
soft tap water or intend to reuse the equipment immediately.
To rinse volumetric flasks, fill them about 1/5 full, swirl and rapidly invert so that the liquid rinses all inside surface
while emptying. Rinse the outside neck under the faucet between internal rinsings.
Cuvettes should be treated like the flasks, except that they must be dry for use. If they are not dry, they should be
rinsed several times with the solution to be measured. This is not convenient when you are filtering directly into the
cuvette. Cuvettes should be stored to avoid scratches. Minor scratches will not affect accuracy, but eventually such
treatment will cause errors.
Dilution Technique
It's easy to perform an accurate dilution, but there are several points which must be carefully observed.
Position yourself so you have good light, and preferably are facing a light-colored wall.
Pipettor. Follow the manufacturer's recommendation with your pipettor. Most have three positions of the activating
button. For these, the general instructions are (after firmly seating a fresh tip):
1. Depress the activating button to the first stop.
2. Lower the pipettor till the tip is slightly below the surface of the sample to be pipetted.
3. Slowly release the activating button. Wait a few seconds and withdraw the pipettor.
4. Check that there is no air bubble at the end of the tip.
5
.Tilt the volumetric flask, and insert the pipettor such that the tip is well below any ground portion, and is touching
the side.
6. Gently depress the activating button past the first stop to the second. This dispenses the liquid and blows out the
last droplet.
7. Remove, and dispose of the tip by depressing the button to the final (eject) position.
Volumetric Flask. Fill the flask to the mark with water, or raw sewage containing no dye, depending on the step in the
dilution procedure and type of standard being prepared. Use a dropper or clean pipette to add the last bit. If you
overfill slightly, don't worry about it. In a typical volumetric flask, missing the mark by half an inch leads to an error of
www.turnerdesigns.com
998-5107
Revision A
Page 10 of 17
Appliation Note:
Flow Measurements in Sanitary Sewers by Dye Dilution
only about 0.7%. If you overfill a lot start all over. For highest accuracy, the bottom of the meniscus should touch the
top of the mark.
Cap the flask, and holding the cap tightly in place, invert. Swirl the flask and right it until the air bubble reaches the
top. Repeat a total of 10 times.
You can easily check the precision of your dilution technique. Just make several identical dilutions and check the
repeatability, using the Fluorometer. See MEASUREMENT - Normal Measurements.
Standards Required
When making routine measurements, only one standard is required. This is a precisely known dilution of the injected
dye in raw, freshly-stirred, or mixed sewage. The standard must be treated in the same manner as your samples,
i.e., allow it to settle or filter it.
For the first measurement in a new system, you will also need a RECOVERY STANDARD. This is the same precise
dilution made above, but with distilled water. Actually, this recovery standard is very little additional trouble to
prepare. Until considerable experience is gained, it is good practice to prepare it routinely.
Preparation of Standards
Referring to the section on DYE INJECTION - Dye Concentration, an example was given where a 1% solution was
injected with the intent of obtaining a concentration of 0.1 ppm in the sewer. Let's continue with this example.
While there is no theoretical requirement that the standard be 0.1 ppm (it can be anywhere from 0.01 - 0.5 ppm),
errors are reduced if the standard is near the sample concentration. To prepare 0.1 ppm standard, we need to dilute
a 1% solution (10,000 ppm) to 0.1 ppm, a 100,000-fold dilution factor., This will be done in two steps: one dilution of
100-fold, and one of 1000-fold. Since sewage may contain large particles capable of plugging the tip of the pipettor,
it is customary to make only the last dilution with sewage; all others are with distilled water. Since the last dilution
should be as near pure freshly-stirred or mixed sewage as possible, it will always be 100-fold or greater. As much as
1% clean water present will not cause a significant error.
In this case, it is immaterial whether the 100-fold, or the 1000-fold dilution is prepared first, though doing the 100-fold
first is technically the more correct.
If you have an adjustable pipettor and desire to make dilutions which are not a factor of 10, keep it simple. If, for
example, you would ideally like 38,000:1, make a 40,000:1 dilution. One dilution of 0.25 ml (250 l) to 100, and one
of 1 ml to 100 gets you 40,000.
The nicety of adjusting the standard concentration to be near that of the sample was much more important with
meter fluorometers than with digital. With the digital fluorometer it is not normally of any particular advantage. If you
are doing meter calibration, it is desirable to avoid the (otherwise negligible) error of the fluorometer changing from
the high to low range, or vice versa.
We cannot emphasize enough the necessity for proper mixing techniques. Even when dilutions are accurate, if you
draw your sample from an inadequately mixed flask, your results are invalid.
Preparation of Recovery Standard
Repeat your last dilution with distilled water instead of sewage.
Insurance
Immediately place at least 20 ml (about 2/3 fluid ounce) of your injected dye and of all dilutions in clean, dry,
marked sample bottles. Save these and the remainder of all sewage samples, including the blank sewage till
you have calculated all flows and decided the results are reasonable and consistent. The ability to recheck
your dilutions may well save you from re-running the study.
www.turnerdesigns.com
998-5107
Revision A
Page 11 of 17
Appliation Note:
Flow Measurements in Sanitary Sewers by Dye Dilution
PROOF OF PERFORMANCE
Significance of Errors
It is important to keep in mind the accuracy required. If your problem is localizing massive groundwater infiltration,
then ±5% is probably adequate. If, on the other hand, you are calibrating a flowmeter used to decide the ratio of
payments between a group of municipalities supporting a single sewage plant, then you might require ±1%.
Errors that may result may be estimated, as you go through this section on proof of performance. So, keep your
objective in mind. It may well reduce test costs significantly.
Sampling Errors
These errors and the steps to take to correct them are discussed in SAMPLING - When Should Samples Be Taken?
and SAMPLING - Is Mixing Adequate?
In addition, loss of dye by adsorption on the walls of the flow channel is accounted for when you carry out the tests
outlined under SAMPLING - When Should Samples Be Taken? Such adsorption is limited in its capacity and is
reversible. It will show up as a slower-than-normal build up of dye concentration after injection has started and a
slower-than-normal fall in dye concentration after injection has stopped. If a clean "plateau" of dye concentration can
be reached, accuracy will not be impaired.
Recovery Ratio Test
The physical and chemical properties of your sewage may interfere with the measurement of the fluorescent dyes. A
recovery ratio test is used to determine the degree of such interference and the effectiveness of the several simple
procedures used to reduce this interference.
How to make measurements with the Model 10-AU Fluorometer are discussed in the section entitled
MEASUREMENTS.
Details of how to prepare Standards and Recovery Standards are discussed in the section entitled PREPARATION
OF STANDARDS.
To determine a Recovery Ratio:
1. Determine the fluorescence due to dye added to distilled water (the Recovery Standard).
2. Determine the fluorescence due to the same dilution of dye in raw sewage (the Standard).
3. Divide the number from step 2 by the number from step 1. This is the Recovery Ratio.
In all cases encountered to date (and expected) this ratio will be less than one.
If your recovery ratio is around 0.9, expect accuracy of about ±5%. If it is around 0.95, expect accuracy of about
±2%. For highest accuracy, all steps possible to obtain a high recovery ratio should be taken.
The most general cause of low recovery ratios is the masking effect of suspended solids in the sewage. To improve
the recovery ratio, filtration of the Recovery Standard (and all unknowns) is called for. For details, refer to the section
entitled FILTRATION.
Effect of pH
Dye fluorescence drops off (reversibly), if your sewage is more acid than pH 4 or more alkaline than pH 10.5.
Recovery Ratio will be very low at extreme pH values.
The pH is easily checked with a pH meter or indicator paper. If the pH is low, add a pinch of baking soda. The
amount is not critical, since it cannot take the pH too high. If the pH is high, some dilute acid will have to be added till
the pH is correct. It is probable (not verified) that monosodium phosphate could be used to correct high pH in the
same way that the baking soda is used for low pH.
Repeat the Recovery Ratio with pre-treated sewage.
If recoveries are good, flow measurements of high accuracy may be made.
However, the pH of all samples, blanks and sewage used for making the standards must be adjusted.
www.turnerdesigns.com
998-5107
Revision A
Page 12 of 17
Appliation Note:
Flow Measurements in Sanitary Sewers by Dye Dilution
Unusual Standards
1.Dye adsorption on particulate material.
If there is a large amount of partially burned coal, or other similar materials present, they will adsorb dye and
cause low Recovery Ratios.
To check for this problem, filter the sewage before the dye is added, in the process of making up your Standard.
Recheck the Recovery Ratio. If it is significantly better, adsorption on particulate material is indicated.
Since dye is truly removed from the system, accurate measurements are not possible under such conditions.
2. Dye not adsorbed on particulate materials, but filtered sewage appears colored.
Dissolved colored materials can mask fluorescence, just as particulate material can, causing low Recovery
Ratios.
To check for this, dilute the sewage used for making the Standard until an acceptable Recovery Ratio is
obtained.
Scale up the amount of dye injected by this factor. Dilute all samples and blanks and sewage used for making
the Standard by this factor with distilled water. High precision flow measurements may now be made, at the cost
of one extra dilution per sample.
3. Chemical degradation.
The dye is slowly destroyed by very high concentrations of residual chlorine, much higher than normally
encountered in sewage. Fresh chlorine, however, destroys the dye rapidly. If the dye goes past a chlorinator, the
chlorinator must be turned off for the duration of the test.
Presumably, other strong oxidizing or reducing agents could present a problem.
A series of Recovery Ratios is called for, one done as quickly as possible, and others at intervals of several
hours.
If degradation is slow, satisfactory results may be obtained by making up your Standard at the same time that
injection is going on, and measuring your samples as quickly as possible.
Keep the Standard and all samples at the same temperature until measurements can be made, since chemical
degradation is sharply temperature sensitive.
Help From the Manufacturer
If you feel that you have a special problem, call our Technical Service Department.
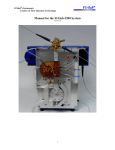
MEASUREMENT
Your Model 10-AU Fluorometer should be equipped with the 13 mm x 100 mm cuvette holder and the appropriate
filters and lamp from the 10-041 or 10-041R Rhodamine Optical Kit. (Refer to the Model 10-AU Fluorometer User's
Manual for selection and installation instructions.)
The following information describes, in general, what needs to be done to measure samples. Step-by-step
instructions using the Model 10-AU Fluorometer are set forth in "A Procedure for the Turner Designs Model 10-AU
Digital Fluorometer: Flow Measurements in Sanitary Sewers by Dye Dilution." (Detailed operating instructions for the
fluorometer can also be found in the user's manual.)
Sample Handling
For precise measurements, samples and standards must be at the same temperature, since the fluorescence of
rhodamine WT has a temperature coefficient of -2.6% per degree centigrade.
Equipment required is described under FILTRATION -- A Quick Field Filtration Technique. The points that should be
remembered are:
1. All samples, standards and blanks should be poured into clean, dry 13 mm x 100 mm cuvettes. (If you have used
the Quick Field Filtration Technique, they will already be in such cuvettes).
www.turnerdesigns.com
998-5107
Revision A
Page 13 of 17
Appliation Note:
Flow Measurements in Sanitary Sewers by Dye Dilution
The volume of liquid in the cuvettes should be at least 5 ml. This will be assured if they are filled about two-thirds
or more. Do not overfill, however, as it makes the cuvettes awkward to handle.
2. All samples, standards and blanks should be in your test tube rack, except when being measured.
3. The test tube rack should be in a pan of water at room temperature.
The water level in the pan should be high enough so that it covers the bottom three-fourths of the cuvettes.
4. If samples were at about room temperature, they should be in the water bath for at least 15 minutes before
measurements start.
If they were at a markedly different temperature, allow 30 minutes.
5. Measurements should be made rapidly, since the instrument is at a higher temperature than the room.
If a measurement (or instrument adjustment) cannot be made within 45 seconds, the sample should be returned
to the test tube rack, so that it will return to the correct temperature.
This is why duplicate Standards are called for. See Samples Required, below.
6. We recommend a minimum of 5 minutes in the test tube rack between one measurement and the next on a
single sample.
7. The outside of the cuvette MUST BE carefully dried with facial tissue before it is placed in the instrument for
measurement.
8. The fluorometer should be allowed to warm up for at least ten minutes prior to the start of measurements.
Samples Required
Experience may allow you to reduce the number of standards, but for initial studies you should have:
1. Two cuvettes filled with Standard. See Preparation of Standards.
2. Two cuvettes filled Recovery Standard.
3. One cuvette filled with Blank.
If you are studying Blank variability, you may have a number of cuvettes filled with Blanks. See DYE INJECTION
-- Dye Concentration.
4. One cuvette filled with distilled water.
5. Your various samples, each in its own cuvette.
Recovery Ratio
Recovery Ratio Tests are important in predicting the precision of your flow measurements and guiding you in
improving this precision. See PROOF OF PERFORMANCE -- Recovery Ratio Test, Effect of pH, Unusual Situations
and Help from the Factory.
1. Insert the cuvette containing distilled water (outside of the cuvette MUST BE dry!) and suppress the reading to
zero (blanking procedure in the Calibration section of the user's manual).
2. Insert the cuvette containing your Recovery Standard. Record the reading on the digital display.
Note:The number you are reading is "relative" concentration. Do not fall into the trap of believing that this is the exact
concentration. You set up the instrument with a standard of possibly questionable accuracy, and definitely at a
different temperature. You do not need to know the actual concentrations of your samples, only the relative
concentrations.
3. Insert the cuvette containing your (sewage) Standard. Record the reading.
4. Insert the cuvette containing your (sewage) Blank. Record the reading.
5. Subtract reading 4 from reading 3.
The net reading obtained in step 5 is the reading due to the dye present in the sewage. Divide the net reading from
step 5 by the reading from step 2, to get the Recovery Ratio.
www.turnerdesigns.com
998-5107
Revision A
Page 14 of 17
Appliation Note:
Flow Measurements in Sanitary Sewers by Dye Dilution
Reading Samples
1. Remember, the only thing that you need is the ratio of Standard to sample.
2. Insert the cuvette containing your Blank (sewage). Record the reading.
If you wish, you may set the sewage Blank to zero. However, it is useful to know how large the blank is. If it is
small compared to the standard and samples, then you are more confident of the relative accuracy of the test. If
a small blank varies by a few percent, it is negligible. If a large one varies the same percentage, the error in the
answer will be proportionately larger.
Therefore, we recomment that you leave the distilled water set to zero. This way you definitely have a record of
the magnitude of the blank; repeats will always have positive values; and you may average three or more
cuvettes of your blank for greater accuracy. You will always work with the net reading: sample (or standard)
minus the blank.
3. Insert the cuvette containing your Standard. Record its reading.
As in the case of the blank, if you wish you may read and average three or more cuvettes of your standard.
4. Read and record all samples.
If any sample is unduly high ("OVER" on the Model 10-AU Fluorometer), see "High Concentration
Measurements," following.
Reading High Concentrations
For concentrations between 0.5 and 2 ppm, the samples may be read from a calibration curve. This is not usually
recommended as the curve must be prepared by making at least five dilutions, preferably seven or more (0.5, 0.75,
1.0, 1.25, 1.5, 1.75, and 2.0 ppm). For this, you need to determine what dilution of your injected dye will give you
about 2 ppm, and prepare the necessary dilutions to define the curve. Under no circumstances should you attempt
to carry the curve beyond 2 ppm. The curve will be so flat that accuracy will suffer.
Unless there are a very large number of samples falling slightly above the linear range, the fastest and most
accurate way to handle high-concentration samples is to make a dilution.
There is no theoretical upper limit to the concentration which can be handled by dilution. In fact, in unusual situations
(very high color, for example), you may wish to deliberately run the concentration very high so that the interference
from the color may be diluted out. In one instance, the author ran the concentration to about 100 ppm, and made
1000-fold dilutions. The sewer line was opaque with riboflavin, and the 1000-fold dilution allowed measurement to be
made with good accuracy.
It is best to stick to multiples of 10. Prepare a suitable over-range standard. If your normal dilution factor for the
standard was one million, make one of 100,000 -- whatever is needed to give you a standard, which when diluted to
the same extent as your samples will yield a standard of the optimum concentration (about 100 ppb).
Dilute your samples, the new standard, and your blank with distilled water. If you are running all samples high
because of high turbidity or color, then prepare a recovery standard in the same manner.
In the equation for calculating flow, D (the dilution of the standard) is the amount of dilution of the standard above
that of the samples. Thus, if your standard is diluted 10,000-fold, then standard, blank and samples are diluted
another 100-fold, this 100-fold should not be counted. The purpose of the "D" is to correct for any dilutions made of
the injected solution that are NOT made in the samples.
FLOW RATE CALCULATION
The mathematical equation normally used to calculate flow is:
1. Q = q C/c
Where:
Q
is the flow being measured
q
is the dye injection rate
C
is the concentration of the injected dye
c
is the concentration of dye measured downstream of injection
www.turnerdesigns.com
998-5107
Revision A
Page 15 of 17
Appliation Note:
Flow Measurements in Sanitary Sewers by Dye Dilution
Since fluorescence is normally proportional to concentration, a more practical form of this equation is:
2. Q = q x Rst D/r
Where:
Rst is the reading obtained on your standard
r
is the reading obtained on your sample
D
is the dilution ratio, used to prepare the standard
The following discussion of Flow Rate Calculation will be based on equation 2.
Sample Readings
Sample readings are all net readings. If (sewage) blank was set to zero, then the readings obtained for samples are
the net readings. If the distilled water blank was set to zero, subtract the (sewage) blank reading from all readings to
obtain the actual net reading.
Injection Rate
The Injection Rate is normally determined by finding the time it takes to fill a volumetric flask, See DYE INJECTION - Calibrating the Injector.
Since volumetric flasks are calibrated in milliliters and elapsed time is most easily measured in seconds, we have a
conversion problem.
Two handy numbers are:
milliliters x .0002642 = U.S. gallons
milliliters x .00003532 = Cubic feet
As an example, let's presume that when you tested your dye injector, you found that it took 158 seconds to fill a 100
ml volumetric flask.
This means that the flow rate was 100 divided by 158 or 0.631 milliliters per second, or 37.85 milliliters per minute.
If you wish your final answer to be in mgd, then the rate of dye introduced must also be in mgd.
To convert milliliters per minute to gallons per minute, multiply 37.85 by .0002642, yielding .01 gallons per minute, or
0.00001440 mgd.
If you wish your final answer to be in cubic feet per second, then convert milliliters per second (0.631) to cubic feet
per second by multiplying 0.631 by .00003532, yielding .00002287 cubic feet per second.
Standard Dilution Ratio
You have already selected a Standard Dilution Ratio. See PREPARATION OF STANDARDS.
In the example given, it was 100,000 (two 100-fold and one 10-fold: 100 x 100 x 10 = 100,000).
Example:
We wish to calculate the flow in mgd.
q =00.0000144 mgd (See Injection Rate).
Rst =95.4 (See Reading Samples).
r =25.8 (See Reading Samples).
D =100,000 (See Standard Dilution Ratio).
Q =0.0000144 x 95.4 x 100,000/25.8 = 5.32 mgd, or more reasonably stated, 5.3 mgd.
Of course, if you are measuring several flows from one injection, the obvious thing to do is calculate q Rst D, as r is
the only variable, from sample to sample.
www.turnerdesigns.com
998-5107
Revision A
Page 16 of 17
Appliation Note:
Flow Measurements in Sanitary Sewers by Dye Dilution
ALTERNATIVE OPERATION - CONTINUOUS FLOW
The "grab-sample" method described above is not the only mode of operation using the Model 10-AU Fluorometer.
If the sewage is not unusually turbid or colored, accuracy may be improved by operating in a continuous-flow mode.
NOTE: The Model 10-AU-000 Laboratory Fluorometer cannot perform continuous-flow studies.
In this mode, sewage is continuously pumped through a flow cell installed in the fluorometer, via a submersible
pump.
Advantages
1.
No cuvette error. Standards, blanks, and samples are all measured with the same cuvette.
2.
Temperature correction can be made automatically by the Model 10-AU (if the optional temperaturecompensation feature is purchased).
3.
Anomalies, such as rapidly changing flows, become obvious.
4.
If the data are collected with a computer or the optional internal data logger, they may be exported to a
spreadsheet program. This permits the averaging of very large numbers of points for even better accuracy.
Disadvantages
1.
Longer setup time.
2.
More complicated equipment. A three-way valve should be used such that the standard and/or blank may be
poured or siphoned through without disconnection.
3.
Power. A submersible pump that will pump the sewage to the surface from a manhole is necessary. This
generally implies the availability of 115 VAC.
4.
Standard preparation requires more time, as one ideally should have several gallons, usually achieved by
multiple use of a 2-liter volumetric flask (the largest generally available).
5.
Not suitable if turbidity is unusually high. Note: The use of a 10 mm diameter flow cell permits the handling of
situations comparable to those using the 13 mm x 100 mm cuvettes. The 25 mm Continuous-Flow Cuvette
System should be used only with quite clean water.
www.turnerdesigns.com
998-5107
Revision A
Page 17 of 17