1
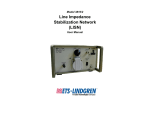
Model HI-1600
Microwave Survey Meter
User Manual
ETS-Lindgren L.P. reserves the right to make changes to any product described
herein in order to improve function, design, or for any other reason. Nothing
contained herein shall constitute ETS-Lindgren L.P. assuming any liability
whatsoever arising out of the application or use of any product or circuit
described herein. ETS-Lindgren L.P. does not convey any license under its
patent rights or the rights of others.
© Copyright 1988–2009 by ETS-Lindgren L.P. All Rights Reserved. No part
of this document may be copied by any means without written permission
from ETS-Lindgren L.P.
Trademarks used in this document: The ETS-Lindgren logo is a trademark of
ETS-Lindgren L.P.
Revision Record | HI-1600 Microwave Survey Meter, MANUAL
Part #H-600011, Rev. C
Revision
Description
Date
Initial Release
January, 1988
A
Release
May, 1999
B
Release
August, 2004
Update to current style standards;
September, 2009
C
add PIB; update photos
ii
|
Table of Contents
Notes, Cautions, and Warnings ................................................ v 1.0 Introduction .......................................................................... 7 ETS-Lindgren Product Information Bulletin ................................................... 8 2.0 Maintenance ......................................................................... 9 Maintenance Recommendations ................................................................... 9 Annual Calibration ....................................................................................... 11 Replacement Parts ...................................................................................... 11 Service Procedures ..................................................................................... 11 3.0 Specifications..................................................................... 13 Electrical Specifications ............................................................................... 13 Physical Specifications ................................................................................ 13 4.0 Pre-Installation Tasks ........................................................ 15 Battery Test ................................................................................................. 15 Probe Test ................................................................................................... 16 5.0 Operation ............................................................................ 17 Probe ........................................................................................................... 17 Survey Meter ............................................................................................... 18 Standard “Load” Versus Time ...................................................................... 19 Range Preparation ....................................................................................... 19 Testing the Range ....................................................................................... 20 Secondary Test ............................................................................................ 21 Appendix A: Warranty ............................................................. 23 Appendix B: EC Declaration of Conformity .......................... 25 |
iii
This page intentionally left blank.
iv
|
Notes, Cautions, and Warnings
Note: Denotes helpful information intended to
provide tips for better use of the product.
Caution: Denotes a hazard. Failure to follow
instructions could result in minor personal injury
and/or property damage. Included text gives proper
procedures.
Warning: Denotes a hazard. Failure to follow
instructions could result in SEVERE personal injury
and/or property damage. Included text gives proper
procedures.
See the ETS-Lindgren Product Information Bulletin for safety,
regulatory, and other product marking information.
|
v
This page intentionally left blank.
vi
|
1.0 Introduction
The HI-1600's meter case houses a rugged meter, movement driven by an
operational amplifier and is powered by two 9 volt alkaline batteries. The
negative battery is used in conjunction with a stable voltage regulator that
provides the critical reference voltages required to maintain calibration of the
instrument. The circuit provides a stable integration circuit with a fast and slow
position switch. When used in the fast position the time required for the meter
needle to reach 90% of final value (with a constant cw microwave field input) is
less than one second. The slow position provides a longer time constant, just
under three seconds, allowed by the DHEW Performance Standard for
Microwave Ovens, CFR 1030.10. The meter is calibrated for measurements at
both 915 MHz and 2450 MHz.
The diode detection array of eight hot carrier diodes is housed in the large end of
the plastic probe. This antenna array has the unique feature of being able to sum
microwave electric fields at any polarization in a plane perpendicular to the axis
of the probe. The antenna lobe is also very broad, making the instrument easy to
use when measuring leakage around an oven door. The spacer is designed to
provide five centimeter spacing (as required by the HEW standard) from the
outer surface of the probe cover to the center of the array. The shape of the
probe provides minimum perturbation of the fields impinging on the diode array.
This instrument is calibrated with the hemispherical cover in place, testing
without the cover may cause erroneous readings. The probe is attached
permanently to the meter case by 48 inch (1.2m) shielded cable. Each detection
probe and meter amplifier is calibrated as a unit. Two ranges, 0-10 and 0-20
2
2
mw/cm , are provided at 915 MHz and one range, 0-10 mw/cm , at 2450 MHz.
The instrument is calibrated at an ambient temperature of 75° F (23º C) and will
give reliable readings under most temperature ranges. Care should be taken,
however, when using the instrument after it has been stored in extreme cold or
hot conditions. The inability to zero the meter, or a zero that is drifting rapidly,
prior to taking a reading usually notes this condition. If this condition is noted,
allow 15 minutes for the meter to reach room temperature prior to recording
readings.
Introduction
|
7
ETS-Lindgren Product Information Bulletin
See the ETS-Lindgren Product Information Bulletin included with your shipment
for the following:
8
•
Warranty information
•
Safety, regulatory, and other product marking information
•
Steps to receive your shipment
•
Steps to return a component for service
•
ETS-Lindgren calibration service
•
ETS-Lindgren contact information
|
Introduction
2.0 Maintenance
Before performing any maintenance, follow
the safety information in the ETS-Lindgren
Product Information Bulletin included with
your shipment.
If you have any questions concerning
WARRANTY
maintenance, contact ETS-Lindgren
Customer Service.
Maintenance Recommendations
The only maintenance required is the replacement of batteries or spacer cover
should it become damaged or worn. The spacer cover may be purchased from
ETS-Lindgren. The batteries, however, are the common 9 volt, alkaline type.
Spacer Cover Replacement
•
•
Pull the cover off while holding the red portion of the handle.
Slide the new cover into place, firmly seating it so that the back of the
cover is flush with the black portion of the handle.
Maintenance
|
9
Battery Replacement
When replacing batteries, always replace both batteries.
•
•
Turn the selector to “OFF”
Unsnap the two clips on the side of
the cover that hold the cover in
place.
•
•
Replace both batteries
Replace the top of the case and
re-secure the clips
•
Turn the selector to “BATT TEST”.
The meter should read above the
green marker line. If it does not read
at this level, the batteries are not
charged.
10
|
Maintenance
Annual Calibration
See the Product Information Bulletin included with your shipment for information
on ETS-Lindgren calibration services.
Replacement Parts
Following are the part numbers for ordering replacement parts for the HI-1600
Microwave Survey Meter.
Part Description
Part Number
User Manual
H-600011
Carrying Case
H-490271
Probe Cover
H-470124
Plastic Beaker
H-44600
Service Procedures
For the steps to return a system or system component to ETS-Lindgren for
service, see the Product Information Bulletin included with your shipment.
Maintenance
|
11
This page intentionally left blank.
12
|
Maintenance
3.0 Specifications
Electrical Specifications
Frequency Response
915 MHz & 2450 MHz
Range
2450 MHz: 0-10 mW/cm
2
915 MHz : 0-10, 0-20 mW/cm
Accuracy
±1 dB
Response Time
Fast Mode: <1 second
2
Slow Mode: <3 seconds
Maximum Power Density
2 W/cm
2
Physical Specifications
Readout Dimensions
3.5 x 6 x 2.5 in.
(WxHxD)
(8.9 x15.3 x 6.4 cm)
Probe Length
12 in. (30 cm)
Probe Cable Length
48 in. (1.2 m)
Specifications
|
13
This page intentionally left blank.
14
|
Specifications
4.0 Pre-Installation Tasks
Before operating any components, follow the
safety information in the ETS-Lindgren
Product Information Bulletin included with your
shipment.
Before each use, both the batteries and the probe of the HI-1600 should be
tested.
Battery Test
Turn the selection knob on the meter to the “BATT. TEST” position.
The meter should read above the green marker line. If it does not read
at this level, replace both batteries. To replace batteries, refer to the
Maintenance Section.
Pre-Installation Tasks
|
15
Probe Test
Turn the selection knob on the meter to the “PROBE TEST” position.
With the “ZERO ADJ.” knob in a center position, the meter should read
between the green lines (in the “OK PROBE TEST” area). If it does
not, the probe has been damaged and should not be used. A defective
probe cannot be replaced in the field and should be returned to
ETS-Lindgren for repair. See the Product Information Bulletin included
with your shipment for details regarding returning instruments for
repair.
16
|
Pre-Installation Tasks
5.0 Operation
Before placing into operation, follow the safety
information in the ETS-Lindgren
Product Information Bulletin included with your
shipment.
Probe
When holding the probe, use the handle provided. Do not place hands
near the cover end of the probe. The probe should be held parallel to
the direction of the propagated wave, i.e., keep the probe
perpendicular to the range surface being measured.
Operation
|
17
Survey Meter
To operate the survey meter:
•
Turn the selection knob to the desired meter range. Two meter ranges
2
2
are available for 915 MHz ovens, 0-20 mw/cm and 0-10 mw/cm . One
2
meter range (0-10 mw/cm ) is available for 2450 MHz.
•
Select “Fast” response for initial scan of entire door periphery to locate
the maximum leakage point. Once the origin of the maximum leakage
has been identified, turn the select switch to “Slow” response and
monitor for two minutes. Record the maximum repeatable values
obtained during this survey.
•
Adjust the meter pointer to true zero, using the “Zero Adj.” knob.
Under extreme temperature conditions the meter will not zero with the
“Zero Adj.” knob. If this should occur, allow 10 to 15 minutes for the
meter to warm up.
18
|
Operation
The selection knob should be turned off when the meter is not in use.
Standard “Load” Versus Time
Laboratory tests indicate maximum radiation usually occurs within
three minutes after “Power On” with specified load. In order to measure
maximum radiation, scan perimeter of door when power comes on.
This initial scan will take approximately one minute and will locate the
maximum leakage point(s). Monitor the maximum leakage point(s) for
another two minutes.
Range Preparation
Move oven to edge of cabinet so that lower slot (door to cabinet)
overhangs.
•
Place 275 cc of cold water in 600 cc beaker and place beaker in center
of oven. Additional suitable beakers are available; see the
Replacement and Optional Parts table in the Maintenance Section of
this manual for more information.
Load specifications: 275 cc of cold tap water in a 600 cc beaker
(Kimax #14005 or equivalent). Do not deviate from the specified.
Operation
|
19
The beaker must be placed in the center of the oven rack.
•
Close and latch oven door.
•
Set range timer to five minutes and select “High” (915 MHz) power.
•
When power indicator (or “Cook”) lamp lights, range is ready for test.
Testing the Range
Testing should begin immediately after the power indicator lamp
comes on. As you scan the perimeter of the oven door, watch the
meter for deflection. The entire perimeter of the oven must be
scanned.
•
Place the white probe cover adjacent to slot between door and oven
body, scan entire perimeter of oven door. Keep axis of probe
perpendicular to oven surface being measured.
•
Select “Fast” response for initial scan of entire door periphery to locate
the maximum leakage point. Meter readings noted on first scan should
indicate the suspect locations of radiation, if any exist.
•
Once the origin of the maximum leakage has been identified, turn the
select switch to “Slow” response and monitor for two minutes,
recording the maximum repeatable values obtained during this survey.
20
|
Operation
Secondary Test
Before beginning this test, re-check the meter’s battery and re-zero the
meter. Also, perform the probe test. Steps to perform the probe test
are outlined in the Pre-Installation Task section of this manual.
•
Remove the beaker from the range. Empty the water and refill with
cold water to 275 cc level and place in center of oven shelf. Close and
latch the oven door.
•
•
Set the timer for five minutes on “High” power.
Start the scan when the power indicator lamp comes on, as before.
Select “Fast” response and quickly scan the entire gasket perimeter to
confirm location of maximum radiation indicated on initial test.
•
Once the origin of the maximum leakage point has been confirmed,
turn the select switch to “Slow” response and monitor for two minutes,
recording the maximum repeatable values obtained during this survey.
This maximum reading is to be used in judging compliance with the
following limit:
•
All ovens manufactured after September 1971, maximum allowable
2
5 mw/cm .
If the maximum reading exceeds the acceptable limit, the range must
be repaired.
After repairs are made, complete testing must be repeated.
Operation
|
21
This page intentionally left blank.
22
|
Operation
Appendix A: Warranty
See the Product Information Bulletin included with your shipment for
the complete ETS-Lindgren warranty for your HI-1600 Microwave
Survey Meter.
DURATION OF WARRANTIES FOR HI-1600 MICROWAVE SURVEY METER
All product warranties, except the warranty of title, and all remedies for warranty
failures are limited to one year.
Product Warranted
Duration of Warranty Period
HI-1600 Microwave Survey Meter
1 Year
Warranty
|
23
This page intentionally left blank.
24
|
Warranty
Appendix B: EC Declaration of Conformity
EC Declaration of Conformity
|
25
This page intentionally left blank.
26
|
EC Declaration of Conformity