1
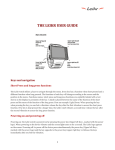
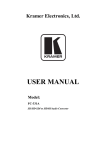
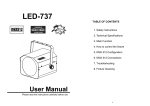
Multi-Monitor Driver
User's Manual
For IBM Personal Computers and Compatibles
with Windows 98SE/ME/2000/XP
Driver and Pen Utilities Version 4.3
The information contained in this document is subject to change without notice.
All trademarks referenced in this document belong to their respective owners.
For Only one Tablet LCD Monitor
You may configure the Pen Device by modifying the functions of Pen Tip and Barrel Buttons, adjusting the feel
of the Pen to heavier or lighter, and obtaining other information about the device. You may also use these
functions to verify that the Pen Device is functioning properly.
You invoke the Configuration function by tapping with Pen Tip on the Tablet Icon (
) on the system Task Bar,
usually located at the lower right corner of the screen. You may also invoke it by first tapping on Start Button at
the lower left corner of the screen, and selecting Settings then Control Panel, and finally double tapping on the
Tablet Icon (
).
When you invoke the Configuration function, you will be presented with a dialog with a number of configuration
pages, as described below.
The Info Configuration Page
The Info Configuration Page displays version and other information about the product.
Figure 1 A Sample Info Configuration Page
The Monitor Setting Configuration Page
You use the Monitor Setting Configuration page to map to the screen:
Figure 2 The Monitor Setting Configuration Page
Map to full screen
Set by user
You can set the Offset[X] , Offset[Y] ,Width[X] , Height[Y] that you want.
The Button Configuration Page
You use the Button Configuration Page to change the functions of Pen Tip and Barrel Buttons, to set the speed of
double tap with Pen Tip, and so on. This Page looks as follows:
Figure 3 The Button Configuration Page
Mode
When you move the Pen over the screen, the cursor on the screen moves instantly with it. The place of
Pen's tip corresponds directly in position to the point on the screen.
Barrel Buttons
The numerals 1 and 2 indicate where Barrel Button 1 and Barrel Button 2 are, respectively, on the body
(barrel) of the Pen.
Button Command
You may choose one of Pen Tip, Barrel Button 1, and Barrel Button 2, and set it to one of the Mouse
Commands on a three-button mouse.
Double Click Time
Move the Speed Slider toward “Slow” if you wish to allow yourself more time in double tapping
with Pen Tip; move the Speed Slider toward “Fast” if you wish the reverse. This setting is the same
as Double-click Speed on the page displayed by selecting Start, Settings, Control Panel, Mouse, and
Buttons. Changing the speed in one place changes the other at the same time.
Default
You choose this option to restore all the settings on this Page to their respective values when the Tablet
Monitor Driver was first installed.
The Pressure Configuration Page
You use the Pressure Configuration Page to verify that Pressure Sensitivity works properly, and to make
adjustments. The Pressure-Sensitive Pen can be used to draw heavier lines or darker colors when more force is
applied to Pen Tip. This requires that the drawing application supports a Wintab-compatible interface and the
Wintab-compatible driver is properly installed by installing the Tablet Monitor Driver as described before. The
Pressure Configuration Page looks as follows:
Figure 4 The Pressure Configuration Page
Pressure Test
You may test the “feel” of the Pen in this area. When you draw with a lighter force pressing down on
the screen, you will see a narrower line in this area; when you draw with more force, you will see that
the Pen leaves a wider trace in the area. You may also choose a color for the test to get a better feel.
While you draw, the barometer on the right side of the drawing area indicates the pressure level you are
applying to Pen Tip. At the same time, the numerical value of the pressure level is also shown on the
right above the Clear Button.
Clear
You press Clear Button to clear the drawing from Pressure Test area.
Click Sensitivity
This controls the feel when you tap with the Pen to cause an action such as “select”. Tapping with
Pen Tip is equivalent to “clicking” on the left button of a mouse unless you have changed it on
the Button Configuration Page or you have changed the mouse setting on the Control Panel to
“left-handed”. You move the Sensitivity Bar closer to “low” if you wish to get a “click” action
with smaller force; you move it closer to “high” for a heavier pointing device. Note: that this has
nothing to do with how heavy you draw to get a thick line. Your application program controls the latter,
not the Tablet Monitor Driver.
The Calibration Configuration Page
This Page provides the calibration function same as Windows Tablet PC system provided. The calibration
function can adjust the deviation between the cursor and the pen tip and make the cursor presenting and following
completely under the pen tip.
Figure 5 The Calibration Configuration Page
After you tap the "Calibration", the screen becomes completely white but Target Mark
appears in the
left-up corner. Target Mark will appears orderly in the four corner of screen after you use the pen tip to tap the
center of Target Mark. When you finish tapping the four Target Marks in the four corners, select "OK" and the
calibration process is completed.
For one Tablet LCD Monitor and one general LCD Monitor
You may configure the Pen Device by modifying the functions of Pen Tip and Barrel Buttons, adjusting the feel
of the Pen to heavier or lighter, and obtaining other information about the device. You may also use these
functions to verify that the Pen Device is functioning properly.
You invoke the Configuration function by tapping with Pen Tip on the Tablet Icon (
) on the system Task Bar,
usually located at the lower right corner of the screen. You may also invoke it by first tapping on Start Button at
the lower left corner of the screen, and selecting Settings then Control Panel, and finally double tapping on the
Tablet Icon (
).
When you invoke the Configuration function, you will be presented with a dialog with a number of configuration
pages, as described below.
The Info Configuration Page
The Info Configuration Page displays version and other information about the product.
Figure 1 A Sample Info Configuration Page
The Monitor Setting Configuration Page
You use the Monitor Setting Configuration page to map to the screen:
Figure 2 The Monitor Setting Configuration Page
One tablet map to one monitor
One tablet map to all monitor
Set by user
You can set the Offset[X] , Offset[Y] ,Width[X] , Height[Y] that you want.
The Button Configuration Page
You use the Button Configuration Page to change the functions of Pen Tip and Barrel Buttons, to set the speed of
double tap with Pen Tip, and so on. This Page looks as follows:
Figure 3 The Button Configuration Page
Mode
When you move the Pen over the screen, the cursor on the screen moves instantly with it. The place of
Pen's tip corresponds directly in position to the point on the screen.
Barrel Buttons
The numerals 1 and 2 indicate where Barrel Button 1 and Barrel Button 2 are, respectively, on the body
(barrel) of the Pen.
Button Command
You may choose one of Pen Tip, Barrel Button 1, and Barrel Button 2, and set it to one of the Mouse
Commands on a three-button mouse.
Double Click Time
Move the Speed Slider toward “Slow” if you wish to allow yourself more time in double tapping
with Pen Tip; move the Speed Slider toward “Fast” if you wish the reverse. This setting is the same
as Double-click Speed on the page displayed by selecting Start, Settings, Control Panel, Mouse, and
Buttons. Changing the speed in one place changes the other at the same time.
Default
You choose this option to restore all the settings on this Page to their respective values when the Tablet
Monitor Driver was first installed.
The Pressure Configuration Page
You use the Pressure Configuration Page to verify that Pressure Sensitivity works properly, and to make
adjustments. The Pressure-Sensitive Pen can be used to draw heavier lines or darker colors when more force is
applied to Pen Tip. This requires that the drawing application supports a Wintab-compatible interface and the
Wintab-compatible driver is properly installed by installing the Tablet Monitor Driver as described before. The
Pressure Configuration Page looks as follows:
Figure 4 The Pressure Configuration Page
Pressure Test
You may test the “feel” of the Pen in this area. When you draw with a lighter force pressing down on
the screen, you will see a narrower line in this area; when you draw with more force, you will see that
the Pen leaves a wider trace in the area. You may also choose a color for the test to get a better feel.
While you draw, the barometer on the right side of the drawing area indicates the pressure level you are
applying to Pen Tip. At the same time, the numerical value of the pressure level is also shown on the
right above the Clear Button.
Clear
You press Clear Button to clear the drawing from Pressure Test area.
Click Sensitivity
This controls the feel when you tap with the Pen to cause an action such as “select”. Tapping with
Pen Tip is equivalent to “clicking” on the left button of a mouse unless you have changed it on the
Button Configuration Page or you have changed the mouse setting on the Control Panel to
“left-handed”. You move the Sensitivity Bar closer to “low” if you wish to get a “click” action
with smaller force; you move it closer to “high” for a heavier pointing device.
Note: that this has nothing to do with how heavy you draw to get a thick line. Your application program
controls the latter, not the Tablet Monitor Driver.
The Calibration Configuration Page
This Page provides the calibration function same as Windows Tablet PC system provided. The calibration
function can adjust the deviation between the cursor and the pen tip and make the cursor presenting and following
completely under the pen tip.
Figure 5 The Calibration Configuration Page
After you tap the "Calibration", the screen becomes completely white but Target Mark
appears in the
left-up corner. Target Mark will appears orderly in the four corner of screen after you use the pen tip to tap the
center of Target Mark. When you finish tapping the four Target Marks in the four corners, select "OK" and the
calibration process is completed.
For More than two Tablet LCD Monitor
You may configure the Pen Device by modifying the functions of Pen Tip and Barrel Buttons, adjusting the feel
of the Pen to heavier or lighter, and obtaining other information about the device. You may also use these
functions to verify that the Pen Device is functioning properly.
You invoke the Configuration function by tapping with Pen Tip on the Tablet Icon (
) on the system Task Bar,
usually located at the lower right corner of the screen. You may also invoke it by first tapping on Start Button at
the lower left corner of the screen, and selecting Settings then Control Panel, and finally double tapping on the
Tablet Icon (
).
When you invoke the Configuration function, you will be presented with a dialog with a number of configuration
pages, as described below.
The Info Configuration Page
The Info Configuration Page displays version and other information about the product.
Figure 1 A Sample Info Configuration Page
The Layout Configuration Page
Note:The PC does not know which tablet is tablet 1 or tablet 2. So we have to set the
primary monitor with tablet 1and the secondary monitor with tablet 2…….
Figure 2 the Layout Configuration Page
After selecting Tablet 1 or Tablet 2,and pushing the Setting button.
The Monitor Setting Configuration Page
You use the Monitor Setting Configuration page to map to the screen:
Figure 3 The Monitor Setting Configuration Page
One tablet map to one monitor
One tablet map to all monitor
Set by user
You can set the Offset[X] , Offset[Y] ,Width[X] , Height[Y] that you want.
The Button Configuration Page
You use the Button Configuration Page to change the functions of Pen Tip and Barrel Buttons, to set the
speed of double tap with Pen Tip, and so on. This Page looks as follows:
Figure 4 The Button Configuration Page
Mode
When you move the Pen over the screen, the cursor on the screen moves instantly with it. The place of
Pen's tip corresponds directly in position to the point on the screen.
Barrel Buttons
The numerals 1 and 2 indicate where Barrel Button 1 and Barrel Button 2 are, respectively, on the
body (barrel) of the Pen.
Button Command
You may choose one of Pen Tip, Barrel Button 1, and Barrel Button 2, and set it to one of the Mouse
Commands on a three-button mouse.
Double Click Time
Move the Speed Slider toward “Slow” if you wish to allow yourself more time in double tapping
with Pen Tip; move the Speed Slider toward “Fast” if you wish the reverse. This setting is the same
as Double-click Speed on the page displayed by selecting Start, Settings, Control Panel, Mouse, and
Buttons. Changing the speed in one place changes the other at the same time.
Default
You choose this option to restore all the settings on this Page to their respective values when the
Tablet Monitor Driver was first installed.
The Pressure Configuration Page
You use the Pressure Configuration Page to verify that Pressure Sensitivity works properly, and to make
adjustments. The Pressure-Sensitive Pen can be used to draw heavier lines or darker colors when more
force is applied to Pen Tip. This requires that the drawing application supports a Wintab-compatible
interface and the Wintab-compatible driver is properly installed by installing the Tablet Monitor Driver as
described before. The Pressure Configuration Page looks as follows:
Figure 5 The Pressure Configuration Page
Pressure Test
You may test the “feel” of the Pen in this area. When you draw with a lighter force pressing down
on the screen, you will see a narrower line in this area; when you draw with more force, you will see
that the Pen leaves a wider trace in the area. You may also choose a color for the test to get a better
feel.
While you draw, the barometer on the right side of the drawing area indicates the pressure level you
are applying to Pen Tip. At the same time, the numerical value of the pressure level is also shown on
the right above the Clear Button.
Clear
You press Clear Button to clear the drawing from Pressure Test area.
Click Sensitivity
This controls the feel when you tap with the Pen to cause an action such as “select”. Tapping with
Pen Tip is equivalent to “clicking” on the left button of a mouse unless you have changed it on the
Button Configuration Page or you have changed the mouse setting on the Control Panel to
“left-handed”. You move the Sensitivity Bar closer to “low” if you wish to get a “click”
action with smaller force; you move it closer to “high” for a heavier pointing device.
Note: that this has nothing to do with how heavy you draw to get a thick line. Your application
program controls the latter, not the Tablet Monitor Driver.
The Calibration Configuration Page
This Page provides the calibration function same as Windows Tablet PC system provided. The calibration
function can adjust the deviation between the cursor and the pen tip and make the cursor presenting and
following completely under the pen tip.
Figure 6 The Calibration Configuration Page
After you tap the "Calibration", the screen becomes completely white but Target Mark
appears in the
left-up corner. Target Mark will appears orderly in the four corner of screen after you use the pen tip to tap the
center of Target Mark. When you finish tapping the four Target Marks in the four corners, select "OK" and the
calibration process is completed.
The Primary Configuration Page
You use the Primary Configuration Page to set which one is the primary device for your application.
Figure 7 The Primary Configuration Page
Enable Virtual Device as Primary Device
You have all tablet can be used by your application.
Select Primary Device
You can select an input device which one of you have tablet as Primary Device for your application.