1
KLIMAX DS SYSTEM
INSTALLATION AND SETUP
2 SET UP OF THE NAS (continued...)
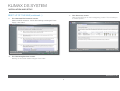
3.
4.
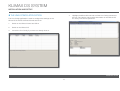
The ‘Clock’ screen
Select the appropriate timezone and time for your location. If the
‘Synchronize clock…’ checkbox is selected, deselect it. Press
‘Apply’, then ‘Next’.
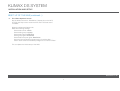
5.
The ‘Ethernet’ screen
Select the IP address assignment appropriate for the network the
Klimax DS system is being installed into. Press ‘Apply’, then ‘Next’.
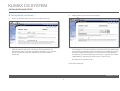
6.
The ‘Global Network Settings’ screen
Select a hostname for the NAS, e.g. ‘nas001’. This name
should be unique to the network. The name will be used to refer
to the NAS from other devices on the network, for example the
ripping software (please refer to the Ripstation Micro DS section for
details). Leave other settings unchanged. Press ‘Apply’, then ‘Next’.
7.
The ‘Admin Password’ screen
Complete the required information. Press ‘Apply’, then ‘Next’.
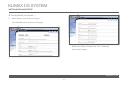
8.
The ‘Security Mode’ screen
Nothing on this screen needs changed. Press ‘Next’.
The ‘Alerts’ screen
Enter one or more service email contacts. If there are any problems
with the NAS an email notification will automatically be sent. This
allows the problem to be diagnosed and corrective action taken
before the user is aware that a problem exists. Press ‘Apply’,
then ‘Next’.
www.l i nn.c o .uk
4