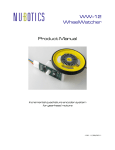
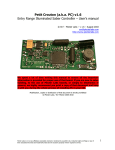
Download WC-132 WheelCommander Product Manual
Transcript
WC-132 WheelCommander Product Manual Differential Drive Motion Controller for Standard RC Servos and DC Gearhead Motors 1.14 11/23/2011 WheelCommander Overview This revolutionary controller performs full motion control of a differential drive platform, freeing the main robot controller to perform higher level behavior control. Features based on wheel circumference and wheel base measurements, accepts velocity, rotation rate, position, and angle in real world units built-in closed-loop velocity and position control loops for each wheel additional closed-loop velocity and position steering control of platform to ensure accurate straight-line motion, or, each wheel can be separately commanded asynchronous serial (RS-232) features: o programmable baud rates (38400 default; 115200 max) o ASCII, human readable commands o TTL signal levels (not level-shifted) I2C features: o programmable I2C slave address (8 bit I2C address is 20h default) o binary, SMBus-compatible commands o up to 400KHz transmission rates o clock stretching must be allowed by I2C master 4 general purpose 10 bit analog input lines and 4 general purpose digital I/O lines, each with its own power and ground pin provisions for H-bridge current sense field-upgradable firmware via asynchronous serial two indicator LEDs; one clear-EEPROM jumper code examples for common master robot controllers available define the forward vs. backward direction of motion with the flip of a bit position, angle, velocity, and rotation rate are all readable at any time, for either the platform or each individual wheel Benefits drives standard RC servos modified for continuous rotation OR DC gearhead motors with external H-bridge asynchronous serial OR I2C command interfaces, autoswitching upon receipt of first valid command for easy hookup easy to interface with external H-bridges in sign-magnitude or locked-antiphase modes designed for use with Nubotics WheelWatcher Incremental Encoders can also be used with Nubotics Unicoder Magnetic Encoders (with proper adapter) supports 3rd party encoders, in either decoded (clock / direction) format, as per the WheelWatcher encoders*, or in Channel A / Channel B quadrature format supports any encoder resolution up to 1024 per wheel rotation well isolated servo, digital, and analog power and ground planes to minimize noise designed to stack with future Nubotics WheelDriver motor driver board digital and servo power voltages readable via two dedicated analog inputs and resistor divider networks helps your robot controller be self-aware * Note: The new WW-11 and WW-12 WheelWatcher encoders work best with the WheelCommander motion controller using quadrature format. Simply connect Vcc, Gnd, ChA, and ChB, for each encoder to the WheelCommander, and leave Mode floating, or tie it high with a 10K pullup resistor. WheelCommander WC-132 Product Manual 2 Description Thank you for purchasing a Nubotics WheelCommander. This revolutionary new product is unlike any other servo or motor controller on the market. The Nubotics WheelCommander coordinates the motion of both wheels of a differential drive robot, using odometry provided by Nubotics WheelWatcher encoders (or other encoders). It uses real world units of measurement to specify distance, velocity, angle, and rate of rotation. It provides battery voltage monitoring, motor current monitoring, as well as four general purpose digital I/O and four analog input lines. And, it can work with simple, low cost RC servos and yet provide accurate dead reckoning and speed control. Kinematics The WheelCommander offers two separate motion control systems, which you are free to use depending on your needs. The first is the velocity and rotation rate control system. This system is useful when your main robot controller needs to parametrically control the motion of the robot in response to periodically changing sensor data, such as sonar or IR range finders. The second is the position and angle control system. This is useful when you need the robot base to reproduce a predetermined sequence of movements over specific distances and turning angles. Both of these systems provide feedback in the way of odometry information, which your robot controller can use to infer the robot’ s position in world coordinates; this is not done within the WheelCommander due to the need to perform trigonometry to calculate world coordinates. Both of these systems have their own sets of PID constants for the wheels and for steering of them. The following two figures outline the kinematics performed by the WheelCommander using either control system. First, for velocity and rotation rate control, the figure shows you what measurements are needed of your robot, how the robot will move for arbitrary combinations of velocity and rotation rate, and the assumed world coordinate system within which the robot operates. Second, for position and angle control, we show similar diagrams indicating how the robot will move along an arc based on the distance and angle movements specified. Note that straight line motion and rotation in place are both special cases of the general problem of moving in an arc. Straight line motion corresponds with a rotation rate of 0 degrees/sec or angle change of 0 degrees, resulting in an arc with an infinite radius of curvature. Spinning in place corresponds with velocity of 0 distance units/sec or a distance change of 0 units, resulting in a radius of 0. Finally, spinning around one wheel occurs when the arc radius equals +/- ½ of the wheel base. WheelCommander WC-132 Product Manual 3 Figure 1 Figure 2 WheelCommander WC-132 Product Manual 4 Communications The WheelCommander provides two different physical interfaces for transmission of commands and status information: asynchronous serial or I2C. The asynchronous serial connection is via J10, part of the 14 pin right angle connector along the top edge of the board, and is TTL-level (not level shifted), for easy connection to your microcontroller. Connection to a PC’ s true serial port requires either an RS-232 serial level shifter (available separately), or a USB-to-serial converter. Connection to I2C is via J12, on the left edge of the board. External 4.7K ohm pull up resistors on both SDA and SCL are required for proper I2C operation. The WheelCommander command set has the same high level structure, command codes, parameters, and return values regardless of physical interface used to transport them. The encoding of parameter and return values does change to be appropriate for each interface, as does the method of specifying the length of a command. Each WheelCommander command has the following structure: CommandCode [[param1][param2]...] EndOfLine CommandCode is an 8 bit value between 0x41 (ASCII ‘ A’ ) and 0x5A (ASCII ‘ Z’ ), or the special value 0x2E (ASCII ‘ .’ ), the “ Sync”command. Commands can be set commands, action commands or get commands. Parameters and return values can be 8, 16, or 32 bits in length. The method of indicating EndOfLine is indicated differently depending on transport method. The byte order for multibyte parameters also depends on transport method. Each WheelCommander command returns one of the following results: Sync EndOfLine Ack EndOfLine Nack EndOfLine CommandCode [[param1][param2]...] EndOfLine Sync is the 8 bit value 0x2E (ASCII ‘ .’ ). It indicates that the WheelCommander confirms receipt of a Sync command. Ack is the 8 bit value 0x61 (ASCII ‘ a’ ), and is returned for all set or action commands that were valid and successfully processed. WheelCommander WC-132 Product Manual 5 Nack is the 8 bit value 0x6E (ASCII ‘ n’ ) and is returned for all commands which are invalid for any reason –bad CommandCode, illegal characters in the parameter fields, wrong command length, premature command termination due to receipt of a Sync command, or failure to perform the command. CommandCode and associated parameters are returned for all valid get commands, in order to return the values queried, unless short-mode is on, in which case just the parameters are returned. Asynchronous Serial Transport In asynchronous serial mode, EndOfLine can be indicated by your robot controller using an actual ASCII LineFeed character (‘ \n’or 0x0A), an ASCII CarriageReturn character (‘ \r’or 0x0D), or even an ASCII Null character (‘ \0' or 0x00). The WheelCommander will always indicate EndOfLine back to your controller with a LineFeed. White space (the ASCII space character, 0x20 = ‘’ , or the tab character, 0x07) will be ignored. Parameters are specified in hexadecimal format, with the most significant byte first. For example, the value 21 decimal equals 0x15 in hexadecimal, and so in asynchronous serial mode it would be represented by two ASCII characters, ‘ 1' = 0x31 followed by ‘ 5' = 0x35. The various possible parameters are: - short byte: there is a special short form of a single byte parameter, for indicating simple values of 0 and 1 –in other words, a single bit; in this case only one ASCII numeral 0 or 1 are sent. - byte: an 8 bit value between ‘ 00' (decimal 0) and ‘ FF’(decimal 255); both nibbles must be transmitted, each consisting of one 8 bit ASCII character. - signed byte: an 8 bit, 2s complement value between ‘ 80' (decimal -128) and ‘ 7F’(decimal +127). Both nibbles required. - word: a 16 bit value between ‘ 0000' and ‘ FFFF’(decimal 65535); all 4 nibbles must be transmitted - signed word: a 16 bit, 2s complement value from ‘ 8000' (decimal -32768) to ‘ 7FFF’(decimal 32767); all 4 nibbles required. WheelCommander WC-132 Product Manual 6 - dword: a 32 bit value between ‘ 00000000' and ‘ FFFFFFFF’ ; all 8 nibbles must be transmitted - signed dword: a 32 bit, 2s complement value between ‘ 80000000' (decimal 2147483648) and ‘ 7FFFFFFF’(decimal 2147483647); all 8 nibbles required. I2C Transport The factory default I2C Slave Address for the WheelCommander is 0010000 = 0x10; this is the upper 7 bits of the 8 bit I2C address byte, where the least significant bit indicates the direction of transfer (1 = read, 0 = write), per the I2C standard. The complete 8 bit I2C address byte would then be 0x20 or 0x21: 7 6 5 4 3 2 1 0 0 0 1 0 0 0 0 R/W NOTE: A common source of error when first using any I2C device results from using the wrong slave address. Some I2C APIs want the 7 bit value, and others want the 8 bit value. For example, the Ridgesoft RoboJDE’ s I2CMaster.transfer() method wants the 8 bit value, whereas the Savage Innovations OOPIC wants a 7 bit value. In I2C mode, EndOfLine is indicated implicitly by means of the number of bytes written to the slave (the WheelCommander) by the master (your robot controller). After writing the slave address, CommandCode, and parameter bytes as required by the command, the master simply ends the transfer by signaling a STOP condition after receiving ACK on the last byte. The master can optionally request the return value of the command using a REPEATED START or a separate START in read mode, and request a single byte. For complex query commands which both require you to write one or more parameters and also read one or more return values, you would first issue a START, the slave address with the WRITE bit set, the CommandCode and any required parameters, a Repeated START condition, the slave address with the READ bit set, and then the return values can be read. Your master would read as many bytes as it required or until an I2C NACK condition occurred. It would then signal a STOP condition. Alternatively, in a single master environment, separate START/STOP conditions can occur for each phase of a complex query command –first write the command and its parameters if any (which may be required to specify what is being queried, e.g., which digital I/O pin), then a read transaction will read the CommandCode (if short-mode is off) plus the returned parameters. Be sure to compare the CommandCode to that which you originally issued, to make sure the parameters are what you expect. WheelCommander WC-132 Product Manual 7 NOTE: This non-standard method of reading parameters was added to support access from Via MiniITX boards and others under Linux. In that environment, the I2C sensor library can be used to communicate with I2C peripherals such as Devantech SRF08 sonar rangers as well as the WheelCommander. Most WheelCommander commands can be issued with a single library call, except for commands which require parameters to be written and also read in the same command. In that case, you must issue separate write and read requests. Parameters are specified in binary format, with the least significant byte first in order to be compatible with SMBus standards. For example, one could set a relative position change of 500 (500 decimal = 1F4 hexadecimal) units by issuing the following command: START [SlaveAddr / Write] Ack ‘ X’Ack F4 Ack 01 Ack STOP From Master SDA From WC SDA START Addr / Write ‘ X’ 0xF4 0x01 0010000 0 01011000 11110100 00000001 STOP Ack Ack Ack Ack 0 0 0 0 ‘ X’is the 8 bit ASCII value for the capital letter ex = 0x58, which represents the Set Delta Distance command. In this case, Ack represents the I2C notion of acknowledgement, not the WheelCommander Ack character. Certain commands (C, B, R, G, and K) can take a relatively long time to execute. As a result, the read phase of the command will ignore I2C connection requests from the master until the command is finished and the WC is ready. This is a similar behavior to that of standard I2C serial EEPROMs, which do the same thing during a write until the write is complete. Your I2C master code will need to either retry the read phase until the WC responds, or delay the read phase in anticipation of the long execution time. The C, B, R, and G commands take less than 100 ms to execute, so a time delay is appropriate here. The K command can take a minute or so, so retries are the best option for this command to poll for completion. Note also that the WheelCommander’ s slave I2C implementation utilizes standard I2C clock stretching to slow down transfers from the master as needed. If the master is not capable of respecting clock stretch requests from the slave, incorrect operation and communication errors can result. WheelCommander WC-132 Product Manual 8 WC-132 Command Set Modifier abbreviations: c = single character modifier (usually ascii 0 or 1) mn = 2 digit hex modifier (8 bit) or single 8 bit byte in I2C mode mnop = 4 digit hex modifier (16 bit) or single 16 bit word in I2C mode mnopqrst = 8 digit hex modifier (32 bit) or single 32 bit dword in I2C mode Name Code Hex Params Written Response Read Meaning Communication Commands Sync . 2E None . (2E) we are synchronized Echo ‘E’ 45 Mn ‘E’ nm echo back nibbles in reversed order Name ‘N’ 4E None ‘NwcXX’ 5 byte string: device name ‘Wc’ = WheelCommander, firmware version XX Status ‘S’ 53 None ‘S’ mnop current device status (See below) (*) Odometry ‘O’ 4F c mnopqrst Retrieve current encoder tick count for wheel c, where c=0 for left, =1 for right, =2 for left followed by right Informational Commands Control Commands *Calibrate ‘K’ 4B none ‘a’ automatically configure motors Cal Stat ‘Q’ 51 none Qmn return calibration status I2C Addr ‘T’ 54 mn ‘a’ (61) set I2C slave address to 7 bit value mn Set Const ‘F’ 46 mnop ‘a’ set constant number ‘mn’ to value ‘op’ Reset Consts ‘F’ 46 FFFF ‘a’ reset all constants to factory defaults Get Const ‘F’ 46 mn ‘F’ mnop gets value of constant ‘mn’ Analog Input ‘H’ 48 xy ‘H’ xy mnop read analog input xy; mnop is the 10 bit analog value (*) Analog Control ‘H’ 48 Xy mn opqr ‘a’ set analog input bit xy’s interrupt control flags to mn, lower limit to op, upper to qr; see below Digital Input ‘J’ 4A xy ‘J’ xy mn Set digital I/O pin xy to be an input; read its value, and return as mn (**) Digital Output ‘J’ 4A xy mn ‘a’ set digital I/O pin xy’s interrupt control flags to mn; see below (*) Interrupt Output ‘I’ 49 Xy ‘a’ xy specifies the digital output pin to assert, as well as other parameters; see below (*) Query Interrupt ‘I’ 49 none xy mnop returns interrupt status byte xy (see below) as well as a 16 bit map of pending interrupts I/O Commands Motion Commands *Reset ‘R’ 52 none ‘a’ resets all motion values, stops motion *Brake ‘B’ 42 none ‘a’ active braking; stops current motion *Coast ‘C’ 43 none ‘a’ turn off motors, stops current motion (low power consumption mode) Axis Control ‘L’ 4C c ‘a’ separate or coordinate the axes; c is 0=left wheel; 1=right wheel; 2=both (default) WheelCommander WC-132 Product Manual 9 Set Accel ‘A’ 41 mnop ‘a’ Set goal acceleration for use in position or angle commands Get Accel ‘A’ 41 none ‘A’ mnop returns current acceleration goal (not measured) Set Velocity ‘V’ 56 mnop ‘a’ set goal velocity to mnop (signed value), in distance units per second Get Velocity ‘V’ 56 none ‘V’ mnop Returns currently measured velocity (signed value) Set Position ‘D’ 44 mnopqrst ‘a’ set absolute goal position, in terms of distance units (see below), (signed) Get Position ‘D’ 44 none ‘D’ mnopqrst returns current absolute position Set Delta Distance ‘X’ 58 mnopqrst ‘a’ set relative distance goal (signed) Get Delta Distance ‘X’ 58 mnopqrst ‘X’ mnopqrst same as Get Position Set Angle ‘W’ 57 mnop ‘a’ set angle to rotate the platform, in degrees (signed); > 0 is counter clockwise when robot viewed from above) Get Angle ‘W’ 57 none ‘W’ mnop distance the platform has rotated since reset Set Relative Angle ‘Z’ 5A mnop ‘a’ set relative angle change from current position, in degrees (signed) Get Relative Angle ‘Z’ 5A none ‘Z’ mnop same as Get Angle Set Rotation Rate ‘Y’ 59 mnop ‘a’ set rate of rotation of platform in degrees per second (signed) Get Rotation Rate ‘Y’ 59 none ‘Y’ mnop returns currently measured rate of rotation *Go! ‘G’ 47 none ‘a’ start executing current velocity, rotation rate, distance, and/or angle movements Upgrade ‘U’ 55 mnop none Maintenance Commands if mnop is correct password, jump to the bootloader to perform firmware upgrade Other ‘n’ (6E) not-acknowledge; returned for illegal commands, ill-formed commands * = long running command. In I2C mode, the WC will ignore connections until ready. (*) denotes commands available in firmware revision 37 or higher. (**) denotes commands changed in firmware revision 37 or higher which are no longer compatible with earlier versions. WheelCommander WC-132 Product Manual 10 User-Modifiable Constants Address Default Name 0-1 Meaning not used / reserved –not accessible 2 80h MODE mode (see below) 3 4 BAUD asynchronous serial baud rate (see below) 4 20h I2CADR I2C address 5 6 KpV axis velocity P (proportional) gain 6 4 KiV axis velocity I (integral) gain 7 1 KdV axis velocity D (differential) gain 8 16 KfV axis velocity feedforward gain 9 1 KoV axis velocity output gain (deprecated in firmware 37 and above) 10 6 KpP axis position P (proportional) gain 11 4 KiP axis position I (integral) gain 12 1 KdP axis position D (differential) gain 13 4 KdpP steering position P (proportional) gain 14 0 KdiP steering position I (integral) gain 15 0 KdpV steering velocity P (proportional) gain 16 4 KdiV steering velocity I (integral) gain 17 1 KdH angle hysteresis (difference between encoder counts tolerated without correction) 18 1 KpH position hysteresis (error tolerated per axis, below which motion deemed complete) 19 2 KpvTh position velocity threshold (velocity of axis must be <= to declare motion complete) 20 2 KvTh velocity threshold (how close actual velocity must be to declare “ at speed” ) (**) 21,22 35 Wb wheel base in current units of measurement (e.g., millimeters or tenths of an inch) (**) 23,24 82 Wc wheel circumference in current units (e.g., millimeters or tenths of an inch) (***) 25,26 375 Klz left servo zero calibration constant (***) 27,28 375 Krz right servo zero calibration constant (***) 29,30 80 MxSpd maximum useful speed (measured during motor calibration) (***) 31 0 AxSgn motor vs. encoder direction control; bit 0 = right motor, bit 1 = left motor; 0 is normal, 1 means the direction of motor rotation is inverted (**) 32,33 200 Lm left motor output slope WheelCommander WC-132 Product Manual 11 (**) 34,35 0 Lb left motor output intercept (***) 36 4 PWM when in H bridge mode, the current PWM frequency (see table) (*) 37 2 ModeExt extended mode (bit 0 = quadrature encoder not clk/dir; bit 1 = trapezoidal move enable) (*) 38,39 128 Tpr encoder ticks per wheel rotation (*) 40 1 KDdP steering position control D (differential) gain (*) 41 1 KDdV steering velocity control D (differential) gain (*) 42 16 KfP axis position velocity feedforward gain (*) 43,44 0 Wc_diff difference in wheel circumference between left and right; used to correct slight differences in wheel size which cause long term curvature of a straight movement (*) 45,46 200 Rm right motor output slope (*) 47,48 0 Rb right motor output intercept (*) 49 9 Kob binary point for fixed point arithmetic associated with m and b motor output constants; 9 means the 9 least significant bits represent the binary fractional part, and the remaining 7 bits are the binary whole part (*) this constant is new for firmware revision 37 and above (**) this constant has been widened from 8 to 16 bits to provide more precision, in firmware revision 37 and above (***) this constant’ s address has moved compared to firmware older than revision 37 Mode Constant Bit Assignments (stored in constant address 2) Bit Name Default Meaning 0 Slow Comms 0 insert a 40ms intercharacter delay for compatibility with the BasicStamp 1 Notify 0 0: instant ack (motion commands); 1: current position/ velocity on goal reached 2 Short Mode 0 turn off echoing of command code when returning data; for OOPIC; for commands that take an address field, such as Get Const, Analog Input, and Digital Input, the address field will also not be returned in short mode –only the requested value is 3 Polarity 0 0 / 1 - flip / don’ t flip forward vs. backward direction of platform 4 PWM 0 0 = RC servo mode; 1 = PWM (h-bridge) mode 5 LockedAntiphase 0 (if PWM = 1) 0 = sign/magnitude control; 1 = locked antiphase control WheelCommander WC-132 Product Manual 12 6 DualDirLines / HighEnable 0 (PWM =1, LockedAntiphase = 0): 0 = single, 1 = dual/inverted direction line (PWM = 1, LockedAntiphase = 1): 0 = active low. 1 = active high motor enable 7 CounterAxis 1 motor shafts point in: 0 = same, 1 = opposite directions Baud Rate Selection (stored in constant address 3) Value / Baud Rate 0 / 1200 1 / 4800 2 / 9600 3 / 19200 4 / 38400 Value / Baud Rate 5 / 57600 6 / 115200 7 / 230400 (experimental) 8 / 460800 (experimental) PWM Output Frequency (stored in constant addr 34; Mode.PWM = 1) Value 0 1 2 3 4 5 6 7 8 9 10 PWM Frequency 62Hz 125Hz 244Hz 488Hz 976Hz 1953Hz 3906Hz 7812Hz 15625Hz 31250Hz 62500Hz NOTE: the PWM output frequency range is expanded in firmware revision 37 and greater, both going lower and higher than before. Typical Robot Platform Measurements Robot Type Wheel Base Wheel Circumference Junun / 1SORC MarkIII, band wheel 35 (.1"), 89 (mm) 82 (.1"), 209 (mm) MarkIII, o-ring wheel 35 (.1"), 89 (mm) 86 (.1"), 219 (mm) Rogue Robotics Blue 65 (.1"), 165 (mm) 92 (.1"), 235 (mm) Parallax BoeBot 44 (.1"), 112 (mm) 82 (.1"), 209 (mm) WheelCommander WC-132 Product Manual 13 Status Bit Definitions Bit Number Meaning 0 Angle Control In Progress 1 Velocity Control In Progress 2 Position Control In Progress 3 Rotation Rate Control In Progress 4 Motion Goal Reached (velocity/rotation/position/angle reached or attained) 5 Motion Control Active 6 I2C Transport Active 7 Asynchronous Serial Transport Active 8 Motors Are Enabled 9 Command Overflow Error - Command Received During Execution of Previous 10 Port Overflow Error - Asynchronous Serial Transfer Too Fast / Buffer Overrun 11 Delayed Coast In Progress (deprecated in firmware 37 and above) 12 State of Left Wheel Dir Line 13 Interrupt Asserted (host should issue Query Interrupt command for source) 14 State of Right Wheel Dir Line 15 Trapezoidal Mode enabled Calibration Error Codes Value Meaning 1 Calibration completed ok 2 Calibration is running 3 Failed to find servo zero motion position 4 Error: left encoder attached to right motor and vice versa – check wiring 5 Failed to measure max speed of left motor; check power and wiring 6 Failed to measure max speed of right motor; check power and wiring 7 Failed to find stable low speed output value 8 Failed to find stable moderate speed output value 9 low and moderate speed output values are inconsistent 10 Curve fitting results are invalid 11 Uncalibrated – please calibrate NOTE: error 10 is new in revision 37 firmware and above. WheelCommander WC-132 Product Manual 14 Command Set Detailed Descriptions Name: Sync Code: ‘ .’(0x2E) Params: none Returns: ‘ .’ Description: This command serves as an early test of communications with a WheelCommander, to determine if the WheelCommander is present and the baud rate is set properly (in asynchronous serial mode) or that the I2C slave address matches between your master program and the setting of the WheelCommander. It can also be used to cancel a partial command string (in asynchronous serial mode only). To cancel a partial command string in I2C mode, stop the master transfer after the incorrect number of bytes for the specific command. You can also use this command in asynchronous serial mode repeatedly until a ‘ .’is returned, in order to reestablish synchronization between your program and the WheelCommander. Name: Echo Code: ‘ E’(0x45) Params: mn, 8 bit value to be echoed back Returns: ‘ E’nm, 8 bit echo value with nibbles reversed Description: This command is used to test communications between your master program and the WheelCommander. The nibbles are reversed to ensure that your program is not communicating with some other device which happens to echo back characters in an unmodified fashion. Example Host sends: WC-132 returns: E12\n E21\n Name: Name Code: ‘ N’(0x4E) Params: none Returns: ‘ NWcxx’ , where xx is the firmware version Description: This command lets you confirm that your program is talking to a WheelCommander (the Wc part of the name string), and also to determine the current firmware version. 5 ASCII characters are always returned, regardless of physical interface type (asynchronous serial or I2C). NOTE: the firmware version is returned in ASCII HEX, so, a return value of 25 means firmware revision 37. Example Host sends: WC-132 returns: N\n NWc25\n WheelCommander WC-132 Product Manual 15 Name: Status Code: ‘ S’(0x53) Params: none Returns: ‘ S’mnop, 16 bits of status (see p.12 for bit definitions) Description: This command lets you determine the current operating mode of the WheelCommander. Name: Odometry Code: ‘ O’(0x4F) Params: c = 0 for left, 1 for right, 2 for left followed by right Returns: ‘ O’mnopqrst[…], 32 bit signed value Description: This command lets you retrieve the current raw encoder tick count for the specified wheel. Name: Calibrate Code: ‘ K’(0x4B) Params: none Returns: ‘ a’or ‘ n’ Description: This starts up the lengthy calibration process. It only needs to be performed successfully once for a given robot design. Repeat this procedure if calibration fails, if you change servo models or motor types, if you change wheel diameter or wheel base (distance between wheels), or if you change the motor supply voltage by a large margin. A return value of ‘ a’indicates that calibration is complete. While calibration is running, the WheelCommander will not respond to commands using either transport method. In I2C mode, it will even ignore its own slave address; this can be used to poll the WheelCommander for completion, without keeping the I2C bus busy. Your master program may continue to use the I2C bus to access other devices in the meantime. Name: Calibration Status Code: ‘ Q’(0x51) Params: none Returns: Qmn, an 8 bit status code (see p.13 for values) Description: After calibration completes, a return value of ‘ n’indicates the calibration procedure failed. Execute this command (‘ Q’ ) to determine the type of failure. WheelCommander WC-132 Product Manual 16 Name: Code: Params: Set I2C Slave Address ‘ T’(0x54) mn, an 8 bit values whose 7 most significant bits are the same as the 7 most significant bits of the I2C standard’ s slave address byte Returns: ‘ a’or ‘ n’ Description: This command is a short cut for the Set Constant command to modify the I2C slave address. Either method instantaneously changes the current slave address. Name: Code: Params: Set Constant ‘ F’(0x46) mn op, two 8 bit values; mn is the constant number to change, and op is the value to change it to Returns: ‘ a’or ‘ n’ Description: This command lets you directly modify any user-modifiable constant in the WheelCommander (see the table on p.10 for details). Please do not modify any constants if you don’ t know what you are doing. Also, the EEPROM locations used have a finite lifespan. Please do not use the Set Constant command except at robot startup if needed -- rapid and continuous rewriting of an EEPROM location will eventually literally wear it out. Name: Reset Constants to Factory Defaults Code: ‘ F’(0x46) Params: FF FF (two 8 bit values, with all bits set to one) Returns: ‘ a’or ‘ n’ Description: This will result in all user-modifiable constants to be overwritten with factory default values. This may be useful to recover from configuration errors or to start clean when moving the WheelCommander to a new robot platform. WARNING: this will reset every constant, including baud rate and I2C address, so use this command carefully. Name: Get Constant Code: ‘ F’(0x46) Params: mn, a single 8 bit value specifying the constant number to read Returns: ‘ F’mn op, where op is the 8 bit value of constant number mn Description: This will return the current value of any of the user modifiable constants. In asynchronous serial mode, you can currently only read a single constant at a time. In I2C mode, you can continue reading as many constants as you require, up to 30 constants in one command. WheelCommander WC-132 Product Manual 17 Name: Code: Params: Get Analog Input ‘ H’(0x48) mn, a single 8 bit value specifying which analog input to read (valid values are 0 to 7) Returns: H mn opqr, where the least significant 10 bits of the 16 bit value opqr contain the A/D value of A/D converter mn Description: Analog inputs 0-3 are available on J3, located on the front left side of the PCB, and are labeled A0-A3. Analog inputs 4 and 5 are connected to left and right current sense pins for future use with the WheelDriver dual H-bridge board. Otherwise, you may use these for your own purposes. See the connector pinout section below for A4 and A5 locations. Analog inputs 6 and 7 read the digital and servo supplies respectively. They use resistor divider networks to ensure that the maximum allowable input voltage to the A/D converters is not violated. See the connector pinout section for divider values. Name: Set Analog Interrupt Control Code: ‘ H’(0x48) Params: xy mn op qr (see below) Returns: ‘ a’or ‘ n’ Description: This command, new to firmware revision 37, allows one to specify how the user programmable interrupt output pin is affected by a given analog input. ‘ xy’specifies the pin number; ‘ mn’specifies the analog input interrupt control flags for this pin; ‘ op’specifies the lower limit value; and ‘ qr’specifies the upper limit value. The interrupt control flags are specified as follows: Analog and Digital Input Interrupt Control Flags Bit Name Default Meaning 0 Level Analog –not used; digital output –value to set it to 1 Digital 0 if an analog pin; 1 if a digital pin 2 Input 1 0 if an output (digital only); 1 if an input 3 Monitor 0 0 = ignore, 1 = watch this pin for trigger condition 4 Watch hi 0 Interrupt when asserted high if digital, or above hi limit if analog 5 Watch lo 0 Interrupt when asserted low if digital, or below lo limit if analog 6 Edge 0 If digital, 0 = level triggered, 1 = edge triggered; ignored for analog 7 State 1 = This pin is causing the interrupt Example WheelCommander WC-132 Product Manual 18 A photoresistor is connected in a voltage divider arrangement with a fixed resistor, with the fixed resistor tied to Vdd and the photoresistor tied to Vss; the center tap is connected to analog input 2. You want the interrupt pin to trigger when the room is dark, which happens when the resistance of the photoresistor grows large, pulling down analog input 2. Say you pick a voltage cut off of 0.5v, which corresponds to an 8 bit ADC value of (0.5 / 5.0) * 256 = 25 decimal or 19 hex. You need to set the interrupt flag bits to watch lo, monitor, and input. Issue the following command: Host sends: WC-132 returns: ‘ H’02 2C 19 FF ‘ a’ Name: Code: Params: Get Digital Input ‘ J’(0x4A) mn, a single 8 bit value specifying which digital input to read (value values are 0 to 7) Returns: ‘ J’mn op, where op is an 8 bit value whose least significant bit contains the logic level of digital input mn Description: Digital inputs 0 through 3 are located on the front right side of the PCB, and are labeled D0-D3. In dual-dir-bits mode, D2 is the right motor inverted direction line and D3 is the left motor inverted direction line, so they won’ t be available for general purpose use in that mode. D4 is hardwired to the Clear EEPROM jumper, so you can use it to read the current state of the jumper. D5 = right motor direction in sign/magnitude mode, or right motor enable in locked-antiphase mode. D6 is the same as D5 but for the left motor. D7 is connected to J5 pin 3 and is normally unused. NOTE: all digital input pins have pullups enabled; these pullups are located inside the microcontroller on the WC-132, and are normally between 20K and 50K ohms. Name: Code: Params: Set Digital Output and Interrupt Control ‘ J’(0x4A) mn op, two 8 bit values, where mn is the digital output to change (0 to 7), and op contains the digital input interrupt control flags Returns: ‘ a’or ‘ n’ Description: This command lets to change the specified digital I/O pin direction, interrupt generation ability, and also set its level (0 or 1) if it is an output. The firmware currently allows you to change any of the 8 digital I/O lines, but this can be dangerous in various motor control configurations, as D5 and D6, and sometimes D2 and D3, can already be in use. D4 is hardwired to the clear EEPROM setting, so please never set this high or you could cause a short circuit; the clear EEPROM jumper, when present, connects D4 to ground. D7 is available on pin 3 of J5. WheelCommander WC-132 Product Manual 19 NOTE: all digital input pins have pullups enabled; these pullups are located inside the microcontroller on the WC-132, and are normally between 20K and 50K ohms. Example Your robot has a font bumper switch connected to D1. The switch is wired so that it grounds the pin, relying on the internal pullup to pull D1 to a logic high level when the bumper is not depressed (actuated). You wish to see an interrupt in your main robot controller by connecting one of its input pins to another digital output pin (already enabled as the interrupt output; see below) whenever the bumper is pressed. You would set the digital input interrupt flags byte so that Digital, Input, Monitor, and Watch Lo are 1s. To do so, issue the following command: Host sends: ‘ J’01 2E WC-132 returns: ‘ a’ Name: Interrupt Control Code: ‘ I’(0x49) Params: xy –8 bit interrupt system control flags Returns: ‘ a’or ‘ n’ Description: This command allows you to specify details about the interrupt system. A single digital output pin, if set using the Pin field of the interrupt system control flags and enabled with the Int Enable flag, will be generated when any specified condition occurs. These conditions include when a motion command completes (the Motion Complete flag below), or when any of the analog input or digital input interrupt conditions are met. These multiple interrupt sources are logically OR’ d together to generate the single interrupt output. Note that the WC-132 interrupt system is a software-mediated construct –this has no connection whatsoever to the hardware interrupts inside the WC-132’ s microcontroller. It is provided to enable your main robot controller to know when it should poll the WC-132, rather than have to poll continuously. The interrupt pin will be deasserted when the user issues the Query Interrupt command (below). Interrupt System Control Flags and Status Flags Bit Name Default Meaning 0-3 Pin 0 Which digital output pin to use as the interrupt signal 4 Int is Active 0 The interrupt is currently asserted 5 Motion Complete 0 1 = Generate interrupt when motion command has completed 6 Active High 0 0 = set low to indicate interrupt assertion; 1 = set high WheelCommander WC-132 Product Manual 20 7 Int Enable 0 0 = disable interrupt system; 1 = enabled Name: Query Interrupt Code: ‘ I’(0x49) Params: none Returns: ‘ I’xy mnop –xy = interrupt status flags, mnop interrupt map Description: This command allows you determine the source of an interrupt, which the host learned about either through the hardware interrupt line set up previously with the Interrupt Control command, or, by seeing bit 13 –Interrupt Asserted –of the Status command’ s return data being asserted. The first byte returned (after the optional command echo ‘ I’ ) is the interrupt status flags, as defined above in the Interrupt Control command. The next two bytes are a 16 bit map of the interrupt status for all analog and digital input lines. Bits 0 through 7, contained in the second byte returned –the first byte of the interrupt map –indicate the interrupt status of the digital inputs. A bit will be 1 if the digital input interrupt condition previously set up using the Set Digital Output and Interrupt Control command has been met; otherwise, bits will be 0. Bits 8 through 15 of the interrupt map –the third byte returned –reflect the interrupt status for the analog inputs. Bit 8 corresponds to A0 and Bit 15 corresponds to A7. Issuing this command will deassert the interrupt output line and clear the Int is Active and Interrupt Asserted flags. Name: Reset Motion Parameters Code: ‘ R’(0x52) Params: none Returns: ‘ a’or ‘ n’ Description: The Reset Motion Parameters command stops any current motion (like Brake does), and also clears out any current settings for acceleration, velocity, rate of rotation, position, and angle. Name: Brake Code: ‘ B’(0x42) Params: none Returns: ‘ a’or ‘ n’ Description: This command stops the velocity and position control loops. When using servos, the WC-132 pulses the servos with the zero motion value (found during calibration), effectively serving as a form of active braking. In PWM sign/magnitude mode, the PWM output pins will be set to 0% duty cycle, which unfortunately provides no active braking. In locked-antiphase mode, the PWM output pins are set at 50% duty cycle with the motors enabled, resulting in active braking. NOTE: this can consume considerable power, so do not leave you robot in this state for long periods or you will drain your WheelCommander WC-132 Product Manual 21 batteries. Issue Coast instead to ensure motors and servos are turned off. Name: Coast Code: ‘ C’(0x43) Params: none Returns: ‘ a’or ‘ n’ Description: This command stops the velocity and position control loops. When using servos, no more control pulses are sent, which results in your robot coasting to a stop. When using h-bridges, the motors are unpowered. This is the lowest power consumption setting. Name: Code: Params: Set Axis Control ‘ L’(0x4C) c, a single character (asynchronous serial mode) or byte (I2C mode), where 0 = specify settings for the left wheel, 1 = right wheel, and 2 = both wheels (the default) ‘ a’or ‘ n’ Returns: Description: This command allows you to individually control the motion of each wheel. The default is to coordinate each wheel together. Currently, the firmware is limited in that you must set acceleration, velocity, and/or position or distance values for a given wheel, then issue a Go! command, before you can change any settings for the other wheel. Velocity, position, and distance queries will be of the currently selected wheel (or whatever mechanism is attached to that motor or servo); angle and rotation rate queries are always of the platform. Name: Get Axis Control Code: ‘ L’(0x4C) Params: none Returns: ‘ L’c, where c is defined as in the Set Axis Control command Description: This returns the current state of Axis Control. The default value is 2, which means the two wheels are controlled simultaneously. Name: Set Acceleration Code: ‘ A’(0x41) Params: mnop, a 16 bit acceleration goal for position or distance moves Returns: ‘ a’or ‘ n’ Description: This command lets you set the maximum rate of change of velocity during a position, distance, and/or angle command. It has no effect on simple velocity or rate of rotation motions. The unit of measurement is in terms of distance per second squared, where distance is in the same units used for wheel circumference and wheel base. WheelCommander WC-132 Product Manual 22 NOTE: the Reset Motion Parameters (‘ R’ ) command will reset the acceleration for position, distance, and/or angle commands to max speed (firmware 37) or max speed / 2 (firmware 38 and above) over one second. Name: Code: Params: Returns: Get Acceleration ‘ A’(0x41) none mnop, the current actual setting used for position or distance moves Description: Unlike the other query commands, this does not return the actual measured value; it instead returns the actual value used by the firmware based on the value set in a previous Set Acceleration command. The value is adjusted automatically by the firmware to conform to numeric limitations in the firmware, so the value read back may not be the value written. Name: Code: Params: Set Velocity ‘ V’(0x56) mnop, a 16 bit velocity goal value for the platform (if Axis Control = 2), or the selected wheel (if Axis Control = 0 or 1) Returns: ‘ a’or ‘ n’ Description: This command lets you specify a goal velocity for either a simple velocity control motion, or as a maximum goal velocity for use during a controlled position or distance motion. NOTE: the Reset command will set the velocity to max speed (firmware 37) or max speed divided by 2 (firmware 38 or above) for subsequent motion commands, unless overridden with this command. Max speed is determined during calibration, and is stored as the Max Speed constant at addresses 29 and 30. The units are in terms of distance per second, where the units of distance are the same as you used for specifying the wheel circumference and wheel base. For example, a robot with a wheel circumference of 8.2 inches (specified as 82), might have a maximum useful velocity of 82 (8.2 inches per second) if the motors can rotate at 60 RPM, which is the same as 1 rotation per second. NOTE: most robots cannot move at velocities below approximately 10 to 15 (1.0 to 1.5 inches per second) in a controlled manner due to the very low encoder click rate. Name: Code: Params: Returns: Get Velocity ‘ V’(0x56) none mnop, the current measured velocity of the platform (if Axis Control = 2) or the selected wheel (if Axis Control = 0 or 1) Description: This returns the actual measured velocity of either the platform or a specific wheel, in units of distance per second. This can be used during either velocity or position control modes. When returning the velocity of the platform, the value returned is the average of each wheel. WheelCommander WC-132 Product Manual 23 Figure 3 Note: relative angle and distance commands are performed with the X and Z commands; absolute angle and distance commands are performed with the D and W commands. Name: Code: Params: Set Position ‘ D’(0x44) mnopqrst, a 32 bit position to which to move the platform (Axis Control = 2) or the selected wheel Returns: ‘ a’or ‘ n’ Description: This command sets a goal distance for the platform or a specific wheel, relative to the robot’ s frame of reference, where the origin is where the robot was last powered on or when the last Reset Motion Parameters command (‘ R’ ) was executed. Units are in distance, the same as used for wheel circumference and wheel base. In the hypothetical robot mentioned in the Set Velocity command above, motions of less than 10-15 (less than 1.0"-1.5") may not be able to be accomplished due to low encoder resolution coupled with wheel and motor gear train friction. Name: Code: Params: Get Position ‘ D’(0x44) none WheelCommander WC-132 Product Manual 24 Returns: mnopqrst, a 32 bit position of the platform (Axis Control = 2) or of the selected wheel Description: This command returns the current measured position, in the robot’ s frame of reference, relative to the origin and in the units of measurement as defined in the Set Position command. The position can be of either the platform or an individual wheel. NOTE: the robot’ s frame of reference changes as it rotates, so the distance is really a line integral of the actual distance the robot has travelled. It is not trivial to estimate the robot’ s position in the room’ s frame of reference, although executing a series of simple stationary rotations and simple forward and reverse motions will make it easier, if one also ignores wheel slippage. Wheel slippage can be reduced by using low acceleration values. This command can be used during either velocity or position control modes. Name: Code: Params: Set Distance ‘ X’(0x58) mnopqrst, a 32 bit distance to move the platform (Axis Control = 2) or the selected wheel, relative to the current position Returns: ‘ a’or ‘ n’ Description: This command is similar to the Set Position command, except that it specifies a distance to move relative to the current position. A series of Set Distance commands with a parameter of 100, moves the robot forward 100 units each time; a series of Set Position commands with a parameter of 100, results in no motion once position 100 is reached. Units and reference frame information are the same as the Set Position command. Name: Get Distance Code: ‘ X’(0x58) Params: mnopqrst, a 32 bit absolute position Returns: Description: Currently, the firmware returns the same value for this command as for the Get Position command. This can be used during either velocity or position control modes. Name: Code: Params: Set Angle ‘ W’(0x57) mnop, a 16 bit absolute angle in degrees to rotate the platform (Axis Control = 2); ignored for Axis Control = 0 or 1 Returns: Description: This command sets a goal angle, in degrees, through which the robot platform should be rotated in a controlled manner. This is relative to the robot’ s frame of reference, where the origin is an angle of zero degrees when the robot was last powered on or when the last Reset Motion Parameters command (‘ R’ ) was executed. While this can be combined with a Set Distance or Set Position command, the motion of the robot may not be what you expect. It is better to use this with a zero distance change, so that the robot rotates in place. WheelCommander WC-132 Product Manual 25 Firmware versions 37 and above are able to combine Position / Distance and Angle commands to move the platform over a controlled arc. In the hypothetical robot in the Set Velocity command description, angle changes of less than 10-20 degrees may not be especially well controlled. Name: Code: Params: Returns: Get Angle ‘ W’(0x57) none mnop, the current measured angle (0-359 degrees) through which the platform has rotated; available in any Axis Control mode Description: This returns the current angle, in degrees, that the robot has rotated relative to the origin, which is assumed to be position 0 and angle 0, either the last time the robot was powered on or the last time the Reset Motion Parameters command was executed. This can be useful, for example, while sweeping fixed sensors (sensors mounted in fixed position on the robot platform) by rotating the robot; the angle read can help you determine the location of a given object during the sweep. It can also help you estimate the robot’ s position and angle (pose) in the room’ s frame of reference, but this requires you to constantly monitor angle and position values and accumulate estimates of how these values affect the robot’ s pose. This can be used during either velocity or position control modes. Name: Code: Params: Set Relative Angle ‘ Z’(0x5A) mnop, a 16 bit relative angle in degrees to rotate the platform (Axis Control = 2); ignored for Axis Control = 0 or 1 Returns: Description: This command sets a goal angle, in degrees, through which the robot platform should be rotated in a controlled manner. This is relative to the robot’ s current pose; i.e., repeating a Set Relative Angle command of 90 degrees will rotate the robot by 90 degrees every time. While this can be combined with a Set Distance or Set Position command, the motion of the robot may not be what you expect. It is better to use this with a zero distance change, so that the robot rotates in place. In the hypothetical robot in the Set Velocity command description, angle changes of less than 10-20 degrees may not be especially well controlled. Name: Code: Params: Returns: Get Relative Angle ‘ Z’(0x5A) none mnop, the current measured angle (0-359 degrees) through which the platform has rotated; available in any Axis Control mode Description: Currently, the firmware returns the same value for this command as for the Get Angle command. In the WheelCommander WC-132 Product Manual 26 future, it could return the angle subtended from the start of the last Set Relative Angle or Set Angle command. This can be used during either velocity or position control modes. Name: Code: Params: Set Rotation Rate ‘ Y’(0x59) mnop, a 16 bit value specifying the number of degrees per second to rotate the platform (Axis Control = 2); ignored for Axis Control = 0 or 1 Returns: ‘ a’or ‘ n’ Description: This command sets a maximum rate of rotation of the platform, in degrees per second. Most servo controlled robots cannot rotate at much less than 10 degrees per second. This does not affect a Position, Distance, or Angle movement. Name: Code: Params: Returns: Get Rotation Rate ‘ Y’(0x59) none mnop, the current rate of rotation of the platform; available in any Axis Control mode Description: This command returns the current actual rate of rotation of the platform, in degrees per second. This can be used during either velocity or position control modes. Name: Go! Code: ‘ G’(0x47) Params: none Returns: ‘ a’or ‘ n’ Description: This command starts a movement as specified by previously executed Set Acceleration, Set Velocity, Set Rotation Rate, Set Angle, Set Position, and/or Set Distance commands. A Reset Motion Parameters command will discard previous settings. Any settings made since then specify the motion to be made by this Go! command. If only Set Rotation Rate and/or Set Velocity commands have been issued, then the WheelCommander’ s velocity PID loops will be active; this is a simple velocity motion. In this case, PID velocity and rotation control loops are in charge. Simple velocity motions keep running until Coast, Brake, or Reset Motion Parameter commands are issued, or until another Go! command takes over. However, if Set Position, Set Distance, and/or Set Angle commands were issued, regardless of the other commands, then the position PID loops will be active; this is a controlled position motion. Controlled position motions will eventually terminate, as indicated by the Motion Goal Reached status bit, bit 4 of the Status command’ s 16 bit return value. This can be polled to determine when a motion is complete. Alternatively, in asynchronous serial mode, the Notify mode bit enables asynchronous notification of motion completion by means of returning the WheelCommander WC-132 Product Manual 27 current position, in the same format as the Get Position command’ s return value. As yet another alternative, the interrupt system can be enabled such that a digital output line is asserted when a motion is complete. Name: Upgrade Firmware Code: ‘ U’(0x55) Params: mnop, a 16 bit unlock password Returns: Description: This command is for internal use only. WheelCommander WC-132 Product Manual 28 WC-132 Installation and Configuration Parts List 1. 1.63" x 2.14", 4 layer printed circuit board, preassembled 2. Two WheelWatcher-compatible, 4", colorcoded, dual-ended cables 3. One I2C 6" color-coded cable 4. Optional analog and digital I/O cable harness You Provide 1. 2. 3. 4. 5. Servos or motors and a dual H-bridge Wheels Power Robot controller or PC interface connection Two encoders (either WheelWatchers or WheelCommander attached to two servos and two WW-01 WheelWatcher encoders. other) Connections At a minimum, you must connect: digital power to J1 (6.2v or above) (ground wire goes towards left side in above photo) communications to your host controller (asynchronous serial –TTL levels, not level-shifted; or I2C, TTL levels; external I2C pullups required) (asynchronous serial ground wire goes towards left side in above photo) When ready to try motion commands, you must connect: if using servos, connect servo power to J2 (any voltage your servos can handle; may be wired to share the same supply with J1); ground wire goes towards left side of above photo), and connect the servos to J7 and J9 (black/brown ground wires face towards center of board; see above) or, if using DC motors with an H-bridge, provide motor power to the H-bridge as well as to J2 (so the WheelCommander can measure the voltage of it), including ground WheelWatcher encoders* (or other encoders) to J6 and J8 (red and black wires face UP) * Note: The new WW-11 and WW-12 WheelWatcher encoders work best with the WheelCommander motion controller using quadrature format. Simply connect Vcc, Gnd, ChA, and ChB, for each encoder to the WheelCommander, and leave Mode floating, or tie it high with a 10K pullup resistor. WheelCommander WC-132 Product Manual 29 Mounting: mounting holes are .118" diameter (4-40 screw size), spaced 1.89" x 1.40" the WC-132 fits between the standoffs on Junun.org MarkIII-style chassis, under the main robot controller –though you may have to extend the standoffs a bit to clear the analog and digital I/O connectors On MarkIII-style chassis, the mounting holes cannot be used, as they are above the servos; use double-stick foam tape instead Setup In your own software or using the optional Windows-based WCWizard utility, establish communications with the WheelCommander, set the following parameters as needed: 1. asynchronous serial baud rate 2. I2C slave address 3. wheel circumference 4. wheel base 5. mode (default is servo mode, counter rotating axes) 6. invoke the built-in motor calibration command with the robot raised off the ground so that its wheels freely rotate 7. check the result of calibration 8. tune the velocity and position PID loops WheelCommander WC-132 Product Manual 30 WCWizard Velocity PID Loop Tuning Configuration Wizard Setting up and tuning the control loops is easy using an asynchronous serial level converter or USB serial port converter and WCWizard, the WheelCommander configuration wizard, which runs under Windows 2000, Windows XP, Windows Vista, and Windows 7. The wizard helps you perform the following: 1. set up the serial port parameters and/or I2C slave address 2. upload new firmware 3. define the robot chassis geometry (wheel diameter and spacing, forward direction) 4. configure motor connections (servo vs. H-bridge; H-bridge interface details) 5. invoke the WheelCommander's built-in motor calibration routine 6. interactively tune the velocity PID parameters with a graphical velocity display 7. interactively tune the position PID parameters 8. test the robot using an interactive driving dialog Please see the WheelCommander Wizard User’ s Manual for details. WheelCommander WC-132 Product Manual 31 Connecting to a PC We recommend the Acroname 4 pin extension cable, p/n C10-SER-INT-CONN-EXT (figure 4), together with either the Acroname USB Serial Interface Connector, p/n S27USB-SERIAL (figures 5 and 7), or the Serial Interface Connector, p/n S13-SERIAL-INTCONN (figure 6). Figure 4 Figure 5 Figure 6 Figure 7 Note: Do not connect the WC-132 directly to a USB to RS-232 converter nor to a standard PC serial port –the high voltages present can damage the WC-132, and the inverted signaling will result in bad data. WC-132 to S27 USB-Serial Connections WC-132 Pin J10.1 J10.2 J10.3 J10.4 Name RXD Vdd TXD Digital Vss S27 Pin SRX (Data Out) VCC STX (Data In) GND Note: this can be connected straight through, using the C10-SER-INT-CONN-EXT cable shown above. WheelCommander WC-132 Product Manual 32 Units of Measurement The WheelCommander does not need to know what units of measurement you are using to specify the wheel base, wheel circumference, velocity, and position; they just need to be consistent and use numerical values of reasonable magnitude –they must fit within two bytes, but also should offer enough precision that determination of the angle of the platform can be done with the desired precision using integer arithmetic. For example, for a wheel 8" in circumference, you could use multiples of 0.01" because the circumference would need two bytes to be specified (8 / 0.01 = 800 = 0x0320). On the other hand, using whole inches is also not desirable, as there can be as much as 0.5" in error on each measurement, which would result in very inaccurate odometry (0.5" distance error for every wheel rotation, or approximately a 14 degree error on a 90 degree turn, which is equivalent to only about 26 positions per 360 degrees). Instead, for many small robots, we recommend multiples of 0.1". With that, typical robot dimensions fit well in one byte, and also result in 0.1" or better position error per wheel rotation and a 1.4 degree error on turns. Another unit of measurement that works well is the millimeter. A typical robot wheel is 209 mm in circumference, with a wheel base of 89 mm. Motor Calibration The WheelCommander includes a built-in routine for testing and configuring the motors. The steps it performs are: 1. For servos only, finds the zero position for each servo (the pulse width that results in no motion) 2. Measures maximum velocity of each motor 3. Determines direction of rotation of each motor with respect to the encoders; some servos rotate in the opposite direction compared to others, so this important step corrects this 4. Finds the output value (servo control pulse width or motor PWM value) corresponding to 10% of maximum speed and 80% of maximum speed 5. Calculates the coefficients of a linear equation for each wheel (the m and b terms of y = mx + b, where y is speed measured by the encoders, and x is servo pulse width or PWM value) used to enable the WheelCommander to smoothly control velocity over a large useful range; b ensures that starting friction and the servo’ s deadband is overcome even at low velocities, and m essentially sets the largest minimum output value needed to attain full speed 6. Stores the measurements in EEPROM for use in the future WheelCommander WC-132 Product Manual 33 If your robot uses DC motors with an external H-bridge instead of servos, we still recommend running calibration to determine motor rotation direction, maximum speed, and m and b values. In this case, step 1 is automatically skipped. While the factory default values for the servo zero positions, maximum speed, and m and b may function as is out of the box, it is highly recommended that you run the calibration procedure prior to tuning the PID loop parameters. TIP: Whether or not you are not using WC Wizard, place the robot on a small box or stand, and run the calibration with the wheels off the ground. If you are not using WC Wizard, calibration can be performed by issuing the Calibrate command: ‘ K’\n and wait for either ‘ a’(indicating success) or ‘ n’ . You can then query the Calibration Status code: ‘ Q’\n which should return: ‘ Q’01 \n A value of 01 means “ calibration completed ok.”See the Calibration Error Codes table for other values. PID Loop Tuning The control loops for velocity, rotation rate, angle, and position are set to factory specified values that work adequately with servo-based robots, with a 6 volt servo supply, on a MarkIII robot base, using GWS servos. For other servos, or with higher or lower supplies, or different mechanical platforms, some tuning of the control loops will be necessary. Below we outline a manual method for tuning the loops. If you use Windows, you should try the WCWizard tuning dialogs, as they help you visualize how well each change you make to the tuning constants works, and take care of the drudgery of reading and writing the constants. Note, that PID loop tuning is considered a black art, even by experts in the field, so don’ t be frustrated if it takes a while to make it work well –this is common for setting up and tuning all kinds of PID loop controlled industrial machinery. First, start with the default settings. If you need to start over, you can restore the all of the factory settings (including baud rate, I2C address, mode, and PID parameters) by issuing the Reset Consts command –‘ F’command code with parameter value of 0xFFFF. WheelCommander WC-132 Product Manual 34 Figure 8 Axis Velocity Tuning Related Constants: KpV, KiV, KdV, KfV First, make sure velocity control works well. Most typical servos cannot spin the wheels faster than 100 RPM; usually more like 60 to 80. Assuming 60 RPM, calculate the maximum possible velocity: Vmax = 60 RPM * (1 minute / 60 seconds) * WheelCircumference e.g., for .1" units and a standard injection molded wheel, Vmax = (100 / 60) * 82 = 82 tenths of an inch per second. This value is automatically measured during the calibration procedure, and can be queried by reading MxSpd, a 16 bit constant stored at addresses 29 and 30. It is also displayed in WCWizard on the Calibration dialog. Set your robot up on a small box (like a car up on jacks) so that the wheels can turn but the robot does not move. Issue a velocity command for Vmax, followed by the Go command: ‘ V’00 52 \n ‘ G’\n WheelCommander WC-132 Product Manual 35 Now, query the velocity a few times and see what the current velocity is: ‘ V’\n If the velocity is too low, you need to increase KfV; if it is too high, decrease it. It might not be stable, yet, though. At this point, you are just trying to set the overall scale. Now, try running it at the lowest velocity you expect to require in your application. A value of 5-20% of Vmax are common. This will most likely be unstable –the velocity will rise and fall quickly, and not appear to be under control. This can be a result of a number of factors, usually that one or more of the constants is too large (KpV, KiV, KdV, and KfV, as well as sometimes b, the y-intercept value). You can try reducing each of these values after querying what they are set to: ‘ F’05 \n will query the current KpV, for example. See the User Modifiable Constants Table for the addresses of these constants. If you still cannot make it stable, then try reducing Lb and Rb (constant addresses 3435 and 47-48). It may be that the calibration procedure resulted in too large of a b value, so that it is not possible to output a small enough servo control pulse to go as slow as you require. Also, you may need to reduce KdfV and KdiV (the steering control constants), as instability of the steering PID loop will make it hard to tune unstable wheel loops. If all else fails, you can start from scratch rather than work from the default values. First, set KpV, KiV, KdV, KdpV, KdiV, and KDdV to zero, and KfV to 16. Next, adjust KfV until a smooth wheel velocity is produced. If no value except 0 does this, then reduce b by 10% and try again. Once you find a KfV value that outputs a consistent speed, adjust it to be near the goal value. The point of KfV, the velocity feedforward term, is to set a starting point for the control loops that is in the ballpark of the goal velocity under normal loads. This frees the PID loop to only controlling for error due to voltage drop, friction, or variable loads. Now, increase KpV slowly, until it becomes unstable. Drop it back to be just on the edge. Next, increase KiV. This will usually take any sag out of the velocity to be at or very close to the goal velocity. Increase this until unstable, then drop it a back to the edge. Do the same with KdV. You should now have good control at low speeds. Verify the scalability by increasing the goal velocity by small steps –e.g., increments of 10. If the tuning is good, and the KfV scale is good, it should continue to match the goal velocity up to Vmax. If not, you may need to increase KfV a little. If this results in the low speed not being stable again, reduce KfV back to the good position, then reduce b by 10% or so and increase m by one (to slightly increase the slope, resulting in larger WheelCommander WC-132 Product Manual 36 outputs on the high end, but not much or any change on the low end). Figure 9 Velocity Steering Tuning (Differential Drive Steering Parameters) Constants KdpV (steering velocity proportional constant), KdiV (steering velocity integral constant), and KDdV (steering velocity differential constant) are used to tune the ability of your robot to drive in a straight line. Often, KdpV can be zero. KdiV should be nonzero but not too large, or the platform will overcompensate and not drive straight, and/or become unstable. With these settings, the steering velocity loop essentially uses a difference in position of each wheel as the error term –if one wheel gets ahead of the other, its velocity controller is told to slow down. If you are not using WC Wizard, you will need to monitor the current rotation rate and/or current angle using Get Rotation Rate or Get Angle commands. These should remain near zero (or whatever the starting angle was, in the case of Get Angle), during a long move. If the angle grows continuously during a move, try increasing KdpV and/or KdiV –but not too much, or it will become unstable and not track straight. NOTE: running the robot at top speed can result in poor tracking (straightness), as the control systems can become saturated. Try running 5-10% below Vmax. WheelCommander WC-132 Product Manual 37 Figure 10 Position Tuning Once velocity control is working well, it is time to tune position control. KpP, KiP, KdP, and KfP are the constants for tuning the position loop. KpP specifies the proportional term, KiP specifies the integral term, and KdP specifies the differential term. KfP specifies a velocity feedforward term; normally 16 is the correct value. The default values should work well. WCWizard will by default execute alternating delta position commands of 100 units +/- when you click the “ Alternate Incrs”button. The position graph will show position vs. time. If the position loop is tuned properly, little or no overshoot of the goal should occur, and it should dampen nicely and not oscillate until the next position command. If it overshoots, reduce KpP and/or KiP. If it oscillates, increase KdP, but not too much or it will oscillate even more. If the cruising speed is incorrect (too high or too low), adjust the KfP value. Firmware revisions 37-39 do not work properly if Trapezoidal mode is not set; this is fixed in firmware 40 and above. Trapezoidal mode enables smooth acceleration, cruising, and deceleration, using either the default of ½ of the maximum velocity as measured during calibration, or, the value specified before Go using the Velocity and/or Acceleration commands. WheelCommander WC-132 Product Manual 38 Figure 11 Position Steering Tuning (Differential Drive Steering Parameters) Constants KdpP (steering position proportional constant), KdiP (steering position integral constant), and KDdP (steering position differential constant) set the PID parameters for maintaining straight line motion when executing position commands. Often, KdiP is zero, and KdpP is a small value near one. If you are not using WC Wizard, you will need to monitor the current angle using the Get Angle command while executing a long Set Position command. If well tuned, the current angle should stay near 0, though it may deviate a few degrees back and forth during a move. If it gets progressively off track one direction or the other, try increasing KdpP and/or KdiP – though if these are too large, it will become unstable and not track straight either. The same issue regarding running at maximum velocity applies here as well –set the velocity 5-10% below maximum before issuing your position command, in order to insure the PID loops have adequate headroom to control steering. WheelCommander WC-132 Product Manual 39 WheelCommander Hardware Information Figure 12: Connectors. The silk screen on the back of the board (not pictured) shows the reference designators ‘J1', ‘J2', etc. Connector Pinouts J1 - digital power J1.1 - Vin J1.2 - digital Vss (ground; to right in figure 8) J2 - servo power J2.1 - Vservo J2.2 - servo Vss (ground; to right in figure 8) WheelCommander WC-132 Product Manual 40 J10 - serial communications J10.1 - RXD (linked to I2C SDA if RC11 & RC12 present) J10.2 - Vdd (+5v) (out) normally not connected except to power external asynchronous serial level converters J10.3 - TXD (linked to I2C SCL if RC11 and RC12 present) J10.4 - digital Vss (ground; to right in figure 8) J12 - I2C This connects directly to the I2C pins on the processor, bypassing RC11 and RC12, which connect the I2C SDA and SCL lines to the communications connector J10 in some versions of the WC-132. If RC11 and RC12 are present (located between the I2C and JTAG connectors), you could use J12 as an alternate communications connector for I2C or asynchronous serial, if it is more convenient for you. Production boards will omit RC11 and RC12 to separate the asynchronous serial and I2C busses, in which case, J12 is the only way to command the WC-132 via I2C. IMPORTANT NOTE I2C cable color coding: Some models ship with a preassembled I2C cable that plugs into a right angle connector installed at J12 facing left in figure 8. It is best to go by the wire color, not the WC-132 silkscreen pin numbers nor the connector housing pin numbers, as pins 1 and 4 differ between the two. Signal Name Color of Wire WC-132 Silk Screen Pin Numbering Connector Housing Pin Numbering Vdd (+5v) Red 1 4 SCL Blue 2 2 SDA Yellow 3 T (3) 4 1 (triangle mark) Vss (Ground) Black J7 - left J7.1 J7.2 J7.3 - servo servo control (white / yellow / orange) Vservo (red) servo Vss (black / brown; to right in figure 8) J9 - right servo J9.1 - servo control (white / yellow / orange) J9.2 - Vservo (red) J9.3 - servo Vss (black / brown; to left in figure 8) WheelCommander WC-132 Product Manual 41 J6 - left encoder (black and red are topmost in figure 8; violet and orange will be closest to the board) J6.1 – Clock or Channel A - violet J6.2 - Vdd - red J6.3 – Direction or Channel B - orange J6.4 - digital Vss - black J8 - right encoder (black and red are topmost in figure 8; violet and orange will be closest to the board) J8.1 - Clock or Channel A - violet J8.2 - Vdd - red J8.3 - Direction or Channel B - orange J8.4 - digital Vss - black J3 - analog inputs (signal is topmost row; ground is bottom row) NOTE: supply is analog power and ground, isolated from rest of board A3 A2 A1 A0 Signal J3.12 J3.9 J3.6 J3.3 Power (Vdd)+ J3.11 J3.7 J3.5 J3.2 Ground (Vss) - J3.10 J3.7 J3.4 J3.1 Other analog inputs: A4 = left H bridge current sense (when using optional H bridge to drive a DC gearhead motor instead of RC servos; available when using servos) A5 = right H bridge current sense (available when using servos) A6 = Vin (J1) voltage divider; multiply 10 bit ADC value by (5/1024) * (40.1/10) = 0.01958 or divide by 51.07 to convert to volts A7 = Vservo (J2) voltage divider; multiply by (5/1024) * (100.9/10) = 0.04927 or divide by 20.30 to convert to volts J4 - digital I/O (signal is topmost row; ground is bottom most) note: supply is digital power and ground D3* D2* D1 D0 Signal J4.12 J4.9 J4.6 J4.3 Power (Vdd)+ J4.11 J4.7 J4.5 J4.2 Ground (Vss) - J4.10 J4.7 J4.4 J4.1 *Note: D2 is used for the Right Motor Inverted Direction in dual-dir-bits, signmagnitude mode; in this mode, it is not available for other purposes. Likewise, D3 is used for the Left Motor Inverted Direction. Other digital inputs: D4 - JP1 pin 2 (clear EEPROM jumper; never use as an output or general purpose input, but you can read this to determine whether the shunt is WheelCommander WC-132 Product Manual 42 installed on pins 1-2) D5 - J16 pin 3 (right DC motor direction; available when using servos) D6 - J16 pin 4 (left DC motor direction; available when using servos) D7 - J5 pin 3 (SPI SCK signal, which is not used in current firmware, so, D7 is available for general use) J16 - H-bridge direction control J16.1 - digital Vss J16.2 - Vdd J16.3 - Right Motor Direction (sign/magnitude mode) / Enable (locked-antiphase mode) / D5 J16.4 - Left Motor Direction / Enable / D6 J15 - H-bridge current sense J15.1 - analog Vss J15.2 - analog Vdd J15.3 - Left Current Sense / A4 J15.4 - Right Current Sense / A5 J13 - H-bridge left PWM J13.1 - PWM out J13.2 - Vmotor monitor (note: this is for low current voltage monitoring only, not for supplying power to an H bridge; external wiring is recommended) J13.3 - Vmotor Vss (low current ground) J14 - H-bridge right PWM J14.1 - PWM out J14.2 - Vmotor monitor J14.3 - Vmotor Vss J5 - SPI J11 - JTAG These connectors are currently not usable by customers, but are for factory use only. The only exceptions are J5 (SPI) pin 2 which is +5v; J5 (SPI) pin 6 which is digital ground; J5 (SPI) pin 3, which is Digital I/O line D7; and J5 (SPI) pin 5, which is an active low RESET pin. If you would like to give your robot controller the ability to hardreset the WheelCommander, you can do so with this pin. It must be at a logic-high level for the WheelCommander to run. JP1 - clear-EEPROM / D4 You can restore the all of the factory settings (including baud rate and I2C address, as well as PID parameters and platform setup values) by issuing the Reset Consts command –‘ F’command code with parameter value of 0xFFFF. Alternatively, to recover from communications misconfigurations only, install a 2mm WheelCommander WC-132 Product Manual 43 pitch shunt on the Clear EEPROM jumper header over pins 1 and 2, then power cycle the WheelCommander. The RED LED will be on and the GREEN LED will be off, indicating the Clear EEPROM jumper is present. BE SURE TO REMOVE THE JUMPER or move it back to between pins 2 and 3 before the next power cycle, after you correct the baud rate or I2C Slave address. Clearing the EEPROM resets the baud rate to 38400 and the I2C address to 0x20. The normal position for the shunt is over pins 2 and 3, which are the two pins towards the center of the board. WheelCommander WC-132 Product Manual 44 Specifications Value Min Max Units Digital Vin 6.2 16.0 V DC Digital Icc TBD 800 mA at 6.2v Vin Follow motor manufacturer’ s recommendations; Note 1 Servo Vin DC Input Logic Lo w -0.5 0.2 * Vcc Volts DC Input Logic High 0.6 * Vcc Vcc + 0.5 Volts 1 µA DC Input Current DC Output Logic Low Vss 0.7 Volts DC Output Logic High 4.2 Vcc Volts 40 mA DC Output Current Analog Input Voltage 0.00488 Vcc Volts; Note 2 H bridge PWM 0.062 64 KHz Servo Control 0.5 2.5 msec at 50Hz asynchronous serial Baud Rate 1200 115200 Baud; Note 3 I2C Trans. Rate 0 400 KHz A/D Inputs Dedicated: 4 A/D Resolution 10 bits Digital I/O Dedicated: 4 General Purpose: 4 Note 4 General Purpose: 4 Note 1: servo life may be shortened with supply voltages above its rated value (usually 6v), although maximum speed will be increased. Note 2: at 10 bit A/D resolution, the smallest value above zero (a reading of 1), corresponds to 4.88 mV. A reading of 1023 corresponds to Vcc. Note 3: 230400 and 460800 can be enabled on the WheelCommander side, but are currently untested and unsupported. Note 4: when using RC servos, three of the dedicated are available for general purpose use. When using DC motors with dual external H-bridges, only one of the dedicated digital I/O lines are available. WheelCommander WC-132 Product Manual 45 Interfacing Examples Please check www.nubotics.com for Arduino, Player/Stage, Parallax Basic Stamp asynchronous serial, RidgeSoft RoboJDE java I2C, and Microsoft Visual Basic asynchronous serial examples. Acroname has published an example for using the WheelCommander with their BrainStem controller: http://acroname.com/examples/10013/10013.html RoboRealm, an excellent commercial robot machine vision package, now includes support for the WheelCommander: http://www.roborealm.com/help/Nubotics_Wheel_Commander.php WheelCommander WC-132 Product Manual 46 Frequently Asked Questions General Questions Where can I buy it? Click here! What do the LEDs mean? The RED LED (DL1) will be lit after power on reset to indicate that stored EEPROM values are being used; if off immediately after power on reset, the red LED indicates that the Clear EEPROM jumper is active (connecting pins 1 and 2 of JP1). If the Clear EEPROM jumper is active, the serial port baud rate will be reset to 38400, and the I2C slave address will be reset to 0x20. During operation, the red LED will be lit during active movement, and off at the end of movement. Further, the red LED, together with the green LED, will flash through various combinations during the calibration procedure to indicate the current step number. Finally, the red and green LEDs alternately blink during firmware updates, to indicate that an upgrade is in progress. The GREEN LED (DL2) will be lit when the command receiver is idle, and off while in the middle of receiving and parsing a command. Further, it, together with the red LED, will reflect the current stage of the calibration procedure, and will also alternately blink with the red LED during firmware upgrades. What kind of encoders will it work with? The WC-132 WheelCommander, firmware rev level 28, is only compatible with 128 pulse-per-wheel rotation encoders, which output the decoded quadrature signals of CLK and DIR. Future firmware versions might support programmable encoder resolutions as well as the use of raw quadrature (ChA, ChB) signals. Do I need to zero out my servos by adjusting their potentiometers? No, you don't. You just need to make sure the potentiometer is relatively close to the center so that full speed operation in both directions is possible. The built-in calibration procedure will detect the exact pulse width needed to prevent servo motion. If I command the WheelCommander via serial, what can I do with it's I2C port (or vice versa)? Currently (firmware version 28), the unused command interface is inactive and inaccessible. Future firmware versions might provide a passthrough capability, so that a serially commander WC-132 can communicate with I2C sensors and transfer sensor data back to your master controller. WheelCommander WC-132 Product Manual 47 I can't seem to get I2C commanding to work properly; the Sync command works, but nothing else. What's wrong? The WheelCommander I2C slave mode requires the I2C master (your controller) to support clock-stretching by the slave (the WheelCommander). For many commands, the WheelCommander must perform some processing between reception of a command via an I2C master write transfer, and a subsequent I2C master read request. If the WheelCommander receives a read request when it does not have data ready yet, it will assert (hold low) the SCL line to signal to the master that data is not ready. When data is ready, the WheelCommander will release SCL, allowing the transfer to continue. This clock-stretching method is part of the Philips I2C standard. It will be helpful to test and debug your I2C master code with other simpler I2C devices, such as I2C serial EEPROMs, to make sure it works prior to using it with the WheelCommander. Further, many I2C master hardware implementations will require you to implement certain time delays between operations. The Microchip PIC 18F series of controllers, for example, require delays between issuing a STOP and any subsequent START, of at least 4.7 microseconds (50 microseconds in SMBus environments). Shorter times will result in unreliable behavior, including but not limited to bus hangs. I've been looking at the status word. Reads fine. However, bits 15 and 13 are always at 1. These specify the state of the two 'clk' lines. Should these reflect the state of the LEDs on the WheelWatchers? As I turn each wheel, the 'Dir' bits follow the LEDs. This is normal. The red LEDs are hooked to ChA -- in other words, a buffered version of the signal detected by one of the photosensors. The green LED, however, hooks to the decoded direction output of the LS7084 chip; this is the same as the "State of x Wheel Dir Line" in the status word (bits 12 and 14). The "State of x Wheel Clk Line" (bits 13 and 15) reflects the value of the clock output of the LS7084, not ChA -- so they are not the same. The clock output of the LS7084 only pulses low for tens of microseconds upon detection of an edge transition on either ChA or ChB, so you would be lucky indeed to see bits 13 or 15 go low. In hindsight, these bits are not very useful, except to confirm that the WheelWatcher encoders are connected. After I enable PWM mode by setting constant 2 to 0x98, I see pulses on the servo outputs still. Is there something I have missed? The servo output pins are connected to the PWM output pins, so you will see the same signal. WheelCommander WC-132 Product Manual 48 I'm using the WheelCommander with an external H-bridge and PWM mode. When I try to run the Calibrate command, it runs one motor 100% on, the other nearly 100% off, for 4 seconds; then turns both wheels off; and then nothing. What's wrong? The Calibration Status command, when issued after the Calibrate command (as explained on pages 24-25 in the manual), will indicate an error code which should help diagnose the problem. In the situation you described, the problem is most likely that you have swapped the encoder connectors or the motor connectors. When calibrating, should I insert a sizeable delay before reading an 'a' result, or immediately accept an error result and poll the status word for calibrate complete? If using a delay, what would be a suitable value. Once calibration is initiated by writing the 'K' command, in I2C mode, it will ignore its own address and not respond to read or write requests until the calibration completes, either with or without error. When the WC-132 finally does respond to your request, it will return either an 'a' or an 'n.' Then, you can issue a 'Q' command. (In serial mode, it will output an 'a' character or an 'n' character when calibration is complete, after which you can issue a 'Q' command.) One scheme for dealing with this, after writing the 'K' command, is to periodically poll (say, every 100ms) the WC-132 until it responds to a read request, then obtain the status. You could implement this inside your firmware by having it retry (STOP; delay; START; issue address plus read bit) every 100mS until you receive an ACK. How long does calibration take? It really depends on the motors or servos and how they respond, but normally approximately one minute. I've got the system moving, but when I execute a Set Position to 100, then a Go, I get the following: one motor turns continuously in the correct direction, but does not stop; the other motor runs for 3 seconds in the correct direction then stops, then reverses; after 3 seconds, it reverses again. Is it possible that this is caused by incorrect direction or PWM signals? It sounds like you have not tuned the PID loops. Tuning is very important, especially for DC motor operation, as every "plant" (motor driver / motor / gearbox / encoder) is different. We highly recommend using our WCWizard to make this easier. It sounds like the position loop constants (KpP, KiP, KdP) are too large, and also probably the steering constants (KdpP, KdiP). If you can't use WCWizard, then please WheelCommander WC-132 Product Manual 49 follow pages 25-28 of the manual. This is a common procedure needed for all kinds of closed-loop motion controllers, especially those used in industrial applications (but of course, also robots). Tuning of PID loops is a bit of an art, but if you follow the process as described in the manual you should have a good chance of getting it to behave well. Can I use the "motion control active" flag to verify that the Wheelcommander is busy/idle, or do I have to check the relevant '...in progress' flags? Status bit 5, "motion control active," is the master flag for all motion types, and is TRUE whenever moving to a position, rotating to an angle, moving at a specified velocity, or rotating at a specified rotation rate. The WheelWatcher cables that come with the WheelCommander are too short for my application. How can I get longer ones? We can sell 6" or 8" cables to you. Please contact info at nubotics dot com. Or, you can buy the precrimped wires for a variety of lengths, as well as the connectors, at Digikey. Here are the part numbers: H2019-ND - 4pos 2mm dual row crimp sockets H2022-ND - 8pos 2mm dual row crimp sockets H3BBT-1010x-A8-ND (x" orange 28 gauge wire with precrimped socket terminals on each end) H3BBT-1010x-R8-ND (x" red...) H3BBT-1010x-V8-ND (x" violet...) H3BBT-1010x-B8-ND (x" black...) Replace the 'x' with a number for the length in inches; for example, H3BBT-10106-B8ND is for a 6" black wire. I can't seem to code the ability of a command to delay until the present command has stopped executing. I am reading the status word and checking the flags, but I can't find a flag or set of flags that gives me this effect. Sequences work if I introduce appropriate delays, but I don't want to use this approach. Reading the status word seems to be fine. What am I doing wrong? Which command is presently executing? Is it an Angle, Relative Angle, Position or Delta Distance command? If so, then Motion Goal Reached, Status bit 4, will be set when the motion concludes. However, if the position loop PID constants are such that the unit either overshoots and oscillates over the goal, or, that it never quite reaches the goal because of static friction (because KdiP is too small), then it may take a long time or may never actually terminate. Of course, too large of an integral constant will make a PID loop unstable as well. WheelCommander WC-132 Product Manual 50 Other constants that affects this are KdH (angle hysteresis), KpH (position hysteresis) and KpvTh (position velocity threshold). KpH sets the maximum error in position or angle allowed to declare Motion Goal Reached. Likewise, KpvTh sets the maximum absolute velocity allowed to declare Motion Goal Reached. Using an H bridge in PWM mode, we've noticed that these constants may need to be adjusted somewhat larger. Note that the Velocity or Rotation Rate commands will be declared Motion Goal Reached when the required velocity or rotation rate is within some tolerance of the goal (KvTh). If the velocity PID loop is not properly tuned, it may never quite reach the goal due to static or dynamic friction. The KiV (velocity integral gain) will ensure that such friction is overcome, though too large of a value will make the loop unstable. So, better tuning will ensure it reaches the goal in a timely manner. As a problem solving tool, you can query the current position, velocity, rotation rate, and/or angle, and display that to yourself to see how much error there is. You could add your own acceptable limits on this, so that you can issue a Coast command before moving on to the next motion. What is the difference between non-trapezoidal position control vs. trapezoidal control? Non-trapezoidal control means that the WC-132 will attempt to reach the desired position as fast as possible. It does not try in any way to modify your goal position request. You will need to control the velocity yourself by issuing incrementally larger goal positions until the real desired goal is reached; the delta in position each time divided by the time between changes gives you your requested velocity. Trapezoidal control, on the other hand, controls acceleration and velocity as it moves to a goal position. The trapezoidal control code feeds a series of goal positions which change by increments determined by the currently required acceleration and velocity. Note that the actual measured real-world velocity that your robot will travel will be what you request only if the position control loop (PID) is well tuned. In general, you may want to use trapezoidal mode since this will do the position scheduling for you, saving a considerable amount of communications overhead between your controller and the WheelCommander. This will in turn ensure that all required processor bandwidth in the WheelCommander is available to process high encoder interrupt rate in addition to doing PID control (were you to use high resolution encoders). When using trapezoidal mode, you will need to issue a non-zero acceleration amount. Values on the order of the requested velocity (or a small integer multiple or fraction of it) work well under most circumstances. Acceleration values much larger than the requested velocity can expose a known bug in the trapezoidal control code. WheelCommander WC-132 Product Manual 51 I will be using the Nubotics WheelCommander WC-132 to control 12 Volt DC encoder motors with external H-Bridges. The power source for the motors is a 12Volt lead acid battery. When the battery discharges, its voltage will drop, and a 100% PWM at low charge may result in a lesser voltage to motors than a 100% PWM at full charge. Hence, do I need to supply a constant regulated 12V to the H-Bridges (for powering motors) so that the wheel commander works effectively and is immune to voltage drop due to discharging of the battery? You only need to do this if you must operate the robot at maximum velocity regardless of battery state. Normally, you should set the maximum commanded velocity that your control program ever issues to the WC-132 to a value that works well all the way to the lowest safe discharge level of the battery (for lead acid, this is usually 10.8 volts) and under the worst expected conditions regarding friction and slope of ground. This way, regardless of battery level, the maximum required PWM is kept below 100%. If instead you were to set the maximum commanded velocity to the maximum speed the robot can run at when the battery is full -- which requires 100% PWM -- then indeed, there is little the WC-132 can do to get the robot to stay at maximum speed when the battery is low. In that case, speed as well as steering will not be well controlled. Another reason to set the maximum commanded velocity below the maximum the robot can attain on a full battery is that it provides margin to allow the PID control loops to adjust for changes in friction, slope of the ground, and so forth, as well as to ensure there is adequate margin for steering. Or should I not bother about this issue and connect the h-bridges directly to the battery without a 12V regulator? There is no need for a regulator normally. Also, it can be difficult to find such a regulator that can provide enough current for the motors and yet not be either costly or run hot. If you use a linear regulator, you would need the battery to always be more than 12v -- the amount more depends on the voltage drop of the regulator. Or, you could use a switching boost regulator, but they are expensive and complex. This is based on the assertion that the control loops in the WheelCommander are taking feedback from the encoders and therefore will make all the required corrections even as the battery voltage drops over time? As long as the commanded velocity does not require more than 100% PWM, then yes, the WC-132 control loops will adjust the PWM to maintain speed. This ability to correct for battery level changes often requires the I term (integral) to be non-zero. Can the Nubotics WheelCommander be used to drive a robot at an arbitrary speed set during runtime, or only at one particular speed thats pre-configured as per the WheelCommander WC-132 Product Manual 52 PID constants? The speed as well as rate of rotation can be commanded (modified) on the fly at run time. That is one of its main purposes. The PID constants adjust how the feedback provided by the encoders, together with the commanded speeds of each wheel, result in motor control signals that seek to minimize the error between the feedback and the commands. They do not, by themselves, set the speeds of the wheels. There may be some confusion due to the MxSpd constant. It stored in EEPROM like the PID constants are, is determined automatically by the calibration routine, and is later used to convert PID equation outputs to PWM values appropriate for your robot. It is not meant to be changed at run time. Are internal pullups enabled for the encoder input pins? No, they are not. The encoder inputs need to be driven high and low by your encoder within the DC Input High and Low ranges mentioned in the Specifications section. For more information visit: www.nubotics.com Produced by Noetic Design, Inc., 25 NW 23rd PL, STE 6 PMB 181, Portland OR 97210 Copyright ©2004-2011 Noetic Design, Inc. All rights reserved. November 23, 2011 WheelCommander WC-132 Product Manual 53


