1
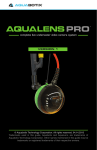
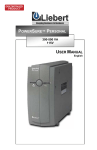
MANUAL
VERSION 2
Aquabotix Technology Corporation. All rights reserved. July 2015
Trademarks used in this guide, Aquabotix and AquaLens, are trademarks of
Aquabotix Technology Corporation. Other names mentioned in this guide may
be trademarks or registered trademarks of their respective owners.
1
TABLE OF CONTENTS
3
LEGAL DISCLAIMER
7
7
8
CHAPTER 1 – SYSTEM
Overview
Package Includes
9
9
10
11
CHAPTER 2 – ASSEMBLY
Charging
Pole Attachment
Unit Assembly
12
CHAPTER 3 – MAINTENANCE
13
CHAPTER 4 – TOPSIDE VIEWING STATION - Optional
17
CHAPTER 5 – WARRANTY
2
LEGAL DISCLAIMER
Trademarks used in this guide, Aquabotix and AquaLens Pro, are trademarks of
Aquabotix Technology Corporation. Other names mentioned in this guide may
be trademarks or registered trademarks of their respective owners. The purpose
of this manual is to provide AquaLens users with a clear understanding of
operating procedures. If further information is needed, contact Aquabotix at
[email protected] or 508.676.1000.
website: www.aquabotix.com
Aquabotix reserves the right to make changes to the specifications of the
AquaLens PRO at any time without notice. Also, Aquabotix may alter any or all
documentation without notice.
3
LEGAL DISCLAIMER
Important Safety Instructions
Assemble and use AquaLens PRO only as instructed by this manual.
Read and follow these important safety instructions and the detailed assembly
in this manual prior to using the AquaLens PRO.
Follow all safety and operational warnings and heed all additional restrictions on
use.
Refer all non-routine service issues to Aquabotix at www.aquabotix.com or
[email protected]. Safety and Operational Warnings
Assemble AquaLens PRO in a safe, dry place. Do not assemble while
submerged in water or allow Aqualens PRO to get wet before it is fully
assembled and enclosed in the watertight dome. Do not assemble with wet
hands.
AquaLens PRO is powered by lithium ion batteries. Do not use any other type of
battery or powering device for AquaLens PRO. Caution should be used when
charging batteries.
Do not attempt to charge batteries in AquaLens PRO while submerged in water.
Do not let the battery assembly area get wet. Do not assemble with wet hands.
The AquaLens PRO dome must be completely secured to keep it watertight.
Check the security of the dome before submersion.
The topside box and LCD screen are waterproof to 10ft. depth. Do not
submerge the topside box deeper than 10ft.
AquaLens PRO is meant for depths no greater than 300ft. from the water
surface. Do not go beyond this depth due to limitation as operational safety is
not tested and rated for such depths.
Secure all cables on board to prevent tripping hazards.
Inspect AquaLens PRO prior to use. If there is any sign of water inside the
camera or housing unit or other damage, do not use. Send AquaLens PRO to
Aquabotix for service.
Do not attempt to dislodge or pry foreign objects from AquaLens PRO. Send
AquaLens to Aquabotix for service.
4
Do not attempt to dislodge or pry foreign objects from AquaLens. Send AquaLens
to Aquabotix for service.
AdditionalRestrictions
Restrictions On
On Use
Use
Additional
AquaLens
is meant
operation
adults
over1818years
yearsofof age
age only.
only. Keep
AquaLensPRO
is meant
for for
operation
by by
adults
over
AquaLensPRO
out of
reach
of children
and
supervise
children
and
AquaLens
outthe
of the
reach
of children
and
supervise
children
andpets
petswhen
AquaLens
is in operation.
when
AquaLens
PRO is in operation.
Do
in rain,
sea conditions
storms. Do not
Donot
notuse
useAquaLens
AquaLens PRO
in rain,
roughrough
sea conditions
and/orand/or
storms.
use AquaLens PRO while underwater machinery is in operation.
Do not use AquaLens while underwater machinery is in operation.
Do not touch AquaLens PRO to underwater marine growth. Keep AquaLens
PRO
clear
of all
underwater
objects. marine growth. Keep AquaLens clear of all
Do not
touch
AquaLens
to underwater
underwater objects.
Do not expose AquaLens PRO to high temperatures above 40° C / 104° F; avoid
direct
sunlight.
Do not
expose AquaLens to high temperatures above 40° C / 104° F; avoid direct
sunlight.
Use AquaLens PRO in the recommended operating water temperature range of
2° C / 35° F to 32° C / 89° F.
Use AquaLens in the recommended operating water temperature range of 2° C /
35° F to 32°
C / 89° PRO
F.
Dropping
AquaLens
or subjecting it to strong force may damage the device
and its watertight dome. Handle with care.
Dropping AquaLens or subjecting it to strong force may damage the device and
its watertight dome. Handle with care.
Failure to follow these important safety instructions and the detailed
assembly and use instructions of this manual will void your limited warranty
from Aquabotix and may result in serious injury or death. Aquabotix
disclaims all liability arising from or caused by the failure to assemble and
use HydroView in accordance with this manual, including all important
safety instructions.
5
4
Water Caution
Caution: The electronics contained within this topside box are susceptible to
Caution:
The electronics
contained
this topside
boxwater
are susceptible
to to
water damage.
The following
mustwithin
be done
to prevent
entry; Prior
water
damage.
following
must around
be donethe
to prevent
Prior
to
closing
the lid,The
all water
droplets
sealing water
edge entry;
must be
removed.
closing the lid, all water droplets around the sealing edge must be removed.
When closing this lid, all wires must remain clear of container’s sealing edge.
When closing this lid, all wires must remain clear of container’s sealing edge.
Please ensure the battery is on the left side of the box when the hinge is at the
Please ensure the battery is on the left side of the box when the hinge is at the
top.
top.
Place
Battery
Here
Please note: The sealing edge of the topside box has been treated with lubricant
Please
The
sealing
of the
box
has been
treated
withalubricant
to
keep note:
the seal
water
tight.edge
Be sure
thistopside
lubricant
remains
clean
to ensure
to keep
theseal.
sealAwater
tight. Be absorbing
sure this lubricant
clean to
ensure a
water
tight
silica moisture
pack hasremains
been included
in the
water tight
silica
moisture
has
been
included
the
topside
box.seal.
This A
pack
needs
to be absorbing
kept in the pack
topside
box
at all
times. Itinshould
topside
box.
be should
kept in not
thesit
topside
at all
times. It should
be
kept to
the This
right pack
of theneeds
batterytoand
on anybox
of the
wires.
be kept to the right of the battery and should not sit on any of the wires.
6
5
Assembly
CHAPTER 1 - SYSTEM
7
PACKAGE INCLUDES
PACKAGE INCLUDES:
Viewing sphere with 25 ft. of
cable attached
Waterproof topside box with
cable connector
ACME threaded angular adapter
for pole mounting
Battery charger
Your AquaLens PRO has been
charged before shipment, however you
should charge the unit fully before use.
8
CHARGING
CHARGING
STEP 1
Unclip the topside box to access the
battery pack
CHARGING
STEP 2
Disconnect the cable connectors
inside the topside box.
CHARGING
STEP 3
Connect the clip from the battery
charger to the male end of the clip
from inside the topside box.
Plug the charger into a wall outlet until
fully charged.
CHARGING
STEP 4
When the AquaLens PRO is powered
on, lights will illuminate at the top of
the topside box.
All lights including green indicates
good operating power.
Two lights including yellow indicates
low operating power.
Only red indicates immediate need for
recharge.
9
POLE ATTACHMENT
POLE ATTACHMENT
STEP 1
Locate the threaded hole in the back
of the viewing sphere.
POLE ATTACHMENT
STEP 2
Screw in the ACME angular adapter
into the hole clockwise until tight.
Now you will be ready to screw in the
desired pole for use.
10
UNIT ASSEMBLY
UNIT ASSEMBLY
STEP 1
Locate the cable connectors on the
cable coming from the viewing sphere
and the topside box.
Please note: there is a small notch in
the female connector that needs to be
lined up with the bump in the male
connector.
UNIT ASSEMBLY
STEP 2
Insert the two ends together and twist
the blue ring onto to threaded side
until tight.
UNIT ASSEMBLY
STEP 3
After the cables have been connected,
you can power the unit by flipping the
toggle switch on the topside box. This
toggle switch has 3 options: Off, On or
On with LED lighting.
You are now ready to use your unit.
11
MAINTENANCE
Cleaning Dome
Using an acrylic glass cleaner, spray onto surface of dome and rub in with a
microfiber cloth.
After Water Care
1) Rinse AquaLens PRO with fresh water.
2) Wipe down, using a microfiber lens
cleaning cloth.
3) Safely store AquaLens PRO---cover dome to protect from
scratches.
12
TOPSIDE VIEWING STATION - Optional
PACKAGE INCLUDES:
Viewing Sphere with 25 ft. of cable
attached
Topside Viewing Station with:
7” LCD screen
Power Control Box
Remote Control
Connector Cable
Battery Power with recharge plug
Waterproof Carrying Case
STEP 1 Charging
Your AquaLens PRO has been
charged before shipment, however you
should charge the unit fully before use.
Plug the black wall plug into your
outlet. It takes approximately 12 hours
to fully charge the battery. The unit
should be charged while powered off.
STEP 2 Connection
Connect the cable from the topside
viewing station to your AquaLens Pro
cable. (see image at left)
The notch in the connector must align
with the groove in the other
connector. After inserting the
connectors together, be sure to twist
the fastener ring until tight.
13
Power On/Off Lights On/Off STEP 3 Power ON
Turn the power on by flipping the
left switch. To turn on the LED
lights, flip the right switch.
After powering the unit on, you will
be able to see the live video feed
on the monitor.
STEP 4 Recording
The screen will show 4 different
channels upon startup. Select
Channel 2, this is the channel that
records to the SD card. Channels
1, 3 and 4 are obsolete.
The video automatically begins
recording when powered on. In
the top center of the screen you
will be able to see the time
recorded.
STEP 5 Recording
OK Button The OK button on the remote is
used to start/stop recording the
video feed. When recording, the
word record will be written in red
on the screen – otherwise record
will be written in white. Video is
recorded in 5 minute intervals.
Please note: This remote has
other features that are not
supported by Aquabotix.
14
STEP 6 Recording
SD Card Slot All video is recorded to the SD
card located on the side of the
monitor. (32 GB card records
approximately 17 hours)
To access the SD card, simply
push the SD card to release it.
Remove the SD card and insert it
into your computer. You will now
be able to download your videos.
STEP 7 Playback/Delete
To playback and/or delete all your
videos, push enter on your remote
2x. This will bring you into the
View videos mode.
View video Mode To playback the most recent
video, push ok on the remote. You
can scroll through the different
videos by using the up/down
arrows.
To delete all your videos, push
setup 2x on the remote and select
others. Hit ok to enter the menu
and scroll down to SD Card
format (delete) and hit ok.
You will be asked if you would like
to format SD card. By selecting
yes you will delete ALL of your
videos on the SD card. Press
setup to return to the main menu.
To delete a single video please
insert the SD card into your
computer.
15
Directions for Adjusting Date/Time (using the remote provided)
1. Quickly push setup 2 times.
2. Scroll down to TIME SETTING.
3. Hit OK to select , and then scroll down and select SET.
4. Press OK to highlight the field that needs to be changed.
5. Scroll down through the fields until your desired input is highlighted and
select OK.
6. Hit SETUP to move to the next number that need to be updated and so
on through the rest of the options.
7. When finished hit OK and then SETUP to exit the menus.
16
WARANTY
AquaLens Pro One Year Limited Warranty Certificate
Aquabotix warrants that, under normal use and service, the AquaLens Pro will
be free from defects in material and workmanship for one year from the date of
purchase, applies only to the original purchaser and may not be transferred.
Unless authorized by Aquabotix, any modification, customization, repair,
disassembly of the product, abuse, exposure to contamination, excessive
electric or magnetic force will void this warranty.
If Aquabotix receives, during the applicable warranty period, notice of defect in
any product, which is covered by Aquabotix’s warranty, Aquabotix shall either
replace or repair the product at Aquabotix’s discretion. If Aquabotix is unable to
repair or replace, as applicable, a defective product, which is covered by
Aquabotix’s warranty, Aquabotix shall, within a reasonable time after being
notified about the defect, refund the full purchase price of the product.
Aquabotix shall have no obligation to repair, replace or refund the purchase or
product until the customer submits an RMA form and returns the defective
product to Aquabotix.
Warranty does not cover the following: damage caused by abuse or misuse,
improper maintenance, incorrect assembly, accidental damage, or damage due
to incorrect power connection as described in the user manual. Consumable
items including o-rings, moisture absorbing packs, LED lights and batteries are
specifically excluded from the warranty. Items subject to normal wear and tear
include, but are not limited to, the lens and the outer shell which are only
covered for defects in workmanship or materials. In no event will Aquabotix be
liable for any incidental or consequential damages.
Opening the AquaLens’ dome (unless instructed by Aquabotix) voids this
warranty.
Claims for damage, shortage or errors in shipping must be reported within three
(3) days following delivery to the customer. Aquabotix is not responsible for
returned items lost or damaged during shipping. A copy of the dated receipt or
bill of sale from the original end user purchase is required to determine
coverage.
This limited warranty gives you specific legal rights, and you may also have
other rights which vary from state to state.
For more information: [email protected]
or (508) 676-1000
17