1
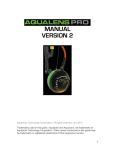
complete live underwater video camera system
VERSION 3
© Aquabotix Technology Corporation. All rights reserved. 04.12.2012
Trademarks used in this guide, Aquabotix and AquaLens, are trademarks of
Aquabotix Technology Corporation. Other names mentioned in this guide may be
trademarks or registered trademarks of their respective owners.
Table of Contents
Legal Disclaimer
Trademarks ____________________________________________________________1
Important Safety Instructions _____________________________________________2
Safety and Operational Warnings _________________________________________2
Additional Restrictions On Use ___________________________________________3
Assembly
Overview _______________________________________________________________4
Specifications __________________________________________________________5
Pole Attachment (preferred method) _______________________________________6
Topside Box Connections ________________________________________________7
LCD Screen Wrist Mount Assembly ________________________________________
8
LCD Screen Sticker Mount Assembly ______________________________________9
LCD Screen Screw Mount Assembly _______________________________________
10
Batteries _______________________________________________________________
11
Maintenance
Removing Dome ________________________________________________________
12
Cleaning Dome _________________________________________________________
12
Preventing Fogging on Dome _____________________________________________
12
After Water Care ________________________________________________________
12
Recomended Replacement Periods _______________________________________
13
Replacing O-Ring _______________________________________________________
13
Replacing Moisture Absorbing Pack _______________________________________
14
15
Aquabotix’s AquaLens One Year Limited Warranty Certificate _________________
1
Legal Disclaimer
Trademarks used in this guide, Aquabotix and AquaLens, are trademarks of
Aquabotix Technology Corporation. Other names mentioned in this guide may be
trademarks or registered trademarks of their respective owners. The purpose of
this manual is to provide AquaLens users with a clear understanding of operating
procedures. If further information is needed, contact Aquabotix at
[email protected] or 508.676.1000.
website: www.aquabotix.com
Aquabotix reserves the right to make changes to the specifications of the AquaLens at any
time without notice. Also, Aquabotix may alter any or all documentation without notice.
2
Legal Disclaimer
Important Safety Instructions
Assemble and use AquaLens only as instructed by this manual.
Read and follow these important safety instructions and the detailed assembly in
this manual prior to using the Aqualens.
Follow all safety and operational warnings and heed all additional restricitons
on use.
Refer all non-routine service issues to Aquabotix at www.aquabotix.com or
[email protected].
Safety and Operational Warnings
Assemble AquaLens in a safe, dry place. Do not assemble while submerged in
water or allow Aqualens to get wet before it is fully assembled and enclosed in the
watertight dome. Do not assemble with wet hands.
AquaLens is powered by eight (8) AA Alkaline batteries. Do not use any other
type of battery or powering device for AquaLens. Caution should be used when
inserting or changing batteries.
Do not attempt to insert or change batteries into AquaLens while submerged in
water. Do not let the battery assembly area get wet. Do not assemble with wet
hands.
When using topside power to operate your AquaLens, use caution to prevent
shock or damage.
The AquaLens dome must be completely secured to keep it watertight. Check the
security of the dome before submersion. To tighten, line up the grooves and turn
clockwise until it locks.
The topside box and LCD screen are not waterproof. Do not submerge the topside
box or LCD screen in water. Do not let the topside box or LCD screen get wet.
AquaLens is meant for depths no greater than 10 meters from the water surface.
Do not go beyond this depth due to limitation as operational safety is not tested
and rated for such depths.
Secure all cables on board to prevent tripping hazards.
Do not submerge cable connector plugs, let them get wet or handle them with
wet hands.
Legal Disclaimer
3
Assure cable is properly secured to pole with adapter or straps before use.
AquaLens will sink if not properly secured.
Inspect AquaLens prior to use. If there is any sign of water inside the camera
or housing unit or other damage, do not use. Send AquaLens to Aquabotix for
service.
Do not attempt to dislodge or pry foreign objects from AquaLens. Send AquaLens
to Aquabotix for service.
Additional Restrictions On Use
AquaLens is meant for operation by adults over 18 years of age only. Keep
AquaLens out of the reach of children and supervise children and pets when
AquaLens is in operation.
Do not use AquaLens in rain, rough sea conditions and/or storms.
Do not use AquaLens while underwater machinery is in operation.
Do not touch AquaLens to underwater marine growth. Keep AquaLens clear of all
underwater objects.
Do not expose AquaLens to high temperatures above 40° C / 104° F; avoid direct
sunlight.
Use AquaLens in the recommended operating water temperature range of 2° C /
35° F to 32° C / 89° F.
Dropping AquaLens or subjecting it to strong force may damage the device and
its watertight dome. Handle with care.
Failure to follow these important safety instructions and the detailed
assembly and use instructions of this manual will void your limited warranty
from Aquabotix and may result in serious injury or death. Aquabotix
disclaims all liability arising from or caused by the failure to assemble and
use HydroView in accordance with this manual, including all important
safety instructions.
4
Assembly
(attach to forearm)
3.5” LCD screen
Arm band
Swivel mount
Built in connection
Video out (composite)
12 VDC connector
Standard 15 ft. cable
(optional lengths: 25,50,75 & custom)
(attach to belt)
Compact Size
3 lbs.
Universal fit to any pole
5 in.
Standard attacher
Viewing sphere
Video camera (640 X 480p)
LED lighting
Anti-fogging technology
Battery compartment
8 hr. battery life (6 hr. w/ LED’s)
50 ft.
waterproof
5
Assembly
Specifications
Diameter
5 in.
Weight
10 lbs.
Depth
(cable dependent)
Standard: 15 ft. cable
Optional: 25, 50 or 75
Operating Voltage
10 VDC
Battery Run Time
10 hours (8 AA batteries required)
Monitor
3.5 in. LCD screen
Camera
(Low Med High HD)
Total resolution: 640 X 480 pixels
Color
Yellow
6
Assembly
b
a
Pole Attachment (prefered method)
If using a boat hook with threaded end:
a) Thread the angular adapter into the hole on the back of the viewing sphere. Be
sure to align the angular adapter vertically with the camera.
b) Thread your boat hook into the angular adapter.
7
Assembly
c
b
d
a
Topside Box Connections
a) Attach the camera connecter cable to the topside box.
b) Attach the AC power adaptor for continuous use (optional).
c) Turn the power switch on.
d) Toggle the lights on / off. Please note: The lights will not turn on unless the
power switch is turned on.
8
LCD Screen Assembly
a
b
c
LCD Screen Wrist Mount Assembly
a) Unscrew the swivel mount from the LCD screen.
b) Attach the provided pre-cut piece of Velcro to the back of the LCD screen.
c) This will then attach to a provided wrist band, allowing you to wear the screen
on your wrist.
9
LCD Screen Assembly
LCD Screen Sticker Mount Assembly
1) Attach the swivel mount to the provided pre-cut sticker and mount directly to
your desired location.
2) Move the screen up and down for convenient viewing.
10
LCD Screen Assembly
LCD Screen Screw Mount Assembly
1) Attach the swivel mount directly to your desired location using 4 screws (not
provided). Make sure the surface you are mounting the LCD to is ...
2) Move the screen up and down for convenient viewing.
11
Assembly
c
a
e
b
d
Batteries
a) Remove dome, turning counterclockwise. Use caution when handling your
dome to prevent scratches and to protect clarity. Use caution when handling
O-ring to be sure the area remains clean to ensure a water tight seal.
b) With viewing sphere facing you, loosen, not remove, both screws with your
fingers.
c) Swivel battery access plate to get to battery pack.
d) Disconnect the battery pack, using the battery electrical snap.
e) Insert eight (8) AA batteries (not supplied).
Reconnect the battery pack, using the battery electrical snap. Swivel battery
access plate to cover battery pack. Tighten both screws on the access
plate with your fingers. Re-attach dome by lining up the grooves and turning
clockwise until it locks.
Use caution when handling O-ring to be sure the area remains clean to ensure
a water tight seal.
12
Maintenance
Removing Dome
To remove dome, turn counter clockwise and remove. Use caution when handling
your dome to prevent scratches and to protect clarity.
Use caution when handling O-ring to be sure the area remains clean to ensure a
water tight seal.
Cleaning Dome
Using an acrylic glass cleaner, spray onto surface of dome and rub in
with a microfiber cloth.
Preventing Fogging On Dome
1) Remove dome, turning counter clockwise.
Use caution when handling O-ring to be sure the area remains clean to
ensure a water tight seal.
2) Spray a small amount of anti-fogging spray on the inside surface of dome.
3) Wipe area with a small cloth until surface is clear.
4) Re-apply as required.
After Water Care
1) Rinse AquaLens with fresh water.
2) Wipe down, using a microfiber lens cleaning cloth.
3) Safely store AquaLens---cover dome to protect from scratches.
13
Maintenance
Recommended Replacement Periods
O-ring: Every 6 months.
Moisture absorbing pack (pg.10): Every 6 months.
To purchase these from Aquabotix, visit our online store---accessed
through our website at http://www.aquabotix.com/categories.php.
Replacing O-ring
1. Remove dome, turning counter clockwise.
2. To remove O-ring, use an O-ring removal tool or something flat that can get it
out, such as a flat head screwdriver or tweezers.
3. Remove replacement O-ring from package. Inspect for cracks and tears.
4. Lubricate O-ring with an O-ring lubricant, found at most hardware stores.
5. Insert O-ring. Use caution when handling O-ring to be sure the area remains
clean to ensure a water tight seal.
6. Re-attach dome by lining up the grooves and turning clockwise until it locks.
14
Maintenance
Replacing Moisture Absorbing Pack
1. Remove dome, turning counter clockwise. Use caution when handling O-ring
to be sure the area remains clean to ensure a water tight seal.
2. Pull off black cap.
3. Moisture absorbing pack will be exposed.
4. Take out moisture absorbing pack and replace.
5. Re-attach black cap.
6. Re-attach dome by lining up the grooves and turning clockwise until it locks.
Use caution when handling O-ring to be sure the area remains clean to ensure
a water tight seal.
15
Warranty
AquaLens One Year Limited Warranty Certificate
Aquabotix warrants that, under normal use and service, the AquaLens will be free from
defects in material and workmanship for one year from the date of purchase by the original
purchaser.
If Aquabotix receives, during the applicable warranty period, notice of defect in any product
which is covered by Aquabotix’s warranty, Aquabotix shall either replace or repair the
product at Aquabotix’s discretion.
If Aquabotix is unable to repair or replace, as applicable, a defective product which is
covered by Aquabotix’s warranty, Aquabotix shall, within a reasonable time after being
notified about the defect, refund the full purchase price of the product.
Aquabotix shall have no obligation to repair, replace or refund the purchase or product until
the customer submits an RMA form and returns the defective product to Aquabotix.
Warranty does not cover the following: damage caused by abuse or misuse, improper
maintenance, incorrect assembly, accidental damage, or damage due to incorrect power
connection as described in the user manual. Consumable items including o-rings, moisture
absorbing packs, LED lights and batteries are specifically excluded from the warranty. Items
subject to normal wear and tear include, but are not limited to, the lens and the outer shell
which are only covered for defects in workmanship or materials.
Claims for damage, shortage or errors in shipping must be reported within three (3) days
following delivery to the customer. Aquabotix is not responsible for returned items lost or
damaged during shipping.
A copy of the dated receipt or bill of sale from the original end user purchase is required to
determine coverage.
This limited warranty gives you specific legal rights, and you may also have other rights
which vary from state to state.
This model of the AquaLens is intended for personal and recreational use only. Aquabotix
offers a separate commercial-grade PRO model of the AquaLens for use in commercial
applications. The use of this model for commercial applications will void this limited warranty.
For further information contact Aquabotix at:
[email protected]
617.419.5883
Aquabotix Technology Corporation
1082 Davol St. (L102)
Fall River, MA 02720
www.aquabotix.com