Download Copy - Pdfstream.manualsonline.com
Transcript
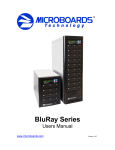
Orbit 3 Users Manual www.microboards.com Version 1.01 Orbit 3 MICROBOARDS TECHNOLOGY, LLC 2 Orbit 3 MICROBOARDS TECHNOLOGY, LLC TABLE OF CONTENTS System Overview............................................................................................................................. 5 Unpacking your system ................................................................................................................... 5 Microboards Statement Regarding Improper Duplication ............................................................... 5 Installation Requirements ................................................................................................................ 6 Installing the Input Rods ........................................................................................................ 6 Power supply ................................................................................................................................... 6 Orbit 3 Operation ............................................................................................................................. 7 The Output Bin................................................................................................................................. 7 Loading Discs .................................................................................................................................. 7 Rejected Discs................................................................................................................................. 7 Main Menu ....................................................................................................................................... 8 Copy ................................................................................................................................................ 8 Disc-to-Disc Copy .................................................................................................................. 8 Disc-to-HDD Copy ................................................................................................................. 9 HDD-to-Disc Copy ................................................................................................................. 9 Deleting Hard Drive (HDD) Partitions .................................................................................... 9 Copy & Compare ........................................................................................................................... 10 Compare ........................................................................................................................................ 10 Batch Mode.................................................................................................................................... 10 Batch Copy .......................................................................................................................... 10 Batch Copy & Compare ....................................................................................................... 10 Track Extraction (for AUDIO CD ONLY) ....................................................................................... 10 Error status in Track Extraction: .......................................................................................... 11 Setup Menu ................................................................................................................................... 12 Accessing the Setup Menu............................................................................................................ 13 Master Source...................................................................................................................... 13 Burn Disc ............................................................................................................................. 13 Use Buzzer .......................................................................................................................... 13 CD Write .............................................................................................................................. 13 DVD Write ............................................................................................................................ 13 Ask Quantity......................................................................................................................... 13 Drive Status ......................................................................................................................... 14 Drive Inquiry......................................................................................................................... 14 F/W Version ......................................................................................................................... 14 F/W Update.......................................................................................................................... 14 Log ....................................................................................................................................... 14 Exit ....................................................................................................................................... 14 Specifications................................................................................................................................. 14 Supported Formats........................................................................................................................ 14 Firmware Updates ......................................................................................................................... 14 Technical Support.......................................................................................................................... 15 3 Orbit 3 MICROBOARDS TECHNOLOGY, LLC 4 Orbit 3 MICROBOARDS TECHNOLOGY, LLC System Overview The Orbit 3 employs 2 general purpose DVD-+R/DL recorders, along with a single DVD reader. A hard drive also comes standard with the system, allowing for DVD/CD image archival and CD track extraction for CD audio compilations. An intuitive, menu driven display and 5-button control interface provide one-touch operation for the novice user while providing advanced features for the professional. COPY START (DISC to DISC) Advanced Features: • Stand-Alone DVD-+R/RW/DL / CD-R duplicator • One Touch duplication • Speed selectable (1x to 16x for DVD-+R and 4x to 48x for CD-R) • Supports writing to DVD-+R/RW/DL, CD-R/RW • Copy and Compare • Batch mode duplication • Hard drive comes standard for standalone DVD/CD image archival and CD track extraction for audio compilation CDs • Store multiple hard drive images (number depends on hard drive installed) • Counter feature allows the user to input how many discs are needed to be copied; the Orbit 3 keeps track of the total discs completed. • Automatically detects DVD or CD masters • Simulation mode to ensure recording stability • Easy-to-read, two-line display for status and error reporting • Updates easily installed through DVD/CD reader Unpacking your system When unpacking your duplicator, confirm the following items are included: • Orbit 3 duplicator • Microboards Documentation CD • Power cable • Input Rods • User’s Manual • Output Bin and Spindle If any of these items are missing, please contact Microboards Technology Technical Support. IMPORTANT: Please keep all the packing for your Orbit 3 duplicator. If your unit ever needs to be sent in for service, it must be returned in the original packing or the warranty may be voided. Microboards Statement Regarding Improper Duplication Microboards Technology fully supports the right of any business, organization, group, or individual to protect their property from unlicensed, unauthorized, or illegal duplication. As a user of our equipment, we expect you to support that right as well. Microboards Technology is neither responsible nor liable for the infringement of any laws regarding the illegal duplication of property. Microboards Technology products are in no way intended to encourage or condone such duplication. 5 Orbit 3 MICROBOARDS TECHNOLOGY, LLC Installation Requirements System Setup • • • Connect the power cable to the Orbit 3 duplicator and plug in to a protected power outlet strip or UPS power supply. Turn on power to the duplicator. Install the Input Rods and Output Bin. The system is now ready to use. Install your Orbit 3 duplicator in the following environment: 9 On a level and stable surface 9 In a well ventilated location 9 Temperature: 40-100° F (5-40° C) 9 Humidity: 20-80%RH (no dew formation) 9 In an area with enough space to access the reject area behind the Orbit 3 9 In an area with enough vertical space for loading the Input bin 9 In an area with enough space for the Output Bin Do not install your Orbit 3 duplicator in the following places: 8 Under direct sunlight (If the machine is exposed to sunlight, the light should be blocked by a curtain or blind.) 8 A dusty location 8 A place where there is a lot of vibration 8 Near open flame 8 A place where the temperature and humidity change drastically 8 Near a heating device such as a heater or furnace 8 A location where air from an air conditioner blows directly onto the unit 8 Near a container filled with water In winter during times of low humidity or in a location where static electricity is generated, use an anti-static-electricity mat or humidifier to prevent static electricity. Installing the Input Rods The input rods should be installed onto the Orbit 3 before attempting to load the Input bin. The short, wide rod is shipped in the correct location, in the far left Input rod position. The remaining 2 long input rods should be installed on the right. Power supply Use house current as the power source for the unit. Do not use an outlet near a motor driven appliance (i.e. air conditioner, copying machine). Use an outlet with stable power supply voltages. Do not overload an outlet. Do not use a service outlet from a PCs or other office machine. Do not touch the power cord with a wet hand. Be careful not to damage the power cord. Inspect the power cord periodically. In the event that the power cord is damaged, replace the power cord. 6 Orbit 3 MICROBOARDS TECHNOLOGY, LLC Orbit 3 Operation The Output Bin The Output bin should be installed prior to operating the Orbit 3. 1. Remove the 2 thumbscrews on the front of the Orbit 3. 2. Attach the Output Bin to the front of the Orbit 3 using the 2 thumbscrews. 3. Slide the Output Spindle into the Bin until the spindle locks against the vertical rods of the Output Bin. The feet of the spindle must be installed in the correct position, or the burned media may not be unloaded properly. Correct Incorrect Please note that the Output Bin has a capacity of 100 discs. Exceeding the capacity of the Output Bin can lead to media jamming in the Orbit 3 or damaged discs. Loading Discs The Orbit 3 will accept CD or DVD 120 mm (12 cm) discs only. Business card or 8 cm discs are not supported by this system. Figure 1 Figure 2 Load the first 5 or 6 discs flat, as seen in figure 1. Load the rest of the discs at an angle, against the wide input rod, as seen in figure 2. The Orbit 3 holds a maximum of 100 discs. DO NOT load more than 100 discs in the Orbit 3, as this may cause the discs to feed or unload incorrectly. Rejected Discs Rejected discs will be unloaded out the back of the Orbit 3. There should be enough unobstructed space behind the Orbit 3 to accommodate rejected discs. 7 Orbit 3 MICROBOARDS TECHNOLOGY, LLC Main Menu The Up and Down Arrow buttons (▲▼) allow you to navigate through the menu without selecting the current menu item. The NO button will move you to the next menu item. YES will select the current menu item. Copy? (DISC to DISC) YES You will not be asked to load the master if you have a Hard Drive Partition selected as the master source NO,▼ Copy & Compare? (DISC to DISC) YES NO,▼ Compare? (DISC to DISC) YES Quantity? 000 Analyzing Master Put MASTER in drive then press YES key COPY CD-DA 15:26 20% Quantity will only be asked if you have enabled this option in the System Setup menu NO,▼ Batch Copy? YES YES Batch Mode? Insert Master NO,▼ NO,▼ NO,▼ YES Trk Extraction? (DISCtoHDD1) NO,▼ Batch Copy & Compare? HDD(01)? FREE YES YES Analyzing Master INSERT MASTER DISC NO,▼ YES EXTRACT THE Trk? TRK 01/12 Press NO or ▼ to move to the next HDD partition. Press YES to save the extracted audio tracks to the displayed partition. FREE indicates an empty partition. System Setup? First Master and blank load from input hopper, then copy begins YES YES = execute the selected track YES,NO,▼,▲ NO,▼,▲ = skip track EXTRACT THE Trk? TRK 12/12 SETUP MENU (see pg 12) YES,NO,▼,▲ End EXTRACTION? NO,▼ NO, ▼ YES COPY TO HDD OK? YES REGIST CD-DA NO 15:26 NEXT MASTER YES 20% NO Copy? (HDD1toDISC) COPY MENU Copy The source of the master will depend on which mode you have chosen in the System Setup menu. Please see page 12 for more information. Disc-to-Disc Copy 1. Place the blank discs in the input hopper. If you are not using a selected quantity, load the number of copies you want to make. If you are selecting the quantity, please make sure you have at least as many discs as the quantity selected (see Setup Menu: Ask Quantity, page 13). 2. The display will read COPY? (DISC to DISC). 3. Press YES. 4. The reader drive tray will open and the display will read “Put MASTER in drive then press YES”. Load the master disc in the open reader drive tray and press the YES button. The reader drive will close. COPY 4.0GB 5. The first blank discs will be loaded. DVD 25% 6. The display will now show the progress of the Copy Job. 7. The Recorder(s) will eject successfully recorded discs when the job is complete and unload them onto the front output spindle. Rejected discs will be unloaded out the back of the duplicator. 8 Orbit 3 MICROBOARDS TECHNOLOGY, LLC Disc-to-HDD Copy The number of partitions available will depend on the capacity of the hard drive installed in the Orbit 3. If your master is not already on the hard drive, please follow these steps. 1. Press NO or the up or down arrows until the display reads SYSTEM SETUP. Press YES. 2. The display will read DISC TO DISC; press NO. The display will read DISC TO HDD. 3. Press YES, then use the up or down arrows to select the hard drive HDD (02)? partition to which you would like to register the master. In this FREE example, Hard Drive partition 02 is selected. 4. Use the down arrow until the display reads Exit and press YES. Press NO or the down arrow and the display will read COPY? DISC to HDD (02). 5. Next, follow the directions as listed in Disc-to-Disc Copy. The display will show which hard drive partition is the source of the master, as well as the type and size of the master on that partition. After reading the master to the selected hard drive partition, duplication will begin automatically. HDD-to-Disc Copy If your master is already on the hard drive, please follow these steps. If you have no masters on the hard drive, this option will not appear in the System Setup menu. 1. Press NO or the up or down arrows until the display reads SYSTEM SETUP. Press YES. 2. The display will read DISC TO DISC; press NO until the display reads HDD TO DISC. 3. Press YES, then use the up or down arrows to select the hard drive HDD (02)? partition from which you would like to burn. In this example, Hard DVD-VIDEO 4.0GB Drive partition 02 is selected. 4. Exit Use the down arrow until the display reads Exit and press YES. Press NO or the down arrow and the display will read COPY? HDD (02) to DISC. 5. Next, follow the directions as listed in Disc-to-Disc Copy. The display will show which hard drive partition is the source of the master, as well as the type and size of the master on that partition. The reader drive does not need to be loaded when burning from an existing HDD partition. Deleting Hard Drive (HDD) Partitions The Delete option will not appear in the System Setup menu if there is no information stored on any of the hard drive partitions. 1. Press NO or the up or down arrows until the display reads SYSTEM SETUP. Press YES. 2. Press NO or the up or down arrows until the display reads DELETE. Press the YES button. 3. The display will show the first partition containing an image: HDD (02)? DVD-VIDEO 4.0GB 4. You can now select which hard drive partition to erase. Pressing the NO or ▼ button will scroll you though the partition selections that contain information. 5. Press the YES button if you are sure you want to clear the HDD. The partition selected will be cleared. 6. Press ESC to exit this menu, or scroll through the filled partitions if you would like to delete another. 9 Orbit 3 MICROBOARDS TECHNOLOGY, LLC Copy & Compare Copy and Compare mode will run a comparison of the Master and the new copies prior to unloading the recorder drives. Like Copy mode, the source of the master will depend on the System Setup selections. The same steps are followed as with the standard Copy mode. Copies that do not pass the comparison will be rejected. Compare This function will run a comparison between the selected master and the copies. Pre-burned copies are loaded into the input hopper. The discs are not burned when running a Compare. Discs that do not pass the comparison will be rejected. Batch Mode Batch mode can be used if you have more than one master that needs to be duplicated. Load the first master into the input hopper, then the number of blank discs you require. Load the second master next, then place as many blanks as is necessary on top of the second master, and so on. In the example to the right, the gray discs are the masters and the white discs are the blanks. Master 1 will first duplicate onto the 2 blanks discs Master 2 Blanks loaded above it, and then Master 2 will be duplicated onto the 3 blank discs loaded above it. Master 1 Each loaded master must have at least one blank disc to which it will be copied. Loading 2 masters in a row will stop the Batch duplication. Since the input hopper and output spindle has a 100 disc capacity, you could make a single copy each of a maximum of 50 different masters in an unattended operation once the Batch duplication has begun. After the Batch copy begins, the master will be read to the hard drive. Duplication of the master will come from this hard drive image and not directly from the master disc. Please note that the Batch mode will save the master to a hidden HDD partition and will not overwrite any partition to which you have already saved a master. Batch Copy This mode will duplicate the masters onto the blanks, with both loaded into the input hopper as described above. Batch Copy & Compare Batch Copy & Compare will function as a Disc-to-Disc Copy & Compare by running a comparison of each burned disc to the master. Load the masters and blanks as described above. Track Extraction (for AUDIO CD ONLY) When extracting Audio, you can select the partition to which the extracted tracks will be saved. Any displayed HDD partition that is not specified as FREE on the display already contains information that will be overwritten if you select that partition. 1. At the COPY START? Menu, press the NO or ▼ button until the display reads: Trk EXTRACTION? (CDtoHDD) Press the YES button. 10 Orbit 3 MICROBOARDS TECHNOLOGY, LLC 2. You will now select the hard drive partition to which you would like to save the extracted tracks. The display will show each partition on the hard drive in turn and what is saved on that partition. If any master data is already on the selected partition, it will be overwritten during the track extraction. In the top example to the right, hard drive partition 01 already contains data. Press the NO or ▼ button to move to the next partition. HDD(01)? CD-DA 79:28 Partition 02 is empty, indicated by the display reading FREE. Press YES to select this partition, or the NO or ▼ button to move to the next partition. HDD(02)? Press YES to overwrite, NO to move to the next partition. FREE 3. Press YES when the correct hard drive partition has been selected. 4. Insert a master audio disc into the reader drive and press YES. The Orbit 3 will analyze the master disc. INSERT MASTER DISC 5. After completing the master disc analysis, the Orbit 3 displays Selected Track Number / Total Track Number. This master data has a total of 12 tracks. Press NO or ▼ to skip forward a track. EXTRACT THE Trk? Press YES to select the track you want to extract. TRK 01/12 6. If you skip forward all tracks, it asks if you want to end extraction for the master data. END EXTRACTION? Press YES to finish extraction and register selected tracks in HDD. Press NO or ▼ to add more tracks from this master data. 7. If you press YES in step 5, the Orbit 3 asks you to register the extracted tracks in HDD. Press YES to start registration. COPY TO HDD OK? 8. After registration completes, the Orbit 3 asks you if you want to extract more tracks from other master audio discs. NEXT MASTER Press YES to extract more tracks from other master audio discs. Press NO to complete extraction. 9. If you press NO, the Orbit 3 moves back to COPY menu so that you can copy the extracted tracks in HDD to blank CD-R media. COPY START (HDD to DISC) Error status in Track Extraction: In the following situation in TRACK EXTRACTION, the Orbit 3 shows an error status on the LCD. 1. If you try to extract a track which is not CD-DA, the track number does not display properly, showing “—“. Pressing the YES button will not add the track. 2. If the total time of extracted audio tracks is over 80 minutes or 99 tracks have already been selected, the Orbit 3 displays OVER. Pressing the YES button will not add the track. 11 EXTRACT THE Trk? --/12 EXTRACT THE Trk? 06/12 OVER Orbit 3 MICROBOARDS TECHNOLOGY, LLC Setup Menu SYSTEM SETUP Yes MASTER SELECT? DISC TO HD? DISC TO HD? HD to DISC? Yes Yes Yes DELETE? Yes Yes HD 1? HD 1? Yes HD 2? HD 2? Yes HD XX*? HD XX*? Yes Yes Yes Yes BURN DISC? Answer YES to burn discs or NO to set in Test mode. Pressing ▲or ▼will keep the current settings. USE BUZZER? Answer YES or NO to use or silence the buzzer. Pressing ▲or ▼will keep the current settings. CD WRITE? DVD WRITE? Yes Yes ASK QUANTITY? DRIVE STATUS? 48X CD? 40X CD? Yes Yes 16X DVD? 12X DVD? Yes Yes * The number of hard drive partitions available will depend on the capacity of the hard drive installed in the Orbit 3. 4X CD? Yes 1X DVD? Yes Answer YES to require a quantity or NO to run without setting a quantity. Pressing ▲or ▼will keep the current settings. Yes Writer 1: ON Writer 2: ON? Yes DRIVE INQUIRY? Both HD to DISC and DELETE options will only show those Hard Drive partitions that contain data. Yes Writer 1: ON Writer 2: OFF? Writer 1: OFF Writer 2: ON? Yes Yes HDD HDD The display will cycle through the MAKE, MODEL, and FIRMWARE of the selected drive until you press a button. DRIVE01 READER DRIVE03 RECORDER EXIT? HDD HDD F/W VERSION Yes ORBIT 3 VER 1.00 F/W UPDATE Yes INSERT PROGRAM DISC LOG? Yes OK TOTAL EXIT? Checking UPDATE? VER a.bc -> b.cd xxxxxxx xxxxxxx KEY Yes Updating No Yes Caption indicates button to press Display sequence DISC TO DISC? ▲ (Back), NO, or ▼ (Forward) YES or ESC to return to Menu 12 Complete Orbit 3 MICROBOARDS TECHNOLOGY, LLC Accessing the Setup Menu 1. At the COPY START? (DISC to DISC) menu, press the NO, ▼, or ▲ buttons until the display shows SYSTEM SETUP? SYSTEM SETUP? 2. 3. 4. 5. Press the YES button Pressing the NO or ▼ button will allow you to navigate through the menu. Pressing the YES button will allow you to view or change the configuration of the system. Please follow the flow chart on page 12 to navigate through the different menus. Here is a description of each System Setup menu item: Master Source The default is set to Disc-to-Disc. Press the YES button to change the source drive. • Disc To Disc – This option will use the reader drive during every duplication cycle. • Disc To HDD – This option will register the master in the reader drive to the selected hard drive partition from the Copy Start menu. After registering the master, the reader drive will eject and the duplication process will begin automatically. • HDD To Disc – This option will only be available after a master has been registered to the hard drive. Answering YES to this option will allow you to select as the master any partition containing a master image. Only those partitions containing a master image will be available for selection. • Delete – This option is used to delete the master images on the selected hard drive partitions. This option will only be available after a master has been registered to the hard drive. Press the YES button to delete the image on the displayed hard drive partition. Burn Disc Answering NO to this item will set the Orbit 3 in test mode. Duplication will be simulated, with the discs remaining blank. DVD +R media is not compatible with simulation and will be burned during a simulation attempt. Use Buzzer Allows you to turn the notification buzzer on or off. CD Write This menu item allows you to change the burn speed for CD media. Use the NO or ▼▲ buttons to move to the speed you want. Press YES to select the speed. DVD Write This menu item allows you to change the burn speed for DVD media. Ask Quantity With this option turned on, you will be asked to specify the number of discs you want to burn, with a limit of 100 discs. Use the ▼▲ buttons to change the number in the current column up or down. YES will move you one column to the right, NO will move you 1 column to the left. Press YES when in the right column to save the number of copies entered. The example to the right shows that 75 copies have been entered with the cursor currently in the right column (underlined). QUANTITY? 075 Leaving the value at 000 will allow for any number of discs to be burned as if the Ask Quantity option were not turned on. The Quantity option does not apply to Batch Mode duplication. 13 Orbit 3 MICROBOARDS TECHNOLOGY, LLC Drive Status This option allows you to disable a drive, if necessary. Any disabled drive will be bypassed during the duplication process; no discs will be loaded to or burned in a disabled drive. The recorder drives are numbered from the bottom up. There are 3 options: 1. Writer 1 ON / Writer 2 ON – this is the default setting, with both recorder drives active. 2. Writer 1 ON / Writer 2 OFF – this will disable the top recorder drive. 3. Writer 1 OFF / Writer 2 ON – this will disable the bottom recorder drive. Both recorder drives cannot be disabled at the same time. Drive Inquiry Displays an inquiry of each drive connected, showing drive model and firmware. F/W Version This selection shows the installed Orbit 3 firmware version and H/W information. F/W Update Used when updating the firmware of the Orbit 3 duplicator. Log This selection displays the number of successfully duplicated discs and the total number of duplicated discs attempted over the entire life of the duplicator. Exit Press YES to exit out of the System Setup menu. Specifications DVD Recorder Drives: Power Source: Weight: Dimensions: Power supply: Environment: DVD-+R/RW/DL CD-R/RW Recorder 115V/230V 50-60Hz auto-switching power supply 27.5 pounds 15.25” W x 10” D x 9.5” H (15.5” with Input Rods installed) 400W Temperature: 40°F - 105°F (5°C - 40°C) Humidity: 20% - 80% Supported Formats Recording Format Recording Capacity (nominal) Applicable Media CD DVD CD DVD CD DVD CD-ROM Mode 1, CD-ROM XA Mode 2 (form 1 & 2), Photo CD, CD-DA (Audio CD), CD-Extra, CD-R, CD-RW DVD-ROM, DVD-+R/RW/DL, DVD-VIDEO 700MB 4.7GB for General DVD 8.3GB for Dual Layer CD-R, CD-RW DVD-+R, DVD-+RW, DVD-+R DL Firmware Updates Occasionally it may be necessary to load updated firmware to the Orbit 3 duplicator. Only those firmware versions recommended and provided by Microboards Technical Support for this specific product should be installed. Installation of an incorrect firmware on any Microboards Technology product may result in any remaining warranty being voided. 14 Orbit 3 MICROBOARDS TECHNOLOGY, LLC Technical Support For technical questions or support issues, contact Microboards Technology technical support: United States PH: 952-556-1639 FAX: 952-556-1628 [email protected] www.microboards.com Europe PH: +44 (0) 845 230 7800 www.microboards.co.uk Japan PH: 03-3561-2266 www.microboards.co.jp Please have the Model and Serial Number of your Microboards Product available when contacting Technical Support. Any unauthorized modification to this equipment may result in the revocation by the FCC of the user’s authority to operate this equipment. NOTE: This equipment has been tested and found to comply with the limits for a Class B digital device, pursuant to Part 15 of the FCC Rules. These limits are designed to provide reasonable protection against harmful interference in a residential installation. This equipment generates, uses, and can radiate radio frequency energy and, if not installed and used in accordance with the instructions, may cause harmful interference to radio communications. However, there is no guarantee that interference will not occur in a particular installation. If this equipment does cause harmful interference to radio or television reception, which can be determined by turning the equipment off and on, the user is encouraged to try to correct the interference by one or more of the following measures: • • • • Reorient or relocate the receiving antenna Increase the separation between the equipment and antenna Connect the equipment into an outlet on a circuit different than that to which the receiver is connected Consult the dealer or an experienced radio/TV technician for help 15 Orbit 3 MICROBOARDS TECHNOLOGY, LLC 16


