1
ODBC Installation and Configuration Guide
Passport Business Solutions
PBS Data Dictionary™, AcuODBC® and
AcuODBC® Server
Installation and Configuration Guide
Passport Business Solutions™
Version 11.x
August 2007
ODBC Installation and Configuration Guide
Passport Business Solutions
PBS Data Dictionary, AcuODBC®
and AcuODBC® Server
Installation and Configuration Guide
for Passport Business Solutions
Passport Software, Inc.
3801 West Lake Avenue, Suite 301
Glenview, IL 60026
(847) 729-7900
http://www.pass-port.com/
PROPRIETARY RIGHTS NOTICE: No part of this material may be reproduced or transmitted in any form or by
any means, electronic, mechanical, or otherwise, including photocopying and recording or in connection with any
information storage or retrieval system, without the permission in writing from Passport Software, Inc.
Passport Software, Inc ("PSI") has taken reasonable preventive measures to ensure the accuracy of the information
contained in this manual. However, PSI makes no warranties or representations with respect to the information
contained herein; and shall not be liable for damages resulting from any errors or omissions herein or from the use
of the information contained in this manual.
Trademark Acknowledgements
Portions copyright © 1988 – 2007 Acucorp, Inc. All rights reserved. ACU COBOL and AcuODBC are trademarks of AcuCorp, Inc.
Passport Business Solutions and the PBS Manufacturing Series are trademarks of Passport Software, Inc.
The enclosed PBS Manufacturing Series documentation:
Copyright, Passport Software, Inc. ©2007. All rights reserved. The additional names of companies and products may be the intellectual property
of their respective owners.
ODBC Installation and Configuration Guide
Passport Business Solutions
Table of Contents
1. Introduction .............................................................................................................................................................2
Product Description ..................................................................................................................................................2
AcuODBC ............................................................................................................................................................2
PBS Data Dictionary XFD Files and Multi-Company Utility..............................................................................2
AcuODBC Requirements..........................................................................................................................................2
Supported Modules and Files....................................................................................................................................3
Financial and Distribution Files..........................................................................................................................3
Manufacturing Files.............................................................................................................................................8
2. Concepts and Terms..............................................................................................................................................12
3. AcuODBC and PBS Data Dictionary Installations.............................................................................................14
Installing AcuODBC...............................................................................................................................................14
Installing the PBS Data Dictionary for Windows (PBS Data Dictionary CD ROM) .............................................15
Installing the Data Dictionary for Multi-Companies ..............................................................................................16
4. AcuODBC Product Configuration .......................................................................................................................20
Setup Example ........................................................................................................................................................20
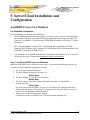
5. Server/Client Installation and Configuration .....................................................................................................27
AcuODBC® Server for Windows ..........................................................................................................................27
Pre-Installation Information ..............................................................................................................................27
Step 1: Install AcuODBC Server for Windows...................................................................................................27
Step 2: AcuAccess file installation .....................................................................................................................28
Step 3: Configure your DSN ..............................................................................................................................29
Step 4: Start the Service .....................................................................................................................................30
Step 5: Configure the Data Source ....................................................................................................................32
Step 6. Install and Configure the AcuODBC Client for Windows......................................................................33
Security Considerations .....................................................................................................................................33
AcuODBC for UNIX/Linux Server Installation and Configuration .......................................................................36
Pre-Installation Information ..............................................................................................................................36
Install the Acucorp ODBC Server software .......................................................................................................36
Install the PBS ODBC Scripts............................................................................................................................39
Configure the Acucorp ODBC Server Software.................................................................................................39
Install the PBS Data Dictionary XFD files for UNIX or Linux..........................................................................40
Create a DSN on the UNIX/Linux Server...........................................................................................................40
Start the ODBC Server.......................................................................................................................................42
Configure the AcuODBC Client for a Connection to the Server ............................................................................42
Test the AcuODBC Server/Client Installation........................................................................................................44
Where to go from here?......................................................................................................................................45
Appendix ....................................................................................................................................................................46
1. Data Security and Limiting Access to PBS Data ................................................................................................46
2. Support................................................................................................................................................................47
3. ODBC Performance ............................................................................................................................................48
Passport Software, Inc.
ODBC Installation and Configuration Guide
1
ODBC Installation and Configuration Guide
Passport Business Solutions
1. Introduction
The AcuCorp® extend® 6 AcuODBC® Data Interface for Windows® provides you with direct
access to Passport Business Solutions information stored in AcuCOBOL Vision and Relative
data files. The AcuODBC Data Interface for Windows presents your Passport Business Solutions
accounting information to you for use with ODBC-enabled applications using the Microsoft's
Open DataBase Connectivity standard.
Product Description
The single user version of the ODBC product for Passport Business Solutions consists of two
components; the Acucorp extend 6 AcuODBC Data Interface for Windows and the PBS Data
Dictionary XFD files. Chapters 3 and 4 cover this installation and configuration.
NOTE: Each of these products is installed separately.
AcuODBC
Acucorp's extend 6 AcuODBC Data Interface for Windows is the conduit between your Passport
Business Solutions data and ODBC-enabled applications such as Microsoft Office applications.
AcuODBC gives ODBC-enabled applications access to your Passport Business Solutions data
files. The AcuODBC driver is used to create the data source that you will use in real-time to
access your Passport Business Solutions data.
PBS Data Dictionary XFD Files and Multi-Company Utility
Passport Software, Inc. has created PBS data dictionary XFD files that are used in conjunction
with AcuODBC to complete access to your Passport Business Solutions data. These dictionary
files are specific to the format of your Passport Business Solutions data files and allow
AcuODBC to properly organize the data within these files for ODBC-enabled applications.
The multi-company utility allows you to create a data dictionary for any additional companies
that you have in Passport Business Solutions. This is installed as a standard part of the PBS
product.
AcuODBC Requirements
In order to interface your Passport Business Solutions data with a Windows application through
AcuODBC, you must be able to provide the following environment for Acucorp extend® 6
AcuODBC Data Interface for Windows.
Passport Software, Inc.
ODBC Installation and Configuration Guide
2
ODBC Installation and Configuration Guide
Passport Business Solutions
Microsoft Windows 98 SE, Windows NT, Windows 2000, Windows XP, Windows Vista for
the single user or client installation.
For a server installation the Windows operating system required is either Windows 2000 or
Windows 2003. A server installation is only needed if you are installing AcuODBC Server.
A server installation will provide a more robust access to PBS data, especially for multi-file
access.
The operating systems for Linux should be GLIBC 2.2 or 2.3. For UNIX the operating
systems supported are either Version 5.06, 5.07 or 6.0.
ODBC Data Source Administrator Version 3.5 or later. (This is part of your Windows
operating system. If you have an earlier version installed, the Administrator will be updated
when you install AcuODBC.)
ODBC Driver Manager Version 2.0 or later. (Provided by most ODBC-enabled applications.
If you have an earlier version installed, the Administrator will be updated when you install
AcuODBC.)
Supported Modules and Files
The PBS Data Dictionary provides access for the Passport Business Solutions modules listed
below. We have provided access to the most relevant files within Passport Business Solutions.
Each Passport Business Solutions file can be identified as a table within an ODBC-enabled
application by its filename preceded by an application identifier such as AP for Accounts
Payable or GL for General Ledger. For example, the Passport Business Solutions Accounts
Receivable Customer File will be listed as a table called "ar_cusfil".
Financial and Distribution Files
The following is a list of the PBS Financial and Distribution Series modules, table identifiers for
the module, and the files you can access via the PBS Data Dictionary files. Additional
information about most of these files can be found in the Passport Business Solutions user
manual for each module in the appendix titled Initializing Data Files and in the AcuODBC Field
Definition Guide for Passport Business Solutions files.
Accounts Payable (AP)
File name
Accounts Payable Account File
A/P Check File
Distribution to G/L File
Open Item File
Vendor Contacts File
Passport Software, Inc.
ODBC Installation and Configuration Guide
Dictionary file name
ap_apacct00.xfd
ap_apchkf00.xfd
ap_apdist00.xfd
ap_apopen00.xfd
ap_pcofil00.xfd
3
ODBC Installation and Configuration Guide
Passport Business Solutions
Purchasing Address File
Memo Transaction File
Vendor File
Vendor History File
Void Check File
ap_puradr00.xfd
ap_trxmem00.xfd
ap_venfil00.xfd
ap_venhis00.xfd
ap_voidck00.xfd
Account Receivable (AR)
File name
Accounts Receivable Account File
A/R Codes File
Distribution to G/L File
Open Item File
Commission Due File
Customer Contacts File
Cash Application File
Customer History File
Customer History File
Customer File
Deliver-to (Ship-to) File
Goods and Services File
Invoice History Auxiliary file
Invoice History Header File
Invoice History Line File
Invoice History Serial Transaction File
Cash History File
Returned Check Charge File
Returned Check Transaction File
Returned Check Application File
Returned Check Application Job File
Invoice Auxiliary File
Invoice Header File
Invoice Line Item File
Miscellaneous Charges Distribution File
Miscellaneous Charges file
Sales Rep File
Prepaid Payments File
Taxes – Open File
Dictionary file name
ar_aracct00.xfd
ar_arcods00.xfd
ar_ardist00.xfd
ar_aropen00.xfd
ar_comfil00.xfd
ar_confil00.xfd
ar_cshapl00.xfd
ar_cshtrx00.xfd
ar_cuhfil00.xfd
ar_cusfil00.xfd
ar_dlvfil00.xfd
ar_gdssvc00.xfd
ar_ihsaux00.xfd
ar_ihshdr00.xfd
ar_ihslin00.xfd
ar_ihsser00.xfd
ar_kshhst00.xfd
ar_nsfchg00.xfd
ar_nsftrx00.xfd
ar_nsfapl00.xfd
ar_nsfjob00.xfd
ar_piauxf00.xfd
ar_pihdrf00.xfd
ar_pilinf00.xfd
ar_sldtrx00.xfd
ar_slstrx00.xfd
ar_slmfil00.xfd
ar_ppctrx00.xfd
ar_txopen00.xfd
Check Reconciliation (CR)
File name
Checking Account File
Checkbook File
Distribution to G/L File
Dictionary file name
cr_ckacct00.xfd
cr_ckbook00.xfd
cr_crdist00.xfd
Passport Software, Inc.
ODBC Installation and Configuration Guide
4
ODBC Installation and Configuration Guide
Passport Business Solutions
General Ledger (GL)
File name
Budget File
Chart of Accounts File
Comparative File
Codes File
Distributions Transaction File
Cost Center Group File
G/L Layout File
General Journal Transaction File
General Journal Header File
General Ledger Transaction File
Dictionary file name
gl_budget00.xfd
gl_chartf00.xfd
gl_cmprtv00.xfd
gl_glcods00.xfd
gl_gnjtrx00.xfd
gl_grpfil00.xfd
gl_layout00.xfd
gl_mltrxd00.xfd
gl_mltrxh00.xfd
gl_trxfil00.xfd
Inventory Control (IC)
File name
Alternate Item File
Item Product Category File
Warranty Coverage File
I/C Codes File
Distribution to G/L File
Warranty Codes File
Serial File
Inventory Account File
Inventory Transaction Job File
Item File
Item Numeric Sequence File
Inventory History File
Kit File
LIFO/FIFO Layer File
Price File
Serial History File
Status File
Item Status Code File
Item Product Sub-category File
Units of Measure File
Warehouse File
Work Order Cost File
Work Order File
Work Order Header File
Work Order Line File
Dictionary file name
ic_altitm00.xfd
ic_categf00.xfd
ic_covfil00.xfd
ic_iccods00.xfd
ic_icdist00.xfd
ic_icrefm00.xfd
ic_ictrkf00.xfd
ic_invact00.xfd
ic_invtrx00.xfd
ic_itmfil00.xfd
ic_itmnuf00.xfd
ic_itxhis00.xfd
ic_kitfil00.xfd
ic_layfil00.xfd
ic_prcfil00.xfd
ic_serhis00.xfd
ic_stafil00.xfd
ic_statfi00.xfd
ic_subcat00.xfd
ic_unitfi00.xfd
ic_whsfil00.xfd
ic_wkocst00.xfd
ic_wkofil00.xfd
ic_wkohdr00.xfd
ic_wkolin00.xfd
Job Cost (JC)
File name
Cost Category File
Cost Transaction File
Dictionary file name
jc_catfil00.xfd
jc_csttrx00.xfd
Passport Software, Inc.
ODBC Installation and Configuration Guide
5
ODBC Installation and Configuration Guide
Passport Business Solutions
Additional Job Description File
Job Detail File
Detail Holding File
Distribution to G/L File
Job Master File
jc_descfi00.xfd
jc_dtlfil00.xfd
jc_hldfil00.xfd
jc_jcdist00.xfd
jc_mstfil00.xfd
Order Entry (OE)
File name
Order Line Item File
Order Header File
Order Transaction File
Recurring Order Header File
Recurring Order Line File
Dictionary file name
oe_linitm00.xfd
oe_ordhdr00.xfd
oe_oetkxf00.xfd
oe_oerhdr00.xfd
oe_oerlin00.xfd
Purchase Order (PO)
File name
P/O Auxiliary File
Distribution to G/L File
P/O Header File
P/O Line File
Receivings History File
Vendor/Item File
Dictionary file name
po_auxfil00.xfd
po_podist00.xfd
po_pohdrf00.xfd
po_polinf00.xfd
po_rcvhis00.xfd
po_venitm00.xfd
Payroll (PR)
File name
Change Employee File
Deduction and Earning Codes File
Employee Direct Deposit Accounts File
Extended Information File
Employee File
Payroll History File
Adjustments File
Multi-City / Multi-State File
Distribution to G/L File
Quarter to Date History File
City/State History File
Tax Codes File
Time Worked Distributions File
Time Worked File
Void Check File
Year to Date History File
Dictionary file name
pr_cngemp00.xfd
pr_dedcod00.xfd
pr_empdda00.xfd
pr_empext00.xfd
pr_empfil00.xfd
pr_khisfl00.xfd
pr_mantrx00.xfd
pr_mcsfil00.xfd
pr_prdist00.xfd
pr_qtdhis00.xfd
pr_scdhis00.xfd
pr_taxcod00.xfd
pr_timdis00.xfd
pr_timtrx00.xfd
pr_vdmtrx00.xfd
pr_ytdhis00.xfd
Passport Software, Inc.
ODBC Installation and Configuration Guide
6
ODBC Installation and Configuration Guide
Passport Business Solutions
PBS Company System Files (RW)
File name
Valid G/L Account File
Cash Account File
Dictionary file name
rw_acctfi00.xfd
rw_cshact00.xfd
Point of Sale (PS)
File name
Alternate Item File
Credit Card File
Contract Pricing File
Customer Restrictions File
Drawer File
Layaway/Line Comments File
Layaway Header File
Layaway Line File
Layaway Payments File
Layaway Tracking File
Override File
Transaction/Line Comments File
Transaction Header File
Transaction Line File
Transaction Payment File
Sales Summary File
Services File
Pay out File
Payment Codes File
Control File
POS Ship-to File
Serial Transaction File
Posted Payments File
Register File
Comments History File
Header History File
Line History File
Payment History File
Serial History File
Special Sale Prices
Store File
User File
Dictionary file name
ps_aliitm00.xfd
ps_ccrdfi00.xfd
ps_cntrpc00.xfd
ps_crdhld00.xfd
ps_drwfil00.xfd
ps_lwycmt00.xfd
ps_lwyhdr00.xfd
ps_lwylin00.xfd
ps_lwypay00.xfd
ps_lwytrk00.xfd
ps_ovrrid00.xfd
ps_poscmt00.xfd
ps_poshdr00.xfd
ps_poslin00.xfd
ps_pospay00.xfd
ps_possum00.xfd
ps_possvc00.xfd
ps_potfil00.xfd
ps_pscods00.xfd
ps_psctlf00.xfd
ps_psship00.xfd
ps_pstkxf00.xfd
ps_pstpay00.xfd
ps_regifi00.xfd
ps_shscmt00.xfd
ps_shshdr00.xfd
ps_shslin00.xfd
ps_shspay00.xfd
ps_shsser00.xfd
ps_spcsal00.xfd
ps_storfi00.xfd
ps_userfi00.xfd
* common to all companies
PBS Common* Files (RW)
File name
Multi-company File
Passport Software, Inc.
ODBC Installation and Configuration Guide
Dictionary file name
rw_mltcmp.xfd
7
ODBC Installation and Configuration Guide
Passport Business Solutions
Manufacturing Files
The following is a data dictionary list for the PBS Manufacturing Series files.
Customer Order Processing
Customer Tracking File
Customer Control File
Backlog, Orders and Sales
Daily Orders Tracking File
EDI Allowances
EDI File
EDI Order Line
EDI Order Header
EDI Trading Partner
EDI File
Terms
Default Comments
Sales Order Header
Sales Order Line Comments
Sales Order Line
Lot/Serial Control File
Standard Certifications
Customer Type
Price Discount
Sales History
EDI Standard Carrier Codes
Ship-to Addresses
Sales Accounts
Sales Rep Commission
Special Prices
co_bostrk00.xfd
co_coctlf00.xfd
co_copbos00.xfd
co_copord00.xfd
co_cpoalw00.xfd
co_cpodpn00.xfd
co_cpodtl00.xfd
co_cpohdr00.xfd
co_cponam00.xfd
co_cponte00.xfd
co_cpotrm00.xfd
co_csocom00.xfd
co_csohdr00.xfd
co_csolcm00.xfd
co_csolin00.xfd
co_csolsn00.xfd
co_ctffil00.xfd
co_custyp00.xfd
co_prcdsc00.xfd
co_salhis00.xfd
co_scacod00.xfd
co_shipto00.xfd
co_slsact00.xfd
co_slscom00.xfd
co_spcprc00.xfd
Capacity Planning
Control File
Detail Plan Detail
Detail Plan Periods
Detail Plan Summary
Rough Plan Detail
Rough Plan Periods
Rough Plan Summary
Rough Planned Orders
Resource Structures
cp_cpctlf00.xfd
cp_dpldet00.xfd
cp_dplnpd00.xfd
cp_dplsum00.xfd
cp_rpldet00.xfd
cp_rplnpd00.xfd
cp_rplsum00.xfd
cp_rpofil00.xfd
cp_rsfil00.xfd
Inventory Management
Branch Warehouse Items
General Ledger Control File
im_bwhitm00.xfd
im_glictl00.xfd
Passport Software, Inc.
ODBC Installation and Configuration Guide
8
ODBC Installation and Configuration Guide
Inventory Cost Categories
Control File
Inventory History
Item Comments
Item Master File
Item Type Code
Lot/Serial Number History
Material Usage Variance
On hand Detail
Physical Count Records
Purchase Order Line Items
Period Quantity Sold History
Product Category
Shop Order Comments
Shop Orders
Shop Order Material Records
Warehouse Code
Passport Business Solutions
im_iacwhs00.xfd
im_icscat00.xfd
im_imctlf00.xfd
im_invhis00.xfd
im_itmcom00.xfd
im_itmfil00.xfd
im_itmtyp00.xfd
im_lsnhis00.xfd
im_muvhis00.xfd
im_ohidet00.xfd
im_phycnt00.xfd
im_politm00.xfd
im_pqshis00.xfd
im_prdcat00.xfd
im_socomt00.xfd
im_sofil00.xfd
im_somatl00.xfd
im_whscod00.xfd
Manufacturing Job Costing
Costing Barcode Work File
Employee Labor
Mfg. Employee File
Estimate Details
Estimate Header
Estimate Lines
Job Billings
Job Master
Labor Batch Import File
Labor Import Control File
Labor Exception Code
Control File
Misc. Cost Codes
Alternate Operations
Shop Order Labor
Shop Order Misc. Costs
Shop Order Misc. Costs Detail
mj_empbar00.xfd
mj_emplab00.xfd
mj_empsbs.xfd
mj_estdet00.xfd
mj_esthdr00.xfd
mj_estlin00.xfd
mj_jobbil00.xfd
mj_jobmst00.xfd
mj_labimp00.xfd
mj_lbactl00.xfd
mj_lbxcod00.xfd
mj_mjctlf00.xfd
mj_mscccd00.xfd
mj_soalto00.xfd
mj_solab00.xfd
mj_somsc00.xfd
mj_sopmcd00.xfd
Master Scheduling & MRP
Branch Warehouse Factors
Forecast Periods
Firm Planned Orders
Planning Group Items
MRP Header
MRP Orders
MRP Pegging
ms_bwhmrp00.xfd
ms_fcstpd00.xfd
ms_fpofil00.xfd
ms_grpitm00.xfd
ms_mrphdr00.xfd
ms_mrpord00.xfd
ms_mrppeg00.xfd
Passport Software, Inc.
ODBC Installation and Configuration Guide
9
ODBC Installation and Configuration Guide
MRP Requirements
MRP Run File
Control File
Planning Group
Schedule Periods
Passport Business Solutions
ms_mrprqt00.xfd
ms_mrprun00.xfd
ms_msctlf00.xfd
ms_plngrp00.xfd
ms_schdpd00.xfd
Product Definition
Engineering References
Labor Grade Rates
Control File
Product Structures
Routing Instructions
Routing Operations
Standard Operations Instructions
Standard Operations
Work Centers
pd_engref00.xfd
pd_labgrd00.xfd
pd_pdctlf00.xfd
pd_psfil00.xfd
pd_rtgins00.xfd
pd_rtgopn00.xfd
pd_stdins00.xfd
pd_stdopn00.xfd
pd_wrkctr00.xfd
Product Purchasing
Blanket PO Line Comments
Blanket PO Header
Blanket PO Lines
Item Sources
Non Vendor Sources
Planner Buyer Code
Purchasing Addresses
P.O. Change Log
Comments Codes File
Control File
Invoice Distribution File
Invoice Transaction File
PO Line Comments
PO Header
Purchase Price Variance Detail
Purchase Price Summary
Reject Reason Code
Receiving History
Rejected Material
Vendor Performance
Shipments In Transit
Vendor Warehouse
pp_bolcom00.xfd
pp_bpohdr00.xfd
pp_bpolin00.xfd
pp_itmsrc00.xfd
pp_nonsrc00.xfd
pp_plnbuy00.xfd
pp_poaddr00.xfd
pp_pocngl00.xfd
pp_pocomt00.xfd
pp_poctlf00.xfd
pp_poidst00.xfd
pp_poitrx00.xfd
pp_polcom00.xfd
pp_pphdrf00.xfd
pp_ppvdet00.xfd
pp_ppvsum00.xfd
pp_prrcod00.xfd
pp_rcvhis00.xfd
pp_rjtmtl00.xfd
pp_venpfm00.xfd
pp_vensit00.xfd
pp_venwhs00.xfd
Passport Software, Inc.
ODBC Installation and Configuration Guide
10
ODBC Installation and Configuration Guide
Passport Business Solutions
Shop Floor Control
Item Operation History
Operation Schedule
Schedule Run File
Control File
Operation/Material Assignment
Time Phased Capacities
Work Center Flow
sf_iophis00.xfd
sf_opnscd00.xfd
sf_scdrun00.xfd
sf_sfctlf00.xfd
sf_sopmtl00.xfd
sf_timcap00.xfd
sf_wctflo00.xfd
Passport Software, Inc.
ODBC Installation and Configuration Guide
11
ODBC Installation and Configuration Guide
Passport Business Solutions
2. Concepts and Terms
The following terms are found in this guide and are described as they are used in this guide. For
general accounting definitions consult the glossary in your Passport Business Solutions System
Manager User Manual. Other definitions can be found in Chapter 1 of each Passport Business
Solutions module user manual.
Column
This term is used when referring to relational databases. A column can be considered the same
as a field as defined above.
Data File
A Passport Business Solutions data file contains one or more related records. For example, a
group of employee records might comprise an employee file.
Data Source Name (DSN)
A data source name is the name you assign to a group of AcuCOBOL Vision or Relative files
that you want to access via ODBC.
Database
A database, loosely speaking, refers to all available data, whether contained in one file or many
files.
In Passport Business Solutions, the database consists of multiple files related to a specific
module. These files are standardly stored in a folder by module. For example, Accounts
Receivable files are standardly stored in a folder named AR00. Accounts Payable files are
standardly stored in a folder named AP00.
In relational database terminology, a database consists of one or more files that contain one or
more tables.
Field
A data field consists of one or more characters that represent a single piece of information. For
example, a first name, a last name, and an amount are all data fields. The content, or value, of
the field "first name" might be "John" or "Debbie" or any other "first name" consistent with the
rules governing the content of the "first name" field. The content, or value, of the field "amount"
might be "129" or "5.98" or any other "amount" consistent with the rules governing the contents
of the field "amount".
Fields may carry any name, but the content type specifies the rules governing the content of a
field. Passport Business Solutions fields available to an ODBC-enabled application are
classified as type "alphanumeric," "integer," "decimal," or "date" fields.
Alphanumeric fields may contain letters of the alphabet, numbers, special symbols ($, *, :, #),
Passport Software, Inc.
ODBC Installation and Configuration Guide
12
ODBC Installation and Configuration Guide
Passport Business Solutions
or any combination of these three kinds of characters. Some alphanumeric fields can only have
uppercase characters and some can have both upper and lower case.
Integer fields may contain only whole numbers. They may not contain letters, special symbols,
or fractional numbers.
Decimal fields may contain whole numbers and fractional numbers expressed in decimal
notation.
Date fields contain only dates.
Open DataBase Connectivity (ODBC)
This is a data access standard developed by Microsoft. This standard allows data to be
exchanged between database systems that use incompatible data access methods. This is the
standard used by AcuODBC to make Passport Business Solutions data available to ODBCenabled applications such as Excel®, Access® or Crystal Reports®.
Record
Records are comprised of one or more related fields. For example, an employee record might
contain a "first name" and a "last name" field. It might also contain a "social security number"
field and a "marital status" field.
Row
This term is used when referring to relational databases. A row can be considered the same as a
record as defined above.
Table
This term is used when referring to relational databases. A table can be considered the same as a
file as defined above.
XFD
This is an abbreviation for external file definition and it is an extension for a file type used with
AcuODBC. These files contain a definition for one PBS file. An example of one of these files is
ap_venfil00.xfd. The ‘ap’ represents Accounts Payable. The ‘venfil’ represents Vendor file. The
‘00’ means it is for company ‘00’.
All the XFD files make up the data dictionary.
Passport Software, Inc.
ODBC Installation and Configuration Guide
13
ODBC Installation and Configuration Guide
Passport Business Solutions
3. AcuODBC and PBS Data Dictionary
Installations
Installing AcuODBC
AcuCorp’s extend 6® AcuODBC product is the driver program for ODBC access to Passport
Business Solutions AcuCorp vision data files. AcuODBC acts as a gateway to your Passport
Business Solutions data using Microsoft's Open Database Connectivity (ODBC) standard.
You will need the Product Codes and Keys in order to complete the installation of the
AcuODBC. This should be on a piece of paper titled Important Licensing Information included
with the AcuODBC shipment.
If you are also installing the AcuODBC Server for Windows follow the installation instructions
in the Server/Client Installation and Configuration section in this document. For AcuODBC
Server for Linux or UNIX you will need a third CD ROM, which is labeled Version 6.2.0.1 for
UNIX platforms. The installation instructions are in the UNIX/Linux AcuODBC Server
Installation section of this document.
If you have AcuODBC Server you may install either the client or server first. However you may
not know what to enter for the client configuration until the server is fully installed.
The following instructions will work for an AcuODBC Version 6.2 Windows single user or
client installation:
0. Insert the ACUCOBOL-GT CD ROM labeled Version 6.2.0.1 for Microsoft Windows 98
SE, 2000, 2003, NT, and XP into your computer's CD ROM drive.
1. The Setup for Version 6.2 screen will display. Click on Next.
2. The Version 6.2 installation screen will display. Click on Next.
3. The Choose Destination Location screen will display. Either use the default location or
Browse to another location and click Next.
4. The Select Products screen will display. Click on the box next to AcuODBC (R). There
are 2 columns of selections and it is in the middle of the left side. Then click on Next.
5. The Installation Settings window will display. Click on Next. The setup will copy the
AcuODBC (R) components into the directory location.
Passport Software, Inc.
ODBC Installation and Configuration Guide
14
ODBC Installation and Configuration Guide
Passport Business Solutions
6. The Update Redistributable ODBC files screen displays. Select Yes.
7. The Activator Wizard 6.2 will display. Enter the Product Code and then enter the
Product Key without spaces. Double check the code and key to verify that it is entered
properly and click on Finish. A message will display that indicates that the installation is
complete.
8. A Complete screen will display. You may be asked to restart the computer now or later. If
you do, you will need to restart the computer for the AcuODBC to function properly.
9. You are then asked if you want to install the documentation set. Select No for this. The
documentation is available on the CD ROM and you can access it there. In most cases
you do not need it.
10. To verify that the AcuODBC is installed, on your computer workstation, select Start >
Settings > Control panel.
On Windows 2000, Windows XP Pro and Windows Vista select Administrative Tools >
Data sources (ODBC). Select the Drivers tab. The AcuODBC Driver Version
6.02.01.xxx should be installed.
On Windows 98 SE, look for the ODBC Data Sources under Control Panel and then
select at the Drivers tab to view the driver version 6.02.00.xxxx.
Installing the PBS Data Dictionary for Windows (PBS Data
Dictionary CD ROM)
The PBS Data Dictionary installation provides an XFD file (External File Definition) for each
data file you will have access to using AcuODBC with Passport Business Solutions. XFD is the
extension for each file. All of these XFD files will be installed in the "odbc/odbc00" directory
(folder) under your PBS top-level directory (folder).
There are two Windows installations provided on the CD ROM. One is for the PBS financial
and distribution files. The other is for the manufacturing files.
The installation of the PBS data dictionary for UNIX and Linux is covered in the “AcuODBC for
UNIX/Linux Server Installation and Configuration” section later in this document.
Do the following steps for the installation:
0. You must be on the computer where PBS is installed.
1. Insert your PBS Data Dictionary CD ROM into the CD ROM Drive.
2. Using Windows Explorer, browse to the CD ROM and double click on the pbs_odbc.exe
file. For the manufacturing data dictionary double click on mfg_odbc.exe.
Passport Software, Inc.
ODBC Installation and Configuration Guide
15
ODBC Installation and Configuration Guide
Passport Business Solutions
3. You will be prompted for a path. The path is defaulted to C:\Program files\PSI\PBS. In
order for the multi-company ODBC utility to work properly, you must install the PBS
data dictionary in the top-level Passport Business Solutions directory. This is the standard
location for data dictionary XFD files.
Installing the Data Dictionary for Multi-Companies
The Data Dictionary Multi-Company Utility
If you are only using company 00 you can skip this step.
You must be a Passport Business Solutions administrative user to run this utility.
The Data Dictionary Multi-Company Utility will copy the contents of ODBC00 into a new
directory, rename and alter the data dictionary files. The directory name will depend on the
company number. If it is company ‘01’, then the directory will be ODBC01.
You must first create the companies in Passport Business Solutions before you can run the
Multi-Company Utility. You must be set up with standard data paths in Passport Business
Solutions. When you add a company in Passport Business Solutions you can run the MultiCompany Utility again.
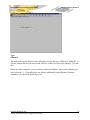
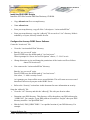
The following example creates a PBS data dictionary for company TH. To create a data
dictionary XFD file set, open a command prompt and do the following.
Go to the top-level PBS directory and do the following:
Type
adodbc
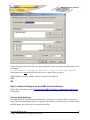
Enter an administrative user ID and, if needed, a password. You will see the following screen:
Passport Software, Inc.
ODBC Installation and Configuration Guide
16
ODBC Installation and Configuration Guide
Passport Business Solutions
If you want to create a data dictionary for each of the companies installed with Passport Business
Solutions, select the <Enter> key. The utility will close when it is finished.
In this case you are only going to create a data dictionary XFD file set for Company ‘TH’.
Type
N
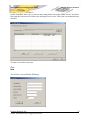
You will see the following screen.
Passport Software, Inc.
ODBC Installation and Configuration Guide
17
ODBC Installation and Configuration Guide
Passport Business Solutions
Type
<Enter>
The utility will copy the data dictionary XFD files from the directory ODBC00 to ODBCTH. It
will also rename and alter the data in each XFD file so that it will access the company ‘TH’ data
files.
If there are other companies, you can continue with the installation. Once you are finished, you
can click on the ‘x’. If the utility does not find any additional Passport Business Solutions
companies you will see the following screen:
Passport Software, Inc.
ODBC Installation and Configuration Guide
18
ODBC Installation and Configuration Guide
Passport Business Solutions
Press the <Esc> key to close the program or click on the ‘x’.
This completes the installation of the data dictionary XFD files for multiple PBS companies.
After the multi-company utility is run, for data security purposes you may want to move specific
XFD files to another location on the server or local workstation before you configure the ODBC.
For more information read the appendix Data Security and Limiting Access to PBS Data.
Whenever possible we do recommend that you keep the XFD files in the standard location.
Passport Software, Inc.
ODBC Installation and Configuration Guide
19
ODBC Installation and Configuration Guide
Passport Business Solutions
4. AcuODBC Product Configuration
After you have installed the extend 6 AcuODBC Data Interface for Windows and the PBS Data
Dictionary XFD files, you must configure a Data Source Name (DSN) that will connect your
PBS Data Dictionary XFD files with your actual Passport Business Solutions data files. This is
done using the Windows ODBC Data Source Administrator.
If the PBS Data Dictionary XFD files have been installed correctly, the files reside in the folder
"/ODBC/odbc00" in your Passport Business Solutions top-level folder. For example, if your
Passport Business Solutions software is installed on the C: drive in a folder named Passport
Business Solutions, your data dictionary files will be installed in C:/PBS/odbc/odbc00. If you
ran the multi-company utility other directories will be there as well.
Each installation is different and there is not one set of instructions that can tell you exactly how
to set up ODBC access on your system.
Setup Example
The following example sets up ODBC access to Passport Business Solutions Accounts Payable,
Accounts Receivable, and General Ledger data installed in C:\PBS. To setup your AcuODBC
DSN
In Windows 2000, Windows XP or Windows Vista
Select:
S t a r t > S e t t i n g s > C o n t r o l P a n e l > A d m i n i s t r a t i ve t o o l s > D a t a S o u r c e s ( O D B C )
Or in Windows 98 Select:
Start > Settings > Control Panel > ODBC Data Sources
Passport Software, Inc.
ODBC Installation and Configuration Guide
20
ODBC Installation and Configuration Guide
Passport Business Solutions
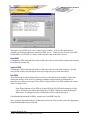
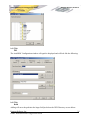
This opens your ODBC Data Source Administrator window. You use this application to
configure your Passport Business Solutions ODBC access. You may elect to create User DSN,
System DSN, or File DSN as it relates to the first three tabs in the above screen.
User DSN
Configuring a DSN under this tab creates a data source that is local to the computer and can only
be used by the current user.
System DSN
Configuring a DSN under this tab creates a data source that is local to the computer. It is not
user specific and any user having the correct privileges may access the data source.
File DSN
These DSNs can be shared among all users who have the same drivers installed. These data
sources do not have to be local to a particular computer on the network or dedicated to a
particular user. When you created a User DSN or System DSN a File DSN with the same name
will be created as well.
Note: When deleting a User DSN or System DSN the File DSN still remains as a Data
source. Therefore you should also delete the File DSN. Otherwise when choosing the
Data source, it still appears to be available but will error when selecting it.
For additional information on DSNs, consult your AcuODBC help file.
Once you have determined the type of data source that you want to create, select the appropriate
tab and add this data source to the list.
Passport Software, Inc.
ODBC Installation and Configuration Guide
21
ODBC Installation and Configuration Guide
Passport Business Solutions
Left Click on
Add
You will be prompted to select a driver that you want to use for a data source. Select the
AcuODBC driver. This is the driver that will be used to access Passport Business Solutions data.
Double Left Click on AcuODBC
Click on Finish
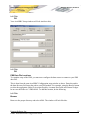
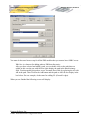
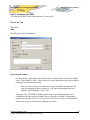
The AcuODBC Configuration dialog will be displayed. In the Data Source Name field type in
the name you want to give to this data source. This name may be anything your want, but should
be representative of the data you intend to access. If you are using only one company in PBS,
you could type ‘PBS’ in this field. If you are using multiple companies you might type in
something like "PBS-00" or "Accounting Data – Company XYZ" in this field
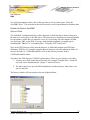
Next, in the XFD Directory field, enter the directory or folder that contains your PBS Data
Dictionary XFD files. For example, using the Browse button to select the appropriate folder. In
our case the folder is C:\PBS\odbc\odbc00. Click on the directory location, such as
C:\PBS\odbc\odbc00 folder.
The path to the XFD directory CANNOT contain spaces. There are two options to solve this:
1. You may use a DOS contraction of the name. For example "Program files", which will
not work, can be substituted with "progra~1" which will work.
2. The other option is to move the PBS installation to another directory where there is no
space in the path.
The browse window will look similar to the one displayed below.
Passport Software, Inc.
ODBC Installation and Configuration Guide
22
ODBC Installation and Configuration Guide
Passport Business Solutions
Left Click
OK
Your AcuODBC Setup windows will look similar to this:
Left Click
OK
PBS Data File Locations
To complete setup of the DNS, you must now configure the data source to connect to your PBS
data files.
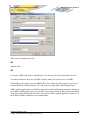
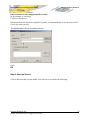
This is done from the same AcuODBC Configuration setup window as above. Enter the path in
the data directory field enter the path to your PBS module. For example, using the Browse button
to select the appropriate folder for Accounts Payable, Accounts Receivable and General Ledger.
In our case the folder is C:\PBS\APOO. To add this location, do the following.
Left Click
Browse
Browse to the proper directory and select AP00. The window will look like this:
Passport Software, Inc.
ODBC Installation and Configuration Guide
23
ODBC Installation and Configuration Guide
Passport Business Solutions
Left Click
OK
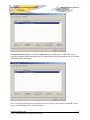
The AcuODBC Configuration window will again be displayed and will look like the following:
Left Click
Add
Adding will move the path into the larger field just below the XFD Directory as seen below:
Passport Software, Inc.
ODBC Installation and Configuration Guide
24
ODBC Installation and Configuration Guide
Passport Business Solutions
You must do the same browse step for all the PBS modules that you want to have ODBC access.
TIP: Here is a shortcut for adding paths to PBS data directories.
After you have selected and added a path, you can double click on the path that was
added, in this case the one with AP00 to again display the path in the data dictionary
field. You then modify this path to access Accounts Receivable by replacing the AP with
AR in the path. Then Click on the Add button and the path to AR will also display in the
box below. Per our example, do the same for adding GL (General Ledger).
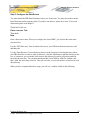
When you are finished the following screen will display:
Passport Software, Inc.
ODBC Installation and Configuration Guide
25
ODBC Installation and Configuration Guide
Passport Business Solutions
When you are finished, then click
OK
and then click
OK
to close the ODBC Data Source Administrator. You can now close the Control Panel as well.
You must do the same steps for each PBS Company where you require access via ODBC.
This completes the setup of your AcuODBC DNS. You will now be able to gain access to your
Passport Business Solutions data for A/P, A/R, and G/L using ODBC-enabled applications.
ODBC-enabled applications use different setup routines and configuration parameters. Setting up
your ODBC-enabled applications is beyond the scope of this document. Refer to the user manual
or on-line help for information about how your specific ODBC-enabled application makes use of
the Windows ODBC standard to access external data.
Passport Software, Inc.
ODBC Installation and Configuration Guide
26
ODBC Installation and Configuration Guide
Passport Business Solutions
5. Server/Client Installation and
Configuration
AcuODBC® Server for Windows
Pre-Installation Information
Before beginning, you must have the following.
• The CD ROM labeled PBS Data Dictionary. You must use the Version 6.2 Data dictionary
because date fields have a particular formatting requirement when being accessed by the
Version 6.2 AcuODBC. If you do not have a PBS Data Dictionary for Version 6.2, contact
PSI support.
•
The “AcuCorp extend 6 Version 6.2.0.1 CD ROM for Microsoft Windows 98, ME,
Windows 2000, Windows 2003, Windows NT, and Windows XP for the installation of the
AcuODBC Client and AcuODBC Server.
•
You will need a set of product code and keys for both the client and the server. These can
be found on the piece of paper titled Important Licensing Information.
Step 1: Install AcuODBC Server for Windows
Install the AcuODBC Server software on your server. You can use the following steps or you
can follow the documentation supplied by Acucorp.
1. The AcuCorp CD should auto-start.
2. The first Window is Setup for Version 6.2.0
Select Next
3. The next Window is Version 6.2.0 installation.
Select Next
4. The next window asks you to Choose Destination Location. Use the default
location provided.
Select Next
If you have previously installed a Version 6.2 AcuCOBOL-GT product to this same
default directory, then it will ask you if you want to over-write. It is OK to over-write,
because you are installing a different product.
5. Then you are on the Select Products window.
Click the box next to AcuODBC Server. Do not selection anything else!
Passport Software, Inc.
ODBC Installation and Configuration Guide
27
ODBC Installation and Configuration Guide
Passport Business Solutions
Select Next
6. Next the Installation Settings window displays. It warns you that you need a license
(product code and keys) in order to install a working product.
Select Yes
7. You will come to the Activator Wizard Screen that asks you to enter the Product Code
and Keys. Enter them now, but do not use any spaces. Triple-check your data entry after
entering the Code and Key.
Select Finish.
8. Navigate, using Windows explore, to the CD ROM drive.
9. You may have to manually install the etc directory from the AcuCorp CD ROM.
To do this open Windows Explore® and navigate the CD ROM. Copy the etc directory to
the C:\Acucorp\Acucbl620\AcuGT directory. Remove the Read-only status on all the files
in the etc directory.
Step 2: AcuAccess file installation
The AcuAccess file is needed for entering an ODBC Server security configuration, DSN
configuration and starting the ODBC service.
There is a zip file on the PBS Data Dictionary CD ROM called. AcuAccess-etc.zip.
Following the install of AcuODBC Server for Windows, please unzip this file into the
top-level PBS directory. It will create a directory called etc with several files in the
directory.
The zip file components include the following:
o AcuAccess.dat
o AcuAccess.vix
o odbcs.cfg
You will need to setup the path to the AcuAccess file in the odbcs.cfg file. Based on the
directions above, you just installed under the top-level PBS directory. You must enter the
path to the etc directory. The default location provided is:
C:\PBS\etc\AcuAccess
The setup of the AcuAccess file is explained in the next section.
Perform steps 3-5 on your server using the ODBC Server Control Panel.
To run this, select the following:
Start > Programs > Acucorp 6.2.0 > AcuODBC > AcuODBC Server > AcuODBC Server
Control Panel
Passport Software, Inc.
ODBC Installation and Configuration Guide
28
ODBC Installation and Configuration Guide
Passport Business Solutions
Step 3: Configure your DSN
To configure the DSN, do the following steps. First left click
Services Tab
Then click
New
The following screen will display:
Enter the port number.
For Port, choose a port number that will be used by client machines to access the ODBC
server. This example is 20222. Check with your system administrator for port availability
and usage on your particular system.
Here is a note for the system administrator. The AcuODBC daemon can work
with privileged port numbers (from 0 to 1023) and with non-privileged port
numbers (1024 and higher, up to 32767).
Setup note: The ACUODBCS_PORT number must be specified in both the server
configuration file and on the AcuODBC Server tab on the AcuODBC Configuration
property sheet on the client. The values of both variables must match. If you change the
value in one location, you must also change it in the other.
Passport Software, Inc.
ODBC Installation and Configuration Guide
29
ODBC Installation and Configuration Guide
Passport Business Solutions
Enter or browse to the configuration file location.
In our example we are using:
C:\PBS\etc\AcuAccess
Entering an Error file location is optional. If you do, you must manually create an error text file.
Give it any name you like.
The Services tab will look something like this:
Click
OK
Step 4: Start the Service
Click on the entry that you just added. You will seen a screen like the following:
Passport Software, Inc.
ODBC Installation and Configuration Guide
30
ODBC Installation and Configuration Guide
Passport Business Solutions
You must start the service. Click on the Start button to start the service. When the service
starts the red button on the left turns green, the Start button is greyed out and the screen will look
something like the following;
Note: If for any reason you have to reboot your server, please verify that the AcuODBC Server
service is still running. If not, restart the service.
Passport Software, Inc.
ODBC Installation and Configuration Guide
31
ODBC Installation and Configuration Guide
Passport Business Solutions
Step 5: Configure the Data Source
You must install the PBS Data Dictionary before you do this step. You may also need to run the
Data Dictionary multi-company utility. If you have not done so, please do so now. If you need
instructions please read chapter 3.
Then left click on
Data sources Tab
Then click
New
Enter a data source name. When you configure the client ODBC, you will use the same name
you enter here.
Use the “XFD Directory” browse button to browse to your XFD data dictionary directory and
add that path.
Use the “Data Directory” browse button to browse to the location of each data directory where
your PBS data files are stored. After each browse, click the Add button to add the directory to the
list. As a shortcut, you can double click items in the directory list and it will put the path info
back into the entry box. You can then edit the module, from AR00 to AP00 for example, and
then “Add” this new entry to the list. This will save time, as you will not have to browse for each
data directory.
When you have completed the above steps, you will see a window similar to the following:
Passport Software, Inc.
ODBC Installation and Configuration Guide
32
ODBC Installation and Configuration Guide
Passport Business Solutions
If there are spaces in the XFD directory path, add double quotes on either end of the path. Here is
an example.
“C:\Program files\Passport Business Solutions\PBS\odbc\odbc00”
Double quotes are not needed for the Data directory path if there are spaces.
When finished, close this window and save what you have entered
Click
OK
Step 6. Install and Configure the AcuODBC Client for Windows
Skip to the section below called Configure the ODBC Client for a Connection to the Server
for the steps.
Security Considerations
Be aware that in the installation instructions above, the server was setup to allow access to all
users. Thus if someone knows how to set up the client DSN for your data sources, and they know
the DSN name, they will be able to access the data files.
Passport Software, Inc.
ODBC Installation and Configuration Guide
33
ODBC Installation and Configuration Guide
Passport Business Solutions
On the AcuODBC Server Access tab you may setup limit access to the ODBC Server. You must
first open the AcuAccess file before you can setup Server access. This is the screen that lists user
accesses:
To enter a access for a new user
Click
New
You will see a screen like the following:
Passport Software, Inc.
ODBC Installation and Configuration Guide
34
ODBC Installation and Configuration Guide
Passport Business Solutions
Please refer to the AcuCorp ODBC Server documentation for instructions on setting up and
using this feature.
Passport Software, Inc.
ODBC Installation and Configuration Guide
35
ODBC Installation and Configuration Guide
Passport Business Solutions
AcuODBC for UNIX/Linux Server Installation and
Configuration
The person who installs and configures the server should have a good grasp of UNIX/Linux
system administration.
Pre-Installation Information
Before beginning, you must have the following:
•
The CD ROM labeled PBS Data Dictionary. You must use the Version 6.2 PBS Data
Dictionary because date fields have a particular formatting requirement when being
accessed by the Version 6.2 AcuODBC. If you do not have a PBS Data Dictionary for
Version 6.2, contact PSI support.
•
The “AcuCorp extend® 6 CD ROM labeled Version 6.2.0.1 for Microsoft® Windows® 98,
ME, 2000, 2003, NT, and XP for the installation of the AcuODBC Client.
•
The Acucorp extend® 6 AcuODBC Server Version 6.2 product CD. This is labeled Version
6.2.0.1 for UNIX Platforms.
•
You will need a set of product code and keys for both the client and the server. These are on
a piece of paper labeled Important Licensing Information.
Also note the following:
•
Insure that the versions of your AcuODBC CD ROM and your AcuODBC Server CD ROM
versions match.
•
Verify that you have a consistent network connection between your Windows clients and
your Unix/Linux server.
Install the Acucorp ODBC Server software
Install the AcuODBC Server software using the Acucorp Product CD for Unix/Linux.
You must have the ODBC Server product code and keys to complete this installation and this can
be found on the piece of paper titled Important Licensing Information. The product code and
keys for AcuODBC is different than the code and keys for AcuODBC Server.
1. Mount the installation CD ROM in the CD ROM drive using the appropriate mount
command for your operating system. On some systems the CD ROM may auto-mount.
2.
Change to the mount directory and type:
./install
Passport Software, Inc.
ODBC Installation and Configuration Guide
36
ODBC Installation and Configuration Guide
Passport Business Solutions
3. A platform list displayed. It will look something like the following:
1 AIX 4.1
2 AIX 4.3.2 (32-bit) PowerPC
3 AIX 5.2L (32-bit) PowerPC
4 AIX 5.2L (64-bit) PowerPC
5 HP/UX 10.20
6 HP/UX 11.0 (32-bit)
7 HP/UX 11.0 (64-bit)
8 HP/UX 11.22 (32-bit) IA-64
9 HP/UX 11.22 (64-bit) IA-64
10 HP/UX 11i (32-bit)
11 HP/UX 11i (64-bit)
12 Linux (glibc 2.0) Intel x86
13 Linux (glibc 2.1) Intel x86
14 Linux (glibc 2.2) IA-64
15 Linux (glibc 2.2) Intel x86
16 Linux (glibc 2.2) S/390
17 Linux (glibc 2.2) iSeries
Press 'Enter' for the second half of the list.
Your selection? >
If you do not see your operating system listed above, press Enter to view the second half of
the list.
Your selection? >
Please enter the number corresponding to your platform:
18
19
20
21
22
23
24
25
26
27
28
29
30
31
32
33
Linux (glibc 2.3) Intel x86
SCO UNIX OpenServer 5.0.0 ELF
SCO UNIX OpenServer 5.0.4 ELF
SCO UNIX OpenServer 5.0.5 ELF
SCO UNIX OpenServer 5.0.6 ELF
SCO UNIX OpenServer 5.0.7 ELF ODS
SCO UnixWare 7.0 ELF
SCO UnixWare 7.1 ELF
Solaris 7.0 (SPARC) 32-bit
Solaris 7.0 (SPARC) 64-bit
Solaris 8.0 (Intel x86)
Solaris 8.0 (SPARC) 32-bit
Solaris 8.0 (SPARC) 64-bit
Solaris 9.0 (SPARC) 32-bit
Solaris 9.0 (SPARC) 64-bit
UNIX SVR4v3 (MP-RAS 3.x)
Press 'Enter' for the first half of the list.
The platforms that are supported in PBS are bolded. Enter the number corresponding to
your operating system platform.
4.
When prompted, specify an installation directory. Press Enter to accept the default
directory (/usr/acucobol6x), or type the name of an alternate directory at the prompt.
If you have previously installed Acucorp products do not select the directory where your
products are currently stored or you may overwrite the previous version. You will not
overwrite files and programs if you have Thin client or PBS installed, because everything
for these products are installed under to top-level PBS directory.
Passport Software, Inc.
ODBC Installation and Configuration Guide
37
ODBC Installation and Configuration Guide
Passport Business Solutions
If the directory you select does not already exist, the installation program creates a new
directory for you.
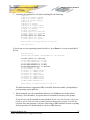
5. Next the following will display:
Now we will determine which products to install. Answer "Y" for each
product you wish to install. You will be asked later for the license
code and key for each product you selected. If you do not have these
codes and keys the product will not execute, so you should only install
products for which you have a license code and key.
Available products are:
ACUCOBOL-GT Development System
ACUCOBOL-GT Runtime
AcuServer
AcuConnect
Acu4GL for Informix
Acu4GL for Oracle
Acu4GL for Sybase
Acu4GL for DB2
AcuSQL Precompiler
AcuSQL Runtime
AcuODBC Server
You are asked a series of “Do you want to install…” questions. Answer Y to only the
question “Do you want to install AcuODBC Server” and select N to not install the other
options. The AcuODBC Server question is last.
The installer then checks for product dependencies and automatically extracts all the files
required to run the product selected. The following message will display:
Installation to /usr/acucobol62 has completed successfully.
6. When prompted, enter Y to confirm that the port and operating system are compatible.
7. Then enter the product code and key for the AcuODBC Server product you’ve installed.
The screen displays something like this:
Activating license for AcuODBC Server:
Enter the product code []:
Enter the product key []:
Enter the code and keys without any spaces. Verify the product code and key after entry.
Press Enter after each prompt.
8. Then a message like the following will display:
Select the Enter key
Creating ./bin/acuodbcs.alc... Done...
If you Enter N, you will have to run the Activator executable later to install the license
files.
Passport Software, Inc.
ODBC Installation and Configuration Guide
38
ODBC Installation and Configuration Guide
Passport Business Solutions
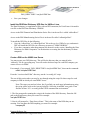
Install the PBS ODBC Scripts
Install the XFD files from the PBS Data Dictionary CD ROM.
•
Copy odbcunix.tar file to a temp directory.
•
Untar odbcunix.tar.
•
From your temp directory, copy all of the *.sh scripts to “/usr/acucobol62/bin”.
•
From your temp directory, copy the “odbcscfg” file to root level “/etc” directory. Make it
readable by everyone, but only writable for root.
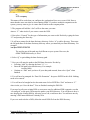
Configure the Acucorp ODBC Server Software
Create the “AcuAccess” file.
•
Go to the “/usr/acucobol62/bin” directory.
•
Run the “acu_access.sh” script.
Press ENTER to use the default path of “/etc/AcuAccess”.
When it prompts for “Server Access File Options” choose, “5 – Exit” to exit.
•
Change directories to /etc and change the permissions of the AcuAccess file as follows:
chmod 700 AcuAccess*
•
Now return to the “/usr/acucobol62/bin” directory.
Run the “acu_access.sh” script.
Press ENTER to use the default path of “/etc/AcuAccess”.
Now select, “1 - Add a security record”.
As it prompts you, choose all the access record defaults. This will create an access record
that allows full access by anyone to the ODBC Server.
•
Refer to the “Security” section later in this document for more information on security.
Setup the “odbcscfg” file
• Go to the “/etc” directory and edit the “odbcscfg” file with your favorite editor.
•
Determine your DSN directory. This directory will be the path to your PBS software plus
“/ODBC/dsn”. For example, if your PBS software is located at “/usr/pbs” then your DSN
directory would be “/usr/pbs/ODBC/dsn”.
•
Edit the field, “DSN_DIRECTORY=” to equal the location of your DSN directory. For
example:
Passport Software, Inc.
ODBC Installation and Configuration Guide
39
ODBC Installation and Configuration Guide
Passport Business Solutions
DSN_DIRECTORY=/usr/pbs/ODBC/dsn
•
Save your changes.
Install the PBS Data Dictionary XFD files for UNIX or Linux
The Data Dictionary (a compilation of files with an XFD extension) for Unix/Linux is located in
a tar file on the PBS Data Dictionary CDROM.
Access to the PBS Financial and Distribution Series files is in the tar file is called “odbcxfd.tar”.
Access to the PBS Manufacturing Series files is in the tar file called “odbcmfgxfd.tar”.
To install the XFD files do the following:
• Copy the “odbcxfd.tar” or “odbcmfgxfd.tar” file to the top-level PBS directory and untar it.
This will install the XFD files in a directory structure of “ODBC/ODBC00”.
• If you have companies other than company 00, then refer to the section “Installing the Data
Dictionary for Multi-Companies” for instructions on creating the data dictionary for these
companies.
Create a DSN on the UNIX/Linux Server
You must create your DSN directory. This will be the directory that you entered in the
“odbcscfg” file in a preceding step. You will need to do these steps for each PBS company you
want to access via ODBC.
For example, if you entered “DSN_DIRECTORY=/usr/pbs/ODBC/dsn”, then run the command:
mkdir /usr/pbs/ODBC/dsn
From the “/usr/acucobol62/bin” directory, run the “srvconfig.sh” script.
The rest of this section takes you step by step through using the script. Do these steps for each
company in PBS in which you want ODBC access.
Note: The steps you need are below, but if you find you need more information on using
the script, please refer to the Acucorp help file. Select the AcuODBC user guide. Then
find the section “9.5.1 srvconfig.sh the UNIX command-line environment”
1. The first prompt after running the script is the location of the DSN directory. Enter the full
path to the dsn directory that you created. For example:
/usr/pbs/ODBC/dsn
2. Next it will prompt for, “Data Source Name.” This is the name of the DSN that you are
creating. You can name the DSN anything you want. For example:
company00
Passport Software, Inc.
ODBC Installation and Configuration Guide
40
ODBC Installation and Configuration Guide
Passport Business Solutions
or
XYZ-company
This name will be used when you configure the workstation Data source name field. Enter a
name that the users can relate to when running ODBC. If you have multiple companies on the
system, you may want to give it a name that is similar to the company name.
3. The program will add the “.dsn” suffix to the name you enter.
Answer “Y” when it asks if you want to create the DSN.
4. Next select “General” for the type of information you want to edit. Do this by typing the letter
“G” and pressing the Enter key.
5. It will now prompt for the data dictionary directory. Select “A” to add a directory. Then enter
the full path name to the data dictionary directory where you installed your Data Dictionary. For
example:
/usr/pbs/ODBC/ODBC00
The usr/pbs part of the path may be different on your system. However, the
ODBC/ODBC00 directory is fixed.
6. Select “Q” to quit adding the data dictionary path.
7. Now you will enter the paths to the PBS data directories. Do this by:
• Selecting “Add” by entering the letter “A” • • •
• Enter the full path to the data directory. For example:
/usr/pbs/AR00
• Continue to “Add” until you have all your data paths entered, then select “Quit” when
finished.
8. You will now be prompted for “Data File Extension”. Just press ENTER at this field. Nothing
needs to be entered.
9. You will now be brought back to the main menu. Select ENTER to “Exit” and answer “Y”
when it asks you “Save the data?” You are finished creating the DSN file.
If you need to edit your existing DSN or create new ones for additional PBS companies, run the
“srvconfig.sh” script again. Then enter the path to your DSN directory. You will then see how it
now displays the existing DSN(s), allowing you to edit, or add new ones. You add new ones by
entering a DSN name that doesn’t already exist.
If you ever need to delete a DSN, delete the actual DSN file from the DSN directory.
Passport Software, Inc.
ODBC Installation and Configuration Guide
41
ODBC Installation and Configuration Guide
Passport Business Solutions
Start the ODBC Server
You start the ODBC server by running the “acu_start.sh” script from the “/usr/acucobol62/bin”
directory.
When you start the ODBC Server, it will report:
Opening '/dev/console' for error output
If you need to, you can move the ODBC Server start command to your Unix/Linux startup
procedure. The startup command is:
/usr/acucobol62/bin/acuodbcs -start -c /etc/odbcscfg -n 20222
You can also specify your own port number if you don’t want to use the default of 20222.
To stop the ODBC Server, use the “acu_stop.sh” script.
Any time you make a change to the AcuAccess settings, the DSN’s, or the data dictionary, you
must stop and restart the ODBC Server for the changes to take effect.
We have also supplied a trace file script that will start the ODBC Server in trace mode. This can
be used when trying to debug problems. The script name is, “acu_start_trace.sh”. This script will
run ODBC Server on port 20222 and place the trace information into
“/usr/acucobol62/tracefile.txt”.
Another tool for debugging is the “netstat” command. You can use it after you start the server to
insure that it is listening on the port. The command to use for port 20222 would be:
netstat –a | grep 20222
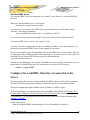
Configure the AcuODBC Client for a Connection to the
Server
This step assumes that you have already installed the ODBC software on the client workstation
machine. If this has not been done, install the client following the Acucorp documentation.
This client configuration applies whether server is Windows, UNIX or Linux.
To do this installation, you must have the AcuCorp extend 6 CD ROM labeled Version 6.2.0.1
for Microsoft ® Windows® 98 SE, ME, 2000, 2003, NT, and XP and you must have a Product
Codes and Keys. The installation instructions are found in the section of this document called
Installing AcuODBC.
On the client system:
Run the Windows ODBC configuration tool. This will probably be located at:
Passport Software, Inc.
ODBC Installation and Configuration Guide
42
ODBC Installation and Configuration Guide
Passport Business Solutions
Start | Settings | Control Panel | Data Sources ODBC
Or
Start | Settings | Control Panel | Administrative Tools | Data Sources (ODBC)
On either the “System DSN” or “User DSN” tab, click Add.
Select “AcuODBC Driver” from the list of driver names and click Finish.
On the General tab, enter the “Data Source Name” (DSN). This must match the DSN name as
was entered on the Windows or UNIX/Linux AcuODBC server. For example, if you entered
the DSN name on the server as “XYZ-Company” then enter the Data Source Name as “XYZCompany”. Here is an example of this screen:
For Unix/Linux, you only enter the DSN name that you entered when creating the DSN. Keep it
the same case and do not include the “.dsn” extension.
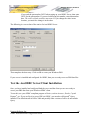
Now click on the “AcuODBC Server” tab and enter the following:
Select “Remote SQL Processing”. This will utilize the power of the ODBC server by having the
ODBC server perform all the SQL processing.
Select “IP Address” and enter the IP address of your ODBC server.
Passport Software, Inc.
ODBC Installation and Configuration Guide
43
ODBC Installation and Configuration Guide
Passport Business Solutions
If you used the port number 20222 when setting up your ODBC Server, then enter
20222 for the port number. If you used a different port number, enter that number
here. The values of both variables must match. If you change the value in one
location, you must also change it in the other.
The following is a screen shot of the entries for AcuODBC Server:
That completes the data entry. Click on OK to create your Windows DSN.
If your server is installed and configured for ODBC, then you are ready to access PBS data files.
Test the AcuODBC Server/Client Installation
Once you have installed and configured both the server and the client you are now ready to
access your PBS data from your Windows ODBC client.
To test this, use your ODBC compliant program of choice, such as Access™, Excel®, Crystal
Reports®, etc. If you use Excel to access PBS via ODBC, you must have Microsoft® Query
installed. The default install of Office 2000 and possibly other versions of office do not include
Query.
Passport Software, Inc.
ODBC Installation and Configuration Guide
44
ODBC Installation and Configuration Guide
Passport Business Solutions
Where to go from here?
These instructions only cover the basics of getting the ODBC Server up and running.
For more information on using ODBC in your external applications, like Access and Excel, refer
to the documentation provided with the application, study one of the many documents available
for the application or get some training from a local provider.
Passport Software, Inc.
ODBC Installation and Configuration Guide
45
ODBC Installation and Configuration Guide
Passport Business Solutions
Appendix
1. Data Security and Limiting Access to PBS Data
There may be situations where you do not want all your ODBC users to have access to sensitive
data such as Payroll or General Ledger information. The normal install of the data dictionary
files puts them in PBS/ODBC/ODBC00 directory. If you run the multi-company ODBC utility
they could be in other ODBCxx directories as well.
There are several ways to fix this. Here are a few suggestions.
•
Remove the data dictionaries that access the sensitive data from the ODBC00 (or other
companies) directory. For example, if you do not want users to access General Ledger
(gl_xxxxxx00.xfd) or Payroll (pr_xxxxxx00.xfd) files, then remove the data dictionaries
from the ODBC00 directory. If you have a user that needs access to these files, you
could install the data dictionaries on the user’s local drive. When you configure their
workstation use the local data dictionaries and not the data dictionaries on the server.
However, this would not be a good solution if the user’s drive is shared because the data
dictionaries could then be configured and accessed by another user.
•
Separate the data dictionaries that access sensitive data and put them in a different server
directory that is protected. For example, you could create a directory called ODBC00PR
and place the Payroll data dictionary files in this directory. The system administrator
would have to put restrictions on the ODBC00PR directory so that it would only be
accessed by the eligible users.
Also, only allow fully qualified users access to the PBS Data Dictionary installation CD ROM.
The multi-company ODBC utility only works when the data dictionary files are in the
/ODBC/ODBC00 directory under top-level PBS. If you need to run the utility and you have
moved some or all of xx_xxxxxx00.xfd files to another directory or drive location, you will have
to move them back to run the utility.
Passport Software, Inc.
ODBC Installation and Configuration Guide
46
ODBC Installation and Configuration Guide
Passport Business Solutions
2. Support
If help is needed to resolve any issues, please contact your PBS supplier or our support
department at: (800) 969-7900 ext. 124 or email [email protected].
In addition, if you discover anything that will help improve this document, please let us know.
Passport Software, Inc.
3801 West Lake Avenue
Suite 301
Glenview, IL 60026
800-969-7900
http://www.pass-port.com/
Passport Software, Inc.
ODBC Installation and Configuration Guide
47
ODBC Installation and Configuration Guide
Passport Business Solutions
3. ODBC Performance
ODBC performance can vary per system and data files being accessed. There are several ways
you may address performance and speed:
1. Optimize your queries in Access by using Import instead of Link Tables, or use maketable queries to create static copies of large data tables. This will allow you to work with
a localized data set while you are running queries, but the disadvantage here is that you
will have to re-import your data every time you wish to work with it.
2. Improve your network performance by upgrading your network hardware, such as
switched hubs, gigabit Ethernet, and faster workstation computers. This option provides a
limited increase in bandwidth, which should help performance and speed.
3. Install the AcuODBC Server software on your Passport Business Solutions server. With
AcuODBC server, all queries and transactions take place on the server processor instead
of the local machine, which improves performance significantly. This third option will
provide the most performance gain, allowing your server to handle all ODBC requests on
the server side while still accessing your data when on your workstation computer.
Passport Software, Inc.
ODBC Installation and Configuration Guide
48