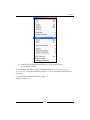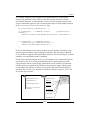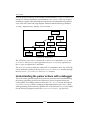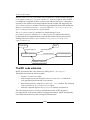
1
Getting Started with LLVM
Core Libraries
Get to grips with LLVM essentials and use the core
libraries to build advanced tools
Bruno Cardoso Lopes
Rafael Auler
BIRMINGHAM - MUMBAI
Getting Started with LLVM Core Libraries
Copyright © 2014 Packt Publishing
All rights reserved. No part of this book may be reproduced, stored in a retrieval
system, or transmitted in any form or by any means, without the prior written
permission of the publisher, except in the case of brief quotations embedded in
critical articles or reviews.
Every effort has been made in the preparation of this book to ensure the accuracy
of the information presented. However, the information contained in this book is
sold without warranty, either express or implied. Neither the authors, nor Packt
Publishing, and its dealers and distributors will be held liable for any damages
caused or alleged to be caused directly or indirectly by this book.
Packt Publishing has endeavored to provide trademark information about all of the
companies and products mentioned in this book by the appropriate use of capitals.
However, Packt Publishing cannot guarantee the accuracy of this information.
First published: August 2014
Production reference: 1200814
Published by Packt Publishing Ltd.
Livery Place
35 Livery Street
Birmingham B3 2PB, UK.
ISBN 978-1-78216-692-4
www.packtpub.com
Cover image by Aniket Sawant ([email protected])
Credits
Authors
Bruno Cardoso Lopes
Rafael Auler
Reviewers
Project Coordinator
Priyanka Goel
Proofreaders
Simran Bhogal
Eli Bendersky
Mario Cecere
Logan Chien
Jonathan Todd
Jia Liu
John Szakmeister
Commissioning Editor
Mary Jasmine Nadar
Acquisition Editor
Kevin Colaco
Indexers
Hemangini Bari
Mariammal Chettiyar
Tejal Soni
Graphics
Ronak Dhruv
Abhinash Sahu
Content Development Editor
Arun Nadar
Production Coordinators
Saiprasad Kadam
Technical Editors
Pramod Kumavat
Pratik More
Conidon Miranda
Cover Work
Manu Joseph
Copy Editors
Dipti Kapadia
Insiya Morbiwala
Aditya Nair
Alfida Paiva
Stuti Srivastava
Saiprasad Kadam
About the Authors
Bruno Cardoso Lopes received a PhD in Computer Science from University
of Campinas, Brazil. He's been an LLVM contributor since 2007 and implemented
the MIPS backend from scratch, which he has been maintaining for several years.
Among his other contributions, he has written the x86 AVX support and improved
the ARM assembler. His research interests include code compression techniques
and reduced bit width ISAs. In the past, he has also developed drivers for Linux
and FreeBSD operating systems.
Rafael Auler is a PhD candidate at University of Campinas, Brazil. He holds a
Master's degree in Computer Science and a Bachelor's degree in Computer Engineering
from the same university. For his Master's work, he wrote a proof-of-concept tool
that automatically generates LLVM backends based on architecture description files.
Currently, his PhD research topics include dynamic binary translation, Just-in-Time
compilers, and computer architecture. Rafael was also a recipient of the Microsoft
Research 2013 Graduate Research Fellowship Award.
About the Reviewers
Eli Bendersky has been a professional programmer for 15 years, with extensive
experience in systems programming, including compilers, linkers, and debuggers.
He's been a core contributor to the LLVM project since early 2012.
Logan Chien received his Master's degree in Computer Science from National
Taiwan University. His research interests include compiler design, compiler
optimization, and virtual machines. He is a software developer and has been
working on several open source projects, including LLVM, Android, and so on.
He has written several patches to fix the ARM zero-cost exception handling
mechanism and enhanced the LLVM ARM integrated assembler. He was also a
Software Engineer Intern at Google in 2012. At Google, he integrated the LLVM
toolchain with the Android NDK.
Jia Liu started GNU/Linux-related development in his college days and has been
engaged in open-source-related development jobs after graduation. He is now
responsible for all software-related work at China-DSP.
He is interested in compiler technology and has been working on it for years. In his
spare time, he also works on a few open source projects such as LLVM, QEMU, and
GCC/Binutils.
He is employed by a Chinese processor vendor, Glarun Technology—you can
just call it China-DSP. China-DSP is a high-performance DSP vendor; the core
business of the company is processor design, system software, and an embedded
parallel processing platform that provides independent knowledge of electricity,
telecommunications, automotive, manufacturing equipment, instrumentation,
and consumer electronics.
I want to thank my father and my mother; they raised me. Thanks to
my girlfriend; in fact, I think she is my life's mentor. Thanks to my
colleagues; we happily work with one another.
John Szakmeister holds a Master of Science in Electrical Engineering
from Johns Hopkins University and is a co-founder of Intelesys Corporation
(www.intelesyscorp.com). John has been writing software professionally for more
than 15 years and enjoys working on compilers, operating systems, sophisticated
algorithms, and anything embedded. He's an avid supporter of Open Source and
contributes to many projects in his free time. When he is not hacking, John works
toward his black belt in Ninjutsu and enjoys reading technical books.
I would like to thank my wife, Ann, and our two boys, Matthew
and Andrew, for being so patient and understanding while I was
reviewing this book.
www.PacktPub.com
Support files, eBooks, discount offers,
and more
You might want to visit www.PacktPub.com for support files and downloads related to
your book.
Did you know that Packt offers eBook versions of every book published, with PDF and ePub
files available? You can upgrade to the eBook version at www.PacktPub.com and as a print
book customer, you are entitled to a discount on the eBook copy. Get in touch with us at
[email protected] for more details.
At www.PacktPub.com, you can also read a collection of free technical articles, sign up for a
range of free newsletters, and receive exclusive discounts and offers on Packt books and eBooks.
TM
http://PacktLib.PacktPub.com
Do you need instant solutions to your IT questions? PacktLib is Packt's online digital book
library. Here, you can access, read, and search across Packt's entire library of books.
Why subscribe?
•
Fully searchable across every book published by Packt
•
Copy and paste, print, and bookmark content
•
On demand and accessible via web browser
Free access for Packt account holders
If you have an account with Packt at www.PacktPub.com, you can use this to access PacktLib
today and view nine entirely free books. Simply use your login credentials for immediate access.
Table of Contents
Preface
Chapter 1: Build and Install LLVM
1
9
Understanding LLVM versions
Obtaining prebuilt packages
Obtaining the official prebuilt binaries
Using package managers
10
10
11
12
Building from sources
System requirements
Obtaining sources
13
13
14
Staying updated with snapshot packages
SVN
Git
Building and installing LLVM
Using the autotools-generated configure script
Using CMake and Ninja
Using other Unix approaches
Windows and Microsoft Visual Studio
Mac OS X and Xcode
Summary
Chapter 2: External Projects
Introducing Clang extras
Building and installing Clang extra tools
Understanding Compiler-RT
Seeing Compiler-RT in action
Using the DragonEgg plugin
Building DragonEgg
Understanding the compilation pipeline with DragonEgg
and LLVM tools
Understanding the LLVM test suite
12
14
15
15
15
18
21
21
25
30
31
32
33
34
34
36
37
38
39
Table of Contents
Using LLDB
40
Exercising a debug session with LLDB
Introducing the libc++ standard library
Summary
Chapter 3: Tools and Design
Introducing LLVM's basic design principles and its history
Understanding LLVM today
Interacting with the compiler driver
Using standalone tools
Delving into the LLVM internal design
Getting to know LLVM's basic libraries
Introducing LLVM's C++ practices
Seeing polymorphism in practice
Introducing C++ templates in LLVM
Enforcing C++ best practices in LLVM
Making string references lightweight in LLVM
Demonstrating the pluggable pass interface
Writing your first LLVM project
Writing the Makefile
Writing the code
Navigating the LLVM source – general advice
Understanding the code as a documentation
Asking the community for help
Coping with updates – using the SVN log as a documentation
Concluding remarks
Summary
Chapter 4: The Frontend
Introducing Clang
Frontend actions
Libraries
41
43
46
47
47
50
52
54
56
57
58
59
59
60
61
62
64
64
66
68
68
69
69
71
72
73
73
74
76
Using libclang
76
Understanding Clang diagnostics
78
Reading diagnostics
Learning the frontend phases with Clang
Lexical analysis
Exercising lexical errors
Writing libclang code that uses the lexer
Preprocessing
Syntactic analysis
Understanding Clang AST nodes
Understanding the parser actions with a debugger
Exercising a parser error
Writing code that traverses the Clang AST
[ ii ]
80
83
83
85
85
88
90
90
92
94
94
Table of Contents
Serializing the AST with precompiled headers
Semantic analysis
Exercising a semantic error
97
98
99
Generating the LLVM IR code
Putting it together
Summary
Chapter 5: The LLVM Intermediate Representation
Overview
Understanding the LLVM IR target dependency
Exercising basic tools to manipulate the IR formats
Introducing the LLVM IR language syntax
Introducing the LLVM IR in-memory model
Writing a custom LLVM IR generator
Building and running the IR generator
Learning how to write code to generate any IR construct
with the C++ backend
Optimizing at the IR level
Compile-time and link-time optimizations
Discovering which passes matter
Understanding pass dependencies
Understanding the pass API
Writing a custom pass
Building and running your new pass with the LLVM build system
Building and running your new pass with your own Makefile
Summary
Chapter 6: The Backend
Overview
Using the backend tools
Learning the backend code structure
Knowing the backend libraries
Learning how to use TableGen for LLVM backends
The language
Knowing the code generator .td files
Target properties
Registers
Instructions
Understanding the instruction selection phase
The SelectionDAG class
Lowering
DAG combine and legalization
[ iii ]
99
100
104
105
105
107
108
109
113
114
119
119
120
120
122
124
126
127
128
130
132
133
134
135
137
138
139
140
142
142
143
144
147
148
150
151
Table of Contents
DAG-to-DAG instruction selection
153
Pattern matching
Visualizing the instruction selection process
Fast instruction selection
Scheduler
Instruction itineraries
Hazard detection
Scheduling units
Machine instructions
Register allocation
Register coalescer
Virtual register rewrite
Target hooks
Prologue and epilogue
Frame indexes
Understanding the machine code framework
MC instructions
Code emission
Writing your own machine pass
Summary
Chapter 7: The Just-in-Time Compiler
Getting to know the LLVM JIT engine basics
Introducing the execution engine
Memory management
Introducing the llvm::JIT framework
Writing blobs to memory
Using JITMemoryManager
Target code emitters
Target information
Learning how to use the JIT class
The generic value
Introducing the llvm::MCJIT framework
The MCJIT engine
Learning the module's states
154
156
157
157
158
159
159
160
161
162
166
167
168
168
169
169
170
172
175
177
178
179
180
181
181
182
183
184
185
189
190
190
190
Understanding how MCJIT compiles modules
191
Using the MCJIT engine
195
The Object buffer, the cache, and the image
Dynamic linking
The memory manager
The MC code emission
Object finalization
[ iv ]
192
193
193
194
195
Table of Contents
Using LLVM JIT compilation tools
Using the lli tool
Using the llvm-rtdyld tool
Other resources
Summary
Chapter 8: Cross-platform Compilation
Comparing GCC and LLVM
Understanding target triples
Preparing your toolchain
Standard C and C++ libraries
Runtime libraries
The assembler and the linker
The Clang frontend
Multilib
197
198
198
200
200
201
202
203
205
205
206
206
207
207
Cross-compiling with Clang command-line arguments
Driver options for the target
Dependencies
Cross-compiling
208
208
209
210
Changing the system root
Generating a Clang cross-compiler
Configuration options
Building and installing your Clang-based cross-compiler
Alternative build methods
212
213
213
214
215
Testing
Development boards
Simulators
Additional resources
Summary
216
216
217
217
218
Installing GCC
Potential problems
Ninja
ELLCC
EmbToolkit
Chapter 9: The Clang Static Analyzer
Understanding the role of a static analyzer
Comparing classic warnings versus the Clang Static Analyzer
The power of the symbolic execution engine
Testing the static analyzer
Using the driver versus using the compiler
Getting to know the available checkers
Using the static analyzer in the Xcode IDE
[v]
210
211
215
215
216
219
220
220
224
226
226
227
229
Table of Contents
Generating graphical reports in HTML
Handling large projects
A real-world example – finding bugs in Apache
230
231
232
Extending the static analyzer with your own checkers
Getting familiar with the project architecture
Writing your own checker
235
235
237
More resources
Summary
248
248
Solving the problem with a custom checker
Chapter 10: Clang Tools with LibTooling
Generating a compile command database
The clang-tidy tool
Using clang-tidy to check your code
Refactoring tools
Clang Modernizer
Clang Apply Replacements
ClangFormat
Modularize
Understanding C/C++ APIs' Definitions
Understanding the working of modules
Using modules
Understanding Modularize
Using Modularize
238
249
249
251
252
253
253
254
256
258
258
261
262
264
264
Module Map Checker
PPTrace
Clang Query
Clang Check
Remove c_str() calls
Writing your own tool
Problem definition – writing a C++ code refactoring tool
Configuring your source code location
Dissecting tooling boilerplate code
Using AST matchers
265
265
267
269
270
270
271
271
272
276
Writing the callbacks
Testing your new refactoring tool
More resources
Summary
281
283
284
284
Composing matchers
Putting the AST matcher predicates in the code
Index
277
279
285
[ vi ]
Preface
LLVM is an inspiring software project that started with the passion for compilers of a
single person, Chris Lattner. The events that followed the first versions of LLVM and
how it became widely adopted later reveal a pattern that may be observed across the
history of other successful open source projects: they did not start within a company,
but instead they are the product of simple human curiosity with respect to a given
subject. For example, the first Linux kernel was the result of a Finnish student being
intrigued by the area of operating systems and being motivated to understand and
see in practice how a real operating system should work.
For Linux or LLVM, the contribution of many other programmers matured and
leveraged the project to a first-class software that rivals, in quality, any other
established competitor. It is unfair, therefore, to attribute the success of any big
project to a single person. However, in the open source community, the leap from
a student's project to an incredibly complex yet robust software depends on a key
factor: attracting contributors and programmers who enjoy spending their time on
the project.
Schools create a fascinating atmosphere because education involves the art of teaching
people how things work. For these people, the feeling of unraveling how intricate
mechanisms work and surpassing the state of being puzzled to finally mastering them
is full of victory and overcoming. In this environment, at the University of Illinois at
Urbana-Champaign (UIUC), the LLVM project grew by being used both as a research
prototype and as a teaching framework for compiler classes lectured by Vikram Adve,
Lattner's Master's advisor. Students contributed to the first bug reports, setting in
motion the LLVM trajectory as a well-designed and easy-to-study piece of software.
Preface
The blatant disparity between software theory and practice befuddles many Computer
Science students. A clean and simple concept in computing theory may involve
so many levels of implementation details such that they disguise real-life software
projects to become simply too complex for the human mind to grasp, especially all of
its nuances. A clever design with powerful abstractions is the key to aid the human
brain to navigate all the levels of a project: from the high-level view, which implements
how the program works in a broader sense, to the lowest level of detail.
This is particularly true for compilers. Students who have a great passion to learn
how compilers work often face a tough challenge when it comes to understanding
the factual compiler implementation. Before LLVM, GCC was one of the few open
source options for hackers and curious students to learn how a real compiler is
implemented, despite the theory taught in schools.
However, a software project reflects, in its purest sense, the view of the programmers
who created it. This happens through the abstractions employed to distinguish
modules and data representation across several components. Programmers may
have different views about the same topic. In this way, old and large software
bases such as GCC, which is almost 30 years old, frequently embody a collection of
different views of different generation of programmers, which makes the software
increasingly difficult for newer programmers and curious observers to understand.
The LLVM project not only attracted experienced compiler programmers, but also a
lot of young and curious minds that saw in it a much cleaner and simpler hackable
piece of software, which represented a compiler with a lot of potential. This was
clearly observed by the incredible number of scientific papers that chose LLVM as a
prototype to do research. The reason is simple; in academia, students are frequently
in charge of the practical aspects of the implementation, and thus, it is of paramount
importance for research projects that the student be able to master its experimental
framework code base. Seduced by its newer design using the C++ language (instead
of C used in GCC), modularity (instead of the monolithic structure of GCC), and
concepts that map more easily to the theory being taught in modern compiler
courses, many researchers found it easy to hack LLVM in order to implement their
ideas, and they were successful. The success of LLVM in academia, therefore, was a
consequence of this reduced gap between theory and practice.
[2]
Preface
Beyond an experimental framework for scientific research, the LLVM project also
attracted industry interest due to its considerably more liberal license in comparison
with the GPL license of GCC. As a project that grew in academia, a big frustration
for researchers who write code is the fear that it will only be used for a single
experiment and be immediately discarded afterwards. To fight this fate, Chris
Lattner, in his Master's project at UIUC that gave birth to LLVM, decided to license
the project under the University of Illinois/NCSA Open Source License, allowing its
use, commercial or not, as long as the copyright notice is maintained. The goal was
to maximize LLVM adoption, and this goal was fulfilled with honor. In 2012, LLVM
was awarded the ACM Software System Award, a highly distinguished recognition
of notable software that contributed to science.
Many companies embraced the LLVM project with different necessities and performed
different contributions, widening the range of languages that an LLVM-based
compiler can operate with as well as the range of machines for which the compiler
is able to generate code. This new phase of the project provided an unprecedented
level of maturity to the library and tools, allowing it to permanently leave the state
of experimental academia software to enter the status of a robust framework used in
commercial products. With this, the name of the project also changed from Low Level
Virtual Machine to the acronym LLVM.
The decision to retire the name Low Level Virtual Machine in favor of just LLVM
reflects the change of goals of the project across its history. As a Master's project,
LLVM was created as a framework to study lifelong program optimizations.
These ideas were initially published in a 2003 MICRO (International Symposium
on Microarchitecture) paper entitled LLVA: A Low-level Virtual Instruction Set
Architecture, describing its instruction set, and in a 2004 CGO (International
Symposium on Code Generation and Optimization) paper entitled LLVM: A
Compilation Framework for Lifelong Program Analysis & Transformation.
Outside of an academic context, LLVM became a well-designed compiler with the
interesting property of writing its intermediate representation to disk. In commercial
systems, it was never truly used as a virtual machine such as the Java Virtual
Machine (JVM), and thus, it made little sense to continue with the Low Level Virtual
Machine name. On the other hand, some other curious names remained as a legacy.
The file on the disk that stores a program in the LLVM intermediate representation
is referred to as the LLVM bitcode, a parody of the Java bytecode, as a reference to
the amount of space necessary to represent programs in the LLVM intermediate
representation versus the Java one.
[3]
Preface
Our goal in writing this book is twofold. First, since the LLVM project grew a lot,
we want to present it to you in small pieces, a component at a time, making it as
simple as possible to understand while providing you with the joy of working with
a powerful compiler library. Second, we want to evoke the spirit of an open source
hacker, inspiring you to go far beyond the concepts presented here and never stop
expanding your knowledge.
Happy hacking!
What this book covers
Chapter 1, Build and Install LLVM, will show you how to install the Clang/LLVM
package on Linux, Windows, or Mac, including a discussion about building LLVM
on Visual Studio and Xcode. It will also discuss the different flavors of LLVM
distributions and discuss which distribution is best for you: pre-built binaries,
distribution packages, or source codes.
Chapter 2, External Projects, will present external LLVM projects that live in separate
packages or repositories, such as extra Clang tools, the DragonEgg GCC plugin, the
LLVM debugger (LLDB), and the LLVM test suite.
Chapter 3, Tools and Design, will explain how the LLVM project is organized in
different tools, working out an example on how to use them to go from source
code to assembly language. It will also present how the compiler driver works, and
finally, how to write your very first LLVM tool.
Chapter 4, The Frontend, will present the LLVM compiler frontend, the Clang project.
It will walk you through all the steps of the frontend while explaining how to write
small programs that use each part of the frontend as it is presented. It finishes by
explaining how to write a small compiler driver with Clang libraries.
Chapter 5, The LLVM Intermediate Representation, will explain a crucial part of the
LLVM design: its intermediate representation. It will show you what characteristics
make it special, present its syntax, structure, and how to write a tool that generates
the LLVM IR.
Chapter 6, The Backend, will introduce you to the LLVM compiler backend, responsible
for translating the LLVM IR to machine code. This chapter will walk you through all
the backend steps and provide you with the knowledge to create your own LLVM
backend. It finishes by showing you how to create a backend pass.
[4]
Preface
Chapter 7, The Just-in-Time Compiler, will explain the LLVM Just-in-Time compilation
infrastructure, which allows you to generate and execute machine code on demand.
This technology is essential in applications where the program source code is only
known at runtime, such as JavaScript interpreters in Internet browsers. This chapter
walks you through the steps to use the right libraries in order to create your own
JIT compiler.
Chapter 8, Cross-platform Compilation, will guide you through the steps for
Clang/LLVM to create programs for other platforms such as ARM-based ones.
This involves configuring the right environment to correctly compile programs
that will run outside the environment where they were compiled.
Chapter 9, The Clang Static Analyzer, will present a powerful tool for discovering
bugs in large source code bases without even running the program, but simply by
analyzing the code. This chapter will also show you how to extend the Clang Static
Analyzer with your own bug checkers.
Chapter 10, Clang Tools with LibTooling, will present the LibTooling framework and
a series of Clang tools that are built upon this library, which allow you to perform
source code refactoring or simply analyze the source code in an easy way. This
chapter finishes by showing you how to write your own C++ source code refactoring
tool by using this library.
At the time of this writing, LLVM 3.5 had not been released. While this book
focuses on LLVM Version 3.4, we plan to release an appendix updating the
examples in this book to LLVM 3.5 by the third week of September 2014, allowing
you to exercise the content of the book with the newest versions of LLVM. This
appendix will be available at https://www.packtpub.com/sites/default/files/
downloads/6924OS_Appendix.pdf.
What you need for this book
To begin exploring the world of LLVM, you can use a UNIX system, a Mac OS X
system, or a Windows system, as long as they are equipped with a modern C++
compiler. The LLVM source code is very demanding on the C++ compiler used to
compile it and uses the newest standards. This means that on Linux, you will need
at least GCC 4.8.1; on Max OS X, you will need at least Xcode 5.1; and on Windows,
you will need Visual Studio 2012.
Even though we explain how to build LLVM on Windows with Visual Studio, this
book does not focus on this platform because some LLVM features are unavailable
for it. For example, LLVM lacks loadable module support on Windows, but we show
you how to write LLVM plugins that are built as shared libraries. In these cases, the
only way to see this in practice is to use either Linux or Mac OS X.
[5]
Preface
If you do not want to build LLVM for yourself, you can use a prebuilt binary
bundle. However, you will be restricted to use the platforms where this
convenience is available.
Who this book is for
This book is intended for enthusiasts, computer science students, and compiler
engineers interested in learning about the LLVM framework. You need a background
in C++ and, although not mandatory, should know at least some compiler theory.
Whether you are a newcomer or a compiler expert, this book provides a practical
introduction to LLVM and avoids complex scenarios. If you are interested enough
and excited about this technology, then this book is definitely for you.
Conventions
In this book, you will find a number of styles of text that distinguish between
different kinds of information. Here are some examples of these styles, and an
explanation of their meaning.
Code words in text, database table names, folder names, filenames, file extensions,
pathnames, dummy URLs, user input, and Twitter handles are shown as follows:
"The prebuilt package for Windows comes with an easy-to-use installer that unpacks
the LLVM tree structure in a subfolder of your Program Files folder."
A block of code is set as follows:
#include <stdio.h>
#include <stdint.h>
#include <stdlib.h>
int main() {
uint64_t a = 0ULL, b = 0ULL;
scanf ("%lld %lld", &a, &b);
printf ("64-bit division is %lld\n", a / b);
return EXIT_SUCCESS;
}
When we wish to draw your attention to a particular part of a code block, the
relevant lines or items are set in bold:
KEYWORD(float
KEYWORD(goto
KEYWORD(inline
, KEYALL)
, KEYALL)
, KEYC99|KEYCXX|KEYGNU)
[6]
Preface
KEYWORD(int
KEYWORD(return
KEYWORD(short
KEYWORD(while
,
,
,
,
KEYALL)
KEYALL)
KEYALL)
KEYALL)
Any command-line input or output is written as follows:
$ sudo mv clang+llvm-3.4-x86_64-linux-gnu-ubuntu-13.10 llvm-3.4
$ export PATH="$PATH:/usr/local/llvm-3.4/bin"
New terms and important words are shown in bold. Words that you see on the screen,
in menus or dialog boxes for example, appear in the text like this: "During installation,
make sure to check the Add CMake to the system PATH for all users option."
Warnings or important notes appear in a box like this.
Tips and tricks appear like this.
Reader feedback
Feedback from our readers is always welcome. Let us know what you think about
this book—what you liked or may have disliked. Reader feedback is important for us
to develop titles that you really get the most out of.
To send us general feedback, simply send an e-mail to [email protected],
and mention the book title via the subject of your message.
If there is a topic that you have expertise in and you are interested in either writing
or contributing to a book, see our author guide on www.packtpub.com/authors.
Customer support
Now that you are the proud owner of a Packt book, we have a number of things to
help you to get the most from your purchase.
[7]
Preface
Downloading the example code
You can download the example code files for all Packt books you have purchased
from your account at http://www.packtpub.com. If you purchased this book
elsewhere, you can visit http://www.packtpub.com/support and register to
have the files e-mailed directly to you.
Errata
Although we have taken every care to ensure the accuracy of our content, mistakes do
happen. If you find a mistake in one of our books—maybe a mistake in the text or the
code—we would be grateful if you would report this to us. By doing so, you can save
other readers from frustration and help us improve subsequent versions of this book.
If you find any errata, please report them by visiting http://www.packtpub.com/
submit-errata, selecting your book, clicking on the errata submission form link,
and entering the details of your errata. Once your errata are verified, your submission
will be accepted and the errata will be uploaded on our website, or added to any list
of existing errata, under the Errata section of that title. Any existing errata can be
viewed by selecting your title from http://www.packtpub.com/support.
Piracy
Piracy of copyright material on the Internet is an ongoing problem across all media.
At Packt, we take the protection of our copyright and licenses very seriously. If you
come across any illegal copies of our works, in any form, on the Internet, please
provide us with the location address or website name immediately so that we
can pursue a remedy.
Please contact us at [email protected] with a link to the suspected
pirated material.
We appreciate your help in protecting our authors, and our ability to bring you
valuable content.
Questions
You can contact us at [email protected] if you are having a problem with
any aspect of the book, and we will do our best to address it.
[8]
Build and Install LLVM
The LLVM infrastructure is available for several Unix environments (GNU/Linux,
FreeBSD, Mac OS X) and Windows. In this chapter, we describe the necessary
steps to get LLVM working in all these systems, step by step. LLVM and Clang
prebuilt packages are available in some systems but they can be compiled from
the source otherwise.
A beginner LLVM user must consider the fact that the basic setup for a LLVM-based
compiler includes both LLVM and Clang libraries and tools. Therefore, all the
instructions in this chapter are aimed at building and installing both. Throughout this
book, we will focus on LLVM Version 3.4. It is important to note, however, that LLVM
is a young project and under active development; therefore, it is subject to change.
At the time of this writing, LLVM 3.5 had not been released. While
this book focuses on LLVM Version 3.4, we plan to release an
appendix updating the examples in this book to LLVM 3.5 by the
third week of September 2014, allowing you to exercise the content
of the book with the newest versions of LLVM. This appendix
will be available at https://www.packtpub.com/sites/
default/files/downloads/6924OS_Appendix.pdf.
This chapter will cover the following topics:
•
Understanding LLVM versions
•
Installing LLVM with prebuilt binaries
•
Installing LLVM using package managers
•
Building LLVM from source for Linux
•
Building LLVM from source for Windows and Visual Studio
•
Building LLVM from source for Mac OS X and Xcode
Build and Install LLVM
Understanding LLVM versions
The LLVM project is updated at a fast pace, thanks to the contribution of many
programmers. By Version 3.4, its SVN (subversion, the version control system
employed) repository tallied over 200,000 commits, while its first release happened
over 10 years ago. In 2013 alone, the project had almost 30,000 new commits. As a
consequence, new features are constantly being introduced and other features are
rapidly getting outdated. As in any big project, the developers need to obey a tight
schedule to release stable checkpoints when the project is working well and passes a
variety of tests, allowing users to experience the newest features with the comfort of
using a well-tested version.
Throughout its history, the LLVM project has employed the strategy of releasing two
stable versions per year. Each one of them incremented the minor revision number
by 1. For example, an update from version 3.3 to version 3.4 is a minor version
update. Once the minor number reaches 9, the next version will then increment the
major revision number by 1, as when LLVM 3.0 succeeded LLVM 2.9. Major revision
number updates are not necessarily a big change in comparison with its predecessor
version, but they represent roughly five years of progress in the development of the
compiler if compared with the latest major revision number update.
It is common practice for projects that depend on LLVM to use the trunk version,
that is, the most updated version of the project available in the SVN repository,
at the cost of using a version that is possibly unstable. Recently, beginning with
version 3.4, the LLVM community started an effort to produce point releases,
introducing a new revision number. The first product of this effort was LLVM 3.4.1.
The goal of point releases is to backport bug fixes from trunk to the latest tagged
version with no new features, thus maintaining full compatibility. The point releases
should happen after three months of the last release. Since this new system is still in its
infancy, we will focus on installing LLVM 3.4 in this chapter. The number of prebuilt
packages for LLVM 3.4 is larger, but you should be able to build LLVM 3.4.1, or any
other version, with no problems by following our instructions.
Obtaining prebuilt packages
To ease the task of installing the software on your system, LLVM contributors prepare
prebuilt packages with the compiled binaries for a specific platform, as opposed
to the requirement that you compile the package yourself. Compiling any piece of
software can be tricky in some circumstances; it might require some time and should
only be necessary if you are using a different platform or actively working on project
development. Therefore, if you want a quick way to start with LLVM, explore the
available prebuilt packages. In this book, however, we will encourage you to directly
hack in to the LLVM source tree. You should be prepared to be able to compile LLVM
from source trees yourself.
[ 10 ]
Chapter 1
There are two general ways to obtain prebuilt packages for LLVM; you can obtain
packages via distributed binaries in the official website or by third-party GNU/
Linux distributions and Windows installers.
Obtaining the official prebuilt binaries
For version 3.4, the following prebuilt packages can be downloaded from the official
LLVM website:
Architecture
Version
x86_64
Ubuntu (12.04, 13.10), Fedora 19, Fedora 20, FreeBSD 9.2, Mac OS X
10.9, Windows, and openSUSE 13.1
i386
openSUSE 13.1, FreeBSD 9.2, Fedora 19, Fedora 20, and openSUSE 13.1
ARMv7/
ARMv7a
Linux-generic
To view all the options for a different version, access http://www.llvm.org/
releases/download.html and check the Pre-built Binaries section relative to
the version you want to download. For instance, to download and perform a
system-wide installation of LLVM on Ubuntu 13.10, we obtain the file's URL
at the site and use the following commands:
$ sudo mkdir -p /usr/local; cd /usr/local
$ sudo wget http://llvm.org/releases/3.4/clang+llvm-3.4-x86_64-linux-gnuubuntu-13.10.tar.xz
$ sudo tar xvf clang+llvm-3.4-x86_64-linux-gnu-ubuntu-13.10.tar.xz
$ sudo mv clang+llvm-3.4-x86_64-linux-gnu-ubuntu-13.10 llvm-3.4
$ export PATH="$PATH:/usr/local/llvm-3.4/bin"
LLVM and Clang are now ready to be used. Remember that you need to permanently
update your system's PATH environment variable, since the update we did in the last
line is only valid for the current shell session. You can test the installation by executing
Clang with a simple command, which prints the Clang version you just installed:
$ clang –v
[ 11 ]
Build and Install LLVM
If you have a problem when running Clang, try to run the binary directly from
where it was installed to make sure that you are not running into a misconfigured
PATH variable issue. If it still doesn't work, you might have downloaded a prebuilt
binary for an incompatible system. Remember that, when compiled, the binaries
link against dynamic libraries with specific versions. A link error while running the
application is a clear symptom of the use of a binary compiled to a system that is
incompatible with yours.
In Linux, for example, a link error can be reported by printing the
name of the binary and the name of the dynamic library that failed
to load, followed by an error message. Pay attention when the name
of a dynamic library is printed on the screen. It is a clear sign that the
system dynamic linker and loader failed to load this library because this
program was not built for a compatible system.
To install prebuilt packages in other systems, the same steps can be followed,
except for Windows. The prebuilt package for Windows comes with an easy-to-use
installer that unpacks the LLVM tree structure in a subfolder of your Program Files
folder. The installer also comes with the option to automatically update your PATH
environment variable to be able to use Clang executables from within any command
prompt window.
Using package managers
Package manager applications are available for a variety of systems and are also
an easy way to obtain and install LLVM/Clang binaries. For most users, this is
usually the recommended way to install LLVM and Clang, since it automatically
handles dependency issues and ensures that your system is compatible with the
installed binaries.
For example, in Ubuntu (10.04 and later), you should use the following command:
$ sudo apt-get install llvm clang
In Fedora 18, the command line used is similar but the package manager is different:
$ sudo yum install llvm clang
Staying updated with snapshot packages
Packages can also be built from nightly source code snapshots, containing the latest
commits from the LLVM subversion repository. The snapshots are useful to LLVM
developers and users who wish to test the early versions or to third-party users who
are interested in keeping their local projects up-to-date with mainline development.
[ 12 ]
Chapter 1
Linux
Debian and Ubuntu Linux (i386 and amd64) repositories are available for you to
download the daily compiled snapshots from the LLVM subversion repositories.
You can check for more details at http://llvm.org/apt.
For example, to install the daily releases of LLVM and Clang on Ubuntu 13.10, use
the following sequence of commands:
$ sudo echo "deb http://llvm.org/apt/raring/ llvm-toolchain-raring main"
>> /etc/apt/sources.list
$ wget -O - http://llvm.org/apt/llvm-snapshot.gpg.key | sudo apt-key add –
$ sudo apt-get update
$ sudo apt-get install clang-3.5 llvm-3.5
Windows
Windows installers of specific LLVM/Clang snapshots are available for download
at http://llvm.org/builds/ in the Windows snapshot builds section. The final
LLVM/Clang tools are installed by default in C:\Program Files\LLVM\bin (this
location may change depending on the release). Note that there is a separate Clang
driver that mimics Visual C++ cl.exe named clang-cl.exe. If you intend to use
the classic GCC compatible driver, use clang.exe.
Note that snapshots are not stable releases and might be highly
experimental.
Building from sources
In the absence of prebuilt binaries, LLVM and Clang can be built from scratch by
obtaining the source code first. Building the project from the source is a good way
to start understanding more about the LLVM structure. Additionally, you will be
able to fine-tune the configuration parameters to obtain a customized compiler.
System requirements
An updated list of the LLVM-supported platforms can be found at http://llvm.
org/docs/GettingStarted.html#hardware. Also, a comprehensive and updated
set of software prerequisites to compile LLVM is described at http://llvm.org/
docs/GettingStarted.html#software. In Ubuntu systems, for example, the
software dependencies can be resolved with the following command:
$ sudo apt-get install build-essential zlib1g-dev python
[ 13 ]
Build and Install LLVM
If you are using an old version of a Linux distribution with outdated packages, make
an effort to update your system. LLVM sources are very demanding on the C++
compiler that is used to build them, and relying on an old C++ compiler is likely
to result in a failed build attempt.
Obtaining sources
The LLVM source code is distributed under a BSD-style license and can be
downloaded from the official website or through SVN repositories. To download
the sources from the 3.4 release, you can either go to the website, http://llvm.org/
releases/download.html#3.4, or directly download and prepare the sources for
compilation as follows. Note that you will always need Clang and LLVM, but the
clang-tools-extra bundle is optional. However, if you intend to exercise the tutorial
in Chapter 10, Clang Tools with LibTooling, you will need it. Refer to the next chapter
for information on building additional projects. Use the following commands to
download and install LLVM, Clang, and Clang extra tools:
$ wget http://llvm.org/releases/3.4/llvm-3.4.src.tar.gz
$ wget http://llvm.org/releases/3.4/clang-3.4.src.tar.gz
$ wget http://llvm.org/releases/3.4/clang-tools-extra-3.4.src.tar.gz
$ tar xzf llvm-3.4.src.tar.gz; tar xzf clang-3.4.src.tar.gz
$ tar xzf clang-tools-extra-3.4.src.tar.gz
$ mv llvm-3.4 llvm
$ mv clang-3.4 llvm/tools/clang
$ mv clang-tools-extra-3.4 llvm/tools/clang/tools/extra
Downloaded sources in Windows can be unpacked using gunzip,
WinZip, or any other available decompressing tool.
SVN
To obtain the sources directly from the SVN repositories, make sure you have the
subversion package available on your system. The next step is to decide whether you
want the latest version stored in the repository or whether you want a stable version.
In the case of the latest version (in trunk), you can use the following sequence of
commands, assuming that you are already in the folder where you want to put
the sources:
$ svn co http://llvm.org/svn/llvm-project/llvm/trunk llvm
$ cd llvm/tools
[ 14 ]
Chapter 1
$ svn co http://llvm.org/svn/llvm-project/cfe/trunk clang
$ cd ../projects
$ svn co http://llvm.org/svn/llvm-project/compiler-rt/trunk compiler-rt
$ cd ../tools/clang/tools
$ svn co http://llvm.org/svn/llvm-project/clang-tools-extra/trunk extra
If you want to use a stable version (for example, version 3.4), substitute trunk for
tags/RELEASE_34/final in all the commands. You may also be interested in an
easy way to navigate the LLVM SVN repository to see the commit history, logs,
and source tree structure. For this, you can go to http://llvm.org/viewvc.
Git
You can also obtain sources from the Git mirror repositories that sync with the
SVN ones:
$ git clone http://llvm.org/git/llvm.git
$ cd llvm/tools
$ git clone http://llvm.org/git/clang.git
$ cd ../projects
$ git clone http://llvm.org/git/compiler-rt.git
$ cd ../tools/clang/tools
$ git clone http://llvm.org/git/clang-tools-extra.git
Building and installing LLVM
The various approaches to build and install LLVM are explained here.
Using the autotools-generated configure script
A standard way to build LLVM is to generate the platform-specific Makefiles by
means of the configure script that was created with the GNU autotools. This build
system is quite popular, and you are probably familiar with it. It supports several
different configuration options.
You need to install GNU autotools on your machine only if you
intend to change the LLVM build system, in which case, you will
generate a new configure script. Usually, it is unnecessary to do so.
[ 15 ]
Build and Install LLVM
Take out some time to look at the possible options using the following commands:
$ cd llvm
$ ./configure --help
A few of them deserve a brief explanation:
•
--enable-optimized: This option allows us to compile LLVM/Clang without
•
--enable-assertions: This option enables assertions in the code. This
•
--enable-shared: This option allows us to build LLVM/Clang libraries as
•
--enable-jit: This option enables Just-In-Time Compilation for all the
•
--prefix: This is the path to the installation directory where the final LLVM/
Clang tools and libraries will be installed; for example, --prefix=/usr/
local/llvm will install binaries under /usr/local/llvm/bin and libraries
under /usr/local/llvm/lib.
•
--enable-targets: This option allows us to select the set of targets that the
debug support and with optimizations. By default, this option is turned off.
Debug support, as well as the disabling of optimizations, is recommended if
you are using LLVM libraries for development, but it should be discarded for
deployment since the lack of optimizations introduces a significant slowdown
in LLVM.
option is very useful when developing LLVM core libraries. It is turned
on by default.
shared libraries and link the LLVM tools against them. If you plan to develop a
tool outside the LLVM build system and wish to dynamically link against the
LLVM libraries, you should turn it on. This option is turned off by default.
targets that support it. It is turned on by default.
compiler must be able to emit code for. It is worth mentioning that LLVM is
able to perform cross-compilation, that is, compile programs that will run on
other platforms, such as ARM, MIPS, and so on. This option defines which
backends to include in the code generation libraries. By default, all the targets
are compiled, but you can save compilation time by specifying only the ones
you are interested in.
This option is not enough to generate a standalone cross-compiler.
Refer to Chapter 8, Cross-platform Compilation, for the necessary steps
to generate one.
After you run configure with the desired parameters, you need to complete
the build with the classic make and make install duo. We will give you an
example next.
[ 16 ]
Chapter 1
Building and configuring with Unix
In this example, we will build an unoptimized (debug) LLVM/Clang with a sequence
of commands that suit any Unix-based system or Cygwin. Instead of installing at /
usr/local/llvm, as in the previous examples, we will build and install it in our home
directory, explaining how to install LLVM without root privileges. This is customary
when working as a developer. In this way, you can also maintain the multiple versions
that have been installed. If you want, you can change the installation folder to /usr/
local/llvm, making a system-wide installation. Just remember to use sudo when
creating the installation directory and to run make install. The sequence
of commands to be used is as follows:
$ mkdir where-you-want-to-install
$ mkdir where-you-want-to-build
$ cd where-you-want-to-build
In this section, we will create a separate directory to hold the object files, that is,
the intermediary build byproducts. Do not build in the same folder that is used
to keep the source files. Use the following commands with options explained in
the previous section:
$ /PATH_TO_SOURCE/configure --disable-optimized --prefix=../where-youwant-to-install
$ make && make install
You can optionally use make -jN to allow up to N compiler instances
to work in parallel and speed up the build process. For example, you
can experiment with make -j4 (or a slightly larger number) if your
processor has four cores.
Allow some time for the compilation and installation of all components to finish. Note
that the build scripts will also handle the other repositories that you downloaded and
put in the LLVM source tree. There is no need to configure Clang or Clang extra
tools separately.
To check whether the build succeeded, it is always useful to use the echo $? shell
command. The $? shell variable returns the exit code of the last process that you ran
in your shell session, while echo prints it to the screen. Thus, it is important to run
this command immediately after your make commands. If the build succeeded, the
make command will always return 0, as with any other program that has completed
its execution successfully:
$ echo $?
0
[ 17 ]
Build and Install LLVM
Configure your shell's PATH environment variable to be able to easily access the
recently installed binaries, and make your first test by asking for the Clang version:
$ export PATH="$PATH:where-you-want-to-install/bin"
$ clang –v
clang version 3.4
Using CMake and Ninja
LLVM offers an alternative cross-platform build system based on CMake, instead
of the traditional configuration scripts. CMake can generate specialized Makefiles
for your platform in the same way as the configuration scripts do, but CMake is more
flexible and can also generate build files for other systems, such as Ninja, Xcode,
and Visual Studio.
Ninja, on the other hand, is a small and fast build system that substitutes GNU Make
and its associated Makefiles. If you are curious to read the motivation and the story
behind Ninja, visit http://aosabook.org/en/posa/ninja.html. CMake can be
configured to generate Ninja build files instead of Makefiles, giving you the option to
use either CMake and GNU Make or CMake and Ninja.
Nevertheless, by using the latter, you can enjoy very quick turnaround times
when making changes to the LLVM source code and recompiling it. This scenario is
especially useful if you intend to develop a tool or a plugin inside the LLVM source
tree and depend on the LLVM build system to compile your project.
Make sure that you have CMake and Ninja installed. For example, in Ubuntu systems,
use the following command:
$ sudo apt-get install cmake ninja-build
LLVM with CMake also offers a number of build-customizing options. A full list of
options is available at http://llvm.org/docs/CMake.html. The following is a list
of options that correspond to the same set that we presented earlier for autotoolsbased systems. The default values for these flags are the same as those for the
corresponding configure script flags:
•
CMAKE_BUILD_TYPE: This is a string value that specifies whether the
build will be Release or Debug. A Release build is equivalent to use the
--enable-optimized flag in the configure script, while a Debug build is
equivalent to the --disable-optimized flag.
•
CMAKE_ENABLE_ASSERTIONS: This is a Boolean value that maps to the
--enable-assertions configure flag.
[ 18 ]
Chapter 1
•
•
•
BUILD_SHARED_LIBS: This is a Boolean value that maps to the -enableshared configure flag, establishing whether the libraries should be shared
or static. Shared libraries are not supported on Windows platforms.
CMAKE_INSTALL_PREFIX: This is a string value that maps to the --prefix
configure flag, providing the installation path.
LLVM_TARGETS_TO_BUILD: This is a semicolon-separated list of targets to
build, roughly mapping to the comma-separated list of targets used in the
--enable-targets configure flag.
To set any of these parameter-value pairs, supply the -DPARAMETER=value argument
flag to the cmake command.
Building with Unix using CMake and Ninja
We will reproduce the same example that we presented earlier for the configure
scripts, but this time, we will use CMake and Ninja to build it:
First, create a directory to contain the build and installation files:
$ mkdir where-you-want-to-build
$ mkdir where-you-want-to-install
$ cd where-you-want-to-build
Remember that you need to use a different folder than the one used to hold the LLVM
source files. Next, it is time to launch CMake with the set of options that you chose:
$ cmake /PATHTOSOURCE -G Ninja -DCMAKE_BUILD_TYPE="Debug" -DCMAKE_
INSTALL_PREFIX="../where-you-want-to-install"
You should substitute /PATHTOSOURCE with the absolute location of your LLVM
source folder. You can optionally omit the -G Ninja argument if you want to
use traditional GNU Makefiles. Now, finish the build with either ninja or make,
depending on which you chose. For ninja, use the following command:
$ ninja && ninja install
For make, use the following command:
$ make && make install
[ 19 ]
Build and Install LLVM
As we did earlier in the previous example, we can issue a simple command to check
whether the build succeeded. Remember to use it immediately after the last build
command, without running other commands in between, because it returns the exit
value of the last program that you ran in the current shell session:
$ echo $?
0
If the preceding command returns zero, we are good to go. Finally, configure your
PATH environment variable and use your new compiler:
$ export PATH=$PATH:where-you-want-to-install/bin
$ clang -v
Solving build errors
If the build commands return a nonzero value, it means that an error has occurred.
In this case, either Make or Ninja will print the error to make it visible for you. Make
sure to focus on the first error that appeared to find help. LLVM build errors in a
stable release typically happen when your system does not meet the criteria for the
required software versions. The most common issues come from using an outdated
compiler. For example, building LLVM 3.4 with GNU g++ Version 4.4.3 will result
in the following compilation error, after successfully compiling more than half of
the LLVM source files:
[1385/2218] Building CXX object projects/compiler-rt/lib/interception/
CMakeFiles/RTInterception.i386.dir/interception_type_test.cc.o
FAILED: /usr/bin/c++ (...)_test.cc.o -c /local/llvm-3.3/llvm/projects/
compiler-rt/lib/interception/interception_type_test.cc
test.cc:28: error: reference to 'OFF64_T' is ambiguous
interception.h:31: error: candidates are: typedef __sanitizer::OFF64_T
OFF64_T
sanitizer_internal_defs.h:80: error:
sanitizer::u64 __sanitizer::OFF64_T
typedef __
To solve this, you could hack the LLVM source code to work around this issue (and
you will find how to do this if you either search online or look at the source yourself),
but you will not want to patch every LLVM version that you want to compile.
Updating your compiler is far simpler and is certainly the most appropriate solution.
In general, when running into build errors in a stable build, concentrate on what
differences your system has in comparison with the recommended setup. Remember
that the stable builds have been tested on several platforms. On the other hand, if you
are trying to build an unstable SVN release, it is possible that a recent commit broke
the build for your system, and it is easier to backtrack to an SVN release that works.
[ 20 ]
Chapter 1
Using other Unix approaches
Some Unix systems provide package managers that automatically build and install
applications from the source. They offer a source-compilation counterpart that was
previously tested for your system and also try to solve package-dependency issues.
We will now evaluate such platforms in the context of building and installing LLVM
and Clang:
•
For Mac OS X using MacPorts, we can use the following command:
$ port install llvm-3.4 clang-3.4
•
For Mac OS X using Homebrew, we can use the following:
$ brew install llvm -with-clang
•
For FreeBSD 9.1 using ports, we can use the following (note that starting from
FreeBSD 10, Clang is the default compiler, and thus it is already installed):
$ cd /usr/ports/devel/llvm34
$ make install
$ cd /usr/ports/lang/clang34
$ make install
•
For Gentoo Linux, we can use the following:
$ emerge sys-devel/llvm-3.4 sys-devel/clang-3.4
Windows and Microsoft Visual Studio
To compile LLVM and Clang on Microsoft Windows, we use Microsoft Visual Studio
2012 and Windows 8. Perform the following steps:
1. Obtain a copy of Microsoft Visual Studio 2012.
2. Download and install the official binary distribution of the CMake tool
available at http://www.cmake.org. During installation, make sure to
check the Add CMake to the system PATH for all users option.
[ 21 ]
Build and Install LLVM
3. CMake will generate the project files needed by Visual Studio to configure
and build LLVM. First, run the cmake-gui graphic tool. Then, click on
the Browse Source… button and select the LLVM source code directory.
Next, click on the Browse Build button and choose a directory to put the
CMake-generated files, which will be used later by Visual Studio, as shown
in the following screenshot:
4. Click on Add Entry and define CMAKE_INSTALL_PREFIX to contain the
installation path for the LLVM tools, as shown in the following screenshot:
[ 22 ]
Chapter 1
5. Additionally, the set of supported targets can be defined using LLVM_TARGETS_
TO_BUILD, as shown in the following screenshot. You can optionally add any
other entry that defines the CMake parameters we previously discussed.
6. Click on the Configure button. A pop-up window asks for the generator
of this project and for the compiler to be used; select Use default native
compilers and for Visual Studio 2012, select the Visual Studio 11 option.
Click on Finish, as shown in the following screenshot:
[ 23 ]
Build and Install LLVM
For Visual Studio 2013, use the generator for Visual Studio 12. The
name of the generator uses the Visual Studio version instead of its
commercial name.
7. After the configuration ends, click on the Generate button. The Visual Studio
solution file, LLVM.sln, is then written in the specified build directory. Go to
this directory and double-click on this file; it will open the LLVM solution
in Visual Studio.
8. To automatically build and install LLVM/Clang, in the tree view window
on the left, go to CMakePredefinedTargets, right-click on INSTALL, and
select the Build option. The predefined INSTALL target instructs the system
to build and install all the LLVM/Clang tools and libraries, as shown in the
following screenshot:
[ 24 ]
Chapter 1
9. To selectively build and install specific tools or libraries, select the
corresponding item in the tree list view window on the left-hand side,
right-click on the item, and select the Build option.
10. Add the LLVM binaries install directory to the system's PATH
environment variable.
In our example, the install directory is C:\Program Files (x86)\LLVM\install\
bin. To directly test the installation without updating the PATH environment
variable, issue the following command in a command prompt window:
C:>"C:\Program Files (x86)\LLVM\install\bin\clang.exe" –v
clang version 3.4…
Mac OS X and Xcode
Although LLVM can be compiled for Mac OS X by using regular Unix instructions
described earlier, Xcode can also be used:
1. Obtain a copy of Xcode.
2. Download and install the official binary distribution of the CMake tool
available at http://www.cmake.org. Make sure to check the Add CMake
to the system PATH for all users option.
[ 25 ]
Build and Install LLVM
3. CMake is able to generate the project files used by Xcode. First, run the
cmake-gui graphic tool. Then, as shown in the preceding screenshot, click
on the Browse Source button and select the LLVM source code directory.
Next, click on the Browse Build button and choose a directory to add the
CMake-generated files, which will be used by Xcode.
4. Click on Add Entry and define CMAKE_INSTALL_PREFIX to contain the
installation path for the LLVM tools.
5. Additionally, the set of supported targets can be defined using LLVM_
TARGETS_TO_BUILD. You can optionally add any other entries that define
the CMake parameters we previously discussed.
[ 26 ]
Chapter 1
6. Xcode does not support the generation of LLVM Position Independent Code
(PIC) libraries. Click on Add Entry and add the LLVM_ENABLE_PIC variable,
which was the BOOL type, leaving the checkbox unmarked, as shown in the
following screenshot:
7. Click on the Configure button. A pop-up window asks for the generator for
this project and the compiler to be used. Select Use default native compilers
and Xcode. Click on the Finish button to conclude the process, as shown in
the following screenshot:
[ 27 ]
Build and Install LLVM
8. After the configuration ends, click on the Generate button. The LLVM.
xcodeproj file is then written in the build directory that was specified
earlier. Go to this directory and double-click on this file to open the
LLVM project in Xcode.
9. To build and install LLVM/Clang, select the install scheme.
10. Next, click on the Product menu and then select the Build option, as shown
in the following screenshot:
[ 28 ]
Chapter 1
11. Add the LLVM binaries install directory to the system's PATH
environment variable.
In our example, the folder with the installed binaries is /Users/Bruno/llvm/
install/bin. To test the installation, use the clang tool from the install directory
as follows:
$ /Users/Bruno/llvm/install/bin/clang –v
clang version 3.4…
[ 29 ]
Build and Install LLVM
Summary
This chapter provided detailed instructions on how to install LLVM and Clang by
showing you how to use prebuilt binaries via officially built packages, third-party
package managers, and daily snapshots. Moreover, we detailed how to build the
project from sources by using standard Unix tools and IDEs in different operating
system environments.
In the next chapter, we will cover how to install other LLVM-based projects that may
be very useful for you. These external projects typically implement tools that are
developed outside the main LLVM SVN repository and are shipped separately.
[ 30 ]
External Projects
Projects that live outside the core LLVM and Clang repositories need to be separately
downloaded. In this chapter, we introduce a variety of other official LLVM projects
and explain how to build and install them. Readers only interested in core LLVM
tools may skip this chapter or come back when required.
In this chapter, we will cover what are and how to install the following projects:
•
Clang extra tools
•
Compiler-RT
•
DragonEgg
•
LLVM test suite
•
LLDB
•
libc++
Beyond the projects covered in this chapter, there are two official LLVM projects
outside the scope of this book: Polly, the polyhedral optimizer, and lld, the LLVM
linker, which is currently in development.
Prebuilt binary packages do not include any of the external projects presented in
this chapter, except for Compiler-RT. Therefore, unlike the previous chapter, we will
only cover techniques that involve downloading the source code and build them
ourselves.
Do not expect the same level of maturity as that of the core LLVM/Clang project
from all of these projects. Some of them are experimental or in their infancy.
External Projects
Introducing Clang extras
The most noticeable design decision of LLVM is its segregation between backend
and frontend as two separate projects, LLVM core and Clang. LLVM started as a set
of tools orbiting around the LLVM intermediate representation (IR) and depended
on a hacked GCC to translate high-level language programs to its particular IR,
stored in bitcode files. Bitcode is a term coined as a parody of Java bytecode files. An
important milestone of the LLVM project happened when Clang appeared as the first
frontend specifically designed by the LLVM team, bringing with it the same level of
quality, clear documentation, and library organization as the core LLVM. It is not
only able to convert C and C++ programs into LLVM IR but also to supervise the
entire compilation process as a flexible compiler driver that strives to stay compatible
with GCC.
We will henceforth refer to Clang as a frontend program rather than a driver,
responsible for translating C and C++ programs to the LLVM IR. The exciting
aspect of Clang libraries is the possibility to use them to write powerful tools, giving
the C++ programmer freedom to work with hot topics of C++ such as C++ code
refactoring tools and source-code analysis tools. Clang comes prepackaged with
some tools that may give you an idea of what we can do with its libraries:
•
•
Clang Check: It is able to perform syntax checks, apply quick fixes to solve
common issues, and also dump the internal Clang Abstract Syntax Tree
(AST) representation of any program
Clang Format: It comprises both a tool and a library, LibFormat, that are able
to not only indent code but also format any piece of C++ code to conform
with LLVM coding standards, Google's style guide, Chromium's style guide,
Mozilla's style guide, and WebKit's style guide
The clang-tools-extra repository is a collection of more applications that are built
on top of Clang. They are able to read large C or C++ code bases and perform all
sorts of code refactoring and analysis. We enumerate below some of the tools of this
package, but it is not limited to them:
•
Clang Modernizer: It is a code refactoring tool that scans C++ code and
changes old-style constructs to conform with more modern styles proposed
by newer standards, such as the C++-11 standard
•
Clang Tidy: It is a linter tool that checks for common programming mistakes
that violate either LLVM or Google coding standards
•
Modularize: It helps you in identifying C++ header files that are suitable to
compose a module, a new concept that is being currently discussed by C++
standardization committees (for more information, please refer to Chapter 10,
Clang Tools with LibTooling)
[ 32 ]
Chapter 2
•
PPTrace: It is a simple tool that tracks the activity of the Clang
C++ preprocessor
More information on how to use these tools and how to build your own tool is
available in Chapter 10, Clang Tools with LibTooling.
Building and installing Clang extra tools
You can obtain an official snapshot of version 3.4 of this project at http://llvm.
org/releases/3.4/clang-tools-extra-3.4.src.tar.gz. If you want to scan
through all available versions, check http://llvm.org/releases/download.html.
To compile this set of tools without difficulty, build it together with the source of the
core LLVM and Clang, relying on the LLVM build system. To do this, you must put
the source directory into the Clang source tree as follows:
$ wget http://llvm.org/releases/3.4/clang-tools-extra-3.4.src.tar.gz
$ tar xzf clang-tools-extra-3.4.src.tar.gz
$ mv clang-tools-extra-3.4 llvm/tools/clang/tools/extra
You may also obtain sources directly from the official LLVM subversion repository:
$ cd llvm/tools/clang/tools
$ svn co http://llvm.org/svn/llvm-project/clang-tools-extra/trunk extra
Recall from the previous chapter that you can replace trunk with tags/RELEASE_34/
final if you want to obtain the stable sources for version 3.4. Alternatively, if
you prefer using the GIT version control software, you can download it with the
following command lines:
$ cd llvm/tools/clang/tools
$ git clone http://llvm.org/git/clang-tools-extra.git extra
After placing the sources into the Clang tree, you must proceed with the compilation
instructions from Chapter 1, Build and Install LLVM, using either CMake or the
autotools-generated configure script. To test for a successful install, run the
clang-modernize tool as follows:
$ clang-modernize –version
clang-modernizer version 3.4
[ 33 ]
External Projects
Understanding Compiler-RT
The Compiler-RT (runtime) project provides target-specific support for low-level
functionality that is not supported by the hardware. For example, 32-bit targets
usually lack instructions to support 64-bit division. Compiler-RT solves this problem
by providing a target-specific and optimized function that implements 64-bit division
while using 32-bit instructions. It provides the same functionalities and thus is the
LLVM equivalent of libgcc. Moreover, it has runtime support for the address and
memory sanitizer tools. You can download Compiler-RT Version 3.4 at http://llvm.
org/releases/3.4/compiler-rt-3.4.src.tar.gz or look for more versions at
http://llvm.org/releases/download.html.
Since it is a crucial component in a working LLVM-based compiler tool chain, we
have already presented how to install Compiler-RT in the previous chapter. If you
still do not have it, remember to put its sources into the projects folder inside the
LLVM source tree, such as in the following command sequence:
$ wget http://llvm.org/releases/3.4/compiler-rt-3.4.src.tar.gz.
$ tar xzf compiler-rt-3.4.src.tar.gz
$ mv compiler-rt-3.4 llvm/projects/compiler-rt
If you prefer, you can rely instead on its SVN repository:
$ cd llvm/projects
$ svn checkout http://llvm.org/svn/llvm-project/compiler-rt/trunk
compiler-rt
You can also download it via a GIT mirror as an alternative to SVN:
$ cd llvm/projects
$ git clone http://llvm.org/git/compiler-rt.git
Compiler-RT works, among others, in GNU/Linux, Darwin, FreeBSD,
and NetBSD. The supported architectures are the following: i386,
x86_64, PowerPC, SPARC64, and ARM.
Seeing Compiler-RT in action
To see a typical situation where the compiler runtime library kicks in, you can
perform a simple experiment by writing a C program that performs 64-bit division:
#include <stdio.h>
#include <stdint.h>
#include <stdlib.h>
int main() {
[ 34 ]
Chapter 2
uint64_t a = 0ULL, b = 0ULL;
scanf ("%lld %lld", &a, &b);
printf ("64-bit division is %lld\n", a / b);
return EXIT_SUCCESS;
}
Downloading the example code
You can download the example code files for all Packt books you
have purchased from your account at http://www.packtpub.
com. If you purchased this book elsewhere, you can visit http://
www.packtpub.com/support and register to have the files
e-mailed directly to you.
If you have a 64-bit x86 system, experiment with two commands by using your
LLVM compiler:
$ clang -S -m32 test.c -o test-32bit.S
$ clang -S test.c -o test-64bit.S
The -m32 flag instructs the compiler to generate a 32-bit x86 program, while the -S
flag produces the x86 assembly language file for this program in test-32bit.S.
If you look at this file, you will see a curious call whenever the program needs to
perform the division:
call ___udivdi3
This function is defined by Compiler-RT and demonstrates where the library will be
used. However, if you omit the -m32 flag and use the 64-bit x86 compiler, as in the
second compiler command that generated the test-64bit.S assembly language file,
you will no longer see a program that requires the assistance of Compiler-RT because
it can easily perform this division with a single instruction:
divq -24(%rbp)
[ 35 ]
External Projects
Using the DragonEgg plugin
As explained earlier, LLVM started as a project that was dependent on GCC when it
still lacked its own C/C++ frontend. In those instances, to use LLVM, you needed to
download a hacked GCC source tree called llvm-gcc and compile it in its entirety.
Since the compilation involved the full GCC package, it was a very time-consuming
and tricky task, requiring knowledge of all the necessary GNU lore to rebuild GCC
by yourself. The DragonEgg project appeared as a clever solution to leverage the
GCC plugin system, separating the LLVM logic in its own and much smaller code
tree. In this way, the users no longer needed to rebuild the entire GCC package, but
just a plugin, and then load it into GCC. DragonEgg is also the sole project under the
LLVM project umbrella that is licensed under GPL.
Even with the rise of Clang, DragonEgg persists today because Clang only handles
the C and C++ languages, while GCC is able to parse a wider variety of languages.
By using the DragonEgg plugin, you can use GCC as a frontend to the LLVM
compiler, being able to compile most of the languages supported by GCC: Ada, C,
C++, and FORTRAN, with partial support for Go, Java, Obj-C, and Obj-C++.
The plugin acts by substituting the middle- and backend of GCC with the LLVM
ones and performs all the compilation steps automatically, as you would expect
from a first-class compiler driver. The compilation pipeline for this new scenario is
represented in the following illustration:
Program source
GCC preprocessor,
lexer, and parser
LLVM IR optimizer
LLVM backend
LLVM integrated
assembler
GCC linker
Program binary
If you wish, you can use the -fplugin-arg-dragonegg-emit-ir -S set of flags to
stop the compilation pipeline at the LLVM IR generation phase and use LLVM tools
to analyze and investigate the result of the frontend, or use the LLVM tools to finish
the compilation yourself. We will see an example shortly.
As it is an LLVM side project, maintainers do not update DragonEgg at the same
pace as the LLVM main project. The most recent stable version of DragonEgg at
the time of this writing was version 3.3, which is bound to the toolset of LLVM 3.3.
Therefore, if you generate LLVM bitcodes, that is, programs written on disk by using
the LLVM IR, you cannot use LLVM tools of a version other than 3.3 to analyze this
file, optimize, or proceed with the compilation. You can find the official DragonEgg
website at http://dragonegg.llvm.org.
[ 36 ]
Chapter 2
Building DragonEgg
To compile and install DragonEgg, first get the source from http://llvm.org/
releases/3.3/dragonegg-3.3.src.tar.gz. For Ubuntu, use the following
commands:
$ wget http://llvm.org/releases/3.3/dragonegg-3.3.src.tar.gz.
$ tar xzvf dragonegg-3.3.src.tar.gz
$ cd dragonegg-3.3.src
If you wish to explore the current but unstable sources from SVN, use the following
command:
$ svn checkout http://llvm.org/svn/llvm-project/dragonegg/trunk dragonegg
For the GIT mirror, use the following:
$ git clone http://llvm.org/git/dragonegg.git
To compile and install, you need to provide the LLVM installation path. The LLVM
version must match the version of DragonEgg being installed. Assuming the same
install prefix, /usr/local/llvm, from Chapter 1, Build and Install LLVM, and assuming
GCC 4.6 is installed and present in your shell PATH variable, you should use the
following commands:
$ GCC=gcc-4.6 LLVM_CONFIG=/usr/local/llvm/bin/llvm-config make
$ cp –a dragonegg.so /usr/local/llvm/lib
Note that the project lacks autotools or CMake project files. You should build directly
by using the make command. If your gcc command already supplies the correct GCC
version that you want to use, you can omit the GCC=gcc-4.6 prefix when running
make. The plugin is the resulting shared library named dragonegg.so, and you can
invoke it using the following GCC command line. Consider that you are compiling a
classic "Hello, World!" C code.
$ gcc-4.6 –fplugin=/usr/local/llvm/lib/dragonegg.so hello.c –o hello
Although DragonEgg theoretically supports GCC version 4.5 and
higher, GCC 4.6 is highly recommended. DragonEgg is not extensively
tested and maintained in other GCC versions.
[ 37 ]
External Projects
Understanding the compilation pipeline with
DragonEgg and LLVM tools
If you wish to see the frontend in action, use the -S -fplugin-arg-dragoneggemit-ir flag, which will emit a human-readable file with the LLVM IR code:
$ gcc-4.6 -fplugin=/usr/local/llvm/lib/dragonegg.so -S -fplugin-argdragonegg-emit-ir hello.c -o hello.ll
$ cat hello.ll
The ability to stop the compilation once the compiler translates the program to IR
and serializing the in-memory representation to disk is a particular characteristic of
LLVM. Most other compilers are unable to do this. After appreciating how LLVM IR
represents your program, you can manually proceed with the compilation process by
using several LLVM tools. The following command invokes a special assembler that
converts LLVM in textual form to binary form, still stored on disk:
$ llvm-as hello.ll -o hello.bc
$ file hello.bc
hello.bc: LLVM bitcode
If you want, you can translate it back to human-readable form by using
a special IR disassembler (llvm-dis). The following tool will apply
target-independent optimizations while displaying to you statistics
about successful code transformations:
$ opt -stats hello.bc -o hello.bc
The -stats flag is optional. Afterwards, you can use the LLVM backend tool to
translate it to target-machine assembly language:
$ llc -stats hello.bc -o hello.S
Again, the -stats flag is optional. Since it is an assembly file, you can use either
your GNU binutils assembler or the LLVM assembler. In the following command,
we will use the LLVM assembler:
$ llvm-mc -filetype=obj hello.S -o hello.o
LLVM defaults to use your system linker because the LLVM linker project, lld,
is currently in development and is not integrated into the core LLVM project.
Therefore, if you do not have lld, you can finish the compilation by using your
regular compiler driver, which will activate your system linker:
$ gcc hello.o -o hello
[ 38 ]
Chapter 2
Keep in mind that, for performance reasons, the real LLVM compiler driver never
serializes the program representation to disk in any stage, except for the object file,
since it still lacks an integrated linker. It uses the in-memory representation and
coordinates several LLVM components to carry on compilation.
Understanding the LLVM test suite
The LLVM test suite consists of an official set of programs and benchmarks used
to test the LLVM compiler. The test suite is very useful to LLVM developers, which
validates optimizations and compiler improvements by compiling and running such
programs. If you are using an unstable release of LLVM, or if you hacked into LLVM
sources and suspect that something is not working as it should, it is very useful to
run the test suite by yourself. However, keep in mind that simpler LLVM regression
and unit tests live in the LLVM main tree, and you can easily run them with make
check-all. The test suite differs from the classic regression and unit tests because
it contains entire benchmarks.
You must place the LLVM test suite in the LLVM source tree to allow the LLVM
build system to recognize it. You can find the sources for version 3.4 at http://
llvm.org/releases/3.4/test-suite-3.4.src.tar.gz.
To fetch the sources, use the following commands:
$ wget http://llvm.org/releases/3.4/test-suite-3.4.src.tar.gz
$ tar xzf test-suite-3.4.src.tar.gz
$ mv test-suite-3.4 llvm/projects/test-suite
If you otherwise prefer downloading it via SVN to get the most recent and possibly
unstable version, use the following:
$ cd llvm/projects
$ svn checkout http://llvm.org/svn/llvm-project/test-suite/trunk testsuite
If you prefer GIT instead, use the following commands:
$ cd llvm/projects
$ git clone http://llvm.org/git/llvm-project/test-suite.git
You need to regenerate the build files of LLVM to use the test suite. In this special
case, you cannot use CMake. You must stick with the classic configure script to
work with the test suite. Repeat the configuration steps described in Chapter 1,
Build and Install LLVM.
[ 39 ]
External Projects
The test suite has a set of Makefiles that test and check benchmarks. You can also
provide a custom Makefile that evaluates custom programs. Place the custom
Makefile in the test suite's source directory using the naming template llvm/
projects/test-suite/TEST.<custom>.Makefile, where the <custom> tag
must be replaced by any name you want. Check llvm/projects/test-suite/
TEST.example.Makefile for an example.
You need to regenerate LLVM build files to allow for a custom or changed
Makefile to work.
During configuration, a directory for the test suite is created in the LLVM object
directory where programs and benchmarks will run. To run and test the example
Makefile, enter the object directory path from Chapter 1, Build and Install LLVM, and
execute the following command lines:
$ cd your-llvm-build-folder/projects/test-suite
$ make TEST="example" report
Using LLDB
The LLDB (Low Level Debugger) project is a debugger built with the LLVM
infrastructure, being actively developed and shipped as the debugger of Xcode 5 on
Mac OS X. Since its development began in 2011, outside the scope of Xcode, LLDB
had not yet released a stable version until the time of this writing. You can obtain
LLDB sources at http://llvm.org/releases/3.4/lldb-3.4.src.tar.gz. Like
many projects that depend on LLVM, you can easily build it by integrating it in the
LLVM build system. To accomplish this, just put its source code in the LLVM tools
folder, as in the following example:
$ wget http://llvm.org/releases/3.4/lldb-3.4.src.tar.gz
$ tar xvf lldb-3.4.src.tar.gz
$ mv lldb-3.4 llvm/tools/lldb
You can alternatively use its SVN repository to get the latest revision:
$ cd llvm/tools
$ svn checkout http://llvm.org/svn/llvm-project/lldb/trunk lldb
If you prefer, you can use its GIT mirror instead:
$ cd llvm/tools
$ git clone http://llvm.org/git/llvm-project/lldb.git
[ 40 ]
Chapter 2
LLDB is still experimental for GNU/Linux systems.
Before building it, note that LLDB has some software prerequisites: Swig, libedit
(only for Linux), and Python. On Ubuntu systems, for example, you can solve these
dependencies with the following command:
$ sudo apt-get install swig libedit-dev python
Remember that, as with other projects presented in this chapter, you need to
regenerate LLVM build files to allow for LLDB compilation. Follow the same steps
for building LLVM from source that we saw in Chapter 1, Build and Install LLVM.
To perform a simple test on your recent lldb installation, just run it with the -v flag
to print its version:
$ lldb -v
lldb version 3.4 ( revision )
Exercising a debug session with LLDB
To see how it looks to use LLDB, we will start a debug session to analyze the Clang
binary. The Clang binary contains many C++ symbols you can inspect. If you
compiled the LLVM/Clang project with the default options, you have a Clang binary
with debug symbols. This happens when you omit the --enable-optimized flag
when running the configure script to generate LLVM Makefiles, or use -DCMAKE_
BUILD_TYPE="Debug" when running CMake, which is the default build type.
If you are familiar with GDB, you may be interested in referring to the table at
http://lldb.llvm.org/lldb-gdb.html, which maps common GDB commands
to the LLDB counterpart.
In the same way as GDB, we start LLDB by passing as a command-line argument the
path to the executable we want to debug:
$ lldb where-your-llvm-is-installed/bin/clang
Current executable set to 'where-your-llvm-is-installed/bin/clang'
(x86_64).
(lldb) break main
Breakpoint 1: where = clang`main + 48 at driver.cpp:293, address =
0x000000001000109e0
[ 41 ]
External Projects
To start debugging, we provide the command-line arguments to the Clang binary.
We will use the -v argument, which should print the Clang version:
(lldb) run -v
After LLDB hits our breakpoint, feel free to step through each C++ line of code with
the next command. As with GDB, LLDB accepts any command abbreviation, such as
n instead of next, as long as it stays unambiguous:
(lldb) n
To see how LLDB prints C++ objects, step until you reach the line after declaring the
argv or the ArgAllocator object and print it:
(lldb) n
(lldb) p ArgAllocator
(llvm::SpecificBumpPtrAllocator<char>) $0 = {
Allocator = {
SlabSize = 4096
SizeThreshld = 4096
DefaultSlabAllocator = (Allocator = llvm::MallocAllocator @
0x00007f85f1497f68)
Allocator = 0x0000007fffbff200
CurSlab = 0x0000000000000000
CurPtr = 0x0000000000000000
End = 0x0000000000000000
BytesAllocated = 0
}
}
After you are satisfied, quit the debugger with the q command:
(lldb) q
Quitting LLDB will kill one or more processes. Do you really want to
proceed: [Y/n] y
[ 42 ]
Chapter 2
Introducing the libc++ standard library
The libc++ library is a C++ standard library rewrite for the LLVM project umbrella
that supports the most recent C++ standards, including C++11 and C++1y, and that
is dual-licensed under the MIT license and the UIUC license. The libc++ library is an
important companion of Compiler-RT, being part of the runtime libraries used by
Clang++ to build your final C++ executable, along with libclc (the OpenCL runtime
library) when necessary. It differs from Compiler-RT because it is not crucial for you
to build libc++. Clang is not limited to it and may link your program with the GNU
libstdc++ in the absence of libc++. If you have both, you can choose which library
Clang++ should use with the -stdlib switch. The libc++ library supports x86 and
x86_64 processors and it was designed as a replacement to the GNU libstdc++ for
Mac OS X and GNU/Linux systems.
libc++ support on GNU/Linux is still under way, and is not as stable as the
Mac OS X one.
One of the major impediments to continue working in the GNU libstdc++, according
to libc++ developers, is that it would require a major code rewrite to support the
newer C++ standards, and that the mainline libstdc++ development switched to a
GPLv3 license that some companies that back the LLVM project are unable to use.
Notice that LLVM projects are routinely used in commercial products in a way that
is incompatible with the GPL philosophy. In the face of these challenges, the LLVM
community decided to work on a new C++ standard library chiefly for Mac OS X,
with support for Linux.
The easiest way to get libc++ in your Apple computer is to install Xcode 4.2 or later.
If you intend to build the library yourself for your GNU/Linux machine, bear
in mind that the C++ standard library is composed of the library itself and a
lower-level layer that implements functionalities dealing with exception handling
and Run-Time Type Information (RTTI). This separation of concerns allow the
C++ standard library to be more easily ported to other systems. It also gives you
different options when building your C++ standard library. You can build libc++
linked with either libsupc++, the GNU implementation of this lower-level layer, or
with libc++abi, the implementation of the LLVM team. However, libc++abi currently
only supports Mac OS X systems.
[ 43 ]
External Projects
To build libc++ with libsupc++ in a GNU/Linux machine, start by downloading the
source packages:
$ wget http://llvm.org/releases/3.4/libcxx-3.4.src.tar.gz
$ tar xvf libcxx-3.4.src.tar.gz
$ mv libcxx-3.4 libcxx
You still could not rely, until the time of this writing, on the LLVM build system to
build the library for you as we did with other projects. Therefore, notice that we did
not put libc++ sources into the LLVM source tree this time.
Alternatively, the SVN repository with the experimental top-of-trunk version is
also available:
$ svn co http://llvm.org/svn/llvm-project/libcxx/trunk libcxx
You can also use the GIT mirror:
$ git clone http://llvm.org/git/llvm-project/libcxx.git
As soon as you have a working LLVM-based compiler, you need to generate the
libc++ build files that specifically use your new LLVM-based compiler. In this
example, we will assume that we have a working LLVM 3.4 compiler in our path.
To use libsupc++, we first need to find where you have its headers installed in
your system. Since it is part of the regular GCC compiler for GNU/Linux, you
can discover this by using the following commands:
$ echo | g++ -Wp,-v -x c++ - -fsyntax-only
#include "..." search starts here:
#include <...> search starts here:
/usr/include/c++/4.7.0
/usr/include/c++/4.7.0/x86_64-pc-linux-gnu
(Subsequent entries omitted)
In general, the first two paths indicate where the libsupc++ headers are. To confirm
this, look for the presence of a libsupc++ header file such as bits/exception_ptr.h:
$ find /usr/include/c++/4.7.0 | grep bits/exception_ptr.h
Afterwards, generate libc++ build files to compile it with your LLVM-based compiler.
To perform this, override the shell CC and CXX environment variables, which define
the system C and C++ compilers, respectively, to use the LLVM compiler you want
to embed with libc++. To use CMake to build libc++ with libsupc++, you will need to
define the CMake parameters LIBCXX_CXX_ABI, which define the lower-level library to
use, and LIBCXX_LIBSUPCXX_INCLUDE_PATHS, which is a semicolon-separated list of
paths pointing to the folders with the libsupc++ include files that you just discovered:
[ 44 ]
Chapter 2
$ mkdir where-you-want-to-build
$ cd where-you-want-to-build
$ CC=clang CXX=clang++ cmake -DLIBCXX_CXX_ABI=libstdc++
-DLIBCXX_LIBSUPCXX_INCLUDE_PATHS="/usr/include/c++/4.7.0;/usr/
include/c++/4.7.0/x86_64-pc-linux-gnu" -DCMAKE_INSTALL_PREFIX=
"/usr" ../libcxx
At this stage, make sure that ../libcxx is the correct path to reach your libc++
source folder. Run the make command to build the project. Use sudo for the
installation command, since we will install the library in /usr to allow clang++
to find the library later:
$ make && sudo make install
You can experiment with the new library and the newest C++ standards by using the
-stdlib=libc++ flag when calling clang++ to compile your C++ project.
To see your new library in action, compile a simple C++ application with the
following command:
$ clang++ -stdlib=libc++ hello.cpp -o hello
It is possible to perform a simple experiment with the readelf command to analyze
the hello binary and confirm that it is indeed linked with your new libc++ library:
$ readelf d hello
Dynamic section at offset 0x2f00 contains 25 entries:
Tag
0x00000001
Type
(NEEDED)
Name/Value
Shared library: [libc++.so.1]
Subsequent entries are omitted in the preceding code. We see right at the first ELF
dynamic section entry a specific request to load the libc++.so.1 shared library that
we just compiled, confirming that our C++ binaries now use the new C++ standard
library of LLVM. You can find additional information at the official project site,
http://libcxx.llvm.org/.
[ 45 ]
External Projects
Summary
The LLVM umbrella is composed of several projects; some of them are not necessary
for the main compiler driver to work but are useful tools and libraries. In this
chapter, we showed how one can build and install such components. Further
chapters will explore in detail some of those tools. We advise the reader to
come back to this chapter again for build and install instructions.
In the next chapter, we will introduce you to the design of the LLVM core libraries
and tools.
[ 46 ]
Tools and Design
The LLVM project consists of several libraries and tools that, together, make a large
compiler infrastructure. A careful design is the key to connecting all these pieces
together. Throughout, LLVM emphasizes the philosophy that everything is a library,
leaving a relatively small amount of code that is not immediately reusable and is
exclusive of a particular tool. Still, a large number of tools allows the user to exercise
the libraries from a command terminal in many ways. In this chapter, we will cover
the following topics:
•
•
•
•
•
An overview and design of LLVM core libraries
How the compiler driver works
Beyond the compiler driver: meeting LLVM intermediary tools
How to write your first LLVM tool
General advice on navigating the LLVM source code
Introducing LLVM's basic design
principles and its history
LLVM is a notoriously didactic framework because of a high degree of organization
in its several tools, which allows the curious user to observe many steps of the
compilation. The design decisions go back to its first versions more than 10 years
ago when the project, which had a strong focus on backend algorithms, relied
on GCC to translate high-level languages, such as C, to the LLVM intermediate
representation (IR). Today, a central aspect of the design of LLVM is its IR. It uses
Single-Static Assignments (SSA), with two important characteristics:
•
Code is organized as three-address instructions
•
It has an infinite number of registers
Tools and Design
This does not mean, however, that LLVM has a single form of representing the
program. Throughout the compilation process, other intermediary data structures
hold the program logic and help its translation across major checkpoints. Technically,
they are also intermediate forms of program representation. For example, LLVM
employs the following additional data structures across different compilation stages:
•
When translating C or C++ to the LLVM IR, Clang will represent the
program in the memory by using an Abstract Syntax Tree (AST) structure
(the TranslationUnitDecl class)
•
When translating the LLVM IR to a machine-specific assembly language,
LLVM will first convert the program to a Directed Acyclic Graph (DAG)
form to allow easy instruction selection (the SelectionDAG class) and then it
will convert it back to a three-address representation to allow the instruction
scheduling to happen (the MachineFunction class)
•
To implement assemblers and linkers, LLVM uses a fourth intermediary
data structure (the MCModule class) to hold the program representation in
the context of object files
Besides other forms of program representation in LLVM, the LLVM IR is the
most important one. It has the particularity of being not only an in-memory
representation, but also being stored on disk. The fact that LLVM IR enjoys a
specific encoding to live in the outside world is another important decision that
was made early in the project lifetime and that reflected, at that time, an academic
interest to study lifelong program optimizations.
In this philosophy, the compiler goes beyond applying optimizations at compile
time, exploring optimization opportunities at the installation time, runtime, and
idle time (when the program is not running). In this way, the optimization happens
throughout its entire life, thereby explaining the name of this concept. For example,
when the user is not running the program and the computer is idle, the operating
system can launch a compiler daemon to process the profiling data collected during
runtime to reoptimize the program for the specific use cases of this user.
Notice that by being able to be stored on disk, the LLVM IR, which is a key enabler of
lifelong program optimizations, offers an alternative way to encode entire programs.
When the whole program is stored in the form of a compiler IR, it is also possible to
perform a new range of very effective inter-procedural optimizations that cross the
boundary of a single translation unit or a C file. Thus, this also allows powerful linktime optimizations to happen.
[ 48 ]
Chapter 3
On the other hand, before lifelong program optimizations become a reality,
program distribution needs to happen at the LLVM IR level, which does not
happen. This would imply that LLVM will run as a platform or virtual machine
and will compete with Java, which too has serious challenges. For example, the
LLVM IR is not target-independent like Java. LLVM has also not invested in
powerful feedback-directed optimizations for the post-installation time. For the
reader who is interested in reading more about these technical challenges, we
suggest reading a helpful LLVMdev discussion thread at http://lists.cs.uiuc.
edu/pipermail/llvmdev/2011-October/043719.html.
As the project matured, the design decision of maintaining an on-disk representation
of the compiler IR remained as an enabler of link-time optimizations, giving less
attention to the original idea of lifelong program optimizations. Eventually, LLVM's
core libraries formalized their lack of interest in becoming a platform by renouncing
the acronym Low Level Virtual Machine, adopting just the name LLVM for historical
reasons, making it clear that the LLVM project is geared to being a strong and
practical C/C++ compiler rather than a Java platform competitor.
Still, the on-disk representation alone has promising applications, besides linktime optimizations, that some groups are fighting to bring to the real world. For
example, the FreeBSD community wants to embed program executables with its
LLVM program representation to allow install-time or offline microarchitectural
optimizations. In this scenario, even if the program was compiled to a generic x86,
when the user installs the program, for example, on the specific Intel Haswell x86
processor, the LLVM infrastructure can use the LLVM representation of the binary
and specialize it to use new instructions supported on Haswell. Even though this
is a new idea that is currently being assessed, it demonstrates that the on-disk
LLVM representation allows for radical new solutions. The expectations are for
microarchitectural optimizations because the full platform independence seen in Java
looks impractical in LLVM and this possibility is currently explored only on external
projects (see PNaCl, Chromium's Portable Native Client).
As a compiler IR, the two basic principles of the LLVM IR that guided the
development of the core libraries are the following:
•
SSA representation and infinite registers that allow fast optimizations
•
Easy link-time optimizations by storing entire programs in an on-disk
IR representation
[ 49 ]
Tools and Design
Understanding LLVM today
Nowadays, the LLVM project has grown and holds a huge collection of compilerrelated tools. In fact, the name LLVM might refer to any of the following:
•
The LLVM project/infrastructure: This is an umbrella for several projects
that, together, form a complete compiler: frontends, backends, optimizers,
assemblers, linkers, libc++, compiler-rt, and a JIT engine. The word "LLVM"
has this meaning, for example, in the following sentence: "LLVM is comprised
of several projects".
•
An LLVM-based compiler: This is a compiler built partially or completely
with the LLVM infrastructure. For example, a compiler might use LLVM for
the frontend and backend but use GCC and GNU system libraries to perform
the final link. LLVM has this meaning in the following sentence, for example:
"I used LLVM to compile C programs to a MIPS platform".
•
LLVM libraries: This is the reusable code portion of the LLVM infrastructure.
For example, LLVM has this meaning in the sentence: "My project uses LLVM
to generate code through its Just-in-Time compilation framework".
•
LLVM core: The optimizations that happen at the intermediate language
level and the backend algorithms form the LLVM core where the project
started. LLVM has this meaning in the following sentence: "LLVM and
Clang are two different projects".
•
The LLVM IR: This is the LLVM compiler intermediate representation.
LLVM has this meaning when used in sentences such as "I built a frontend
that translates my own language to LLVM".
To understand the LLVM project, you need to be aware of the most important parts
of the infrastructure:
•
Frontend: This is the compiler step that translates computer-programming
languages, such as C, C++, and Objective-C, into the LLVM compiler IR. This
includes a lexical analyzer, a syntax parser, a semantic analyzer, and the LLVM
IR code generator. The Clang project implements all frontend-related steps
while providing a plugin interface and a separate static analyzer tool to
allow deep analyses. For details, you can go through Chapter 4, The Frontend,
Chapter 9, The Clang Static Analyzer, and Chapter 10, Clang Tools with LibTooling.
[ 50 ]
Chapter 3
•
IR: The LLVM IR has both human-readable and binary-encoded
representations. Tools and libraries provide interfaces to IR construction,
assembling, and disassembling. The LLVM optimizer also operates on the IR
where most part of optimizations is applied. We explain the IR in detail in
Chapter 5, The LLVM Intermediate Representation.
•
Backend: This is the step that is responsible for code generation. It converts
LLVM IR to target-specific assembly code or object code binaries. Register
allocation, loop transformations, peephole optimizers, and target-specific
optimizations/transformations belong to the backend. We analyze this in
depth in Chapter 6, The Backend.
The following diagram illustrates the components and gives us an overview of
the entire infrastructure when used in a specific configuration. Notice that we can
reorganize the components and utilize them in a different arrangement, for example,
not using the LLVM IR linker if we do not want to explore link-time optimizations.
Program source
Clang frontend or
GCC with DragonEgg
Program source
Clang frontend or
GCC with DragonEgg
Program source
Clang frontend or
GCC with DragonEgg
LLVM IR linker
LLVM IR optimizer
LLVM backend
Compiler-RT runtime
libraries
Libc++ standard
library
System libraries
LLVM integrated
assembler
GCC linker or LLD
(under development)
Program binary
The interaction between each of these compiler parts can happen in the following
two ways:
•
In memory: This happens via a single supervisor tool, such as Clang, that
uses each LLVM component as a library and depends on the data structures
allocated in the memory to feed the output of a stage to the input of another
•
Through files: This happens via a user who launches smaller standalone
tools that write the result of a particular component to a file on disk,
depending on the user to launch the next tool with this file as the input
Hence, higher-level tools, such as Clang, can incorporate the usage of several other
smaller tools by linking together the libraries that implement their functionality.
This is possible because LLVM uses a design that emphasizes the reuse of the
maximum amount of code, which then lives in libraries. Moreover, standalone tools
that incarnate a smaller number of libraries are useful because they allow a user to
interact directly with a specific LLVM component via the command line.
[ 51 ]
Tools and Design
For example, consider the following diagram. We show you the names of tools
in boxes in boldface and libraries that they use to implement their functionality
in separated boxes in regular font. In this example, the LLVM backend tool, llc,
uses the libLLVMCodeGen library to implement part of its functionality while the
opt command, which launches only the LLVM IR-level optimizer, uses another
library—called libLLVMipa—to implement target-independent interprocedural
optimizations. Yet, we see clang, a larger tool that uses both libraries to override llc
and opt and present a simpler interface to the user. Therefore, any task performed
by such higher-level tools can be decomposed into a chain of lower-level tools while
yielding the same results. The next sections illustrate this concept. In practice, Clang
is able to carry on the entire compilation and not just the work of opt and llc. That
explains why, in a static build, the Clang binary is often the largest, since it links with
and exercises the entire LLVM ecosystem.
libLLVMipa
libLLVMCodeGen
opt
llc
clang
Interacting with the compiler driver
A compiler driver is similar to the clerk at a burger place who interfaces with
you, recognizes your order, passes it to the backend that builds your burger, and
then delivers it back to you with coke and perhaps some ketchup sachets, thereby
completing your order. The driver is responsible for integrating all necessary
libraries and tools in order to provide the user with a friendlier experience, freeing
the user from the need to use individual compiler stages such as the frontend,
backend, assembler, and linker. Once you feed your program source code to a
compiler driver, it can generate an executable. In LLVM and Clang, the compiler
driver is the clang tool.
Consider the simple C program, hello.c:
#include <stdio.h>
int main() {
printf("Hello, World!\n");
return 0;
}
[ 52 ]
Chapter 3
To generate an executable for this simple program, use the following command:
$ clang hello.c –o hello
Use instructions from Chapter 1, Build and Install LLVM, to
obtain a ready-to-use version of LLVM.
For people who are familiar with GCC, note that the preceding command is very
similar to the one used for GCC. In fact, the Clang compiler driver was designed to
be compatible with GCC flags and command structure, allowing LLVM to be used
as a replacement for GCC in many projects. For Windows, Clang also has a version
called clang-cl.exe that mimics the Visual Studio C++ compiler command-line
interface. The Clang compiler driver implicitly invokes all other tools from the
frontend to the linker.
In order to see all subsequent tools called by the driver to complete your order,
use the -### command argument:
$ clang -### hello.c –o hello
clang version 3.4 (tags/RELEASE_34/final)
Target: x86_64-apple-darwin11.4.2
Thread model: posix
"/bin/clang" -cc1 -triple x86_64-apple-macosx10.7.0 … -main-file-name
hello.c (...) /examples/hello/hello.o -x c hello.c
"/opt/local/bin/ld" (...) -o hello /examples/hello/hello.o (...)
The first tool the Clang driver calls is the clang tool itself with the -cc1 parameter,
which disables the compiler-driver mode while enabling the compiler mode. It also
uses a myriad of arguments to tweak the C/C++ options. Since LLVM components
are libraries, the clang –cc1 is linked with the IR generation, the code generator
for the target machine, and assembler libraries. Therefore, after parsing, clang –
cc1 itself is able to call other libraries and supervise the compilation pipeline in the
memory until the object file is ready. Afterwards, the Clang driver (different from
the compiler clang -cc1) invokes the linker, which is an external tool, to generate
the executable file, as shown in the preceding output line. It uses the system linker to
complete the compilation because the LLVM linker, lld, is still under development.
Notice that it is much faster to use the memory than the disk, making intermediary
compilation files unattractive. This explains why Clang, the LLVM frontend and
the first tool to interact with the input, is responsible for carrying on the rest of the
compilation in the memory rather than writing an intermediary output file to be read
by another tool.
[ 53 ]
Tools and Design
Using standalone tools
We can also exercise the compilation workflow described previously through the
usage of LLVM standalone tools, linking the output of one tool into the output
of another. Although this slows downs the compilation due to the use of the disk
to write intermediary files, it is an interesting didactic exercise to observe the
compilation pipeline. This also allows you to fine-tune the parameters given to
intermediary tools. Some of these tools are as follows:
•
opt: This is a tool that is aimed at optimizing a program at the IR level. The
•
llc: This is a tool that converts the LLVM bitcode to a target-machine
•
llvm-mc: This tool is able to assemble instructions and generate object files for
•
lli: This tool implements both an interpreter and a JIT compiler for the
•
llvm-link: This tool links together several LLVM bitcodes to produce
•
llvm-as: This tool transforms human-readable LLVM IR files, called LLVM
•
llvm-dis: This tool decodes LLVM bitcodes into LLVM assemblies.
input must be an LLVM bitcode file (encoded LLVM IR) and the generated
output file must have the same type.
assembly language file or object file via a specific backend. You can pass
arguments to select an optimization level, to turn on debugging options,
and to enable or disable target-specific optimizations.
several object formats such as ELF, MachO, and PE. It can also disassemble
the same objects, dumping the equivalent assembly information and the
internal LLVM machine instruction data structures for such instructions.
LLVM IR.
a single LLVM bitcode that encompasses all inputs.
assemblies, into LLVM bitcodes.
Let's consider a simple C program composed of functions among multiple source
files. The first source file is main.c, and it is reproduced as follows:
#include <stdio.h>
int sum(int x, int y);
int main() {
int r = sum(3, 4);
printf("r = %d\n", r);
return 0;
}
[ 54 ]
Chapter 3
The second file is sum.c, and it is reproduced as follows:
int sum(int x, int y) {
return x+y;
}
We can compile this C program with the following command:
$ clang main.c sum.c –o sum
However, we can achieve the same result using the standalone tools. First, we change
the clang command to generate LLVM bitcode files for each C source file and stop
there instead of proceeding with the entire compilation:
$ clang -emit-llvm -c main.c -o main.bc
$ clang -emit-llvm -c sum.c -o sum.bc
The –emit-llvm flag tells clang to generate either the LLVM bitcode or LLVM
assembly files, depending on the presence of the -c or -S flag. In the preceding
example, -emit-llvm, together with the –c flag, tells clang to generate an object
file in the LLVM bitcode format. Using the -flto -c combination of flags yields the
same result. If you intend to generate the LLVM assembly, which is human readable,
use the following pair of commands instead:
$ clang -emit-llvm –S -c main.c -o main.ll
$ clang -emit-llvm –S -c sum.c -o sum.ll
Notice that without the -emit-llvm or -flto flags, the -c
flag generates an object file with the target machine language
while the -S, generates the target assembly language file.
This behavior is compatible with GCC.
The .bc and .ll are the file extensions that are used for the LLVM bitcode and
assembly files, respectively. In order to continue with the compilation, we can
proceed in the following two ways:
•
Generate target-specific object files from each LLVM bitcode and build the
program executable by linking them with the system linker (part A of the
next diagram):
$ llc -filetype=obj main.bc -o main.o
$ llc -filetype=obj sum.bc -o sum.o
$ clang main.o sum.o -o sum
[ 55 ]
Tools and Design
•
First, link the two LLVM bitcodes into a final LLVM bitcode. Then, build the
target-specific object file from the final bitcode and generate the program
executable by calling the system linker (part B of the following diagram):
$ llvm-link main.bc sum.bc -o sum.linked.bc
$ llc -filetype=obj sum.linked.bc -o sum.linked.o
$ clang sum.linked.o -o sum
A)
sum.c
-emit-llvm
sum.bc
llc
sum.o
System linker
sum
main.c
-emit-llvm
main.bc
llc
main.o
B)
sum.c
main.c
-emit-llvm
-emit-llvm
clang main.o sum.o -o sum
optimizations
sum.bc
llvm-link
main.bc
sum.linked.bc
llc
sum.linked.o
System linker
clang sum.linked.o -o sum
sum
The -filetype=obj parameter specifies an object file output instead of the target
assembly file. We use the Clang driver, clang, to invoke the linker, but the system
linker can be used directly if you know all parameters that your system linker
requires to link with your system libraries.
Linking IR files prior to the backend invocation (llc) allows the final produced
IR to be further optimized with link-time optimizations provided by the opt tool
(for examples, see Chapter 5, The LLVM Intermediate Representation). Alternatively,
the llc tool can generate an assembly output, which can be further assembled
using llvm-mc. We show you more details of this interface in Chapter 6, The Backend.
Delving into the LLVM internal design
In order to decouple the compiler into several tools, the LLVM design typically
enforces component interaction to happen at a high level of abstraction. It segregates
different components into separate libraries; it is written in C++ using object-oriented
paradigms and a pluggable pass interface is available, allowing easy integration of
transformations and optimizations throughout the compilation pipeline.
[ 56 ]
Chapter 3
Getting to know LLVM's basic libraries
The LLVM and Clang logic is carefully organized into the following libraries:
•
libLLVMCore: This contains all the logic related to the LLVM IR: IR
•
libLLVMAnalysis: This groups several IR analysis passes, such as alias
•
libLLVMCodeGen: This implements target-independent code generation
•
libLLVMTarget: This provides access to the target machine information
•
libLLVMX86CodeGen: This has the x86 target-specific code generation
•
libLLVMSupport: This comprises a collection of general utilities. Error,
•
libclang: This implements a C interface, as opposed to C++, which is
construction (data layout, instructions, basic blocks, and functions)
and the IR verifier. It also provides the pass manager.
analysis, dependence analysis, constant folding, loop info, memory
dependence analysis, and instruction simplify.
and machine level—the lower level version of the LLVM IR—analyses
and transformations.
by generic target abstractions. These high-level abstractions provide the
communication gateway between generic backend algorithms implemented
in libLLVMCodeGen and the target-specific logic that is reserved for the
next library.
information, transformation, and analysis passes, which compose the x86
backend. Note that there is a different library for each machine target, such
as LLVMARMCodeGen and LLVMMipsCodeGen, implementing ARM and MIPS
backends, respectively.
integer and floating point handling, command-line parsing, debugging,
file support, and string manipulation are examples of algorithms that
are implemented in this library, which is universally used across
LLVM components.
the default implementation language of LLVM code, to access much of
Clang's frontend functionalities—diagnostic reporting, AST traversing,
code completion, mapping between cursors, and source code. Since it is
a C, simpler interface, it allows projects written in other languages, such
as Python, to use the Clang functionality more easily, albeit the C interface
is designed to be more stable and allow external projects to depend
on it. This only covers a subset of the C++ interface used by internal
LLVM components.
[ 57 ]
Tools and Design
•
libclangDriver: This contains the set of classes used by the compiler driver
•
libclangAnalysis: This is a set of frontend level analyses provided by
tool to understand GCC-like command-line parameters to prepare jobs and
to organize adequate parameters for external tools to finish different steps
of the compilation. It can manage different strategies for the compilation,
depending on the target platform.
Clang. It features CFG and call-graph construction, reachable code, format
string security, among others.
As an example of how these libraries can be used to compose LLVM tools, Figure
3.3 shows you the llc tool's dependence upon libLLVMCodeGen, libLLVMTarget,
and others as well as the dependence of these libraries on others. Still, notice that the
preceding list is not complete.
We will leave other libraries that were omitted from this initial overview to later
chapters. For Version 3.0, the LLVM team wrote a nice document showing the
dependency relationship between all LLVM libraries. Even though the document is
outdated, it still provides an interesting overview of the organization of the libraries
and is accessible at http://llvm.org/releases/3.0/docs/UsingLibraries.html.
llc
libLLVMBitReader
libLLVMCore
libLLVMAsmParser
libLLVMSupport
libLLVMIRReader
libLLVMX86CodeGen
...
...
...
libLLVMAnalysis
...
libLLVMCodeGen
...
libLLVMTarget
...
Introducing LLVM's C++ practices
The LLVM libraries and tools are written in C++ to take advantage of
object-oriented programming paradigms and to enhance interoperability
between its parts. Additionally, good C++ programming practices are enforced
in an attempt to avoid inefficiencies in the code as much as possible.
[ 58 ]
Chapter 3
Seeing polymorphism in practice
Inheritance and polymorphism abstracts common tasks of the backends by leaving
generic code-generation algorithms to base classes. In this scheme, each specific
backend can focus on implementing its particularities by writing fewer necessary
methods that override superclass generic operations. LibLLVMCodeGen contains
the common algorithms, and LibLLVMTarget contains the interface that abstracts
individual machines. The following code snippet (from llvm/lib/Target/Mips/
MipsTargetMachine.h) shows you how a MIPS target-machine description class is
declared as a subclass of the LLVMTargetMachine class and illustrates this concept.
This code is part of the LLVMMipsCodeGen library:
class MipsTargetMachine : public LLVMTargetMachine {
MipsSubtarget
Subtarget;
const DataLayout
DL;
...
To further clarify this design choice, we show you another backend example in which
the target-independent register allocator, which is common to all backends, needs to
know which registers are reserved and cannot be used for allocation. This information
depends upon the specific target and cannot be encoded into generic superclasses. It
performs this task through the use of MachineRegisterInfo::getReservedRegs(),
which is a generic method that must be overridden by each target. The following code
snippet (from llvm/lib/Target/Sparc/SparcRegisterInfo.cpp) shows you an
example of how the SPARC target overrides this method:
BitVector SparcRegisterInfo::getReservedRegs(…) const {
BitVector Reserved(getNumRegs());
Reserved.set(SP::G1);
Reserved.set(SP::G2);
...
In this code, the SPARC backend individually selects which registers cannot be used
for general register allocation by building a bit vector.
Introducing C++ templates in LLVM
LLVM frequently uses C++ templates, although special caution is taken to control the
long compilation times that are typical of C++ projects that abuse templates. Whenever
possible, it employs template specialization to allow the implementation of fast and
recurrently used common tasks. As a template example in the LLVM code, let's present
the function that checks whether an integer, passed as a parameter, fits into the given
bit width, which is the template parameter (code from llvm/include/llvm/Support/
MathExtras.h):
template<unsigned N>
inline bool isInt(int64_t x) {
[ 59 ]
Tools and Design
return N >= 64 ||
(-(INT64_C(1)<<(N-1)) <= x && x < (INT64_C(1)<<(N-1)));
}
In this code, notice how the template has code that handles all bit width values, N. It
features an early comparison to return true whenever the bit width is greater than
64 bits. If not, it builds two expressions, which are the lower and upper bounds for
this bit width, checking whether x is between these bounds. Compare this code to the
following template specialization, which is used to get faster code for the common
case where the bit width is 8:
llvm/include/llvm/Support/MathExtras.h:
template<>
inline bool isInt<8>(int64_t x) {
return static_cast<int8_t>(x) == x;
}
This code brings down the number of comparisons from three to one, thereby
justifying the specialization.
Enforcing C++ best practices in LLVM
It is common to introduce bugs unintentionally when programming, but the
difference is in how you manage your bugs. The LLVM philosophy advises you to
use the assertion mechanism implemented in libLLVMSupport whenever possible.
Notice that debugging a compiler can be particularly difficult, because the product
of the compilation is another program. Therefore, if you can detect erratic behavior
earlier, before writing a complicated output that is not trivial in order to determine
whether it is correct, you are saving a lot of your time. For example, let's see the code
of an ARM backend pass that changes the layout of constant pools, redistributing
them across several smaller pools "islands" across a function. This strategy is
commonly used in ARM programs to load large constants with a limited PC-relative
addressing mechanism because a single, larger pool can be placed in a location that
is too far away from the instruction that uses it. This code lives at llvm/lib/Target/
ARM/ARMConstantIslandPass.cpp and we show an excerpt of it next:
const DataLayout &TD = *MF->getTarget().getDataLayout();
for (unsigned i = 0, e = CPs.size(); i != e; ++i) {
unsigned Size = TD.getTypeAllocSize(CPs[i].getType());
assert(Size >= 4 && "Too small constant pool entry");
unsigned Align = CPs[i].getAlignment();
assert(isPowerOf2_32(Align) && "Invalid alignment");
// Verify that all constant pool entries are a multiple of their
alignment.
// If not, we would have to pad them out so that instructions
stay aligned.
[ 60 ]
Chapter 3
assert((Size % Align) == 0 && "CP Entry not multiple of 4
bytes!");
In this fragment, the code iterates through a data structure that represents ARM
constant pools, and the programmer expects each field of this object to respect
specific constraints. Notice how the programmer keeps the data semantics under
his control by using assert calls. If something is different from what he expected
when writing this code, his program will immediately quit execution and print the
assertion call that failed. The programmer uses the idiom of suffixing the Boolean
expression with && "error cause!", which does not interfere in the evaluation of
the Boolean expression of assert but will give a short textual explanation about the
assertion failure when this expression is printed in the event of its failure. The use of
asserts has a performance impact that is completely removed once the LLVM project
is compiled in a release build because it disables the assertions.
Another common practice that you will see with frequency in the LLVM code is the
use of smart pointers. They provide automatic memory deallocation once the symbol
goes out of scope and is used in the LLVM code base to, for example, hold the target
information and modules. In the past, LLVM provided a special smart pointer class
called OwningPtr, which is defined in llvm/include/llvm/ADT/OwningPtr.h.
As of LLVM 3.5, this class has been deprecated in favor of std::unique_ptr(),
introduced with the C++11 standard.
If you are interested in the full list of C++ best practices adopted in the LLVM
project, visit http://llvm.org/docs/CodingStandards.html. It is a worthwhile
read for every C++ programmer.
Making string references lightweight in LLVM
The LLVM project has an extensive library of data structures that support common
algorithms, and strings have a special place in the LLVM libraries. They belong to a
class in C++ that leads to a heated discussion: when should we use a simple char*
versus the string class of the C++ standard library? To discuss this in the context of
LLVM, consider the intensive use of string references throughout LLVM libraries to
reference the name of LLVM modules, functions, and values, among others. In some
cases, the strings LLVM handles can contain null characters, rendering the approach
of passing constant string references as const char* pointers to be impossible, since
the null character terminates a C-style string. On the other hand, working with const
std::string& frequently introduces extra heap allocations, because the string class
needs to own the character buffer. We see this in the following example:
bool hasComma (const std::string &a) {
// code
}
void myfunc() {
[ 61 ]
Tools and Design
char buffer [40];
// code to create our string in our own buffer
hasComma(buffer); // C++ compiler is forced to create a new
string object, duplicating the buffer
hasComma("hello, world!"); // Likewise
}
Notice that every time we try to create a string in our own buffer, we will spend an
extra heap allocation to copy this string to the internal buffer of the string object,
which must own its buffer. In the first case, we have a stack-allocated string while
in the second case, the string is held as a global constant. What C++ is missing, for
these cases, is a simple class that avoids unnecessary allocations when we only
need a reference to a string. Even if we work strictly with string objects, saving
unnecessary heap allocations, a reference to a string object imposes two indirections.
Since the string class already works with an internal pointer to hold its data,
passing a pointer to a string object introduces the overhead of a double reference
when we access the actual data.
We can make this more efficient with an LLVM class to work with string references:
StringRef. This is a lightweight class that can be passed by value in the same way
as const char*, but it also stores the size of the string, allowing null characters.
However, contrary to string objects, it does not own the buffer and, thus, never
allocates heap space but merely refers to a string that lives outside it. This concept is
also explored in other C++ projects: Chromium, for instance, uses the StringPiece
class to implement the same idea.
LLVM also introduces yet another string-manipulation class. To build a new
string out of several concatenations, LLVM provides the Twine class. It defers
the actual concatenation by storing only references to the strings that will compose
the final product. This was created in the pre-C++11 era when string concatenation
was expensive.
If you are interested in finding out about other generic classes that LLVM provides
to help its programmers, a very important document you should keep in your
bookmarks is the LLVM Programmer's Manual, which discusses all LLVM generic
data structures that might be useful for any code. The manual is located at
http://llvm.org/docs/ProgrammersManual.html.
Demonstrating the pluggable pass interface
A pass is a transformation analysis or optimization. LLVM APIs allow you to easily
register any pass during different parts of the program compilation lifetime, which is
an appreciated point of the LLVM design. A pass manager is used to register, schedule,
and declare dependencies between passes. Hence, instances of the PassManager class
are available throughout different compiler stages.
[ 62 ]
Chapter 3
For example, targets are free to apply custom optimizations at several points
during code generation, such as prior to and after register allocation or before
the assembly emission. To illustrate this, we show you an example where the X86
target conditionally registers a pair of custom passes prior to the assembly emission
(from lib/Target/X86/X86TargetMachine.cpp):
bool X86PassConfig::addPreEmitPass() {
...
if (getOptLevel() != CodeGenOpt::None &&
getX86Subtarget().
hasSSE2()) {
addPass(createExecutionDependencyFixPass(&X86::VR128RegClass));
...
}
if (getOptLevel() != CodeGenOpt::None &&
getX86Subtarget().padShortFunctions()) {
addPass(createX86PadShortFunctions());
}
...
Note how the backend reasons about whether the pass should be added by using
specific target information. Before adding the first pass, the X86 target is checked
to see whether it supports SSE2 multimedia extensions. For the second pass, it checks
whether it was specifically asked for padding.
Part A of the following diagram shows you an example of how optimization passes
are inserted in the opt tool and part B illustrates the several target hooks in the
code generation where custom target optimizations can be inserted. Note that the
insertion points are spread during different code generation stages. This diagram
is especially useful when you write your first passes and need to decide where to
run them. The PassManager interface is described in detail in Chapter 5, The LLVM
Intermediate Representation.
A)
B)
opt
AddStandardCompilePasses()
Backend
AddCodeGenPrepare()
AddStanardLinkPasses()
addPrelSel()
CreateGlobalOptimizerPasses()
AddInstSelector()
...
AddILPOpts()
Custom passes can be added via
command line
...
AddPreRegAlloc()
AddOptimizedRegAlloc()
AddPostRegAlloc()
...
AddPreEmitPass()
[ 63 ]
Hook where
target-specific
optimization
passes can br
added
Tools and Design
Writing your first LLVM project
In this section, we will show you how to write your first project that uses LLVM
libraries. In the previous sections, we presented how to use LLVM tools to produce
an intermediary language file that corresponds to a program, a bitcode file. We will
now create a program that reads this bitcode file and prints the name of the functions
defined within it and their number of basic blocks, showing how easy it is to use
LLVM libraries.
Writing the Makefile
Linking with LLVM libraries requires the use of long command lines that are not
practical to write without the help of a build system. We show you a Makefile in
the following code, based on the one used in DragonEgg, to accomplish this task,
explaining each part as we present it. If you copy and paste this code, you will lose
the tab character; remember that Makefiles depend on using the tab character to
specify the commands that define a rule. Thus, you should manually insert them:
LLVM_CONFIG?=llvm-config
ifndef VERBOSE
QUIET:=@
endif
SRC_DIR?=$(PWD)
LDFLAGS+=$(shell $(LLVM_CONFIG) --ldflags)
COMMON_FLAGS=-Wall -Wextra
CXXFLAGS+=$(COMMON_FLAGS) $(shell $(LLVM_CONFIG) --cxxflags)
CPPFLAGS+=$(shell $(LLVM_CONFIG) --cppflags) -I$(SRC_DIR)
This first part defines the first Makefile variables that will be used as the compiler
flags. The first variable determines the location of the llvm-config program. In this
case, it needs to be in your path. The llvm-config tool is an LLVM program that
prints a variety of useful information to build an external project that needs to be
linked with the LLVM libraries.
When defining the set of flags to be used in the C++ compiler, for instance, notice that
we ask Make to launch the llvm-config --cxxflags shell command line, which
prints the set of C++ flags that you used to compile the LLVM project. This way, we
make the compilation of the sources of our project compatible with LLVM sources. The
last variable defines the set of flags that are to be passed to the compiler preprocessor.
HELLO=helloworld
HELLO_OBJECTS=hello.o
[ 64 ]
Chapter 3
default: $(HELLO)
%.o : $(SRC_DIR)/%.cpp
@echo Compiling $*.cpp
$(QUIET)$(CXX) -c $(CPPFLAGS) $(CXXFLAGS) $<
$(HELLO) : $(HELLO_OBJECTS)
@echo Linking $@
$(QUIET)$(CXX) -o $@ $(CXXFLAGS) $(LDFLAGS) $^ `$(LLVM_CONFIG)
--libs bitreader core support`
In this second fragment, we defined our Makefile rules. The first rule is always
the default one, which we bound to build our hello-world executable. The second
one is a generic rule that compiles all of our C++ files into object files. We pass
the preprocessor flags and the C++ compiler flags to it. We also use the $(QUIET)
variable to omit the full command line from appearing on the screen, but if you
want a verbose build log, you can define VERBOSE when running GNU Make.
The last rule links all object files—in this case, just one—to build our project executable
that is linked with LLVM libraries. This part is accomplished by the linker, but some
C++ flags might also take effect. Thus, we pass both C++ and linker flags to the
command line. We finish this with the `command` construct, which instructs the
shell to substitute this part with the output of `command`. In our case, the command is
llvm-config --libs bitreader core support. The --libs flag asks llvm-config
to provide us with the list of linker flags that are used to link with the requested LLVM
libraries. Here, we asked for libLLVMBitReader, libLLVMCore, and libLLVMSupport.
This list of flags, returned by llvm-config, is a series of -l linker parameters, as
in -lLLVMCore -lLLVMSupport. Note, however, that the order of the parameters
passed to the linker matters and requires that you put libraries that depend on others
first. For example, since libLLVMCore uses the generic functionality provided by
libLLVMSupport, the correct order is -lLLVMCore -lLLVMSupport.
The order matters because a library is a collection of object files, and when linking
a project against a library, the linker only selects those object files that are known to
resolve undefined symbols seen so far. Thus, if it is processing the last library in your
command-line argument and this library happens to use a symbol from a library that
was already processed, most linkers (including GNU ld) will not go back to include
a potentially missing object file, thus ruining the build.
[ 65 ]
Tools and Design
If you want to avoid this responsibility and force the linker to iteratively visit each
library until all necessary object files are resolved, you must use the --start-group
and --end-group flags at the start and end of the list of libraries, but this can
slow down the linker. In order to avoid headaches in building the entire dependency
graph to figure out the order of the linker arguments, you can simply use
llvm-config --libs and let it do this for you, as we did previously.
The last part of the Makefile defines a clean rule to delete all compiler-generated files,
allowing us to restart the build from scratch. The clean rule is written as follows:
clean::
$(QUIET)rm -f $(HELLO) $(HELLO_OBJECTS)
Writing the code
We present the code of our pass in its entirety. It is relatively short because it builds
upon the LLVM pass infrastructure, which does most of the work for us.
#include
#include
#include
#include
#include
#include
#include
#include
"llvm/Bitcode/ReaderWriter.h"
"llvm/IR/Function.h"
"llvm/IR/Module.h"
"llvm/Support/CommandLine.h"
"llvm/Support/MemoryBuffer.h"
"llvm/Support/raw_os_ostream.h"
"llvm/Support/system_error.h"
<iostream>
using namespace llvm;
static cl::opt<std::string> FileName(cl::Positional, cl::desc("Bitcode
file"), cl::Required);
int main(int argc, char** argv) {
cl::ParseCommandLineOptions(argc, argv, "LLVM hello world\n");
LLVMContext context;
std::string error;
OwningPtr<MemoryBuffer> mb;
MemoryBuffer::getFile(FileName, mb);
Module *m = ParseBitcodeFile(mb.get(), context, &error);
if (m == 0) {
std::cerr << "Error reading bitcode: " << error << std::end;
return -1;
}
raw_os_ostream O(std::cout);
[ 66 ]
Chapter 3
for (Module::const_iterator i = m->getFunctionList().begin(),
e = m->getFunctionList().end(); i != e; ++i) {
if (!i->isDeclaration()) {
O << i->getName() << " has " << i->size() << " basic
block(s).\n";
}
}
return 0;
}
Our program uses the LLVM facilities from the cl namespace (cl stands for
command line) to implement the command-line interface for us. We just call
the ParseCommandLineOptions function and declare a global variable of the
cl::opt<string> type to show that our program receives a single parameter,
which is a string type that holds the bitcode filename.
Later, we instantiate an LLVMContext object to hold all the data that pertains to
an LLVM compilation, allowing LLVM to be thread-safe. The MemoryBuffer class
defines a read-only interface for a block of memory. The ParseBitcodeFile function
will use this to read the contents of our input file and parse the contents of the LLVM
IR in this file. After performing checks against errors and ensuring that everything
went fine, we iterate through all functions of the module in this file. An LLVM
module is a concept that is similar to a translation unit and contains everything
encoded into the bitcode file, being the highest entity in the LLVM hierarchy,
followed by functions, then by basic blocks and finally, by instructions. If the function
is only a declaration, we discard it, since we want to check for function definitions.
When we find these function definitions, we print their name and the number of basic
blocks it has.
Compile this program and run it with -help to see what the LLVM command-line
functionalities that have already been prepared for your program are. Afterwards,
look for a C or C++ file that you want to convert to the LLVM IR, convert it, and
analyze it using your program:
$ clang -c -emit-llvm mysource.c -o mysource.bc
$ helloworld mysource.bc
If you want to further explore what you can extract from functions, refer to the LLVM
doxygen documentation about the llvm::Function class at http://llvm.org/
docs/doxygen/html/classllvm_1_1Function.html. As an exercise, try to extend
this example to print the list of arguments of each function.
[ 67 ]
Tools and Design
Navigating the LLVM source – general
advice
Before proceeding with learning more about the LLVM implementation, note that
there are points that are worth understanding, chiefly for new programmers in
the world of open source software. If you were working in a closed-source project
inside a company, you would probably get lot of help from fellow programmers
who are older than you in the project and have a deeper understanding about many
design decisions that might sound obscure to you at first. If you run into problems,
the author of a component will probably be willing to explain it to you orally. The
efficacy of his oral explanations comes when while doing so, he might even be able to
read your facial expressions, figure out when you do not understand a specific point,
and adapt his discourse to create a custom explanation for you.
However, when working remotely, as happens with most community projects,
there is no physical presence, and thus, less oral communication. Therefore, there
is more incentive for stronger documentation in open source communities. On
the other hand, documentation might not be what most usually expect, as in an
English-written document that clearly states all design decisions. Much of the
documentation is the code itself, and in this sense, there is pressure to write clear
code in order to help others understand what is happening without the English
documentation.
Understanding the code as a documentation
Even though the most important parts of LLVM have an English documentation
and we refer to them throughout this book, our final goal is to prepare you to
read the code directly because this is a prerequisite to go deeper into the LLVM
infrastructure. We will provide you with the basic concepts that are necessary
to help you understand how LLVM works, and with it, you will find the joy of
understanding LLVM code without the need to read an English documentation
or to be able to read the many parts of LLVM that lack any English documentation
at all. Even though this can be challenging, when you start doing it, you will grow
inside of yourself a deeper sense of understanding about the project and will be
increasingly more confident about hacking into it. Before you realize it, you will be
a programmer with advanced knowledge about LLVM internals and will be helping
others in the e-mail lists.
[ 68 ]
Chapter 3
Asking the community for help
The e-mail lists are there to remind you that you are not alone. They are the cfe-dev
lists for the Clang frontend and the llvmdev list for LLVM core. Take a moment to
subscribe to these lists at the following addresses:
•
Clang Front End Developer List (http://lists.cs.uiuc.edu/mailman/
listinfo/cfe-dev)
•
LLVM core Developer List (http://lists.cs.uiuc.edu/mailman/
listinfo/llvmdev)
There are many people working in the project, trying to implement things that you are
also interested in. Therefore, there is a high probability that you might ask something
that others have already dealt with.
Before asking for help, it is best to exercise your brain and try to hack into the code
without assistance. See how high you can fly on your own and try your best to evolve
your knowledge. If you run into something that looks puzzling to you, write an e-mail
to the list, making it clear that you have previously investigated the matter before
soliciting for help. By following these guidelines, you have a far better chance of
receiving the best answers to your problem.
Coping with updates – using the SVN log as a
documentation
The LLVM project is constantly changing, and in effect, a very common scenario you
might find yourself in is to update the LLVM version and see that the portion of your
software that interfaces with LLVM libraries is broken. Before trying to read the code
again to see how it has changed, use the code revision that is in your favor.
To see how this works in practice, let's exercise the update of the frontend Clang
from 3.4 to 3.5. Suppose that you wrote a code for the static analyzer that instantiates
a BugType object:
BugType *bugType = new BugType("This is a bug name",
"This is a bug category name");
[ 69 ]
Tools and Design
This object is used to make your own checkers (more details in Chapter 9, The Clang
Static Analyzer) report specific kinds of bugs. Now, let's update the entire LLVM
and Clang codebases to the 3.5 Version and compile the lines. This gives us the
following output:
error: no matching constructor for initialization of
'clang::ento::BugType'
BugType *bugType = new BugType("This is a bug name",
^
~~~~~~~~~~~~~~~~~~~~
This error happened because the BugType constructor method changed from one
version to the other. If you have difficulty in figuring out how to adapt your code
to the newer version, you need to have access to a change log, which is an important
documentation that states code changes from a specific period. Luckily, for every
open source project that uses a code-revision system, we can easily obtain it by
querying the code revision server for the commit messages that affected a particular
file. In the case of LLVM, you can even do this by using your browser through
ViewVC at http://llvm.org/viewvc.
In this case, we are interested in looking at what changed in the header file that
defines this constructor method. We look into the LLVM source tree and find it
at include/clang/StaticAnalyzer/Core/BugReporter/BugType.h.
If you are using a text-mode editor, be sure to use a tool that helps
you navigate in the LLVM source code. For instance, take a moment
to look at how to use CTAGS in your editor. You will easily find
each file in the LLVM source tree that defines the classes that you are
interested in. If you are stubborn and want to live without CTAGS or
any other tool that helps you navigate large C/C++ projects, (such
as Visual Studio's IntelliSense or Xcode), you can always resort to a
command such as grep -re "keyword" *, which is issued at the
root folder of the project to list all files that contain the keyword. By
using smart keywords, you can easily find definition files.
To look at the commit messages that affect this specific header file, we can
access http://llvm.org/viewvc/llvm-project/cfe/trunk/include/clang/
StaticAnalyzer/Core/BugReporter/BugType.h?view=log, which will print the
log in our browser. Now, we see a particular revision that happened three months
ago at the time of writing this book, when LLVM was being updated to v3.5:
Revision 201186 - (view) (download) (annotate) - [select for diffs]
Modified Tue Feb 11 15:49:21 2014 CST (3 months, 1 week ago) by alexfh
File length: 2618 byte(s)
Diff to previous 198686 (colored)
[ 70 ]
Chapter 3
Expose the name of the checker producing each diagnostic message.
Summary: In clang-tidy we'd like to know the name of the checker
producing each diagnostic message. PathDiagnostic has BugType and
Category fields, which are both arbitrary human-readable strings, but we
need to know the exact name of the checker in the form that can be used
in the CheckersControlList option to enable/disable the specific checker.
This patch adds the CheckName field to the CheckerBase class, and sets it
in the CheckerManager::registerChecker() method, which gets them from the
CheckerRegistry. Checkers that implement multiple checks have to store
the names of each check in the respective registerXXXChecker method.
Reviewers: jordan_rose, krememek
commits
Reviewed By: jordan_rose
CC: cfe-
Differential Revision: http://llvm-reviews.chandlerc.com/D2557
This commit message is very thorough and explains all the reasoning behind the
change of the BugType constructor: previously, instantiating this object with two
strings was not enough to know which checker discovered a specific bug. Therefore,
you must now instantiate the object by passing an instance of your checker object,
which will be stored in the BugType object and make it easy to discover which
checker produces each bug.
Now, we change our code to conform to the following updated interface. We assume
that this code runs as part of a function member of a Checker class, as is usually
the case when implementing static analyzer checkers. Therefore, the this keyword
should return a Checker object:
BugType *bugType = new BugType(this, "This is a bug name",
"This is a bug category name");
Concluding remarks
When you hear that the LLVM project is well documented, do not expect to find an
English page that precisely describes all bits and pieces of the code. What this means
is that when you rely on reading the code, the interfaces, the comments, and commit
messages, you will be able to progress with your understanding about the LLVM
project and get yourself updated with the latest changes. Do not forget to practice
hacking into the source code to discover how things are done, which means that
you need your CTAGS ready for exploration!
[ 71 ]
Tools and Design
Summary
In this chapter, we presented you with a historical perspective of the design
decisions used in the LLVM project and gave you an overview of the most important
ones. We also showed you how to use the LLVM components in two different ways.
First, by using the compiler driver, which is a high-level tool that performs the
entire compilation for you in a single command. Second, by using separate LLVM
standalone tools. Besides storing intermediary results on the disk, which slows down
compilation, the tools allow us to interface with specific fragments of the LLVM
libraries via the command line, giving us finer control over the compilation process.
They are an excellent way to learn how LLVM works. We also showed you a few of
the C++ coding styles used in LLVM and explained how you should face the LLVM
code documentation and use the community to ask for help.
In the next chapter, we will present details about the Clang frontend implementation
and its libraries.
[ 72 ]
The Frontend
The compiler frontend converts source code into the compiler's intermediate
representation prior to target-specific code generation. Since programming languages
have distinct syntax and semantic domains, frontends usually handle either a
single language or a group of similar ones. Clang, for instance, handles C, C++, and
objective-C source code inputs. In this chapter, we will cover the following topics:
•
How to link programs with Clang libraries and use libclang
•
Clang diagnostics and the Clang frontend stages
•
Lexical, syntactical, and semantic analyses with libclang examples
•
How to write a simplified compiler driver that uses the C++ Clang libraries
Introducing Clang
The Clang project is known as the official LLVM frontend for C, C++, and Objective-C.
You can access the Clang official website at http://clang.llvm.org, and we cover
Clang configuration, build, and install in Chapter 1, Build and Install LLVM.
Similar to the confusion over the name LLVM owing to its multiple meanings,
Clang may also refer to up to three distinct entities:
1. The frontend (implemented in Clang libraries).
2. The compiler driver (implemented in the clang command and the Clang
Driver library).
3. The actual compiler (implemented in the clang -cc1 command). The
compiler in clang -cc1 is not implemented solely with Clang libraries, but
also makes extensive use of LLVM libraries to implement the middle- and
backends of the compiler, as well as the integrated assembler.
The Frontend
In this chapter, we focus on Clang libraries and the C-family frontend for LLVM.
To understand how the driver and compiler work, we start by analyzing the
command line invocation for the clang compiler driver:
$ clang hello.c –o hello
After parsing the command-line arguments, the Clang driver invokes the internal
compiler by spawning another instance of itself with the -cc1 option. By using
-Xclang <option> in the compiler driver, you can pass specific arguments
to this tool, which, unlike the driver, has no obligation of mimicking the GCC
command-line interface. For example, the clang -cc1 tool has a special option
to print the Clang Abstract Syntax Tree (AST). To activate it, you can use the
following command structure:
$ clang -Xclang -ast-dump hello.c
You can also directly call clang -cc1 instead of the driver:
$ clang -cc1 -ast-dump hello.c
However, remember that one of the tasks of the compiler driver is to initialize the
call of the compiler with all the necessary parameters. Run the driver with the -###
flag to see which parameters it uses to call the clang -cc1 compiler. For example, if
you call clang -cc1 manually, you will also need to provide all the system headers'
locations by yourself via the -I flag.
Frontend actions
An important aspect (and source of confusion) of the clang -cc1 tool is that it
implements not only the compiler frontend but also instantiates, by means of the
LLVM libraries, all other LLVM components necessary to carry on the compilation
up to the point where LLVM can. Thus, it implements an almost complete compiler.
Typically, for x86 targets, clang -cc1 stops at the object file frontier because the
LLVM linker is still experimental and is not integrated. At this point, it relinquishes
control back to the driver, which will call an external tool to link the project. The
-### flag shows the list of programs called by the Clang driver and illustrates this:
$ clang hello.c -###
clang version 3.4 (tags/RELEASE_34/final 211335)
Target: i386-pc-linux-gnu
Thread model: posix
"clang" "-cc1" (...parameters) "hello.c" "-o" "/tmp/hello-dddafc1.o"
"/usr/bin/ld" (...parameters) "/tmp/hello-ddafc1.o" "-o" "hello"
[ 74 ]
Chapter 4
We omitted the full list of parameters used by the driver. The first line shows that
clang -cc1 carries on the compilation from the C source file up to the object code
emission. Afterwards, the last line shows that Clang still depends on the system
linker to finish the compilation.
Internally, each invocation of clang -cc1 is controlled by one main frontend action.
The complete set of actions is defined in the source file include/clang/Frontend/
FrontendOptions.h. The following table contains a few examples and describes
different tasks that the clang -cc1 tool may execute:
Action
ASTView
Description
EmitBC
Emit an LLVM bitcode .bc file
EmitObj
Emit a target-specific .o file
FixIt
Parse and apply any fixits to the source
PluginAction
Run a plugin action
RunAnalysis
Run one or more source code analyses
Parse ASTs and view them in Graphviz
The -cc1 option triggers the execution of the cc1_main function (check the source
code file tools/driver/cc1_main.cpp for details). For example, when indirectly
calling -cc1 via clang hello.c -o hello, this function initializes target-specific
information, sets up the diagnostic infrastructure, and performs the EmitObj action.
This action is implemented in CodeGenAction, a subclass of FrontendAction. This
code will instantiate all Clang and LLVM components and orchestrate them to build
the object file.
The existence of different frontend actions allows Clang to run the compilation
pipeline for purposes other than compilation, such as static analysis. Still, depending
on the target that you specify for clang via the -target command-line argument,
it will load a different ToolChain object. This will change which tasks should be
performed by -cc1 by means of the execution of a different frontend action, which
ones should be performed by external tools, and which external tools to use. For
example, a given target may use the GNU assembler and the GNU linker to finish the
compilation, while another may use the LLVM integrated assembler and the GNU
linker. If you are in doubt about which external tools Clang is using for your target,
you may always resort to the -### switch to print the driver commands. We discuss
more about different targets in Chapter 8, Cross-platform Compilation.
[ 75 ]
The Frontend
Libraries
From this point on, we will focus on Clang as a set of libraries that implements a
compiler frontend rather than the driver and compiler applications. In this sense,
Clang is designed to be modular and is composed of several libraries. The libclang
(http://clang.llvm.org/doxygen/group__CINDEX.html) is one of the most
important interfaces for external Clang users and provides extensive frontend
functionality through a C API. It includes several Clang libraries, which can also be
used individually and linked together into your projects. A list of the most relevant
libraries for this chapter follows:
•
libclangLex: This library is used for preprocessing and lexical analysis,
•
libclangAST: This library adds functionality to build, manipulate, and
•
libclangParse: This library is used for parsing logic using the results from
•
libclangSema: This library is used for semantic analysis, which provides
•
libclangCodeGen: This library handles LLVM IR code generation using
•
libclangAnalysis: This library contains the resources for static analysis
•
libclangRewrite: This library allows support for code rewriting and
•
libclangBasic: This library provides a set of utilities – memory allocation
handling macros, tokens, and pragma constructions
traverse Abstract Syntax Trees
the lexical phase
actions for AST verification
target-specific information
providing an infrastructure to build code-refactoring tools (more details in
Chapter 10, Clang Tools with LibTooling)
abstractions, source locations, and diagnostics, among others.
Using libclang
Throughout this chapter, we will explain parts of the Clang frontend and give you
examples by using the libclang C interface. Even though it is not a C++ API that
directly accesses the internal Clang classes, a big advantage of using libclang
comes from its stability; since many clients rely on it, the Clang team designed it
considering backwards compatibility with previous versions. However, you should
feel free to use the regular C++ LLVM interfaces whenever you want, in the same
way as when you used the regular C++ LLVM interface for reading bitcode function
names in the example from Chapter 3, Tools and Design.
[ 76 ]
Chapter 4
In your LLVM installation folder, in the include subfolder, check for the subfolder
clang-c, that is, where the libclang C headers are located. To run the examples
from this chapter, you will need to include the Index.h header, the main entry
point of the Clang C interface. Originally, developers created this interface to help
integrated development environments, such as Xcode, to navigate a C source file
and produce quick code fixes, code completion, and indexing, which gave the name
Index.h for the main header file. We will also illustrate how to use Clang with the
C++ interface, but we will leave that for the end of the chapter.
Different from the example in Chapter 3, Tools and Design, where we used llvm-config
to help us build the list of LLVM libraries to link with, we do not have such a tool
for Clang libraries. To link against libclang, you can change the Makefile from
Chapter 3, Tools and Design, to the following listing. In the same way as in the previous
chapter, remember to manually insert the tab characters to allow the Makefile to work
properly. Since this is a generic Makefile intended for all examples, notice that we
used the llvm-config --libs flag without any argument, which returns the full
list of LLVM libraries.
LLVM_CONFIG?=llvm-config
ifndef VERBOSE
QUIET:=@
endif
SRC_DIR?=$(PWD)
LDFLAGS+=$(shell $(LLVM_CONFIG) --ldflags)
COMMON_FLAGS=-Wall -Wextra
CXXFLAGS+=$(COMMON_FLAGS) $(shell $(LLVM_CONFIG) --cxxflags)
CPPFLAGS+=$(shell $(LLVM_CONFIG) --cppflags) -I$(SRC_DIR)
CLANGLIBS = \
-Wl,--start-group\
-lclang\
-lclangFrontend\
-lclangDriver\
-lclangSerialization\
-lclangParse\
-lclangSema\
-lclangAnalysis\
-lclangEdit\
-lclangAST\
-lclangLex\
-lclangBasic\
-Wl,--end-group
[ 77 ]
The Frontend
LLVMLIBS=$(shell $(LLVM_CONFIG) --libs)
PROJECT=myproject
PROJECT_OBJECTS=project.o
default: $(PROJECT)
%.o : $(SRC_DIR)/%.cpp
@echo Compiling $*.cpp
$(QUIET)$(CXX) -c $(CPPFLAGS) $(CXXFLAGS) $<
$(PROJECT) : $(PROJECT_OBJECTS)
@echo Linking $@
$(QUIET)$(CXX) -o $@ $(CXXFLAGS) $(LDFLAGS) $^ $(CLANGLIBS)
$(LLVMLIBS)
clean::
$(QUIET)rm -f $(PROJECT) $(PROJECT_OBJECTS)
If you are using dynamic libraries and have installed your LLVM in a nonstandard
location, remember that it is not enough to configure your PATH environment
variable, but your dynamic linker and loader also need to know where the LLVM
shared libraries are located. Otherwise, when you run your projects, it will not find
the requested shared libraries, if it is linked with any. Configure the library path in
the following way:
$ export
LD_LIBRARY_PATH=$(LD_LIBRARY_PATH):/your/llvm/installation/lib
Substitute /your/llvm/installation with the full path to where you installed
LLVM in Chapter 1, Build and Install LLVM.
Understanding Clang diagnostics
Diagnostics are an essential part of the interaction of a compiler with its users. They
are the messages that a compiler gives to the user to signal errors, warnings, or
suggestions. Clang features very good compilation diagnostics with pretty printing
and C++ error messages with improved readability. Internally, Clang divides
diagnostics as per kind: each different frontend phase has a distinct kind and its own
diagnostics set. For example, it defines diagnostics from the parsing phase in the file
include/clang/Basic/DiagnosticParseKinds.td. Clang also classifies diagnostics
according to the severity of the reported issue: NOTE, WARNING, EXTENSION, EXTWARN,
and ERROR. It maps these severities as Diagnostic::Level enum.
[ 78 ]
Chapter 4
You can introduce new diagnostics by adding new TableGen definitions in the files
include/clang/Basic/Diagnostic*Kinds.td and by writing code that is able to
check the desired condition, emitting the diagnostic accordingly. All .td files in the
LLVM source code are written using the TableGen language.
TableGen is an LLVM tool used in the LLVM build system to generate C++ code
for parts of the compiler that can be synthesized in a mechanical fashion. The idea
started with LLVM backends, which has plenty of code that can be generated
based on descriptions of the target machine and now is present throughout the
entire LLVM project as well. TableGen is designed to represent information in a
straightforward way: through records. For example, DiagnosticParseKinds.td
contains definitions of records that represent diagnostics:
def err_invalid_sign_spec : Error<"'%0'
cannot be signed or unsigned">;
def err_invalid_short_spec : Error<"'short %0' is invalid">;
In this example, def is the TableGen keyword to define a new record. Which fields
must be conveyed in these records depends entirely on which TableGen backend
will be used, and there is a specific backend for each type of generated file. The
output of TableGen is always a .inc file that is included in another LLVM source
file. In this case, TableGen needs to generate DiagnosticsParseKinds.inc with
macro definitions explaining each diagnostic.
The err_invalid_sign_spec and err_invalid_short_spec are record identifiers,
while Error is a TableGen class. Notice that the semantics is slightly different from
C++ and does not correspond exactly to C++ entities. Each TableGen class, different
from C++, is a record template defining fields of information that other records can
inherit. However, like C++, TableGen also allows for a hierarchy of classes.
The template-like syntax is used to specify parameters for the definition based on the
Error class, which receives a single string as a parameter. All definitions deriving from
this class will be diagnostics of type ERROR and the specific message is encoded in the
class parameter, for example, "'short %0' is invalid". While the TableGen syntax
is quite simple, it can easily confuse readers due to the high amount of information
encoded in TableGen entries. Refer to http://llvm.org/docs/TableGen/LangRef.
html when in doubt.
[ 79 ]
The Frontend
Reading diagnostics
We now present a C++ example that uses the libclang C interface to read and
dump all the diagnostics produced by Clang when reading a given source file.
extern "C" {
#include "clang-c/Index.h"
}
#include "llvm/Support/CommandLine.h"
#include <iostream>
using namespace llvm;
static cl::opt<std::string>
FileName(cl::Positional, cl::desc("Input file"), cl::Required);
int main(int argc, char** argv)
{
cl::ParseCommandLineOptions(argc, argv, "Diagnostics Example");
CXindex index = clang_createIndex(0, 0);
const char *args[] = {
"-I/usr/include",
"-I."
};
CXTranslationUnit translationUnit = clang_parseTranslationUnit
(index, FileName.c_str(), args, 2, NULL, 0,
CXTranslationUnit_None);
unsigned diagnosticCount = clang_getNumDiagnostics(translationUnit);
for (unsigned i = 0; i < diagnosticCount; ++i) {
CXDiagnostic diagnostic = clang_getDiagnostic(translationUnit, i);
CXString category = clang_getDiagnosticCategoryText(diagnostic);
CXString message = clang_getDiagnosticSpelling(diagnostic);
unsigned severity = clang_getDiagnosticSeverity(diagnostic);
CXSourceLocation loc = clang_getDiagnosticLocation(diagnostic);
CXString fName;
unsigned line = 0, col = 0;
clang_getPresumedLocation(loc, &fName, &line, &col);
std::cout << "Severity: " << severity << " File: "
<< clang_getCString(fName) << " Line: "
<< line << " Col: " << col << " Category: \""
<< clang_getCString(category) << "\" Message: "
<< clang_getCString(message) << std::endl;
[ 80 ]
Chapter 4
clang_disposeString(fName);
clang_disposeString(message);
clang_disposeString(category);
clang_disposeDiagnostic(diagnostic);
}
clang_disposeTranslationUnit(translationUnit);
clang_disposeIndex(index);
return 0;
}
Before including the libclang C header file in this C++ source, we use the extern
"C" environment to allow the C++ compiler to compile this header as C code.
We repeat the use of the cl namespace, from the previous chapter, to help us parse
the command-line arguments of our program. We then use several functions from
the libclang interface (http://clang.llvm.org/doxygen/group__CINDEX.html).
First, we create an index, the top-level context structure used by libclang, by calling
the clang_createIndex() function. It receives two integer-encoded Booleans as
parameters: the first is true if we want to exclude declarations from precompiled
headers (PCH) and the second is true if we want to display diagnostics. We set
both to false (zero) because we want to display the diagnostics by ourselves.
Next, we ask Clang to parse a translation unit via clang_parseTranslationUnit()
(see http://clang.llvm.org/doxygen/group__CINDEX__TRANSLATION__UNIT.
html). It receives as an argument the name of the source file to parse, which we
retrieve from the FileName global. This variable corresponds to the string parameter
used to launch our tool. We also need to specify a set of two arguments defining where
to find include files—you are free to adjust these arguments to suit your system.
The tough part of implementing our own Clang tool is the lack of the
driver's parameter-guessing abilities, which supplies the adequate
parameters to process source files in your system. You would not have
to worry about this if you were creating a Clang plugin, for example.
To solve this issue, you can use a compile commands database,
discussed in Chapter 10, Clang Tools with LibTooling, which gives the
exact set of parameters used to process each input source file you want
to analyze. In this case, we can generate the database with CMake.
However, in our example, we provide these arguments ourselves.
[ 81 ]
The Frontend
After parsing and putting all the information in the CXTranslationUnit
C data structure, we implement a loop that iterates through all diagnostics
generated by Clang and dump them to the screen. To do this, we first use clang_
getNumDiagnostics() to retrieve the number of diagnostics generated when
parsing this file and determine the bounds of the loop (see http://clang.llvm.
org/doxygen/group__CINDEX__DIAG.html). Second, for each loop iteration,
we use clang_getDiagnostic() to retrieve the current diagnostic, clang_
getDiagnosticCategoryText() to retrieve a string describing the type of this
diagnostic, clang_getDiagnosticSpelling() to retrieve the message to display to
the user, and clang_getDiagnosticLocation() to retrieve the exact code location
where it occurred. We also use clang_getDiagnosticSeverity() to retrieve
the enum member that represents the severity of this diagnostic (NOTE, WARNING,
EXTENSION, EXTWARN, or ERROR), but we convert it to an unsigned value and print
it as a number for simplicity.
Since this is a C interface that lacks the C++ string class, when dealing with
strings, the functions usually return a special CXString object that requires you
to call clang_getCString() to access the internal char pointer to print it and
clang_disposeString() to later delete it.
Remember that your input source file may include other files, requiring the
diagnostic engine to also record the filename besides line and column. The triple
attributes set of file, line, and column allows you to locate which part of the code
is being referred. A special object, CXSourceLocation, represents this triple
set. To translate this to filename, line, and column number, you must use the
clang_getPresumedLocation() function with CXString and int as by-reference
parameters that will be filled accordingly.
After we are done, we delete our objects by means of clang_disposeDiagnostic(),
clang_disposeTranslationUnit(), and clang_disposeIndex().
Let's test it with the file hello.c as follows:
int main() {
printf("hello, world!\n")
}
There are two mistakes in this C source file: it lacks the inclusion of the correct
header file and is missing a semicolon. Let us build our project and then run it
to see which diagnostics Clang will provide us:
$ make
$ ./myproject hello.c
[ 82 ]
Chapter 4
Severity: 2 File: hello.c Line: 2 Col: 9 Category: "Semantic Issue"
Message: implicitly declaring library function 'printf' with type 'int
(const char *, ...)'
Severity: 3 File: hello.c Line: 2 Col: 24 Category: "Parse Issue"
Message: expected ';' after expression
We see that these two diagnostics are produced by different phases of the frontend,
semantic and parser (syntactical). We will explore each phase in the next sections.
Learning the frontend phases with Clang
To transform a source code program into LLVM IR bitcode, there are a few
intermediate steps the source code must pass through. The following figure
illustrates all of them, and they are the topics of this section:
Frontend (Clang)
C, C++, Objective-C
source code
Lexical analysis
Syntactic analysis
Lexical analysis
Semantic analysis
LLVM IR generator
The very first frontend step processes the source code's textual input by splitting
language constructs into a set of words and tokens, removing characters such as
comments, white spaces, and tabs. Each word or token must be part of the language
subset, and reserved language keywords are converted into internal compiler
representations. The reserved words are defined in include/clang/Basic/
TokenKinds.def. For example, see the definition of the while reserved word
and the < symbol, two known C/C++ tokens, highlighted in the TokenKinds.def
excerpt here:
TOK(identifier)
// abcde123
// C++11 String Literals.
TOK(utf32_string_literal) // U"foo"
…
PUNCTUATOR(r_paren,
")")
PUNCTUATOR(l_brace,
"{")
PUNCTUATOR(r_brace,
"}")
PUNCTUATOR(starequal,
"*=")
PUNCTUATOR(plus,
"+")
PUNCTUATOR(plusplus,
"++")
PUNCTUATOR(arrow,
"->")
[ 83 ]
The Frontend
PUNCTUATOR(minusminus,
PUNCTUATOR(less,
…
KEYWORD(float
KEYWORD(goto
KEYWORD(inline
KEYWORD(int
KEYWORD(return
KEYWORD(short
KEYWORD(while
"--")
"<")
,
,
,
,
,
,
,
KEYALL)
KEYALL)
KEYC99|KEYCXX|KEYGNU)
KEYALL)
KEYALL)
KEYALL)
KEYALL)
The definitions on this file populates the tok namespace. In this way, whenever the
compiler needs to check for the presence of reserved words after lexical processing,
they can be accessed using this namespace. For instance, the {, <, goto, and while
constructs are accessed by the enum elements tok::l_brace, tok::less, tok::kw_
goto, and tok::kw_while.
Consider the following C code in min.c:
int min(int a, int b) {
if (a < b)
return a;
return b;
}
Each token contains an instance of the SourceLocation class, which is used to hold
a location within a program source code. Remember that you worked with the C
counterpart CXSourceLocation, but both refer to the same data. We can dump the
tokens and their SourceLocation results from lexical analysis by using the following
clang -cc1 command line:
$ clang -cc1 -dump-tokens min.c
For instance, the output of the highlighted if statement is:
if 'if' [StartOfLine] [LeadingSpace] Loc=<min.c:2:3>
l_paren '(' [LeadingSpace] Loc=<min.c:2:6>
identifier 'a' Loc=<min.c:2:7>
less '<' [LeadingSpace] Loc=<min.c:2:9>
identifier 'b' [LeadingSpace] Loc=<min.c:2:11>
r_paren ')' Loc=<min.c:2:12>
return 'return' [StartOfLine] [LeadingSpace] Loc=<min.c:3:5>
identifier 'a' [LeadingSpace] Loc=<min.c:3:12>
semi ';' Loc=<min.c:3:13>
Note that each language construct is prefixed by its type: r_paren for ), less for <,
identifier for strings not matching reserved words, and so on.
[ 84 ]
Chapter 4
Exercising lexical errors
Let's consider the source code lex-err.c:
int a = 08000;
The error in the preceding code comes from the wrong spelling of octal constants:
a constant in octal must not have digits above 7. This triggers a lexical error,
as shown here:
$ clang -c lex.c
lex.c:1:10: error: invalid digit '8' in octal constant
int a = 08000;
^
1 error generated.
Now, let's run this same example with the project we crafted in the diagnostics section:
$ ./myproject lex.c
Severity: 3 File: lex.c Line: 1 Col: 10 Category: "Lexical or
Preprocessor Issue" Message: invalid digit '8' in octal constant
We see that our project identifies it as being a lexer issue, which is what we
were expecting.
Writing libclang code that uses the lexer
We show here an example that uses libclang to tokenize, using the LLVM lexer,
the stream of the first 60 characters of a source code file:
extern "C" {
#include "clang-c/Index.h"
}
#include "llvm/Support/CommandLine.h"
#include <iostream>
using namespace llvm;
static cl::opt<std::string>
FileName(cl::Positional ,cl::desc("Input file"),
cl::Required);
int main(int argc, char** argv)
{
[ 85 ]
The Frontend
cl::ParseCommandLineOptions(argc, argv, "My tokenizer\n");
CXIndex index = clang_createIndex(0,0);
const char *args[] = {
"-I/usr/include",
"-I."
};
CXTranslationUnit translationUnit = clang_
parseTranslationUnit(index, FileName.c_str(),
args,
2, NULL, 0, CXTranslationUnit_None);
CXFile file = clang_getFile(translationUnit, FileName.c_str());
CXSourceLocation loc_start = clang_getLocationForOffset
(translationUnit, file, 0);
CXSourceLocation loc_end = clang_getLocationForOffset
(translationUnit, file, 60);
CXSourceRange range = clang_getRange(loc_start, loc_end);
unsigned numTokens = 0;
CXToken *tokens = NULL;
clang_tokenize (translationUnit, range, &tokens, &numTokens);
for (unsigned i = 0; i < numTokens; ++i) {
enum CXTokenKind kind = clang_getTokenKind(tokens[i]);
CXString name = clang_getTokenSpelling(translationUnit,
tokens[i]);
switch (kind) {
case CXToken_Punctuation:
std::cout << "PUNCTUATION(" << clang_getCString(name) << ") ";
break;
case CXToken_Keyword:
std::cout << "KEYWORD(" << clang_getCString(name) << ") ";
break;
case CXToken_Identifier:
std::cout << "IDENTIFIER(" << clang_getCString(name) << ") ";
break;
case CXToken_Literal:
std::cout << "COMMENT(" << clang_getCString(name) << ") ";
break;
default:
std::cout << "UNKNOWN(" << clang_getCString(name) << ") ";
break;
}
clang_disposeString(name);
}
[ 86 ]
Chapter 4
std::cout << std::endl;
clang_disposeTokens (translationUnit, tokens, numTokens);
clang_disposeTranslationUnit(translationUnit);
return 0;
}
To build this code, we start with the same boilerplate code to initialize the
command-line parameters and calls to clang_createIndex()/clang_
parseTranslationUnit() seen in the previous example. The difference comes
next. Instead of querying for diagnostics, we prepare the arguments of the clang_
tokenize() function, which will run the Clang lexer and return a stream of tokens for
us. To do this, we must build a CXSourceRange object specifying the range of source
code (begin and end) where we want to run the lexer. This object can be composed of
two CXSourceLocation objects, one for the start and the other for the end. We create
them with clang_getLocationForOffset(), which returns a CXSourceLocation for
a specific offset from a CXFile obtained using clang_getFile().
To build CXSourceRange out of two CXSourceLocation, we use the clang_
getRange() function. With it, we are ready to call clang_tokenize() with two
important parameters passed by reference: a pointer to CXToken, which will store
the token stream, and an unsigned type that will return the number of tokens in the
stream. With this number, we build a loop structure and iterate through all tokens.
For each token, we get its kind via clang_getTokenKind() and also the fragment
of code that corresponds to it via clang_getTokenSpelling(). We then use a
switch construct to print a different text depending on the token kind, as well as the
fragment of code corresponding to this token. You can see the result in the example
that follows.
We will use the following input to this project:
#include <stdio.h>
int main() {
printf("hello, world!");
}
After running our tokenizer, we obtain the following output:
PUNCTUATION(#) IDENTIFIER(include) PUNCTUATION(<) IDENTIFIER(stdio)
PUNCTUATION(.) IDENTIFIER(h) PUNCTUATION(>) KEYWORD(int)
IDENTIFIER(main) PUNCTUATION(() PUNCTUATION()) PUNCTUATION({)
IDENTIFIER(printf) PUNCTUATION(() COMMENT("hello, world!")
PUNCTUATION()) PUNCTUATION(;) PUNCTUATION(})
[ 87 ]
The Frontend
Preprocessing
The C/C++ preprocessor acts before any semantic analysis takes place and is
responsible for expanding macros, including files, or skipping parts of the code by
means of the preprocessor directives, which start with #. The preprocessor works in a
tight dependence with the lexer, and they interact with each other continuously. Since
it works early in the frontend, before the semantic analysis tries to extract any meaning
from your code, you can do bizarre things with macros, such as change a function
declaration with macro expansions. Notice that this allows us to promote a radical
change in the syntax of the language. If it pleases you, you can even code like this:
This is the code of Adrian Cable, one of the winners of the 22nd International
Obfuscated C Code Contest (IOCCC), which, for our amusement, allows
us to reproduce the contestants' source code under the Creative Commons
Attribution-ShareAlike 3.0 license. It is an 8086 emulator. If you want to learn
how to deobfuscate this code, read the ClangFormat section in Chapter 10, Clang
Tools with LibTooling. To expand the macros, you can also run the compiler driver
with the -E option, which will only run the preprocessor and then interrupt the
compilation, without any further analyses.
[ 88 ]
Chapter 4
The fact that the preprocessor allows us to transform our source code into
unintelligible pieces of text is a warning message to use macros with moderation.
Good advice aside, the token stream is preprocessed by the lexer to handle
preprocessor directives such as macros and pragmas. The preprocessor uses
a symbol table to hold the defined macros and, whenever a macro instantiation
occurs, the tokens saved in the symbol table replace the current ones.
If you have Clang extra tools installed (Chapter 2, External Projects), you will
have pp-trace available at your command prompt. This tool exposes the
preprocessor activity.
Consider the following example of pp.c:
#define EXIT_SUCCESS 0
int main() {
return EXIT_SUCCESS;
}
If we run the compiler driver with the -E option, we will see the following output:
$ clang -E pp.c -o pp2.c && cat pp2.c
...
int main() {
return 0;
}
If we run the pp-trace tool, we will see the following output:
$ pp-trace pp.c
...
- Callback: MacroDefined
MacroNameTok: EXIT_SUCCESS
MacroDirective: MD_Define
- Callback: MacroExpands
MacroNameTok: EXIT_SUCCESS
MacroDirective: MD_Define
Range: ["/examples/pp.c:3:10", "/examples/pp.c:3:10"]
Args: (null)
- Callback: EndOfMainFile
[ 89 ]
The Frontend
We omitted the long list of built-in macros that pp-trace dumps before starting
the preprocessing of the actual file. In fact, this list can be very useful if you want to
know which macros your compiler driver defines by default when building your
sources. The pp-trace tool is implemented by overriding preprocessor callbacks,
which means that you can implement functionality in your tool that happens each
time the preprocessor manifests itself. In our example, it acted twice: to read the
EXIT_SUCCESS macro definition and later by expanding it in line 3. The pp-trace
tool also prints the parameters that your tool will receive if it implements the
MacroDefined callback. The tool is also quite small and, if you wish to implement
preprocessor callbacks, reading its source is a good first step.
Syntactic analysis
After the lexical analysis tokenizes the source code, the syntactic analysis takes place
and groups together the tokens to form expressions, statements, and function bodies,
among others. It checks whether a group of tokens makes sense together with respect
to their physical layout, but the meaning of this code is not yet analyzed, in the same
way as the syntactic analysis of the English language is not worried with what your
text says, but whether the sentences are correct or not. This analysis is also called
parsing, which receives a stream of tokens as input and outputs an Abstract Syntax
Tree (AST).
Understanding Clang AST nodes
An AST node represents declarations, statements, and types. Hence, there are three
core classes to represent AST nodes: Decl, Stmt, and Type. Each C or C++ language
construct is represented in Clang by a C++ class, which must inherit from one of
these core classes. The following diagram illustrates part of the class hierarchy. For
example, the IfStmt class (representing a complete if statement body) directly
inherits from the Stmt class. On the other hand, the FunctionDecl and VarDecl
classes—used to hold function and variable declarations or definitions—inherits
from more than one class and only reaches Decl indirectly.
[ 90 ]
Chapter 4
Decl
Stmt
IfStmt
NamedDecl
WhileStmt
ValueDecl
Type
LabelDecl
FunctionType
PointerType
ComplexType
DeclaratorDecl
...
FunctionDecl
...
VarDecl
To view the full diagram, navigate the doxygen pages for each class. For example,
for Stmt, visit http://clang.llvm.org/doxygen/classclang_1_1Stmt.html;
click on the subclasses to discover their immediate derived classes.
The top-level AST node is TranslationUnitDecl. It is the root of all other AST
nodes and represents an entire translation unit. Using the min.c source code as an
example, remember that we can dump its AST nodes with the -ast-dump switch:
$ clang -fsyntax-only -Xclang -ast-dump min.c
TranslationUnitDecl …
|-TypedefDecl … __int128_t '__int128'
|-TypedefDecl … __uint128_t 'unsigned __int128'
|-TypedefDecl … __builtin_va_list '__va_list_tag [1]'
`-FunctionDecl … <min.c:1:1, line:5:1> min 'int (int, int)'
|-ParmVarDecl … <line:1:7, col:11> a 'int'
|-ParmVarDecl … <col:14, col:18> b 'int'
`-CompoundStmt … <col:21, line:5:1>
...
[ 91 ]
The Frontend
Note the presence of the top-level translation unit declaration, TranslationUnitDecl,
and the min function declaration, represented by FunctionDecl. The CompoundStmt
declaration contains other statements and expressions. It is illustrated in a graphical
view of the ASTs in the following diagram, obtained with the following command:
$ clang -fsyntax-only -Xclang -ast-view min.c
CompoundStmt
IfStmt
ReturnStmt
BinaryOperator
ReturnStmt
ImplicitCastExpr
ImplicitCastExpr
ImplicitCastExpr
ImplicitCastExpr
DeclRefExpr
DeclRefExpr
DeclRefExpr
DeclRefExpr
Function body AST from min.c
The AST node CompoundStmt contains the if and return statements, IfStmt and
ReturnStmt. Every use of a and b generates an ImplicitCastExpr expression to
the int type, as required by C standards.
The ASTContext class contains the whole AST for a translation unit. Any AST node
can be reached by starting at the top-level TranslationUnitDecl instance through
the ASTContext::getTranslationUnitDecl() interface.
Understanding the parser actions with a debugger
The set of tokens generated in the lexer phase are processed and consumed during
the parsing, generating an AST node whenever a group of required tokens are
seen together. For example, whenever the token tok::kw_if is found, the function
ParseIfStatement is called, consuming all the tokens that are part of an if body,
while generating all the necessary children AST nodes and an IfStmt root for them.
See the following snippet from the file lib/Parse/ParseStmt.cpp (line 212):
[ 92 ]
Chapter 4
…
case tok::kw_if: // C99 6.8.4.1: if-statement
return ParseIfStatement(TrailingElseLoc);
case tok::kw_switch: // C99 6.8.4.2: switch-statement
return ParseSwitchStatement(TrailingElseLoc);
…
We can better understand how Clang reaches the ParseIfStatement method in
min.c by dumping the call backtrace through a debugger:
$ gdb clang
$ b ParseStmt.cpp:213
$ r -cc1 -fsyntax-only min.c
...
213
return ParseIfStatement(TrailingElseLoc);
(gdb) backtrace
#0
clang::Parser::ParseStatementOrDeclarationAfterAttributes
#1
clang::Parser::ParseStatementOrDeclaration
#2
clang::Parser::ParseCompoundStatementBody
#3
clang::Parser::ParseFunctionStatementBody
#4
clang::Parser::ParseFunctionDefinition
#5
clang::Parser::ParseDeclGroup
#6
clang::Parser::ParseDeclOrFunctionDefInternal
#7
clang::Parser::ParseDeclarationOrFunctionDefinition
#8
clang::Parser::ParseExternalDeclaration
#9
clang::Parser::ParseTopLevelDecl
#10 clang::ParseAST
#11 clang::ASTFrontendAction::ExecuteAction
#12 clang::FrontendAction::Execute
#13 clang::CompilerInstance::ExecuteAction
#14 clang::ExecuteCompilerInvocation
#15 cc1_main
#16 main
The ParseAST() function starts the translation unit parsing by reading the toplevel declarations through Parser::ParseTopLevelDecl(). Then, it processes all
subsequent AST nodes and consumes the associated tokens, attaching each new AST
node to its parent AST node. The execution only returns to ParseAST() when the
parser has consumed all tokens. Afterwards, a user of the parser can access the AST
nodes from the top-level TranslationUnitDecl.
[ 93 ]
The Frontend
Exercising a parser error
Consider the following for statement in parse.c:
void func() {
int n;
for (n = 0 n < 10; n++);
}
The error in the code comes from a missing semicolon after n = 0. Here is the
diagnostic message that Clang outputs during compilation:
$ clang -c parse.c
parse.c:3:14: error: expected ';' in 'for' statement specifier
for (n = 0 n < 10; n++);
^
1 error generated.
Now let's run our diagnostics project:
$ ./myproject parse.c
Severity: 3 File: parse.c Line: 3 Col: 14 Category: "Parse Issue"
Message: expected ';' in 'for' statement specifier
Since all tokens in this example are correct, the lexer finishes successfully and produces
no diagnostics. However, when grouping the tokens together to see if they make
sense when building the AST, the parser notices that the for structure is missing a
semicolon. In this case, our diagnostic category is Parse Issue.
Writing code that traverses the Clang AST
The libclang interface allows you to walk the Clang AST by means of a cursor object,
which points to a node of the current AST. To get the top-level cursor, you can use
the clang_getTranslationUnitCursor() function. In this example, we will write a
tool that outputs the name of all C functions or C++ methods contained in a C or C++
source file:
extern "C" {
#include "clang-c/Index.h"
}
#include "llvm/Support/CommandLine.h"
#include <iostream>
using namespace llvm;
static cl::opt<std::string>
[ 94 ]
Chapter 4
FileName(cl::Positional, cl::desc("Input file"), cl::Required);
enum CXChildVisitResult visitNode (CXCursor cursor, CXCursor parent,
CXClientData client_data) {
if (clang_getCursorKind(cursor) == CXCursor_CXXMethod ||
clang_getCursorKind(cursor) == CXCursor__FunctionDecl) {
CXString name = clang_getCursorSpelling(cursor);
CXSourceLocation loc = clang_getCursorLocation(cursor);
CXString fName;
unsigned line = 0, col = 0;
clang_getPresumedLocation(loc, &fName, &line, &col);
std::cout << clang_getCString(fname) << ":"
<< line << ":"<< col << " declares "
<< clang_getCString(name) << std::endl;
return CXChildVisit_Continue;
}
return CXChildVisit_Recurse;
}
int main(int argc, char** argv)
{
cl::ParseCommandLineOptions(argc, argv, "AST Traversal Example");
CXindex index = clang_createIndex(0, 0);
const char *args[] = {
"-I/usr/include",
"-I."
};
CXTranslationUnit translationUnit = clang_parseTranslationUnit
(index, FileName.c_str(), args, 2, NULL, 0,
CXTranslationUnit_None);
CXCursor cur = clang_getTranslationUnitCursor(translationUnit);
clang_visitChildren(cur, visitNode, NULL);
clang_disposeTranslationUnit(translationUnit);
clang_disposeIndex(index);
return 0;
}
The most important function in this example is clang_visitChildren(), which will
recursively visit all child nodes of the cursor passed as a parameter, calling a callback
function on each visit. We start our code by defining this callback function, which
we name visitNode(). This function must return a value that is a member of the
CXChildVisitResult enum, which gives us only three possibilities:
[ 95 ]
The Frontend
•
Return CXChildVisit_Recurse when we want clang_visitChildren()
to continue its AST traversal by visiting the children of the node we are
currently in
•
Return CXChildVisit_Continue when we want it to continue visiting,
but skip the children of the current node we are in
•
Return CXChildVisit_Break when we are satisfied and want clang_
visitChildren() to no longer visit any more nodes
Our callback function receives three parameters: the cursor that represents the AST
node we are currently visiting; another cursor that represents the parent of this node;
and a CXClientData object, which is a typedef to a void pointer. This pointer allows
you to pass any data structure whose state you want to maintain across your callback
calls. This can be useful if you want to build an analysis.
While this code structure can be used to build analyses, if you feel that
your analysis is more complex and needs a structure like control flow
graph (CFG), do not use cursors or libclang—it is more adequate to
implement your analysis as a Clang plugin that directly uses the Clang
C++ API to create a CFG out of the AST (see http://clang.llvm.
org/docs/ClangPlugins.html and the CFG::buildCFG method).
It is usually much more difficult to build analyses directly out of the
AST than with a CFG. You should also look at Chapter 9, The Clang Static
Analyzer, which explains how to build powerful Clang static analyses.
In our example, we ignore the client_data and parent parameters. We
simply ask whether the current cursor is pointing to a C function declaration
(CXCursor__FunctionDecl) or C++ method (CXCursor_CXXMethod) by means of
the clang_getCursorKind() function. When we are sure that we are visiting the
right cursor, we use a couple of functions to extract information from the cursor:
clang_getCursorSpelling() to get the code fragment corresponding to this
AST node and clang_getCursorLocation() to get the CXSourceLocation object
associated with it. Afterwards, we print them in a similar way to what we used
when we implemented the diagnostics project and finish the function by returning
CXChildVisit_Continue. We use this option because we are sure there are no
nested function declarations, and it does not make sense to continue the traversal by
visiting the children of this cursor.
If the cursor is not what we are expecting, we simply continue the AST recursive
traversal by returning CXChildVisit_Recurse.
[ 96 ]
Chapter 4
With the visitNode callback function implemented, the remainder of the code is
quite simple. We use the initial boilerplate code to parse command-line parameters
and to parse the input file. Afterwards, we call visitChildren() with the top-level
cursor and our callback. The last parameter is the client data that we do not use and
set to NULL.
We will run this project in the following input file:
#include <stdio.h>
int main() {
printf("hello, world!");
}
The output is as follows:
$ ./myproject hello.c
hello.c:2:5 declares main
This project also prints a tremendous amount of information by pointing out each line
of the stdio.h header file that declares a function, but we omitted it here for brevity.
Serializing the AST with precompiled headers
We can serialize the Clang AST and save it in a PCH extension file. This feature
speeds up compilation time by avoiding processing the same header files every time
they are included in the source files of a project. When choosing to use PCH files, all
header files are precompiled into a single PCH file and, during the compilation of a
translation unit, information from the precompiled headers are lazily fetched.
To generate PCH files for C, for example, you should use the same syntax seen in
GCC for precompiled header generation, which relies on the -x c-header flag,
as seen here:
$ clang -x c-header myheader.h -o myheader.h.pch
To use your new PCH file, you should employ the -include flag as follows:
$ clang -include myheader.h myproject.c -o myproject
[ 97 ]
The Frontend
Semantic analysis
The semantic analysis ensures that the code does not violate the language type
system by means of a symbol table. This table stores, among other things, mappings
between identifiers (symbols) and their respective types. An intuitive approach for
type checking is to perform it after parsing by traversing the AST while gathering
information about types from the symbol table.
Clang, on the other hand, does not traverse the AST after parsing. Instead, it
performs type checking on the fly, together with AST node generation. Let us go
back to the min.c parsing example. In this case, the ParseIfStatement function
invokes the semantic action ActOnIfStmt to perform semantic checking for the if
statement, emitting diagnostics accordingly. In lib/Parse/ParseStmt.cpp, line
1082, we can observe the transfer of control to allow the semantic analysis to happen:
…
return Actions.ActOnIfStmt(IfLoc, FullCondExp, …);
…
To aid the semantic analysis, the DeclContext base class contains references from the
first to the last Decl node for each scope. This eases the semantic analysis because,
to perform symbol lookup of name references and check both the symbol type and
whether the symbol actually exists, the semantic analysis engine can find the symbol
declarations by looking into AST nodes derived from DeclContext. Examples of such
AST nodes are TranslationUnitDecl, FunctionDecl, and LabelDecl.
Using the min.c example, you can use Clang to dump declaration contexts as
follows:
$ clang -fsyntax-only -Xclang -print-decl-contexts min.c
[translation unit] 0x7faf320288f0
<typedef> __int128_t
<typedef> __uint128_t
<typedef> __builtin_va_list
[function] f(a, b)
<parameter> a
<parameter> b
Note that only declarations inside TranslationUnitDecl and FunctionDecl
appear on the results, since they are the only nodes that derive from DeclContext.
[ 98 ]
Chapter 4
Exercising a semantic error
The following sema.c file contains two definitions using the identifier a:
int a[4];
int a[5];
The preceding error comes from the use of the same name for two distinct variables,
which have different types. This error must be caught during semantic analysis, and
Clang reports the problem accordingly:
$ clang -c sema.c
sema.c:3:5: error: redefinition of 'a' with a different type
int a[5];
^
sema.c:2:5: note: previous definition is here
int a[4];
^
1 error generated.
If we run our diagnostics project, we get the following output:
$ ./myproject sema.c
Severity: 3 File: sema.c Line: 2 Col: 5 Category: "Semantic Issue"
Message: redefinition of 'a' with a different type: 'int [5]' vs 'int
[4]'
Generating the LLVM IR code
After the combined parsing and semantic analysis, the ParseAST function invokes
the method HandleTranslationUnit to trigger any client that is interested in
consuming the final AST. If the compiler driver used the CodeGenAction frontend
action, this client will be BackendConsumer, which will traverse the AST while
generating LLVM IR that implements the exact same behavior that is represented
in the tree. The translation to LLVM IR starts at the top-level declaration,
TranslationUnitDecl.
If we continue with our min.c example, the if statement is converted to LLVM IR
in the file lib/CodeGen/CGStmt.cpp, line 130, by the function EmitIfStmt. Using
the debugger backtrace, we can see the calling path from the ParseAST function to
EmitIfStmt:
[ 99 ]
The Frontend
$ gdb clang
(gdb) b CGStmt.cpp:130
(gdb) r -cc1 -emit-obj min.c
...
130
case Stmt::IfStmtClass: EmitIfStmt(cast<IfStmt>(*S));
break;
(gdb) backtrace
#0
clang::CodeGen::CodeGenFunction::EmitStmt
#1
clang::CodeGen::CodeGenFunction::EmitCompoundStmtWithoutScope
#2
clang::CodeGen::CodeGenFunction::EmitFunctionBody
#3
clang::CodeGen::CodeGenFunction::GenerateCode
#4
clang::CodeGen::CodeGenModule::EmitGlobalFunctionDefinition
#5
clang::CodeGen::CodeGenModule::EmitGlobalDefinition
#6
clang::CodeGen::CodeGenModule::EmitGlobal
#7
clang::CodeGen::CodeGenModule::EmitTopLevelDecl
#8
(anonymous namespace)::CodeGeneratorImpl::HandleTopLevelDecl
#9
clang::BackendConsumer::HandleTopLevelDecl
#10 clang::ParseAST
As the code is translated to LLVM IR, we finish our frontend tour. If we proceed
with the regular pipeline, next, LLVM IR libraries are used to optimize the LLVM
IR code and the backend performs target-code generation. If you want to implement
a frontend for your own language, the Kaleidoscope frontend tutorial is an excellent
read at http://llvm.org/docs/tutorial. In the next section, we will present
how to write a simplified Clang driver that will put to use the same frontend
stages discussed in our tour.
Putting it together
In this example, we will take the opportunity to introduce you to the Clang C++
interface and will not rely on the libclang C interface anymore. We will create a
program that will apply the lexer, the parser, and the semantic analysis to input files
by using the internal Clang C++ classes; thus, we will have the opportunity to do the
work of a simple FrontendAction object. You can continue using the Makefile that
we presented at the beginning of this chapter. However, you may be interested in
turning off the -Wall -Wextra compiler flags because it will generate a large
volume of warnings for Clang headers regarding unused parameters.
[ 100 ]
Chapter 4
The source code for this example is reproduced as follows:
#include
#include
#include
#include
#include
#include
#include
#include
#include
#include
#include
#include
#include
#include
#include
#include
#include
#include
#include
"llvm/ADT/IntrusiveRefCntPtr.h"
"llvm/Support/CommandLine.h"
"llvm/Support/Host.h"
"clang/AST/ASTContext.h"
"clang/AST/ASTConsumer.h"
"clang/Basic/Diagnostic.h"
"clang/Basic/DiagnosticOptions.h"
"clang/Basic/FileManager.h"
"clang/Basic/SourceManager.h"
"clang/Basic/LangOptions.h"
"clang/Basic/TargetInfo.h"
"clang/Basic/TargetOptions.h"
"clang/Frontend/ASTConsumers.h"
"clang/Frontend/CompilerInstance.h"
"clang/Frontend/TextDiagnosticPrinter.h"
"clang/Lex/Preprocessor.h"
"clang/Parse/Parser.h"
"clang/Parse/ParseAST.h"
<iostream>
using namespace llvm;
using namespace clang;
static cl::opt<std::string>
FileName(cl::Positional, cl::desc("Input file"), cl::Required);
int main(int argc, char **argv)
{
cl::ParseCommandLineOptions(argc, argv, "My simple front end\n");
CompilerInstance CI;
DiagnosticOptions diagnosticOptions;
CI.createDiagnostics();
IntrusiveRefCntPtr<TargetOptions> PTO(new TargetOptions());
PTO->Triple = sys::getDefaultTargetTriple();
TargetInfo *PTI = TargetInfo::CreateTargetInfo(CI.
getDiagnostics(), PTO.getPtr());
CI.setTarget(PTI);
[ 101 ]
The Frontend
CI.createFileManager();
CI.createSourceManager(CI.getFileManager());
CI.createPreprocessor();
CI.getPreprocessorOpts().UsePredefines = false;
ASTConsumer *astConsumer = CreateASTPrinter(NULL, "");
CI.setASTConsumer(astConsumer);
CI.createASTContext();
CI.createSema(TU_Complete, NULL);
const FileEntry *pFile = CI.getFileManager().getFile(FileName);
if (!pFile) {
std::cerr << "File not found: " << FileName << std::endl;
return 1;
}
CI.getSourceManager().createMainFileID(pFile);
CI.getDiagnosticsClient().BeginSourceFile(CI.getLangOpts(), 0);
ParseAST(CI.getSema());
// Print AST statistics
CI.getASTContext().PrintStats();
CI.getASTContext().Idents.PrintStats();
return 0;
}
The preceding code runs the lexer, the parser, and the semantic analysis over
the input source file that you specify via the command line. It finishes by printing
the parsed source code and AST statistics. This code performs the following steps:
1. The CompilerInstance class manages the entire infrastructure
to handle compilation (see http://clang.llvm.org/doxygen/
classclang_1_1CompilerInstance.html). The first step instantiates this
class and saves it to CI.
2. Usually, the clang -cc1 tool will instantiate a specific FrontendAction,
which will perform all the steps covered here. Since we want to expose these
steps to you, we will not use FrontendAction; instead, we will configure
CompilerInstance ourselves. We use a CompilerInstance method to create
the diagnostic engine and set the current target by getting a target triple from
the system.
3. We now instantiate three new resources: a file manager, a source manager,
and the preprocessor. The first is necessary to read source files, while the
second is responsible for managing SourceLocation instances used in the
lexer and parser.
[ 102 ]
Chapter 4
4. We create an ASTConsumer reference and push it to CI. This allows a frontend
client to consume the final AST (after parsing and semantic analysis) in
its own way. For example, if we wanted this driver to generate LLVM IR
code, we would have to provide a specific code generation ASTConsumer
instance (called BackendConsumer), which is precisely how CodeGenAction
sets up ASTConsumer of its CompilerInstance. In this example, we include
the header ASTConsumers.h, which provides assorted consumers for us to
experiment with, and we use a consumer that merely prints the AST to the
console. We create it by means of the CreateASTPrinter() call. If you are
interested, take some time to implement your own ASTConsumer subclass
to perform any kind of frontend analysis you are interested in (start
by looking at lib/Frontend/ASTConsumers.cpp, which has some
implementation examples).
5. We create a new ASTContext, used by the parser, and Sema, used by the
semantic analysis, and push them to our CI object. We also initialize the
diagnostics consumer (in this case, our standard consumer will also merely
print the diagnostics to the screen).
6. We call ParseAST to perform the lexical and syntactic analysis, which will
call our ASTConsumer afterwards by means of the HandleTranslationUnit
function call. Clang will also print the diagnostics and interrupt the pipeline
if there is a serious error in any frontend phase.
7. We print AST statistics to standard output.
Let's test our simple frontend tool in the following file:
int main() {
char *msg = "Hello, world!\n";
write(1, msg, 14);
return 0;
}
The output generated is as follows:
$ ./myproject test.c
int main() {
char *msg = "Hello, world!\n";
write(1, msg, 14);
return 0;
}
[ 103 ]
The Frontend
*** AST Context Stats:
39 types total.
31 Builtin types
3 Complex types
3 Pointer types
1 ConstantArray types
1 FunctionNoProto types
Total bytes = 544
0/0 implicit default constructors created
0/0 implicit copy constructors created
0/0 implicit copy assignment operators created
0/0 implicit destructors created
Number of memory regions: 1
Bytes used: 1594
Bytes allocated: 4096
Bytes wastes: 2502 (includes alignment, etc)
Summary
In this chapter, we described the Clang frontend. We explained the distinction
between the Clang frontend libraries, the compiler driver, and the actual compiler
in the clang -cc1 tool. We also talked about diagnostics and introduced a small
libclang program to dump them. Next, we went touring through all steps of the
frontend: lexer, parser, semantic analysis, and code generation by showing how
Clang implements these stages. Finally, we finished the chapter with an example
of how to write a simple compiler driver that activates all frontend stages. If you
are interested in reading more about the AST, a good community document is
at http://clang.llvm.org/docs/IntroductionToTheClangAST.html. If you
are interested in reading more about the Clang design, you should check out
http://clang.llvm.org/docs/InternalsManual.html before diving into
the actual source code.
In the next chapter, we will move on to the next step of the compilation pipeline:
the LLVM intermediate representation.
[ 104 ]
The LLVM Intermediate
Representation
The LLVM Intermediate Representation (IR) is the backbone that connects
frontends and backends, allowing LLVM to parse multiple source languages
and generate code to multiple targets. Frontends produce the IR, while backends
consume it. The IR is also the point where the majority of LLVM target-independent
optimizations takes place. In this chapter, we will cover the following topics:
•
The characteristics of the LLVM IR
•
The LLVM IR language syntax
•
How to write a tool that generates the LLVM IR
•
The LLVM IR pass structure
•
How to write your own IR pass
Overview
The choice of the compiler IR is a very important decision. It determines how much
information the optimizations will have to make the code run faster. On one hand,
a very high-level IR allows optimizers to extract the original source code intent with
ease. On the other hand, a low-level IR allows the compiler to generate code tuned
for a particular hardware more easily. The more information you have about the
target machine, the more opportunities you have to explore machine idiosyncrasies.
Moreover, the task at lower levels must be done with care. As the compiler
translates the program to a representation that is closer to machine instructions,
it becomes increasingly difficult to map program fragments to the original source
code. Furthermore, if the compiler design is exaggerated using a representation that
represents a specific target machine very closely, it becomes awkward to generate
code for other machines that have different constructs.
The LLVM Intermediate Representation
This design trade-off has led to different choices among compilers. Some compilers,
for instance, do not support code generation for multiple targets and focus on only
one machine architecture. This enables them to use specialized IRs throughout their
entire pipeline that make the compiler efficient with respect to a single architecture,
which is the case of the Intel C++ Compiler (icc). However, writing compilers that
generate code for a single architecture is an expensive solution if you aim to support
multiple targets. In these cases, it is unfeasible to write a different compiler for each
architecture, and it is best to design a single compiler that performs well on a variety
of targets, which is the goal of compilers such as GCC and LLVM.
For these projects, called retargetable compilers, there are substantially more challenges
to coordinate the code generation for multiple targets. The key to minimizing the
effort to build a retargetable compiler lies in using a common IR, the point where
different backends share the same understanding about the source program to
translate it to a divergent set of machines. Using a common IR, it is possible to share
a set of target-independent optimizations among multiple backends, but this puts
pressure on the designer to raise the level of the common IR to not overrepresent
a single machine. Since working at higher levels precludes the compiler from
exploring target-specific trickery, a good retargetable compiler also employs other
IRs to perform optimizations at different, lower levels.
The LLVM project started with an IR that operated at a lower level than the Java
bytecode, thus, the initial acronym was Low Level Virtual Machine. The idea was to
explore low-level optimization opportunities and employ link-time optimizations.
The link-time optimizations were made possible by writing the IR to disk, as in a
bytecode. The bytecode allows the user to amalgamate multiple modules in the same
file and then apply interprocedural optimizations. In this way, the optimizations will
act on multiple compilation units as if they were in the same module.
In Chapter 3, Tools and Design, we explained that LLVM, nowadays, is neither a
Java competitor nor a virtual machine, and it has other intermediate representations
to achieve efficiency. For example, besides the LLVM IR, which is the common
IR where target-independent optimizations work, each backend may apply
target-dependent optimizations when the program is represented with the
MachineFunction and MachineInstr classes. These classes represent the
program using target-machine instructions.
On the other hand, the Function and Instruction classes are, by far, the most
important ones because they represent the common IR that is shared across multiple
targets. This intermediate representation is mostly target-independent (but not
entirely) and the official LLVM intermediate representation. To avoid confusion,
while LLVM has other levels to represent a program, which technically makes them
IRs as well, we do not refer to them as LLVM IRs; however, we reserve this name for
the official, common intermediate representation by the Instruction class, among
others. This terminology is also adopted by the LLVM documentation.
[ 106 ]
Chapter 5
The LLVM project started as a set of tools that orbit around the LLVM IR, which
justifies the maturity of the optimizers and the number of optimizers that act at this
level. This IR has three equivalent forms:
•
An in-memory representation (the Instruction class, among others)
•
An on-disk representation that is encoded in a space-efficient form
(the bitcode files)
•
An on-disk representation in a human-readable text form
(the LLVM assembly files)
LLVM provides tools and libraries that allow you to manipulate and handle the IR
in all forms. Hence, these tools can transform the IR back and forth, from memory
to disk as well as apply optimizations, as illustrated in the following diagram:
Transform
passes
Analysis
passes
Frontend
LLVM IR
Backend
Disk
Understanding the LLVM IR target
dependency
The LLVM IR is designed to be as target-independent as possible, but it still conveys
some target-specific aspects. Most people blame the C/C++ language for its inherent,
target-dependent nature. To understand this, consider that when you use standard C
headers in a Linux system, for instance, your program implicitly imports some header
files from the bits Linux headers folder. This folder contains target-dependent header
files, including macro definitions that constrain some entities to have a particular
type that matches what the syscalls of this kernel-machine expect. Afterwards, when
the frontend parses your source code, it needs to also use different sizes for int, for
example, depending on the intended target machine where this code will run.
[ 107 ]
The LLVM Intermediate Representation
Therefore, both library headers and C types are already target-dependent, which
makes it challenging to generate an IR that can later be translated to a different
target. If you consider only the target-dependent, C standard library headers, the
parsed AST for a given compilation unit is already target-dependent, even before the
translation to the LLVM IR. Furthermore, the frontend generates IR code using type
sizes, calling conventions, and special library calls that match the ones defined by
each target ABI. Still, the LLVM IR is quite versatile and is able to cope with distinct
targets in an abstract way.
Exercising basic tools to manipulate
the IR formats
We mention that the LLVM IR can be stored on disk in two formats: bitcode and
assembly text. We will now learn how to use them. Consider the sum.c source code:
int sum(int a, int b) {
return a+b;
}
To make Clang generate the bitcode, you can use the following command:
$ clang sum.c -emit-llvm -c -o sum.bc
To generate the assembly representation, you can use the following command:
$ clang sum.c -emit-llvm -S -c -o sum.ll
You can also assemble the LLVM IR assembly text, which will create a bitcode:
$ llvm-as sum.ll -o sum.bc
To convert from bitcode to IR assembly, which is the opposite, you can use the
disassembler:
$ llvm-dis sum.bc -o sum.ll
The llvm-extract tool allows the extraction of IR functions, globals, and also the
deletion of globals from the IR module. For instance, extract the sum function from
sum.bc with the following command:
$ llvm-extract -func=sum sum.bc -o sum-fn.bc
Nothing changes between sum.bc and sum-fn.bc in this particular example since
sum is already the sole function in this module.
[ 108 ]
Chapter 5
Introducing the LLVM IR language syntax
Observe the LLVM IR assembly file, sum.ll:
target datalayout = "e-p:64:64:64-i1:8:8-i8:8:8-i16:16:16i32:32:32-i64:64:64-f32:32:32-f64:64:64-v64:64:64-v128:128:128a0:0:64-s0:64:64-f80:128:128-n8:16:32:64-S128"
target triple = "x86_64-apple-macosx10.7.0"
define i32 @sum(i32 %a, i32 %b) #0 {
entry:
%a.addr = alloca i32, align 4
%b.addr = alloca i32, align 4
store i32 %a, i32* %a.addr, align 4
store i32 %b, i32* %b.addr, align 4
%0 = load i32* %a.addr, align 4
%1 = load i32* %b.addr, align 4
%add = add nsw i32 %0, %1
ret i32 %add
}
attributes #0 = { nounwind ssp uwtable ... }
The contents of an entire LLVM file, either assembly or bitcode, are said to define
an LLVM module. The module is the LLVM IR top-level data structure. Each module
contains a sequence of functions, which contains a sequence of basic blocks that
contain a sequence of instructions. The module also contains peripheral entities to
support this model, such as global variables, the target data layout, and external
function prototypes as well as data structure declarations.
LLVM local values are the analogs of the registers in the assembly language and
can have any name that starts with the % symbol. Thus, %add = add nsw i32 %0,
%1 will add the local value %0 to %1 and put the result in the new local value, %add.
You are free to give any name to the values, but if you are short on creativity, you
can just use numbers. In this short example, we can already see how LLVM expresses
its fundamental properties:
•
It uses the Static Single Assignment (SSA) form. Note that there is no value
that is reassigned; each value has only a single assignment that defines it.
Each use of a value can immediately be traced back to the sole instruction
responsible for its definition. This has an immense value to simplify
optimizations, owing to the trivial use-def chains that the SSA form creates,
that is, the list of definitions that reaches a user. If LLVM had not used the
SSA form, we would need to run a separate data flow analysis to compute
the use-def chains, which are mandatory for classical optimizations such as
constant propagation and common subexpression elimination.
[ 109 ]
The LLVM Intermediate Representation
•
Code is organized as three-address instructions. Data processing
instructions have two source operands and place the result in a distinct
destination operand.
•
It has an infinite number of registers. Note how LLVM local values can be
any name that starts with the % symbol, including numbers that start at zero,
such as %0, %1, and so on, that have no restriction on the maximum number
of distinct values.
The target datalayout construct contains information about endianness and type
sizes for target triple that is described in target host. Some optimizations
depend on knowing the specific data layout of the target to transform the code
correctly. Observe how the layout declaration is done:
target datalayout = "e-p:64:64:64-i1:8:8-i8:8:8-i16:16:16i32:32:32-i64:64:64-f32:32:32-f64:64:64-v64:64:64-v128:128:128a0:0:64-s0:64:64-f80:128:128-n8:16:32:64-S128"
target triple = "x86_64-apple-macosx10.7.0"
We can extract the following facts from this string:
•
The target is an x86_64 processor with macOSX 10.7.0. It is a little-endian
target, which is denoted by the first letter in the layout (a lowercase e).
Big-endian targets need to use an uppercase E.
•
The information provided about types is in the format type:<size>:
<abi>:<preferred>. In the preceding example, p:64:64:64 represents
a pointer that is 64 bits wide in size, with the abi and preferred alignments
set to the 64-bit boundary. The ABI alignment specifies the minimum required
alignment for a type, while the preferred alignment specifies a potentially
larger value, if this will be beneficial. The 32-bit integer types i32:32:32
are 32 bits wide in size, 32-bit abi and preferred alignment, and so on.
The function declaration closely follows the C syntax:
define i32 @sum(i32 %a, i32 %b) #0 {
This function returns a value of the type i32 and has two i32 arguments, %a and %b.
Local identifiers always need the % prefix, whereas global identifiers use @. LLVM
supports a wide range of types, but the most important ones are the following:
•
Arbitrary-sized integers in the iN form; common examples are i32, i64,
and i128.
•
Floating-point types, such as the 32-bit single precision float and 64-bit
double precision double.
[ 110 ]
Chapter 5
•
Vectors types in the format <<# elements> x <elementtype>>. A vector
with four i32 elements is written as <4 x i32>.
The #0 tag in the function declaration maps to a set of function attributes, also very
similar to the ones used in C/C++ functions and methods. The set of attributes is
defined at the end of the file:
attributes #0 = { nounwind ssp uwtable "less-precisefpmad"="false" "no-frame-pointer-elim"="true" "no-frame-pointerelim-non-leaf"="true" "no-infs-fp-math"="false" "no-nans-fpmath"="false" "unsafe-fp-math"="false" "use-softfloat"="false" }
For instance, nounwind marks a function or method as not throwing exceptions, and
ssp tells the code generator to use a stack smash protector in an attempt to increase the
security of this code against attacks.
The function body is explicitly divided into basic blocks (BBs), and a label is used
to start a new BB. A label relates to a basic block in the same way that a value
identifier relates to an instruction. If a label declaration is omitted, the LLVM
assembler automatically generates one using its own naming scheme. A basic block
is a sequence of instructions with a single entry point at its first instruction, and a
single exit point at its last instruction. In this way, when the code jumps to the label
that corresponds to a basic block, we know that it will execute all of the instructions
in this basic block until the last instruction, which will change the control flow by
jumping to another basic block. Basic blocks and their associated labels need to
adhere to the following conditions:
•
Each BB needs to end with a terminator instruction, one that jumps to other
BBs or returns from the function
•
The first BB, called the entry BB, is special in an LLVM function and must not
be the target of any branch instructions
Our LLVM file, sum.ll, has only one BB because it has no jumps, loops, or calls.
The function start is marked with the entry label, and it ends with the return
instruction, ret:
entry:
%a.addr = alloca i32, align 4
%b.addr = alloca i32, align 4
store i32 %a, i32* %a.addr, align 4
store i32 %b, i32* %b.addr, align 4
%0 = load i32* %a.addr, align 4
%1 = load i32* %b.addr, align 4
%add = add nsw i32 %0, %1
ret i32 %add
[ 111 ]
The LLVM Intermediate Representation
The alloca instruction reserves space on the stack frame of the current function.
The amount of space is determined by element type size, and it respects a specified
alignment. The first instruction, %a.addr = alloca i32, align 4, allocates a
4-byte stack element, which respects a 4-byte alignment. A pointer to the stack
element is stored in the local identifier, %a.addr. The alloca instruction is
commonly used to represent local (automatic) variables.
The %a and %b arguments are stored in the stack locations %a.addr and %b.addr by
means of store instructions. The values are loaded back from the same memory
locations by load instructions, and they are used in the addition, %add = add nsw
i32 %0, %1. Finally, the addition result, %add, is returned by the function. The nsw
flag specifies that this add operation has "no signed wrap", which indicates instructions
that are known to have no overflow, allowing for some optimizations. If you are
interested in the history behind the nsw flag, a worthwhile read is the LLVMdev post
at http://lists.cs.uiuc.edu/pipermail/llvmdev/2011-November/045730.html
by Dan Gohman.
In fact, the load and store instructions are redundant, and the function
arguments can be used directly in the add instruction. Clang uses -O0
(no optimizations) by default, and the unnecessary loads and stores are
not removed. If we compile with -O1 instead, the outcome is a much simpler
code, which is reproduced here:
define i32 @sum(i32 %a, i32 %b) ... {
entry:
%add = add nsw i32 %b, %a
ret i32 %add
}
...
Using the LLVM assembly directly is very handy when writing small examples to
test target backends and as a means to learn basic LLVM concepts. However,
a library is the recommended interface for frontend writers to build the LLVM IR,
which is the subject of our next section. You can find a complete reference to the
LLVM IR assembly syntax at http://llvm.org/docs/LangRef.html.
[ 112 ]
Chapter 5
Introducing the LLVM IR in-memory model
The in-memory representation closely models the LLVM language syntax that we
just presented. The header files for the C++ classes that represent the IR are located
at include/llvm/IR. The following is a list of the most important classes:
•
The Module class aggregates all of the data used in the entire translation
unit, which is a synonym for "module" in LLVM terminology. It declares the
Module::iterator typedef as an easy way to iterate across the functions
inside this module. You can obtain these iterators via the begin() and end()
methods. View its full interface at http://llvm.org/docs/doxygen/html/
classllvm_1_1Module.html.
•
The Function class contains all objects related to a function definition or
declaration. In the case of a declaration (use the isDeclaration() method
to check whether it is a declaration), it contains only the function prototype.
In both cases, it contains a list of the function parameters accessible via the
getArgumentList() method or the pair of arg_begin() and arg_end().
You can iterate through them using the Function::arg_iterator typedef.
If your Function object represents a function definition, and you iterate
through its contents via the for (Function::iterator i = function.
begin(), e = function.end(); i != e; ++i) idiom, you will iterate
across its basic blocks. View its full interface at http://llvm.org/docs/
doxygen/html/classllvm_1_1Function.html.
•
The BasicBlock class encapsulates a sequence of LLVM instructions,
accessible via the begin()/end() idiom. You can directly access its last
instruction using the getTerminator() method, and you also have a few
helper methods to navigate the CFG, such as accessing predecessor basic
blocks via getSinglePredecessor(), when the basic block has a single
predecessor. However, if it does not have a single predecessor, you need
to work out the list of predecessors yourself, which is also not difficult if
you iterate through basic blocks and check the target of their terminator
instructions. View its full interface at http://llvm.org/docs/doxygen/
html/classllvm_1_1BasicBlock.html.
•
The Instruction class represents an atom of computation in the LLVM IR, a
single instruction. It has some methods to access high-level predicates, such as
isAssociative(), isCommutative(), isIdempotent(), or isTerminator(),
but its exact functionality can be retrieved with getOpcode(), which returns a
member of the llvm::Instruction enumeration, which represents the LLVM
IR opcodes. You can access its operands via the op_begin() and op_end()
pair of methods, which are inherited from the User superclass that we will
present shortly. View its full interface at http://llvm.org/docs/doxygen/
html/classllvm_1_1Instruction.html.
[ 113 ]
The LLVM Intermediate Representation
We have still not presented the most powerful aspect of the LLVM IR (enabled by
the SSA form): the Value and User interfaces; these allow you to easily navigate the
use-def and def-use chains. In the LLVM in-memory IR, a class that inherits from
Value means that it defines a result that can be used by others, whereas a subclass
of User means that this entity uses one or more Value interfaces. Function and
Instruction are subclasses of both Value and User, while BasicBlock is a subclass
of just Value. To understand this, let's analyze these two classes in depth:
•
The Value class defines the use_begin() and use_end() methods to allow
you to iterate through Users, offering an easy way to access its def-use chain.
For every Value class, you can also access its name through the getName()
method. This models the fact that any LLVM value can have a distinct identifier
associated with it. For example, %add1 can identify the result of an add
instruction, BB1 can identify a basic block, and myfunc can identify a function.
Value also has a powerful method called replaceAllUsesWith(Value *),
which navigates through all of the users of this value and replaces it with
some other value. This is a good example of how the SSA form allows you to
easily substitute instructions and write fast optimizations. You can view the
full interface at http://llvm.org/docs/doxygen/html/
classllvm_1_1Value.html.
•
The User class has the op_begin() and op_end() methods that allows
you to quickly access all of the Value interfaces that it uses. Note that this
represents the use-def chain. You can also use a helper method called
replaceUsesOfWith(Value *From, Value *To) to replace any of its used
values. You can view the full interface at http://llvm.org/docs/doxygen/
html/classllvm_1_1User.html.
Writing a custom LLVM IR generator
It is possible to use the LLVM IR generator API to programmatically build the IR for
sum.ll (created at the -O0 optimization level, that is, without optimizations). In this
section, you will see how to do it step by step. First, take a look at which header files
are needed:
•
#include <llvm/ADT/SmallVector.h>: This is used to make the
SmallVector<> template available, a data structure to aid us in building
efficient vectors when the number of elements is not large. Check
http://llvm.org/docs/ProgrammersManual.html for help on LLVM
data structures.
[ 114 ]
Chapter 5
•
#include <llvm/Analysis/Verifier.h>: The verifier pass is an important
•
#include <llvm/IR/BasicBlock.h>: This is the header file that declares the
BasicBlock class, an important IR entity that we already presented.
•
#include <llvm/IR/CallingConv.h>: This header file defines the set of
•
#include <llvm/IR/Function.h>: This header file declares the Function
•
#include <llvm/IR/Instructions.h>: This header file declares all of the
subclasses of the Instruction class, a fundamental data structure of the IR.
•
#include <llvm/IR/LLVMContext.h>: This header file stores the global
•
#include <llvm/IR/Module.h>: This header file declares the Module class,
•
#include <llvm/Bitcode/ReaderWriter.h>: This header file contains code
•
#include <llvm/Support/ToolOutputFile.h>: This header file declares a
analysis that checks whether your LLVM module is well formed with respect
to the IR rules.
ABI rules used in function calls, such as where to store function arguments.
class, which is an IR entity.
scope data of the LLVM library, which allows multithread implementations
to work using different contexts in each thread.
the top-level entity in the IR hierarchy.
to allow us to both read/write LLVM bitcode files.
helper class used to write an output file.
In this example, we also import the symbols from the llvm namespace:
using namespace llvm;
Now, it is time to write the code in separate steps:
1. The first code we will write is to define a new helper function called
makeLLVMModule, which returns a pointer to our Module instance,
the top-level IR entity that contains all the other IR objects:
Module *makeLLVMModule() {
Module *mod = new Module("sum.ll", getGlobalContext());
mod->setDataLayout("e-p:64:64:64-i1:8:8-i8:8:8-i16:16:16i32:32:32-i64:64:64-f32:32:32-f64:64:64-v64:64:64v128:128:128-a0:0:64-s0:64:64-f80:128:128n8:16:32:64-S128");
mod->setTargetTriple("x86_64-apple-macosx10.7.0");
[ 115 ]
The LLVM Intermediate Representation
If we put the triple and data layout objects into our module, we enable
optimizations that depend on this information, but it needs to match the
data layout and triple strings used in the LLVM backend. However, you can
leave these out of your module if you do not care about layout-dependent
optimizations and intend to specify which target to use in the backend in
an explicit way. To create a module, we get the current LLVM context from
getGlobalContext() and define the name of the module. We chose to use
the name of the file that we used as a model, sum.ll, but you can choose
any other module name. The context is an instance of the LLVMContext class,
which must be used in order to guarantee thread safety as multithreaded IR
generation must be done with one context per thread. The setDataLayout()
and setTargetTriple() functions allow us to set the strings that define the
data layout and target triple of our module.
2. To declare our sum function, we first define the function signature:
SmallVector<Type*, 2> FuncTyArgs;
FuncTyArgs.push_back(IntegerType::get(mod->getContext(),
32));
FuncTyArgs.push_back(IntegerType::get(mod->getContext(),
32));
FunctionType *FuncTy = FunctionType::get(
/*Result=*/ IntegerType::get(mod->getContext(), 32),
/*Params=*/ FuncTyArgs, /*isVarArg=*/ false);
Our FunctionType object specifies a function that returns a 32-bit integer
type, has no variable arguments, and has two 32-bit integer arguments.
3. We create a function using the Function::Create() static method—passing
the function type FuncTy created previously, the linkage type, and the module
instance. The GlobalValue::ExternalLinkage enumeration member means
that the function can be referred from other modules (translation units):
Function *funcSum = Function::Create(
/*Type=*/ FuncTy,
/*Linkage=*/ GlobalValue::ExternalLinkage,
/*Name=*/ "sum", mod);
funcSum->setCallingConv(CallingConv::C);
4. Next, we need to store the Value pointers of the arguments to be able to use
them later. To do this, we use an iterator of function arguments. The int32_a
and int32_b function arguments point to the first and second arguments,
respectively. We also set the names of each argument, which is optional
because LLVM can provide temporary names:
Function::arg_iterator args = funcSum->arg_begin();
Value *int32_a = args++;
int32_a->setName("a");
[ 116 ]
Chapter 5
Value *int32_b = args++;
int32_b->setName("b");
5. To start the function body, we create the first basic block with the label
(or value name) entry and store a pointer for it in labelEntry. We need
to pass a reference to the function that this basic block will reside in:
BasicBlock *labelEntry = BasicBlock::Create(mod>getContext(), "entry", funcSum, 0);
6. The entry basic block is now ready to be filled with instructions. We add
two alloca instructions to the basic block, creating 32-bit stack elements
with a 4-byte alignment. In the constructor method for the instruction, we
need to pass a reference to the basic block that it will reside in. By default,
new instructions are inserted at the end of the basic block, as follows:
// Block entry (label_entry)
AllocaInst *ptrA = new AllocaInst(IntegerType::get(mod>getContext(), 32), "a.addr", labelEntry);
ptrA->setAlignment(4);
AllocaInst *ptrB = new AllocaInst(IntegerType::get(mod>getContext(), 32), "b.addr", labelEntry);
ptrB->setAlignment(4);
Alternatively, you can use a helper template class called
IRBuilder<> to build IR instructions (see http://llvm.org/
docs/doxygen/html/classllvm_1_1IRBuilder.html).
However, we chose not to use it to be able to present you with the
original interface. If you want to use it, you just need to include the
llvm/IR/IRBuilder.h header file, instantiate it with an LLVM
context object, and call the SetInsertPoint() method to define
where you want to place your new instructions. Afterwards, just
invoke any instruction-creating method such as CreateAlloca().
7. We store the int32_a and int32_b function arguments into the stack
locations using the pointers returned by the alloca instructions, ptrA
and ptrB. Although the store instructions are referenced in the following
code by st0 and st1, these pointers are never used in this example since
store instructions have no results. The third StoreInst argument specifies
whether this is a volatile store, which is false in this example:
StoreInst *st0 = new StoreInst(int32_a, ptrA, false,
labelEntry);
st0->setAlignment(4);
StoreInst *st1 = new StoreInst(int32_b, ptrB, false,
labelEntry);
st1->setAlignment(4);
[ 117 ]
The LLVM Intermediate Representation
8. We also create nonvolatile load instructions, loading the values back from the
stack location in ld0 and ld1. These values are then placed as arguments for
the add instruction, and the addition result, addRes, is set as the return value
from the sum function. Next, the makeLLVMModule function returns the LLVM
IR module with the sum function that we just created:
LoadInst *ld0 = new LoadInst(ptrA, "", false,
labelEntry);
ld0->setAlignment(4);
LoadInst *ld1 = new LoadInst(ptrB, "", false,
labelEntry);
ld1->setAlignment(4);
BinaryOperator *addRes =
BinaryOperator::Create(Instruction::Add, ld0, ld1,
"add", labelEntry);
ReturnInst::Create(mod->getContext(), addRes,
labelEntry);
return mod;
}
There are plenty of variations for each instruction creation
function. Consult the header files in include/llvm/IR or
the doxygen documentation to check for all possible options.
9. For the IR generator program to be a standalone tool, it needs a main()
function. In this main() function, we create a module by calling
makeLLVMModule and validate the IR construction using verifyModule().
The PrintMessageAction enumeration member sets the error messages to
stderr if the validation fails. Finally, the module bitcode is written to disk
by the WriteBitcodeToFile function, as shown in the following code:
int main() {
Module *Mod = makeLLVMModule();
verifyModule(*Mod, PrintMessageAction);
std::string ErrorInfo;
OwningPtr<tool_output_file> Out(new tool_output_file(
"./sum.bc", ErrorInfo,
sys:fs::F_None));
if (!ErrorInfo.empty()) {
errs() << ErrorInfo << '\n';
return -1;
}
WriteBitcodeToFile(Mod, Out->os());
Out->keep(); // Declare success
return 0;
}
[ 118 ]
Chapter 5
Building and running the IR generator
To build this tool, you can use the same Makefile from Chapter 3, Tools and Design.
The most critical part of the Makefile is the llvm-config --libs call that defines
which LLVM libraries your project will link with. In this project, you will use the
bitwriter component instead of the bitreader component used in Chapter 3,
Tools and Design. Therefore, change the llvm-config call to llvm-config --libs
bitwriter core support. To build, run, and check the generated IR, use the
following command:
$ make && ./sum && llvm-dis < sum.bc
...
define i32 @sum(i32 %a, i32 %b) {
entry:
%a.addr = alloca i32, align 4
%b.addr = alloca i32, align 4
store i32 %a, i32* %a.addr, align 4
store i32 %b, i32* %b.addr, align 4
%0 = load i32* %a.addr, align 4
%1 = load i32* %b.addr, align 4
%add = add i32 %0, %1
ret i32 %add
}
Learning how to write code to generate any IR
construct with the C++ backend
The llc tool, detailed in Chapter 6, The Backend, has an interesting feature to assist
developers with IR generation. The llc tool is capable of generating the C++
source code needed to generate the same IR file for a given LLVM IR file (bitcode or
assembly). This makes the IR building API easier to use since it is possible to rely on
other existing IR files to learn how to build even the trickiest IR expressions. LLVM
implements this through the C++ backend, which is made available using the llc
tool with the -march=cpp argument:
$ llc -march=cpp sum.bc -o sum.cpp
Open the sum.cpp file, and note that the generated C++ code is very similar to the
one that we wrote in the previous section.
[ 119 ]
The LLVM Intermediate Representation
The C++ backend is included by default when you configure your
LLVM build with all targets. However, if you specify targets during
configuration, the C++ backend needs to be included as well. Use
the cpp backend name to include the C++ backend, for example,
--enable-targets=x86,arm,mips,cpp.
Optimizing at the IR level
Once translated to the LLVM IR, a program is subject to a variety of
target-independent code optimizations. The optimizations can work, for example,
on one function at a time or on one module at a time. The latter is used when the
optimizations are interprocedural. To intensify the impact of the interprocedural
optimizations, the user can use the llvm-link tool to link several LLVM modules
together into a single one. This enables optimizations to work on a larger scope;
these are sometimes called link-time optimizations because they are only possible
in a compiler that optimizes beyond the translation-unit boundary. An LLVM user
has access to all of these optimizations and can individually invoke them using the
opt tool.
Compile-time and link-time optimizations
The opt tool uses the same set of optimization flags found in the Clang compiler
driver: -O0, -O1, -O2, -O3, -Os, and -Oz. Clang also has support for -O4, but not opt.
The -O4 flag is a synonym of -O3 with link-time optimizations (-flto), but as we
discussed, enabling link-time optimizations in LLVM depends on how you organize
the input files. Each flag activates a different optimization pipeline, which involves
a set of optimizations that acts in a specific order. From the Clang man page file, we
can read the following instructions:
–Ox flags: Specify which optimization level to use. -O0 means "no optimization":
this level compiles the fastest and generates the most debuggable code. -O2 is a
moderate level of optimization which enables most optimizations. -Os is like -O2
with extra optimizations to reduce code size. -Oz is like -Os (and thus -O2), but
reduces code size further. -O3 is like -O2, except that it enables optimizations that
take longer to perform or that may generate larger code (in an attempt to make the
program run faster). On supported platforms, -O4 enables link-time optimization;
object files are stored in the LLVM bitcode file format and whole program
optimization is done at link time. -O1 is somewhere between -O0 and -O2.
[ 120 ]
Chapter 5
To use any of these predefined sequences of optimizations, you can launch the opt
tool, which works on bitcode files. For example, the following command optimizes
the sum.bc bitcode:
$ opt -O3 sum.bc -o sum-O3.bc
You can also use a flag that activates standard, compile-time optimizations:
$ opt -std-compile-opts sum.bc -o sum-stdc.bc
Alternatively, you can use a set of standard, link-time optimizations:
$ llvm-link file1.bc file2.bc file3.bc -o=all.bc
$ opt -std-link-opts all.bc -o all-stdl.bc
It is also possible to apply individual passes using opt. A very important LLVM pass
is mem2reg, which will promote allocas to LLVM local values, possibly converting
them to use the SSA form if they receive multiple assignments when converted into
a local value. In this case, the conversion involves the use of phi functions (refer to
http://llvm.org/doxygen/classllvm_1_1PHINode.html)—these are awkward
to build for yourself when generating the LLVM IR, but are essential to enable SSA.
For this reason, it is preferable to write suboptimal code that relies on alloca, load,
and store, leaving the SSA version with long-lasting local values to the mem2reg
pass. This is the pass that was responsible for optimizing our sum.c example in the
previous section. For example, to run mem2reg and later count the number of each
instruction in the module, in that order, we can use the following command (the
order of the pass arguments matters):
$ opt sum.bc -mem2reg -instcount -o sum-tmp.bc -stats
===------------------------------------------------------------------------===
... Statistics Collected ...
===------------------------------------------------------------------------===
1 instcount - Number of Add insts
1 instcount - Number of Ret insts
1 instcount - Number of basic blocks
2 instcount - Number of instructions (of all types)
1 instcount - Number of non-external functions
2 mem2reg - Number of alloca's promoted
2 mem2reg - Number of alloca's promoted with a single store
[ 121 ]
The LLVM Intermediate Representation
We use the -stats flag to force LLVM to print statistics about each pass.
Otherwise, the instruction count pass will silently finish without reporting the
number of instructions.
Using the -time-passes flag, we can also see how much execution time each
optimization takes from the total execution time:
$ opt sum.bc -time-passes -domtree -instcount -o sum-tmp.bc
A complete list of LLVM analysis, transform, and utility passes can be found at
http://llvm.org/docs/Passes.html.
The phase-ordering problem states that the order used to
apply optimizations to code greatly affects its performance
gains and that each program has a different order that works
best. Using a predefined sequence of optimizations with -Ox
flags, you understand that this pipeline may not be the best
for your program. If you want to run an experiment that
exposes the complex interactions among optimizations, try to
run opt -O3 twice in your code and see how its performance
can be different (not necessarily better) in comparison with
running opt -O3 only once.
Discovering which passes matter
Optimizations are usually composed of analysis and transform passes. The
former recognizes proprieties and optimization opportunities while generating
the necessary data structures that can later be consumed by the latter. Both are
implemented as LLVM passes and can have dependency chains.
In our sum.ll example, we see that at the optimization level -O0, several alloca, load,
and store instructions are used. However, when using -O1, all of these redundant
instructions disappear because -O1 includes the mem2reg pass. However, if you did
not know that mem2reg is important, how would you discover which passes make a
difference to your program? To understand this, let's call the unoptimized version,
sum-O0.ll, and the optimized version, sum-O1.ll. To build the latter, you can use -O1:
$ opt -O1 sum-O0.ll -S -o sum-O1.ll
[ 122 ]
Chapter 5
However, if you want more fine-grained information about which set of
transformations actually had an influence on the outcome, you can pass
the -print-stats option to the clang frontend (or pass -stats to opt):
$ clang -Xclang -print-stats -emit-llvm -O1 sum.c -c -o sum-O1.bc
===------------------------------------------------------------------------===
... Statistics Collected ...
===------------------------------------------------------------------------===
1 cgscc-passmgr - Maximum CGSCCPassMgr iterations on one SCC
1 functionattrs - Number of functions marked readnone
2 mem2reg
- Number of alloca's promoted with a single store
1 reassociate
- Number of insts reassociated
1 sroa
- Maximum number of partitions per alloca
2 sroa
- Maximum number of uses of a partition
4 sroa
- Number of alloca partition uses rewritten
2 sroa
- Number of alloca partitions formed
2 sroa
- Number of allocas analyzed for replacement
2 sroa
- Number of allocas promoted to SSA values
4 sroa
- Number of instructions deleted
This output suggests that both mem2reg and sroa (the scalar replacement of
aggregates) participated in the removal of redundant allocas. To see how each
one acts, try to run just sroa:
$ opt sum-O0.ll -stats -sroa -o sum-O1.ll
===------------------------------------------------------------------------===
... Statistics Collected ...
===------------------------------------------------------------------------===
1 cgscc-passmgr - Maximum CGSCCPassMgr iterations on one SCC
1 functionattrs - Number of functions marked readnone
2 mem2reg
- Number of alloca's promoted with a single store
1 reassociate
- Number of insts reassociated
1 sroa
- Maximum number of partitions per alloca
[ 123 ]
The LLVM Intermediate Representation
2 sroa
- Maximum number of uses of a partition
4 sroa
- Number of alloca partition uses rewritten
2 sroa
- Number of alloca partitions formed
2 sroa
- Number of allocas analyzed for replacement
2 sroa
- Number of allocas promoted to SSA values
4 sroa
- Number of instructions deleted
Note that sroa also employs mem2reg, even though you did not explicitly specify
this at the command line. If you activate only the mem2reg pass, you will also see the
same improvement:
$ opt sum-O0.ll -stats -mem2reg -o sum-O1.ll
===------------------------------------------------------------------------===
... Statistics Collected ...
===------------------------------------------------------------------------===
2 mem2reg - Number of alloca's promoted
2 mem2reg - Number of alloca's promoted with a single store
Understanding pass dependencies
There are two main types of dependencies between transform passes and analyses:
•
Explicit dependency: The transform pass requests an analysis, and the pass
manager automatically schedules the analysis passes that it depends upon
to run before it. If you try to run a single pass that depends on others, the
pass manager will silently schedule all of the necessary passes to run before
it. Loop Info and Dominator Tree are examples of analyses that provide
information to other passes. Dominator trees are an essential data structure
to allow the SSA construction algorithm to determine where to place the
phi functions. In this way, the mem2reg, for instance, requests domtree
in its implementation, establishing a dependency relation between these
two passes:
DominatorTree &DT = getAnalysis<DominatorTree>(Func);
[ 124 ]
Chapter 5
•
Implicit dependency: Some transform or analysis passes depend on the IR
code to use specific idioms. In this way, it can easily identify patterns, even
though the IR has a myriad of other ways of expressing the same computation.
This implicit dependency can arise, for example, if a pass has specifically been
engineered to work just after another transform pass. Thus, the pass may be
biased to work with code that follows a particular idiom (from the previous
pass). In this case, since this subtle dependence is on a transform pass rather
than on an analysis, you need to manually add the passes to the pass queue
in the correct order via the command-line tool (clang or opt) or using a pass
manager. If the incoming IR does not use the idioms that the pass is expecting,
the pass will silently skip its transformations because it is unable to match the
code. The set of passes contained in a given optimization level are already
self-contained, and no dependency problems emerge.
Using the opt tool, you can obtain information about how the pass manager
schedules passes and which dependent passes are being used. For example,
to discover the full list of passes used when you request just the mem2reg pass,
you can issue the following command:
$ opt sum-O0.ll -debug-pass=Structure -mem2reg -S -o sum-O1.ll
Pass Arguments: -targetlibinfo -datalayout -notti -basictti -x86tti
-domtree -mem2reg -preverify -verify -print-module
Target Library Information
Data Layout
No target information
Target independent code generator's TTI
X86 Target Transform Info
ModulePass Manager
FunctionPass Manager
Dominator Tree Construction
Promote Memory to Register
Preliminary module verification
Module Verifier
Print module to stderr
[ 125 ]
The LLVM Intermediate Representation
In the Pass Arguments list, we can see that the pass manager considerably expanded
the number of passes to enable the correct execution of mem2reg. The domtree
pass, for instance, is requested by mem2reg, and thus, is included automatically
by the pass manager. Next, the output details the structure used to run each pass;
the passes in the hierarchy that are immediately after ModulePass Manager are
applied on a per-module basis, while the passes in the hierarchy that are below
FunctionPass Manager are applied on a per-function basis. We can also see the
order of pass execution, in which the Promote Memory to Register pass runs after
its dependency: the Dominator Tree Construction pass.
Understanding the pass API
The Pass class is the main resource to implement optimizations. However, it is
never used directly, but only through well-known subclasses. When implementing a
pass, you should pick the best subclass that suits the granularity that your pass will
work best at, such as per function, per module, per loop, and per strongly connected
component, among others. Common examples of such subclasses are as follows:
•
ModulePass: This is the most general pass; it allows an entire module to
•
FunctionPass: This subclass allows the handling of one function at a
•
BasicBlockPass: This uses basic blocks as its granularity. The same
modifications forbidden in a FunctionPass class are also forbidden
be analyzed at once, without any specific function order. It also does not
guarantee any proprieties for its users, allowing the deletion of functions
and other changes. To use it, you need to write a class that inherits from
ModulePass and overload the runOnModule() method.
time, without any particular order. It is the most popular type of pass.
It forbids the change of external functions, the deletion of functions,
and the deletion of globals. To use it, write a subclass that overloads the
runOnFunction() method.
here. It is also forbidden to change or delete external basic blocks. Users
need to write a class that inherits from BasicBlockPass and overload its
runOnBasicBlock() method.
The overloaded entry points runOnModule(), runOnFunction(), and
runOnBasicBlock() return a bool value of false if the analyzed unit (module,
function, and basic block) remains unchanged, and they return a value of true
otherwise. You can find the complete documentation on Pass subclasses at
http://llvm.org/docs/WritingAnLLVMPass.html.
[ 126 ]
Chapter 5
Writing a custom pass
Suppose that we want to count the number of arguments for each function in a
program, outputting the function name as well. Let's write a pass to do this. First,
we need to choose the right Pass subclass. FunctionPass seems appropriate since
we require no particular function order and do not need to delete anything.
We name our pass FnArgCnt and place it under the LLVM source code tree:
$ cd <llvm_source_tree>
$ mkdir lib/Transforms/FnArgCnt
$ cd lib/Transforms/FnArgCnt
The FnArgCnt.cpp file, located at lib/Transforms/FnArgCnt, needs to contain the
pass implementation, which is reproduced here:
#include "llvm/IR/Function.h"
#include "llvm/Pass.h"
#include "llvm/Support/raw_ostream.h"
using namespace llvm;
namespace {
class FnArgCnt : public FunctionPass {
public:
static char ID;
FnArgCnt() : FunctionPass(ID) {}
virtual bool runOnFunction(Function &F) {
errs() << "FnArgCnt --- ";
errs() << F.getName() << ": ";
errs() << F.getArgumentList().size() << '\n';
return false;
}
};
}
char FnArgCnt::ID = 0;
static RegisterPass<FnArgCnt> X("fnargcnt", "Function Argument
Count Pass", false, false);
First, we include the necessary header files and gather symbols from the
llvm namespace:
#include "llvm/IR/Function.h"
#include "llvm/Pass.h"
#include "llvm/Support/raw_ostream.h"
using namespace llvm;
[ 127 ]
The LLVM Intermediate Representation
Next, we declare FnArgCnt—our FunctionPass subclass—and implement the
main pass mechanism in the runOnFunction() method. From within each function
context, we print the function name and the number of arguments it receives. The
method returns false because no changes have been made to the analyzed function.
The code of our subclass is as follows:
namespace {
struct FnArgCnt : public FunctionPass {
static char ID;
FnArgCnt() : FunctionPass(ID) {}
virtual bool runOnFunction(Function &F) {
errs() << "FnArgCnt --- ";
errs() << F.getName() << ": ";
errs() << F.getArgumentList().size() << '\n';
return false;
}
};
}
The ID is determined internally by LLVM to identify a pass, and it can be declared
with any value:
char FnArgCnt::ID = 0;
Finally, we deal with the pass registration mechanism, which registers the pass with
the current pass manager during the pass load time:
static RegisterPass<FnArgCnt> X("fnargcnt", "Function Argument
Count Pass", false, false);
The first argument, fnargcnt, is the name used by the opt tool to identify the pass,
whereas the second argument contains its extended name. The third argument tells
us whether the pass changes the current CFG, and the last returns true only if it
implements an analysis pass.
Building and running your new pass with the LLVM
build system
To compile and install the pass, we need a Makefile within the same directory of the
source code. Different from our previous projects, we are not building a standalone
tool anymore, and this Makefile is integrated in the LLVM build system. Since it relies
on the LLVM main Makefile, which implements a great deal of rules, its contents are
considerably simpler than a standalone Makefile. Refer to the following code:
# Makefile for FnArgCnt pass
# Path to top level of LLVM hierarchy
[ 128 ]
Chapter 5
LEVEL = ../../..
# Name of the library to build
LIBRARYNAME = LLVMFnArgCnt
# Make the shared library become a loadable module so the tools can
# dlopen/dlsym on the resulting library.
LOADABLE_MODULE = 1
# Include the makefile implementation stuff
include $(LEVEL)/Makefile.common
The comments in the Makefile are self-explanatory, and a shared library is created
using the common LLVM Makefile. Using this infrastructure, our pass is installed
together with other standard passes and can be loaded directly by opt, but it requires
that you rebuild your LLVM installation.
We also want our pass to be compiled in the object directory, and we need to include
our pass in the Transforms directory, Makefile. Thus, in lib/Transforms/Makefile,
the PARALLEL_DIRS variable needs to be changed to include the FnArgCnt pass:
PARALLEL_DIRS = Utils Instrumentation Scalar InstCombine IPO
Vectorize Hello ObjCARC FnArgCnt
With instructions from Chapter 1, Build and Install LLVM, the LLVM project needs to
be reconfigured:
$ cd path-to-build-dir
$ /PATH_TO_SOURCE/configure --prefix=/your/installation/folder
Now, from within the object directory, go to the new pass directory and run make:
$ cd lib/Transforms/FnArgCnt
$ make
A shared library will be placed under the build tree in the directory Debug+Asserts/
lib. Debug+Asserts should be replaced with your configuration mode, for example,
Release if you configured a release build. Now, invoke opt with the custom pass
(in Mac OS X):
$ opt -load <path_to_build_dir>/Debug+Asserts/lib/LLVMFnArgCnt.dylib
-fnargcnt < sum.bc >/dev/null
FnArgCnt --- sum: 2
The appropriate shared library extension needs to be used in Linux (.so). As
expected, the sum.bc module has only one function with two integer arguments,
as shown in the previous output.
[ 129 ]
The LLVM Intermediate Representation
Alternatively, you can rebuild the entire LLVM system and reinstall it. The build
system will install a new opt binary that recognizes your pass without the -load
command-line argument.
Building and running your new pass with your own
Makefile
The dependence on the LLVM build system can be annoying, such as needing to
reconfigure the entire project or rebuild all the LLVM tools with our new code.
However, we can create a standalone Makefile that compiles our pass outside
the LLVM source tree in the same way that we have been building our projects
in previously. The comfort of being independent from the LLVM source tree is
sometimes worth the extra effort of building your own Makefile.
We will base our standalone Makefile on the one used to build a tool in Chapter 3, Tools
and Design. The challenge now is that we are not building a tool anymore, but a shared
library that has the code of our pass and will be loaded on demand by the opt tool.
First, we create a separate folder for our project that does not live inside the
LLVM source tree. We put the FnArgCnt.cpp file in this folder with the pass
implementation. Second, we create the Makefile as follows:
LLVM_CONFIG?=llvm-config
ifndef VERBOSE
QUIET:=@
endif
SRC_DIR?=$(PWD)
LDFLAGS+=$(shell $(LLVM_CONFIG) --ldflags)
COMMON_FLAGS=-Wall -Wextra
CXXFLAGS+=$(COMMON_FLAGS) $(shell $(LLVM_CONFIG) --cxxflags)
CPPFLAGS+=$(shell $(LLVM_CONFIG) --cppflags) -I$(SRC_DIR)
ifeq ($(shell uname),Darwin)
LOADABLE_MODULE_OPTIONS=-bundle -undefined dynamic_lookup
else
LOADABLE_MODULE_OPTIONS=-shared -Wl,-O1
endif
FNARGPASS=fnarg.so
FNARGPASS_OBJECTS=FnArgCnt.o
[ 130 ]
Chapter 5
default: $(FNARGPASS)
%.o : $(SRC_DIR)/%.cpp
@echo Compiling $*.cpp
$(QUIET)$(CXX) -c $(CPPFLAGS) $(CXXFLAGS) $<
$(FNARGPASS) : $(FNARGPASS_OBJECTS)
@echo Linking $@
$(QUIET)$(CXX) -o $@ $(LOADABLE_MODULE_OPTIONS) $(CXXFLAGS)
$(LDFLAGS) $^
clean::
$(QUIET)rm -f $(FNARGPASS) $(FNARGPASS_OBJECTS)
The novelties (highlighted in the preceding code) in this Makefile, in comparison
to the one from Chapter 3, Tools and Design, is the conditional definition of the
LOADABLE_MODULE_OPTIONS variable, which is used in the command line that
links our shared library. It defines the platform-dependent set of compiler flags
that instructs it to generate a shared library instead of an executable. For Linux, for
example, it uses the -shared flag to create a shared library as well as the -Wl,-O1
flag, which passes the -O1 flag to GNU ld. This flag asks the GNU linker to perform
symbol table optimizations, reducing the library load time. If you do not use GNU
linker, you can omit this flag.
We also removed the llvm-config --libs shell command from our linker command
line. This command was used to supply the libraries that our project links to. Since we
know that the opt executable already has all the necessary symbols that we use, we
simply do not include any redundant libraries, allowing for faster link times.
To build your project, use the following command line:
$ make
To run your pass that was built in fnarg.so, use the following command lines:
$ opt -load=fnarg.so -fnargcnt < sum.bc > /dev/null
FnArgCnt --- sum: 2
[ 131 ]
The LLVM Intermediate Representation
Summary
The LLVM IR is the middle point between the frontend and backend. It is the place
where target-independent optimizations take place. In this chapter, we explored the
tools for the manipulation of the LLVM IR, the assembly syntax, and how to write a
custom IR code generator. Moreover, we showed how the pass interface works, how
to apply optimizations, and then provided examples on how to write our own IR
transform or analysis passes.
In the next chapter, we will discuss how LLVM backends work and how we can
build our own backend to translate LLVM IR code to a custom architecture.
[ 132 ]
The Backend
The backend is comprised of the set of code generation analysis and transform
passes that converts the LLVM intermediate representation (IR) into object code
(or assembly). LLVM supports a wide range of targets: ARM, AArch64, Hexagon,
MSP430, MIPS, Nvidia PTX, PowerPC, R600, SPARC, SystemZ, X86, and XCore. All
these backends share a common interface, which is part of the target-independent
code generator, abstracting away the backend tasks by means of a generic API. Each
target must specialize the code generator generic classes to implement target-specific
behavior. In this chapter, we will cover many general aspects about an LLVM
backend that are useful for readers interested in writing a new backend, maintaining
an existing backend, or writing backend passes. We will cover the following topics:
•
Overview of the LLVM backend organization
•
How to interpret the various TableGen files that describe a backend
•
What is and how does the instruction selection happen in LLVM
•
What is the role of the instruction scheduling and register allocation phase
•
How does code emission work
•
How to write your own backend pass
The Backend
Overview
There are several steps involved in transforming the LLVM IR into target assembly
code. The IR is converted to a backend-friendly representation of instructions,
functions, and globals. This representation changes as the program progresses
through the backend phases and gets closer to the actual target instructions. The
following diagram shows an overview of the necessary steps to go from LLVM
IR to object code or assembly, while indicating, in white boxes, where extraneous
optimization passes can act to further improve the translation quality.
Passes
Instruction
selection
Passes
Instruction
scheduling
Instruction
scheduling
Passes
Register
allocation
LLVM IR
Assembly
Passes
Code
emission
Object
code
This translation pipeline is composed of different phases of the backend, which are
shown in the light gray, intermediary boxes. They are also called superpasses because,
internally, they are implemented with several smaller passes. The difference between
these and white boxes is that, in general, the former represent a set of passes that
are critical to the success of the backend, while the latter are more important for
increasing the generated code efficiency. We give a brief description of the code
generator phases illustrated in the preceding diagram in the following list:
•
The Instruction Selection phase converts the in-memory IR representation
into target-specific SelectionDAG nodes. Initially, this phase converts the
three-address structure of the LLVM IR to a Directed Acyclic Graph (DAG)
form, that is, one that uses a directed acyclic graph. Each DAG is capable
of representing the computation of a single basic block, which means that
each basic block is associated with a different DAG. While nodes typically
represent instructions, the edges encode a dataflow dependence among
them, but are not limited to it. The transformation to use DAGs is important
to allow the LLVM code generator library to employ tree-based patternmatching instruction selection algorithms that, with some adaptation, work
on a DAG as well (not just trees). By the end of this phase, the DAG has all
of its LLVM IR nodes converted to target-machine nodes, that is, nodes that
represent machine instructions rather than LLVM instructions.
[ 134 ]
Chapter 6
•
After instruction selection, we already have a good idea about which target
instructions will be used to perform the computation of each basic block. This
is encoded in the SelectionDAG class. However, we need to return to a threeaddress representation to determine the order of instructions inside basic
blocks, as a DAG does not imply ordering between instructions that do not
depend on one other. The first instance of Instruction Scheduling, also called
Pre-register Allocation(RA) Scheduling, orders the instructions while trying
to explore instruction-level parallelism as much as possible. The instructions
are then converted to the MachineInstr three-address representation.
•
Recall that the LLVM IR has an infinite set of registers. This characteristic is
preserved until we reach Register Allocation, which transforms an infinite
set of virtual register references into a finite set of target-specific registers,
generating spills whenever needed.
•
The second instance of Instruction Scheduling, also called Post-register
Allocation(RA) Scheduling, takes place. Since real register information
is now available at this point, the presence of extra hazards and delays
associated with certain types of registers can be used to improve the
instruction order.
•
The Code Emission phase converts instructions from the MachineInstr
representation to MCInst instances. In this new representation, which is more
suitable for assemblers and linkers, there are two options: to emit assembly
code or emit binary blobs into a specific object code format.
Therefore, there are four distinct levels of instruction representation used throughout
the backend pipeline: in-memory LLVM IR, SelectionDAG nodes, MachineInstr,
and MCInst.
Using the backend tools
The llc is the main tool to use as a backend. If we continue our tour with the sum.
bc bitcode from the previous chapter, we can generate its assembly code with the
following command:
$ llc sum.bc -o sum.s
Alternatively, to generate object code, we use the following command:
$ llc sum.bc -filetype=obj -o sum.o
[ 135 ]
The Backend
If you use the preceding commands, llc will try to select a backend that matches
the target triple specified in the sum.bc bitcode. To override this and select specific
backends, use the -march option. For example, use the following to generate MIPS
object code:
$ llc -march=mips -filetype=obj sum.bc -o sum.o
If you issue the llc -version command, llc will show the complete list of supported
-march options. Note that this list is compatible with the --enable-targets options
used during LLVM configuration (see Chapter 1, Build and Install LLVM, for details).
Notice, however, that we just forced llc to use a different backend to generate
code for a bitcode originally compiled for x86. In Chapter 5, The LLVM Intermediate
Representation, we explained that the IR has target-dependent aspects despite being
designed as a common language for all backends. Since C/C++ languages have
target-dependent attributes, this dependence is reflected on the LLVM IR.
Thus, you must be careful when using llc with a bitcode target triple that does not
match the -march target. This situation may lead to ABI mismatches, bad program
behavior and, in some cases, failure in the code generator. In the majority of cases,
however, the code generator does not fail and will generate code with subtle bugs,
which is much worse.
To understand how the IR target dependency may appear in practice,
let's see an example. Consider that your program allocates a vector
of char pointers to store different strings, and you use the common
C idiom malloc(sizeof(char*)*n) to allocate memory for your
string vector. If you specify to the frontend that the target is, for
instance, a 32-bit MIPS architecture, it will generate a bitcode that asks
malloc to allocate n times 4 bytes of memory, since each pointer in the
32-bit MIPS is of 4 bytes. However, if you use this bitcode as input to
llc and force it to compile on an x86_64 architecture, you will generate
a broken program. At runtime, a potential segmentation fault will occur
because x86_64 uses 8 bytes for each pointer, which makes our malloc
call undersized. The correct malloc call for x86_64 would allocate n
times 8 bytes.
[ 136 ]
Chapter 6
Learning the backend code structure
The backend implementation is scattered among different directories in the LLVM
source tree. The main libraries behind code generation are found in the lib directory
and its subfolders CodeGen, MC, TableGen, and Target:
•
•
•
•
The CodeGen directory contains implementation files and headers for all
generic code generation algorithms: instruction selection, scheduler, register
allocation, and all analyses needed for them.
The MC directory holds the implementation of low-level functionality
for the assembler (assembly parser), relaxation algorithm (disassembler),
and specific object file idioms such as ELF, COFF, MachO, and so on.
The TableGen directory holds the complete implementation of the TableGen
tool, which is used to generate C++ code based on high-level target
descriptions found in .td files.
Each target is implemented in a different subfolder under the Target
folder (for example, Target/Mips) with several .cpp, .h, and .td files.
Files implementing similar functionality in different targets tend to share
similar names.
If you write a new backend, your code will live exclusively in a subfolder of the
Target folder. As an example, let's use Sparc to illustrate the organization of the
Target/Sparc subfolder:
Filenames
Description
SparcInstrInfo.td
Instruction and format definitions
SparcInstrFormats.td
SparcRegisterInfo.td
Registers and register classes definitions
SparcISelDAGToDAG.cpp
Instruction selection
SparcISelLowering.cpp
SelectionDAG node lowering
SparcTargetMachine.cpp
Information about target-specific
properties such as the data layout and the
ABI
Sparc.td
Definition of machine features, CPU
variations, and extension features
SparcAsmPrinter.cpp
Assembly code emission
SparcCallingConv.td
ABI-defined calling conventions
[ 137 ]
The Backend
Since backends usually obey this code organization, developers can easily map how
a specific issue of one backend is implemented in another target. For example, if
you are writing the Sparc backend register information in SparcRegisterInfo.td
and are wondering how the x86 backend implemented this, just take a look at the
X86RegisterInfo.td file in the Target/X86 folder.
Knowing the backend libraries
The llc non-shared code is quite small (see tools/llc/llc.cpp) and most of its
functionality is implemented as reusable libraries, in the same way as other LLVM
tools. In the case of llc, its functionality is provided by the code generator libraries.
This set of libraries is composed of a target-dependent part and a target-independent
one. The code generator target-dependent libraries are in different files from the
target-independent ones, allowing you to link with a restricted set of desired target
backends. For instance, by using --enable-targets=x86,arm during the LLVM
configuration, only the x86 and the ARM backend libraries are linked into llc.
Recall that all LLVM libraries are prefixed with libLLVM. We omit this prefix here for
clarity. The target-independent code generator libraries are the following:
•
AsmParser.a: This library contains code to parse assembly text and
•
AsmPrinter.a: This library contains code to print assembly language and
•
CodeGen.a: This library contains the code generation algorithms
•
MC.a: This library contains the MCInst class and related ones and is used to
•
MCDisassembler.a: This library contains the code to implement a
disassembler that reads object code and decodes bytes to MCInst objects
•
MCJIT.a: This library contains the implementation for the just-in-time code
•
MCParser.a: This library contains the interface to the MCAsmParser class and
•
SelectionDAG.a: This library contains SelectionDAG and related classes
•
Target.a: This library contains the interfaces that allow the
implement an assembler
implement a backend that generates assembly files
represent the program in the lowest level that LLVM allows
generator
is used to implement a component that parses assembly text and performs
part of the work of an assembler
target-independent algorithms to solicit target-dependent functionality,
although this functionality per se is implemented in other libraries
(the target-dependent ones)
[ 138 ]
Chapter 6
The target-specific libraries, on the other hand, are the following:
•
<Target>AsmParser.a: This library contains the target-specific part of
the AsmParser library, responsible for implementing an assembler for
the target machine
•
•
•
•
•
<Target>AsmPrinter.a: This library contains the functionality to print
target instructions and allow the backend to generate assembly language files
<Target>CodeGen.a: This library contains the majority of the
target-dependent functionality of the backend, including specific
register handling rules, instruction selection, and scheduling
<Target>Desc.a: This library contains target-machine information
regarding the low-level MC infrastructure and is responsible for registering
target-specific MC objects such as MCCodeEmitter
<Target>Disassembler.a: This library complements the MCDisassembler
library with target-dependent functionality to build a system that is able to
read bytes and decode them into MCInst target instructions
<Target>Info.a: This library is responsible for registering the
target in the LLVM code generator system and provides façade classes
that allow the target-independent code generator libraries to access
target-specific functionality
In these library names, <Target> must be replaced with the target name, for
example, X86AsmParser.a is the name of the parser library of the X86 backend. A
complete LLVM installation contains these libraries in the <LLVM_INSTALL_PATH>/
lib directory.
Learning how to use TableGen for LLVM
backends
LLVM uses the record-oriented language TableGen to describe information used
in several compiler stages. For example, in Chapter 4, The Frontend, we briefly
discussed how TableGen files (with the .td extension) are used to describe different
diagnostics of the frontend. TableGen was originally written by the LLVM team to
help programmers write LLVM backends. Even though the code generator libraries'
design emphasizes a clean separation of concerns between target characteristics,
for example, using a different class to reflect register information and another for
instructions, the backend programmer eventually ends up writing code that reflects
the same machine aspect in several different files. The problem with this approach
is that, despite the extra effort to write the backend code, it introduces information
redundancy in the code that must be manually synchronized.
[ 139 ]
The Backend
For example, if you want to change how the backend deals with a register, you
would need to change several distinct parts of the code: the register allocator to show
which types the register supports; the assembler printer to reflect how the register is
printed; the assembler parser to reflect how it is parsed in assembly-language code;
and the disassembler, which needs to know the register's encoding. Therefore, it
becomes complex to maintain the code of a backend.
To mitigate this, TableGen was created as a declarative programming language to
describe files that act as a central repository of information about the target. The
idea was to declare machine aspects in a single location, for example, the machine
instructions description in <Target>InstrInfo.td, and then use a TableGen
backend that uses this repository with a specific goal, for example, generate the
pattern-matching instruction selection algorithm, which is tediously long to write
by yourself.
Nowadays, TableGen is used to describe all kinds of target-specific information, such
as instruction formats, instructions, registers, pattern-matching DAGs, instruction
selection matching order, calling conventions, and target CPU properties (supported
Instruction Set Architecture (ISA) features and processor families).
Complete and automatic generation of the backend, a simulator, and the
hardware-synthesis description file for a processor has been a long-sought
goal in computer architecture research and is still an open problem. The
typical approach involves putting all machine information in a declarative
description language, similar to TableGen, and then use tools that try to
derive all kinds of software (and hardware) that you need to evaluate
and test the processor architecture. As expected, this is very challenging
and the quality of the generated tools falls short when compared to
hand-written ones. The approach of LLVM with TableGen is to aid the
programmer in smaller code-writing tasks, still giving full control to the
programmer to implement any custom logic with C++ code.
The language
The TableGen language is composed of definitions and classes that are used to
form records. The definition def is used to instantiate records from the class and
multiclass keywords. These records are further processed by TableGen backends to
generate domain-specific information for the code generator, Clang diagnostics, Clang
driver options, and static analyzer checkers. Therefore, the actual meaning of what
records represent is given by the backend, while records solely hold up information.
[ 140 ]
Chapter 6
Let's work out a simple example to illustrate how TableGen works. Suppose that you
want to define ADD and SUB instructions for a hypothetical architecture, where ADD
has the following two forms: all operands are all registers and operands are a register
and an immediate.
The SUB instruction only has the first form. See the following sample code of our
insns.td file:
class Insn<bits <4> MajOpc, bit MinOpc> {
bits<32> insnEncoding;
let insnEncoding{15-12} = MajOpc;
let insnEncoding{11} = MinOpc;
}
multiclass RegAndImmInsn<bits <4> opcode> {
def rr : Insn<opcode, 0>;
def ri : Insn<opcode, 1>;
}
def SUB : Insn<0x00, 0>;
defm ADD : RegAndImmInsn<0x01>;
The Insn class represents a regular instruction and the RegAndImmInsn multiclass
represents instructions with the forms mentioned above. The def SUB construct
defines the SUB record whereas defm ADD defines two records: ADDrr and ADDri. By
using the llvm-tblgen tool, you can process a .td file and check the resulting records:
$ llvm-tblgen -print-records insns.td
------------- Classes ----------------class Insn<bits<4> Insn:MajOpc = { ?, ?, ?, ? }, bit Insn:MinOpc = ?> {
bits<5> insnEncoding = { Insn:MinOpc, Insn:MajOpc{0},
Insn:MajOpc{1}, Insn:MajOpc{2}, Insn:MajOpc{3} };
string NAME = ?;
}
------------- Defs ----------------def ADDri { // Insn ri
bits<5> insnEncoding = { 1, 1, 0, 0, 0 };
string NAME = "ADD";
}
def ADDrr { // Insn rr
bits<5> insnEncoding = { 0, 1, 0, 0, 0 };
string NAME = "ADD";
}
[ 141 ]
The Backend
def SUB { // Insn
bits<5> insnEncoding = { 0, 0, 0, 0, 0 };
string NAME = ?;
}
The TableGen backends are also available to use in the llvm-tblgen tool; type
llvm-tblgen --help to list all backend options. Note that our example uses no
LLVM-specific domain and will not work with a backend. For more information
on TableGen language aspects, refer to the page at http://llvm.org/docs/
TableGenFundamentals.html.
Knowing the code generator .td files
As mentioned before, the code generator uses TableGen records extensively to
express target-specific information. We present in this subsection a tour of the
TableGen files used for code generation purposes.
Target properties
The <Target>.td file (for example, X86.td) defines the supported ISA features and
processor families. For example, X86.td defines the AVX2 extension:
def FeatureAVX2 : SubtargetFeature<"avx2", "X86SSELevel", "AVX2",
"Enable AVX2 instructions",
[FeatureAVX]>;
The def keyword defines the record FeatureAVX2 from the record class type
SubtargetFeature. The last argument is a list of other features already included in
the definition. Therefore, a processor with AVX2 contains all AVX instructions.
Moreover, we can also define a processor type and include which ISA extension or
features it provides:
def : ProcessorModel<"corei7-avx", SandyBridgeModel,
[FeatureAVX, FeatureCMPXCHG16B, ...,
FeaturePCLMUL]>;
The <Target>.td file also includes all other .td files and is the main file for targetspecific domain information. The llvm-tblgen tool must always use it to obtain any
TableGen records for a target. For instance, to dump all possible records for x86, use
the following commands:
$ cd <llvm_source>/lib/Target/X86
$ llvm-tblgen -print-records X86.td -I ../../../include
[ 142 ]
Chapter 6
The X86.td file has part of the information that TableGen uses to generate the
X86GenSubtargetInfo.inc file, but it is not limited to it and, in general, there is
no direct mapping between a single .td file and a single .inc file. To understand
this, consider that <Target>.td is an important top-level file that includes all others
by means of TableGen's include directives. Therefore, when generating C++ code,
TableGen always parses all backend .td files, which makes you free to put records
wherever you think is most appropriate. Even though X86.td includes all other
backend .td files, the contents of this file, excluding the include directives, are
aligned with the definition of the Subtarget x86 subclass.
If you check the X86Subtarget.cpp file that implements the x86Subtarget class,
you will find a C++ preprocessor directive called #include "X86GenSubtargetInfo.
inc", which is how we embed TableGen-generated C++ code into the regular code
base. This particular include file contains processor feature constants, a vector of
processor features that relates a feature with its string description, and other
related resources.
Registers
Registers and register classes are defined in the <Target>RegisterInfo.td
file. Register classes are used later in instruction definitions to tie an instruction
operand to a particular set of registers. For instance, 16-bit registers are defined in
X86RegisterInfo.td with the following idiom:
let SubRegIndices = [sub_8bit, sub_8bit_hi], ... in {
def AX : X86Reg<"ax", 0, [AL,AH]>;
def DX : X86Reg<"dx", 2, [DL,DH]>;
def CX : X86Reg<"cx", 1, [CL,CH]>;
def BX : X86Reg<"bx", 3, [BL,BH]>;
...
The let construct is used to define an extra field, SubRegIndices in this case, that is
placed in all records inside the environment starting with { and ending with }. The
16-bit register definitions deriving from the X86Reg class hold, for each register, its
name, number, and a list of 8-bit subregisters. The register class definition for 16-bit
registers is reproduced as follows:
def GR16 : RegisterClass<"X86", [i16], 16,
(add AX, CX, DX, ..., BX, BP, SP,
R8W, R9W, ..., R15W, R12W, R13W)>;
[ 143 ]
The Backend
The GR16 register class contains all 16-bit registers and their respective register
allocation preferred order. Every register class name receives the suffix RegClass
after TableGen processing, for example, GR16 becomes GR16RegClass. TableGen
generates register and register classes definitions, method implementations to
gather information about them, binary encoding for the assembler, and their
DWARF (Linux debugging records format) information. You can check the
TableGen-generated code using llvm-tblgen:
$ cd <llvm_source>/lib/Target/X86
$ llvm-tblgen -gen-register-info X86.td -I ../../../include
Alternatively, you can check the C++ file <LLVM_BUILD_DIR>/lib/Target/X86/
X86GenRegisterInfo.inc that is generated during the LLVM build process.
This file is included by X86RegisterInfo.cpp to help in the definition of the
X86RegisterInfo class. It contains, among other things, the enumeration of
processor registers, which makes this file a useful reference guide when you are
debugging your backend and do not have a clue about what register is represented
by the number 16 (which is the best guess your debugger can give you).
Instructions
Instruction formats are defined in <Target>InstrFormats.td and instructions are
defined in <Target>InstrInfo.td. The instruction formats contain the instruction
encoding fields necessary to write the instruction in binary form, while instruction
records represent each one as a single instruction. You can create intermediary
instruction classes, that is, TableGen classes used to derive instruction records, to
factor out common characteristics, such as the common encoding of similar data
processing instructions. However, every instruction or format must be a direct or
indirect subclass of the Instruction TableGen class defined in include/llvm/
Target/Target.td. Its fields show us what the TableGen backend expects to find in
the instruction records:
class Instruction {
dag OutOperandList;
dag InOperandList;
string AsmString = "";
list<dag> Pattern;
list<Register> Uses = [];
list<Register> Defs = [];
list<Predicate> Predicates = [];
bit isReturn = 0;
bit isBranch = 0;
...
[ 144 ]
Chapter 6
A dag is a special TableGen type used to hold SelectionDAG nodes. These nodes
represent opcodes, registers, or constants during the instruction selection phase.
The fields present in the code play the following roles:
•
The OutOperandList field stores resultant nodes, allowing the backend
to identify the DAG nodes that represent the outcome of the instruction.
For example, in the MIPS ADD instruction, this field is defined as (outs
GP32Opnd:$rd). In this example:
°°
outs is a special DAG node to denote that its children are output
°°
GPR32Opnd is a MIPS-specific DAG node to denote an instance of
°°
$rd is an arbitrary register name that is used to identify the node
operands
a MIPS 32-bit general purpose register
•
The InOperandList field holds the input nodes, for example, in the MIPS
ADD instruction, "(ins GPR32Opnd:$rs, GPR32Opnd:$rt)".
•
The AsmString field represents the instruction assembly string, for example,
in the MIPS ADD instruction, "add $rd, $rs, $rt".
•
Pattern is the list of dag objects that will be used to perform pattern matching
•
Uses and Defs record the lists of implicitly used and defined registers during
•
The Predicates field stores a list of prerequisites that are checked before
the instruction selection tries to match the instruction. If the check fails, there
is no match. For example, a predicate may state that the instruction is only
valid for a specific subtarget. If you run the code generator with a target
triple that selects another subtarget, this predicate will evaluate to false and
the instruction never matches.
•
Other fields include isReturn and isBranch, among others, which augment
the code generator with information about the behavior of the instructions.
For example, if isBranch = 1, the code generator knows that the instruction
is a branch and must live at the end of a basic block.
during instruction selection. If a pattern is matched, the instruction selection
phase replaces the matching nodes with this instruction. For example, in the
[(set GPR32Opnd:$rd, (add GPR32Opnd:$rs, GPR32Opns:$rt))] pattern
of the MIPS ADD instruction, [ and ] denote the contents of a list that has only
one dag element, which is defined between parenthesis in a LISP-like notation.
the execution of this instruction. For example, the return instruction of a
RISC processor implicitly uses the return address register, while the call
instruction implicitly defines the return address register.
[ 145 ]
The Backend
In the following code block, we can see the definition of the XNORrr instruction in
SparcInstrInfo.td. It uses the F3_1 format (defined in SparcInstrFormats.td),
which covers part of the F3 format from the SPARC V8 architecture manual:
def XNORrr : F3_1<2, 0b000111,
(outs IntRegs:$dst), (ins IntRegs:$b, IntRegs:$c),
"xnor $b, $c, $dst",
[(set i32:$dst, (not (xor i32:$b, i32:$c)))]>;
The XNORrr instruction has two IntRegs (a target-specific DAG node representing
the SPARC 32-bit integer register class) source operands and one IntRegs result, as
seen in OutOperandList = (outs IntRegs:$dst) and InOperandList = (ins
IntRegs:$b, IntRegs:$c).
The AsmString assembly refers to the operands specified by using the $ token: "xnor
$b, $c, $dst". The Pattern list element (set i32:$dst, (not (xor i32:$b,
i32:$c))) contains the SelectionDAG nodes that should be matched to the
instruction. For instance, the XNORrr instruction is matched whenever the xor result
has its bits inverted by a not and both xor operands are registers.
To check the XNORrr instruction record fields, you can use the following sequence of
commands:
$ cd <llvm_sources>/lib/Target/Sparc
$ llvm-tblgen -print-records Sparc.td -I ../../../include | grep XNORrr
-A 10
Multiple TableGen backends utilize the information of instruction records to fulfill
their role, generating different .inc files out of the same instruction records. This
is aligned with the TableGen goal of creating a central repository that is used to
generate code to several parts of the backend. Each one of the following files is
generated by a different TableGen backend:
•
<Target>GenDAGISel.inc: This file uses the information of the
patterns field in the instruction records to emit the code that selects
instructions of the SelectionDAG data structure. This file is included in the
<Target>ISelDAGtoDAG.cpp file.
•
<Target>GenInstrInfo.inc: This file contains an enumeration that lists
all instructions in the target, among other instruction-describing tables.
This file is included in <Target>InstrInfo.cpp, <Target>InstrInfo.h,
<Target>MCTargetDesc.cpp, and <Target>MCTargetDesc.h. However,
each file defines a specific set of macros before including the TableGengenerated file, changing how the file is parsed and used in each context.
[ 146 ]
Chapter 6
•
<Target>GenAsmWriter.inc: This file contains code that maps the strings
•
<Target>GenCodeEmitter.inc: This file contains functions that map the
•
<Target>GenDisassemblerTables.inc: This file implements tables and
•
<Target>GenAsmMatcher.inc: This file implements the parser of
that are used to print each instruction assembly. It is included in the
<Target>AsmPrinter.cpp file.
binary code to emit for each instruction, thus generating the machine code to
fill an object file. It is included in the <Target>CodeEmitter.cpp file.
algorithms that are able to decode a sequence of bytes and identify which
target instruction it represents. It is used to implement a disassembler tool
and is included in the <Target>Disassembler.cpp file.
an assembler of target instructions. It is included two times in the
<Target>AsmParser.cpp file, each one with a different set of preprocessor
macros and, thus, changing how the file is parsed.
Understanding the instruction selection
phase
Instruction selection is the process of transforming the LLVM IR into the
SelectionDAG nodes (SDNode) representing target instructions. The first step is
to build the DAG out of LLVM IR instructions, creating a SelectionDAG object
whose nodes carry IR operations. Next, these nodes go through the lowering,
DAG combiner, and legalization phases, making it easier to match against target
instructions. The instruction selection then performs a DAG-to-DAG conversion
using node pattern matching and transforms the SelectionDAG nodes into nodes
representing target instructions.
The instruction selection pass is one of the most expensive ones
employed in the backend. A study compiling the functions of the
SPEC CPU2006 benchmark reveals that, on average, the instruction
selection pass alone uses almost half of the time spent in the llc tool
with –O2, generating x86 code, in LLVM 3.0. If you are interested
in knowing the average time spent in all –O2 target-independent
and target-dependent passes, you can check out the appendix of
the technical report of the LLVM JIT compilation cost analysis at
http://www.ic.unicamp.br/~reltech/2013/13-13.pdf.
[ 147 ]
The Backend
The SelectionDAG class
The SelectionDAG class employs a DAG to represent the computation of each basic
block, and each SDNode corresponds to an instruction or operand. The following
diagram was generated by LLVM and shows the DAG for sum.bc, which has only
one function and one basic block:
The edges of this DAG enforces ordering among its operations by means of a usedef relationship. If node B (for example, add) has an outgoing edge to node A
(for example, Constant<-10>), this means that node A defines a value (the 32-bit
integer -10) that node B uses (as an operand of an addition). Thus, the operation
of A must execute before B. The black arrows represent regular edges showing a
dataflow dependence, just as in our add example. The dashed blue arrows represent
non-dataflow chains that exist to enforce order between two otherwise unrelated
instructions, for example, load and store instructions must stick with their original
program ordering if they access the same memory position. In the preceding
diagram, we know that the CopyToReg operation must happen before X86ISD::RET_
FLAG thanks to a dashed blue edge. The red edge guarantees that its adjacent nodes
must be glued together, which means that they must be issued next to each other
with no other instruction in between them. For example, we know that the same
nodes CopyToReg and X86ISD::RET_FLAG must be scheduled right next to each other
thanks to a red edge.
[ 148 ]
Chapter 6
Each node can supply a different type of value depending on its relationship with its
consumers. A value is not necessarily concrete, but may also be an abstract token. It
may have any of the following types:
•
The value supplied by the node can be a concrete value type representing
either integer, floating, vector, or pointer. The result of a data processing
node that calculates a new value out of its operands is an example of
this category. The type can be i32, i64, f32, v2f32 (vector with two f32
elements), and iPTR, among others. When another node consumes this value,
the producer-consumer relationship is depicted with a regular black edge in
LLVM diagrams.
•
The Other type is an abstract token used to represent chain values (ch in
the diagram). When another node consumes an Other type value, the edge
connecting the two is printed as a dashed blue line in LLVM diagrams.
•
The Glue type represents glues. When another node consumes a Glue type
value, the edge connecting the two receives the red color in LLVM diagrams.
The SelectionDAG objects have a special EntryToken to mark the basic block entry,
which supplies a value of type Other to allow chained nodes to start by consuming
this first token. The SelectionDAG object also has a reference to the graph root right
next to the last instruction, whose relationship is also encoded as a chain of values of
type Other.
In this stage, target-independent and target-specific nodes can co-exist as a result of
the effort of preliminary steps, such as lowering and legalization, which is responsible
for preparing the DAG for instruction selection. By the end of instruction selection,
though, all nodes that are matched by target instructions will be target- specific. In
the preceding diagram, we have the following target-independent nodes: CopyToReg,
CopyFromReg, Register(%vreg0), add, and Constant. In addition, we have the
following nodes that were already preprocessed and are target-specific (although they
can still change after instruction selection): TargetConstant, Register(%EAX), and
X86ISD::RET_FLAG.
We may also observe the following semantics from the example in the diagram:
•
Register: This node may reference virtual or physical (target-specific)
•
CopyFromReg: This node copies a register defined outside the current basic
register(s).
block's scope, allowing us to use it in the current context—in our example,
it copies a function argument.
[ 149 ]
The Backend
•
CopyToReg: This node copies a value to a specific register without supplying
any concrete value for other nodes to consume. However, this node
produces a chain value (of type Other) to be chained with other nodes
that do not generate a concrete value. For instance, to use a value written
to EAX, the X86ISD::RET_FLAG node uses the i32 result supplied by the
Register(%EAX) node and consumes the chain produced by CopyToReg as
well, guaranteeing that %EAX is updated with CopyToReg, because the chain
enforces CopyToReg to be scheduled before X86ISD::RET_FLAG.
To go deeper into the details of the SelectionDAG class, refer to the llvm/include/
llvm/CodeGen/SelectionDAG.h header file. For node result types, your reference
should be the llvm/include/llvm/CodeGen/ValueTypes.h header file. The header
file llvm/include/llvm/CodeGen/ISDOpcodes.h contains the definition of targetindependent nodes and lib/Target/<Target>/<Target>ISelLowering.h defines
the target-specific ones.
Lowering
In the previous subsection, we showed a diagram where target-specific and
target-independent nodes co-existed. You may ask yourself, how come some
target-specific nodes are already in the SelectionDAG class if this is an input to
instruction selection? To understand this, we first show the big picture of all steps
prior to instruction selection in the following diagram, starting with the LLVM IR
step that is to the top-left:
SelectionDAGBuilder
LLVM
IR
Map IR
instructions to
SelectionDAG
nodes
SelectionDAG
nodes
Legalize
type 1
Target
lowering
Instruction
selection
DAG
combine 2
DAG
combine 1
DAG
combine
DAG
legalize
DAG
combine
[ 150 ]
Legalize
type 2
Legalize
vectors
Chapter 6
First, a SelectionDAGBuilder instance (see SelectionDAGISel.cpp for details)
visits every function and creates a SelectionDAG object for each basic block. During
this process, some special IR instructions such as call and ret already need targetspecific idioms—for instance, how to pass call arguments and how to return from
a function—to be transformed into SelectionDAG nodes. To solve this issue, the
algorithms in the TargetLowering class are used for the first time. This class is an
abstract interface that each target must implement, but also has plenty of common
functionality used throughout all backends.
To implement this abstract interface, each target declares a TargetLowering
subclass named <Target>TargetLowering. Each target also overloads methods
that implement how a specific target-independent, high-level node should be lowered
to a level closer to the one of this machine. As expected, only a small subset of
nodes must be lowered in this way, while the majority of the others are matched
and replaced at instruction selection. For instance, in SelectionDAG from sum.
bc, the X86TargetLowering::LowerReturn() method (see lib/Target/X86/
X86ISelLowering.cpp) is used to lower the IR ret instruction. While doing this,
it generates the X86ISD::RET_FLAG node, which copies the function result to EAX—a
target-specific way to handle the function return.
DAG combine and legalization
The SelectionDAG output from SelectionDAGBuilder is not yet ready for instruction
selection and must pass through additional transformations—those shown in the
preceding diagram. The sequence of passes applied prior to instruction selection is
the following:
•
The DAG combine pass optimizes suboptimal SelectionDAG constructions by
matching a set of nodes and replacing them with a simpler construct whenever
it is profitable. For example, the subgraph (add (Register X), (constant
0)) can be folded to (Register X). Similarly, target-specific combine methods
can identify patterns of nodes and decide whether or not combining and
folding them improves the quality of the instruction selection of this specific
target. You can find the LLVM common DAG combine implementation in
the lib/CodeGen/SelectionDAG/DAGCombiner.cpp file and target-specific
combines in the lib/Target/<Target_Name>/<Target>ISelLowering.cpp
file. The method setTargetDAGCombine() marks nodes that the target wants
to combine. The MIPS backend, for instance, tries to combine additions—see
setTargetDAGCombine(ISD::ADD) and performADDCombine() in lib/
Target/Mips/MipsISelLowering.cpp.
[ 151 ]
The Backend
The DAG combine runs after each legalization phase to minimize
any SelectionDAG redundancy. Moreover, the DAG combine has
knowledge of where in the pass chain it runs (for example, after type
legalization or vector legalization) and can use that information to be
more precise.
•
The type legalization pass guarantees that instruction selection only needs
to deal with legal types. Legal types are the ones natively supported by
the target. For example, an addition with i64 operands is illegal in a target
that only supports i32 types. In this case, the type legalizer action integer
expansion breaks an i64 operand into two i32 operands while generating
proper nodes to handle them. Targets define which register classes are
associated with each type, explicitly declaring the supported types. Thus,
illegal types must be detected and handled accordingly: scalar types can be
promoted, expanded, or softened, and vector types can be split, scalarized,
or widened—see llvm/include/llvm/Target/TargetLowering.h for
explanations on each. Again, targets can also set up custom methods to
legalize types. The type legalizer runs twice, after the first DAG combine
and after vector legalization.
•
There are cases when a vector type is directly supported by a backend,
meaning that there is a register class for it, but a specific operation on a
given vector type is not. For example, x86 with SSE2 supports the v4i32
vector type. However, there is no x86 instruction to support ISD::OR on
v4i32 types, but only on v2i64. Therefore, the vector legalizer handles those
cases and promotes or expands the operations, using legal types for the
instruction. The target can also handle the legalization in a custom manner.
In the aforementioned ISD::OR case, the operation is promoted to use
v2i64 type. Have a look at the following code snippet of lib/Target/X86/
X86ISelLowering.cpp:
setOperationAction(ISD::OR, v4i32, Promote);
AddPromotedToType (ISD::OR, v4i32, MVT::v2i64);
For certain types, expansion will remove the vector and use scalars
instead. This may lead to unsupported scalar types for the target.
However, the subsequent type legalizer instance will clean this up.
[ 152 ]
Chapter 6
•
The DAG legalizer has the same role as the vector legalizer, but handles any
remaining operations with unsupported types (scalar or vectors). It supports
the same actions: the promotion, expansion, and handling of custom nodes.
For instance, x86 does not support any of the following three: signed integer to
floating-point operation (ISD::SINT_TO_FP) for i8 type and asks the legalizer
to promote the operation; signed division (ISD::SDIV) on i32 operands and
issues an expansion request, issuing a library call to handle the division; and
floating-point absolute (ISD::FABS) on f32 operands and uses a custom
handler to generate equivalent code with the same effect. x86 issues such
actions (see lib/Target/X86/X86ISelLowering.cpp) in the following way:
setOperationAction(ISD::SINT_TO_FP, MVT::i8, Promote);
setOperationAction(ISD::SDIV, MVT::i32, Expand);
setOperationAction(ISD::FABS, MVT::f32, Custom);
DAG-to-DAG instruction selection
The purpose of the DAG-to-DAG instruction selection is to transform targetindependent nodes into target-specific ones by using pattern matching. The
instruction selection algorithm is local, working on SelectionDAG (basic block)
instances at a time.
As an example, our final SelectionDAG structure after instruction selection is
presented next. The CopyToReg, CopyFromReg, and Register nodes are untouched
and remain until register allocation. In fact, the instruction selection phase may
even generate additional ones. After instruction selection, our ISD::ADD node is
transformed to the X86 instruction ADD32ri8 and X86ISD::RET_FLAG to RET.
[ 153 ]
The Backend
Note that there may be three types of instruction representations
co-existing in the same DAG: generic LLVM ISD nodes such
as ISD::ADD, target-specific <Target>ISD nodes such as
X86ISD::RET_FLAG, and target physical instructions such as
X86::ADD32ri8.
Pattern matching
Each target handles instruction selection by implementing the Select method
from its SelectionDAGISel subclass named <Target_Name>DAGToDAGISel, for
example, SparcDAGToDAGISel::Select() in SPARC (see the file lib/Target/
Sparc/SparcISelDAGToDAG.cpp). This method receives an SDNode parameter to be
matched and returns an SDNode value representing a physical instruction; otherwise
an error occurs.
[ 154 ]
Chapter 6
The Select() method allows two ways to match physical instructions. The most
straightforward way is by calling the generated matching code from TableGen
patterns, as shown in step 1 of the following list. However, patterns may not be
expressive enough to cope with the odd behavior of some instructions. In such
cases, custom C++ matching logic implementation must be written in this method,
as shown in step 2 of the following list. We detail the approaches as follows:
1. The Select() method calls SelectCode(). TableGen generates the
SelectCode() method for each target, and in this code, TableGen also
generates the MatcherTable, mapping ISD and <Target>ISD nodes
to physical-instruction nodes. The matcher table is generated from the
instruction definitions in the .td files (usually, <Target>InstrInfo.td).
The SelectCode() method ends by calling SelectCodeCommon(), a targetindependent method to match the nodes by using the target matcher table.
TableGen has a dedicated instruction selection backend to generate these
methods and this table:
$ cd <llvm_source>/lib/Target/Sparc
$ llvm-tblgen -gen-dag-isel Sparc.td -I ../../../include
The same output is present in the generated C++ files for each target in the
file <build_dir>/lib/Target/<Target>/<Target>GenDAGISel.inc; for
example, in SPARC, the methods and the table are available in the <build_
dir>/lib/Target/Sparc/SparcGenDAGISel.inc file.
2. Provide custom matching code in Select prior to the SelectCode
invocation. For instance, the i32 node ISD::MULHU performs the
multiplication of two i32, produces an i64 result, and returns the high i32
part. In 32-bit SPARC, the multiplication instruction SP::UMULrr returns the
higher part in the special register Y, which requires the SP::RDY instruction
to read it. TableGen is unable to represent this logic, but we solve this with
the following code:
case ISD::MULHU: {
SDValue MulLHS = N->getOperand(0);
SDValue MulRHS = N->getOperand(1);
SDNode *Mul = CurDAG->getMachineNode(SP::UMULrr, dl,
MVT::i32, MVT::Glue, MulLHS, MulRHS);
return CurDAG->SelectNodeTo(N, SP::RDY, MVT::i32,
SDValue(Mul, 1));
}
[ 155 ]
The Backend
Here, N is the SDNode argument to be matched and, in this context, N equals
ISD::MULHU. Since sanity checks have already been performed before this
case statement, we proceed to generate the SPARC-specific opcodes to replace
ISD::MULHU. To do this, we create a node with the physical instruction
SP::UMULrr by calling CurDAG->getMachineNode(). Next, by using CurDAG>SelectNodeTo(), we create an SP::RDY instruction node and change all the
uses from the ISD::MULHU result to point to the SP::RDY result. The following
diagram shows the SelectionDAG structure from this example before and after
instruction selection. The preceding C++ code snippet is a simplified version of
the code in lib/Target/Sparc/SparcISelDAGToDAG.cpp.
...
...
...
...
0
0
1
UMULrr
glue
i32
1
ISD::MULHAR
i32
...
0
RDY
0
...
i32
1
add
0
i32
1
ADDrr
i32
Before instruction selection
After instruction selection
Visualizing the instruction selection process
There are several llc options allowing the SelectionDAG visualization in different
instruction-selection phases. If you use any of these options, llc will generate a
.dot graph similar to the ones shown earlier in this chapter, but you will need to
use the dot program to display it or dotty to edit it, which can both be found in the
Graphviz package at www.graphviz.org. The following table shows each option
sorted by execution order:
The llc option
-view-dag-combine1-dags
Phase
-view-legalize-types-dags
Before legalize type
-view-dag-combine-lt-dags
After legalize type 2 and before DAG
combine
Before DAG combine 1
[ 156 ]
Chapter 6
The llc option
-view-legalize-dags
Phase
-view-dag-combine2-dags
Before DAG combine 2
-view-isel-dags
Before instruction selection
-view-sched-dags
After instruction selection and before
scheduling
Before legalization
Fast instruction selection
LLVM also supports an alternative instruction selection implementation called the
fast instruction selection (in the FastISel class, which lives in the <llvm_source>/
lib/CodeGen/SelectionDAG/FastISel.cpp file). The goal of fast instruction
selection is to provide quick code generation at the expense of code quality, which
suits the philosophy of the -O0 optimization level pipeline. The speed gain occurs
by avoiding complicated folding and lowering logic. TableGen descriptions are also
used for simple operations, but more complicated matching of instructions require
target-specific handling code.
The -O0 pipeline also uses a fast but suboptimal register allocator
and scheduler, trading code quality for compilation speed. We will
expose them in the next subsections.
Scheduler
After instruction selection, the SelectionDAG structure has nodes representing
physical instructions—those directly supported by the processor. The next stage
comprises a pre-register allocation scheduler working on SelectionDAG nodes
(SDNodes). There are a few different schedulers to choose from and each one of them
is a subclass of ScheduleDAGSDNodes (see the file <llvm_source>/ lib/CodeGen/
SelectionDAG/ScheduleDAGSDNodes.cpp). The scheduler type can be selected in
the llc tool by using the -pre-RA-sched=<scheduler> option. The possible values
for <scheduler> are the following:
•
list-ilp, list-hybrid, source, and list-burr: These options refer to list
scheduling algorithms implemented by the ScheduleDAGRRList class (see
the file <llvm_source>/lib/CodeGen/SelectionDAG/ScheduleDAGRRList.
cpp)
•
fast: The ScheduleDAGFast class (in <llvm_source>/lib/CodeGen/
SelectionDAG/ScheduleDAGFast.cpp) implements a suboptimal but
fast scheduler
[ 157 ]
The Backend
•
vliw-td: A VLIW-specific scheduler implemented by the ScheduleDAGVLIW
class (see the file <llvm_source>/lib/CodeGen/SelectionDAG/
ScheduleDAGVLIW.cpp)
The default option selects the best predefined scheduler for a target whereas
the linearize option performs no scheduling. The available schedulers may
use information from instruction itineraries and hazard recognizers to better
schedule instructions.
There are three distinct scheduler executions in the code generator:
two prior and one post register allocation. The first works on
SelectionDAG nodes while the other two work on machine
instructions, explained further in this chapter.
Instruction itineraries
Some targets provide instruction itineraries to represent instruction latency and
hardware pipeline information. The scheduler uses these attributes during the
scheduling decision to maximize throughput and avoid performance penalties.
This information is described in TableGen files in each target directory, usually
with the name <Target>Schedule.td (for example, X86Schedule.td).
LLVM provides the ProcessorItineraries TableGen class in <llvm_source>/
include/llvm/Target/TargetItinerary.td, as follows:
class ProcessorItineraries<list<FuncUnit> fu, list<Bypass> bp,
list<InstrItinData> iid> {
...
}
Targets may define processor itineraries for a chip or family of processors. To
describe them, targets must provide a list of functional units (FuncUnit), pipeline
bypasses (Bypass), and instruction itinerary data (InstrItinData). For instance,
the itinerary for ARM Cortex A8 instructions lives in <llvm_source>/lib/Target/
ARM/ARMScheduleA8.td, as follows:
def CortexA8Itineraries : ProcessorItineraries<
[A8_Pipe0, A8_Pipe1, A8_LSPipe, A8_NPipe, A8_NLSPipe],
[], [
...
InstrItinData<IIC_iALUi, [InstrStage<1, [A8_Pipe0, A8_Pipe1]>],
[2, 2]>,
...
]>;
[ 158 ]
Chapter 6
Here, we see that there are no bypasses. We also see the list of functional units (A8_
Pipe0, A8_Pipe1, and so on) of this processor and the itinerary data for instructions
from the type IIC_iALUi. This type is a class of binary instructions of the form reg
= reg + immediate, such as the ADDri and SUBri instructions. These instructions
take one machine cycle to complete the stage involving the A8_Pipe0 and A8_Pipe1
functional units, as defined in InstrStage<1, [A8_Pipe0, A8_Pipe1]>.
Subsequently, the list [2, 2] represents the cycles after the issuing of the instruction
that each operand takes to be read or defined. In this case, the destination register
(index 0) and the source register (index 1) are both available after 2 cycles.
Hazard detection
A hazard recognizer computes hazards by using information from the processor
itineraries. The ScheduleHazardRecognizer class provides an interface for hazard
recognizer implementations and the ScoreboardHazardRecognizer subclass
implements the scoreboard hazard recognizer (see the file <llvm_source>/lib/
CodeGen/ScoreboardHazardRecognizer.cpp), which is LLVM's default recognizer.
Targets are allowed to provide their own recognizer. This is necessary because
TableGen may not be able to express specific constraints, in which case a custom
implementation must be provided. For example, both ARM and PowerPC provide
the ScoreboardHazardRecognizer subclasses.
Scheduling units
The scheduler runs before and after register allocation. However, the SDNode
instruction representation is only available in the former while the latter uses the
MachineInstr class. To cope with both SDNodes and MachineInstrs, the SUnit class
(see the file <llvm_source>/include/llvm/CodeGen/ScheduleDAG.h) abstracts the
underlying instruction representation as the unit used during instruction scheduling.
The llc tool can dump scheduling units by using the option -view-sunit-dags.
[ 159 ]
The Backend
Machine instructions
The register allocator works on an instruction representation given by the
MachineInstr class (MI for short), defined in <llvm_source>/include/llvm/
CodeGen/MachineInstr.h. The InstrEmitter pass, which runs after scheduling,
transforms SDNode format into MachineInstr format. As the name implies, this
representation is closer to the actual target instruction than an IR instruction.
Differing from SDNode formats and their DAG form, the MI format is a three-address
representation of the program, that is, a sequence of instructions rather than a DAG,
which allows the compiler to efficiently represent a specific scheduling decision,
that is, the order of each instruction. Each MI holds an opcode number, which is
a number that has a meaning only for a specific backend, and a list of operands.
By using the llc option -print-machineinstrs, you can dump machine
instructions after all registered passes or after a specific pass by using -printmachineinstrs=<pass-name>. The pass names have to be looked up in the LLVM
source code. To do this, go to the LLVM source code folder and run a grep search
for the macro that passes usually utilize to register their name:
$ grep –r INITIALIZE_PASS_BEGIN *
CodeGen/PHIElimination.cpp:INITIALIZE_PASS_BEGIN(PHIElimination, "phinode-elimination"
(...)
For example, see the following SPARC machine instructions for sum.bc after all
passes:
$ llc -march=sparc -print-machineinstrs sum.bc
Function Live Ins: %I0 in %vreg0, %I1 in %vreg1
BB#0: derived from LLVM BB %entry
Live Ins: %I0 %I1
%vreg1<def> = COPY %I1; IntRegs:%vreg1
%vreg0<def> = COPY %I0; IntRegs:%vreg0
%vreg2<def> = ADDrr %vreg1, %vreg0; IntRegs:%vreg2,%vreg1,%vreg0
%I0<def> = COPY %vreg2; IntRegs:%vreg2
RETL 8, %I0<imp-use>
MI contains significant meta-information about an instruction: it stores used and
defined registers, it distinguishes between register and memory operands (among
other types), stores the instruction type (branch, return, call, and terminator, among
others), stores predicates such as whether it is commutable or not, and so on. It is
important to preserve this information even at lower levels such as in MIs because
passes running after InstrEmitter and prior to code emission rely on these fields to
perform their analyses.
[ 160 ]
Chapter 6
Register allocation
The basic task of the register allocation is to transform an endless number of virtual
registers into physical (limited) ones. Since targets have a limited number of physical
registers, some virtual registers are assigned to memory locations, the spill slots. Yet,
some MI code fragments may already be using physical registers even before register
allocation. This happens for machine instructions that need to use a specific register
to write their result or because of an ABI requirement. For these cases, the register
allocator respects this previous allocation and work to assign other physical registers
to the remaining virtual registers.
Another important role of the LLVM register allocator is to deconstruct the SSA
form of the IR. Up until this point, the machine instructions may also contain
phi instructions that were copied from the original LLVM IR and are necessary
to support the SSA form. In this way, you can implement machine-specific
optimizations with the comfort of SSA. However, the traditional way to convert phi
instructions to regular instruction is to replace them with copy instructions. Thus,
SSA deconstruction must not be delayed beyond register allocation, which is the
phase that will assign registers and eliminate redundant copy operations.
LLVM has four register allocation implementations that can be selected in llc by
using the -regalloc=<regalloc_name> option. The <regalloc_name> options are
the following: pbqp, greedy, basic, and fast.
•
pbqp: This option maps the register allocation into a Partitioned Boolean
•
greedy: This option offers an efficient global (function-wide) register
•
basic: This option uses a very simple allocator and provides an extension
•
fast: This allocator option is local (operates on a per-BB fashion) and works
Quadratic Programming (PBQP) problem. A PBQP solver is used to map the
result of this problem back to registers.
allocation implementation, supporting live-range splitting while minimizing
spills. You can read a nice explanation about the algorithm at http://blog.
llvm.org/2011/09/greedy-register-allocation-in-llvm-30.html.
interface. Hence, it provides the basics for the development of new register
allocators and is used as a baseline for register allocation efficiency. You
can also read about its algorithm in the same blog post as of the greedy
algorithm, shown in the preceding link.
by keeping values in registers and reusing them as much as possible.
The default allocator is mapped to one of the four options and is selected
depending on the current optimization level (the -O option).
[ 161 ]
The Backend
Although the register allocator, regardless of the chosen algorithm, is implemented
in a single pass, it still depends on other analyses, composing the allocator
framework. There are a few passes used in the allocator framework, and we expose
here register coalescer and virtual register rewrite to illustrate their concept. The
following figure illustrates how these passes interact with one other:
Virtual registers
MachineInstr
Passes
Register
coalescer
Passes
MachineInstr
Virtual
register
rewrite
Passes
Register
allocation
Physical registers
Register coalescer
The register coalescer removes redundant copy instructions (COPY) by joining
intervals. The coalescing is implemented in the RegisterCoalescer class (see lib/
CodeGen/RegisterCoalescer.cpp)—a machine function pass. A machine function
pass is similar to an IR pass that operates on a per-function basis, but instead of
working with IR instructions, it works with MachineInstr instructions. During
coalescing, the method joinAllIntervals() iterates over a work list of copy
instructions. The joinCopy() method creates CoalescerPair instances from copy
machine instructions and coalesces copies away whenever possible.
An interval is a pair of program points, start and end, which starts when a value is
produced and lasts while this value is held in a temporary location until it is finally
used, that is, killed. Let's see what happens when the coalescer runs in our sum.bc
bitcode example.
We check the debugging output from the coalescer by using the regalloc debug
option in llc:
$ llc -march=sparc -debug-only=regalloc sum.bc 2>&1 | head –n30
Computing live-in reg-units in ABI blocks.
0B
BB#0 I0#0 I1#0
********* INTERVALS **********
[ 162 ]
Chapter 6
I0 [0B,32r:0) [112r,128r:1)
I1 [0B,16r:0)
0@0B-phi 1@112r
0@0B-phi
%vreg0 [32r,48r:0)
0@32r
%vreg1 [16r,96r:0)
0@16r
%vreg2 [80r,96r:0)
0@80r
%vreg3 [96r,112r:0)
0@96r
RegMasks:
********** MACHINEINSTRS **********
# Machine code for function sum: Post SSA
Frame Objects:
fi#0: size=4, align=4, at location[SP]
fi#1: size=4, align=4, at location[SP]
Function Live Ins: $I0 in $vreg0, $I1 in %vreg1
0B BB#0: derived from LLVM BB %entry
Live Ins: %I0 %I1
16B
%vreg1<def> = COPY %I1<kill>; IntRegs:%vreg1
32B
%vreg0<def> = COPY %I0<kill>; IntRegs:%vreg0
48B
STri <fi#0>, 0, %vreg0<kill>; mem:ST4[%a.addr]
IntRegs:%vreg0
64B
STri <fi#1>, 0, %vreg1; mem:ST4[%b.addr] IntRegs:$vreg1
80B
%vreg2<def> = LDri <fi#0>, 0; mem:LD4[%a.addr]
IntRegs:%vreg2
96B
%vreg3<def> = ADDrr %vreg2<kill>, %vreg1<kill>;
IntRegs:%vreg3,%vreg2,%vreg1
112B
%I0<def> = COPY %vreg3<kill>; IntRegs:%vreg3
128B
RETL 8, %I0<imp-use,kill>
# End machine code for function sum.
You can enable internal debug messages for a specific LLVM pass or
component with the -debug-only option. To find out components to
debug, run grep –r "DEBUG_TYPE" * in the LLVM source folder.
The DEBUG_TYPE macro defines the flag option that activates the
debug messages of the current file, for example, #define DEBUG_
TYPE "regalloc" is used in register allocation implementation files.
[ 163 ]
The Backend
Notice that we redirected the standard error output where debug information is
printed to the standard output with 2>&1. Afterwards, we piped the standard output
(and, with it, the debugging information) to head -n30 to print only the first 30 lines
of the output. In this way, we control the amount of information that is displayed in
the terminal, because debug information can be quite verbose.
Let's first check the ** MACHINEINSTRS ** output. This is a dump of all machine
instructions used as input to the register coalescer pass—the same that you would
obtain if you used the -print-machine-insts=phi-node-elimination option
that prints the machine instructions after the phi node elimination pass (which
runs before the coalescer). The coalescer debugger output, however, augments the
machine instructions with the index information for each MI: 0B, 16B, 32B, and so on.
We need them to correctly interpret the intervals.
These indexes are also called slot indexes, assigning a different number to each live
range slot. The letter B corresponds to block, used for live ranges entering/leaving a
basic block boundary. In the case of our instructions, they are printed with an index
followed by B because it is the default slot. A different slot, the letter r, found in the
intervals, means register, which is used to signal a normal register use/def slot.
By reading the list of machine instructions, we already know important pieces
for the register allocator superpass (the composition of smaller passes): %vreg0,
%vreg1, %vreg2, and %vreg3 are all virtual registers that need to be allocated to
physical registers. Thus, at most four physical registers will be spent besides %I0
and %I1, which are already in use. The reason is to obey the ABI calling convention
that requires function parameters to be in these registers. Because the live variable
analysis pass runs before coalescing, the code is also annotated with live variable
information, showing at which points each register is defined and killed, which is
very useful for us to see which registers interfere with one other, that is, are alive
at the same time and need to live in distinct physical registers.
Independent of the result of the register allocator, the coalescer, on the other hand,
is just looking for register copies. In a register-to-register copy, the coalescer will try
to join the interval of the source register with the interval of the destination register,
making them live in the same physical register and avoid the need for a copy
instruction, just like the copies in the indexes 16 and 32.
The first messages after *** INTERVALS *** comes from another analysis that
register coalescing depends on: the live interval analysis (different from live variable
analysis) implemented in lib/CodeGen/LiveIntervalAnalysis.cpp. The coalescer
needs to know the intervals where each virtual register is alive to be able to reason
about which intervals to coalesce. For example, we can see from this output that the
virtual register's %vreg0 interval was determined to be [32r:48r:0).
[ 164 ]
Chapter 6
This means a half-open interval where %vreg0 is defined at 32 and killed at 48. The
number 0 after 48r is a code to show where the first definition of this interval is,
whose meaning is printed right after the interval: 0:32r. Thus, the definition 0 is at the
index 32, which we already knew. However, this can be useful to help keep track of
the original definition if intervals are split. Finally, the RegMasks show calls sites that
clobber a large number of registers, which is a big source of interference. Since we do
not have any calls in this function, there are no RegMask locations.
After reading the intervals, we can observe some very promising ones: The interval
of the %I0 register is [0B,32r:0), the interval of the %vreg0 register is [32r,48r:0),
and at 32, we have a copy instruction that copies %I0 to %vreg0. Those are the
prerequisites for a coalescing to happen: join the interval [0B,32r:0) with interval
[32r:48r:0) and assign the same register to %I0 and %vreg0.
Now, let's print the rest of the debug output to see what happens:
$ llc -march=sparc -debug-only=regalloc sum.bc
...
entry:
16B %vreg1<def> = COPY %I1; IntRegs:%vreg1
Considering merging %vreg1 with %I1
Can only merge into reserved registers.
32B %vreg0<def> = COPY %I0; IntRegs:%vreg0
Considering merging %vreg0 with %I0
Can only merge into reserved registers.
64B %I0<def> = COPY %vreg2; IntRegs:%vreg2
Considering merging %vreg2 with %I0
Can only merge into reserved registers.
....
We see that the coalescer considered joining %vreg0 with %I0, as we wanted.
However, it implements special rules when one of the registers is a physical register,
such as %I0. The physical register must be reserved to have its interval joined. This
means that the physical register must not be available to be allocated to other live
ranges, which is not the case with %I0. The coalescer, then, discards this opportunity,
fearing that prematurely assigning %I0 to this whole range may not be beneficial in
the long run and leaves this decision to the register allocator.
Therefore, the sum.bc program presented no opportunities for coalescing. Although
it tries to merge virtual registers with the function argument registers, it fails because
in this phase it can only merge virtual with reserved—not regularly allocable—
physical registers.
[ 165 ]
The Backend
Virtual register rewrite
The register allocation pass selects the physical registers to be used for each virtual
one. Later on, VirtRegMap holds the result from register allocation, containing a map
from virtual to physical registers. Next, the virtual register rewrite pass—represented
by the VirtRegRewriter class implemented in <llvm_source>/lib/CodeGen/
VirtRegMap.cpp—uses VirtRegMap and replaces virtual register references with
physical ones. Spill code is generated accordingly. Moreover, the remaining identity
copies of reg = COPY reg are deleted. For example, let's analyze how the allocator
and rewriter deals with sum.bc using the -debug-only=regalloc option. First, the
greedy allocator outputs the following text:
...
assigning %vreg1 to %I1: I1
...
assigning %vreg0 to %I0: I0
...
assigning %vreg2 to %I0: I0
Virtual registers 1, 0, and 2 are allocated to physical registers %I1, %I0, and %I0,
respectively. The same output is present in the VirtRegMap dump as follows:
[%vreg0 -> %I0] IntRegs
[%vreg1 -> %I1] IntRegs
[%vreg2 -> %I0] IntRegs
The rewriter then replaces all virtual registers with physical registers and deletes
identity copies:
> %I1<def> = COPY %I1
Deleting identity copy.
> %I0<def> = COPY %I0
Deleting identity copy.
...
We can see that, even though the coalescer was unable to remove this copy, the
register allocator was able to assign the same register to both live ranges and delete
the copy operation as we wanted. Finally, the resulting machine instructions for the
sum function are significantly reduced:
0B BB#0: derived from LLVM BB %entry
Live Ins: %I0 %I1
48B
%I0<def> = ADDrr %I1<kill>, %I0<kill>
[ 166 ]
Chapter 6
80B
RETL 8, %I0<imp-use>
Note that copy instructions are removed and no virtual registers remain.
The llc program options, -debug or -debug-only=<name>, are
only available when LLVM is compiled in debug mode, by using
--disable-optimized during configuration time. You can find
more details about this in the Building and installing LLVM section of
Chapter 1, Build and Install LLVM.
The register allocator and the instruction scheduler are sworn enemies
in any compiler. The job of the register allocator is to keep live ranges
as short as possible, reducing the number of edges of the interference
graph and thus reducing the number of necessary registers to avoid
spills. To do this, the register allocator prefers to schedule instructions
in a serial fashion (putting an instruction that depends on the other
right next to it) because in this way the code uses less registers. The job
of the scheduler is the opposite: to extract instruction-level parallelism,
it needs to keep alive as much unrelated and parallel computations
as possible, requiring a much larger number of registers to hold
intermediary values and increasing the number of interferences among
live ranges. Making an efficient algorithm to cope with scheduling and
register allocation collaboratively is an open research problem.
Target hooks
During coalescing, virtual registers need to come from compatible register classes to
be successfully coalesced. The code generator garners this type of information from
target-specific descriptions obtained by abstract methods. The allocator can obtain
all the information related to a register in subclasses of TargetRegisterInfo (for
example, X86GenRegisterInfo); this information includes if it is reserved or not, its
parent register classes, and whether it is physical or virtual.
The <Target>InstrInfo class is another data structure that provides target-specific
information that is necessary for register allocation. Some of the examples are
discussed here:
•
The isLoadFromStackSlot() and isStoreToStackSlot() methods, from
<Target>InstrInfo, are used during spill code generation to discover
whether the machine instruction is a memory access to a stack slot.
•
Additionally, the spiller generates target-specific memory access
instructions to stack slots using the storeRegToStackSlot() and
loadRegFromStackSlot() methods.
[ 167 ]
The Backend
•
The COPY instructions may remain after the rewriter because they were
not coalesced away and are not identical copies. In such cases, the
copyPhysReg() method is used to generate a target-specific register copy,
even among different register classes when necessary. An example from
SparcInstrInfo::copyPhysReg() is the following:
if (SP::IntRegsRegClass.contains(DestReg, SrcReg))
BuildMI(MBB, I, DL, get(SP::ORrr), DestReg).addReg(SP::G0)
.addReg(SrcReg, getKillRegState(KillSrc));
...
The BuildMI() method is used everywhere in the code generator to generate
machine instructions. In this example, an SP::ORrr instruction is used to
copy a CPU register to another CPU register.
Prologue and epilogue
Functions need a prologue and an epilogue to be complete. The former sets up the
stack frame and callee-saved registers during the beginning of a function, whereas
the latter cleans up the stack frame prior to function return. In our sum.bc example,
when compiled for SPARC, this is how the machine instructions look like after
prologue and epilogue insertion:
%O6<def> = SAVEri %O6, -96
%I0<def> = ADDrr %I1<kill>, %I0<kill>
%G0<def> = RESTORErr %G0, %G0
RETL 8, %I0<imp-use>
In this example, the SAVEri instruction is the prologue and RESTORErr is the
epilogue, performing stack-frame-related setup and cleanup. Prologue and epilogue
generation is target-specific and defined in the <Target>FrameLowering::emitPr
ologue() and <Target>FrameLowering::emitEpilogue() methods (see the file
<llvm_source>/lib/Target/<Target>/<Target>FrameLowering.cpp).
Frame indexes
LLVM uses a virtual stack frame during the code generation, and stack elements
are referred using frame indexes. The prologue insertion allocates the stack frame
and gives enough target-specific information to the code generator to replace virtual
frame indices with real (target-specific) stack references.
[ 168 ]
Chapter 6
The method eliminateFrameIndex() in the <Target>RegisterInfo class
implements this replacement by converting each frame index to a real stack offset
for all machine instructions that contain stack references (usually loads and stores).
Extra instructions are also generated whenever additional stack offset arithmetic is
necessary. See the file <llvm_source>/lib/Target/<Target>/<Target>RegisterI
nfo.cpp for examples.
Understanding the machine code
framework
The machine code (MC for short) classes comprise an entire framework for lowlevel manipulation of functions and instructions. In comparison with other backend
components, this is a new framework that was designed to aid in the creation of
LLVM-based assemblers and disassemblers. Previously, LLVM lacked an integrated
assembler and was only able to proceed with the compilation until the assembly
language emission step, which created an assembly text file as output and depended
on external tools to carry on the rest of the compilation (assembler and linker).
MC instructions
In the MC framework, machine code instructions (MCInst) replace machine
instructions (MachineInstr). The MCInst class, defined in the <llvm_source>/
include/llvm/MC/MCInst.h file, defines a lightweight representation for
instructions. Compared to MIs, MCInsts carry less information about the program.
For instance, an MCInst instance can be created not only by a backend, but also by a
disassembler right out of binary code, an environment with little information about
the instruction context. In fact, it encodes the view of an assembler, that is, a tool
whose purpose is not to apply rich optimizations but rather to organize instructions
in the object file.
Each operand can be a register, immediate (integer or floating-point number), an
expression (represented by MCExpr), or another MCInstr instance. Expressions
are used to represent label computations and relocations. The MI instructions are
converted to MCInst instances early in the code emission phase, which is the subject
of our next subsection.
[ 169 ]
The Backend
Code emission
The code emission phase takes place after all post-register allocation passes.
Although the naming may seem confusing, the code emission starts at the assembly
printer (AsmPrinter) pass. All the steps from an MI instruction to MCInst and then
to an assembly or binary instruction are shown in the following diagram:
MCInstLowering
MI
(2)
(1)
AsmPrinter
Binary
instruction
MCInst
(3)
ARMAsmPrinter ...
Assembler
MCStreamer
(5)
MCAsmSteamer
(6)
MCCodeEmitter
EmitInstuction()
ARMMCCodeEmitter
MCObjectSteamer
...
EmitInstuction() (4)
MCInstPrinter
Assembly
instruction
MCELFStreamer
ARMMCInstPrinter ...
MCCOFFStreamer
ARMELFStreamer ...
Let's have a walkthrough over the steps shown in the preceding diagram:
1. AsmPrinter is a machine function pass that first emits the function header
and then iterates over all basic blocks, dispatching one MI instruction at a
time to the EmitInstruction() method for further processing. Each target
provides an AsmPrinter subclass that overloads this method.
2. The <Target>AsmPrinter::EmitInstruction() method receives an MI
instruction as input and transforms it into an MCInst instance through the
MCInstLowering interface—each target provides a subclass of this interface
and has custom code to generate these MCInst instances.
3. At this point, there are two options to continue: emit assembly or binary
instructions. The MCStreamer class processes a stream of MCInst instructions
to emit them to the chosen output via two subclasses: MCAsmStreamer and
MCObjectStreamer. The former converts MCInst to assembly language and
the latter converts it to binary instructions.
4. If generating assembly instructions, MCAsmStreamer::EmitInstruction()
is called and uses a target-specific MCInstPrinter subclass to print assembly
instructions to a file.
[ 170 ]
Chapter 6
5. If generating binary instructions, a specialized—target and object-specific—
version of MCObjectStreamer::EmitInstruction() calls the LLVM object
code assembler.
6. The assembler uses a specialized MCCodeEmitter::EncodeInstruction()
method that is capable of—departing from a MCInst instance—encoding and
dumping binary instruction blobs to a file in a target-specific manner.
You can also use the llc tool to dump MCInst fragments. For example, to encode
MCInst into assembly comments, you can use the following command:
$ llc sum.bc -march=x86-64 -show-mc-inst -o ...
pushq %rbp
## <MCInst #2114 PUSH64r
##
<MCOperand Reg:107>>
...
However, if you want to show each instruction binary encoding in the assembly
comments, use the following command instead:
$ llc sum.bc -march=x86-64 -show-mc-encoding -o ...
pushq %rbp
## encoding: [0x55]
...
The llvm-mc tool also allows you to test and use the MC framework. For instance, to
discover the assembler encoding for a specific instruction, use the --show-encoding
option. The following is an example for an x86 instruction:
$ echo "movq 48879(,%riz), %rax" | llvm-mc -triple=x86_64 --show-encoding
# encoding: [0x48,0x8b,0x04,0x25,0xef,0xbe,0x00,0x00]
The tool also provides disassembler functionality as follows:
$ echo "0x8d 0x4c 0x24 0x04" | llvm-mc --disassemble -triple=x86_64
leal 4(%rsp), %ecx
Additionally, the --show-inst option shows the MCInst instance for the
disassembled or assembled instruction:
$ echo "0x8d 0x4c 0x24 0x04" | llvm-mc --disassemble -show-inst
-triple=x86_64
leal 4(%rsp), %ecx
# <MCInst #1105 LEA64_32r
[ 171 ]
#
<MCOperand Reg:46>
#
<MCOperand Reg:115>
The Backend
#
<MCOperand Imm:1>
#
<MCOperand Reg:0>
#
<MCOperand Imm:4>
#
<MCOperand Reg:0>>
The MC framework allows LLVM to provide alternative tools to classic object file
readers. For example, a default LLVM build currently installs the llvm-objdump and
llvm-readobj tools. Both use the MC disassembler library and implement similar
functionalities to the ones seen in the GNU Binutils package (objdump and readelf).
Writing your own machine pass
In this section, we will show how you can write a custom machine pass to count, just
before code emission, how many machine instructions each function has. Differing
from IR passes, you cannot run this pass with the opt tool, or load the pass and
schedule it to happen via the command line. Machine passes are determined by the
backend code. Therefore, we will modify an existing backend to run with our custom
pass to see it in practice. We will choose SPARC for that end.
Recall from the Demonstrating the pluggable pass interface section in Chapter 3, Tools and
Design, and from the white boxes in the first diagram of this chapter, that we have
many options to decide where our pass should run. To use these methods, we should
look for the TargetPassConfig subclass that our backend implements. If you use
grep, you will find it at SparcTargetMachine.cpp:
$ cd <llvmsource>/lib/Target/Sparc
$ vim SparcTargetMachine.cpp
# use your preferred editor
Looking into the SparcPassConfig class that is derived from TargetPassConfig,
we can see that it overrides addInstSelector() and addPreEmitPass(),
but there are many more methods that we can override if we want to add a
pass to other locations (see the link at http://llvm.org/doxygen/html/
classllvm_1_1TargetPassConfig.html). We will run our pass before code
emission; therefore, we will add our code in addPreEmitPass():
bool SparcPassConfig::addPreEmitPass() {
addPass(createSparcDelaySlotFillerPass(getSparcTargetMachine()));
addPass(createMyCustomMachinePass());
}
[ 172 ]
Chapter 6
The extra line that we added is highlighted in the preceding code and adds our pass
by calling the createMyCustomMachinePass() function. However, this function is
not defined yet. We will add a new source file with the code of our pass and will take
the opportunity to define this function as well. To do this, create a new file called
MachineCountPass.cpp and fill it with the following content:
#define DEBUG_TYPE "machinecount"
#include "Sparc.h"
#include "llvm/Pass.h"
#include "llvm/CodeGen/MachineBasicBlock.h"
#include "llvm/CodeGen/MachineFunction.h"
#include "llvm/CodeGen/MachineFunctionPass.h"
#include "llvm/Support/raw_ostream.h"
using namespace llvm;
namespace {
class MachineCountPass : public MachineFunctionPass {
public:
static char ID;
MachineCountPass() : MachineFunctionPass(ID) {}
virtual bool runOnMachineFunction(MachineFunction &MF) {
unsigned num_instr = 0;
for (MachineFunction::const_iterator I = MF.begin(), E = MF.end();
I != E; ++I) {
for (MachineBasicBlock::const_iterator BBI = I->begin(),
BBE = I->end(); BBI != BBE; ++BBI) {
++num_instr;
}
}
errs() << "mcount --- " << MF.getName() << " has "
<< num_instr << " instructions.\n";
return false;
}
};
}
FunctionPass *llvm::createMyCustomMachinePass() {
return new MachineCountPass();
}
char MachineCountPass::ID = 0;
static RegisterPass<MachineCountPass> X("machinecount", "Machine Count
Pass");
[ 173 ]
The Backend
In the first line, we define the macro DEBUG_TYPE to allow us to debug our pass later by
using the -debug-only=machinecount flag; however, in this example, this code does
not use the debug output. The rest of the code is very similar to the one we wrote in the
previous chapter for the IR pass. The differences are in the following points:
•
In the include files, we include the MachineBasicBlock.h,
MachineFunction.h, and MachineFunctionPass.h headers, which define
the classes that we use to extract information about MachineFunction
and allow us to count the number of machine instructions in it.
We also include the Sparc.h header file because we will declare
createMyCustomMachinePass() there.
•
We create a class that derives from MachineFunctionPass rather than
FunctionPass.
•
We override the runOnMachineFunction() method instead of the
runOnFunction() one. Also, our method implementation is quite different.
We iterate through all MachineBasicBlock instances of the current
MachineFunction. Then, for each MachineBasicBlock, we count all of its
machine instructions by also employing the begin()/end() idiom.
•
We define the function createMyCustomMachinePass(), allowing this pass
to be created and added as a pre-emit pass in the SPARC backend file that we
changed.
Since we have defined the createMyCustomMachinePass() function, we must
declare it in a header file. Let's edit the Sparc.h file to do this. Add our declaration
next to the createSparcDelaySlotFillerPass() one:
FunctionPass *createSparcISelDag(SparcTargetMachine &TM);
FunctionPass *createSparcDelaySlotFillerPass(TargetMachiine &TM);
FunctionPass *createMyCustomMachinePass();
It is time to build the new SPARC backend with the LLVM build system. If you
have not had the opportunity to configure your LLVM build yet, refer to Chapter 1,
Build and Install LLVM. If you already have a build folder where you configured the
project, go to this folder and run make to compile the new backend. Afterwards, you
can install this new LLVM with the modified SPARC backend or, if you prefer, you
can just run the new llc binary right out of your build folder without running make
install:
$ cd <llvm-build>
$ make
$ Debug+Asserts/bin/llc –march=sparc sum.bc
mcount --- sum has 8 instructions.
[ 174 ]
Chapter 6
If we want to see where our pass got inserted in the pass pipeline, we issue the
following command:
$ Debug+Asserts/bin/llc –march=sparc sum.bc -debug-pass=Structure
(...)
Branch Probability Basic Block Placement
SPARC Delay Slot Filler
Machine Count Pass
MachineDominator Tree Construction
Machine Natural Loop Construction
Sparc Assembly Printer
mcount --- sum has 8 instructions.
We see that our pass was scheduled just after the SPARC Delay Slot Filler
and before the Sparc Assembly Printer, where code emission takes place.
Summary
In this chapter, we presented a general overview of how the LLVM backend works.
We saw the different code generator stages and internal instruction representations
that change during compilation. We discussed instruction selection, scheduling,
register allocation, code emission, and presenting ways for the reader to experiment
with these stages by using the LLVM tools. At the end of this chapter, you should
be able to read the llc -debug output, which prints a detailed log of the backend
activities, and have a good idea about everything that is happening inside the
backend. If you are interested in building your own backend, your next step is to
refer to the official tutorial at http://llvm.org/docs/WritingAnLLVMBackend.
html. If you are interested in reading more about the backend design, you should
refer to http://llvm.org/docs/CodeGenerator.html.
In the next chapter, we will present the LLVM Just-in-Time compilation framework,
which allows you to generate code on-demand.
[ 175 ]
The Just-in-Time Compiler
The LLVM Just-in-Time (JIT) compiler is a function-based dynamic translation
engine. To understand what a JIT compiler is, let's go back to the original term.
This term comes from Just-in-Time manufacturing, a business strategy where
factories make or buy supplies on demand instead of working with inventories.
In compilation, this analogy suits well because the JIT compiler does not store the
program binaries on the disk (the inventory) but starts compiling program parts
when you need them, during runtime. Despite the success of the business jargon,
you might stumble upon other names as well, such as late or lazy compilation.
An advantage of the JIT strategy comes from knowing the precise machine and
microarchitecture that the program will run on. This grants the JIT system the
ability to tune code to your particular processor. Furthermore, there are compilers
that will only know their input at runtime, in which case there is no other option
besides implementing a JIT system. For example, the GPU driver compiles the
shading language just in time and the same happens with an Internet browser with
JavaScript. In this chapter, we will explore the LLVM JIT system and cover
the following topics:
•
The llvm::JIT class and its infrastructure
•
How to use the llvm::JIT class for JIT compilation
•
How to use GenericValue to simplify function calls
•
The llvm::MCJIT class and its infrastructure
•
How to use the llvm::MCJIT class for JIT compilation
The Just-in-Time Compiler
Getting to know the LLVM JIT engine
basics
The LLVM JIT compiler is function-based because it is able to compile a single
function at a time. This defines the granularity at which the compiler works, which is
an important decision of a JIT system. By compiling functions on demand, the system
will only work on the functions that are actually used in this program invocation. For
example, if your program has several functions but you supplied wrong commandline arguments while launching it, a function-based JIT system will only compile the
function that prints the help message instead of the whole program.
In theory, we can push the granularity even further and compile only
the traces, which are specific paths of the function. By doing this,
you are already leveraging an important advantage of JIT systems:
knowledge about which program paths deserve more compilation effort
than others in a program invocation with a given input. However, the
LLVM JIT system does not support trace-based compilation, which
receives far more attention in research, in general. JIT compilation is
the subject of endless discussions, with an ample number of different
tradeoffs that are worth a careful study, and it is not trivial to point out
which strategy works best. Currently, the computer science community
has roughly accumulated 20 years of research in JIT compilation and the
area is still thriving with new papers each year, trying to address the
open questions.
The JIT engine works by compiling and executing LLVM IR functions at runtime.
During the compilation stage, the JIT engine will use the LLVM code generator
to generate binary blobs with target-specific binary instructions. A pointer to the
compiled function is returned, and the function can be executed.
[ 178 ]
Chapter 7
You can read an interesting blog post that compares open source
solutions for JIT compilation at http://eli.thegreenplace.
net/2014/01/15/some-thoughts-on-llvm-vs-libjit,
which analyzes LLVM and libjit, a smaller open source project
aimed at JIT compilation. LLVM became more famous as a static
compiler rather than as a JIT system because, for JIT compilation,
the time spent in each pass is very important and it is tallied as the
program execution overhead. The LLVM infrastructure places more
emphasis on supporting slow but strong optimizations on par with
GCC rather than fast but mediocre optimizations important to build
a competitive JIT system. Nevertheless, LLVM has been successfully
used in a JIT system to form the Fourth Tier LLVM (FTL) component
of the Webkit JavaScript engine (see http://blog.llvm.
org/2014/07/ftl-webkits-llvm-based-jit.html). Since the
fourth tier is only used for long running JavaScript applications, the
aggressive LLVM optimizations can help even if they are not as fast
as the one in the lower tiers. The rationale is that if the application
is running for long, we can afford to spend more time in expensive
optimizations. To read more about this tradeoff, check Modeling
Virtual Machines Misprediction Overhead, by César et al., published in
IISWC 2013, which is a study that exposes how much JIT systems lose
by incorrectly using expensive code generation in code that is not
worth the effort. This happens when your JIT system wasted a large
amount of time optimizing a fragment that executes only a few times.
Introducing the execution engine
The LLVM JIT system employs an execution engine to support the execution
of LLVM modules. The ExecutionEngine class declared in <llvm_source>/
include/llvm/ExecutionEngine/ExecutionEngine.h is designed to support the
execution by means of a JIT system or an interpreter (see the following information
box). In general, an execution engine is responsible for managing the execution of
an entire guest program, analyzing the next program fragment that needs to run,
and taking appropriate actions to execute it. When performing JIT compilation,
it is mandatory to have an execution manager to orchestrate the compilation
decisions and run the guest program (a fragment at a time). In the case of LLVM's
ExecutionEngine class, the ExecutionEngine class relinquishes the execution part
to you, the client. It can run the compilation pipeline and produce code that lives in
the memory, but it is up to you whether to execute this code or not.
[ 179 ]
The Just-in-Time Compiler
Besides holding the LLVM module to be executed, the engine supports several
scenarios as follows:
•
Lazy compilation: The engine will only compile a function when it is called.
With lazy compilation disabled, the engine compiles functions as soon as you
request a pointer to them.
•
Compilation of external global variables: This comprises the symbol
resolution and memory allocation of entities outside the current
LLVM module.
•
Lookup and symbol resolution for external symbols via dlsym: This is the
same process that is used at runtime in dynamic shared object (DSO) loading.
There are two JIT execution engine implementations in LLVM: the llvm::JIT class
and the llvm::MCJIT class. An ExecutionEngine object is instantiated by using the
ExecutionEngine::EngineBuilder() method with an IR Module argument. Next,
the ExecutionEngine::create() method creates a JIT or an MCJIT engine instance,
where each implementation significantly differs from the other—which will be made
clear throughout this chapter.
Interpreters implement an alternative strategy for the execution of
the guest code, that is, the code that is not natively supported by
the hardware platform (the host platform). For example, the LLVM
IR is considered the guest code in an x86 platform because the x86
processor cannot directly execute the LLVM IR. Different from
JIT compilation, interpretation is the task of reading individual
instructions, decoding them and executing their behavior, and
mimicking the functionality of a physical processor in the software.
Even though interpreters do not waste time by launching a compiler
to translate the guest code, the interpreters are typically much
slower, except when the time required to compile the guest code
does not pay off the high overhead of interpreting the code.
Memory management
In general, the JIT engine works by writing binary blobs to the memory, which is
accomplished by the ExecutionManager class. Afterwards, you can execute these
instructions by jumping to the allocated memory area, which you do by calling the
function pointer that ExecutionManager returns to you. In this context, memory
management is essential to perform routine tasks such as allocation, deallocation,
providing space for library loading, and memory permission handling.
[ 180 ]
Chapter 7
The JIT and MCJIT classes each implement a custom memory management class
that derives from the RTDyldMemoryManager base class. Any ExecutionEngine
client may also provide a custom RTDyldMemoryManager subclass to specify
where different JIT components should be placed in the memory. You can
find this interface in the <llvm_source>/ include/llvm/ExecutionEngine/
RTDyldMemoryManager.h file.
For example, the RTDyldMemoryManager class declares the following methods:
•
allocateCodeSection() and allocateDataSection(): These methods
•
getSymbolAddress(): This method returns the address of the symbols
•
finalizeMemory(): This method should be called once object loading is
allocate memory to hold the executable code and data of a given size and
alignment. The memory management client may track allocated sections by
using an internal section identifier argument.
available in the currently-linked libraries. Note that this is not used to obtain
JIT compilation generated symbols. You must provide an std::string
instance holding the symbol name to use this method.
complete, and memory permissions can finally be set. For instance, you
cannot run generated code prior to invoking this method. As explained
further in this chapter, this method is directed towards MCJIT clients rather
than JIT clients.
Although clients may provide custom memory management implementations,
JITMemoryManager and SectionMemoryManager are the default subclasses for JIT
and MCJIT, respectively.
Introducing the llvm::JIT framework
The JIT class and its framework represent the older engine and are implemented by
using different parts of the LLVM code generator. It will be removed after LLVM 3.5.
Even though the engine is mostly target-independent, each target must implement
the binary instruction emission step for its specific instructions.
Writing blobs to memory
The JIT class emits binary instructions by using JITCodeEmitter, a
MachineCodeEmitter subclass. The MachineCodeEmitter class is used for machine
code emission that is not related to the new Machine Code (MC) framework—even
though it is old, it is still present to support the functionality of the JIT class. The
limitations are that only a few targets are supported, and for the supported targets,
not all target features are available.
[ 181 ]
The Just-in-Time Compiler
The MachineCodeEmitter class has methods that facilitate the following tasks:
•
To allocate space (allocateSpace()) for the current function to be emitted
•
To write binary blobs to memory buffers (emitByte(), emitWordLE(),
emitWordBE(), emitAlignment(), and so on)
•
To track the current buffer address (that is, the pointer to the address
where the next instruction will be emitted)
•
To add relocations relative to the instruction addresses in this buffer
The task of writing the bytes to the memory is performed by JITCodeEmitter,
which is another class involved in the code emission process. It is a JITCodeEmitter
subclass that implements specific JIT functionality and management. While
JITCodeEmitter is quite simple and only writes bytes to buffers, the JITEmitter
class has the following improvements:
•
The specialized memory manager, JITMemoryManager, mentioned
previously (also the subject of the next section).
•
A resolver (JITResolver) instance to keep a track and resolve call sites
to functions that are not yet compiled. It is essential for the lazy function
compilation.
Using JITMemoryManager
The JITMemoryManager class (see <llvm_source>/include/llvm/
ExecutionEngine/JITMemoryManager.h) implements low-level memory handling
and provides buffers where the aforementioned classes can work. Besides the
methods from RTDyldMemoryManager, it provides specific methods to help the
JIT class such as allocateGlobal(), which allocates memory for a single global
variable; and startFunctionBody(), which makes JIT calls when it needs to
allocate memory marked as read/write executable to emit instructions to.
Internally, the JITMemoryManager class uses the JITSlabAllocator slab allocator
(<llvm_source>/lib/ExecutionEngine/JIT/JITMemoryManager.cpp) and the
MemoryBlock units (<llvm_source>/include/llvm/Support/Memory.h).
[ 182 ]
Chapter 7
Target code emitters
Each target implements a machine function pass called <Target>CodeEmitter
(see <llvm_source>/lib/Target/<Target>/<Target>CodeEmitter.cpp), which
encodes instructions in blobs and uses JITCodeEmitter to write to the memory.
MipsCodeEmitter, for instance, iterates over all the function basic blocks and calls
emitInstruction() for each machine instruction (MI):
(...)
MCE.startFunction(MF);
for (MachineFunction::iterator MBB = MF.begin(), E = MF.end();
MBB != E; ++MBB){
MCE.StartMachineBasicBlock(MBB);
for (MachineBasicBlock::instr_iterator I = MBB->instr_begin(),
E = MBB->instr_end(); I != E;)
emitInstruction(*I++, *MBB);
}
(...)
MIPS32 is a fixed-length, 4-byte ISA, which makes the emitInstruction()
implementation straightforward:
void MipsCodeEmitter::emitInstruction(MachineBasicBlock::instr_
iterator
MI, MachineBasicBlock &MBB) {
...
MCE.processDebugLoc(MI->getDebugLoc(), true);
emitWord(getBinaryCodeForInstr(*MI));
++NumEmitted; // Keep track of the # of mi's emitted
...
}
The emitWord() method is a wrapper for JITCodeEmitter, and
getBinaryCodeForInstr() is TableGen-generated for each target by reading the
instruction encoding descriptions of the .td files. The <Target>CodeEmitter class
must also implement custom methods to encode operands and other target-specific
entities. For example, in MIPS, the mem operand must use the getMemEncoding()
method to be properly encoded (see <llvm_source>/lib/Target/Mips/
MipsInstrInfo.td):
def mem : Operand<iPTR> {
(...)
let MIOperandInfo = (ops ptr_rc, simm16);
let EncoderMethod = "getMemEncoding";
(...)
}
[ 183 ]
The Just-in-Time Compiler
Therefore, MipsCodeEmitter must implement the MipsCodeEmitter::getMemEncod
ing() method to match this TableGen description. The following diagram shows the
relationship between the several code emitters and the JIT framework:
MipsCodeEmitter
ARMCodeEmitter
...
MachineCodeEmitter
RTDyldMemoryManager
JITCodeEmitter
JITMemoryManager
JITEmitter
Target information
To support Just-in-Time compilation, each target must also provide a TargetJITInfo
subclass (see include/llvm/Target/TargetJITInfo.h), such as MipsJITInfo
or X86JITInfo. The TargetJITInfo class provides an interface for common JIT
functionalities that each target needs to implement. Next, we show a list of the
examples of such functionalities:
•
To support situations where the execution engine needs to recompile a
function—likely because it has been modified—each target implements the
TargetJITInfo::replaceMachineCodeForFunction() method and patches
the old function's location with instructions to jump or call the new version
of the function. This is necessary for self-modifying code.
•
The TargetJITInfo::relocate() method patches every symbol reference
in the currently-emitted function to point to the correct memory addresses,
similar to what dynamic linkers do.
•
The TargetJITInfo:: emitFunctionStub() method emits a stub: a
function to call another function at a given address. Each target also provides
custom TargetJITInfo::StubLayout information, with the size in bytes
and alignment for the emitted stub. This stub information is used by
JITEmitter to allocate space for the new stub before emitting it.
Although the goal of the TargetJITInfo methods is not to emit regular instructions
such as in a function body generation, they still need to emit specific instructions
for stub generation and to call new memory locations. However, when the JIT
framework was established, there was no interface to rely on in order to ease the
task of emitting standalone instructions that live outside MachineBasicBlock.
This is what MCInsts does for MCJIT nowadays. Without MCInsts, the old JIT
framework forces the targets to manually encode the instructions.
[ 184 ]
Chapter 7
To show how the <Target>JITInfo implementation needs to manually emit
instructions, let's see the code of MipsJITInfo::emitFunctionStub() (see <llvm_
source>/lib/Target/Mips/MipsJITInfo.cpp) which uses the following code to
generate four instructions:
...
//
//
//
//
if
lui $t9, %hi(EmittedAddr)
addiu $t9, $t9, %lo(EmittedAddr)
jalr $t8, $t9
nop
(IsLittleEndian) {
JCE.emitWordLE(0xf << 26 | 25 << 16 | Hi);
JCE.emitWordLE(9 << 26 | 25 << 21 | 25 << 16 | Lo);
JCE.emitWordLE(25 << 21 | 24 << 11 | 9);
JCE.emitWordLE(0);
...
Learning how to use the JIT class
JIT is an ExecutionEngine subclass declared in <llvm_source>/lib/
ExecutionEngine/JIT/JIT.h. The JIT class is the entry point for compiling
functions by means of the JIT infrastructure.
The ExecutionEngine::create() method calls JIT::createJIT(), with a default
JITMemoryManager. Next, the JIT constructor executes the following tasks:
•
Creates a JITEmitter instance
•
Initializes the target information object
•
Adds the passes for code generation
•
Adds the <Target>CodeEmitter pass to be run in the end
The engine holds a PassManager object to invoke all code generation and JIT
emission passes whenever it is asked to JIT compile a function.
To illustrate how everything takes place, we have described how to JIT compile a
function of the sum.bc bitcode file used throughout Chapter 5, The LLVM Intermediate
Representation, and Chapter 6, The Backend. Our goal is to retrieve the Sum function
and use the JIT system to compute two different additions with runtime arguments.
Perform the following steps:
1. First, create a new file called sum-jit.cpp. We need to include the JIT
execution engine resources:
#include "llvm/ExecutionEngine/JIT.h"
[ 185 ]
The Just-in-Time Compiler
2. Include other header files for reading and writing LLVM bitcode, context
interface, among others, and import the LLVM namespace:
#include
#include
#include
#include
#include
#include
#include
#include
#include
#include
"llvm/ADT/OwningPtr.h"
"llvm/Bitcode/ReaderWriter.h"
"llvm/IR/LLVMContext.h"
"llvm/IR/Module.h"
"llvm/Support/FileSystem.h"
"llvm/Support/MemoryBuffer.h"
"llvm/Support/ManagedStatic.h"
"llvm/Support/raw_ostream.h"
"llvm/Support/system_error.h"
"llvm/Support/TargetSelect.h"
using namespace llvm;
3. The InitializeNativeTarget() method sets up the host target and ensures
that the target libraries to be used by the JIT are linked. As usual, we need a
per-thread context LLVMContext object and a MemoryBuffer object to read
the bitcode file from the disk, as shown in the following code:
int main() {
InitializeNativeTarget();
LLVMContext Context;
std::string ErrorMessage;
OwningPtr<MemoryBuffer> Buffer;
4. We read from the disk by using the getFile() method, as shown in the
following code:
if (MemoryBuffer::getFile("./sum.bc", Buffer)) {
errs() << "sum.bc not found\n";
return -1;
}
5. The ParseBitcodeFile function reads data from MemoryBuffer and
generates the corresponding LLVM Module class to represent it, as shown
in the following code:
Module *M = ParseBitcodeFile(Buffer.get(), Context,
&ErrorMessage);
if (!M) {
errs() << ErrorMessage << "\n";
return -1;
}
[ 186 ]
Chapter 7
6. Create an ExecutionEngine instance by using the EngineBuilder factory first
and then by invoking its create method, as shown in the following code:
OwningPtr<ExecutionEngine> EE(EngineBuilder(M).create());
This method defaults to creating a JIT execution engine and is the JIT setup
point; it calls the JIT constructor indirectly, which creates JITEmitter,
PassManager, and initializes all code generation and target-specific emission
passes. To this point, although the engine is aware of an LLVM Module, no
function is compiled yet.
To compile a function, you still need to call getPointerToFunction(), which
gets a pointer to the native JIT-compiled function. If the function has not been
JIT-compiled yet, the JIT compilation happens and the function pointer is
returned. The following diagram illustrates the compilation process:
getPointerToFunction()
JIT pending
functions
JIT::runJITOnFunctionUnlocked()
MipsCodeEmitter::emitInstruction
JIT::jitTheFunction()
MipsCodeEmitter::runOnFunction
PassManager::run()
CodeGen Passes
7. Retrieve the Function IR object that represents sum through the
getFunction() method:
Function *SumFn = M->getFunction("sum");
Here, JIT compilation is triggered:
int (*Sum)(int, int) = (int (*)(int, int))
EE->getPointerToFunction(SumFn);
You need to perform an appropriate cast to the function pointer type that
matches this function. The Sum function has the define i32 @sum(i32
%a, i32 %b) LLVM prototype; hence, we use the int (*)(int, int) C
prototype.
Another option is to consider lazy compilation by using
getPointerToFunctionOrStub() instead of getPointerToFunction().
This method will generate a stub function and return its pointer if the target
function is not yet compiled and lazy compilation is enabled. Stub is a small
function containing a placeholder that is later patched to jump/call the
real function.
[ 187 ]
The Just-in-Time Compiler
8. Next, we call the original Sum function via the JIT-compiled function pointed
by Sum, as shown in the following code:
int res = Sum(4,5);
outs() << "Sum result: " << res << "\n";
When using lazy compilation, Sum calls the stub function, which then uses a
compilation callback to JIT compile the real function. The stub is then patched
to redirect the execution to the real function. Unless the original Sum function
changes in Module, this function is never compiled again.
9. Call Sum again to compute the next result, as shown in the following code:
res = Sum(res, 6);
outs() << "Sum result: " << res << "\n";
In a lazy compilation environment, since the original function was already
compiled in the first Sum invocation, the second call executes the native
function directly.
10. We successfully computed two additions using the JIT-compiled Sum function.
We now release the execution engine allocated memory that holds the function
code, call the llvm_shutdown() function and return:
EE->freeMachineCodeForFunction(SumFn);
llvm_shutdown();
return 0;
}
To compile and link sum-jit.cpp, you can use the following command line:
$ clang++ sum-jit.cpp -g -O3 -rdynamic -fno-rtti $(llvm-config --cppflags
--ldflags --libs jit native irreader) -o sum-jit
Alternatively, you can use the Makefile from Chapter 3, Tools and Design, add the
-rdynamic flag, and change your llvm-config invocation to use the libraries
specified in the preceding command. Although this example makes no use of
external functions, the -rdynamic flag is important to guarantee that external
functions are resolved at runtime.
Run the example and check the output:
$ ./sum-jit
Sum result: 9
Sum result: 15
[ 188 ]
Chapter 7
The generic value
In the previous example, we cast the returned function pointer to a proper prototype
in order to call the function with a C-style function call. However, when dealing with
multiple functions in a multitude of signatures and argument types, we need a more
flexible way to execute functions.
The execution engine provides another way to call JIT-compiled functions.
The runFunction() method compiles and runs a function with the arguments
determined by a vector of GenericValue—it needs no prior invocation to
getPointerToFunction().
The GenericValue struct is defined in <llvm_source>/include/llvm/
ExecutionEngine/GenericValue.h and is capable of holding any common
type. Let's change our last example to use runFunction() instead of
getPointerToFunction() and castings.
First, create the sum-jit-gv.cpp file to hold this new version and add the
GenericValue header file on top:
#include "llvm/ExecutionEngine/GenericValue.h"
Copy the rest from sum-jit.cpp, and let's focus on the modifications. After the
SumFn Function pointer initialization, create FnArgs—a vector of GenericValue—
and populate it with integer values by using the APInt interface (<llvm_source>/
include/llvm/ADT/APInt.h). Use two 32-bit width integers to adhere to the
original prototype, sum(i32 %a, i32 %b):
(...)
Function *SumFn = M->getFunction("sum");
std::vector<GenericValue> FnArgs(2);
FnArgs[0].IntVal = APInt(32,4);
FnArgs[1].IntVal = APInt(32,5);
Call runFunction() with the function parameter and the argument vector. Here,
the function is JIT compiled and executed. The result is also GenericValue and can
be accessed accordingly (the i32 type):
GenericValue Res = EE->runFunction(SumFn, FnArgs);
outs() << "Sum result: " << Res.IntVal << "\n";
We repeat the same process for the second addition:
FnArgs[0].IntVal = Res.IntVal;
FnArgs[1].IntVal = APInt(32,6);
Res = EE->runFunction(SumFn, FnArgs);
outs() << "Sum result: " << Res.IntVal << "\n";
(...)
[ 189 ]
The Just-in-Time Compiler
Introducing the llvm::MCJIT framework
The MCJIT class is a novel JIT implementation for LLVM. It differs from the old
JIT implementation by the MC framework, explored in Chapter 6, The Backend. MC
provides a uniform representation for instructions and is a framework shared among
the assembler, disassembler, assembly printer and MCJIT.
The first advantage of using the MC library is that targets need to specify their
instruction encodings only once because this information is used by all the
subsystems. Therefore, when writing an LLVM backend, if you implement the
object code emission for your target, you have the JIT functionality as well.
The llvm::JIT framework is going to be removed after LLVM 3.5 and completely
replaced by the llvm::MCJIT framework. So, why did we study the old JIT?
Although they are different implementations, the ExecutionEngine class is generic
and most concepts apply to both engines. Most importantly, as in the LLVM 3.4
release, the MCJIT design does not support some features such as lazy compilation
and is still not a drop-in replacement for the old JIT.
The MCJIT engine
The MCJIT engine is created in the same way as the old JIT engine, by invoking
ExecutionEngine::create(). This method calls MCJIT::createJIT(), which
executes the MCJIT constructor. The MCJIT class is declared in <llvm_source>/
lib/ExecutionEngine/MCJIT/MCJIT.h. The createJIT() method and the MCJIT
constructor are implemented in <llvm_source>/lib/ExecutionEngine/MCJIT/
MCJIT.cpp.
The MCJIT constructor creates a SectionMemoryManager instance; adds the LLVM
module to its internal module container, OwningModuleContainer; and initializes
the target information.
Learning the module's states
The MCJIT class designates states to the initial LLVM Module instances inserted
during engine building. These states represent compilation stages of a module.
They are the following:
•
Added: These modules contain the set of modules that are not yet compiled
but are already added to the execution engine. The existence of this state
allows modules to expose function definitions for other modules and delay
their compilation until necessary.
[ 190 ]
Chapter 7
•
Loaded: These modules are in a JIT-compiled state but are not ready for
execution. Relocation remains unapplied and memory pages still need to
be given appropriate permissions. Clients willing to remap JIT-compiled
functions in the memory might avoid recompilation by using modules in
the loaded state.
•
Finalized: These modules contain functions ready for execution. In this state,
functions cannot be remapped since relocations have been already applied.
One major distinction between JIT and MCJIT lies in the module states. In MCJIT,
the entire module must be finalized prior to requests for symbol addresses
(functions and other globals).
The MCJIT::finalizeObject() function transforms the added modules into
loaded ones and then finalizes them. First, it generates loaded modules by calling
generateCodeForModule(). Next, all the modules are finalized through the
finalizeLoadedModules() method.
Unlike the old JIT, the MCJIT::getPointerToFunction() function requires the Module
object to be finalized prior to its invocation. Therefore, MCJIT::finalizeObject()
must be called before using it.
A new method added in LLVM 3.4 removes this restriction—the
getPointerToFunction() method is deprecated in favor of getFunctionAddress()
when MCJIT is used. This new method loads and finalizes the module prior to the
symbol address request and no finalizeObject() invocation is necessary.
Note that in the old JIT, individual functions are separately JIT compiled
and executed by the execution engine. In MCJIT, the whole module (all
the functions) must be JIT compiled prior to any function execution.
Due to this increase in the granularity, we can no longer say that it is
function-based, but it is a module-based translation engine.
Understanding how MCJIT compiles modules
The code generation takes place at a Module object loading stage and is triggered
by the MCJIT::generateCodeForModule() method in <llvm_source>/lib/
ExecutionEngine/MCJIT/MCJIT.cpp. This method performs the following tasks:
•
Creates an ObjectBuffer instance to hold a Module object. If the Module
object is already loaded (compiled), the ObjectCache interface is used to
retrieve and avoid recompilation.
[ 191 ]
The Just-in-Time Compiler
•
Assuming that no previous cache exists, the MC code emission is performed
by MCJIT::emitObject(). The result is an ObjectBufferStream object
(an ObjectBuffer subclass with streaming support).
•
The RuntimeDyld dynamic linker loads the resulting ObjectBuffer object
and builds a symbol table via RuntimeDyld::loadObject(). This method
returns an ObjectImage object.
•
The module is marked as loaded.
The Object buffer, the cache, and the image
The ObjectBuffer class (<llvm_source>/include/llvm/ExecutionEngine/
ObjectBuffer.h) implements a wrapper over the MemoryBuffer class
(<llvm_source>/include/llvm/Support/MemoryBuffer.h).
The MemoryBuffer class is used by the MCObjectStreamer subclasses to emit
instructions and data to the memory. Additionally, the ObjectCache class directly
references the MemoryBuffer instances and is able to retrieve ObjectBuffer
from them.
The ObjectBufferStream class is an ObjectBuffer subclass with additional
standard C++ streaming operators (for example, >> and <<) and facilitates the
memory buffer read/write operations from the point of view of implementation.
An ObjectImage object (<llvm_source>/include/llvm/ExecutionEngine/
ObjectImage.h) is used to keep the loaded modules and has direct access to the
ObjectBuffer and ObjectFile references. An ObjectFile object (<llvm_source>/
include/llvm/Object/ObjectFile.h) is specialized by target-specific object file
types such as ELF, COFF, and MachO. An ObjectFile object is capable of retrieving
symbols, relocations, and sections directly from the MemoryBuffer objects.
The following diagram illustrates how each class relates to the other—solid arrows
represent collaboration, and dashed arrows denote inheritance:
ObjectCache
ObjectImage
ObjectBufferStreamer
ObjectBuffer
MemoryBuffer
ObjectFile
MatchOObjectFile
[ 192 ]
ELFObjectFile
Chapter 7
Dynamic linking
The MCJIT-loaded module objects are represented by the ObjectImage instances. As
mentioned before, it has transparent access to memory buffers by a target-independent
ObjectFile interface. Hence, it can handle symbols, sections, and relocations.
In order to generate the ObjectImage objects, MCJIT has dynamic linking facilities
provided by the RuntimeDyld class. This class provides a public interface to access
these facilities, whereas the RuntimeDyldImpl objects, which are specialized by each
object's file type, provide the actual implementation.
Therefore, the RuntimeDyld::loadObject() method, which generates the
ObjectImage objects out of ObjectBuffer, first creates a target-specific
RuntimeDyldImpl object and then calls RuntimeDyldImpl::loadObject().
During this process, an ObjectFile object is also created and can be retrieved
via the ObjectImage object. The following diagram illustrates the process:
ObjectBuffer
loadObject()
ObjectImage
RuntimeDyld
loadObject()
RuntimeDyldELF
RuntimeDyldImpl
RuntimeDyldMachO
The runtime RuntimeDyld dynamic linker is used during Module finalization
to resolve relocations and to register exception-handling frames for the Module
object. Recall that the execution engine methods getFunctionAddress() and
getPointerToFunction() require the engine to know symbol (function) addresses.
To solve this, MCJIT also uses RuntimeDyld to ask for any symbol addresses via the
RuntimeDyld::getSymbolLoadAddress() method.
The memory manager
The LinkingMemoryManager class, another RTDyldMemoryManager subclass,
is the actual memory manager used by the MCJIT engine. It aggregates a
SectionMemoryManager instance and sends proxy requests to it.
[ 193 ]
The Just-in-Time Compiler
Whenever the RuntimeDyld dynamic linker requests for a symbol address through
LinkingMemoryManager::getSymbolAddress(), it has two options: if the symbol
is available in a compiled module, it retrieves the address from MCJIT; otherwise, it
requests for the address from external libraries that are loaded and mapped by the
SectionMemoryManager instance. The following diagram illustrates this mechanism.
Refer to LinkingMemoryManager::getSymbolAddress() in <llvm_source>/lib/
ExecutionEngine/MCJIT/MCJIT.cpp for details.
The SectionMemoryManager instance is a simple manager. As an
RTDyldMemoryManager subclass, SectionMemoryManager inherits all its library
lookup methods but implements the code and data section allocation by directly
dealing with low-level MemoryBlock units (<llvm_source>/include/llvm/
Support/Memory.h).
RuntimeDyld
MCJIT
getSymbolAddress()
getSymbolAddress()
LinkingMemoryManager
getSymbolAddress()
SectionMemoryManager
RTDyIdMemoryManager
The MC code emission
MCJIT performs the MC code emission by calling MCJIT::emitObject().
This method performs the following tasks:
•
Creates a PassManager object.
•
Adds a target layout pass and calls addPassesToEmitMC() to add all the
code generation passes and MC code emission.
•
Runs all the passes by using the PassManager::run() method. The resulting
code is stored in an ObjectBufferStream object.
•
Adds the compiled object to the ObjectCache instance and returns it.
The code emission in MCJIT is more consistent than in the old JIT. Instead of
providing the JIT with custom emitters and target information, MCJIT transparently
uses all the information from the existing MC infrastructure.
[ 194 ]
Chapter 7
Object finalization
Finally, the Module objects finalized in the MCJIT::finalizeLoadedModules():
relocations are resolved, loaded modules are moved to a finalized module group,
and LinkingMemoryManager::finalizeMemory() is called to change memory
page permissions. After object finalization, MCJIT-compiled functions are ready
for execution.
Using the MCJIT engine
The following sum-mcjit.cpp source contains the necessary code to JIT compile the
Sum function by using the MCJIT framework, instead of the old JIT. To illustrate how
similar it is to the previous JIT example, we leave the old code around and use the
UseMCJIT Boolean to determine whether the old JIT or MCJIT should be used. Since
the code is quite similar to the code for sum-jit.cpp, we will avoid detailing the
code fragments already exposed in the previous example.
1. First, include the MCJIT header, as shown in the following code:
#include "llvm/ExecutionEngine/MCJIT.h"
2. Include all other necessary headers, and import the llvm namespace:
#include "llvm/ADT/OwningPtr.h"
#include "llvm/Bitcode/ReaderWriter.h"
#include "llvm/ExecutionEngine/JIT.h"
#include "llvm/IR/LLVMContext.h"
#include "llvm/IR/Module.h"
#include "llvm/Support/MemoryBuffer.h"
#include "llvm/Support/ManagedStatic.h"
#include "llvm/Support/TargetSelect.h"
#include "llvm/Support/raw_ostream.h"
#include "llvm/Support/system_error.h"
#include "llvm/Support/FileSystem.h"
using namespace llvm;
3. Set the UseMCJIT Boolean to true in order to test MCJIT. Set it to false in
order to run this example using the old JIT, as shown in the following code:
bool UseMCJIT = true;
int main() {
InitializeNativeTarget();
[ 195 ]
The Just-in-Time Compiler
4. MCJIT requires the initialization of the assembly parser and the printer:
if (UseMCJIT) {
InitializeNativeTargetAsmPrinter();
InitializeNativeTargetAsmParser();
}
LLVMContext Context;
std::string ErrorMessage;
OwningPtr<MemoryBuffer> Buffer;
if (MemoryBuffer::getFile("./sum.bc", Buffer)) {
errs() << "sum.bc not found\n";
return -1;
}
Module *M = ParseBitcodeFile(Buffer.get(), Context,
&ErrorMessage);
if (!M) {
errs() << ErrorMessage << "\n";
return -1;
}
5. Create the execution engine and call the setUseMCJIT(true) method to tell
the engine to use MCJIT, as shown in the following code:
OwningPtr<ExecutionEngine> EE;
if (UseMCJIT)
EE.reset(EngineBuilder(M).setUseMCJIT(true).create());
else
EE.reset(EngineBuilder(M).create());
6. The old JIT requires the Function reference, which is used later to retrieve
the function pointer and to destroy the allocated memory:
Function* SumFn = NULL;
if (!UseMCJIT)
SumFn = cast<Function>(M->getFunction("sum"));
7. As mentioned before, using getPointerToFunction() is deprecated for
MCJIT, while getFunctionAddress() is only available in MCJIT. Hence,
we use the right method for each JIT type:
[ 196 ]
Chapter 7
int (*Sum)(int, int) = NULL;
if (UseMCJIT)
Sum = (int (*)(int, int)) EE->getFunctionAddress(std::string("
sum"));
else
Sum = (int (*)(int, int)) EE->getPointerToFunction(SumFn);
int res = Sum(4,5);
outs() << "Sum result: " << res << "\n";
res = Sum(res, 6);
outs() << "Sum result: " << res << "\n";
8. Since MCJIT compiles the whole module at once, releasing the machine code
memory for the Sum function only makes sense in the old JIT:
if (!UseMCJIT)
EE->freeMachineCodeForFunction(SumFn);
llvm_shutdown();
return 0;
}
To compile and link sum-mcjit.cpp, use the following command:
$ clang++ sum-mcjit.cpp -g -O3 -rdynamic -fno-rtti $(llvm-config
--cppflags --ldflags --libs jit mcjit native irreader) -o sum-mcjit
Alternatively, use your modified Makefile from Chapter 3, Tools and Design. Run the
following example and check the output:
$ ./sum-mcjit
Sum result: 9
Sum result: 15
Using LLVM JIT compilation tools
LLVM provides a few tools to work with JIT engines. The examples of such tools
are lli and llvm-rtdyld.
[ 197 ]
The Just-in-Time Compiler
Using the lli tool
The interpreter tool (lli) implements an LLVM bitcode interpreter and JIT compiler
as well by using the LLVM execution engines studied in this chapter. Let's consider
the source file, sum-main.c:
#include <stdio.h>
int sum(int a, int b) {
return a + b;
}
int main() {
printf("sum: %d\n", sum(2, 3) + sum(3, 4));
return 0;
}
The lli tool is capable of running bitcode files when a main function is provided.
Generate the sum-main.bc bitcode file by using clang:
$ clang -emit-llvm -c sum-main.c -o sum-main.bc
Now, run the bitcode through lli by using the old JIT compilation engine:
$ lli sum-main.bc
sum: 12
Alternatively, use the MCJIT engine:
$ lli -use-mcjit sum-main.bc
sum: 12
There is also a flag to use the interpreter, which is usually much slower:
$ lli -force-interpreter sum-main.bc
sum:12
Using the llvm-rtdyld tool
The llvm-rtdyld tool (<llvm_source>/tools/llvm-rtdyld/llvm-rtdyld.cpp) is
a very simple tool that tests the MCJIT object loading and linking framework. This
tool is capable of reading binary object files from the disk and executing functions
specified by the command line. It does not perform JIT compilation and execution,
but allows you to test and run object files.
[ 198 ]
Chapter 7
Consider the following three C source code files: main.c, add.c, and sub.c:
•
main.c
int add(int a, int b);
int sub(int a, int b);
int main() {
return sub(add(3,4), 2);
}
•
add.c
int add(int a, int b) {
return a+b;
}
•
sub.c
int sub(int a, int b) {
return a-b;
}
Compile these sources in object files:
$ clang -c main.c -o main.o
$ clang -c add.c -o add.o
$ clang -c sub.c -o sub.o
Execute the main function using the llvm-rtdyld tool with the -entry and
-execute options:
$ llvm-rtdyld -execute -entry=_main main.o add.o sub.o; echo $?
loaded '_main' at: 0x104d98000
5
Another option is to print line information for the functions compiled with debug
information using the -printline option. For example, let's look at the following
code:
$ clang -g -c add.c -o add.o
$ llvm-rtdyld -printline add.o
Function: _add, Size = 20
Line info @ 0: add.c, line:2
Line info @ 10: add.c, line:3
Line info @ 20: add.c, line:3
[ 199 ]
The Just-in-Time Compiler
We can see the object abstractions from the MCJIT framework in practice in the
llvm-rtdyld tool. The llvm-rtdyld tool works by reading a list of binary object
files into the ObjectBuffer objects and generates the ObjectImage instances
using RuntimeDyld::loadObject(). After loading all the object files, it resolves
relocations using RuntimeDyld::resolveRelocations(). Next, the entry point is
resolved via getSymbolAddress() and the function is called.
The llvm-rtdyld tool also uses a custom memory manager,
TrivialMemoryManager. It is a simple RTDyldMemoryManager subclass
implementation that is easy to understand.
This great proof-of-concept tool helps you to understand the basic concepts involved
in the MCJIT framework.
Other resources
There are other resources to learn about the LLVM JIT through online documentation
and examples. In the LLVM source tree, <llvm_source>/examples/HowToUseJIT
and <llvm_source>/examples/ParallelJIT contain simple source code examples
that are useful for learning the JIT basics.
The LLVM kaleidoscope tutorial at http://llvm.org/docs/tutorial contains a
specific chapter on how to use JIT http://llvm.org/docs/tutorial/LangImpl4.
html.
More information on MCJIT design and implementation can also be found at
http://llvm.org/docs/MCJITDesignAndImplementation.html.
Summary
JIT compilation is a runtime compilation feature present in several virtual machine
environments. In this chapter, we explored the LLVM JIT execution engine by
showing the distinct implementations available, the old JIT and the MCJIT.
Moreover, we examined implementation details from both approaches and
provided real examples on how to build tools to use the JIT engines.
In the next chapter, we will cover cross-compilation, toolchains, and how to create
an LLVM-based cross compiler.
[ 200 ]
Cross-platform Compilation
Traditional compilers transform the source code into native executables. In this
context, native means that it runs on the same platform of the compiler, and a
platform is a combination of hardware, operating system, application binary
interface (ABI), and system interface choices. These choices define a mechanism that
the user-level program can use to communicate with the underlying system. Hence,
if you use a compiler in your GNU/Linux x86 machine, it will generate executables
that link with your system libraries and are tailored to run on this exact same
platform.
Cross-platform compilation is the process of using a compiler to generate executables
for different, non-native platforms. If you need to generate code that links with
libraries different to the libraries of your own system, you can usually solve this by
using specific compilation flags. However, if the target platform where you intend
to deploy your executable is incompatible with your platform, such as when using
a different processor architecture, operating system, ABI, or object file, you need to
resort to cross compilation.
Cross-compilers are essential when developing applications for systems with
limited resources; embedded systems, for instance, are typically composed of lower
performance processors with constrained memory, and since the compilation process
is CPU and memory intensive, running a compiler in such systems, if possible, is
slow and delays the application development cycle. Therefore, cross-compilers are
invaluable tools in such scenarios. In this chapter, we will cover the following topics:
•
A comparison between the Clang and the GCC cross-compilation approaches
•
What are toolchains?
•
How to cross-compile with Clang command lines
•
How to cross-compile by generating a custom Clang
•
Popular simulators and hardware platforms to test target binaries
Cross-platform Compilation
Comparing GCC and LLVM
Compilers such as GCC must be built with a special configuration to support cross
compilation, requiring the installation of a different GCC for each target. A common
practice, for example, is to prefix your gcc command with the target name, such as
arm-gcc to denote a GCC cross-compiler for ARM. However, Clang/LLVM allows
you to generate code for other targets by simply switching the command-line options
of the same Clang driver between the desired target, paths to libraries, headers,
the linker, and the assembler. One Clang driver, therefore, works for all targets.
However, some LLVM distributions do not include all the targets owing to, for
example, executable size concerns. On the other hand, if you build LLVM yourself,
you get to choose which targets to support; see Chapter 1, Build and Install LLVM.
GCC is a much older, and subsequently, a more mature project than LLVM. It
supports more than 50 backends and is widely utilized as a cross-compiler for these
platforms. However, the design of GCC constrains its driver to deal with a single
target library per installation. This is the reason why, in order to generate code for
other targets, different GCC installations must be arranged.
In contrast, all target libraries are compiled and linked with the Clang driver
in a default build. At runtime, even though Clang needs to know several target
particularities, Clang/LLVM components can access whatever target information
they need by using target-independent interfaces designed to supply information
about any command-line-specified target. This approach gives the driver the
flexibility to avoid the need for a target-specific Clang installation for each target.
The following diagram illustrates how a source code is compiled for different targets
by both LLVM and GCC; the former dynamically generates the code for distinct
processors, while the latter needs a different cross-compiler for each processor.
GCC ARM
driver
GCC MIPS
driver
C/C++
Source
Code
GCC x86
driver
Clang
driver
[ 202 ]
ARM
assembly
MIPS
assembly
X86
assembly
Chapter 8
You can also build a specialized Clang cross-compiler driver just like GCC's.
Although this choice demands more effort to build a separate Clang/LLVM
installation, it leads to an easier to use command-line interface. During configuration
time, the user can provide fixed paths to target libraries, headers, the assembler, and
the linker, avoiding the necessity to pass a myriad of command-line options to the
driver every time cross-compilation is needed.
In this chapter, we show you how to use Clang to generate code for multiple
platforms by using driver command-line options, and how to generate a specific
Clang cross-compiler driver.
Understanding target triples
We will start by presenting three important definitions as follows:
•
Build is the platform where the cross-compiler is built
•
Host designates the platform where the cross-compiler will run
•
Target refers to the platform where executables or libraries generated by the
cross-compiler run
In a standard cross-compiler, the build and host platforms are the same. You define
the build, host, and target via target triples. These triples uniquely identify a target
variation with information about the processor architecture, operating system flavor
and version, C library kind, and object file type.
There is no strict format for triples. GNU tools, for instance, may accept triples
composed of two, three, or even four fields in the <arch>-<sys/vendor>-<other><other> format, such as arm-linux-eabi, mips-linux-gnu, x86_64-linux-gnu,
x86_64-apple-darwin11, and sparc-elf. Clang strives to maintain compatibility
with GCC and thus recognizes this format, but it will internally canonicalize any
triple into its own triple pattern, <arch><sub>-<vendor>-<sys>-<abi>.
[ 203 ]
Cross-platform Compilation
The following table contains a list of possible options for each LLVM triple field; the
<sub> field is not included, since it represents architecture variations, for example,
v7 in the armv7 architecture. See <llvm_source>/include/llvm/ADT/Triple.h for
the triple details:
Architecture (<arch>)
Vendor
(<vendor>)
Operating system (<sys>)
Environment
(<abi>)
arm, aarch64, hexagon,
mips, mipsel, mips64,
mips64el, msp430,
ppc, ppc64, ppc64le,
r600, sparc, sparcv9,
systemz, tce, thumb,
x86, x86_64, xcore,
nvptx, nvptx64, le32,
amdil, spir, and
spir64
unknown,
apple, pc,
scei, bgp,
bgq, fsl,
ibm, and
nvidia
unknown, auroraux,
cygwin, darwin,
dragonfly, freebsd,
ios, kfreebsd, linux,
lv2, macosx, mingw32,
netbsd, openbsd,
solaris, win32, haiku,
minix, rtems, nacl, cnk,
bitrig, aix, cuda, and
nvcl
unknown,
gnu,
gnueabihf,
gnueabi,
gnux32,
eabi, macho,
android, and
elf
Note that not all the combinations of arch, vendor, sys, and abi are valid. Each
architecture supports a limited set of combinations.
The following diagram illustrates the concept of an ARM cross-compiler that is built
on top of x86, runs on x86, and generates ARM executables. The curious reader may
wonder what happens if the host and build are different. This combination results in
a Canadian cross-compiler, a process which is a bit more complex and requires the
darker compiler box in the following diagram to be another cross-compiler instead
of a native compiler. The name Canadian cross was coined after the fact that Canada
had three political parties at the time the name was created and the Canadian cross
uses three different platforms. A Canadian cross is necessary, for example, if you are
distributing cross-compilers for other users and wish to support platforms other than
your own.
build
x86_64-linux-gnu
host
x86_64-linux-gnu
target
arm-linux-eabi
Compiler
Source
Code
C/C++
Source
Code
ARM
Executable
Compiler
Cross-Compiler
Leader
Cross-Compiler
Executable
ARM
Executable
[ 204 ]
Execution
Chapter 8
Preparing your toolchain
The term compiler implies a collection of compilation-related tasks performed by
different components such as the frontend, backend, assembler, and linker. Some of
them are implemented in separate tools, while others are integrated. However, while
developing native applications or for any other target, a user needs more resources,
such as platform-dependent libraries, a debugger, and tools to perform tasks, for
example, to read the object file. Therefore, platform manufacturers usually distribute
a bundle of tools for software development in their platform, thus providing the
clients with a development toolchain.
In order to generate or use your cross-compiler, it is very important to know the
toolchain components and how they interact with each other. The following diagram
shows the main toolchain components necessary for successful cross-compilation,
while the sections that follow describe each component:
C Library
glibc, eglibc,
Newlib, uClibc
headers
Frontend
headers
target triple
paths: libraries, headers,
assembler, and linker
Clang Driver
Target specific
IR
C++ Library
libstdc++, libcxx
headers
Backend
lib
Integrated
Assembler
Runtime
compiler-rt,
libgcc
lib
lib
Assembler
Linker
GNU as, Apple
cctools Id
GNU as, Apple
cctools Id, IId
Standard C and C++ libraries
Target
Executable
A C library is necessary to support standard C language functionalities such as
memory allocation (malloc()/free()), string handling (strcmp()), and I/O
(printf()/scanf()). The examples of popular C library header files include
stdio.h, stdlib.h, and string.h. There are several C library implementations
available. The GNU C library (glibc), newlib, and uClibc are widely known
examples. These libraries are available for different targets and can be ported to
new ones.
[ 205 ]
Cross-platform Compilation
Likewise, the C++ standard library implements C++ functionalities such as input and
output streams, containers, string handling, and thread support. GNU's libstdc++
and LLVM's libc++ (see http://libcxx.llvm.org) are implementation examples.
In fact, the full GNU C++ library comprises of both libstdc++ and libsupc++.
The latter is a target-dependent layer to ease porting, which exclusively deals with
exception handling and RTTI. LLVM's libc++ implementation still depends on
a third-party substitute for libsupc++ for systems other than Mac OS X (see the
Introducing the libc++ standard library section in Chapter 2, External Projects, for
more details).
A cross-compiler needs to know the path of the target C/C++ libraries and headers
in order to search for the right function prototypes and later do proper linking. It
is important that the header files match the compiled libraries, both in version and
in implementation. For example, a misconfigured cross-compiler may look into the
native system headers instead, leading to compilation errors.
Runtime libraries
Each target needs to use special functions to emulate low-level operations that are
not natively supported. For instance, 32-bit targets usually lack 64-bit registers and
are unable to work directly with 64-bit types. Therefore, the target may use two 32bit registers and invoke specific functions to perform simple arithmetic operations
(addition, subtraction, multiplication, and division).
The code generator emits calls to these functions and expects them to be found at
link time. The driver must provide the necessary libraries, not the user. In GCC,
this functionality is implemented by the runtime library, libgcc. LLVM provides
a drop-in replacement called compiler-rt (see Chapter 2, External Projects). Thus,
the Clang driver invokes the linker using either -lgcc or -lclang_rt (to link with
compiler-rt). Again, target-specific runtime libraries must be in the path in order to
be correctly linked.
The assembler and the linker
The assembler and the linker are usually provided by separate tools and invoked by
the compiler driver. For example, the assembler and the linker provided by GNU
Binutils has support for several targets, and for the native target, they are usually
found in the system path with the names as and ld, respectively. There is also an
LLVM-based, but still experimental, linker called lld (http://lld.llvm.org).
[ 206 ]
Chapter 8
To invoke such tools, the target triple is used in the assembler and linker name
prefix and looked up in the PATH variable of the system. For example, when
generating code for mips-linux-gnu, the driver may search for mips-linux-gnu-as
and mips-linux-gnu-ld. Clang may perform this search differently depending on
the target triple information.
Some targets need no external assembler invocation in Clang. Since LLVM provides
direct object code emission through the MC layer, the driver can use the integrated
MC assembler with the -integrated-as option, which is turned on by default for
specific targets.
The Clang frontend
In Chapter 5, The LLVM Intermediate Representation, we explained that the
LLVM IR emitted by Clang is not target-independent as the C/C++ language too
is not independent. In addition to the backend, the frontend must also implement
target-specific constraints. Hence, you must be aware that although support for
a specific processor exists in Clang, if the target triple does not strictly match this
processor, the frontend may generate imperfect LLVM IR that may lead to ABI
mismatches and runtime errors.
Multilib
Multilib is a solution that allows users to run applications compiled for different
ABIs on the same platform. This mechanism avoids multiple cross-compilers as
long as one cross-compiler has access to the compiled versions of each ABI variation
library and header. For example, multilib allows soft-float and hard-float libraries
to coexist, that is, libraries that rely on the software emulation of floating-point
arithmetic and libraries that rely on the processor FPU to handle floating-point
numbers. GCC, for instance, has several versions of libc and libgcc for each
version of multilib.
In MIPS GCC, for example, the multilib library folder structure is organized as follows:
•
lib/n32: This folder holds n32 libraries, supporting the n32 MIPS ABI
•
lib/n32/EL: This folder holds the little-endian versions of libgcc, libc,
and libstdc++
•
lib/n32/msoft-float: This folder holds n32 soft-float libraries
•
lib/n64: This folder holds n64 libraries, supporting the n64 MIPS ABI
•
lib/n64/EL: This folder holds the little-endian version of libgcc, libc,
and libstdc++
•
lib/n64/msoft-float: This folder holds n64 soft-float libraries.
[ 207 ]
Cross-platform Compilation
Clang supports multilib environments as long as the right paths for libraries and
headers are provided. However, since the frontend potentially generates different
LLVM IR for different ABIs in some targets, it is good practice to double-check your
paths and target triples to ensure that they match, avoiding runtime errors.
Cross-compiling with Clang commandline arguments
Now that you know each toolchain component, we will show you how to use Clang
as a cross-compiler by using the appropriate driver arguments.
All the examples in this section are tested in an x86_64 machine
running Ubuntu 12.04. We use Ubuntu-specific tools to download some
dependencies, but the Clang-related commands should work in any other
OS environment without (or with minor) modifications.
Driver options for the target
Clang uses the –target=<triple> driver option to dynamically select the target
triple for which code needs to be generated. Beyond the triple, other options can be
used to make target selection more accurate:
•
The -march=<arch> option selects the target base architecture. The examples
of the <arch> values include armv4t, armv6, armv7, and armv7f for ARM
and mips32, mips32r2, mips64, and mips64r2 for MIPS. This option alone
also selects a default base CPU to be used in the code generator.
•
To select a specific CPU, use -mcpu=<cpu>. For example, cortex-m3 and
cortex-a8 are ARM-specific CPUs and pentium4, athlon64, and corei7avx2 are x86 CPUs. Each CPU has a base <arch> value defined by the target
and used by the driver.
•
The -mfloat-abi=<abi> option determines which kind of registers are used
to hold floating-point values: soft or hard. As mentioned previously, this
determines whether to use software floating-point emulation. This also implies
changes in calling conventions and other ABI specifications. The -msoftfloat and -mhard-float aliases are also available. Note that if this is not
specified, the ABI type conforms to the default type for the selected CPU.
To see other target-specific switches, use clang --help-hidden, which will reveal to
you even the hidden options from the traditional help message.
[ 208 ]
Chapter 8
Dependencies
We will use an ARM cross-compiler as a running example to demonstrate how to
cross-compile with Clang. The first step is to install a complete ARM toolchain in
your system and identify the provided components.
To install a GCC cross-compiler for ARM with a hard floating-point ABI, use the
following command:
$ apt-get install g++-4.6-arm-linux-gnueabihf gcc-4.6-arm-linux-gnueabihf
To install a GCC cross-compiler for ARM with a soft floating-point ABI, use the
following command:
$ apt-get install g++-4.6-arm-linux-gnueabi gcc-4.6-arm-linux-gnueabi
We just asked you to install a complete GCC toolchain, including the
cross-compiler! Why would you need Clang/LLVM now? As explained in
the toolchain section, during cross compilation, the compiler itself acts as a
small piece that fits in an arrangement of several components that include
the assembler, linker, and target libraries. You should seek the toolchain
prepared by your target platform vendor because only this toolchain will have
the correct headers and libraries used in your target platform. Typically, this
toolchain is already distributed with a GCC compiler as well. What we want
to do is to use Clang/LLVM instead, but we still depend on all other toolchain
components to work.
If you want to build all the target libraries and prepare the entire toolchain
yourself, you will also need to prepare an operating system image to boot the
target platform. If you build the system image and the toolchain yourself, you
guarantee that both agree with respect to the version of the libraries used in
the target system. If you like to build everything from scratch, a good guide
on how to do this is available in the Cross Linux from Scratch tutorials at
http://trac.cross-lfs.org.
Although apt-get automatically installs the toolchain prerequisites, the basic
packages needed and recommend for a Clang-based C/C++ ARM cross-compiler
are the following:
•
•
libc6-dev-armhf-cross and libc6-dev-armel-cross
•
•
•
binutils-arm-linux-gnueabi and binutils-arm-linux-gnueabihf
gcc-4.6-arm-linux-gnueabi-base and gcc-4.6-arm-linux-gnueabihfbase
libgcc1-armel-cross and libgcc1-armhf-cross
libstdc++6-4.6-dev-armel-cross and libstdc++6-4.6-dev-armhf-cross
[ 209 ]
Cross-platform Compilation
Cross-compiling
Although we are not interested in the GCC cross-compilers themselves, the
command in the preceding section installs the necessary prerequisites we will need
for our cross-compiler: linker, assembler, libraries, and headers. You can compile
the sum.c program (from Chapter 7, The Just-in-Time Compiler) for the arm-linuxgnueabihf platform using the following command:
$ clang --target=arm-linux-gnueabihf sum.c -o sum
$ file sum
sum: ELF 32-bit LSB executable, ARM, version 1 (SYSV), dynamically linked
(uses shared libs)...
Clang finds all the necessary components from GNU's arm-linux-gnueabihf
toolchain and generates the final executable. In this example, the default architecture
used is armv6, but we can be more specific in providing the --target value and use
-mcpu to achieve more precise code generation:
$ clang --target=armv7a-linux-gnueabihf -mcpu=cortex-a15 sum.c -o sum
Installing GCC
The target triple in --target is used by Clang to search for a GCC installation with
the same or similar prefix. If several candidates are found, Clang selects the one that
it considers the closest match to the target:
$ clang --target=arm-linux-gnueabihf sum.c -o sum -v
clang version 3.4 (tags/RELEASE_34/final)
Target: arm--linux-gnueabihf
Thread model: posix
Found candidate GCC installation: /usr/lib/gcc/arm-linux-gnueabihf/4.6
Found candidate GCC installation: /usr/lib/gcc/arm-linux-gnueabihf/4.6.3
Selected GCC installation: /usr/lib/gcc/arm-linux-gnueabihf/4.6
(...)
Since a GCC installation usually comes with an assembler, a linker, libraries,
and headers, it is used by Clang to reach the desired toolchain components. By
providing a triple with the exact name of an existing toolchain in the system, it is
usually straightforward to obtain such paths. However, if we provide a different or
incomplete triple, the driver searches for and selects what it considers the best match:
$ clang --target=arm-linux sum.c -o sum -v
...
Selected GCC installation: /usr/lib/gcc/arm-linux-gnueabi/4.7
clang: warning: unknown platform, assuming -mfloat-abi=soft
[ 210 ]
Chapter 8
Note that although we installed GCC toolchains for arm-linux-gnueabi and armlinux-gnueabihf, the driver selects the former. In this example, since the selected
platform is unknown, a soft-float ABI is assumed.
Potential problems
If we add the -mfloat-abi=hard option, the driver omits the warning but keeps
selecting arm-linux-gnueabi instead of arm-linux-gnueabihf. This leads to a final
executable that is likely to fail due to runtime errors, because a hard-float object is
linked with a soft-float library:
$ clang --target=arm-linux -mfloat-abi=hard sum.c -o sum
The reason why arm-linux-gnuebihf was not selected even though -floatabi=hard was passed is because we did not specifically ask clang to use the armlinux-gnueabihf toolchain. If you leave this decision to the driver, it will pick the
first toolchain that it finds, which may not be adequate. This example is important
to show you that the driver may not select the best option if you use a vague or
incomplete target triple such as arm-linux.
It is very important to know the underlying toolchain components being used to
confirm whether the right toolchain was selected, for example, by using the -### flag
that prints which tool invocations were used by Clang to compile, assemble, and link
your program.
Let's try to be even more vague about the target triple to see what happens. We will
use just the --target=arm option:
$ clang --target=arm sum.c -o sum
/tmp/sum-3bbfbc.s: Assembler messages:
/tmp/sum-3bbfbc.s:1: Error: unknown pseudo-op: `.syntax'
/tmp/sum-3bbfbc.s:2: Error: unknown pseudo-op: `.cpu'
/tmp/sum-3bbfbc.s:3: Error: unknown pseudo-op: `.eabi_attribute'
(...)
By removing the OS from the triple, the driver gets confused and a compilation
error occurs. What happened is that the driver tried to assemble the ARM assembly
language by using the native (x86_64) assembler. Since the target triple was
quite incomplete and the OS was missing, our arm-linux toolchains were not a
satisfactory match for the driver, which resorted to using the system assembler.
[ 211 ]
Cross-platform Compilation
Changing the system root
The driver is able to find toolchain support for the target by checking the presence
of the GCC cross-compilers with the given triple in the system and by a list of the
known prefixes it scans for in GCC installation directories (see <llvm_source>/
tools/clang/lib/Driver/ToolChains.cpp).
In some other cases—malformed triples or absent GCC cross-compilers—special
options must be passed to the driver in order to use the available toolchain
components. For instance, the --sysroot option changes the base directory,
where Clang searches for toolchain components and can be used whenever the target
triple does not provide enough information. Similarly, you can also use --gcctoolchain=<value> to specify the folder of a specific toolchain you want to use.
In the ARM toolchain installed in our system, the selected GCC installation path for
the arm-linux-gnueabi triple is /usr/lib/gcc/arm-linux-gnueabi/4.6.3. From
this directory, Clang is able to reach the other paths for libraries, headers, assembler,
and linker. One path it reaches is /usr/arm-linux-gnueabi, which contains the
following subdirectories:
$ ls /usr/arm-linux-gnueabi
bin
include
lib
usr
The toolchain components are organized in these folders in the same way as the native
ones live in the filesystem's /bin, /include, /lib, and /usr root folders. Consider that
we want to generate code for armv7-linux with a cortex A9 CPU, without relying on
the driver to find the components automatically for us. As long as we know where the
arm-linux-gnueabi components are, we can provide a --sysroot flag to the driver:
$ PATH=/usr/arm-linux-gnueabi/bin:$PATH /p/cross/bin/clang
--target=armv7a-linux --sysroot=/usr/arm-linux-gnueabi -mcpu=cortex-a9
-mfloat-abi=soft sum.c -o sum
Again, this is very useful when there are toolchain components available, but there is
no solid GCC installation. There are three main reasons why this approach works as
follows:
•
•
The armv7a-linux: armv7a triple activates code generation for ARM and
linux. Among other things, it tells the driver to use the GNU assembler and
linker invocation syntax. If no OS is specified, Clang defaults to the Darwin
assembler syntax, yielding an assembler error.
The /usr, /lib, and /usr/include folders are the default compiler search
places for libraries and headers. The --sysroot option overrides the driver
defaults to look into /usr/arm-linux-gnueabi for these directories instead
of the system root.
[ 212 ]
Chapter 8
•
The PATH environment variable is changed, avoiding the default versions of
as and ld from being used. We then force the driver to look at the /usr/armlinux-gnueabi/bin path first, where the ARM versions of as and ld
are found.
Generating a Clang cross-compiler
Clang dynamically supports the generation of code for any target, as seen in the
previous sections. However, there are reasons to generate a target-dedicated Clang
cross-compiler:
•
If the user wishes to avoid using long command lines to invoke the driver
•
If a manufacturer wishes to ship a platform-specific Clang-based toolchain to
its clients
Configuration options
The LLVM configure system has the following options that assist in cross-compiler
generation:
•
--target: This option specifies the default target triple that the Clang
•
--enable-targets: This option specifies which targets this installation will
•
--with-c-include-dirs: This option specifies a list of directories that the
•
--with-gcc-toolchain: This option specifies a target GCC toolchain
•
--with-default-sysroot: This option adds the --sysroot option to all the
cross-compiler generates code for. This relates to the target, host, and build
concepts we defined earlier. The --host and --build options are also
available, but these are guessed by the configure script—both refer to the
native platform.
support. If omitted, all targets will be supported. Remember that you must
use the command-line options previously explained to select targets different
from the default one, which is specified with the --target flag.
cross-compiler should use to search for header files. Using this option avoids
the excessive usage of -I to locate target-specific libraries, which may not be
located in canonical paths. Additionally, these directories are searched prior
to the system default ones.
already present in the system. The toolchain components are located by this
option and hardcoded in the cross-compiler as with a permanent --gcctoolchain option.
compiler invocations executed by the cross-compiler.
[ 213 ]
Cross-platform Compilation
See <llvm_source>/configure --help for all the LLVM/Clang configuration
options. Extra configuration options (hidden ones) can be used to explore targetspecific features, such as --with-cpu, --with-float, --with-abi, and --with-fpu.
Building and installing your Clang-based
cross-compiler
Instructions to configure, build, and install a cross-compiler are very similar to the
traditional way of compiling LLVM and Clang explained in Chapter 1, Build and
Install LLVM.
Therefore, assuming that the sources are in place, you can generate an LLVM ARM
cross-compiler that targets Cortex-A9, by default, with the following command:
$ cd <llvm_build_dir>
$ <PATH_TO_SOURCE>/configure --enable-targets=arm --disable-optimized
--prefix=/usr/local/llvm-arm --target=armv7a-unknown-linux-gnueabi
$ make && sudo make install
$ export PATH=$PATH:/usr/local/llvm-arm
$ armv7a-unknown-linux-gnueabi-clang sum.c -o sum
$ file sum
sum: ELF 32-bit LSB executable, ARM, version 1 (SYSV), dynamically linked
(uses shared libs)...
Recall from the Understanding target triples section that our GCC-compatible target
triple can have up to four elements, but some tools accept triples with less. In the
case of the configure script used by LLVM, which is generated by GNU autotools, it
expects the target triple to have all the four elements, with the vendor information in
the second element. Since our platform does not have a specific vendor, we expand
our triple to be armv7a-unknown-linux-gnueabi. If we insist on using a triple with
three elements here, the configure script will fail.
No additional options are necessary to detect the toolchain because Clang performs
the GCC installation lookup as usual.
Suppose that you compile and install extra ARM libraries and headers in the /opt/
arm-extra-libs/include and /opt/arm-extra-libs/lib directories, respectively.
By using --with-c-include-dirs=/opt/arm-extra-libs/include, you can
permanently add this directory to the Clang header search path; it is still necessary to
add -L/opt/arm-extra-libs/lib for proper linkage.
$ <PATH_TO_SOURCE>/configure --enable-targets=arm --disable-optimized
--prefix=/usr/local/llvm-arm --target=armv7a-unknown-linux-gnueabi
--with-c-include-dirs=/opt/arm-extra-libs/include
[ 214 ]
Chapter 8
Similarly, we can add a sysroot (--sysroot) flag and also specify the GCC toolchain
(--with-gcc-toolchain) to be always used by the driver. This is redundant for the
chosen ARM triple, but it may be useful for other targets:
$ <PATH_TO_SOURCE>/configure --enable-targets=arm --disable-optimized
--prefix=/usr/local/llvm-arm --target=armv7a-unknown-linux-gnueabi
--with-gcc-toolchain=arm-linux-gnueabi --with-default-sysroot=/usr/armlinux-gnueabi
Alternative build methods
There are other tools available to generate LLVM/Clang-based toolchains, or we can
use other build systems in LLVM. Another alternative way is to create a wrapper to
facilitate the process.
Ninja
One alternative to generate cross-compilers is to use CMake and Ninja. The Ninja
project is intended to be a small and fast build system.
Instead of the traditional configure and build steps to generate a cross-compiler,
you can use special CMake options to generate suitable build instructions for Ninja,
which then builds and installs the cross-compiler for the desired target.
The instructions and documentation on how to go about this approach are present at
http://llvm.org/docs/HowToCrossCompileLLVM.html.
ELLCC
The ELLCC tool is an LLVM-based framework used to generate toolchains for
embedded targets.
It aims at creating an easy resource for generating and using cross-compilers. It is
extensible, supports new target configurations, and is easy to use for developers to
multitarget their programs.
The ELLCC also compiles and installs several toolchain components, including a
debugger and a QEMU for platform testing (if available).
The ecc tool is the final cross-compiler to use. It works by creating a layer over Clang
cross-compilers and accepting GCC and Clang compatible command-line options to
compile for any supported target. You can read more at http://ellcc.org/.
[ 215 ]
Cross-platform Compilation
EmbToolkit
The embedded system toolkit is another framework for generating toolchains for
embedded systems. It supports generating Clang or LLVM-based toolchains while
compiling its components and providing a root filesystem at the same time.
It provides ncurses and GUI interfaces for component selection. You can find more
details at https://www.embtoolkit.org/.
Testing
The most reasonable way to test a successful cross-compilation is to run the resulting
executable on a real target platform. However, when real targets are not available or
affordable, there are several simulators that can be used to test your programs.
Development boards
There are several development boards for a multitude of platforms. Nowadays,
they are affordable and can be bought online. For instance, you can find ARM
development boards ranging from simple Cortex-M series processors to multicore
Cortex-A series.
The peripheral components vary, but it is very common to find Ethernet, Wi-Fi, USB,
and memory cards on these boards. Hence, cross-compiled applications can be sent
through the network, USB, or can be written to flash cards and can be executed on
bare metal or on embedded Linux/FreeBSD instances.
The examples of such development boards include the following:
Name
Features
Architecture/
Processor
Link
Panda Board
Linux,
Android,
Ubuntu
ARM, Dual Core
Cortex A9
http://pandaboard.org/
Beagle Board
Linux,
Android,
Ubuntu
ARM, Cortex A8
http://beagleboard.org/
SEAD-3
Linux
MIPS M14K
Carambola-2
Linux
MIPS 24K
http://www.timesys.com/
supported/processors/mips
http://8devices.com/
carambola-2
[ 216 ]
Chapter 8
There are also plenty of mobile phones with ARM and MIPS processors running
Android with development kits available. You can also try Clang on these.
Simulators
It is very common for manufacturers to develop simulators for their processors
because a software development cycle starts even before a physical platform is
ready. Toolchains with simulators are distributed to clients or used internally for
testing products.
One way to test cross-compiled programs is through these manufacturer-provided
environments. However, there are several open source emulators for a distinct
number of architectures and processors also. QEMU is an open source emulator
supporting user and system emulation.
In user emulation mode, QEMU is able to emulate standalone executables compiled
for other targets in the current platform. For instance, an ARM-executable compiled
and linked with Clang, as described in the previous sections, is likely to work out of
the box in an ARM-QEMU user emulator.
The system emulator reproduces the behavior of an entire system, including
peripherals and multiprocessors. Since the complete boot process is emulated, an
operating system is needed. There are complete development boards emulated by
QEMU. It is also ideal to test bare-metal targets or test programs that interface with
peripherals.
QEMU supports architecture such as ARM, MIPS, OpenRISC, SPARC, Alpha,
and MicroBlaze with different processor variations. You can read more at
http://qemu-project.org.
Additional resources
The official Clang documentation contains very relevant information about using
Clang as a cross-compiler. See http://clang.llvm.org/docs/CrossCompilation.
html.
[ 217 ]
Cross-platform Compilation
Summary
Cross-compilers are an important resource for developing an application for other
platforms. Clang is designed in such a way that cross-compilation is a free feature
and can be performed dynamically by the driver.
In this chapter, we present which elements compound a cross-compilation
environment and how Clang interacts with them in order to produce target
executables. We also see that a Clang cross-compiler may still be useful in some
scenarios and provide instructions on how to build, install, and use a cross-compiler.
In the next chapter, we will present the Clang static compiler and show how you can
search large code bases for common bugs.
[ 218 ]
The Clang Static Analyzer
Humans show difficulty in planning the construction of an abstract apparatus for
which they cannot easily measure the size of and quantify effort. Not surprisingly,
software projects show a remarkable history of failures owing to an unhandled
increase in complexity. If building complex software requires an unusual amount of
coordination and organization, maintaining it is perhaps an even tougher challenge.
Still, the older the software gets, the harder it becomes to maintain. It typically
reflects the effort of different generations of programmers with contrasting views.
When a new programmer is in charge of maintaining old software, it is common
practice to simply tightly wrap unintelligible old code pieces, isolate the software,
and turn it into an untouchable library.
Such complex code bases demand a new category of tools to aid programmers
in taming obscure bugs. The purpose of the Clang Static Analyzer is to offer an
automated way to analyze a large code base and lend a hand for humans to detect
a wide range of common bugs in their C, C++, or Objective-C projects, before
compilation. In this chapter, we will cover the following topics:
•
What are the differences between warnings emitted by classic compiler tools
versus the ones emitted by the Clang Static Analyzer
•
How to use the Clang Static Analyzer in simple projects
•
How to use the scan-build tool to cover large, real-world projects
•
How to extend the Clang Static Analyzer with your own bug checkers
The Clang Static Analyzer
Understanding the role of a static
analyzer
In the overall LLVM design, a project belongs to the Clang frontend if it operates
on the original source-code level (C/C++) since recovering source-level information
at the LLVM IR is challenging. One of the most interesting Clang-based tools is the
Clang Static Analyzer, a project that leverages a set of checkers to build elaborate
bug reports, similar to what compiler warnings traditionally do at a smaller scale.
Each checker tests for a specific rule violation.
As with classic warnings, a static analyzer helps the programmer in finding bugs
early in the development cycle without the need to postpone bug detection to
runtime. The analysis is done after parsing, but before further compilation. On the
other hand, the tool may require a lot of time to process a large code base, which is
a good reason why it is not integrated in the typical compilation flow. For example,
the static analyzer alone may spend hours to process the entire LLVM source code
and run all of its checkers.
The Clang Static Analyzer has at least two known competitors: Fortify and Coverity.
Hewlett Packard (HP) provides the former, while Synopsis provides the latter. Each
tool has its own strengths and limitations, but only Clang is open source, allowing
us to hack it and understand how it works, which is the goal of this chapter.
Comparing classic warnings versus the Clang
Static Analyzer
The algorithm used in the Clang Static Analyzer has exponential-time complexity,
which means that, as the program unit being analyzed grows, the required time
to process it may get very large. As with many exponential-time algorithms that
work in practice, it is bounded, which means that it is able to reduce the execution
time and memory by using problem-specific tricks, albeit it is not enough to make
it polynomial-time.
The exponential-time nature of the tool explains one of its biggest limitations:
it is only able to analyze a single compilation unit at a time and does not perform
inter-module analysis, or whole program processing. Nevertheless, it is a very
capable tool because it relies on a symbolic execution engine.
[ 220 ]
Chapter 9
To give an example of how a symbolic execution engine can help programmers
find intricate bugs, let's first present a very simple bug that most compilers can
easily detect and emit a warning. See the following code:
#include <stdio.h>
void main() {
int i;
printf ("%d", i);
}
In this code, we use a variable that was uninitialized and will cause the program output
to depend on parameters that we cannot control or predict, such as the memory
contents prior to program execution, leading to unexpected program behavior.
Therefore, a simple automated check can save a huge headache in debugging.
If you are familiar with compiler analysis techniques, you may have noticed that we
can implement this check by using a forward dataflow analysis that utilizes the union
confluence operator to propagate the state of each variable, whether it is initialized or
not. A forward dataflow analysis propagates state information about the variables
in each basic block starting at the first basic block of the function and pushing
this information to successor basic blocks. A confluence operator determines how
to merge information coming from multiple preceding basic blocks. The union
confluence operator will attribute to a basic block the result of the union of the
sets of each preceding basic block.
In this analysis, if an uninitialized definition reaches a use, we should trigger a
compiler warning. To this end, our dataflow framework will assign to each variable
in the program the following states:
•
•
•
•
The ⊥ symbol when we do not know anything about it (unknown state)
The initialized label when we know that the variable was initialized
The uninitialized label when we are sure that it was not initialized
The ⊤ symbol when the variable can be either initialized or uninitialized
(which means that we are not sure)
[ 221 ]
The Clang Static Analyzer
The following diagram shows our dataflow analysis for the simple C program that
we just presented:
We see that this information gets easily propagated across lines of code. When it
reaches the printf statement, which uses i, the framework checks what do we
know about this variable and the answer is uninitialized, providing enough evidence
to emit a warning.
Since this dataflow analysis relies on a polynomial-time algorithm, it is very fast.
To see how this simple analysis can lose precision, let's consider Joe, a programmer
who is proficient at the art of making undetectable mistakes. Joe can very easily
trick our detector and would cleverly obscure the actual variable state in separate
program paths. Let's take a look at an example from Joe.
#include <stdio.h>
void my_function(int unknownvalue) {
int schroedinger_integer;
if (unknownvalue)
schroedinger_integer = 5;
printf("hi");
if (!unknownvalue)
printf("%d", schroedinger_integer);
}
Now let's take a look at how our dataflow framework computes the state of variables
for this program:
[ 222 ]
Chapter 9
We see that, in node 4, the variable is initialized for the first time (shown in bold).
However, two different paths reach node 5: the true and the false branches of the
if statement from node 3. In one path, the variable schroedinger_integer is
uninitialized while in the other it is initialized. The confluence operator determines
how to sum the results of predecessors. Our union operator will try to keep both bits
of data, declaring schroedinger_integer as ⊤ (either).
When the detector checks node 7, which uses schroedinger_integer, it is not sure
about whether there is a bug or not in the code and that is because, according to this
dataflow analysis, schroedinger_integer may or may not have been initialized.
In other words, it is truly at a superposition of states, initialized and uninitialized.
Our simple detector can try to warn people that a value may be used without
initialization, and, in this case, it will correctly point to the bug. However, if the
condition used in the last check of Joe's code is changed to if (unknownvalue),
emitting a warning would be a false positive, because now it is exercising the path
where schroedinger_integer was indeed initialized.
This loss of precision in our detector happens because dataflow frameworks are
not path-sensitive and cannot precisely model what happens in every possible
execution path.
[ 223 ]
The Clang Static Analyzer
False positives are highly undesirable because they befuddle programmers with
lists of warnings that blame code that do not contain actual bugs and it obscures
the warnings that are actual bugs. In reality, if a detector generates even a small
quantity of false positives warnings, programmers are likely to ignore all warnings.
The power of the symbolic execution engine
The symbolic execution engine helps when simple dataflow analyses are not enough
to provide accurate information about the program. It builds a graph of reachable
program states and is able to reason about all the possible code execution paths that
may be taken when the program is running. Recall that when you run the program
to debug, you are only exercising one path. When you debug your program with a
powerful virtual machine such as valgrind to look for memory leaks, it is also only
exercising one path.
Conversely, the symbolic execution engine is able to exercise them all without
actually running your code. It is a very powerful feature, but demands large
runtimes to process programs.
Just like classic dataflow frameworks, the engine will assign initial states to each
variable that it finds when traversing the program in the order it would execute each
statement. The difference comes when reaching a control-flow-changing construct: the
engine splits the path in two and continues the analyses separately for each path. This
graph is called the reachable program states graph and a simple example is shown in
the following diagram, exposing how the engine would reason about Joe's code:
[ 224 ]
Chapter 9
In this example, the first if statement in line 6 forks the reachable states graph in
two different paths: in one path, unknown_value is not zero, while in the other,
unknown_value is definitely zero. From this part, the engine operates with this
important constraint on unknown_value and will use it to decide whether the next
branches will be taken or not.
By using this strategy, the symbolic execution engine arrives at the conclusion that
the left path in the figure will never evaluate schroedinger_integer, even though
it has been defined in this path to be 5. On the other hand, it also concludes that
the right path in the figure will evaluate schroedinger_integer to pass it as a
printf() parameter. However, in this path, the value is not initialized. By using this
graph, it reports the bug with precision.
Let's compare the reachable program states graph with a graph about the same code
that shows control flow, a control flow graph (CFG) along with the typical reasoning
that dataflow equations would provide us. See the following diagram:
[ 225 ]
The Clang Static Analyzer
The first thing you will notice is that the CFG may fork to express control flow
change, but it also merges nodes to avoid the combinatorial explosion seen in the
reachable program states graph. When it merges, dataflow analyses can use a union
or an intersection decision to merge the information coming from different paths
(node for line 5). If it uses union, we conclude that schroedinger_integer is both
uninitialized and equal to 5, as in our last example. If it uses intersection, we end up
with no information about schroedinger_integer (the unknown state).
The necessity to merge data in typical dataflow analyses is a limitation that a symbolic
execution engine does not have. This allows for much more precise results, on par with
what you would get by testing your program with several inputs, but at the cost of
increased runtime and memory consumption.
Testing the static analyzer
In this section, we will explore how to use the Clang Static Analyzer in practice.
Using the driver versus using the compiler
Before testing the static analyzer, you should always keep in mind that the command
line clang -cc1 refers directly to the compiler, while using the command line
clang will trigger the compiler driver. The driver is responsible for orchestrating
the execution of all other LLVM programs involved in a compilation, but it is also
responsible for providing adequate parameters about your system.
While using the compiler directly is preferred among some developers, sometimes
it may fail to locate system header files or other configuration parameters that only
the Clang driver knows. On the other hand, the compiler may present exclusive
developer options that allow us to debug it and see what is happening inside. Let's
check how to use both to check a single source code file.
Compiler
Driver
clang –cc1 –analyze –analyzer-checker=<package>
<file>
clang --analyze -Xanalyzer -analyzerchecker=<package> <file>
We used the tag <file> to denote the source code file that you want to analyze and
the tag <package> to allow you to select a collection of specific headers.
[ 226 ]
Chapter 9
When using the driver, notice that the --analyze flag triggers the static analyzer. The
-Xanalyzer flag, however, routes the next flag directly to the compiler, allowing you
to pass specific flags. Since the driver is an intermediary, throughout our examples we
will directly use the compiler. Moreover, in our simple examples, using the compiler
directly should suffice. If you feel that you need the driver to use the checkers in the
official way, remember to use the driver and the -Xanalyzer option before each flag
that we pass to the compiler.
Getting to know the available checkers
A checker is a single unit of analysis that the static analyzer can perform in your
code. Each analysis looks for specific bug types. The static analyzer allows you to
select any subset of checkers that suits your needs, or you can enable all of them.
If you do not have Clang installed, see Chapter 1, Build and Install LLVM,
for installation instructions. To obtain the list of installed checkers, run the
following command:
$ clang -cc1 -analyzer-checker-help
It will print a long list of installed checkers, showing all the analysis possibilities
you get with Clang out of the box. Let's now check the output of the -analyzerchecker-help command:
OVERVIEW: Clang Static Analyzer Checkers List
USAGE: -analyzer-checker <CHECKER or PACKAGE,...>
CHECKERS:
alpha.core.BoolAssignment
to Boolean variables
Warn about assigning non-{0,1} values
The name of the checkers obey the canonical form <package>.<subpackage>.<
checker>, providing an easy way for the user to run only a specific set of related
checkers.
[ 227 ]
The Clang Static Analyzer
In the following table, we show a list of the most important packages,
as well as a list of checker examples that are part of each package.
Package
Name
alpha
Content
Examples
Checkers that are currently
in development
alpha.core.BoolAssignment,
alpha.security.MallocOverflow,
and alpha.unix.cstring.
NotNullTerminated
core
Basic checkers that are
applicable in a universal
context
core.NullDereference,
core.DivideZero, and core.
StackAddressEscape
cplusplus
A single checker for C++
memory allocation (others
are currently in alpha)
cplusplus.NewDelete
debug
Checkers that output debug
information of the static
analyzer
debug.DumpCFG, debug.
DumpDominators, and debug.
ViewExplodedGraph
llvm
A single checker that checks
whether a code follows
LLVM coding standards or
not
llvm.Conventions
osx
Checkers that are specific
for programs developed for
Mac OS X
osx.API, osx.cocoa.ClassRelease,
osx.cocoa.NonNilReturnValue, and
osx.coreFoundation.CFError
security
Checkers for code that
introduces security
vulnerabilities
security.FloatLoopCounter,
security.insecureAPI.
UncheckedReturn, security.
insecureAPI.gets, and security.
insecureAPI.strcpy
unix
Checkers that are specific
to programs developed for
UNIX systems
unix.API, unix.Malloc, unix.
MallocSizeof, and unix.
MismatchedDeallocator
Let's run Joe's code, intended to fool the simple analysis that most compilers use.
First, we try the classic warnings approach. In order to do this, we simply run the
Clang driver and ask it to not proceed with the compilation, but only perform the
syntactic checks:
$ clang -fsyntax-only joe.c
[ 228 ]
Chapter 9
The syntax-only flag, intended to print warnings and check for syntax errors,
fails to detect anything wrong with it. Now it is time to test how symbolic execution
handles this:
$ clang -cc1 -analyze -analyzer-checker=core joe.c
Alternatively, if the preceding command line requires you to specify header
locations, use the driver as follows:
$ clang --analyze –Xanalyzer –analyzer-checker=core joe.c
./joe.c:10:5: warning: Function call argument is an uninitialized value
printf("%d", schroedinger_integer);
^~~~~~~~~~~~~~~~~~~~~~~~~~~~~~~~~~
1 warning generated.
Right on the spot! Remember that the analyzer-checker flag expects the fully
qualified name of a checker, or the name of an entire package of checkers. We chose
to use the entire package of core checkers, but we could have used only the specific
checker core.CallAndMessage that checks parameters of functions calls.
Note that all static analyzer commands will always start with clang -cc1
-analyzer; thus, if you are looking to know all the commands that the analyzer
offers, you can issue the following command:
$ clang -cc1 -help | grep analyzer
Using the static analyzer in the Xcode IDE
If you use the Apple Xcode IDE, you can use the static analyzer from within it. You
need to first open a project and then select the menu item Analyze in the Product
menu. You will see that the Clang Static Analyzer provides the exact path where
this bug occurs, allowing the IDE to highlight it to the programmer as seen in the
following screenshot:
[ 229 ]
The Clang Static Analyzer
The analyzer is able to export information using the plist format, which is then
interpreted by Xcode and displayed in a user-friendly manner.
Generating graphical reports in HTML
The static analyzer is also able to export an HTML file that will graphically point out
program paths in your code that exercises a dangerous behavior, in the same way as
Xcode does. We also use the -o parameter along with a folder name that indicates
where the report will be stored. For an example, check the following command line:
$ clang -cc1 -analyze -analyzer-checker=core joe.c -o report
Alternatively, you can use the driver as follows:
$ clang --analyze –Xanalyzer –analyzer-checker=core joe.c –o report
Using this command line, the analyzer will process joe.c and generate a similar
report to the one seen in Xcode, putting the HTML file in the report folder. After the
command completes, check the folder and open the HTML file to view the bug report.
You should see a report that is similar to the one shown in the following screenshot:
[ 230 ]
Chapter 9
Handling large projects
If you want the static analyzer to check a large project, you will probably be
unwilling to write a Makefile or a bash script to call the analyzer for each project
source file. The static analyzer comes with a handy tool for this, called scan-build.
Scan-build works by replacing your CC or CXX environment variable, which defines
your C/C++ compiler command, thus interfering in the regular build process of
your project. It analyzes each compiled file before compilation and then finishes the
compilation to allow the build process or script to continue working as expected.
Finally, it generates HTML reports you can view in your browser. The basic
command-line structure is pretty simple:
$ scan-build <your build command>
You are free to run any build command after scan-build, such as make. To build
Joe's program, for example, we do not need a Makefile, but we can directly supply
the compilation command:
$ scan-build gcc -c joe.c -o joe.o
After it finishes, you can run scan-view to check out the bug reports:
$ scan-view <output directory given by scan-build>
The last line printed by scan-build gives the parameter that is needed to run scanview. It refers to a temporary folder that holds all the generated reports. You should
see a nicely formatted website with error reports for each of your source files, as seen
in the following screenshot:
[ 231 ]
The Clang Static Analyzer
A real-world example – finding bugs in Apache
In this example, we will explore how easy it is to check bugs in a big project. To
exercise this, go to http://httpd.apache.org/download.cgi and fetch the source
code tar ball of the most recent Apache HTTP Server. At the time of this writing,
it was Version 2.4.9. In our example, we will download it via the console and
decompress the file in the current folder:
$ wget http://archive.apache.org/dist/httpd/httpd-2.4.9.tar.bz2
$ tar -xjvf httpd-2.4.9.tar.bz2
To examine this source code base, we will rely on scan-build. In order to do this,
we need to reproduce the steps to generate the build scripts. Notice that you do need
all dependencies necessary to compile the Apache project. After checking that you do
have all of the dependencies, use the following command sequence:
$ mkdir obj
$ cd obj
$ scan-build ../httpd-2.4.9/configure -prefix=$(pwd)/../install
We used the prefix parameter to denote a new installation path to this project and
avoid the need to have administrative privileges on the machine. However, if you are
not going to actually install Apache, you do not need to provide any extra parameter
as long as you never run make install. In our case, we defined our installation
path as a folder named install that will be created in the same directory where we
downloaded the compressed source. Notice that we also prefixed this command with
scan-build, which will override the CC and CXX environment variables.
After the configure script creates all the Makefiles, it is time to launch the actual
build process. But instead of running just make, we intercept it with scan-build:
$ scan-build make
[ 232 ]
Chapter 9
Since the Apache code is very large, it took us several minutes to finish the analysis
and we found 82 bugs. This is an example scan-view report:
[ 233 ]
The Clang Static Analyzer
After the infamous heartbleed bug hit all the OpenSSL implementations and all the
attention this problem got, it is interesting to see that the static analyzer could still
find six possible bugs in the Apache SSL implementation files modules/ssl/ssl_
util.c and modules/ssl/ssl_engine_config.c. Please note that these occurrences
may refer to paths that are never executed in practice and may not be real bugs, since
the static analyzer works in a limited scope to finish the analysis in acceptable time
frames. Thus, we do not claim that these are real bugs. We present here an example
of an assigned value that is garbage or undefined:
In this example, we see that the static analyzer showed us an execution path that
finishes by assigning an undefined value to dc->nVerifyClient. Part of this path
goes through the call to the ssl_cmd_verify_parse() function, showing the
analyzer capability of checking complex inter-procedural paths within the same
compilation module. In this helper function, the static analyzer shows a path
where mode is not assigned to any value and, therefore, remains uninitialized.
[ 234 ]
Chapter 9
The reason this may not be a real bug is because the code in ssl_cmd_
verify_parse() may handle all cases of input cmd_parms that
actually happen in this program (note the context dependence) correctly
initializing mode in all of them. What scan-build did find is that
this module, in isolation, may lead to this buggy path, but we have no
evidence that the users of this module use the buggy inputs. The static
analyzer is not powerful enough to analyze this module in the context
of the entire project because such analysis would require an impractical
time to finish (remember the exponential complexity of the algorithm).
While this path has 11 steps, the longest path that we found in Apache has 42 steps.
This path happened in the modules/generators/mod_cgid.c module and violates a
standard C API call: it calls the strlen() function with a null pointer argument.
If you are curious to see all these reports in detail, do not hesitate to run the
commands yourself.
Extending the static analyzer with your
own checkers
Thanks to its design, we can easily extend the static analyzer with custom checkers.
Remember that a static analyzer is as good as its checkers, and if you want to analyze
whether any code uses one of your APIs in an unintended way, you need to learn
how to embed this domain-specific knowledge into the Clang Static Analyzer.
Getting familiar with the project architecture
The Clang Static Analyzer source code lives at llvm/tools/clang. The include
files are at include/clang/StaticAnalyzer, and the source code can be found at
lib/StaticAnalyzer. If you look at the folder content, you will observe that the
project is split into three different subfolders: Checkers, Core, and Frontend.
The task of the core is to simulate program execution at the source-code level and,
using a visitor pattern, to call registered checkers at each program point (prior or after
an important statement) to enforce a given invariant. For example, if your checker
ensures that the same allocated memory region is not freed twice, it would observe
calls to malloc() and free(), generating a bug report when it detects a double free.
[ 235 ]
The Clang Static Analyzer
A symbolic engine cannot simulate the program with exact program values as those
you see when a program is running. If you ask the user to input an integer value,
you will definitely know, in a given run, that this value is 5, for example. The power
of a symbolic engine is to reason about what happens in every possible outcome of
the program and, to accomplish this noble goal, it works with symbols (SVals) rather
than concrete values. A symbol may correspond to any number in the integer range,
any floating-point, or even a completely unknown value. The more information it
has about the value, the more powerful it is.
Three important data structures that are key in understanding the project
implementation are ProgramState, ProgramPoint, and ExplodedGraph. The
first represents the current execution context with respect to the current state. For
example, when analyzing Joe's code, it would annotate that a given variable has the
value 5. The second represents a specific point in the program flow, either before or
after a statement, for example, the point after assigning 5 to an integer variable. The
last represents the entire graph of reachable program states. Additionally, the nodes
of this graph are represented by a tuple of ProgramState and ProgramPoint, which
means that each program point has a specific state associated with it. For example,
the point after assigning 5 to an integer variable has the state linking this variable to
the number 5.
As already pointed out at the beginning of this chapter, ExplodedGraph, or in
other words, the reachable states graph, represents a significant expansion over the
classic CFG. Notice that a small CFG with two successive but non-nested ifs would
explode, in the reachable state graphs representation, to four different paths—a
combinatorial expansion. To save space, this graph is folded, which means that if
you create a node that represents the same program point and state as the ones in
another node, it does not allocate a new one, but reuses this existing node, possibly
building cycles. To implement this behavior, ExplodedNode inherits from the LLVM
library superclass llvm::FoldingSetNode. The LLVM library already includes a
common class for these situations because folding is extensively used in the middle
and backend of the compiler when representing programs.
The static analyzer's overall design can be divided into the following parts: the
engine, which follows a simulation path and manages the other components; the
state manager, taking care of ProgramState objects; the constraint manager, working
on deducing constraints on ProgramState caused by following a given program
path; and the store manager, taking care of the program storage model.
Another important aspect of the analyzer is how to model the memory behavior
when simulating program execution along each path. This is quite challenging to do
in languages such as C and C++ because they offer many ways for the programmer
to access the same piece of memory, introducing aliases.
[ 236 ]
Chapter 9
The analyzer implements a regional memory model described in a paper by Xu
et al. (see references at the end of this chapter), which is even able to differentiate
the state of each element of an array. Xu et al. propose a hierarchy of memory
regions in which, for example, an array element is a subregion of the array, which
is a subregion of the stack. Each lvalue in C, or, in other words, each variable or
dereferenced reference, has a corresponding region that models the piece of memory
they are working on. The content of each memory region, on the other hand, are
modeled with bindings. Each binding associates a symbolic value with a region of
memory. We know that this is too much information to absorb, so let's digest it in the
best way possible—by writing code.
Writing your own checker
Let's consider that you are working on a specific embedded software that controls
a nuclear reactor and that relies on an API with two basic calls: turnReactorOn()
and SCRAM() (turn the reactor off). A nuclear reactor contains fuel, where the
reaction happens, and control rods, which contain neutron absorbers to slow
down the reaction and keep the reactor under the power plant category rather
than the nuclear bomb one.
Your client advises you that calling SCRAM() twice may jam the control rods, and
calling turnReactorOn() twice causes the reaction to go out of control. This is an
API with strict usage rules, and your mission is to audit a large code base before it
goes into production to ensure that it never violates these rules:
•
No code path may call SCRAM() more than once without intervening
turnReactorOn()
•
No code path may call turnReactorOn() more than once without
intervening SCRAM()
As an example, consider the following code:
int SCRAM();
int turnReactorOn();
void test_loop(int wrongTemperature, int restart) {
turnReactorOn();
if (wrongTemperature) {
SCRAM();
}
if (restart) {
SCRAM();
}
[ 237 ]
The Clang Static Analyzer
turnReactorOn();
// code to keep the reactor working
SCRAM();
}
This code violates the API if both wrongTemperature and restart are different than
zero because that would result in calling SCRAM() two times without any intervening
turnReactorOn() call. It also violates the API if both parameters are zero because
then the code will call turnReactorOn() twice without any intervening SCRAM() call.
Solving the problem with a custom checker
You can either try to visually inspect the code, which is very tedious and
error-prone, or use a tool such as the Clang Static Analyzer. The problem is, it
does not understand the Nuclear Power Plant API. We will overcome this by
implementing a special checker.
Our first step is to establish the concepts for our state model regarding the
information we want to propagate across different program states. In this problem,
we are concerned with whether the reactor is on or off. We may not know whether
the reactor is on or off; thus, our state model contains three possible states: unknown,
on, and off.
Now we have a decent idea on how our checker will work on states.
Writing the state class
Let's put this into practice. We will base our code on SimpleStreamChecker.cpp,
a sample checker available in the Clang tree.
In lib/StaticAnalyzer/Checkers, we should create a new file, ReactorChecker.
cpp, and start by coding our own class that represents the state that we are interested
in tracking:
#include "ClangSACheckers.h"
#include "clang/StaticAnalyzer/Core/BugReporter/BugType.h"
#include "clang/StaticAnalyzer/Core/Checker.h"
#include "clang/StaticAnalyzer/Core/PathSensitive/CallEvent.h"
#include "clang/StaticAnalyzer/Core/PathSensitive/CheckerContext.h"
using namespace clang;
using namespace ento;
class ReactorState {
private:
[ 238 ]
Chapter 9
enum Kind {On, Off} K;
public:
ReactorState(unsigned InK): K((Kind) InK) {}
bool isOn() const { return K == On; }
bool isOff() const { return K == Off; }
static unsigned getOn() { return (unsigned) On; }
static unsigned getOff() { return (unsigned) Off; }
bool operator==(const ReactorState &X) const {
return K == X.K;
}
void Profile(llvm::FoldingSetNodeID &ID) const {
ID.AddInteger(K);
}
};
The data part of our class is restricted to a single instance of Kind. Notice that the
ProgramState class will manage the state information that we are writing.
Understanding ProgramState immutability
An interesting observation about ProgramState is that it is designed to be
immutable. Once built, it should never change: it represents the state calculated for
a given program point in a given execution path. Differing from dataflow analyses
that process a CFG, in this case, we deal with the reachable program states graph,
which has a different node for every different pair of program point and state. In this
way, if the program loops, the engine will create an entirely new path that records
relevant information about this new iteration. Conversely, in a dataflow analysis, a
loop causes the state of the loop body to be updated with new information until a
fixed point is reached.
However, as stressed earlier, once the symbolic engine reaches a node that represents
the same program point of a given loop body that has the same state, it concludes
that there is no new information to process in this path and reuses the node instead
of creating a new one. On the other hand, if your loop has a body that constantly
updates the state with new information, you will soon reach a limitation of the
symbolic engine: it will give up this path after simulating a predefined number of
iterations, which is a configurable number when you launch the tool.
Dissecting the code
Since state is immutable once created, our ReactorState class does not need setters,
or class member functions that can change its state, but we do need constructors.
That is the purpose of the ReactorState(unsigned InK) constructor, which
receives as input an integer encoding the current reactor state.
[ 239 ]
The Clang Static Analyzer
Finally, the Profile function is a consequence of the ExplodedNode being a subclass
of FoldingSetNode. All subclasses must provide such methods to aid the LLVM
folding to track the state of the node and determine if two nodes are equal (in which
case they are folded). Therefore, our Profile function explains that K, a number,
gives our state.
You can use any of the FoldingSetNodeID member functions starting with Add to
inform unique bits that identify this object instance (see llvm/ADT/FoldingSet.h).
In our case, we used AddInteger().
Defining the Checker subclass
Now it is time to declare our Checker subclass:
class ReactorChecker : public Checker<check::PostCall> {
mutable IdentifierInfo *IIturnReactorOn, *IISCRAM;
OwningPtr<BugType> DoubleSCRAMBugType;
OwningPtr<BugType> DoubleONBugType;
void initIdentifierInfo(ASTContext &Ctx) const;
void reportDoubleSCRAM(const CallEvent &Call,
CheckerContext &C) const;
void reportDoubleON(const CallEvent &Call,
CheckerContext &C) const;
public:
ReactorChecker();
/// Process turnReactorOn and SCRAM
void checkPostCall(const CallEvent &Call, CheckerContext &C) const;
};
Clang version notice – Starting with Clang 3.5, the OwningPtr<>
template was deprecated in favor of the standard C++
std::unique_ptr<> template. Both templates provide smart
pointer implementations.
The first lines of our class specify that we are using a subclass of Checker with
a template parameter. For this class, you can use multiple template parameters
and they express the program points that your checker is interested in visiting.
Technically, the template parameters are used to derive a custom Checker class
that is a subclass of all of the classes specified as parameters. This means that, in
our case, our checker will inherit PostCall from the base class. This inheritance
is used to implement the visitor pattern that will call us only for the objects that
we are interested and, as a consequence, our class must implement the member
function checkPostCall.
[ 240 ]
Chapter 9
You may be interested in registering your checker to visit a wide variety of types of
program points (check CheckerDocumentation.cpp). In our case, we are interested
in visiting the program points immediately after a call because we want to document
a change of state after one of the nuclear power plant API functions gets called.
These member functions use the keyword const, respecting the design that relies on
the checker being stateless. However, we do want to cache the results of retrieving
IdentifierInfo objects that represent the symbol turnReactorOn() and SCRAM().
In this way, we use the mutable keyword, created to bypass const restrictions.
Use the mutable keyword with care. We are not harming the
checker design because we are only caching results to make a faster
computation after the second call to our checker, but conceptually our
checker is still stateless. The mutable keyword should only be used
for mutexes or such caching scenarios.
We also want to inform the Clang infrastructure that we are handling a new type of
bug. In order to do this, we must hold new instances of BugType, one for each new
bug we are going to report: the bug that occurs when the programmer calls SCRAM()
twice and the one that happens when the programmer calls turnReactorOn()
twice. We also use the OwningPtr LLVM class to wrap our object, which is just an
implementation of an automatic pointer, used to automatically de-allocate our object
once our ReactorChecker object gets destroyed.
You should wrap the two classes that we just wrote, ReactorState and
ReactorChecker, in an anonymous namespace. This saves our linker from exporting
these two data structures that we know will be used only locally.
Writing the Register macro
Before we dive into the class implementation, we must call a macro to expand the
ProgramState instance used by the analyzer engine with our custom state:
REGISTER_MAP_WITH_PROGRAMSTATE(RS, int, ReactorState)
Note that this macro does not use a semicolon at the end. This associates a new
map with each ProgramState instance. The first parameter can be any name that
you will use later to refer to this data, the second parameter is the type of map key,
and the third parameter is the type of object that we will store (in our case, our
ReactorState class).
[ 241 ]
The Clang Static Analyzer
Checkers typically use maps to store their state because it is common to associate
a new state with a particular resource, for example, the state of each variable,
initialized or uninitialized in our detector from the beginning of this chapter. In this
case, the key of the map would be a variable name and the stored value would be a
custom class that models the state uninitialized or initialized. For additional ways
to register information into the program state, check out the macro definitions in
CheckerContext.h.
Note that we do not really need a map because we will always store only one state
per program point. Therefore, we will always use the key 1 to access our map.
Implementing the Checker subclass
Our checker class constructor is implemented as follows:
ReactorChecker::ReactorChecker() : IIturnReactorOn(0), IISCRAM(0) {
// Initialize the bug types.
DoubleSCRAMBugType.reset(
new BugType("Double SCRAM",
"Nuclear Reactor API Error"));
DoubleONBugType.reset(new BugType("Double ON",
"Nuclear Reactor API Error"));
}
Clang version notice – Starting with Clang 3.5, our BugType
constructor call needs to be changed to BugType(this,
"Double SCRAM", "Nuclear Reactor API Error") and
BugType(this, "Double ON", "Nuclear Reactor API
Error"), adding the this keyword as the first parameter.
Our constructor instantiates new BugType objects by using the reset() member
function of OwningPtr, and we give descriptions about our new kind of bug. We
also initialize the IdentifierInfo pointers. Next, it is time to define our helper
function to cache the results of these pointers:
void ReactorChecker::initIdentifierInfo(ASTContext &Ctx) const {
if (IIturnReactorOn)
return;
IIturnReactorOn = &Ctx.Idents.get("turnReactorOn");
IISCRAM = &Ctx.Idents.get("SCRAM");
}
[ 242 ]
Chapter 9
The ASTContext object holds specific AST nodes that contain types and declarations
used in the user program, and we can use it to find the exact identifier of the
functions that we are interested in monitoring. Now, we implement the visitor
pattern function, checkPostCall. Remember that it is a const function that should
not modify the checker state:
void ReactorChecker::checkPostCall(const CallEvent &Call,
CheckerContext &C) const {
initIdentifierInfo(C.getASTContext());
if (!Call.isGlobalCFunction())
return;
if (Call.getCalleeIdentifier() == IIturnReactorOn) {
ProgramStateRef State = C.getState();
const ReactorState *S = State->get<RS>(1);
if (S && S->isOn()) {
reportDoubleON(Call, C);
return;
}
State = State->set<RS>(1, ReactorState::getOn());
C.addTransition(State);
return;
}
if (Call.getCalleeIdentifier() == IISCRAM) {
ProgramStateRef State = C.getState();
const ReactorState *S = State->get<RS>(1);
if (S && S->isOff()) {
reportDoubleSCRAM(Call, C);
return;
}
State = State->set<RS>(1, ReactorState::getOff());
C.addTransition(State);
return;
}
}
The first parameter, of type CallEvent, retains information about the exact function
the program called just before this program point (see CallEvent.h), since we
registered a post-call visitor. The second parameter, of type CheckerContext, is
the only source of information about current state in this program point, since our
checker is forced to be stateless. We used it to retrieve ASTContext and initialize
our IdentifierInfo objects that are required to check the functions that we
are monitoring. We enquire the CallEvent object to check if it is a call to the
turnReactorOn() function. In case it is, we need to process the state transition to on
status.
[ 243 ]
The Clang Static Analyzer
Before doing this, we first check the state to see whether it is already on, in which
case we have a bug. Note that in the State->get<RS>(1) statement, RS is simply the
name we gave when we registered the new trait in program state, and 1 is a fixed
integer to always access the location of the map. Although we do not really need a
map in this case, by using a map, you will be able to easily extend our checker to
monitor more complex states if you want.
We recover our stored state as a const pointer because we are dealing with the
information that reaches this program point, which is immutable. It is first necessary
to check if it is a null reference, which represents the case when we do not know
whether the reactor is on or off. If it is non-null, we check if it is on and in a positive
case, we abandon further analysis to report a bug. In the other case, we create a new
state by using the ProgramStateRef set member function and supply this new state
to the addTransition() member function that will record information to create
a new edge in ExplodedGraph. The edges are only created when a state actually
changes. We employ similar logic to handle the SCRAM case.
We present the bug reporting member functions as follows:
void ReactorChecker::reportDoubleON(const CallEvent &Call,
CheckerContext &C) const {
ExplodedNode *ErrNode = C.generateSink();
if (!ErrNode)
return;
BugReport *R = new BugReport(*DoubleONBugType,
"Turned on the reactor two times", ErrNode);
R->addRange(Call.getSourceRange());
C.emitReport(R);
}
void ReactorChecker::reportDoubleSCRAM(const CallEvent &Call,
CheckerContext &C) const {
ExplodedNode *ErrNode = C.generateSink();
if (!ErrNode)
return;
BugReport *R = new BugReport(*DoubleSCRAMBugType,
"Called a SCRAM procedure twice", ErrNode);
R->addRange(Call.getSourceRange());
C.emitReport(R);
}
[ 244 ]
Chapter 9
Our first action is to generate a sink node, which, in the graph of reachable program
states, means that we hit a critical bug in this path and that we do not want to
continue analyzing this path. The next lines create a BugReport object, specifying
that we have found a new bug of the specific type DoubleOnBugType, and we are
free to add a description and supply the error node we just built. We also use the
addRange() member function that will highlight where in the source code the bug
has occurred and display it to the user.
Adding registration code
In order for the static analyzer tool to recognize our new checker, we need to define a
registration function in our source code and later add a description of our checker in
a TableGen file. The registration function appears as follows:
void ento::registerReactorChecker(CheckerManager &mgr) {
mgr.registerChecker<ReactorChecker>();
}
The TableGen file has a table of checkers. It is located, relative to the Clang source
folder, at lib/StaticAnalyzer/Checkers/Checkers.td. Before editing this file,
we need to select a package for our checker to live in. We will put it into alpha.
powerplant. Since this package does not exist yet, we will create it. Open Checkers.
td and add a new definition after all existing package definitions:
def PowerPlantAlpha : Package<"powerplant">, InPackage<Alpha>;
Next, add our newly written checker:
let ParentPackage = PowerPlantAlpha in {
def ReactorChecker : Checker<"ReactorChecker">,
HelpText<"Check for misuses of the nuclear power plant API">,
DescFile<"ReactorChecker.cpp">;
} // end "alpha.powerplant"
If you use CMake to build Clang, you should add your new source file to lib/
StaticAnalyzer/Checkers/CMakeLists.txt. If you use the GNU autotools
configure script to build Clang, you do not need to modify any other file because
the LLVM Makefile will scan for new source code files in the Checkers folder and
link them in the static analyzer checkers library.
[ 245 ]
The Clang Static Analyzer
Building and testing
Go to the folder where you built LLVM and Clang and run make. The build system
will now detect your new code, build it, and link it against the Clang Static Analyzer.
After you finish building, the command clang -cc1 -analyzer-checker-help
should list our new checker as a valid option.
A test case for our checker is managereactor.c, listed as follows (the same
presented earlier):
int SCRAM();
int turnReactorOn();
void test_loop(int wrongTemperature, int restart) {
turnReactorOn();
if (wrongTemperature) {
SCRAM();
}
if (restart) {
SCRAM();
}
turnReactorOn();
// code to keep the reactor working
SCRAM();
}
To analyze it with our new checker, we use the following command:
$ clang --analyze -Xanalyzer -analyzer-checker=alpha.powerplant
managereactor.c
The checker will display the paths that it can find to be wrong and quit. If you
ask for an HTML report, you will see a bug report similar to the one shown in
the following screenshot:
[ 246 ]
Chapter 9
Your mission is now complete: you have successfully developed a program to
automatically check for violations of a specific API rule with path-sensitivity. If you
want, you can check for the implementation of other checkers to learn more about
working in more complex scenarios, or check the resources in the following section
for more information.
[ 247 ]
The Clang Static Analyzer
More resources
You may check the following resources for more projects and other information:
•
http://clang-analyzer.llvm.org: The Clang Static Analyzer project page.
•
http://clang-analyzer.llvm.org/checker_dev_manual.html: A useful
•
http://lcs.ios.ac.cn/~xzx/memmodel.pdf: The paper A Memory Model
•
http://clang.llvm.org/doxygen/annotated.html: The Clang doxygen
•
http://llvm.org/devmtg/2012-11/videos/Zaks-Rose-Checker24Hours.
mp4: A talk explaining how to quickly build a checker, given by Anna Zaks
manual with more information for those who want to develop new checkers.
for Static Analysis of C by Zhongxing Xu, Ted Kremenek, and Jian Zhang.
It details theoretical aspects of the memory model that was implemented
in the analyzer core.
documentation.
and Jordan Rose, static analyzer developers, at the 2012 LLVM Developers'
meeting.
Summary
In this chapter, we explored how the Clang Static Analyzer differs from simple
bug detection tools that run on the compiler frontend. We provided examples
where the static analyzer is more accurate and explained that there is trade-off
between accuracy and computing time, and that the exponential-time static analyzer
algorithm is unfeasible to be integrated into the regular compiler pipeline because
of the time it needs to complete its analyses. We also presented how to use the
command-line interface to run the static analyzer on simple projects and a helper tool
called scan-build to analyze large projects. We finished this chapter by presenting
how to extend the static analyzer with your own path-sensitive bug checker.
In the next chapter, we will present Clang tools that are built on top of the LibTooling
infrastructure, which eases the process of building code-refactoring utilities.
[ 248 ]
Clang Tools with LibTooling
In this chapter, we will see how many tools use the Clang frontend as a library to
manipulate C/C++ programs for different purposes. In particular, all of them rely
on LibTooling, a Clang library that allows standalone tools to be written. In this
case, instead of writing a plugin to fit into the Clang compilation pipeline, you
design your very own tool that uses Clang parsing abilities, allowing your users to
directly call your tool. The tools presented in this chapter are available in the Clang
Extra Tools package; refer to Chapter 2, External Projects, for information on how to
install them. We will finish this chapter with a working example of how to create
your own code-refactoring tool. We will cover the following topics:
•
Generating a compile command database
•
Understanding and using several Clang tools that rely on LibTooling, such
as Clang Tidy, Clang Modernizer, Clang Apply Replacements, ClangFormat,
Modularize, PPTrace, and Clang Query
•
Building your own LibTooling-based code-refactoring tool
Generating a compile command database
In general, a compiler is called from a build script, for example, Makefiles, with a
series of parameters that configure it to adequately use project headers and definitions.
These parameters allow the frontend to correctly lex and parse the input source code
file. However, in this chapter, we will study standalone tools that will run on their
own, and not as part of the Clang compilation pipeline. Thus, in theory, we would
need a specific script to run our tool with the correct parameters for each source file.
Clang Tools with LibTooling
For example, the following command shows the full command line used by Make to
invoke a compiler to build a typical file from the LLVM library:
$ /usr/bin/c++
-DNDEBUG -D__STDC_CONSTANT_MACROS -D__STDC_FORMAT_MACROS
-D__STDC_LIMIT_MACROS -fPIC -fvisibility-inlines-hidden -Wall -W -Wnounused-parameter -Wwrite-strings -Wmissing-field-initializers -pedantic
-Wno-long-long -Wcovered-switch-default -Wnon-virtual-dtor -fno-rtti
-I/Users/user/p/llvm/llvm-3.4/cmake-scripts/utils/TableGen -I/Users/
user/p/llvm/llvm-3.4/llvm/utils/TableGen -I/Users/user/p/llvm/llvm-3.4/
cmake-scripts/include -I/Users/user/p/llvm/llvm-3.4/llvm/include -fnoexceptions -o CMakeFiles/llvm-tblgen.dir/DAGISelMatcher.cpp.o -c /Users/
user/p/llvm/llvm-3.4/llvm/utils/TableGen/DAGISelMatcher.cpp
In the case that you were working with this library, you would be quite unhappy
if you had to issue commands that span 10 lines of your terminal to analyze each
source file, and yet, you cannot discard a single character, since the frontend will
use every bit of this information.
To allow a tool to easily process source code files, any project that uses LibTooling
accepts a command database as the input. This command database has the correct
compiler parameters for each source file of a specific project. To make it easier,
CMake can generate this database file for you if it is called with the -DCMAKE_
EXPORT_COMPILE_COMMANDS flag. For example, suppose that you wish to run a
LibTooling-based tool on a specific source code file from the Apache project. To
obviate you from the need to pass the exact compiler flags needed to correctly
parse this file, you can generate a command database with CMake as follows:
$ cd httpd-2.4.9
$ mkdir obj
$ cd obj
$ cmake -DCMAKE_EXPORT_COMPILE_COMMANDS=ON ../
$ ln -s $(pwd)/compile_commands.json ../
This is similar to the build commands you would issue to build Apache with CMake,
but instead of actually building it, the -DCMAKE_EXPORT_COMPILE_COMMANDS=ON flag
instructs it to generate a JSON file with the compiler parameters that it would use to
compile each Apache source file. We need to create a link to this JSON file to appear
at the root Apache source folder. Then, when we run any LibTooling program
to parse a source file of Apache, it will look for parent directories until it finds
compile_commands.json in it to find the appropriate parameters to parse this file.
[ 250 ]
Chapter 10
Alternatively, if you don't want to build a compile commands database before running
your tool, you can use double dash (--) to directly pass the compiler command
you would use to process this file. This is useful if your project does not need many
parameters for compilation. For example, look at the following command line:
$ my_libtooling_tool test.c -- -Iyour_include_dir -Dyour_define
The clang-tidy tool
In this section, we will present clang-tidy as an example of a LibTooling tool and
explain how to use it. All other Clang tools will have a similar look and feel, thereby
allowing you to comfortably explore them.
The clang-tidy tool is a linter, based on Clang. In general, a linter is a tool that
analyzes code and denounces parts that do not follow best practices. It can check
for specific characteristics, such as the following:
•
Whether the code will be portable across different compilers
•
If the code follows a specific idiom or code convention
•
If the code may lead to a bug due to abuse of a dangerous language feature
In the specific case of clang-tidy, the tool is able to run two types of checkers: those
from the original Clang Static Analyzer and those specially written for clang-tidy.
Despite being able to run static analyzer checks, notice that clang-tidy and other
LibTooling-based tools are based on source code analysis, and that this is quite
different from the elaborated static analysis engine described in the previous chapter.
Rather than simulating program execution, these checks merely traverse the Clang
AST and are also much faster. Different from those of the Clang Static Analyzer,
the checks written for clang-tidy are generally targeted at checking conformance
with a particular coding convention. In particular, they check for the LLVM coding
convention and for the Google coding convention as well as other general checks.
If you follow a particular code convention, you will find clang-tidy very useful to
periodically check your code. With some effort, you can even configure it to run
directly from some text editors. However, the tool is currently in its infancy and
only implements a handful of tests.
[ 251 ]
Clang Tools with LibTooling
Using clang-tidy to check your code
In this example, we will show how to use clang-tidy to check the code that we have
written in Chapter 9, The Clang Static Analyzer. Since we wrote a plugin for the static
analyzer, if we would like to submit this checker to the official Clang source tree, we
would need to strictly follow LLVM coding conventions. It is time to check if we are
really following it. The general command-line interface of clang-tidy is as follows.
$ clang-tidy [options] <source0> [... <sourceN>] [-- <compiler command>]
You can carefully activate each checker by name in the -checks argument, but you
can also use the wildcard operator * to select many checkers that start with the same
substring. When you need to disable a checker, just use the checker name preceded
by a dash. For example, if you want to run all the checkers that belong to the LLVM
coding conventions, you should use the following command:
$ clang-tidy -checks="llvm-*" file.cpp
All the tools described in this chapter will only be available if you
install Clang together with the Clang Extra Tools repository, which is
separated from the Clang tree. If you do not have clang-tidy installed
yet, read Chapter 2, External Projects, for instructions on how to build
and install Clang Extra Tools.
Since our code is compiled together with Clang, we will need a compiler command
database. We will start by generating it. Go to the folder where your LLVM source
code is located, and create a separate sibling folder to hold the CMake files using
the following commands:
$ mkdir cmake-scripts
$ cd cmake-scripts
$ cmake -DCMAKE_EXPORT_COMPILE_COMMANDS=ON ../llvm
If you run into an unknown-source-file error that points to the code of the
checker that you created in the previous chapter, you need to update the
CMakeLists.txt file with the name of your checker source file. Use the
following command line to edit this file and then run CMake again:
$ vim ../llvm/tools/clang/lib/StaticAnalyzer/Checkers/
CMakeLists.txt
Then, create a link in the LLVM root folder to point to the compiler-command
database file.
$ ln -s $(pwd)/compile_commands.json ../llvm
[ 252 ]
Chapter 10
Now, we can finally run clang-tidy:
$ cd ../llvm/tools/clang/lib/StaticAnalyzer/Checkers
$ clang-tidy -checks="llvm-*" ReactorChecker.cpp
You should see many complaints about header files included by our checker that
does not strictly follow the LLVM rule that requires a comment after each closing
curly brackets of namespaces (see http://llvm.org/docs/CodingStandards.
html#namespace-indentation). The good news is that the code of our tool,
excluding the headers, does not violate these rules.
Refactoring tools
In this section, we present many other tools that perform code analysis and
source-to-source transformations by leveraging Clang's parsing abilities.
You should feel comfortable to use them in a way that is similar to that of
clang-tidy, relying on your commands' database to simplify their usage.
Clang Modernizer
The Clang Modernizer is a revolutionary standalone tool that aids the user
in adapting old C++ code to use the newest standards, for example, C++11.
It reaches this goal by performing the following transformations:
•
Loop convert transform: This converts older C-style for(;;) loops to the
newer range-based loop of the form for(auto &...:..)
•
Use-nullptr transform: This converts older C-style usage of NULL
or 0 constants to represent a null pointer to use the newer nullptr
C++11 keyword
•
Use-auto transform: This converts some type declarations to use the
auto keyword in specific cases, which improves code readability
•
Add-override transform: This adds the override specifier to virtual
member function declarations that override a base class function
•
Pass-By-Value transform: This uses the pass-by-value idiom in substitution
for the const reference followed by a copy
•
Replace-auto_ptr transform: This replaces uses of deprecated std::
auto_ptr by std::unique_ptr
[ 253 ]
Clang Tools with LibTooling
The Clang Modernizer is a compelling example of a source-to-source transformation
tool that is made possible by the Clang LibTooling infrastructure. To use it, observe
the following template:
$ clang-modernize [<options>] <source0> [... <sourceN>] [-- <compiler
command>]
Notice that if you do not provide any extra option besides the source file name,
this tool will directly patch the source file with all transformations. Use the
-serialize-replacements flag to force the suggestions to be written onto a
disk, allowing you to read them before applying. There is a special tool to apply
these on-disk patches, which we will present next.
Clang Apply Replacements
The development of Clang Modernizer (previously, C++ migrator) led to discussions
on how to coordinate source-to-source transformations on a large code base. For
instance, when analyzing different translation units, the same header files may be
analyzed multiple times.
An option to handle this is to serialize the replacement suggestions and write them in
a file. A second tool will be responsible for reading these suggestion files, discarding
conflicting and duplicated suggestions, and applying the replacement suggestions to
the source files. This is the purpose of Clang Apply Replacements, which was born to
aid Clang Modernizer in the task of fixing large code bases.
Both Clang Modernizer, which produces replacement suggestions, and Clang Apply
Replacements, which consumes these suggestions, work with a serialized version of
the clang::tooling::Replacement class. This serialization uses the YAML format,
which can be defined as a superset of JSON that is easier to read for humans.
Patch files, used by code revision tools, are precisely a form of serialization of
suggestions, but Clang developers chose to use YAML to work directly with a
serialization of the Replacement class and avoid parsing a patch file.
Therefore, the Clang Apply Replacements tool is not intended to be a generalpurpose code-patching tool, but a rather specialized one, focusing on committing
changes made by Clang tools that rely on the tooling API. Notice that if you are
writing a source-to-source transformation tool, it is only necessary to use Clang
Apply Replacements if you wish to coordinate multiple suggestions with deduplication capabilities. Otherwise, you would simply patch the source files directly.
[ 254 ]
Chapter 10
To see Clang Apply Replacements in action, we first need to use Clang Modernizer
and force it to serialize its suggestions. Suppose we want to transform the following
C++ source file test.cpp to use newer C++ standards:
int main() {
const int size = 5;
int arr[] = {1,2,3,4,5};
for (int i = 0; i < size; ++i) {
arr[i] += 5;
}
return 0;
}
According to the Clang Modernizer user's manual, it is safe to transform this loop
to use the newer auto iterator. For that, we need to use the loop transformation of
Clang Modernizer:
$ clang-modernize -loop-convert -serialize-replacements test.cpp
--serialize-dir=./
The last parameter is optional and specifies that the current folder will be used to
store the replacement files. If we do not specify it, the tool will create a temporary
folder to be later consumed by Clang Apply Replacements. Since we dumped all the
replacements to the current folder, you are free to analyze the generated YAML files.
To apply, simply run clang-apply-replacements with the current folder as its only
parameter:
$ clang-apply-replacements ./
After running this command, if you get the error message "trouble
iterating over directory ./: too many levels of symbolic links", you
can retry the last two commands by using /tmp as the folder to store
the replacement files. Alternatively, you can create a new directory to
hold these files, allowing you to easily analyze them.
Beyond this simple example, these tools are usually crafted to work in large code
bases. Therefore, Clang Apply Replacements will not ask any questions, but will
simply start parsing all YAML files that are available in the folder you specified,
analyzing and applying the transformations.
You can even specify specific coding standards that the tool must follow when
patching, that is, writing new code into the source files. This is the purpose of the
-style=<LLVM|Google|Chromium|Mozilla|Webkit> flag. This functionality is a
courtesy of the LibFormat library, which allows any refactoring tool to write new
code in a specific format or coding convention. We will present more details about
this notable feature in the next section.
[ 255 ]
Clang Tools with LibTooling
ClangFormat
Imagine that you are the judge of a competition similar to the International
Obfuscated C Code Contest (IOCCC). To give you a feel of the competition,
we will reproduce the code of one of the winners of the twenty-second edition,
Michael Birken. Keep in mind that this code is licensed under Creative Commons
Attribution-ShareAlike 3.0 license, which means that you can freely modify it as
long as you maintain the license and the credits to the IOCCC.
[ 256 ]
Chapter 10
In case you are wondering, yes, this is valid C code. Access http://www.ioccc.
org/2013/birken to download it. Now, let us demonstrate what ClangFormat
does for you in this example:
$ clang-format -style=llvm obf.c --
The following screenshot shows the result:
Better, right? In real life, you will fortunately not need to review obfuscated pieces of
code, but fixing formatting to respect particular coding conventions is also not a job
that humans particularly dream of. This is the purpose of the ClangFormat. It is not
only a tool, but also a library, LibFormat, which reformats code to match a coding
convention. In this way, if you create a tool that happens to generate C or C++ code,
you can leave formatting to ClangFormat while you concentrate on your project.
[ 257 ]
Clang Tools with LibTooling
Besides expanding this obviously-contrived example and performing code
indentation, ClangFormat is an ingenious tool that was carefully developed to seek
the best way to break your code into an eighty-column format and improve its
readability. If you ever stopped to think what the best way to break a long sentence
is, you will appreciate how good ClangFormat is at this task. Give it a try by setting
it up to work as an external tool of your favorite editor and configuring a hotkey to
launch it. If you use a famous editor such as Vim or Emacs, be assured that another
person already wrote custom scripts to integrate ClangFormat.
The topic of code formatting, organization, and clarity, also brings us to troublesome
issues of C and C++ codes: the abuse of header files and how to coordinate them.
We dedicate the next section to discuss a work-in-progress solution for this problem,
and how a Clang tool can aid you in adopting this new approach.
Modularize
In order to understand the goals of the Modularize project, we first need to introduce
you to the concept of modules in C and C++, which requires a digression from the
main topic of this chapter. At the time of this writing, modules are not yet officially
standardized. Readers who are not interested in how Clang is already implementing
this new idea for C/C++ projects are encouraged to skip this section and proceed to
the next tool.
Understanding C/C++ APIs' Definitions
Currently, C and C++ programs are divided into header files, for example, files with
the .h extension, and implementation files, for example, files with the .c or .cpp
extension. The compiler interprets each combination of the implementation file and
includes headers as a separate translation unit.
When programming in C or C++, if you are working on a particular implementation
file, you need to reason about which entities belong to a local scope and which
entities belong to a global scope. For example, function or data declarations that will
not be shared among different implementation files should be declared, in C, with
the keyword static, or in C++, in an anonymous namespace. It signals the linker
that this translation unit does not export these local entities, and thus, they are not
available to be used by other units.
However, if you do want to share an entity across several translation units, the
problems begin. For the sake of clarity, let us name the translation unit that exports
an entity to be the exporters and the users of these entities to be the importers. We
will also suppose that an exporter named gamelogic.c wants to export a simple
integer variable called num_lives to the importer named screen.c.
[ 258 ]
Chapter 10
The linker job
First, we will show how the linker handles symbol importing in our example.
After compiling and assembling gamelogic.c, we will have an object file called
gamelogic.o with a symbol table that says that the symbol num_lives is 4 bytes
in size and is available to be used by any other translation unit.
$ gcc -c gamelogic.c -o gamelogic.o
$ readelf -s gamelogic.o
Num
7
Value
00000000
Size
4
Type
OBJECT
Bind
GLOBAL
Vis
DEFAULT
Index
3
Name
num_lives
This table only presents the symbol of interest, omitting the rest. The readelf tool is
only available for Linux platforms that rely on ELF, the widely adopted Executable
and Linkable Format. If you use another platform, you can print the symbol table
using objdump -t. We read this table in the following way: our symbol num_lives
was assigned the seventh position in the table and occupies the first address (zero)
relative to the section of index 3 (the .bss section). The .bss section, in turn, holds
data entities that will be zero-initialized. To verify the correspondence between
section names and their indexes, print the section header with readelf -S or
objdump -h. We can also read from this table that our num_lives symbol is a
(data) object that has 4 bytes of size and is globally visible (global bind).
Similarly, the screen.o file will have a symbol table that says that this translation
unit depends on the symbol num_lives, which belongs to another translation unit.
To analyze screen.o, we will use the same commands we used for gamelogic.o:
$ gcc -c screen.c -o screen.o
$ readelf -s screen.o
Num
10
Value
00000000
Size
0
Type
NOTYPE
Bind
GLOBAL
Vis
DEFAULT
Index
UND
Name
num_lives
The entry is similar to the one seen in the exporter, but it has less information.
It has no size or type and the index that shows which ELF section contains this
symbol is marked as UND (undefined) which characterizes this translation unit as
an importer. If this translation unit gets selected to be included in the final program,
the link cannot succeed without resolving this dependency.
[ 259 ]
Clang Tools with LibTooling
The linker receives both files as inputs and patches the importer with the address of
its requested symbols, located in the exporter.
$ gcc screen.o gamelogic.o -o game
$ readelf -s game
Num
Value
Size
Type
Bind
Vis
Index
Name
60
0804a01c
4
OBJECT
GLOBAL
DEFAULT
25
num_lives
The value now reflects the complete virtual memory address of the variable when
the program gets loaded, providing the symbol's location to the code segments of
the importers, and completing the export-import agreement between two different
translation units.
We conclude that, on the linker side, the sharing of entities between multiple
translation units is simple and efficient.
The frontend counterpart
The simplicity seen in the handling of object files is not reflected in the language. In
the importer implementation, which is different from the linker, the compiler cannot
rely only on the name of the imported entities because it needs to verify that the
semantics of this translation unit do not violate the language type system; it needs to
know that num_lives is an integer. Therefore, the compiler also expects to have type
information along with the names of the imported entities. Historically, C handled
this problem by requiring header files.
Header files have type declarations along with the name of entities that will be
used across different translation units. In this model, the importer uses an include
directive to load type information about entities that it will import. However, header
files can be way more flexible than necessary and can also carry, in fact, any piece of
C or C++ code, not just declarations.
Problems of relying on the C/C++ preprocessor
Different from the import directive in a language such as Java, the semantics of
the include directive are not restricted to provide the compiler with necessary
information to import symbols, but, instead, to actually expand it with more C
or C++ code that needs to be parsed. This mechanism is implemented by the
preprocessor, which blindly copies and patches code before the actual compilation,
and is no smarter than a text-processing tool.
[ 260 ]
Chapter 10
This code size blowup is further complicated in C++ code where the usage of
templates encourages a full-blown class implementation to be described in header
files, which will then become a significant amount of extra C++ code injected into all
importers, users of this header file.
This puts a heavy burden on the compilation of C or C++ projects that rely on many
libraries (or externally-defined entities) because the compiler needs to parse many
header files multiple times, once for each compilation unit that uses the headers.
In retrospect, entity importing and exporting, which could be solved by
an extended symbol table, now requires careful parsing of thousands of
lines of human-written header files.
Large compiler projects typically use a precompiled header scheme to avoid lexing
each header again, for example, Clang with PCH files. However, this only mitigates
the problem, since the compiler still needs to, for example, reinterpret the entire
header in light of possible new macro definitions, and affects the way in which the
current translation unit sees this header.
For example, suppose that our game implements gamelogic.h in the following way:
#ifdef PLATFORM_A
extern uint32_t num_lives;
#else
extern uint16_t num_lives;
#endif
When screen.c includes this file, the type of the imported entity num_lives
depends on whether the macro PLATFORM_A is defined or not in the context of the
translation unit screen.c. Further, this context is not necessarily the same for
another translation unit. This forces the compiler to load the extra code in headers
every time a different translation unit includes them.
To tame C/C++ importing and how library interfaces are written, modules propose
a new method for describing this interface and are part of an on-going discussion
for standardization. Furthermore, the Clang project is already implementing
support for modules.
Understanding the working of modules
Instead of including header files, your translation unit can import a module, which
defines a clear and unambiguous interface to use a specific library. An import
directive would load the entities exported by a given library without injecting extra
C or C++ code into your compilation unit.
[ 261 ]
Clang Tools with LibTooling
However, there is no currently-defined syntax for imports, which is still an on-going
discussion of the C++ standardization committee. Currently, Clang allows you to
pass an extra flag called -fmodules, which will interpret include as a module's
import directive when you are including a header file that belongs to a moduleenabled library.
When parsing header files that belong to a module, Clang will spawn a new
instance of itself with a clean state of the preprocessor to compile these headers,
caching the results in a binary form to enable faster compilation of subsequent
translation units that depend on the same set of header files that make a specific
module. Therefore, the header files that aim at being part of a module should not
depend on previously-defined macros or any other prior state of the preprocessor.
Using modules
To map a set of header files to a specific module, you can define a separate file called
module.modulemap, which provides this information. This file should be placed in
the same folder as that of the include files that define the API of a library. If this file
is present and Clang is invoked with -fmodules, the compilation will use modules.
Let's extend our simple game example to use modules. Suppose that the game
API is defined in two header files, gamelogic.h and screenlogic.h. The main
file game.c imports entities from both files. The contents of our game API source
code are the following:
•
Contents of the gamelogic.h file:
extern int num_lives;
•
Contents of the screenlogic.h file:
extern int num_lines;
•
Contents of the gamelogic.c file:
int num_lives = 3;
•
Contents of the screenlogic.c file:
int num_lines = 24;
Also, in our game API, whenever the user includes the gamelogic.h header file, it
will also want to include screenlogic.h to print game data on the screen. Thus,
we will structure our logical modules to express this dependency. The module.
modulemap file for our project is, therefore, defined as follows:
module MyGameLib {
explicit module ScreenLogic {
[ 262 ]
Chapter 10
header
}
explicit
header
export
}
"screenlogic.h"
module GameLogic {
"gamelogic.h"
ScreenLogic
}
The module keyword is followed by the name you wish to use to identify it. In our
case, we named it MyGameLib. Each module can have a list of enclosed submodules.
The explicit keyword is used to tell Clang that this submodule is only imported if
one of its header files is explicitly included. Afterwards, we use the header keyword
to name which C header files make up this submodule. You can list many header
files to represent a single submodule, but here, we use only one for each one of our
submodules.
Since we are using modules, we can take advantage of them to make our life easier
and our include directives simpler. Note that in the scope of the GameLogic
submodule, by using the export keyword followed by the name of the ScreenLogic
submodule, we are saying that whenever the user imports the GameLogic
submodule, we also make visible the symbols of ScreenLogic.
To demonstrate this, we will write game.c, the user of this API, as follows:
// File: game.c
#include "gamelogic.h"
#include <stdio.h>
int main() {
printf("lives= %d\nlines=%d\n", num_lives, num_lines);
return 0;
}
Notice that we are using the symbols num_lives, defined in gamelogic.h, and
num_lines, defined in screenlogic.h, which are not explicitly included. However,
when clang with the -fmodules flag parses this file, it will convert the first include
directive to have the effect of an import directive of the GameLogic submodule,
which prompts for the symbols defined in ScreenLogic to be available. Therefore,
the following command line should correctly compile this project:
$ clang -fmodules game.c gamelogic.c screenlogic.c -o game
[ 263 ]
Clang Tools with LibTooling
On the other hand, invoking Clang without the modules system will cause it to
report the missing symbol definition:
$ clang game.c gamelogic.c screenlogic.c -o game
screen.c:4:50: error: use of undeclared identifier 'num_lines'; did you
mean 'num_lives'?
printf("lives= %d\nlines=%d\n", num_lives, num_lines);
^~~~~~~~~
num_lives
However, keep in mind that you would like to make your projects to be as portable
as possible, and therefore, it is interesting to avoid such scenarios that are correctly
compiled with modules but not without them. The best scenarios for the adoption
of modules are to simplify the utilization of a library API and to speed up the
compilation of translation units that rely on many common headers.
Understanding Modularize
A good example would be to adapt an existing big project to use modules instead
of including header files. In this way, remember that in the modules framework,
the header files pertaining to each submodule are independently compiled. Many
projects that rely on, for example, macros that are defined in other files prior to the
inclusion, would fail to be ported to use modules.
The purpose of modularize is to help you in this task. It analyzes a set of header
files, and reports if they provide duplicate variable definitions, duplicate macro
definitions, or macro definitions that may evaluate to different results depending
on the preprocessor's state. It helps you diagnose common impediments to create a
module out of a set of header files. It also detects when your project uses include
directives inside namespace blocks, which also forces the compiler to interpret
include files in a different scope that is incompatible with the concept of modules.
In this, the symbols defined in the header files must not depend on the context where
the header was included.
Using Modularize
To use modularize, you must provide a list of header files that will be checked
against each other. Continuing with our game project example, we would write a
new text file called list.txt as follows:
gamelogic.h
screenlogic.h
[ 264 ]
Chapter 10
Then, we simply run modularize with the list as a parameter:
$ modularize list.txt
If you change one of the header files to define the same symbol of the other,
modularize will report that you are relying on unsafe behavior for modules and that
you should fix your header files before trying to write a module.modulemap file for
your project. When fixing your header files, keep in mind that each header file should
be as independent as possible and that it should not change the symbols it defines,
depending on which values were defined in the file that included this header. If you
rely on this behavior, you should break this header file into two or more, each one
defining the symbols that the compiler sees when using a specific set of macros.
Module Map Checker
The Module Map Checker Clang tool allows you to check a module.modulemap file
to ensure that it covers all header files in a folder. You invoke it in our example from
the previous section with the following command:
$ module-map-checker module.modulemap
The preprocessor was at the crux of our discussion about using include directives
versus modules. In the next section, we present a tool that helps you in tracing the
activity of this peculiar frontend component.
PPTrace
Look at the following quote from the Clang documentation on
clang::preprocessor at http://clang.llvm.org/doxygen/
classclang_1_1Preprocessor.html:
Engages in a tight little dance with the lexer to efficiently preprocess tokens.
As already pointed out in Chapter 4, The Frontend, the lexer class in Clang performs
the first pass in analyzing the source files. It groups chunks of text into categories
that will later be interpreted by the parser. The lexer class has no information on
semantics, which is the responsibility of the parser, and about the included header
files and macros expansions, which is the responsibility of the preprocessor.
The pp-trace Clang standalone tool outputs a trace of the preprocessor actions. It
accomplishes this by implementing callbacks of the clang::PPCallbacks interface.
It starts by registering itself as an observer of the preprocessor and then launches
Clang to analyze the input files. For each preprocessor action, such as interpreting
an #if directive, importing a module, and including a header file, among others, the
tool will print a report in the screen.
[ 265 ]
Clang Tools with LibTooling
Consider the following contrived "hello world" example in C:
#if 0
#include <stdio.h>
#endif
#ifdef CAPITALIZE
#define WORLD "WORLD"
#else
#define WORLD "world"
#endif
extern int write(int, const char*, unsigned long);
int main() {
write(1, "Hello, ", 7);
write(1, WORLD, 5);
write(1, "!\n", 2);
return 0;
}
In the first lines of the preceding code, we use a preprocessor directive #if that
always evaluates to false, forcing the compiler to ignore the contents of the source
block until the next #endif directive. Next, we use the #ifdef directive to check if
the CAPITALIZE macro has been defined. Depending on whether it is defined or not,
the macro WORLD will be defined as an uppercase or lowercase string that contains
world. Last, the code issues a series of calls to the write system call to output a
message on the screen.
We run pp-trace as we would run other similar source analyzing Clang
standalone tools:
$ pp-trace hello.c
The result is a series of preprocessor events regarding macro definitions that take
place even before our actual source file is processed. The last events concern our
specific file and appear as follows:
- Callback: If
Loc: "hello.c:1:2"
ConditionRange: ["hello.c:1:4", "hello.c:2:1"]
ConditionValue: CVK_False
- Callback: Endif
Loc: "hello.c:3:2"
[ 266 ]
Chapter 10
IfLoc: "hello.c:1:2"
- Callback: SourceRangeSkipped
Range: ["hello.c:1:2", "hello.c:3:2"]
- Callback: Ifdef
Loc: "hello.c:5:2"
MacroNameTok: CAPITALIZE
MacroDirective: (null)
- Callback: Else
Loc: "hello.c:7:2"
IfLoc: "hello.c:5:2"
- Callback: SourceRangeSkipped
Range: ["hello.c:5:2", "hello.c:7:2"]
- Callback: MacroDefined
MacroNameTok: WORLD
MacroDirective: MD_Define
- Callback: Endif
Loc: "hello.c:9:2"
IfLoc: "hello.c:5:2"
- Callback: MacroExpands
MacroNameTok: WORLD
MacroDirective: MD_Define
Range: ["hello.c:13:14", "hello.c:13:14"]
Args: (null)
- Callback: EndOfMainFile
The first event refers to our first #if preprocessor directive. This region triggers three
callbacks: If, Endif, and SourceRangeSkipped. Notice that the #include directive
inside it was not processed, but skipped. Similarly, we see the events related to the
definition of the WORLD macro: IfDef, Else, MacroDefined, and EndIf. Finally,
pp-trace reports that we used the WORLD macro with the MacroExpands event
and then reached the end of file and called the EndOfMainFile callback.
After preprocessing, the next steps in the frontend are to lex and to parse.
In the next section, we present a tool that enables us to investigate the results
of the parser, the AST nodes.
Clang Query
The Clang Query tool was introduced in LLVM 3.5 and allows you to read a source
file and interactively query its associated Clang AST nodes. It's a great tool for
inspecting and learning about how the frontend represents each piece of code.
However, its main goal is not only to allow you to inspect the AST of a program,
but also test AST matchers.
[ 267 ]
Clang Tools with LibTooling
When writing a refactoring tool, you will be interested in using the AST matchers
library, which contains several predicates that match segments of the Clang AST
that you are interested in. Clang Query is the tool to help you in this part of the
development because it allows you to inspect which AST nodes match a specific AST
matcher. For a list of all available AST matchers, you can check the ASTMatchers.h
Clang header, but a good guess is to use camel case for the name of the class that
represents the AST node you are interested in. For example, functionDecl will
match all FunctionDecl nodes, which represent function declarations. After you
test which matchers exactly return the nodes you are interested in, you can use them
in your refactoring tool to build an automated way of transforming these nodes for
some specific purpose. We will explain how to use the AST matchers library later in
this chapter.
As an example of AST inspection, we will run clang-query in our last "hello
world" code used in PPTrace. Clang Query expects you to have a compile command
database. If you are inspecting a file that lacks a compile command database, feel
free to supply the compilation command after double dashes, or leave it empty if no
special compiler flags are required, as shown in the following command line:
$ clang-query hello.c --
After issuing this command, clang-query will display an interactive prompt,
waiting for your command. You can type the name of any AST matcher after the
match command. For example, in the following command, we ask clang-query to
display all nodes that are CallExpr:
clang-query> match callExpr()
Match #1:
hello.c:12:5: note: "root" node binds here
write(1, "Hello, ", 7);
^~~~~~~~~~~~~~~~~~~~~~
...
The tool highlights the exact point in the program corresponding to the first token
associated with the CallExpr AST node. The list of the commands that Clang Query
understands is the following:
•
help: Prints the list of commands.
•
match <matcher name> or m <matcher name>: This command traverses the
AST with the requested matcher.
[ 268 ]
Chapter 10
•
set output <(diag | print | dump)>: This command changes how to
print the node information once it is successfully matched. The first option
will print a Clang diagnostic message highlighting the node, and is the
default option. The second option will simply print the corresponding source
code excerpt that matched, while the last option will call the class dump()
member function, which is quite sophisticated for debugging, and will also
show all children nodes.
A great way to learn how a program is structured in the Clang AST is to change the
output to dump and match a high-level node. Give it a try:
clang-query> set output dump
clang-query> match functionDecl()
It will show you all instances of classes that make up the statements and expressions
of all function bodies in the C source code that you opened. On the other hand, keep
in mind that this thorough AST dump is more easily obtained by using Clang Check,
which we will present in the next section. Clang Query is more suited at crafting AST
matcher expressions and checking their results. You will later witness how Clang
Query can be an invaluable tool when helping us to craft our first code-refactoring
tool, where we will cover how to build more complicated queries.
Clang Check
The Clang Check tool is a very basic one; it has less than a few hundreds of lines of
code, which makes it easy to study. However, since it is linked against LibTooling,
it features the entire Clang's parsing abilities.
Clang Check enables you to parse C/C++ source files and dump the Clang AST or
perform basic checks. It can also apply "fix it" modifications suggested by Clang,
leveraging the rewriter infrastructure built for Clang Modernizer.
For example, supposing that you want to dump the AST of program.c, you would
issue the following command:
$ clang-check program.c -ast-dump --
Notice that Clang Check obeys the LibTooling way of reading source files and you
should either use a command database file or supply adequate parameters after the
double dash (--).
Since Clang Check is a small tool, consider it as a good example to study when
writing your own tool. We will present another small tool in the next section to
give you a feel of what small code-refactoring tools can do.
[ 269 ]
Clang Tools with LibTooling
Remove c_str() calls
The remove-cstr-calls tool is a simple source-to-source transformation tool
example, that is, a refactoring tool. It works by identifying redundant calls to c_str()
on std::string objects and rewriting the code to avoid them in specific situations.
Such redundant calls might arise when, first, building a new string object by using
the result of c_str() on another string object, such as std::string(myString.c_
str()). This could be simplified to use the string copy constructor directly, such as
std::string(myString). Secondly, when building new instances of the LLVM's
specific classes StringRef and Twine out of a string object. In these cases, it is
preferable to use the string object itself rather than the result of c_str(), using
StringRef(myString) rather than StringRef(myString.c_str()).
The entire tool fits in a single C++ file, making it another excellent, easy-to-study
example of how to use LibTooling to build a refactoring tool, which is the subject of
our next topic.
Writing your own tool
The Clang project provides three interfaces that a user can rely on to utilize Clang
features and its parsing capabilities, including syntactic and semantic analyses.
First, there is libclang, the primary way of interfacing with Clang, which provides
a stable C API and allows an external project to plug it in and have a high-level
access to the entire framework. This stable interface seeks to preserve backwards
compatibility with older versions, avoiding breaking your software when a newer
libclang is released. It is also possible to use libclang from other languages, for
example, using the Clang Python Bindings. Apple Xcode, for instance, interacts with
Clang via libclang.
Secondly, there are Clang Plugins that allow you to add your own passes during
compilation, as opposed to the offline analyses performed by tools such as Clang
Static Analyzer. It is useful when you need to perform it every time you compile
a translation unit. Therefore, you need to be concerned with the time required to
perform such analyses in order to be feasible to run it frequently. On the other
hand, integrating your analysis into a build system is as easy as adding flags to
the compiler command.
The last alternative is the one we will explore, that is, using Clang via LibTooling.
It is an exciting library that allows you to easily build standalone tools similar to
the ones presented in this chapter, targeted at code refactoring or syntax checking.
In comparison with LibClang, LibTooling has less compromise with backwards
compatibility, but allows you to have full access to the Clang AST structure.
[ 270 ]
Chapter 10
Problem definition – writing a C++ code
refactoring tool
In the remainder of this chapter, we will work on an example. Suppose that you
are launching a fictitious startup to promote a new C++ IDE called IzzyC++.
Your business plan is based on capturing users that are tired of being unable to
automatically refactor their code. You will use LibTooling to craft a simple yet
compelling C++ code-refactoring tool; it will receive as parameters a C++ member
function, a fully qualified name, and a replacement name. Its task is to find the
definition of this member function, change it to use the replacement name, and
change all invocations of such functions accordingly.
Configuring your source code location
The first step is to determine where the code of your tool will live. In the LLVM
source folder, we will create a new folder called izzyrefactor inside tools/clang/
tools/extra to hold all the files for our project. Later, expand the Makefile in the
extra folder to include your project. Simply look for the DIRS variable and add the
name izzyrefactor alongside the other Clang tool projects. You may also want to
edit the CMakeLists.txt file, in case you use CMake, and include a new line:
add_subdirectory(izzyrefactor)
Go to the izzyrefactor folder and create a new Makefile to flag the LLVM-build
system that you are building a separate tool that will live independently of other
binaries. Use the following contents:
CLANG_LEVEL := ../../..
TOOLNAME = izzyrefactor
TOOL_NO_EXPORTS = 1
include $(CLANG_LEVEL)/../../Makefile.config
LINK_COMPONENTS := $(TARGETS_TO_BUILD) asmparser bitreader support\
mc option
USEDLIBS = clangTooling.a clangFrontend.a clangSerialization.a \
clangDriver.a clangRewriteFrontend.a clangRewriteCore.a \
clangParse.a clangSema.a clangAnalysis.a clangAST.a \
clangASTMatchers.a clangEdit.a clangLex.a clangBasic.a
include $(CLANG_LEVEL)/Makefile
[ 271 ]
Clang Tools with LibTooling
This file is important for specifying all libraries that need to be linked together with
your code to enable you to build this tool. You can optionally add the line NO_INSTALL
= 1 right after the line that features TOOL_NO_EXPORTS if you do not want your new
tool to be installed alongside other LLVM tools when you run make install.
We use TOOL_NO_EXPORTS = 1 because your tool will not use any plugins, and
therefore, it does not need to export some symbols, reducing the size of the dynamic
symbol table of the final binary, and with it, the time required to dynamically link
and load the program. Notice that we finish by including the Clang master Makefile
that defines all the necessary rules to compile our project.
If you use CMake instead of the auto tools configure script, create a new
CMakeLists.txt file as well with the following contents:
add_clang_executable(izzyrefactor
IzzyRefactor.cpp
)
target_link_libraries(izzyrefactor
clangEdit clangTooling clangBasic clangAST clangASTMatchers)
Alternatively, if you do not want to build this tool inside the Clang source tree, you can
also build it as a standalone tool. Just use the same Makefile presented for the driver
tool at the end of Chapter 4, The Frontend, making a small modification. Notice which
libraries we used in the preceding Makefile, in the USEDLIBS variable, and which
libraries we are using in the Makefile from Chapter 4, The Frontend, in the CLANGLIBS
variable. They refer to the same libraries, except that USEDLIBS has clangTooling,
which contains LibTooling. Therefore, add the line -lclangTooling\ after the line
-lclang\ in the Makefile from Chapter 4, The Frontend, and you are done.
Dissecting tooling boilerplate code
All of your code will live in IzzyRefactor.cpp. Create this file and start adding the
initial boilerplate code to it, as shown in the following code:
int main(int argc, char **argv) {
cl::ParseCommandLineOptions(argc, argv);
string ErrorMessage;
OwningPtr<CompilationDatabase> Compilations (
CompilationDatabase::loadFromDirectory(
BuildPath, ErrorMessage));
if (!Compilations)
report_fatal_error(ErrorMessage);
//...
}
[ 272 ]
Chapter 10
Your main code starts with the ParseCommandLineOptions function from the
llvm::cl namespace (command-line utilities). This function will do the dirty
work of parsing each individual flag in argv for you.
It is customary for LibTooling-based tools to use a
CommonOptionsParser object to ease parsing common options
shared between all refactoring tools (see http://clang.llvm.
org/doxygen/classclang_1_1tooling_1_1CommonOptio
nsParser.html for a code example). In this example, we use the
lower-level ParseCommandLineOptions() function to illustrate
to you exactly which arguments we are going to parse and to train
you to use it for other tools that do not use LibTooling. However,
feel free to use CommonOptionsParser to ease your work
(and as an exercise to write this tool in a different way).
You will verify that all LLVM tools use the utilities provided by the cl namespace
(http://llvm.org/docs/doxygen/html/namespacellvm_1_1cl.html), and it is
really simple to define which arguments our tool recognizes in the command line.
For this, we declare new global variables of the template type opt and list:
cl::opt<string> BuildPath(
cl::Positional,
cl::desc("<build-path>"));
cl::list<string> SourcePaths(
cl::Positional,
cl::desc("<source0> [... <sourceN>]"),
cl::OneOrMore);
cl::opt<string> OriginalMethodName("method",
cl::desc("Method name to replace"),
cl::ValueRequired);
cl::opt<string> ClassName("class",
cl::desc("Name of the class that has this method"),
cl::ValueRequired);
cl::opt<string> NewMethodName("newname",
cl::desc("New method name"),
cl::ValueRequired);
Declare these five global variables before the definition of your main function.
We specialize the type opt according to what kind of data we expect to read as an
argument. For example, if you need to read a number, you would declare a new
cl::opt<int> global variable.
[ 273 ]
Clang Tools with LibTooling
To read the values of these arguments, you first need to call
ParseCommandLineOptions. Afterwards, you just need to refer to the name of
the global variable associated with the argument in a code where you expect
the associated datatype. For example, NewMethodName will evaluate the usersupplied string for this argument if your code expects a string, as in std::out <<
NewMethodName.
This works because the opt_storage<> template, a superclass of opt<>, defines a
class that inherits from the datatype it manages (string, in this case). By inheritance,
the opt<string> variable is also a string that can be used as such. If the opt<>
class template cannot inherit from the wrapped datatype (for example, there is no
int class) it will define a cast operator, for example, operator int() for the int
datatype. This has the same effect in your code; when you refer to a cl::opt<int>
variable, it can automatically cast to an integer and return the number it holds, as
supplied by the user in the command line.
We can also specify different characteristics for an argument. In our example,
we used a positional argument by specifying cl::Positional, which means that
the user will not explicitly specify it by its name, but it will be inferred based on
its relative position in the command line. We also pass a desc object to the opt
constructor, which defines a description that is exhibited to the user when they
print the help information by using the -help argument.
We also have an argument that uses the type cl::list, which differs from opt
by allowing multiple arguments to be passed, in this case, a list of source files to
process. These facilities require the inclusion of the following header:
#include "llvm/Support/CommandLine.h"
As part of LLVM coding standards, you should organize your
include statements by putting local headers first, followed by
Clang and LLVM API headers. When two headers pertain to the
same category, order them alphabetically. An interesting project
is to write a new standalone tool to do this automatically for you.
The last three global variables allow the required options to use our refactoring
tool. The first is an argument of name -method. The first string argument declares
the argument name, without dashes, while the cl::RequiredValues signals the
command-line parser, indicating that this value is required to run this program.
This argument will supply the name of the method that our tool will look for and
then change its name to the one provided in the -newname argument. The -class
argument supplies the name of the class that has this method.
[ 274 ]
Chapter 10
The next code excerpt from the boilerplate code manages a new
CompilationDatabase object. First, we need to include the header files that define
the OwningPtr class, which is a smart pointer used in LLVM libraries, that is, it
automatically de-allocates the contained pointer when it reaches the end of its scope.
#include "llvm/ADT/OwningPtr.h"
Clang version notice
Starting with Clang/LLVM Version 3.5, the OwningPtr<>
template is deprecated in favor of the C++ standard
std::unique_ptr<> template.
Second, we need to include the header file for the CompilationDatabase class,
which is the first one we use, that is officially a part of LibTooling:
#include "clang/Tooling/CompilationDatabase.h"
This class is responsible for managing the compilation database, whose configuration
was explained at the beginning of this chapter. It is a powerful list with the
compilation commands necessary to process each source file that the user is
interested in analyzing with your tool. To initialize this object, we use a factory
method called loadFromDirectory, which will load the compilation database file
from a specific build directory. This is the purpose of declaring the build path as an
argument to our tool; the user needs to specify where their sources, along with the
compilation database file, are located.
Notice that we pass two arguments to this factory member function: BuildPath,
our cl::opt object that represents a command-line object, and a recently-declared
ErrorMessage string. The ErrorMessage string will be filled with a message in
case the engine fails to load the compilation database, which we promptly display
if the factory member function did not return any CompilationDatabase object.
The llvm::report_fatal_error() function will trigger any installed LLVM
error-handling routines and quit our tool with an error code of 1. It requires the
inclusion of the following header:
#include "llvm/Support/ErrorHandling.h"
In our example, since we are abbreviating the fully qualified names of many classes,
we will also need to add several using declarations at the global scope, but you are
free to use the fully qualified names if you want:
using namespace clang;
using namespace std;
[ 275 ]
Clang Tools with LibTooling
using
using
using
using
using
namespace llvm;
clang::tooling::RefactoringTool;
clang::tooling::Replacement;
clang::tooling::CompilationDatabase;
clang::tooling::newFrontendActionFactory;
Using AST matchers
AST matchers were briefly introduced in the Clang Query section of this chapter,
but we will analyze them in greater detail here because they are very important for
writing Clang-based code-refactoring tools.
The AST matcher library allows its users to easily match subtrees of the Clang AST
that obey a specific predicate, for example, all AST nodes that represent a call to a
function of name calloc with two arguments. Looking for specific Clang AST nodes
and changing them is a fundamental task shared by every code-refactoring tool, and
the utilization of this library greatly eases the task of writing such tools.
To help us in the task of finding the right matchers for our case, we will rely on
Clang Query and on the AST matcher documentation available at http://clang.
llvm.org/docs/LibASTMatchersReference.html.
We will begin by writing a test case named wildlifesim.cpp for your tool. This
is a complex unidimensional animal life simulator where animals can walk in any
direction along a line:
class Animal {
int position;
public:
Animal(int pos) : position(pos) {}
// Return new position
int walk(int quantity) {
return position += quantity;
}
};
class Cat : public Animal {
public:
Cat(int pos) : Animal(pos) {}
void meow() {}
void destroySofa() {}
bool wildMood() {return true;}
};
int main() {
Cat c(50);
[ 276 ]
Chapter 10
c.meow();
if (c.wildMood())
c.destroySofa();
c.walk(2);
return 0;
}
We want your tool to be able to rename, for example, the walk member function to
run. Let's start Clang Query and investigate what the AST looks like in this example.
We will use the recordDecl matcher and dump the contents of all RecordDecl AST
nodes, which are responsible for representing C structs and C++ classes:
$ clang-query wildanimal-sim.cpp -clang-query> set output dump
clang-query> match recordDecl()
(...)
|-CXXMethodDecl 0x(...) <line:6:3, line 8:3> line 6:7 walk 'int (int)'
(...)
Inside the RecordDecl object that represents the Animal class, we observe that
walk is represented as a CXXMethodDecl AST node. By looking at the AST matcher
documentation, we discover that it is matched by the methodDecl AST matcher.
Composing matchers
The power of AST matchers comes from composition. If we want only MethodDecl
nodes that declare a member function named walk, we can start by matching all
named declarations with the name walk and later refine it to match only those that
are also a method declaration. The hasName("input") matcher returns all named
declarations with the name "input". You can test the composition of methodDecl
and hasName in Clang Query:
clang-query> match methodDecl(hasName("walk"))
You will see that instead of returning all the eight different method declarations
available in the code, it returns only one, the declaration of walk. Great!
Nonetheless, observe that it is not enough to change the definition of the walk
method only on the Animal class because the derived classes may overload it.
We do not want our refactoring tool to rewrite a method in a super class,
but leave other overloaded methods in derived classes unchanged.
[ 277 ]
Clang Tools with LibTooling
We need to find all classes that are named Animal or derived from it and that define
a walk method. To find all classes that have the name Animal or are derived from
it, we use the matcher isSameOrDerivedFrom(), which expects NamedDecl as a
parameter. This parameter will be supplied by a composition with a matcher that
selects all NamedDecl with a specific name, hasName(). Therefore, our query will
look like this:
clang-query> match recordDecl(isSameOrDerivedFrom(hasName("Animal")))
We also need to select only those derived classes that overload the walk method.
The hasMethod() predicate returns the class declarations that contain a specific
method. We compose it with our first query to form the following:
clang-query> match recordDecl(hasMethod(methodDecl(hasName("walk"))))
To concatenate two predicates with the semantics of an and operator (all predicates
must be valid), we use the allOf() matcher. It establishes that all matchers that are
passed as its operands must be valid. We are now ready to build our final query to
locate all declarations that we will rewrite:
clang-query> match recordDecl(allOf(hasMethod(methodDecl(hasName("wa
lk"))), isSameOrDerivedFrom(hasName("Animal"))))
With this query, we are able to precisely locate all method declarations of walk in
classes that are named Animal or derived from it.
It will allow us to change all the declaration names, but we still need to
change the method invocations. To do this, we will begin by focusing on the
CXXMemberCallExpr nodes and its matcher memberCallExpr. Give it a try:
clang-query> match memberCallExpr()
Clang Query returns four matches because our code has exactly four method
invocations: meow, wildMood, destroySofa, and walk. We are interested in locating
only the last one. We already know how to select specific named declarations by
using the hasName() matcher, but how to map named declarations to member
call expressions? The answer is to use the member() matcher to select only named
declarations that are linked with a method name, and then use the callee() matcher
to link it with a call expression. The full expression is as follows:
clang-query> match memberCallExpr(callee(memberExpr(member(hasName("wa
lk")))))
[ 278 ]
Chapter 10
However, by doing this, we are blindly selecting all method calls to walk().
We want to select only those walk calls that really map to Animal or derived classes.
The memberCallExpr() matcher accepts a second matcher as the argument. We will
use the thisPointerType() matcher to select only method calls whose called object
is a specific class. Using this principle, we build the full expression:
clang-query> match memberCallExpr(callee(memberExpr(member(hasName("wa
lk")))), thisPointerType(recordDecl(isSameOrDerivedFrom(hasName("Anim
al")))))
Putting the AST matcher predicates in the code
After we have decided which predicates to capture the right AST nodes in, it is time
to put this in the code of our tool. First, to use AST matchers, we will need to add
new include directives:
#include "clang/ASTMatchers/ASTMatchers.h"
#include "clang/ASTMatchers/ASTMatchFinder.h"
We also need to add a new using directive to make it easier to refer to these classes
(put it next to the other using directives):
using namespace clang::ast_matchers;
The second header file is necessary for using the actual finder mechanism, which
we will present shortly. Continuing to write the main function where we left off,
we start adding the remaining code:
RefactoringTool Tool(*Compilations, SourcePaths);
ast_matchers::MatchFinder Finder;
ChangeMemberDecl DeclCallback(&Tool.getReplacements());
ChangeMemberCall CallCallback(&Tool.getReplacements());
Finder.addMatcher(
recordDecl(
allOf(hasMethod(id("methodDecl",
methodDecl(hasName(OriginalMethodName)))),
isSameOrDerivedFrom(hasName(ClassName)))),
&DeclCallback);
Finder.addMatcher(
memberCallExpr(
callee(id("member",
memberExpr(member(hasName(OriginalMethodName))))),
thisPointerType(recordDecl(
[ 279 ]
Clang Tools with LibTooling
isSameOrDerivedFrom(hasName(ClassName))))),
&CallCallback);
return Tool.runAndSave(newFrontendActionFactory(&Finder));));
Clang version notice: in Version 3.5, you need to change the last line of
the preceding code to return Tool.runAndSave(newFrontendAct
ionFactory(&Finder).get()); in order for it to work.
This completes the entire code of the main function. We will present the code for the
callbacks later.
The first line of this code instantiates a new RefactoringTool object. This is
the second class that we use from LibTooling, which needs an additional
include statement:
#include "clang/Tooling/Refactoring.h"
The RefactoringTool class implements all the logic to coordinate basic tasks
of your tool, such as opening source files, parsing them, running the AST
matcher, calling your callbacks to perform an action when a match occurs and
applying all source modifications suggested by your tool. This is the reason why
after initializing all necessary objects, we end our main function with a call to
RefactoringTool::runAndSave(). We transfer control to this class to allow it to
perform all these tasks.
Next, we declare a MatchFinder object from the header that we already included.
This class is responsible for performing the matches over the Clang AST, which you
have already exercised with Clang Query. MatchFinder expects to be configured
with AST matchers and a callback function, which will be called when an AST
node matches with the provided AST matcher. In this callback, you will have the
opportunity to change the source code. The callback is implemented as a subclass of
MatchCallback, which we will explore later.
We then proceed to declare the callback objects and use the
MatchFinder::addFinder() method to correlate a specific AST matcher with a
callback. We declare two separate callbacks, one for rewriting method declarations
and another for rewriting method invocations. We named these two callbacks as
DeclCallback and CallCallback. We use the two compositions of AST matchers
that we designed in the previous section, but we substituted the class name Animal
with ClassName, which is the command-line argument that the user will utilize to
supply their class name to be refactored. Also, we substituted the method name walk
with OriginalMethodName, which is also a command-line argument.
[ 280 ]
Chapter 10
We also strategically introduced new matchers called id(), which do not change
which nodes the expression matches, but it does bind a name with a specific node.
This is very important to allow the callbacks to generate replacements. The id()
matcher takes two parameters, the first is the name of the node that you will use to
retrieve it and the second is the matcher that will capture the named AST.
In the first AST composition that is in charge of locating member declarations,
we named the MethodDecl node that identifies the method. In the second AST
composition that is in charge of locating calls to member functions, we named the
CXXMemberExpr node that is linked with the member function called.
Writing the callbacks
You need to define the action to perform when the AST nodes are matched.
We perform this by creating two new classes that derive from MatchCallback,
one for each match.
class ChangeMemberDecl : public
ast_matchers::MatchFinder::MatchCallback{
tooling::Replacements *Replace;
public:
ChangeMemberDecl(tooling::Replacements *Replace) :
Replace(Replace) {}
virtual void run(const ast_matchers::MatchFinder::MatchResult
&Result) {
const CXXMethodDecl *method =
Result.Nodes.getNodeAs<CXXMethodDecl>("methodDecl");
Replace->insert(Replacement(
*Result.SourceManager,
CharSourceRange::getTokenRange(
SourceRange(method->getLocation())), NewMethodName));
}
};
class ChangeMemberCall : public
ast_matchers::MatchFinder::MatchCallback{
tooling::Replacements *Replace;
public:
ChangeMemberCall(tooling::Replacements *Replace) :
Replace(Replace) {}
virtual void run(const ast_matchers::MatchFinder::MatchResult
&Result) {
const MemberExpr *member =
[ 281 ]
Clang Tools with LibTooling
Result.Nodes.getNodeAs<MemberExpr>("member");
Replace->insert(Replacement(
*Result.SourceManager,
CharSourceRange::getTokenRange(
SourceRange(member->getMemberLoc())), NewMethodName));
}
};
Both classes privately store a reference to a Replacements object, which is just a
typedef for std::set<Replacement>. The Replacement class stores information
about which lines need to be patched, in which file and with which text. Its
serialization was discussed in our introduction to the Clang Apply Replacements
tool. The RefactoringTool class internally manages the set of Replacement objects
and that is the reason why we use the RefactoringTool::getReplacements()
method to obtain this set and initialize our callbacks in the main function.
We define a basic constructor with a pointer to the Replacements objects that we
will store for later use. We will implement the action of the callback by overriding
the run() method, and its code is, again, surprisingly simple. Our function receives a
MatchResult object as a parameter. The MatchResult class stores, for a given match,
all the nodes that were bound by a name as solicited by our id() matcher.
These nodes are managed in the BoundNodes class, which are publicly visible in
a MatchResult object with the name of Nodes. Thus, our first action in the run()
function is to obtain our node of interest by calling the specialized method BoundNo
des::getNodeAs<CXXMethodDecl>. As a result, we obtain a reference to a read-only
version of the CXXMethodDecl AST node.
After having access to this node, to determine how to patch the code, we need a
SourceLocation object that tells us the exact lines and columns that the associated
token occupies in the source file. CXXMethodDecl inherits from the super class
Decl, which represents generic declarations. This generic class makes available the
Decl::getLocation() method, which returns exactly the SourceLocation object
that we want. With this information, we are ready to create our first Replacement
object and insert it into the list of source changes suggested by our tool.
The Replacement constructor that we use requires three parameters: a reference to
a SourceManager object, a reference to a CharSourceRange object, and the string
that contains the new text to be written at the location pointed by the first two
parameters. The SourceManager class is a general Clang component that manages
the source code loaded into memory. The CharSourceRange class contains useful
code that analyzes a token and derives a source range (two points in the file)
comprising this token, thereby determining the exact characters that need to be
removed from the source code file to give place to the new text.
[ 282 ]
Chapter 10
With this information, we create a new Replacement object and store it in the set
managed by RefactoringTool, and we are done. RefactoringTool will take care of
actually applying these patches, or removing conflicting ones. Do not forget to wrap
all local declarations around an anonymous namespace; it is a good practice to avoid
this translation unit to export local symbols.
Testing your new refactoring tool
We will use our wild life simulator code sample as a test case for your newly created
tool. You should now run make and wait for LLVM to finish compiling and linking
your new tool. After you have finished with it, feel free to play with the tool. Check
how our arguments declared as cl::opt objects appear in the command-line
interface:
$ izzyrefactor -help
To use the tool, we still need a compile commands database. To avoid the need
to create a CMake configuration file and run it, we will manually create one.
Name it compile_commands.json and type the following code. Substitute the tag
<FULLPATHTOFILE> with the complete path to the folder where you put the source
code of your wild life simulator:
[
{
"directory": "<FULLPATHTOFILE>",
"command": "/usr/bin/c++ -o wildlifesim.cpp.o -c <FULLPATHTOFILE>/
wildlifesim.cpp",
"file": "<FULLPATHTOFILE>/wildlifesim.cpp"
}
]
After you saved the compile commands database, it is time to test the tool:
$ izzyrefactor -class=Animal -method=walk -newname=run ./ wildlifesim.cpp
You can now check the wild life simulator sources and see that the tool renamed all
method definitions and invocations accordingly. This finishes our guide, but you can
check more resources and further improve your knowledge in the next section.
[ 283 ]
Clang Tools with LibTooling
More resources
You can find more resources at the following links:
•
http://clang.llvm.org/docs/HowToSetupToolingForLLVM.html:
•
http://clang.llvm.org/docs/Modules.html: This link presents more
•
http://clang.llvm.org/docs/LibASTMatchersTutorial: This is another
•
http://clang.llvm.org/extra/clang-tidy.html: This has the Clang
•
http://clang.llvm.org/docs/ClangFormat.html: This contains the
•
http://www.youtube.com/watch?v=yuIOGfcOH0k: This contains
This link contains more instructions on how to set up a commands database.
Once you have this file, you can even configure your favorite text editor to
run a tool to check the code on demand.
information on the Clang implementation of C/C++ modules.
tutorial on using AST matchers and LibTooling.
Tidy user's manual along with the manual of other tools.
ClangFormat user's manual.
Chandler Carruth's presentation for the C++Now, explaining how to
build a refactoring tool.
Summary
In this chapter, we presented Clang tools built on top of the LibTooling
infrastructure, which allows you to easily write tools that operate on the C/C++
source code level. We presented the following tools: Clang Tidy, which is the
linter tool of Clang; Clang Modernizer, which automatically substitutes old C++
programming practices with newer ones; Clang Apply Replacements, which apply
patches created by other refactoring tools; ClangFormat, which automatically indents
and formats your C++ code; Modularize, which eases the task of using the yet-to-be
standardized C++ modules framework; PPTrace, which documents the preprocessor
activity; and Clang Query, which allows you to test AST matchers. Finally, we
concluded this chapter by showing how to create your own tool.
This concludes this book, but this should be by no means an end to your studies.
There is a lot of extra material about Clang and LLVM on the Internet, as either
tutorials or formal documentation. Furthermore, Clang/LLVM is always evolving
and introducing new features worth studying. To learn about these, visit the LLVM
blog page at http://blog.llvm.org.
Happy hacking!
[ 284 ]
Index
Symbols
#0 tag 111
--analyze flag 227
-m32 flag 35
<Target>GenAsmMatcher.inc file 147
<Target>GenAsmWriter.inc file 147
<Target>GenCodeEmitter.inc file 147
<Target>GenDAGISel.inc file 146
<Target>GenDisassemblerTables.inc
file 147
<Target>GenInstrInfo.inc file 146
<Target>InstrFormats.td file 144, 146, 147
<Target>InstrInfo class 167
<Target>InstrInfo.td file 144-147
<Target>RegisterInfo.td file 143, 144
<Target>.td file 142, 143
-Xanalyzer flag 227
A
Abstract Syntax Tree (AST) 48
alternative build methods,
LLVM/Clang-based toolchains
about 215
ELLCC 215
EmbToolkit 216
Ninja 215
analyzer-checker flag 229
application binary interface (ABI) 201
ARM cross-compiler 204
AST matchers
composing 277-279
predicates, adding 279-281
URL, for documentation 276
using 276, 277
autotools-generated configure script
--enable-assertions option 16
--enable-jit option 16
--enable-optimized option 16
--enable-shared option 16
--enable-targets option 16
--prefix option 16
used, for building LLVM 15, 16
B
backend
about 133
code structure 137
implementing, TableGen used 139, 140
backend libraries
about 138, 139
target-dependent libraries 138
target-independent libraries 138
basic blocks (BBs) 111
Beagle Board
URL 216
bitcode 32
BuildMI() method 168
C
Canadian cross-compiler 204
C++ backend
about 120
used, for generating IR construct 119
C/C++ API
defining 258
frontend counterpart 260
linker job 259, 260
C/C++ preprocessor
problems 260, 261
checkers
about 220
static analyzer, testing with 227-229
Clang
about 32, 33
Clang Check 32
Clang Format 32
Compiler-RT 34
frontend phases 83
tools 251
URL 73
clang::preprocessor
URL, for documentation 265
Clang Apply Replacements 254, 255
Clang AST nodes
overview 90, 92
Clang-based cross-compiler
building 214
installing 214
URL 217
clang -cc1 tool 74
Clang Check 32, 269
Clang cross-compiler, generating
about 213
configuration options 213, 214
Clang diagnostics
about 78, 79
reading 80-82
Clang doxygen
URL, for documentation 248
ClangFormat 32, 256-258
Clang Front End Developer List
URL 69
Clang Modernizer 32, 253, 254
Clang project
about 73, 74
frontend actions 74, 75
libraries 76
Clang Query 267-269
Clang static analyzer. See static analyzer
clang-tidy tool
about 32, 251
using 252, 253
clang-tools-extra repository
about 32
tools 32
URL 33
clang_visitChildren() function 95
classic warnings
versus static analyzer 220-224
cl namespace
URL 273
CMake
build errors, solving for LLVM 20
URL 18
used, for building LLVM 18
used, for building LLVM with Unix 19, 20
code emission 135, 170-172
CodeGen directory 137
code generator phases
code emission 135
instruction selection 134
post-register allocation scheduling 135
pre-register allocation scheduling 135
register allocation 135
code generator .td files
<Target>InstrFormats.td file 144-147
<Target>InstrInfo.td file 144-147
<Target>RegisterInfo.td file 143, 144
<Target>.td file 142, 143
about 142
code structure, backend 137
compilation, DragonEgg
with LLVM tools 38, 39
compile command database
generating 249, 250
compiler driver
about 52
interacting with 52, 53
Compiler-RT
about 34
working with 34
Compiler-RT Version 3.4
URL, for downloading 34
configuration options, cross-compiler generation
--enable-targets 213
--target 213
--with-c-include-dirs 213
--with-default-sysroot 213
--with-gcc-toolchain 213
control flow graph (CFG) 96, 225
copyPhysReg() method 168
[ 286 ]
C++ programming practices
enforcing, in LLVM 60, 61
polymorphism 59
string references, creating in LLVM 61, 62
templates, using 59, 60
URL 61
cross-compilation, testing
about 216
development boards 216
simulators 217
cross compiling, with Clang command-line
arguments
about 208, 210
dependencies 209
driver options, for target 208
GCC installation 210, 211
potential issues 211
system root, modifying 212
Cross Linux, from Scratch tutorials
URL 209
cross-platform compilation 201
custom checkers
building 246
Checker subclass, defining 240, 241
Checker subclass, implementing 242-245
implementing 238
Register macro, writing 241
registration code, adding 245
state class, creating 238, 239
static analyzer, extending with 235
testing 246
URL, for building 248
URL, for developing 248
writing 237, 238
custom LLVM IR generator
header files 114
writing 114-118
custom Makefile
used, for building pass 130, 131
used, for running pass 130, 131
custom pass
building, with custom Makefile 130, 131
building, with LLVM build system 128, 129
running, with custom Makefile 130, 131
running, with LLVM build system 128, 129
writing 127, 128
custom tool
AST matchers, using 276, 277
boilerplate code, dissecting 272-275
callbacks, defining 281-283
C++ code refactoring tool, creating 271
C++ code refactoring tool, testing 283
creating 270
source code location, configuring 271, 272
D
DAG combine 151-153
DAG legalization 151-153
DAG-to-DAG instruction selection
about 153
pattern matching 154-156
debug session
exercising, LLDB used 41, 42
default values, configure script flags
BUILD_SHARED_LIBS 19
CMAKE_BUILD_TYPE 18
CMAKE_ENABLE_ASSERTIONS 18
CMAKE_INSTALL_PREFIX 19
LLVM_TARGETS_TO_BUILD 19
design principles, LLVM 48, 49
development boards
Beagle Board 216
Carambola-2 216
Panda Board 216
SEAD-3 216
Directed Acyclic Graph (DAG) 48, 134
Dominator Tree 124
DragonEgg
building 37
compiling, with LLVM tools 38, 39
installing 37
LLDB, using 40, 41
LLVM test suite 39, 40
URL 36
using 36
driver
used, for testing static analyzer 226, 227
dynamic linking, MCJIT engine 193
dynamic shared object (DSO) 180
[ 287 ]
E
G
ELLCC
about 215
URL 215
EmbToolkit
about 216
URL 216
emitWord() method 183
epilogue 168
Executable Format 259
execution engine
about 179, 180
external global variables, compilation 180
lazy compilation 180
lookup, for external symbols 180
symbol resolution, for external symbols 180
explicit dependency 124
exponential-time complexity 220
GCC
versus LLVM 202, 203
getPointerToFunction() method 189
Git mirror repository
sources, obtaining from 15
Graphviz package
URL 156
F
fast instruction selection 157
Fourth Tier LLVM component. See FTL
component
frame indexes 168
FreeBSD 9
frontend
used, for testing static analyzer 226, 227
frontend actions, Clang
about 74
ASTView 75
EmitBC 75
EmitObj 75
FixIt 75
PluginAction 75
RunAnalysis 75
frontend phases, Clang
about 83
implementing 100-103
lexical analysis 83, 84
LLVM IR code, generating 99, 100
semantic analysis 98
syntactic analysis 90
FTL component
about 179
URL 179
H
hazard detection 159
header files, custom LLVM IR generator
#include <llvm/ADT/SmallVector.h> 114
#include <llvm/Analysis/Verifier.h> 115
#include <llvm/Bitcode/
ReaderWriter.h> 115
#include <llvm/IR/BasicBlock.h> 115
#include <llvm/IR/CallingConv.h> 115
#include <llvm/IR/Function.h> 115
#include <llvm/IR/Instructions.h> 115
#include <llvm/IR/LLVMContext.h> 115
#include <llvm/IR/Module.h> 115
#include <llvm/Support/
ToolOutputFile.h> 115
HTML
graphical reports, generating in 230
I
implicit dependency 125
Industry Standard Architecture (ISA) 140
infrastructure, LLVM project
backend 51
frontend 50
IR 51
InitializeNativeTarget() method 186
installation, Clang-based
cross-compiler 214
installation, clang-tools-extra
repository tools 33
installation, DragonEgg 37
installation, LLVM
package managers, using 12
prebuilt packages, using 10
instruction itineraries 158, 159
[ 288 ]
instruction scheduling
post-register allocation scheduling 135
pre-register allocation scheduling 135
instruction selection
about 134, 147
DAG combine 151-153
DAG legalization 151-153
DAG-to-DAG instruction selection 153
fast instruction selection 157
lowering 150, 151
SelectionDAG class 148-150
visualizing 156, 157
interaction, compiler
in memory 51
through files 51
intermediate representation. See IR
International Obfuscated C Code
Contest (IOCCC) 88, 256
interpreter tool. See lli tool
IR
about 47, 133
transforming, to assembly code 134, 135
IR construct
generating, with C++ backend 119
IR formats
manipulating, with basic tools 108
IR generator
building 119
running 119
IR level optimization
about 120
compile-time optimization 120-122
custom pass, writing 127, 128
link-time optimization 120-122
pass API 126
pass dependencies 124-126
passes 122-124
isLoadFromStackSlot() method 167
isStoreToStackSlot() method 167
J
JIT class
about 181
generic value 189
using 185-188
JITCodeEmitter class 181
JIT compilation cost analysis
URL, for technical report 147
JIT compiler
about 177
advantage 177
execution engine 179, 180
memory management 180, 181
other resources 200
overview 178, 179
tools 197
JITMemoryManager class
using 182
Just-In-Time Compilation 16
L
large projects, static analyzer
handling 231
real-world example 232-235
URL, for real-world example 232
lazy compilation 180
lexical analysis
about 83, 84
lexical errors, exercising 85
libclang code, writing 85-87
preprocessing 88, 90
libc++
URL 206
libclang
about 57
URL 76
using 76-78
libclangAnalysis 58, 76
libclangAST 76
libclangBasic 76
libclangCodeGen 76
libclangDriver 58
libclangLex 76
libclangParse 76
libclangRewrite 76
libclangSema 76
libc++ standard library
about 43-45
URL 45
libLLVMAnalysis 57
libLLVMCodeGen 57
libLLVMCore 57
[ 289 ]
libLLVMSupport 57
libLLVMTarget 57
libLLVMX86CodeGen 57
libraries, Clang
about 76
libclangAnalysis 76
libclangAST 76
libclangBasic 76
libclangCodeGen 76
libclangLex 76
libclangParse 76
libclangRewrite 76
libclangSema 76
libraries, LLVM
about 57, 58
libclang 57
libclangAnalysis 58
libclangDriver 58
libLLVMAnalysis 57
libLLVMCodeGen 57
libLLVMCore 57
libLLVMSupport 57
libLLVMTarget 57
libLLVMX86CodeGen 57
URL 58
LibTooling 249
Linkable Format 259
Linux 9
llc tool
about 54, 119
using 135, 136
lld
URL 206
LLDB
URL 40
used, for exercising debug session 41, 42
using 40, 41
lli tool
about 54, 197
using 198
LLVM
building 15
building, autotools-generated configure
script used 15, 16
building, CMake used 18
building, from sources 13
building, Ninja used 18
building, other Unix approaches used 21
building, Unix used 17
building with Unix, CMake used 19, 20
building with Unix, Ninja used 19, 20
compiling, on Microsoft
Visual Studio 21-25
compiling, on Windows 21-25
design principles 47-49
history 47-49
installing 15
installing, package managers used 12
installing, prebuilt packages used 10
system requisites, for compiling 13, 14
URL, for documentation 215
URL, for frontend tutorial 100
versus GCC 202, 203
llvm::Function class
URL, for documentation 67
llvm::JIT framework
about 181
blobs, writing to memory 181, 182
JIT class 185-188
JITMemoryManager class, using 182
target code emitters 183, 184
target information 184
llvm::MCJIT framework
about 190
MCJIT engine 190
MCJIT engine, compiling modules 191
MCJIT engine, using 195-197
URL, for design and implementation 200
llvm-as tool 54
LLVM-based compiler 50
LLVM build system
used, for building pass 128, 129
used, for running pass 128, 129
LLVM core 32, 50
LLVM core Developer List
URL 69
LLVMdev
URL 49
llvm-dis tool 54
llvm-extract tool 108
LLVM Intermediate Representation. See
LLVM IR
LLVM internal design
C++ programming practices 58
[ 290 ]
delving into 56
libraries 57, 58
pluggable pass interface 62, 63
LLVM IR
about 48-50, 105
assembly text format 108
basic principles 49
basic tools, exercising for manipulating IR
formats 108
bitcode format 108
fundamental properties 109
overview 105-107
LLVM IR in-memory model
about 113
BasicBlock class 113
Function class 113
Instruction class 113
Module class 113
User class 114
Value class 114
LLVM IR language syntax 109-112
LLVM IR target dependency 107
LLVM Just-in-Time compiler. See
JIT compiler
LLVM kaleidoscope tutorial
URL 200
LLVM libraries 50
llvm-link tool 54
llvm-mc tool 54
LLVM project
about 47, 106, 107
infrastructure 50
understanding 50, 51
LLVM project/infrastructure 50
llvm-rtdyld tool
about 197
using 198, 200
LLVM source code
community, using for help 69
conclusion 71
documentation 68
navigating 68
updating, SVN log used 69-71
LLVM-supported platforms
URL, for updated list 13
LLVM test suite
about 39, 40
URL 39
LLVM versions 10
loadRegFromStackSlot() method 167
Loop Info 124
lowering, instruction selection 150, 151
Low Level Debugger. See LLDB
M
machine code. See MC
MachineCodeEmitter class
about 181
allocateSpace() method 182
emitAlignment() method 182
emitByte() method 182
emitWordBE() method 182
emitWordLE() method 182
machine instructions 160
machine pass
writing 172-175
Mac OS X
about 9
LLVM, compiling on 25-29
Makefile
writing 64, 65
MC
about 169, 181
code emission 170-172
MC code emission 194
MC directory 137
MC instructions 169
MCJIT engine
about 190
dynamic linking 193
MC code emission 194
MemoryBuffer class 192
memory manager 194
modules, compiling 191
modules, states 190, 191
ObjectBuffer class 192
object finalization 195
ObjectImage class 192
using 195-197
MemoryBuffer class 192
memory management 180, 181
memory manager 193-194
[ 291 ]
Microsoft Visual Studio
LLVM, compiling on 21-25
Modularize
about 32, 258
C/C++ API, defining 258
C/C++ preprocessor, problems 260, 261
modules 261, 262
modules, using 262, 263
using 264
working with 264
Module Map Checker 265
modules
added state 190
compiling, by MCJIT engine 191
finalized state 191
loaded state 191
using 262-264
working with 261, 262
Multilib
about 207
folder structure 207
N
Ninja
about 215
build errors, solving for LLVM 20
URL 18
used, for building LLVM 18
used, for building LLVM with Unix 19, 20
O
ObjectBuffer class 192
object finalization 195
official binary distribution
URL, for downloading 21, 25
official prebuilt binaries
obtaining 11, 12
opt tool 54, 125
P
package managers
snapshot packages, using 12
used, for installing LLVM 12
using 12
Panda Board
URL 216
pass API 126
pass dependencies, IR level optimization
about 124, 126
explicit dependency 124
implicit dependency 125
pass manager 62
Pass subclasses
BasicBlockPass 126
FunctionPass 126
ModulePass 126
URL, for documentation 126
pluggable pass interface 62, 63
polymorphism 59
Position Independent Code (PIC)
libraries 27
post-register allocation scheduling 135
PPTrace 33, 265-267
prebuilt packages
obtaining 10
official prebuilt binaries, obtaining 11, 12
package managers, using 12
URL, for downloading 11
used, for installing LLVM 10
precompiled headers (PCH) 81
pre-register allocation scheduling 135
project, LLVM
coding 66, 67
Makefile, writing 64, 65
writing 64
project, static analyzer
architecture 235-237
URL 248
prologue
about 168
frame indexes 168
Q
QEMU
about 217
URL 217
R
refactoring tools
about 253
[ 292 ]
Clang Apply Replacements 254, 255
Clang Check 269
ClangFormat 256-258
Clang Modernizer 253, 254
Clang Query 267, 268
Modularize 258
Module Map Checker 265
PPTrace 265-267
remove-cstr-calls tool 270
register allocation
about 135, 161, 162
register coalescer 162-165
target hooks 167, 168
virtual register rewrite 166, 167
remove-cstr-calls tool 270
resources, Clang tools 284
retargetable compilers 106
RTDyldMemoryManager class
about 181
allocateCodeSection() method 181
allocateDataSection() method 181
finalizeMemory() method 181
getSymbolAddress() method 181
runFunction() method 189
RuntimeDyld dynamic linker 192, 193
S
Scan-build 231
scheduler
about 157, 158
hazard detection 159
instruction itineraries 158, 159
scheduling units 159
SCRAM() function 237
SEAD-3
URL 216
SelectionDAG class 148-150
Select() method 155
semantic analysis
about 98
semantic error, exercising 99
setDataLayout() function 116
setTargetTriple() function 116
simulators 217
snapshot packages
Linux 13
Windows 13
sources
LLVM, building from 13
obtaining 14
obtaining, from Git mirror repository 15
obtaining, from SVN repository 14
URL, for downloading 14
standalone tools
llc 54
lli 54
llvm-as 54
llvm-dis 54
llvm-link 54
llvm-mc 54
opt 54
using 54-56
state class, custom checkers
code, examining 239, 240
ProgramState, creating as immutable 239
static analyzer
about 220
extending, with custom checkers 235
graphical reports, generating in HTML 230
large projects, handling 231
project, architecture 235-237
testing 226
testing, driver used 226, 227
testing, frontend used 226, 227
testing, with checkers 227-229
using, in Xcode IDE 229
versus classic warnings 220-224
Static Single Assignment (SSA) form 109
storeRegToStackSlot() method 167
string references
creating 61, 62
SVN repository
sources, obtaining from 14
URL 15
symbolic execution engine
about 220
benefits 224-226
syntactic analysis
about 90
AST, serializing with precompiled
headers 97
Clang AST nodes 90-92
code, writing that traverses
[ 293 ]
Clang AST 94-97
parser actions, understanding with debugger 92, 93
parser error, exercising 94
syntax-only flag 229
syscalls 107
system requisites, LLVM
for compiling 13, 14
T
TableGen
about 79
code generator .td files 142
URL 142
used, for implementing backend 139, 140
working 140-142
TableGen directory 137
target code emitters 183, 184
target datalayout construct 110
target-dependent libraries
<Target>AsmParser.a 139
<Target>CodeGen.a 139
<Target>Desc.a 139
<Target>Disassembler.a 139
<Target>Info.a 139
about 138, 139
Target folder 137
target-independent libraries
AsmParser.a 138
AsmPrinter.a 138
CodeGen.a 138
MC.a 138
MCDisassembler.a 138
MCJIT.a 138
MCParser.a 138
SelectionDAG.a 138
Target.a 138
target information 184
TargetJITInfo::emitFunctionStub()
method 184
TargetJITInfo::relocate() method 184
TargetJITInfo::replaceMachineCode
ForFunction() method 184
TargetJITInfo class 184
TargetPassConfig class
URL 172
target triples
overview 203
toolchain, preparing
about 205
assembler 206
frontend 207
linker 206
runtime libraries 206
standard C and C++ libraries 205, 206
tools, backend
llc tool 135, 136
tools, Clang
clang-tidy tool 251
refactoring tools 253
resources 284
tools, clang-tools-extra repository
building 33
Clang Modernizer 32
Clang Tidy 32
installing 33
Modularize 32
PPTrace 33
tools, JIT compiler
lli tool 198
llvm-rtdyld tool 197-200
transformations, Clang Modernizer
add-override transform 253
loop convert transform 253
pass-by-value transform 253
replace-auto_ptr transform 253
use-auto transform 253
use-nullptr transform 253
tree view 24
turnReactorOn() function 237
U
UND (undefined) 259
Unix
about 9
used, for building LLVM 17
V
ViewVC
URL 70
[ 294 ]
W
Windows
about 9
LLVM, compiling on 21-25
Windows installers
URL, for downloading 13
X
Xcode
LLVM, compiling on 25-29
Xcode IDE
static analyzer, using in 229
[ 295 ]
Thank you for buying
Getting Started with LLVM Core Libraries
About Packt Publishing
Packt, pronounced 'packed', published its first book "Mastering phpMyAdmin for Effective
MySQL Management" in April 2004 and subsequently continued to specialize in publishing
highly focused books on specific technologies and solutions.
Our books and publications share the experiences of your fellow IT professionals in adapting
and customizing today's systems, applications, and frameworks. Our solution based books
give you the knowledge and power to customize the software and technologies you're using
to get the job done. Packt books are more specific and less general than the IT books you have
seen in the past. Our unique business model allows us to bring you more focused information,
giving you more of what you need to know, and less of what you don't.
Packt is a modern, yet unique publishing company, which focuses on producing quality,
cutting-edge books for communities of developers, administrators, and newbies alike.
For more information, please visit our website: www.packtpub.com.
About Packt Open Source
In 2010, Packt launched two new brands, Packt Open Source and Packt Enterprise, in order
to continue its focus on specialization. This book is part of the Packt Open Source brand,
home to books published on software built around Open Source licenses, and offering
information to anybody from advanced developers to budding web designers. The Open
Source brand also runs Packt's Open Source Royalty Scheme, by which Packt gives a royalty
to each Open Source project about whose software a book is sold.
Writing for Packt
We welcome all inquiries from people who are interested in authoring. Book proposals should
be sent to [email protected]. If your book idea is still at an early stage and you would like
to discuss it first before writing a formal book proposal, contact us; one of our commissioning
editors will get in touch with you.
We're not just looking for published authors; if you have strong technical skills but no writing
experience, our experienced editors can help you develop a writing career, or simply get some
additional reward for your expertise.
OpenGL 4 Shading Language
Cookbook
Second Edition
ISBN: 978-1-78216-702-0
Paperback: 394 pages
Over 70 recipes demonstrating simple and advanced
techniques for producing high-quality, real-time 3D
graphics using OpenGL and GLSL 4.x
1.
Discover simple and advanced techniques for
leveraging modern OpenGL and GLSL.
2.
Learn how to use the newest features of
GLSL including compute shaders, geometry,
and tessellation shaders.
3.
Get to grips with a wide range of techniques for
implementing shadows using shadow maps,
shadow volumes, and more.
Haskell Data Analysis Cookbook
ISBN: 978-1-78328-633-1
Paperback: 334 pages
Explore intuitive data analysis techniques and
powerful machine learning methods using over
130 practical recipes
1.
A practical and concise guide to using Haskell
when getting to grips with data analysis.
2.
Recipes for every stage of data analysis, from
collection to visualization.
3.
In-depth examples demonstrating various tools,
solutions, and techniques.
Please check www.PacktPub.com for information on our titles
C++ Multithreading Cookbook
ISBN: 978-1-78328-979-0
Paperback: 422 pages
Over 60 recipes to help you create ultra-fast
multithreaded applications using C++ with rules,
guidelines, and best practices
1.
Create multithreaded applications using the
power of C++.
2.
Upgrade your applications with parallel
execution in easy-to-understand steps.
3.
Stay up to date with new Windows 8
concurrent tasks.
4.
Avoid classical synchronization problems.
Advanced Quantitative Finance
with C++
ISBN: 978-1-78216-722-8
Paperback: 124 pages
Create and implement mathematical models in
C++ using Quantitative Finance
1.
Describes the key mathematical models used
for price equity, currency, interest rates, and
credit derivatives.
2.
The complex models are explained
step-by-step along with a flow chart
of every implementation.
3.
Illustrates each asset class with fully solved
C++ examples, both basic and advanced,
that support and complement the text.
Please check www.PacktPub.com for information on our titles