1
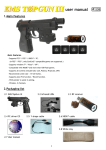
RF TopGun user manual
1.TopGun packaging list
1.1 RF TopGun
1.2 PC driver CD
1.3 LED stand A
(with infrared LEDs on
top and at bottom)
LED stand B
(with infrared LEDs on
top and in the middle)
1.4 LED stand hooks
1.6 Double sided tape
2.TopGun buttons list
1. A (B at the back)
2. C
3. D
4. START
(SELECT at the back)
5. TURBO
(AUTO RELOAD at the back)
6. D-pad
7. CH1 / CH2
8. Power switch (ON/OFF)
1.5 USB power cable
1.7 RF receiver
3.Mount the LED stands
3.1 Mount the two LED stand hooks onto the LED stand A and B. Please refer to the guide below for details:
3.1.1 Mount the hooks on top of the LED stands
3.1.2 Finished diagram
3.2
Either mount the LED stands beside the screen as shown in figure 1, refer to 3.2.1,
or mount the LED stands above and below the screen as shown in figure 2, refer to 3.2.2.
For huge projectors, mount the LED stands inside the screen as shown in figure 3, refer to 3.2.3.
3.2.1 Mount the LED stands A & B beside the screen. The position of the two LED stands could be swapped. See figure 1.
3.2.2 Mount the LED stands A & B above and below the screen. The position of the two LED stands could be swapped.
See figure 2.
3.2.3 Mount the LED stands A & B inside the screen. The position of the two LED stands could be swapped. See figure 3.
figure 1
3.3
figure 2
figure 3
To provide power for the LED stands, please connect the cable of the LED stands to any USB port, via the
"USB power cable". If the console is too far away from the screen, user may consider to provide power with
an "AC – DC power transformer" instead. (it is not included in the package)
AC – DC power transformer requirements : 600mA or above, 5V
Note : 1. The distance between the TopGun and the screen should be 2-3 times of the distance between the two LED
stands. (for LED stands mounted beside the screen)
2. For 16:9 or 16:10 screens, or screen of size 42 inches or above, it is recommended to mount the LED stands
above and below the screen. This enables TopGun to work nearer to the screen. (e.g. For 42 inches 16:9 screen,
if the LED stands is mounted above and below the screen, the minimum workable distance between TopGun and
the screen is 180cm. If the LED stands is mounted beside the screen, the minimum distance becomes 220cm.)
3. For huge projectors, or for screens of 52 inches or above and the provided LED stands does not function well,
user may consider to buy our TopGun Blaze stand II (#0802) to replace the provided LED stands.
TopGun Blaze Stand II official site: http://www.hkems.com/product/xbox/TopGunBlazeStand2.htm
4. User could use the double sided tape provided to mount the LED stands. See (1.6)TopGun packaging list .
5. No matter single TopGun or multiple TopGun installation, only one pair of LED stands is needed for a screen.
6. All 4 sets of infrared LED on the LED stands are not visible, while the red LED will indicate if power is ON.
4.TopGun & RF receiver Installation
4.1 Set the channel of the RF receiver to either 1 or 2 (refer to the picture below), and set the TopGun to the
corresponding channel.
4.2 For PS2™/PS3™, please turn ON the console and load a "GunCon2™ compatible" game first. When the game demo
screen appear, plug in RF receiver. For PC, please simply plug in the RF receiver to USB port. PC would then ask
for the driver. Please refer to (5) Install the driver to install the driver.
Note : normally, the LED on the receiver will keep lighting, which only indicates that the receiver is functioning.
4.3 Insert two AA battery into the TopGun handle in the right direction, according to the picture below.
4.4 Turn ON the switch (ON/OFF) of the TopGun, and the "POWER" LED above will light.
* In case battery is low, the "LOW POWER" LED beside it will light at the same time.
4.5 After turn ON the TopGun and plug in the RF receiver, the LED on the receiver will keep flashing.
If it doesn't flash, that means the gun could not communicate with the receiver. This may be the
problem of wrong channel setting. Please double check if the channel of the TopGun and the RF
receiver are the same.
Note : 1. At most two TopGun could be connected to the same console.
2. No matter single TopGun or dual TopGun installation, only one pair of LED stands is needed for one screen.
3. To install two TopGun, user must set the two TopGun and the two RF receiver to different channels.
4. The range of RF receiver is 7m. In this range, two TopGun of the same channel will interrupt each other.
5. Other 2.4G Hz wireless device may interrupt the TopGun.
6. For the first time to install TopGun on PC, PC would ask for the driver. Please refer to (5) Install the driver
to install the driver.
5.Install the driver
5.1 Note
5.1.1 This step is only for PC. Skip this if you are using PS2™, PS3™.
5.1.2 In case you have installed any other 3rd party TopGun driver, you must un-install them first before you install the
official driver. Otherwise it will result in driver crush.
5.1.3 For the 1st time you connect the TopGun to PC, the PC should ask you for driver. If it doesn’t ask you for driver
but find an unknown USB device instead, please try another USB port or use a USB hubs.
5.1.4 During installing the driver, if the mouse pointer lose control and stay at the bottom right corner, please follow
the steps below and try again.
i) Set the RF receiver and the TopGun to the same channel.
ii) Turn ON the switch (ON/OFF) of the TopGun.
iii) Plug the RF receiver to PC.
5.2 Install procedures
5.2.1 Download the latest driver from the link below : http://www.hkems.com/download%20-%20TopGun2.htm
5.2.2 unzip the compressed file.
5.2.3 Plug the RF receiver to PC and then turn ON the switch (ON/OFF) of the TopGun.
5.2.4 It would find the "HID mini driver for EMS TopGun", hardware installation wizard would pop up. Please let it
search for the most suitable driver automatically from the directory where the file is decompressed.
5.2.5 It would find a "HID-compliant mouse" and hardware installation wizard would pop up again.
Click "install the device automatically (recommended)" to install the driver.
5.2.6 It would find a "HID-compliant device" and hardware installation wizard would pop up again.
Click "install the device automatically (recommended)" to install the driver.
5.2.7 Visit "device manager", you could find "HID mini driver for EMS TopGun", which indicate that the installation
is successful.
5.2.8 Run the "TopGunPanel.exe" program, "EMS TopGun 1" would be shown at the top left corner.
Please configure it according to your preference, and click "submit settings".
Note : The above guide is for windows XP.
6.TopGun Calibration
6.1 Note
6.1.1 Before the first time to use the TopGun, user have to calibrate the TopGun.
6.1.2 The distance between the TopGun and the screen should be 2 to 3 times of that between the two LED stands.
(for LED stands mounted beside the screen)
6.1.3 TopGun has two mode: "Normal mode" and "Calibration mode".
"Calibration mode" is only for calibration process. During normal game play, TopGun should enter the "Normal mode".
In "Calibration mode", the blue LED inside the D-Pad would light no matter where the TopGun is pointing at.
In "Normal mode", the blue LED inside the D-Pad would light only when it is pointing at the screen.
(i.e. Could see all 4 sets of infrared LEDs at the same time)
User could hold button A and B for 5 to 10 sec to enter "Calibration mode".
User could quit the "Calibration mode" by either finishing the calibration process or pressing "START + SELECT".
6.1.4 For PS2™, PS3™, please enter the game before entering the "Calibration mode". (* refer to 8.3)
6.1.5 If the TopGun enter "Calibration mode" automatically, and user could not quit the "Calibration mode" by pressing
"START + SELECT", please jump to step 6.2.3. After the calibration is finished, the gun would return to normal.
6.2 TopGun Calibration procedures
6.2.1 Make sure the blue LED in the D-Pad lights when you aim at all corners of the screen. If the blue LED flashes, there
should be some interruption sources beside/behind where you are aiming at. If it doesn't light, the gun may be too
close to the screen. Please stand back, remove the interruption source and try again.
6.2.2 Aim the TopGun at the ceiling or floor, make sure the blue LED doesn't light, hold A+B buttons for 5-10 sec to enter
the "Calibration mode". In "Calibration mode", the blue LED would be ON no matter where the TopGun is pointing at.
6.2.3 Shoot the following targets in this order (ABCDE):
I) Aim at the top left LED (i.e. point A of the above picture), pull trigger. (i.e. Button D, refer to TopGun buttons list)
If it success, the blue LED will flash for once. If it doesn't, repeat until it does.
II) Aim at the top left corner of the screen (i.e. point B of the above picture), pull trigger. (i.e. Button D)
If it success, the blue LED will flash for once. If it doesn't, repeat until it does.
III) Aim at the top right corner of your screen (i.e. point C of the above picture), pull trigger. (i.e. Button D)
If it success, the blue LED will flash for once. If it doesn't, repeat until it does.
IV) Aim at the bottom right corner of your screen (i.e. point D of the above picture), pull trigger. (i.e. Button D)
If it success, the blue LED will flash for once. If it doesn't, repeat until it does.
V) Aim at the bottom left corner of your screen (i.e. point E of the above picture), pull trigger. (i.e. Button D)
If it success, the blue LED will flash for once. If it doesn't, repeat until it does.
VI) After success in (V) it would quit the calibration mode automatically, and you could use the gun now.
If there is anything wrong in "Calibration mode", such as wrong shooting order or inaccurate aiming, please press
"START" and "SELECT" at the same time to return to "Normal mode", and then restart the calibration from step 6.2.2.
7.Other functions
7.1 Turbo mode
There are 3 settings under turbo mode, they are "Normal", "Turbo 1" and "Turbo 2".
User could select different settings by pressing the TURBO button.
"Normal" – This is the default setting. Auto fire is disabled. The TURBO LED would not light.
"Turbo 1" – This is the auto fire mode. The TURBO LED would keeps lighting to indicate that.
"Turbo 2" – This is the high speed auto fire mode. The TURBO LED would keeps flashing to indicate that.
7.2 Auto reload mode
User could enable or disable the auto reload mode by pressing the AUTO RELOAD button.
When this mode is enabled, the AUTO RELOAD LED would keeps lighting to indicate that.
7.3 Sleep mode
After leaving unused for a certain time, TopGun would enter sleep mode (power saving mode).
By pulling the trigger (button D), Topgun would back to normal mode and function normally.
8.Important note
8.1
Any infrared sources (Sun light, tungsten filaments light bulb, or any high temperature light source) may interrupt
the TopGun System. The Blue LED will keep flashing to indicate that. Please make sure that no infrared sources are
beside or behind the screen.
8.2 The reflect image of the infrared LEDs may interrupt the TopGun System, and the Blue LED will keep flashing to
indicate that. To solve this problem, a cloth could be placed on those smooth surfaces to prevent reflection.
8.3 For PS2™/PS3™, only GunCon2™ compatible games are supported.
8.4 TopGun supports those PS2™ compatible PS3™ consoles.
For any questions, please contact us.
Email : [email protected]
EMS Production Ltd.
www.hkems.com