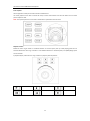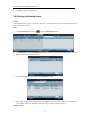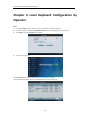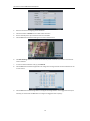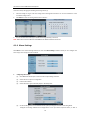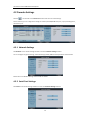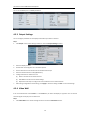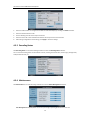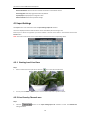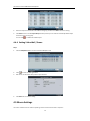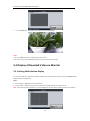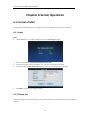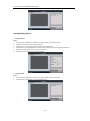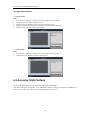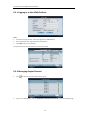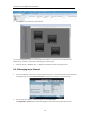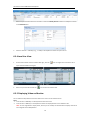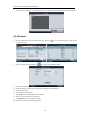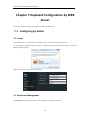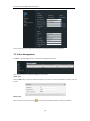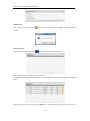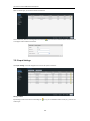
1
Network Keyboard User Manual UD.6L0203D1056A01 User Manual of DS-1100KI Network Keyboard Preventive and Cautionary Tips Before connecting and operating your keyboard, please be advised of the following tips: • Ensure unit is placed in a well-ventilated, dust-free environment. • Keep all liquids away from the keyboard. • Please check the power supply to avoid the damage caused by voltage mismatch. • Please make sure the keyboard work in the allowed range of temperature and humidity. • Please keep the device horizontal and avoid the installation under severe vibration environment. • The dust board will cause a short circuit after damping; please use brush to dedust regularly for the board, connector, chassis fan, etc. 1 User Manual of DS-1100KI Network Keyboard Table of Contents Chapter 1 Introduction................................................................................................................................................ 6 1.1 Overview ....................................................................................................................................................... 6 1.2 Features ........................................................................................................................................................ 6 1.3 Appearance ................................................................................................................................................... 8 Chapter 2 Operation Guide ......................................................................................................................................... 9 2.1 User Account ................................................................................................................................................. 9 2.2 Indicators & Buttons ..................................................................................................................................... 9 2.3 Button Operation ........................................................................................................................................ 12 2.3.1 Operating Video Wall Display ......................................................................................................... 12 2.3.2 PTZ Control Buttons ........................................................................................................................ 12 2.3.3 Other Buttons ................................................................................................................................. 13 2.4 Input Method Shift ..................................................................................................................................... 14 2.5 Basic Operation Procedure ......................................................................................................................... 14 2.6 Quick Configuration Guide .......................................................................................................................... 15 2.7 Quick Operation .......................................................................................................................................... 18 Chapter 3 Local Keyboard Configuration by Admin................................................................................................... 19 3.1 Login ........................................................................................................................................................... 19 3.2 Keyboard Management .............................................................................................................................. 19 3.2.1 Viewing Version Information .......................................................................................................... 20 3.2.2 Configuring Network Settings ......................................................................................................... 20 3.2.3 Configuring Hardware Settings ....................................................................................................... 20 3.2.4 Configuring Time Settings............................................................................................................... 21 3.2.5 Selecting Language ......................................................................................................................... 21 3.2.6 Calibrating Screen ........................................................................................................................... 22 3.2.7 Upgrading Device ............................................................................................................................ 22 3.3 Device Management ................................................................................................................................... 23 3.3.1 Adding a Device .............................................................................................................................. 23 3.3.2 Editing/Deleting Device .................................................................................................................. 24 3.4 User Management ...................................................................................................................................... 25 3.4.1 Adding an User................................................................................................................................ 25 3.4.2 Setting the Related Device .............................................................................................................. 26 3.4.3 Editing User Password/Deleting User ............................................................................................. 27 3.4.4 Importing/Exporting Configuration File ......................................................................................... 27 3.5 Default ........................................................................................................................................................ 28 3.6 Logout ......................................................................................................................................................... 29 3.7 Reboot ........................................................................................................................................................ 29 3.8 Shutdown .................................................................................................................................................... 29 Chapter 4 Local Keyboard Configuration by Operator .............................................................................................. 30 4.1 Encoder Settings ......................................................................................................................................... 31 4.1.1 Network Settings .......................................................................................................................... 31 4.1.2 Serial Port Settings ....................................................................................................................... 31 4.1.3 Camera Settings ........................................................................................................................... 32 2 User Manual of DS-1100KI Network Keyboard 4.1.4 Alarm Settings .............................................................................................................................. 39 4.1.5 Exceptions .................................................................................................................................... 41 4.1.6 Maintenance ................................................................................................................................ 41 4.1.7 Stream Media Settings ................................................................................................................. 42 4.2 Decoder Settings ......................................................................................................................................... 43 4.2.1 Network Settings .......................................................................................................................... 43 4.2.2 Serial Port Settings ....................................................................................................................... 43 4.2.3 Output Settings ............................................................................................................................ 44 4.2.4 Video Wall.................................................................................................................................... 44 4.2.5 Decoding Status ........................................................................................................................... 45 4.2.6 Maintenance ................................................................................................................................ 45 4.3 Input Settings .............................................................................................................................................. 46 4.3.1 Starting Local Live View ............................................................................................................... 46 4.3.2 Live View by Channel-zero .............................................................................................................. 46 4.3.3 Editing a Camera ............................................................................................................................. 47 4.3.4 Setting Input Group ........................................................................................................................ 47 4.4 Output Settings ........................................................................................................................................... 48 4.4.1 Playback on Monitor ....................................................................................................................... 48 4.4.2 Editing an Output Channel.............................................................................................................. 50 4.4.3 Setting Output Group ..................................................................................................................... 50 4.4.4 Setting Video Wall / Scene ........................................................................................................... 51 4.5 Macro Settings ............................................................................................................................................ 51 4.6 Playback ...................................................................................................................................................... 53 4.6.1 Playback by USB File ....................................................................................................................... 53 4.6.2 Playback by File .............................................................................................................................. 54 4.6.3 Playback by Time ............................................................................................................................ 55 4.7 Advanced Settings ....................................................................................................................................... 55 4.7.1 Password Settings ........................................................................................................................... 55 4.7.2 AUX Key Settings ............................................................................................................................. 56 4.7.3 Live View & PTZ Speed Settings ...................................................................................................... 56 4.7.4 FTP Settings .................................................................................................................................... 57 4.8 Logout ......................................................................................................................................................... 57 4.9 Reboot ........................................................................................................................................................ 57 4.10 Shutdown .................................................................................................................................................. 58 Chapter 5 Keyboard Operation ................................................................................................................................. 59 5.1 Shortcut Operation ..................................................................................................................................... 59 5.2 Local Live View............................................................................................................................................ 59 5.3 Display of Decoded Video on Monitor ........................................................................................................ 60 5.3.1 Setting Multi-division Display ......................................................................................................... 60 5.3.2 Setting Camera to Monitor ............................................................................................................. 61 5.3.3 Setting Camera Group to Monitor .................................................................................................. 61 5.3.4 Setting Camera Group to Window .................................................................................................. 62 5.3.5 Setting Camera Group to Monitor Group ....................................................................................... 63 5.3.6 Setting a Tour .................................................................................................................................. 63 3 User Manual of DS-1100KI Network Keyboard 5.3.7 Calling a Tour .................................................................................................................................. 64 5.3.8 Setting a Group Tour ....................................................................................................................... 64 5.3.9 Calling a Group Tour ....................................................................................................................... 65 5.3.10 Operating Instant Playback ........................................................................................................... 65 5.3.11 Operating Image Switch ................................................................................................................ 66 5.4 PTZ Control ................................................................................................................................................. 67 5.4.1 PTZ Control Function ...................................................................................................................... 67 5.4.2 Setting a Preset ............................................................................................................................... 67 5.4.3 Calling a Preset ............................................................................................................................... 68 5.4.4 Setting a Patrol ............................................................................................................................... 69 5.4.5 Calling a Patrol ................................................................................................................................ 70 5.4.6 Setting a Pattern ............................................................................................................................. 71 5.4.7 Calling a Pattern .............................................................................................................................. 72 5.4.8 Calling Pan Scan .............................................................................................................................. 73 5.5 Aux Functions ............................................................................................................................................. 74 5.5.1 Two-way Audio ............................................................................................................................... 74 5.5.2 Picture Capture ............................................................................................................................... 74 5.5.3 Recording ........................................................................................................................................ 75 5.5.4 Other Functions .............................................................................................................................. 75 Chapter 6 Server Operation ...................................................................................................................................... 76 6.1 Control of MVC ........................................................................................................................................... 76 6.1.1 Login ............................................................................................................................................... 76 6.1.2 Device List ....................................................................................................................................... 76 6.1.3 Camera List ..................................................................................................................................... 78 6.1.4 Monitor List .................................................................................................................................... 79 6.1.5 Scene Settings ................................................................................................................................. 82 6.1.6 Screen Settings ............................................................................................................................... 83 6.2 Control of Analog Matrix............................................................................................................................. 86 6.2.1 Login ............................................................................................................................................... 86 6.2.2 Configuring RS-232 Parameters ...................................................................................................... 86 6.2.3 Operating Analog Matrix ................................................................................................................ 87 6.2.4 Configuring RS-485 Parameters ...................................................................................................... 87 6.2.5 Operating PTZ Control .................................................................................................................... 88 6.3 Access by iVMS Platform ............................................................................................................................. 90 6.3.1 Logging in to the iVMS Platform ..................................................................................................... 91 6.3.2 Managing Output Channel.............................................................................................................. 91 6.3.3 Managing Input Channel ................................................................................................................ 92 6.3.4 Local Live View ............................................................................................................................. 93 6.3.5 Displaying Video on Monitor .......................................................................................................... 93 6.3.6 Playback ....................................................................................................................................... 94 Chapter 7 Keyboard Configuration by WEB Server ................................................................................................... 95 7.1 Configuring by Admin ................................................................................................................................. 95 7.1.1 Login ............................................................................................................................................... 95 7.1.2 Keyboard Management .................................................................................................................. 95 4 User Manual of DS-1100KI Network Keyboard 7.1.3 User Management .......................................................................................................................... 96 7.1.4 Device Management ....................................................................................................................... 98 7.1.5 Maintenance ................................................................................................................................ 99 7.2 Configuring by Operator ........................................................................................................................... 100 7.2.1 Device List ..................................................................................................................................... 100 7.2.2 Input Settings................................................................................................................................ 101 7.2.3 Output List .................................................................................................................................... 103 7.2.4 AUX Functions .............................................................................................................................. 104 7.2.5 Live View & PTZ Speed Settings .................................................................................................... 104 7.2.6 FTP Server Settings ....................................................................................................................... 104 Chapter 8 Keyboard Configuration Tool .................................................................................................................. 106 8.1 System Requirements ............................................................................................................................... 106 8.2 Features .................................................................................................................................................... 106 8.3 Selecting Login Mode to Configuration Tool ............................................................................................. 106 8.3.1 Login by Local Configuration File .................................................................................................. 107 8.3.2 Export/Login by Remote Configuration File .................................................................................. 107 8.3.3 Remote Upgrade ........................................................................................................................... 108 8.4 Configuring Keyboard by Configuration Tool ............................................................................................ 109 8.4.1 Managing Device List .................................................................................................................... 109 8.4.2 Managing User List ....................................................................................................................... 111 8.4.3 Managing Channel List .................................................................................................................. 115 8.4.4 Importing Configuration File......................................................................................................... 118 Appendix 1: Specifications ...................................................................................................................................... 119 Appendix 2: Upgrade by FTP ................................................................................................................................... 120 Appendix 3: Version Update.................................................................................................................................... 121 5 User Manual of DS-1100KI Network Keyboard Chapter 1 Introduction 1.1 Overview DS-1100KI Network Keyboard can be used to control the camera/speed dome, display of decoded video on video wall, control of matrix, as well as support 1 channel of video view at up to 1080P resolution. Designed with touch screen, it is easy to operate and configure settings. 1.2 Features Hardware 7’’ TFT touch screen at 800×480 resolution; 4-axis joystick; Shortcut keys for dome control, setting and calling of preset, patrol and pattern; Shortcut keys for playback operation; Shortcut keys for input group and output group; Shortcut keys for wiper and light control operation. Administrator and operator user management; Support upgrade by U-flash disk; Auto searching connected devices in the same network area; Support 3 operators, and each user is allowed to operate 1280 devices; Import and export of keyboard configuration parameters; Macro command operation; Storage of record files and captured pictures to U-flash disk or FTP server; Software Play back record files from the U-flash disk; Play back the remote record files by time or by file; Two-way audio; Support configuration by WEB server; Support configuration by the Keyboard Configuration Tool; Configuration and control of the MVC system; Support control of the analog matrix with the protocol of ZT-1.0, ZT-2.0, EXTRON or CREATOR; Control of up to 255 analog domes by RS-485 connection; Accessible by the platform software. Decoding Capability Provide 1-ch video decoding and local decoding; Support standard MPEG4, private H.264 and standard H.264 encoding formats; Decoding at up to 1080P resolution. Display of Decoded Video on Monitor Display of decoded camera on selected window; 6 User Manual of DS-1100KI Network Keyboard Display of decoded camera group on selected window; Sequence display of decoded camera group on monitor; Sequence display of decoded camera group on monitor group; Display of video via MVC on video wall. 7 User Manual of DS-1100KI Network Keyboard 1.3 Appearance Front View: Description of panel: Serial No. Description Serial No. Description 1 Record playback 2 Functional buttons 3 Numeric buttons 4 PTZ control area Interface Description: Serial No. Description Serial No. Description 1 Touch pen 2 GND 3 Line In 4 Audio Out 5 Reserved 6 RS-485 Interface 7 LAN 8 RS-232 Interface 9 USB Interface 10 12 VDC Power Supply 11 Power On/Off 8 User Manual of DS-1100KI Network Keyboard Chapter 2 Operation Guide 2.1 User Account The keyboard user account is classified to two types: the admin and the operator. The admin user is authorized with the following operation permissions: 1. Add a maximum of 3 operators; 2. Configure the keyboard parameters; 3. Add, edit and delete device; 4. Add, edit and delete user, as well as assign device for the user; The operator user is allowed to operate the assigned device only; Up to 1280 devices can be assigned for each operator. 2.2 Indicators & Buttons LED Indicators on Panel: LED Indicator Description POWER Normally lights when the keyboard is powered on. LINK Lights when the keyboard is connected with the network. Tx/Rx Flickers when the keyboard is transmitting/receiving data. COM Reserved ALARM Reserved 9 User Manual of DS-1100KI Network Keyboard Functional Buttons: MON WIN CAM MON-G CAM-G Select monitor Select window Select camera Select monitor group Select camera group MULT MAC TOUR GROUP SET Multi-division Call Set or call tour Set or call group Set mode PRESET display Set preset CALL macro-command Call preset PATROL PATTERN AUX1 Set or call patrol Set or call pattern AUX 1 SHIFT LOCK PREV NEXT AUX2 Shift Lock screen Previous camera Next camera AUX2 LOCK Button: The LOCK button on the keyboard is used to lock the keyboard and mouse operation. After being locked, it is unallowable to operate all keys (except LOCK and SHIFT), joystick, mouse and the touch screen. In the any interface or operation status, you can press and hold the LOCK key or press the SHIFT + LOCK keys to lock the keyboard operation. In the lock status, you can press and hold the LOCK key or press the SHIFT + LOCK keys to unlock the keyboard operation. Note: The keys will be locked as well when the screen is automatically locked. Numeric Buttons: The numeric buttons are used to input numerals. 10 User Manual of DS-1100KI Network Keyboard 4-axis Joystick: Use the joystick to realize pan and tilt movement at 8 directions. The 4-axis joystick can be used to control the zoom; and the central button used as Enter button and to realize picture capture as well. Note: The captured pictures can be saved in U-flash disk or uploaded to the FTP server. Playback Control: Rotate the outer ring of shutter in clockwise direction to increase speed, and up to 16X playing speed can be achieved. Rotate the outer ring of shutter in anti-clockwise direction to decrease speed, and 1/16X playing speed can be achieved. In playback by file, rotate the inner ring of shutter to play the previous/next file. Backward 5min Stop Record Play/Pause Previous File Next File 11 User Manual of DS-1100KI Network Keyboard 2.3 Button Operation 2.3.1 Operating Video Wall Display Button MON Description Num+MON: select the video output channel to be displayed on the video wall. Note: When the Num=0, the system enters the local live view mode. Example Press the 2+MON buttons to select the monitor 2. MULT Num+MULT: select different multi-division display modes for the selected output channel. Press the 2+MON+4+MULT buttons to configure 4-division display for the monitor 2. WIN Press the 2+MON+3+WIN buttons to select the window 3 of the monitor 2. CAM Num+MON+Num+WIN+Num+CAM: the video signal from the camera group can be outputted to and displayed on the selected window of monitor in cycle. Num+CAM: select the video input. MON-G Num+MON-G: select the monitor group. CAM-G Num+CAM-G: select the camera group. SET SET+Num+TOUR/GROUP/PATROL/PATTERN: the tour, group, patrol and pattern. SET+Num+TOUR: set the tour. Num+TOUR: call the defined tour. TOUR GROUP set SET+Num+GROUP: set the group. Num+GROUP: call the defined group. Press the 2+MON+3+WIN+5+CAM buttons to display the video input 5 on the window 3 of monitor 2. Press the 1+MON-G buttons to select the monitor group 1. Press the 1+MON+1+CAM-G buttons to select the camera group 1 to be displayed on the monitor 1. Press the SET+1+PATTERN buttons to set the pattern 1. Press the SET+1+TOUR buttons to set the tour 1. Press the 1+TOUR buttons to call the pre-defined tour 1. Press the SET+1+GROUP buttons to set the group 1. Press the 1+GROUP buttons to call the defined group 1. 2.3.2 PTZ Control Buttons Button PRESET Description Num+PRESET: move the pan/tilt/zoom to the desired position, and then press the Num+PRESET buttons to set the preset. Num+CALL: call the defined preset. Example Press the 1+PRESET buttons to set the preset 1. PATROL SET+Num+PATROL: set the patrol. Num+PATROL: set the defined patrol. Press the SET+1+PATROL buttons to set the patrol 1. Press the 1+PATROL buttons to call the patrol 1. PATTERN Num+PATTERN: Press the SET+1+PATTERN buttons to set the pattern 1. Press the 1+PATTERN buttons to call the pattern 1. CALL 12 Press the 1+CALL buttons to call the preset 1. User Manual of DS-1100KI Network Keyboard 2.3.3 Other Buttons Button Description Example MAC Num+MAC: call the MAC command. Press the 1+MAC buttons to call the MAC command 1. SHIFT SHIFT+LOCK: lock/unlock the system. Press the SHIFT+LOCK buttons to lock/unlock the system. LOCK Lock/unlock the system. Press and hold the LOCK button or press the SHIFT+LOCK buttons to lock/unlock the system. PREV Select the previous camera for live view on keyboard or on TV wall. Select the next camera for live view on keyboard or on TV wall. Press the AUX1 button to realize its defined function (two-way audio, picture capture or vide wall/scene switch). Press the AUX2 button to realize its defined function (two-way audio, picture capture or vide wall/scene switch). NEXT AUX1 AUX2 13 User Manual of DS-1100KI Network Keyboard 2.4 Input Method Shift Click the tab on the soft keyboard to enter the interface for inputting the English letters, and the can be used to switch the uppercase/lowercase. Click the tab on the soft keyboard to enter the interface for inputting the numerals. 2.5 Basic Operation Procedure Admin: For the first time to operate the keyboard, you should configure the keyboard parameters in Keyboard Configuration menu, add device and operator, and then link the added device to assigned operator. Operator: The operator is allowed to operate local live view, remote configuration of encoder/decoder parameters, display of decoded video on monitor, local playback, PTZ control, AUX functions, etc. Server: Control the matrix system, analog matrix, analog dome and iVMS platform. 14 User Manual of DS-1100KI Network Keyboard 2.6 Quick Configuration Guide Steps: 1. When the keyboard has started up, it enters the following interface: 2. For basic keyboard operation, select the Keyboard icon to continue and enter the login interface. 3. Select admin on the login interface and then input the admin password (default: 12345) to enter the admin interface of keyboard operation. 4. Click Keyboard > Network to enter the Network Settings interface. Configure the network settings of the keyboard, including the Port, IP address, Subnet Mask, Default Gateway, Preferred DNS and Alternate DNS. Click Apply to save the settings. 15 User Manual of DS-1100KI Network Keyboard 5. Click Return to back to the main interface. 6. Click Device on the admin main interface to enter the device management menu. 7. Click Add Device to enter the Device-Add Device interface. Input the device name, device IP/domain name, port, user name and password, and then click Add to add the device. 8. Return to the Device-Device List interface, and the successfully added device is shown on the list. Click Return to back to the main interface. 9. Click User on the main interface to enter the User-User List interface. 10. In the User List interface, click Add User to enter the Add User interface. Input the user name, password and verify the password. Finally, click Add to finish the adding of user. 16 User Manual of DS-1100KI Network Keyboard 11. Return to the User List interface, and click of the selected user to enter the User-Device interface. 12. Click Add Device to enter the User-Add Device interface. Select the device by clicking the checkbox, and click Add to add the device for the current user. 13. The added device (s) for the current user can be displayed on the User List interface. 14. You can directly click the (Login) icon of a user to switch its operating interface. Or you can click Logout on the admin main interface, the message box “Logout Now?” will pop up. Click Yes to confirm the logout, or No to cancel the operation. 17 User Manual of DS-1100KI Network Keyboard 2.7 Quick Operation Multi-division Display The Operator user is allowed to select different multi-division display modes for the selected output channel. Currently, 1/4/9/16-division display modes are configurable. Steps: 1. Press the Num + MON keys to select the monitor. 2. Press the Num + MULT keys to select the multi-division display mode for the output channel. Display of Decoded Video on Monitor Steps: 1. Press the Num + MON keys to select the monitor. 2. Press the Num + WIN keys to select the display window on the monitor. You can also directly touch the screen to select the display window. 3. Press the Num + CAM keys to select the input camera. Example: You can press the “1+MON, 2+WIN, 3+CAM” keys to decode the video signal from camera 3 and display it on window 2 of monitor 1. 18 User Manual of DS-1100KI Network Keyboard Chapter 3 Local Keyboard Configuration by Admin You can configure the keyboard by locally, WEB page or by the configuration tool. This chapter introduces the local keyboard configuration. 3.1 Login Steps: 1. Click the Keyboard icon on the startup interface. 2. Select admin on the login interface and then input the admin password (default: 12345). 3. You can check the checkbox of Remember Password to save the login password for future use. 4. Click Login to enter the main interface of admin. 3.2 Keyboard Management On the main interface of admin, click the Keyboard on the left navigation bar to enter the Keyboard Management interface. In the Keyboard Management interface, you can view the device version information, configure network parameters, configure hardware settings, adjust time, select language, screen calibration and upgrade system. 19 User Manual of DS-1100KI Network Keyboard 3.2.1 Viewing Version Information Click Version to enter the Keyboard-Version interface to view the current version information of the keyboard. 3.2.2 Configuring Network Settings Configure the network settings of the keyboard, including the Port, IP address, Subnet Mask, Default Gateway, Preferred DNS and Alternate DNS. Click Apply to save the settings. Note: Make sure the DHCP is supported by the router before enabling the function. 3.2.3 Configuring Hardware Settings Sound Effect/Alarm Sound/Key Light: Click the corresponding checkbox to it as to enable the function, or remain to disable the function. Keyboard Lock Delay, Screen Off Delay: Use the or to decrease or increase the key lock timeout and the screen-close timeout, with the range of 0~10 minute (s) configurable. When the value is set to 0, the key and screen will be unlocked. Background Contrast: Click to select the value from the drop-down menu, with the 3: 1, 1: 1, 1: 3 and non-transparent optional. Note: The Background Contrast refers to the contrast of the local decoded video and menu, and is valid only for the local live view. Mouse Speed: Select the mouse speed to level 0~3. Screen Brightness: Select the screen brightness to level 0~4. 20 User Manual of DS-1100KI Network Keyboard Click Apply to save the settings. 3.2.4 Configuring Time Settings Date: Click Time: Click to select the date from the calendar. or to decrease or increase the time value. Click Apply to save the settings. 3.2.5 Selecting Language Language: Click to select English as the system language. Click Apply to save the setting. 21 User Manual of DS-1100KI Network Keyboard 3.2.6 Calibrating Screen In order to use the touch screen correctly, it needs to calibrate the screen positioning properly. Steps: 1. Click Calibration to start the calibration of touch screen positioning. 2. The system will pop up the Hint message box. Click Yes to continue the calibration. 3. Use the touch pen to click the three spots marked as “+” by following the hints. 4. The system will pop up the hint “Screen Calibration completed”, click OK to finish the operation. 3.2.7 Upgrading Device Upgrade by FTP 1. Input the address of the FTP server and then click FTP Upgrade to operate the upgrade. Note: You must create the FTP server connection first by TFTP or WFTP in PC before operating the FTP upgrade. Please refer to Appendix2 for the upgrading. 22 User Manual of DS-1100KI Network Keyboard 2. If the upgrading is failed, the corresponding error message box will pop up. Note: When the upgrading is successful, the keyboard will restart automatically to complete the upgrade. Upgrade by USB-flash Disk Steps: 1. Insert the U flash disk to the USB interface and then click USB Upgrade to enter the USB upgrade interface. 2. Select the upgrade file from the disk and finally click Upgrade to start upgrading. Note: The upgrade file must be digicap.dav. 3. If the upgrading is failed, the corresponding error message box will pop up. Note: When the upgrading is successful, the keyboard will restart automatically to complete the upgrade. 3.3 Device Management Click Device on the admin main interface to enter the Device-Device List interface. 3.3.1 Adding a Device Task1: Add Device by Auto Searching 23 User Manual of DS-1100KI Network Keyboard Steps: 1. Click Auto Search button at the upper left corner to enter the Device-Auto Search interface. Note: Only the device that is in the same network segment with the keyboard can be searched out by the keyboard. 2. After the searching is completed, all devices searched out and their information will be displayed in the list below. Select the device from the list, and then input the login user name and password. 3. Click Add to add it to the system. Note: You can also select multiple devices to be added at a time if they have the same login user name and password by checking the checkboxes in front of them. Status: In the status bar, the icon added, and the 4. indicates the device is not added, indicates the device is failed to be indicates the device is successfully added. After having added the devices, click Exit to return to the Device-Device List interface, where you can view the information of added devices. Task2: Add Device by Manually Add Device: Click Add Device to enter the Add Device interface. Input the device name, device IP, port, user name and password, and then click Add to add the device. If the input message is incorrect or the device is offline, the message box “Adding Device failed” will pop up. 3.3.2 Editing/Deleting Device Edit Device On the Device-Device List interface, click of the device from the list to be edited and enter the Device-Edit Device interface. You are allowed to edit the device name, port, user name and password. Finally, click Edit to edit the device information. Note: The user name and password here refer to that are used for to log in the device from keyboard. 24 User Manual of DS-1100KI Network Keyboard Delete Device On the Device-Device List interface, select the device from the list to be deleted, and click the pop-up message box, click Yes to finish the deletion. 3.4 User Management Click User on the admin main interface to enter the User-User List interface. 3.4.1 Adding an User Steps: 1. Click Add User to enter the User-User List interface. 2. Input the user name, password and verify the password. 25 to delete it. In User Manual of DS-1100KI Network Keyboard 3. Click Add to finish the adding of user. 3.4.2 Setting the Related Device Purpose: To the added operators, they do not have the permission of adding devices. Perform the following procedures to relate devices to the operators. Steps: 1. In the User-User List interface, click to enter the User-Device interface. 2. Click Add Device to enter the User-Add Device interface. Select the device by clicking the checkbox, and click Add to add the device for the current user. 3. The successfully added device is listed on the User-Device interface. 4. After having configured the above settings, click Logout on the admin main interface, the message box “Logout Now?” will pop up. Click Yes to confirm the logout, or No to cancel the operation. Deleting a Device 26 User Manual of DS-1100KI Network Keyboard Enter the User-Device interface, you can select the device from the list and click to delete the related device for the current user. In the pop-up message box, click Yes to confirm the deletion. Operator User Login On the User-User List interface, you can click (Login Operator) to directly switch to the Operator user login interface. 3.4.3 Editing User Password/Deleting User Edit User Password: On the User-User List interface, you can click user. Delete User: Click to change of password of the selected to delete the selected user. 3.4.4 Importing/Exporting Configuration File Purpose: The configuration files of the device can be exported to local device for backup; and the configuration files of one device can be imported to multiple device devices if they are to be configured with the same parameters. Click Config file on the admin main interface to enter the file Export/Import Configuration interface. 27 User Manual of DS-1100KI Network Keyboard Importing Configuration File 1. Insert the U-flash disk to the USB interface on the keyboard. 2. Enter the disk to select a file. 3. Click Import to import the configuration file. Exporting Configuration File 1. Insert the U flash disk to the USB interface on the keyboard. 2. Click Export to export the configuration file named in kbCfg.bin. If the imported configuration file is not correct, the message box “Importing file failed: file type mismatched” will pop up. 3.5 Default Purpose: There are two types of restoring default supported: Simple and Complete. Simple: Remain the password of admin and network parameters, and restore other parameters to default. Complete: Restore all the parameters of the keyboard to default. Steps: 28 User Manual of DS-1100KI Network Keyboard 1. Click Default on the admin main interface. And select default type in the pop-up box. 2. Click Yes to continue the operation, or No to cancel the operation. 3.6 Logout Click Logout on the admin main interface, and the message box “Logout now?” pops up. Click Yes to confirm the logout, or No to cancel the operation. After logout, the system will return to the User Login interface. 3.7 Reboot Click Reboot on the admin main interface, the message box “Reboot now?” will pop up. Click Yes to confirm the reboot, or No to cancel the operation. 3.8 Shutdown Click Shutdown on the admin main interface, the message box “Shut down now?” will pop up. Click Yes to confirm the shutdown, or No to cancel the operation. 29 User Manual of DS-1100KI Network Keyboard Chapter 4 Local Keyboard Configuration by Operator Steps: 1. On the User Login interface, select the user name (operator) and enter password. 2. If needed, check the checkbox of Remember Password to save the login password for future use. 3. Click Login to enter the operator main interface. 4. Enter the main interface. Click the Device List on the main interface to enter the Device List interface. The list will display all devices which can be controlled by the current login user. 30 User Manual of DS-1100KI Network Keyboard 4.1 Encoder Settings Click of an encoder on the Device List interface and enter its remote settings interface. You can configure the settings for network, RS-232/RS-485 serial port, camera, alarm, exception, stream media, etc. 4.1.1 Network Settings Click Network on the remote settings interface to enter the Network Settings interface. You can enter the following settings interface to configure the network parameters: General Settings: Configure the NIC type, IP address, port, gateway, subnet mask, MAC address, DNS server address, and HTTP port of the current encoder device. PPPoE: Configure the user name and password of PPPoE settings. DDNS: Enable DDNS, select the protocol type to IPServer, DynDns, PeanutHull or NO-IP, and configure the corresponding settings. NTP: Configure NTP settings to synchronize the time of device to the selected time zone. Network Disk: Set the IP address, file path and type of the network disk to use. 4.1.2 Serial Port Settings Click Serial on the remote settings interface to enter the Serial Settings interface. 31 User Manual of DS-1100KI Network Keyboard You can set the RS232 port and RS485 parameters. 4.1.3 Camera Settings Click Camera on the remote settings interface to enter the Camera Settings interface. You can configure the video display, video parameters, record settings, motion detection, video loss detection, tampering alarm, privacy mask, and IPC management (for hybrid DVR and NVR only). Configuring Video Display On the Video Display interface, you can select the camera name for configuration, edit the camera name, select display or not display of the name/date /week, set the date/time format and OSD display. You can also copy the current settings to other camera (s). 32 User Manual of DS-1100KI Network Keyboard Configuring Video Parameters On the Video Parameters interface, you can select the camera name for configuration, set the main/sub stream, stream type, resolution, frame rate, bit rate type, Max. bit rate, and image quality. You can also copy the current settings to other camera(s). Configuring Record Settings 1. Configuring Advanced Settings On the Record Settings interface, select the camera for configuration. Click Advanced to enter the Advanced Settings interface where you can configure the pre-record, post-record, expired time, redundant record, record audio, etc. Pre-record: The time you set to record before the scheduled time or event. For example, when an alarm triggered the recording at 10:00, if you set the pre-record time as 5 seconds, the camera records it at 9:59:55. Post-record: The time you set to record after the event or the scheduled time. For example, when an alarm triggered the recording ends at 11:00, if you set the post-record time as 5 seconds, it records till 11:00:05. Expired Time: The expired time is the longest time for a record file to be kept in the HDD, if the deadline is reached, the file will be deleted. You can set the expired time to 0, and then the file will not be deleted. The actual keeping 33 User Manual of DS-1100KI Network Keyboard time for the file should be determined by the capacity of the HDD. Redundant Record: Enabling redundant record or capture means you save the record and captured picture in the redundant HDD. Record Audio: Choose “yes” to record the sound, “no” to record the image without sound. 2. Editing Recording Schedule On the Record Settings interface, click Edit to enter record schedule setting interface. Steps: 1. Click the checkbox of Enable Schedule item. 2. Select the day you want to set recording schedule. You can also select it to All Week. 3. To schedule an all-day recording, click the checkbox of the All Day item. 4. Select the recording type for the selected day to Continuous, Motion Detection, Alarm, Motion / Alarm or Motion & Alarm. 5. Configure the period for each day and select the recording type for the selected period. Note: Up to 8 periods can be configured for each day. 6. Click Save to save the current settings and Cancel to return to the previous interface. 7. On the Record Settings interface, you can view the configured recording schedule. 8. If you want to configure the other cameras with the same settings, choose the camera and click Copy. You can also select All to copy the current settings to all cameras. 9. Click Apply to save the current settings and Cancel to return to the previous interface. Configuring Motion Detection Follow the steps to set the motion detection parameters for the Encoder device. In the live view mode, once a motion detection event takes place, the device can analyze it and do many actions to handle it. Enabling motion detection function can trigger certain channels to start recording, or trigger full screen monitoring, audio warning, notify the surveillance center and so on. In this chapter, you can follow the steps to schedule a record which triggered by the detected motion. Steps: 1. On the Camera Settings interface, click Set beside Motion Detection to enter the Motion Detection Settings interface. 34 User Manual of DS-1100KI Network Keyboard 2. Select the camera for configuring motion detection. 3. Click the checkbox of Enable item to enable motion detection. 4. Set the sensitivity level. Up to 6 levels and OFF are selectable. 5. Click the Set button beside Area Settings to set motion detection area. 6. Click Start Drawing, and then use the mouse to click two points on the live view screen to draw area for motion detection. 7. To clear the motion detection area (s), click Clear All. 8. Click the Set button beside Arming Schedule to configure the arming schedule of motion detection for the current camera. 9. Click the Set button beside Linkage Action to configure the linkage method. If the Trigger Alarm Output is selected, you should click the Set button to configure the triggered alarm output (s). 35 User Manual of DS-1100KI Network Keyboard 10. After having configured the above setting and if you want to configure the other cameras with the same settings, choose the camera and click Copy. You can also select All to copy the current settings to all cameras. 11. Click Apply to save the current settings and Cancel to return to the previous interface. Configuring Video Loss Detection Detect the video loss of a camera and take alarm response action(s). Steps: 1. On the Video Loss interface, click Set beside Video Loss to enter the Video Loss Detection interface. 2. Select the camera for configuring video loss detection. 3. Click the checkbox of Enable item to enable video loss detection. 4. Click the Set button beside Arming Schedule to configure the arming schedule of video loss detection for the current camera. 5. Set the Linkage Action by selecting the methods list below. If the Trigger Alarm Output is selected, you should click the Set button to configure the triggered alarm output (s). 36 User Manual of DS-1100KI Network Keyboard 6. After having configured the above setting and if you want to configure the other cameras with the same settings, choose the camera and click Copy. You can also select All to copy the current settings to all cameras. 7. Click Apply to save the current settings and Cancel to return to the previous interface. Configuring Video Tampering Alarm Trigger alarm when the lens is covered and take alarm response action(s). Steps: 1. On the Camera Settings interface, click Set beside Tampering Alarm to enter the Tampering Alarm settings interface. 2. Select the camera for configuring video tampering detection. 3. Click the checkbox of Enable item to enable video tampering detection. 4. Set the sensitivity level to High, Middle or Low. 5. Click the Set button beside Area Settings to set video tampering detection area. Please refer to the settings of motion detection area. 6. Click the Set button beside Arming Schedule to configure the arming schedule of video loss detection for the current camera. 8. Set the Linkage Action by selecting the methods list below. If the Trigger Alarm Output is selected, you should click the Set button to configure the triggered alarm output (s). 9. After having configured the above setting and if you want to configure the other cameras with the same settings, choose the camera and click Copy. You can also select All to copy the current settings to all cameras. 10. Click Apply to save the current settings and Cancel to return to the previous interface Configuring Privacy Mask You are allowed to configure the four-sided privacy mask zones that cannot be viewed by the operator. Steps: 1. On the Camera Settings interface, click Set beside Privacy Mask to enter the Privacy Mask settings interface. 37 User Manual of DS-1100KI Network Keyboard 2. Select the camera for configuring privacy mask. 3. Click the checkbox of Enable item to enable privacy mask. 4. Click the Set button beside Area Settings to set privacy mask area. Please refer to the settings of motion detection area. 5. Click Apply to save the current settings and Cancel to return to the previous interface. Configuring IP Camera If the current Encoder device is Hybrid DVR or NVR type, you can also enter the Channel List interface by clicking Set beside IP Camera Management on the Camera Settings interface. Adding IP Camera: 1. Click the IP Camera List tag to enter the IP camera management interface. 2. Click Add to enter the IP Camera Parameters interface. 3. Configure the Camera No., Registration Mode (IP address/domain name), IP address/ Domain name, Port, User Name, Password, Channel No. and Factory (protocol type) to add the IP camera. 4. Click OK to save the settings. 5. On the Channel List interface, click Apply to finish the adding of the IP camera. Editing Status of Analog Camera: For Hybrid DVR, you can view the status of the connected analog camera, as well as increase the number of IP 38 User Manual of DS-1100KI Network Keyboard camera to add by changing the disabling the analog camera (s). 1. Click the Analog List tag to enter the analog camera management interface. You can the information of the connected analog camera. 2. Click Status to enter the Analog Camera Status interface. 3. You can de-select the camera (s) to disable the analog camera(s) connected. Note: Please refer to the User Manual of DS-9000 or DS-7600 for detailed instructions. 4.1.4 Alarm Settings Click Alarm on the remote settings interface to enter the Alarm Settings interface where you can configure the alarm input, alarm output and manual alarm. 1. Configuring Alarm Input (1) Click Set beside Alarm Input to enter the Alarm Input Settings interface. (2) Select the alarm input for configuration. (3) Edit the Alarm Name. (4) Select the Alarm Type to Normally Open or Normally Close. (5) Set the handling action for the selected alarm input by clicking the checkbox of Handling Alarm. Configure the Arming Schedule and Linkage Action to set up its alarm response actions, as well as 39 User Manual of DS-1100KI Network Keyboard triggered camera and PTZ linkage (calling defined preset / patrol / pattern). (6) After having configured the above setting and if you want to configure the other cameras with the same settings, choose the camera and click Copy. You can also select All to copy the current settings to all cameras. (7) Click Apply to save the current settings and Cancel to return to the previous interface. Note: Please refer to the User Manual of the current DVR for detailed instructions. 2. Configuring Alarm Output (1) Click Set beside Alarm Output to enter the Alarm Output Settings interface. (2) Select the alarm output for configuration. (3) Set the Hold For (duration) time for the alarm output. (4) Set the Dwell Time (duration) for the alarm output. (5) Configure the Arming Schedule of the alarm output. (6) After having configured the above setting and if you want to configure the other cameras with the same settings, choose the camera and click Copy. You can also select All to copy the current settings to all cameras. (7) 3. Click Apply to save the current settings and Cancel to return to the previous interface. Configuring Manual Alarm (1) Click Set beside Manual Alarm to enter the Manual Alarm Settings interface. (2) Select the alarm output (s) for manual triggering. 40 User Manual of DS-1100KI Network Keyboard (3) Click OK to return to the Alarm Settings interface. 4.1.5 Exceptions Configure the exception handling method (s) for each exception type. Steps: 1. Click Exceptions on the remote settings interface to enter the Exception Settings interface. 2. Select the exception type to configure with handling method (s). The exception types include: HDD Full: The HDD is full. HDD Error: Writing HDD error, unformatted HDD, etc. Network Disconnected: Disconnected network cable. IP Conflicted: Duplicated IP address. Illegal Login: Incorrect user ID or password. 3. Select the handling method (s) by clicking the checkbox (s) for the selected exception type. Audible Warning: Audible beep when an alarm is detected. Notify Surveillance Center: Send an exception or alarm signal to remote alarm host when an event occurs. The alarm host refers to the PC installed with Remote Client. Email Linkage: Send an email with alarm information to a user or users when an alarm is detected. Trigger Alarm Output: Trigger an alarm output when an alarm is triggered. You can click the Set button to set the alarm output (s) to trigger. 4. Click Apply to save the current settings. 4.1.6 Maintenance Click Maintenance on the remote settings interface to enter the Device Management interface. 41 User Manual of DS-1100KI Network Keyboard HDD Management: Set and initialize HDD, and set HDD in group management. User Management: Add/edit/delete user account, and assign operating permissions for each user. Device Information: View the version and basic information of the encoder device. Device Upgrade: Remotely upgrade the device by USB file. Import/Export: Import/export configuration files. Restore Default: Restore factory default settings. Remote Panel: Use the remote front panel of the device to realize operation. 4.1.7 Stream Media Settings Purpose: The stream media sever only takes effect when the video needs to be decoded and displayed on the video wall. The decoder connects with the stream media server to get the video stream. Steps: 1. Click Stream Media on the remote settings interface to enter the Stream Media Settings interface. 2. Enable the Stream Media by checking the checkbox. 3. Input the IP address and port of the server. Note: The Server IP refers to the IP address of the PC on which the stream media software is running. 4. You can check the checkbox of Copy to all to copy the current stream media settings to all encoding devices under the current login user. If you uncheck it, the stream media settings are applicable to the current encoding device only. 5. Click Apply to save the settings. 42 User Manual of DS-1100KI Network Keyboard 4.2 Decoder Settings Click the of a decoder on the Device List interface and enter its remote settings. On this interface, you can configure the settings for network, RS-232/RS-485 serial port, output, decoding status, maintenance, etc. 4.2.1 Network Settings Click Network on the remote settings interface to enter the Network Settings interface. You can configure the general settings, advanced settings, PPPoE, DDNS and NTP parameters of the decoder. Please refer to the Network Settings of the Encoder for details. 4.2.2 Serial Port Settings Click Serial on the remote settings interface to enter the Serial Port Settings interface. 43 User Manual of DS-1100KI Network Keyboard You can set the RS232 port and RS485 parameters. 4.2.3 Output Settings You can configure parameters for the display of decoded output video on monitor. Steps: 1. Click Output on the remote settings interface to enter the Output Settings interface. 2. Select the display channel. 3. Enable audio and configure it for a window if required. 4. Set the video format and resolution of the decoded video output. 5. Select the window-division mode (1/2/4-division). 6. Configure window for relevant channel. (1) Select a window and its relevant channel. (2) Click Save to save the current widow settings. (3) Repeat the same steps to configure the other windows for their related channels. 7. After having configured the above settings, click Apply to finish the settings or Clear to cancel the settings. 4.2.4 Video Wall If the connected decoder is DS-6400HDI-T or DS-6400HDI-S, the video wall display is supported. You can decode the video signal and display it on the video wall. Steps: 1. Click Video Wall on the remote settings interface to enter the Video Wall interface. 44 User Manual of DS-1100KI Network Keyboard 2. Select the video wall No. to configure and enable the video wall display by checking the Enable checkbox. 3. Select the window-division mode. 4. Set the decoding channel and the output resolution. 5. Select the screen No. of the selected video wall and the output channel of the decoder. 6. After having configured the above settings, click Apply to finish the settings. 4.2.5 Decoding Status Click Decoding Status on the remote settings interface to enter the Decoding Status interface. You can view the working status of each decode channel, including the decode state, stream type, package mode, video/audio frame rate, etc. 4.2.6 Maintenance Click Maintenance on the remote settings interface to enter the Device Management interface. User Management: Add/edit/delete user account, and assign operating permissions for each user. 45 User Manual of DS-1100KI Network Keyboard Device Information: View the version and basic information of the decoder device. Device Upgrade: Remotely upgrade the device by USB file. Import/Export: Import/export configuration files. Restore Default: Restore factory default settings. 4.3 Input Settings Click Input on the main interface to enter the Input Settings-Input List interface. The list has displayed all device cameras which can be controlled by the current login user. Search by IP or domain is supported. Input the IP address or domain of the device in the text field and click the Search button. Note: The camera name shown in the Camera Name is obtained from the corresponding device. 4.3.1 Starting Local Live View Steps: 1. Select a camera from the input list and click the icon to start the local live view. 2. You can press the NEXT or PREV button to view the video of the next or previous camera. 4.3.2 Live View by Channel-zero Steps: 1. Click the settings interface: button on the Input Settings-Input List interface to enter the Channel-zero 46 User Manual of DS-1100KI Network Keyboard 2. Select an encoding device from the list and click the channel-zero. icon to enter the local live view by the Note: The channel-zero must be supported by the connected encoding device and has been enabled. 4.3.3 Editing a Camera Select a camera from the Input Settings-Input List interface, and click to edit the camera name, camera No., protocol and stream type. Note: The Camera No. should be set uniquely from 1 to 999999. 4.3.4 Setting Input Group Steps: 1. 2. Click Input Group to enter the Input Settings-Input Group interface. Click to select the group No. from the drop-down menu, set the cycle time for the group and click the Save button. 47 User Manual of DS-1100KI Network Keyboard Note: Up to 16 camera groups can be added. 3. Click the Add Camera key to enter the Add Camera interface: 4. Select the cameras from the list to be added to the group, and then click Add to finish the setting. 5. Click Finish to return to the Input Group interface, where you can view the successfully added cameras for the current group. You can click to delete the added camera. 4.4 Output Settings Click Output on the main interface to enter the Output Settings interface. Search by IP or domain is supported. Input the IP address or domain of the device in the text field and click the Search button. The list has displayed all output channels added to the current login user. 4.4.1 Playback on Monitor Select an output channel from the output list and click the icon to enter the Playback interface. Note: Before operating the playback, you must configure the output settings first. Please refer to 4.2.3 Output Settings. Playback by File Steps: 1. Click the By File tab to enter the playback by file interface. 48 User Manual of DS-1100KI Network Keyboard 2. Input the display window. Note: Please refer to the window-division mode in the 4.2.3 Output Settings before inputting the display window here. 3. Input the Camera No. for playback. If the encoding device is ATM DVR, you can input the Card No. 4. Select the record type and file type. 5. Set the start time and end time of the video files for playback. 6. Click Search to search the matched video files. 7. The searching results can be viewed on the Playback File List interface. 8. Select the file for playback from the list and click Playback to play back the video file. Note: The Playback Control buttons on the left side of the control panel are supported during the playback. Playback by Time Steps: 1. Click the By Time tab to enter the playback by time settings interface. 2. Input the display window. Note: Please refer to the window-division mode in the 4.2.3 Output Settings before inputting the display window 49 User Manual of DS-1100KI Network Keyboard here. 3. Input the Camera No. for playback. 4. Set the start time and end time of the video files for playback. 5. Click Playback to start playback. Note: The Playback Control buttons on the left side of the control panel are supported during the playback. 4.4.2 Editing an Output Channel Select an output channel from the on the Output Settings-Output List interface, and click No.. Note: The Output No. should be set uniquely from 1 to 999999. 4.4.3 Setting Output Group Steps: 1. Click Output Group to enter the Output Settings-Output Group interface. 2. Click 3. Click the Add Output key to enter the Add Output interface: to select the group No. from the drop-down menu. 50 to edit the output User Manual of DS-1100KI Network Keyboard 4. Select the outputs from the list to be added to the group, and then click Add to finish the setting. 5. Click Finish to return to the Output Group interface, where you can view the successfully added output channels for the current group. You can click to delete the added output. 4.4.4 Setting Video Wall / Scene Steps: 1. Click the Wall/Scene button to enter the Video Wall/Scene List. 2. Click 3. Edit the No. for the video wall / scene on your demand. 4. Click OK button to save the setting. to enter the editing interface. 4.5 Macro Settings The macro command can be used for operating a series of continuous actions in sequence. 51 User Manual of DS-1100KI Network Keyboard Operation: Press the “Num + MAC” keys to call the programmed macro command. Click Macro on the main interface to enter the Macro Settings interface. Adding Macro Click Add Macro to enter the Macro Setting-Add Macro interface. Edit the macro name, and press the command keys on the keyboard to enter the text box below. Finally, click Add to add the current macro command. Notes: Up to 128 macro commands can be added. Max. 6 numerals can be included in a macro command. The local decoding and live view operation is not supported currently. Viewing Macro The added Macro commands are listed on the Macro Settings-Macro List interface. You can click to view each macro command. Running Macro Select a command from the list and click to run the command, or directly click Num + MAC keys on the 52 User Manual of DS-1100KI Network Keyboard interface to call the macro command. Deleting Macro You can click to delete the added macro command. 4.6 Playback The video files stored in the encoding device can be played back through the related decoder. Three playback modes are available: playback by USB file, playback by time and playback by file. Click Playback on the main interface to enter the Local Playback interface. 4.6.1 Playback by USB File Steps: 1. Connect your USB disk to the keyboard. 2. Click the USB File tab on the Local Playback interface to enter the Playback by Local File interface. 3. Select the video file from the USB disk for playback. 53 User Manual of DS-1100KI Network Keyboard 4. Click Playback to play the selected video file. 4.6.2 Playback by File Steps: 1. Click the By File tab on the Local Playback interface to enter the Playback by File interface. 2. Input the Camera No. for playback. 3. Select the record type and file type. If the encoding device is ATM DVR, you can input the Card No. 4. Set the start time and end time of the video files for playback. 5. Click Search to search the matched video files. (1) The searching results can be viewed on the Playback File List interface. (2) Select the file for playback from the list and click Playback to play back the video file. 54 User Manual of DS-1100KI Network Keyboard 4.6.3 Playback by Time 1. Click the By Time tab on the Local Playback interface to enter the Playback by Time interface. 2. Input the Camera No. for playback. 3. Set the start time and end time of the video files for playback. 4. Click Playback to play back the recoding file. 4.7 Advanced Settings Click Advanced on the main interface to enter the Advanced Settings interface where you can configure the password, AUX key, live view performance and PTZ speed control settings. 4.7.1 Password Settings Click Password on the Advanced Settings interface to enter the Password Settings interface. It is allowed to edit the password for the current login user. Enter the current password and new password, and then click Apply to finish the password modification. 55 User Manual of DS-1100KI Network Keyboard 4.7.2 AUX Key Settings Click Aux Key on the Advanced Settings interface to enter the Aux Key Settings interface. On the Advanced Settings-Aux Key interface, the Aux Key 1 and Aux Key 2 correspond to the AUX1 and AUX2 keys on the keyboard respectively. The function of AUX1/AUX2 can be set to Two-way Audio, Picture Capture or Video Wall/Scene Switch control. Click to select the Aux function for each Aux Key, and then click Apply to save the settings. 4.7.3 Live View & PTZ Speed Settings Click Performance on the Advanced Settings interface to enter the network performance and PTZ speed settings interface. It allows you set the network performance of local live view on keyboard. Five levels are selectable. You can also set the PTZ movement speed of the connected PTZ camera by using the joystick. Four levels are selectable. 56 User Manual of DS-1100KI Network Keyboard 4.7.4 FTP Settings The video files or captured pictures can be uploaded to FTP server. Steps: 1. Click FTP Settings on the Advanced Settings interface to enter the FTP Settings interface. 2. Check the checkbox of Enable FTP. Note: If the Enable FTP is unchecked, the video files or captured pictures will be saved in the U-flash disk. 3. Enter the IP address of the FTP server. 4. Enter the user name and password for login to the FTP server. 5. Enter the file path to which the video files and captured pictures are uploaded. 6. Click Apply to save the settings. 4.8 Logout Click Logout on the main interface, and the message box “Logout now?” will pop up. Click Yes to confirm the logout, or No to cancel the operation. After logout of current login user, the system will return to the User Login interface. 4.9 Reboot Click Reboot on the main interface, the message box “Reboot now?” will pop up. Click Yes to confirm the reboot, or No to cancel the operation. 57 User Manual of DS-1100KI Network Keyboard 4.10 Shutdown Click Shutdown on the main interface, the message box “Shut down now?” will pop up. Click Yes to confirm the shutdown, or No to cancel the operation. 58 User Manual of DS-1100KI Network Keyboard Chapter 5 Keyboard Operation 5.1 Shortcut Operation The operating user must log in the keyboard to realize all shortcut operations (except LOCK). Shortcut Operation: Press the Num keys on the keyboard to enter the shortcuts operation interface. Notes: When user enters the shortcuts operation interface by inputting the Num key, press ESC to cancel the inputted numeral from the screen and start the shortcut operation. When user enters the shortcuts operation interface by inputting the SET key, user should press it again before starting the shortcut operation. In the shortcuts operation interface, the left part has displayed the current output channel, and user can select different window-division display modes, set input channel for each window, or configure other shortcut operations. And the right part of the interface is used for displaying the current key input and some shortcut operations. 5.2 Local Live View The local live view refers to display the video signal from the input channel through the network keyboard. Currently, only the 1-window display mode for 1 decoding channel is supported. In the preview mode, user can operate other shortcut functions. Steps: 1. Press the 0+MON keys to enter local preview. 2. Press the Num + CAM keys to select the camera input for display on the screen. Note: In the local operation status, it is unallowable to operate the window (WIN), camera group (CAM-G), multi-division display (MULT) and camera tour (TOUR) functions. 59 User Manual of DS-1100KI Network Keyboard 3. Press the ESC key on the keyboard to enter full-screen preview mode. Notes: Up to 1080P resolution is supported for local live view. User can press the 0+CAM keys to stop the live view of the current window. 5.3 Display of Decoded Video on Monitor 5.3.1 Setting Multi-division Display You can select different multi-division display modes for the selected output channel. Currently, 1/4/9/16-division display modes are configurable. Steps: 1. Press the Num + MON keys to select the monitor. 2. Press the Num + MULT keys to select the multi-division display mode for the output channel. Note: In the local live view mode when you input 0+MON keys, the multi-division display mode is not supported. 60 User Manual of DS-1100KI Network Keyboard Note: Corresponding error message will appear on the screen when user performs wrong operation. E.g., when the multi-division number entered is not supported by the current output channel, the message “Window mode error.” will appear. 5.3.2 Setting Camera to Monitor The selected input signal can be outputted and displayed by the decoding channel on the monitor. Currently, the supported decoding resolution includes: QCIF, CIF, 2CIF, DCIF, 4CIF, 720p, 1080p, VGA, UXGA, etc. The output interface can be selected to BNC/VGA/HDMI/DVI. Steps: 1. Press the Num + MON keys to select the monitor. 2. Press the Num + WIN keys to select the display window on the monitor. You can also directly touch the screen to select the display window. 3. Press the Num + CAM keys to select the input camera. Example: You can input the “1+MON, 2+WIN, 3+CAM” keys to decode the video signal from camera 3 and display it on window 2 of monitor 1. When you press the 0+CAM keys, it will stop the dynamic decoding of the current window. If no display window is st selected, the decoding of the 1 window will be stopped by default. Description of icons: Switch to full screen of sub screen Restore Audio off Audio on Notes: In the local live view mode, when you input 0+MON keys, only the single-window display mode is supported. Corresponding error message will appear on the screen when you perform wrong operation. 5.3.3 Setting Camera Group to Monitor The video signal from the selected camera group can be outputted to and displayed by the decoding channel on monitor. 1. When the number of cameras is equal to or less than the number of display windows on screen, e.g., 8 cameras9 windows, then each camera will be displayed on its corresponding monitor respectively, e.g., camera 1 on window 1, camera 8 on window 8, etc. 2. When the number of cameras is more than the number of display windows on screen, e.g., 34 cameras 16 61 User Manual of DS-1100KI Network Keyboard windows, then the camera 1-16 will be displayed on window 1-16, camera 17-32 on window 1-16, and camera 33-34 on window 1-2 in cycle view mode. Note: The dwell time for the cycle view is set in the input group setting interface, refer to 4.3.4 Setting Input Group. Steps: 1. Press the Num + MON keys to select the monitor. 2. Press the Num + CAM-G keys to select the input camera group to be decoded and displayed on the monitor. Notes: In the local live view mode when you input 0+MON keys, the multi-division display mode is not supported. When you press the 0+CAM keys, it will stop the dynamic decoding of the current window. Corresponding error message will appear on the screen when you perform wrong operation. 5.3.4 Setting Camera Group to Window The video signal from the camera group can be outputted to and displayed on the selected window of monitor in cycle. Note: The dwell time for the cycle view is set in the input group setting interface, refer to 4.3.4 Setting Input Group. Steps: 1. Press the Num + MON keys to select the monitor. 2. Press the Num + WIN keys or directly touch on the screen to select the display window. 3. Press the Num + CAM-G keys to select the camera group. Example: You can input the “1+MON, 2+WIN, 3+CAM-G” keys to decode the video signal from camera group 3 and display it on window 2 of the monitor 1. Note: In the local live view mode when you input 0+MON keys, the cycle view function is not supported. you press the 0+CAM keys, it will stop the dynamic decoding of the current window. 62 When User Manual of DS-1100KI Network Keyboard Note: Corresponding error message will appear on the lower-left corner of the screen when you perform wrong operation. 5.3.5 Setting Camera Group to Monitor Group The selected camera group signal can be outputted and displayed by the decoding channel on the selected monitor group. 1. When the number of cameras in the camera group is equal to or less than the number of monitors in the monitor group, e.g., 8 cameras9 monitors, then each camera will be displayed on its corresponding monitor respectively, e.g., camera 1 on monitor 1, and camera 8 on monitor 8, etc. 2. When the number of cameras in the camera group is more than the number of monitors in the monitor group, e.g., 34 cameras16 monitors, then the camera 1-16 will be displayed on monitor 1-16, camera 17-32 on monitor 1-16, and camera 33-34 on monitor 1-2 in cycle view mode. Note: The default dwell time of cycle view is 30 sec. Steps: 1. Press the Num + MON-G keys to select the monitor group. 2. Press the Num + CAM-G keys to select the camera group to be viewed in cycle on the specified monitor group. Note: In this operation mode, each output channel in the selected monitor group will be displayed on the screen in 1-division mode by default. 5.3.6 Setting a Tour Up to 64 cameras can be set in a tour, with the dwell time configurable. The default dwell time is 30 seconds. When the system is not in the playback mode, you can directly press the SET key then the Num + TOUR keys to enter the tour settings interface. Steps: 1. Press the SET key to enter the tour settings interface. 2. Press the Num + TOUR keys to set the selected tour. 3. Press the Num + ENTER keys to set the dwell time of the camera and the camera number. 4. Repeat Step 3 to set other cameras. 5. Press the SET key to finish the tour settings. Note: The tour settings will not be saved after the keyboard is rebooted. 63 User Manual of DS-1100KI Network Keyboard Up to 8 tours can be supported currently. The dwell time of the tour is the length of time used for switching from one camera to the next camera in the tour. All cameras are set with the same dwell time. Notes: When the device is restarted, all the tour settings will be invalid. All programmed parameters will be cleared if you press the Num + TOUR keys again in the process of setting tour. Corresponding error message will appear on the screen when you perform wrong operation. 5.3.7 Calling a Tour Steps: 1. Press the Num + MON keys to select the monitor for display. 2. Press the Num + TOUR keys to call the programmed tour to be displayed on the selected monitor. 5.3.8 Setting a Group Tour Multiple camera groups can be displayed on the specified monitors in tour respectively. Each user account is allowed to set up to 8 group tours, and each group can include 8 camera groups to specified monitors. When the system is not in the playback mode, user can directly press the SET key and then Num + GROUP keys to enter the group tour settings interface. Steps: 1. Press the SET key to enter the settings interface. 2. Press the Num + GROUP keys to set the group tour. 3. Press the Num + ENTER keys to set the monitor (MON) number. 64 User Manual of DS-1100KI Network Keyboard 4. Press the Num + ENTER keys to set the camera group (CAM-G) number. 5. Repeat step 3-4 to set other monitors and camera groups. 6. Press the SET key to finish the group tour settings. Notes: The group tour settings will not be saved after keyboard reboot. And if you press the Num + GROUP keys in the process of setting the group tours, all previous settings will be cleared. Corresponding error message will appear on the screen when you perform wrong operation. 5.3.9 Calling a Group Tour Multiple camera groups can be automatically displayed on related monitors respectively in tour by calling the programmed group tour, e.g., camera group 1 on monitor 1, camera group 2 on monitor 2, etc. If multiple camera groups are configured for the same monitor, then it is available for the display of the last programmed camera group only. The dwell time of group tour can be configured. Steps: Press the Num + GROUP keys to directly call the programmed group tour. 5.3.10 Operating Instant Playback The recording files of the previous 5 seconds can be played back via the keyboard instantly. Steps: 1. Press the Num + MON keys to select the monitor. 2. Press the Num + WIN keys to select the display window. 3. Press the Num + CAM keys to select the camera. 65 User Manual of DS-1100KI Network Keyboard 4. Press the key to enter the instant playback interface. Notes: The local playback by time is not supported. You can press the button to stop the instant playback. Other playback operation: Rotate the outer ring of the shutter in clockwise direction to speed up the playback, with the max. speed capable of reaching 16X. And by rotating the outer ring of the shutter in anti-clockwise direction you can speed down the playback, with the min. speed capable of reaching 1/16X. 5.3.11 Operating Image Switch Steps: 1. Set the usage of the Aux Key as the Video Wall/Scene Switch. Please refer to the 4.7.2 AUX Key Settings for detailed instructions. 2. Check the No. of Wall/Scene you want to set. Please refer to the 4.4.4 Setting Video Wall / Scene for detailed instructions. 3. Press Num + AUX keys to select the video wall/scene. 4. Press Num + WIN keys to select the screen (not for video wall). 5. Press Num + CAM/CAM-G to switch the selected camera or camera group on the screen. 6. Press 0 + CAM keys to stop decoding. 66 User Manual of DS-1100KI Network Keyboard 5.4 PTZ Control 5.4.1 PTZ Control Function If the camera connected to the keyboard supports PTZ function, you are allowed to operate the LIGHT/FOCUS/IRIS/ZOOM/WIPER buttons to realize PTZ control. Two operation methods can be used to realize PTZ control: Method 1: 1. Press the Num + MON keys to select the monitor. 2. Press the Num + WIN keys to select the display window. Note: When the current window is in cycle view mode, the keyboard will be unable to automatically connect with the camera and now it is invalid to operate the joystick. Method 2: 1. Press the Num + CAM keys to directly select the camera. 2. When the camera connected to the keyboard supports PTZ function, operate the joystick and LIGHT/WIPER/FOCUS±/IRIS±/ZOOM buttons to realize PTZ control. 5.4.2 Setting a Preset Select the output monitor or window and the keyboard is capable of automatically connecting with its corresponding camera. Operate the joystick to move PTZ to the desired position and then press the PRESET key to complete the preset settings. You are also allowed to directly select the camera by inputting Num + CAM keys and then press the PRESET key to start patrol settings. • Setting a Preset by Output Channel Steps: 1. 2. 3. 4. Press the Num + MON keys to select the output channel. Press the Num + WIN keys to select the display window. Operate the joystick to move PTZ to the desired position. Press the Num + PRESET keys to set the current position as the preset with entered number. Note: Corresponding error message will appear on the screen when you perform wrong operation. • Setting a Preset by Input Channel 67 User Manual of DS-1100KI Network Keyboard Steps: 1. 2. Press the Num + CAM keys to select the input channel. Operate the joystick to move PTZ to the desired position. Press the Num + PRESET keys to set the current position as the preset with entered number. Notes: It is invalid to input the 0+CAM keys in the current operation mode. Corresponding error message will appear on the screen when you perform wrong operation. 5.4.3 Calling a Preset The programmed preset can be called to achieve the desired position. Select the output monitor or window and then press the CALL key on the keyboard to call the preset. You are also allowed to directly select the camera by pressing Num + CAM keys and then press the CALL key to realize preset callup. • Calling a Preset by Output Channel Steps: 1. Press the Num + MON keys to select the output channel. 2. Press the Num + WIN keys to select the display window. 3. Press the Num + CALL keys to call the programmed preset. Note: This operation is valid only when the preset function is supported by the connected camera/dome. Note: Corresponding error message will appear on the screen when you perform wrong operation. • Calling a Preset by Input Channel Steps: 1. Press the Num + CAM keys to select the input channel. 2. Press the Num + CALL keys to call the programmed preset. Note: It is invalid to input the 0+CAM keys in the current operation mode. 68 User Manual of DS-1100KI Network Keyboard Note: Corresponding error message will appear on the screen when you perform wrong operation. 5.4.4 Setting a Patrol Select the output monitor or window and the keyboard is capable of automatically connecting with its corresponding camera. Press the SET key on the keyboard and then press PATROL key to enter the patrol settings interface. You are also allowed to directly select the camera by inputting Num + CAM keys and then press the SET key to start patrol settings. • Setting a Patrol by Output Channel Steps: 1. 2. 3. 4. 5. 6. 7. Press the Num + MON keys to select the output channel. Press the Num + WIN keys to select the display window. Press the SET key to enter the settings interface. Press the Num + PATROL keys to enter the patrol settings interface. Input Num and press the ENTER key to set the preset number, stop time and speed respectively. Repeat Step5 to set other presets. Press the SET key again to finish the patrol settings. Notes: Corresponding error message will appear on the screen when you perform wrong operation. All programmed parameters will be cleared if you press the Num + PATROL keys again in the process of setting the patrol. • Setting a Patrol by Input Channel Steps: 1. 2. 3. Press the Num + CAM keys to select the input channel. Press the SET key to enter the settings interface. Press the Num + PATROL keys to enter the patrol settings interface. 69 User Manual of DS-1100KI Network Keyboard 4. 5. Input Num and press the ENTER key to set the preset number, stop time and speed respectively. Press the SET key again to finish the patrol settings. Notes: It is invalid to input the 0+CAM keys in the current operation mode. Corresponding error message will appear on the screen when you perform wrong operation. 5.4.5 Calling a Patrol Select the output monitor or window and the keyboard is capable of automatically connecting with its corresponding camera. Press the PATROL key on the keyboard to call the programmed patrol. You are also allowed to directly select the camera and then press the PATROL key to realize patrol callup. • Calling a Patrol by Output Channel Steps: 1. Press the Num + MON keys to select the output channel. 2. Press the Num + WIN keys to select the display window. 3. Press the Num + PATROL keys to call the programmed pattern. Note: This operation is valid only when the patrol function is supported by the connected camera/dome. Note: Corresponding error message will appear on the screen when you perform wrong operation. • Calling a Patrol by Input Channel Steps: 1. Press the Num + CAM keys to select the input channel. 2. Press the Num + PATROL keys to call the programmed patrol. Note: It is invalid to input the 0+CAM keys in the current operation mode. 70 User Manual of DS-1100KI Network Keyboard Note: Corresponding error message will appear on the screen when you perform wrong operation. 5.4.6 Setting a Pattern Select the output monitor or window and the keyboard is capable of automatically connecting with its corresponding camera. Press the SET key on the keyboard and then press PATTERN key to enter the pattern settings interface. You are also allowed to directly select the camera and then press the SET key to start pattern settings. • Setting a Pattern by Output Channel Steps: 1. 2. 3. 4. 5. 6. Press the Num + MON keys to select the output channel. Press the Num + WIN keys to select the display window. Press the SET key to enter the settings interface. Press the Num + PATTERN keys to set the pattern number. Operate the joystick to control PTZ movement. Press the SET key again to finish the pattern settings. Note: It is invalid to input the 0+CAM keys in the current operation mode. • Setting a Pattern by Input Channel Steps: 1. 2. 3. 4. 5. Press the Num + CAM keys to select the input channel. Press the SET key to enter the settings interface. Press the Num + PATTERN keys to set the pattern number. Operate the joystick to control PTZ movement. Press the SET key again to finish the pattern settings. 71 User Manual of DS-1100KI Network Keyboard Note: Corresponding error message will appear on the screen when you perform wrong operation. 5.4.7 Calling a Pattern Select the output monitor or window and the keyboard is capable of automatically connecting with its corresponding camera. Press the PATTERN key on the keyboard to call the programmed pattern. You are also allowed to directly select the camera by inputting Num + CAM keys and then press the PATTERN key to realize pattern callup. • Calling a Pattern by Output Channel Steps: 1. Press the Num + MON keys to select the output channel. 2. Press the Num + WIN keys to select the display window. 3. Press the Num + PATTERN keys to call the programmed pattern. Note: This operation is valid only when the pattern function is supported by the connected camera/dome. • Calling a Pattern by Input Channel Steps: 1. Press the Num + CAM keys to select the input channel. 2. Press the Num + PATTERN keys to call the programmed pattern. Note: It is invalid to input the 0+CAM keys in the current operation mode. 72 User Manual of DS-1100KI Network Keyboard Note: Corresponding error message will appear on the screen when you perform wrong operation. 5.4.8 Calling Pan Scan Select the output monitor or window and the keyboard is capable of automatically connecting with its corresponding camera. Press the PATTERN key on the keyboard to call the pan-scan. You are also allowed to directly select the camera by inputting Num + CAM keys and then press the PATTERN key to realize pan-scan callup. • Calling Pan-scan by Output Channel Steps: 1. Press the Num + MON keys to select the output channel. 2. Press the Num + WIN keys to select the display window. 3. Press the PATTERN key to call the pan-scan. 4. Press the PATTERN key again to stop the pan-scan. Note: This operation is valid only when the pattern function is supported by the connected camera/dome. • Calling Pan-scan by Input Channel Steps: 1. Press the Num + CAM keys to select the input channel. 2. Press the PATTERN key to call the pan-scan. 3. Press the PATTERN key again to stop the pan-scan. Note: It is invalid to input the 0+CAM keys in the current operation mode. Note: Corresponding error message will appear on the screen when you perform wrong operation. 73 User Manual of DS-1100KI Network Keyboard 5.5 Aux Functions The keyboard is designed with AUX1 and AUX2 keys on its panel. You are allowed to configure Aux function for AUX1/AUX2 key on the operator user interface. By default settings, the AUX1 is selected to two-way audio and the AUX2 to picture capture function. 5.5.1 Two-way Audio The two-way audio between the keyboard and the currently selected device can be realized through Aux key. Start two-way audio with the output channel: 1. Press the Num + MON keys to select the output channel. 2. Press the AUX1/AUX2 key to start two-way audio. Start two-way audio with the input channel: 1. Press the Num + CAM keys to select the input channel. 2. Press the AUX1/AUX2 key (configured with the Two-way Audio function) to start two-way audio. During the two-way audio: 1. You can stop it by pressing the 0+AUX1/AUX2 keys; 2. When you input Num + MON keys and then presses the AUX1/AUX2 key, it will switch the keyboard to take two-way audio with the nearest device; 3. If it needs to take two-way audio with the camera, it needs to press the ESC key, input the Num + CAM keys and then press the AUX1/AUX2 key to start the two-way audio. When the network is disconnected in the process of two-way audio, you should press the 0+AUX1/AUX2 keys to stop the two-way audio first and then start it again. When you intend to start the two-way audio between the keyboard and the remote device which is taking two-way audio with other device, the error message will appear on the screen. Note: When the current window is configured with more than channels for display (in cycle view mode), the error message will appear on the screen as well. 5.5.2 Picture Capture The video picture from the camera can be captured and saved in U-flash disk or uploaded to FTP server through the keyboard operation. Operation method 1: 1. Press the Num + MON keys to select the output channel. 2. Press the Num + WIN keys to select the display window. 3. Press the AUX1/AUX2 key (configured with the Picture Capture function) to start picture capture. Operation method 2: 1. Press the Num + CAM keys to select the input channel. 2. Press the central button of the joystick. 3. The captured picture will be uploaded to FTP server (when FTP server is configured) or saved in the local U-flash disk. 74 User Manual of DS-1100KI Network Keyboard Note: When the current window is configured with multiple channels for display (in cycle view mode), the error message will appear on the screen as well. 5.5.3 Recording The video from the camera can be recorded and saved in the local U-flash disk or uploaded to FTP server as well. Operation method 1: 1. Press the Num + MON keys to select the output channel. 2. Press the Num + WIN keys to select the display window. 3. Press the REC key to start video recording. Operation method 2: 1. Press the Num + CAM keys to select the input channel. 2. Press the REC key to start video recording. Note: During the recording, the REC key on the keyboard lights in red. When you exit the operation interface, the recording continues and you are allowed to stop it. When the window is configured with multiple channels for display (in cycle view mode), the error message will appear on the screen. And if the current window or output channel is performing playback by time, then the recording operation is not allowed. 5.5.4 Other Functions The PREV and NEXT keys on the keyboard are used to select the previous or next camera during the shortcut operation. Operation method 1: 1. Press the Num + MON keys to select the output channel. 2. Press the Num + WIN keys to select the display window. 3. Press the PREV/NEXT key to select the previous or next camera. Note: If the current window is not in the dynamic decoding mode, it is invalid to press the PREV/NEXT key. When the window is configured with multiple channels for display (in cycle view mode), the error message will appear on the screen. Operation method 2: 1. Press the Num + CAM keys to select the input channel. 2. Press the PREV/NEXT key to select the previous or next camera. 75 User Manual of DS-1100KI Network Keyboard Chapter 6 Server Operation 6.1 Control of MVC Through the DS-1100KI keyboard, you can configure and control the Multi-function Video Center (MVC). 6.1.1 Login Steps: 1. Click the Server icon on the startup interface to enter the Server Login interface. 2. Select the Login Mode to MVC/Subdomain/Matrix Access Gate. 3. On the Login interface, input the IP address, port, user name and password of the MVC. 4. Check the checkbox of Remember Password if you want to save the password for future login. 5. Click Login to enter the main interface of admin. 6.1.2 Device List After you have logged in the Matrix system, you can view the information of its functional modules on the MVC List interface. 76 User Manual of DS-1100KI Network Keyboard The device types in the MVC system are shown as follows: M_ENC: Encoding module M_DEC: Decoding module M_CODE: Code distribution module M_CAS_IN: Input cascading module M_CAS_OUT: Output cascading module M_INTEL: Intelligent module M_ALARM: Alarm module V6_DEC: V6 decoding module V6_CAS: V6 cascading module MVC_B10: MVC B10 MVC_B11: MVC B11 MVC_B12: MVC B12 M_DS: Domain system M_SDS: Sub-domain system MATRIX ACCESS GATEWAY: Matrix access gateway Editing Device Parameters in Batch By clicking the Batch Edit IP button, you can enter the Batch Edit interface to edit the parameters of the encoding/decoding modules, including the start IP, end IP, port, subnet mask and gateway. Notes: The range from the start IP to end IP must be larger than the number of the functional modules. When the NAT function of the system is enabled, it is not allowed to operate the batch edit. Configuring Encoder/Decoder Parameters Click the button of an encoder/decoder on the MVC List and enter its settings interface. 77 User Manual of DS-1100KI Network Keyboard Please refer to the Chapter 4.1 Encoder Settings~ Chapter 4.2 Decoder Settings for details. 6.1.3 Camera List Viewing Camera List Click the Camera tab to view the information of all cameras connected to the current MVC system, including the camera ID, channel No., IP address and port. The No. is used as CAM number in the Shortcut Operation. Setting Input Group Steps: 1. Click Input Group to enter the MVC Input Group interface. 2. 3. Click to select the group No. from the drop-down menu. Set the Cycle Time (1-65535s) for the current group. Note: The Cycle Time refers to the dwell time defined for each camera in this group. 4. Click the Add Camera key to enter the Add Camera interface: 78 User Manual of DS-1100KI Network Keyboard 5. Select the cameras from the list to be added to the group, and then click Add to add the selected cameras. 6. You can also set or edit the Cycle Time (1-65535s) for cameras here. 7. Click Finish to return to the MVC Input Group interface, where you can view the successfully added cameras for the current group. 8. Click Save to save the settings. 6.1.4 Monitor List Viewing Monitor List Steps: 1. Click the Monitor tab to view the information of all monitors connected to the current MVC system, including the monitor ID, output type, IP address and port. 2. Click the button of a monitor from the list to enter the Monitor Settings interface. 79 User Manual of DS-1100KI Network Keyboard 3. Configuring monitor settings: Decoding Ability: Set the parameters according to the resolution of the front-end device. If the maximum resolution of the front-end devices connected is 720P, then the Maximum Ability should be set as 720P. Output Type: Configure the settings according to the mode that is supported by the monitor. Division Mode: The standard-definition decoding module (BNC output) supports 1 / 4-division mode, while the high-definition decoding module (VGA / DVI / HDMI output) supports 1 / 4 / 9 / 16-division mode. Enable Audio: To enable the audio output. Audio Window: Select the window for enabling audio output. 4. After having finished the above settings, click Save. Quick Operation of Monitor Settings: 1. Press the Num + MON keys to select the monitor. 2. Press the Num + MULT keys to select the window-division on the monitor. Example: You can input the “2+MON, 16+MULT” keys to realize 16-divison display on monitor 2. Setting Output Group Steps: 1. Click Output Group to enter the MVC Output Group interface. 2. Click to select the group No. from the drop-down menu. 80 User Manual of DS-1100KI Network Keyboard 3. Click the Add Output key to enter the Add Output interface: 4. Select the outputs from the list to be added to the group, and then click Add to finish the setting. 5. Click OK to return to the MVC Output Group interface, where you can view the successfully added output channels for the current group. Displaying Video on Monitor The selected input signal can be outputted and displayed by the decoding channel on the monitor. Currently, the supported decoding resolution includes: QCIF, CIF, 2CIF, DCIF, 4CIF, 720p, 1080p, VGA, UXGA, etc. The output interface can be selected to BNC/VGA/HDMI/DVI. Task1: Local Live View Steps: 1. Press the 0+MON to enter the local live view mode. 2. Press the Num + CAM keys to enter the local live view of the selected camera. Task2: Display of Video on Monitor Steps: 1. Press the Num + MON keys to select the monitor. 2. Press the Num + WIN keys to select the display window on the monitor. 81 User Manual of DS-1100KI Network Keyboard 3. Press the Num + CAM keys to select the input camera. Example: You can press the “1+MON, 2+WIN, 3+CAM” keys to decode the video signal from camera 3 and display it on window 2 of monitor 1. When you press the 0+CAM keys, it will stop the dynamic decoding of the current window. If no display window is st selected, the decoding of the 1 window will be stopped by default. 6.1.5 Scene Settings Steps: 1. Click the Scene tab to enter the Scene Settings interface. 2. 3. Click on the list to switch to the selected scene. Click the Scene Layout to enter the layout of the selected scene. Note: The scene of MVC can be configured on the iVMS-4100 client software. 4. Click a grid to enter the following interface. 82 User Manual of DS-1100KI Network Keyboard 5. Press the Num + WIN keys or click on the window to select the window No. 6. Press the Num + CAM keys to select the camera No. of which the video is displayed on the selected window. 7. Repeat Step4~6 to configure the screen settings for the other windows of the scene. 6.1.6 Screen Settings Configuring Screen Settings Click the Screen tab to configure video display on screen. Steps: 1. Select the screen No.. 2. Enable the screen display by clicking the checkbox. 3. Select the screen mode, e.g., 2 x 2. 4. Set the main screen No. which refers to the output for image processing. 5. Configure the sub-window settings. (1) Select the sub-screen type to Standard, High Definition or Enhanced High Definition. (2) Select the window, which refers to the sub-window No. of the screen. E.g., if the screen mode is 83 User Manual of DS-1100KI Network Keyboard selected to 2 x 2, then the sub-windows can be numbered as 1, 2, 3 and 4. (3) Select the sub-screen No., which refers to the output connected to the selected sub-window in Step 5 (1). Note: The Main Screen No. and the Sub-screen No. cannot be the same with each other. (4) Repeat the Step 5 (1) ~ (2) to set other sub-windows and their related sub-screen No. (5) Click Save to save the sub-window settings. 6. Click Apply to finish the screen settings. Configuring Video Output to Screen You can follow the steps below to view the video from a camera on the selected screen. Steps: 1. Press the Num + AUX1 keys to select the screen. 2. Press the Num + CAM keys to select the input camera. The number of camera can be viewed from the Camera List. Example: You can press the “1+AUX1, 3+CAM” keys to view the video signal from camera 3 on screen 1. Note: The multi- division display mode is not supported by screen. Roaming Window Switch Steps: 1. Configure the Roaming settings in the iVMS-4100 client software. 2. Press the Num + AUX1 keys to select the screen. 3. Press the Num + WIN keys to select the roaming layer of the screen. 4. Press the Num + CAM keys to select the input camera. Example: You can press the “1+AUX1, 2+WIN, 3+CAM” keys to display the video signal from camera 3 on the roaming window 2 of multi-screen 1. You can press the 0+CAM keys, and it will stop the dynamic decoding of the current camera. 84 User Manual of DS-1100KI Network Keyboard Setting Base Picture Note: When the MVC is configured with the enhanced decoder module, you can set the base picture for the screen display. Steps: 1. Put the base picture in the USB-flash disk and insert it into the keyboard. Note: The base picture must be in JPEG format and with the resolution of lower than 3840×1920. 2. Enter the Screen settings interface. 3. Click the Set Picture button to enter the Setting Background Picture interface. 4. Select the picture file from the directory and click the Upload button to select the layer for the picture. 5. Select the layer from the drop-down list. Two base pictures can be uploaded. 6. Select OK to confirm the base picture settings. 7. On the screen settings interface, click the Open Picture button to select the layer and enable the configured base picture to be shown on the screen display. 85 User Manual of DS-1100KI Network Keyboard 6.2 Control of Analog Matrix 6.2.1 Login Before you start: Make sure the analog matrix has been correctly connected to the keyboard before operation. Steps: 1. Select the login mode to Analog Matrix on the Server Login interface. 2. Enter the number of video inputs in the Input Number field. 3. Enter the number of video outputs in the Output Number field. 4. Click Login to log into the analog matrix system. 6.2.2 Configuring RS-232 Parameters Purpose: The RS-232 parameters must be configured the same with that of the connected analog matrix so as to realize the RS-232 communication. Before you start: Make sure the RS-232 port of analog matrix and the RS-232 port of keyboard have been connected with the control line. Steps: 1. Click RS232 on the Analog Matrix to enter the RS232 settings interface. 86 User Manual of DS-1100KI Network Keyboard 2. Input the address of the connected analog matrix. Each matrix must be assigned with unique address. 3. Select the baud rate of the connected analog matrix. 4. Set the data bit, stop bit, parity and flow control the same with those of the connected analog matrix. 5. Select the protocol of the connected analog matrix. Currently four protocols are supported: ZT-1.0, ZT-2.0, EXTRON and CREATOR. 6. Click Apply to save the settings. 6.2.3 Operating Analog Matrix With successful RS-232 communication between the keyboard and the analog matrix, you can switch the video input to be displayed on the monitor by following the steps below. Steps: 1. Press the Num + MON keys to select the output channel of the analog matrix. 2. Press the Num + CAM keys to select the input channel of the analog matrix. 6.2.4 Configuring RS-485 Parameters Purpose: The RS-485 parameters must be configured the same with that of the connected PTZ camera so as to realize the PTZ control. Before you start: Make sure the R+ and R- terminals of the PTZ camera has been correctly connected to the T+ and T- terminals of the keyboard. Steps: 1. Click RS485 on the Analog Matrix to enter the RS485 settings interface. 87 User Manual of DS-1100KI Network Keyboard 2. Input the address of the connected PTZ camera. The address ranges from 0~255. 3. Select the baud rate of the connected PTZ camera. 4. Set the data bit, stop bit, parity and flow control the same with those of the connected PTZ camera. 5. Select the protocol of the connected PTZ camera. 6. Click Apply to save the settings. 7. You can click the Copy All To button to copy the current RS-485 parameters to other PTZ addresses. 6.2.5 Operating PTZ Control Operating PTZ Movement Steps: 1. Press the Num + CAM keys to select the connected analog dome or pan/tilt unit. Note: The Num must be the same as the PTZ address. 2. Move the joystick to realize the pan/tilt and lens movement. Setting/Calling a Preset • Setting a Preset Steps: 1. 2. 3. 4. Input the Num + CAM keys to select the connected analog dome or pan/tilt unit. Operate the joystick or focus/iris/zoom buttons to move PTZ to the desired position. Input the Num + PRESET keys to set the current position as a preset. Repeat step2 and step3 to continue to set the other presets. • Calling a Preset Steps: 1. 2. Input the Num + CAM keys to select the connected analog dome or pan/tilt unit. Input the Num + CALL keys to call the defined preset. 88 User Manual of DS-1100KI Network Keyboard Setting/Calling a Patrol • Setting a Patrol Steps: 1. 2. 3. 4. 5. 6. Input the Num + CAM keys to select the connected analog dome or pan/tilt unit. Press the SET key to enter the settings interface. Press the Num + PATROL keys to enter the patrol settings interface. Input Num and press the ENTER key to set the preset number, stop time and speed respectively. Repeat Step4 to add other presets to the current patrol. Press the SET key again to finish the patrol settings. • Calling a Patrol Steps: 1. 2. Input the Num + CAM keys to select the connected analog dome or pan/tilt unit. Input the Num + PATROL keys to call the defined patrol. 89 User Manual of DS-1100KI Network Keyboard Setting/Calling a Pattern • Setting a Pattern Steps: 1. 2. 3. 4. 5. Input the Num + CAM keys to select the connected analog dome or pan/tilt unit. Press the SET key to enter the settings interface. Press the Num + PATTERN keys to enter the pattern settings interface. Operate the joystick or focus/iris/zoom buttons to move PTZ to record the pattern. Press the SET key again to finish the pattern settings. • Calling a Pattern Steps: 1. 2. Input the Num + CAM keys to select the connected analog dome or pan/tilt unit. Input the Num + PATTERN keys to call the defined pattern. 6.3 Access by iVMS Platform The accessible iVMS platforms include: iVMS-5000, iVMS-7000 and iVMS-8200. Note: Please make proper configuration on the iVMS platform before connecting the keyboard to the iVMS server. Please refer to the user manual of corresponding iVMS platform for instructions. 90 User Manual of DS-1100KI Network Keyboard 6.3.1 Logging in to the iVMS Platform Steps: 1. On the Server Login interface, select the Login Mode to iVMS Platform. 2. Enter the Server IP, Port, login User Name and Password. 3. Click Login to log in to the platform. The system enters the Control Center Unit List as shown below: 6.3.2 Managing Output Channel 1. Click on the list to edit the selected screen group. 2. Log in to the iVMS platform, and click Organization->Monitor Screen Group to enter the following page: 91 User Manual of DS-1100KI Network Keyboard 3. Click Layout to enter the Screen Layout interface: The corresponding output channel is corresponding to the Index No. on the Screen Group interface of the keyboard, e.g., the index 1 corresponds to the 108_vga_0 output channel. 4. Press the Index No. + MON keys (e.g., 1 + MON) on the keyboard to select the output channel. 6.3.3 Managing Input Channel 1. The corresponding input channel is corresponding to the Index No. on the Control Center Unit List interface of the keyboard, e.g., the index 12060404594398402 corresponds to the Channel 1 of the device 109. 2. You can modify the index No. of the input channel via the iVMS platform. Click Organization->Camera to enter the following page to view the list of connected input channels: 92 User Manual of DS-1100KI Network Keyboard Select an input channel from the list and click it to enter the Modify Camera interface to modify the index No. in the Indexcode filed. 3. Press the Index No. + CAM keys (e.g., 1 + CAM) on the keyboard to select the input channel. 6.3.4 Local Live View 1. On the Control Center Unit List interface after login, click the icon of a region item to enter the list of input channels added to this region. 2. Select an input channel and click the icon to enter its local live view. 6.3.5 Displaying Video on Monitor You can follow the steps below to view the video from a camera on the selected screen. Steps: 1. Press the Num + MON keys on the keyboard to select the screen. 2. Press the Num + WIN keys on the keyboard to select the display window on the selected screen. Note: For the single-division display mode, this step is not needed; the window-division display mode must be configured via the iVMS platform. 93 User Manual of DS-1100KI Network Keyboard 3. Press the Num + CAM keys on the keyboard to select the input channel for display on the selected window. 6.3.6 Playback 1. On the Control Center Unit List interface after login, click the of output channels. 2. Select an output channel and click the icon of a screen group item to enter the list icon to enter the playback interface: 3. Select the camera No. for playback. 4. Select the location of record files to Device Record, NVR Record or CVR Record. 5. Select the record type. 6. Set the date of the record files. 7. Click Search to enter the playback by time interface. 8. Select the output channel and set the time. 9. Click Playback to enter the playback interface. 10. Select the sub window and start playing back. 94 User Manual of DS-1100KI Network Keyboard Chapter 7 Keyboard Configuration by WEB Server You are also allowed to configure the keyboard parameters by WEB server. 7.1 Configuring by Admin 7.1.1 Login Open WEB browser, input the IP address of the keyboard (e.g., http://172.6.24.64) and click Enter. The system pops up a login interface. Input the user name (admin) and password (default: 12345), and then click OK to log into the keyboard. After successful login, you enter the main interface: 7.1.2 Keyboard Management Click Keyboard on the left navigation bar to enter the Keyboard management interface: 95 User Manual of DS-1100KI Network Keyboard On this interface, you can configure the hardware and network parameters of the keyboard. 7.1.3 User Management Click User on the left navigation bar to enter the User management interface: On this interface, you can add, edit or delete the user account. Adding a User Click the Add button to enter the Add Users interface. Input the user name and password to create a new user account. Editing a User Select a user from the list and click the icon to enter the following interface to change its password. 96 User Manual of DS-1100KI Network Keyboard Deleting a User Select a user from the list and click the icon. In the pop-up message box, click OK to delete the selected user account. Setting User-Device Select a user from the list and click the button to enter the User-Device interface. On this interface, you can add device for the current user. Click Add to enter the User-Add Device interface on which it displays all devices already added to the keyboard by admin. Select the device (s) from the list and then click Add button to finish the adding of device (s) for the current user. 97 User Manual of DS-1100KI Network Keyboard On the User-Device interface, you can view the successfully added devices for the current user. You can also select the device from the list and click the icon to delete it. 7.1.4 Device Management Click Device on the left navigation bar to enter the Device management interface: On this interface, you can add, edit or delete the device. Adding a Device Click Add to enter the Add User interface. Input the name, IP, port and login user name/password of the device to add. Click OK to finish the adding of the device. The successfully added devices will be displayed on the list of Device Interface. Editing a Device Select a device from the list and click the icon to enter the following interface to change its Device Name. 98 User Manual of DS-1100KI Network Keyboard Deleting a Device Select a device from the list and click the icon to delete it. 7.1.5 Maintenance Checking Device Work Status Click the Work Status on the left navigation bar to check the work status of the keyboard. Restoring Default Click the Restore Default on the left navigation bar to enter the default interface. Select the default type on your demand, Complete and Simple are selectable. Please refer to 3.5 Default for the details of two default types. Import/Export Configuration File Click the Import/Export Config. File on the left navigation bar to enter the configuration file management interface. Note: For the first time use of the import/export configuration file function, a plug-in needs to be installed. A hint will appear on the lower-half of the screen:” Please click here to download and install the plug-in. Close the browser when installing the plug-in.” Click the hint and follow the pop-up instruction to install the plug-in. 99 User Manual of DS-1100KI Network Keyboard To import the configuration file, click the Browse button and specify the directory of the file in the pop-up box, and click the Import button. To export the configuration file, click the Export button and specify the saving directory of the exported file. Upgrade Click the Upgrade on the left navigation bar to enter the upgrade interface. Click the Browse to select the upgrade file directory in the pop-up box. Click the Upgrade button. 7.2 Configuring by Operator 7.2.1 Device List On the login interface, input the user name and password of operator, and then click OK to log into the keyboard. 100 User Manual of DS-1100KI Network Keyboard After successful login, you enter the Device List interface: On the device list, select an encoding device and click the icon to enter the Network-Stream media interface to configure stream media for the device. 7.2.2 Input Settings Click Input Settings on the left navigation bar to enter the Input List interface: Editing a Camera By selecting a camera from the list and clicking the icon, you are allowed to edit its name, No., protocol and stream type. 101 User Manual of DS-1100KI Network Keyboard Setting a Camera Group 1. Click the Group button on the Input List to enter the Input Group interface: 2. Select the Group No. and edit the cycle time in the given text filed, and click Set button. 3. Click the Add Camera key to enter the Add Camera interface: 4. Select the cameras from the list to be added to the group, and then click Add to finish the setting. 5. Return to the Input Group interface, and you can view the successfully added cameras for the current group. Viewing Channel-zero Click the Channel-zero button to show the list of devices which support the Channel-zero function. 102 User Manual of DS-1100KI Network Keyboard 7.2.3 Output List Click Output Settings on the left navigation bar to enter the Output List interface: Editing an Output Channel By selecting an output channel from the list and clicking the icon, you are allowed to edit its output No.. Setting an Output Group Click the Output Group key on the Output List to enter the Output Group interface to add an output group. Please refer to the same operating steps in Setting an Input Group section. Setting Video Wall/Scene Click the Video Wall/Scene button on the Output List to enter the video wall / scene setting interface. 103 User Manual of DS-1100KI Network Keyboard Click the icon to edit the video wall / scene No.. 7.2.4 AUX Functions Click the Aux Key on the left navigation bar to enter the Aux Key settings interface: On this interface, you can set the function of Aux Key 1 / Aux Key 2 to two-way audio, picture capture, or video wall/scene switch. 7.2.5 Live View & PTZ Speed Settings Click Performance on the left navigation bar to enter the network performance and PTZ speed settings interface. It allows you set the network performance of local live view on keyboard. Five levels are selectable. You can also set the PTZ movement speed of the connected PTZ camera by using the joystick. Four levels are selectable. 7.2.6 FTP Server Settings The video files or captured pictures can be uploaded to FTP server. Steps: 1. Click Ftp Setting on the left navigation bar to enter the FTP settings interface. 104 User Manual of DS-1100KI Network Keyboard 2. Check the checkbox of Enable FTP. 3. Enter the IP address of the FTP server. 4. Enter the user name and password of login to the FTP server. 5. Enter the file path to which the video files and captured pictures are uploaded. 6. Click Save to save the settings. 105 User Manual of DS-1100KI Network Keyboard Chapter 8 Keyboard Configuration Tool Purpose: The configuration tool of the DS-1100KI keyboard is used to facilitate the parameters configuration of the keyboard. 8.1 System Requirements System requirement: 32-bit Windows XP / Windows 7. Running conditions: please place the application program in the same directory where the HCNetSDK.dll, hpr.dll, and Sadp.dll files locate. If the SADP software is not useable, please install the WinPcap_4_1_2.exe first. 8.2 Features The following functions can be realized by operating the keyboard configuration tool: Add/Edit/Delete the user account. Add/Edit/Delete the device under the Administrator. Add/Delete the device under the Operator. Link the device to stream media server in single/batch mode. Delete the channel under the Operator. Save channel information of the user to local directory in text document. Import/Export the configuration file. Export the input/output list as the .txt file. Upgrade the keyboard. 8.3 Selecting Login Mode to Configuration Tool Run the application program to enter the following interface: Select the mode for configuration. Three modes are selectable: Local Config File, Remote Config File and Update Keyboard. Local Config File: Use and edit the configuration file of the keyboard which has been exported to PC or local 106 User Manual of DS-1100KI Network Keyboard storage device via U-flash disk. Remote Config File: Operate and edit the configuration file of the keyboard which has been exported to PC or local storage device via network. Update Keyboard: Upgrade the keyboard via network. 8.3.1 Login by Local Configuration File Before you start Make sure the configuration file (kbCfg.bin) of the keyboard has been exported to your PC or local storage device. Please refer to Chapter 3.4.4 Importing/Exporting Configuration File for exporting the config file. Steps: 1. Click Local Config File icon to enter the following Login interface: 2. Click to select the destination directory of the Config File from your PC or local storage device. Note: The Config File must be in kbCfg format. 3. Input the admin and password for login. 4. Click Login. The configuration file will be backed up in the backup folder by default. If the file has already existed in the backup destination folder, corresponding message box will pop up. Click OK to replace the existing file, or Cancel to keep the original file. 8.3.2 Export/Login by Remote Configuration File Steps: 1. Click Remote Config File icon on the Mode Choose interface to enter the Config File interface. 107 User Manual of DS-1100KI Network Keyboard 2. Click to select the saving directory for the configure file. 3. Input the IP address and port number of the keyboard. 4. Input the user name and password for login to the keyboard. 5. Click Export to export the keyboard configure file to the defined directory, or click Export&login to export log in the software. 6. On the Login interface, select the configure file directory, and input the user name and password for login. Refer to Step2-4 in 6.3.1 Logging in to the iVMS Platform. 7. After successful login, you will enter the main interface. 8.3.3 Remote Upgrade Steps: 1. Click Upgrade Keyboard icon on the Mode Choose interface to enter the Remote Upgrade interface. 2. Select the Update Mode to Firmware Update. 3. Click to select the update file from the local disk. 108 User Manual of DS-1100KI Network Keyboard 4. Input the IP address and port number of the keyboard. 5. Input the user name and password for login to the keyboard. 6. Click Update to start upgrading the keyboard. The upgrading process can be viewed on the Status bar. Note: Please do not shut down the keyboard when the upgrading is not finished. 8.4 Configuring Keyboard by Configuration Tool 8.4.1 Managing Device List After successful login by Local File or Remote File mode, you can enter the following interface: Click the Device on the menu bar to enter the Device Management interface: Adding a Device You can add a device by manually or by SADP software. Normal Mode: 1. Click to enter the Add Devices interface. 109 User Manual of DS-1100KI Network Keyboard 2. Select the Type to Single or Batch. Single IP: add single device each time. Batch IP: add multiple devices located in the same network segment. 3. Enter the device IP for Single IP mode, or the Start IP and the End IP for the Batch IP mode. Note: The start IP and the end IP must be within the same network segment. 4. Enter the Username and Password for login. 5. Click Add to add the device (s). SADP Mode: You can use the SADP software to automatically search and add the online devices in the same network. to enter the Search online devices interface. 1. Click 2. The automatically searched devices will be displayed on the list. Select a device from the list and click Add to enter the Add Devices interface. 3. Enter the Username and Password for login. 4. Click Add to add the device. The successfully added devices will be displayed on the list of Device interface. 110 User Manual of DS-1100KI Network Keyboard Modifying a Device Select a device from the list, and click to enter the Modify Device interface: You are allowed to modify the port, login user name and password. Click Modify to finish the modification. Deleting a Device Select the device(s) from the list and click . The following message box pops up: Click OK to confirm the deletion. 8.4.2 Managing User List Click the User on the menu bar to enter the Device Management interface: 111 User Manual of DS-1100KI Network Keyboard Adding a User Account to enter the Add User interface. 1. Click 2. Enter the username and password. 3. Click Add to add the new user account. The successfully added user accounts are listed on the interface: 112 User Manual of DS-1100KI Network Keyboard Deleting a User Account 1. Select the user account(s) from the list, and click 2. Click OK to confirm the deletion. . The following message box pops up: Modifying Password 1. Select a user account from the list, and click to enter the Modify Password interface: 113 User Manual of DS-1100KI Network Keyboard 2. Enter the new password. 3. Click OK to finish the password modification. Adding the Device to User 1. Select a user account from the list and double-click it to enter the User Devices interface. 2. Select a device or multiple devices from the device list on the left and then click 3. The device (s) successfully added for the current user will be displayed in the list on right. When you select multiple devices, the corresponding message box of the result will pop up: 114 . User Manual of DS-1100KI Network Keyboard You can select the added device from the list on right and click account. to delete it from the current user Adding Stream Media Server to Device 1. On the User Devices interface, select a decoder or multiple decoders from the list of added devices on right, and click to enter the stream media server settings interface: 2. Check the checkbox of Stream Media Start to enable the stream. 3. Enter the Stream Media IP, Stream Media Port and the Stream Media Protocol (TCP/UDP). 4. Click OK to add the stream media server to the selected decoder(s). Note: You can uncheck the checkbox of Stream Media Start and click OK to disable the stream media server for the device. 8.4.3 Managing Channel List Click the Channel on the menu bar to enter the Channel Management interface: 115 User Manual of DS-1100KI Network Keyboard Modifying Channel Index by Single 1. Enter the username of operator in the Channel Type field. Only the operator user account has the permission to operate channel management. , or to get the channel list. 2. Click 3. Select an item from the list, and enter the new index in the Channel Modify field. Note: The new index No. you enter must not exist in the channel list. 4. Click to finish the channel index modification. Modifying Channel Index in Batch 1. Enter the username of operator in the Channel Type field. Only the operator user account has the permission to operate channel management. 2. Click , or to get the channel or scene list. 116 User Manual of DS-1100KI Network Keyboard 3. Select multiple items from the list, and enter the new index in the Channel Modify field. Note: The new index you enter refers to the starting index No. of the channel list. 4. Click to finish the channel index modification. Deleting Channel(s) 1. Select the channel(s) from the list to be deleted. 2. Click to delete the selected channel(s). Saving Channel(s) 1. On the Channel List interface, enter the username in the Channel Type field. 2. Click the to save the channel information file (.txt) of the current login user to the directory where the configuration file is located. 117 User Manual of DS-1100KI Network Keyboard 8.4.4 Importing Configuration File 1. Click the Maintain on the menu bar to enter the Keyboard Maintenance interface. 2. Select the directory of the keyboard configuration file. 3. Enter the IP address of the keyboard. 4. Enter the username and password. 5. Click to import the configuration file to the keyboard. The keyboard will restart after the configuration file has been imported. 118 User Manual of DS-1100KI Network Keyboard Appendix 1: Specifications Model DS-1100KI Control Mode IP-based TFT LCD Panel 7” TFT LCD monitor with touch panel Resolution: 800 × 480 Joystick 4-axis joystick Audio Input / Output Line In 1-ch, 3.5 mm connector (2.0 Vp-p, 1 kΩ) Audio Out 1-ch, 3.5 mm connector (Linear, 560 Ω) Network Interface 1 10M/100M/1000M Ethernet interface RS-232 Interface 1 RS-232 interface RS-485 Interface 1 RS-485 interface USB Interface 1, USB2.0 (for data storage and device upgrade) Power Supply 12V DC Power Consumption ≤ 15W Working Temperature -10°C ~ +55°C Working Humidity 10% ~ 90% Dimensions (W × D × H) 435 × 193 × 110 mm Weight 2 Kg External Interface General 119 User Manual of DS-1100KI Network Keyboard Appendix 2: Upgrade by FTP Enable the FTP service on PC and operate the following steps: Steps: 1. Open the wftp software, and then select Security->Users/rights option. 2. Create new user. 3. Input the user name: target, password: target, and then click OK to continue. 4. Select the user name to target. 5. Input the directory of the upgrade file in the text box of Home Directory, and then click Done to start system upgrading. 120 User Manual of DS-1100KI Network Keyboard Appendix 3: Version Update Version 2.3.0 Updated features: 1. Connectable to 64-ch NVR. 2. Support video wall display control for decoder. Refer to 4.2.4 Video Wall. 3. Support Video Wall/Scene setting for output channel. Refer to 4.4.4 Setting Video Wall / Scene. 4. Support cycle time setting for input group. Refer to 4.3.4 Setting Input Group. 5. Support Video Wall/ Scene switch by shortcut keys. Refer to.5.3.11 Operating Image Switch. 6. Calling pan-scan is supported by pressing Pattern key. Refer to 5.4.8 Calling Pan Scan. 7. Support the export of input/output list as the .txt file by Configuration Tool. Version 2.2.0 (New Joystick) Updated features: 1. Use the new pattern joystick. 2. PTZ speed is configurable by menu settings instead of Aux key definition. Refer to 4.7.3 Live View & PTZ Speed Settings and 7.2.5 Live View & PTZ Speed Settings. Version 2.2.0 Updated features: 1. 3 user accounts can be added for keyboard operation, and up to 1280 devices can be added to each user account. 2. Add the network device by DNS. Refer to 3.3.1 Adding a Device. 3. Captured picture can be uploaded to FTP server. Refer to 4.7.4 FTP Settings. 4. Stream media settings can be copied to all encoders. Refer to 4.1.7 Stream Media Settings. 5. Local live view by zero channel encoding. Refer to 4.3.2 Live View by Channel. 6. Add scene settings for the MVC system. Refer to 6.1.5 Scene Settings. 7. Add the roaming window switch for the large screen display. Refer to Roaming Window Switch. 8. Add the base picture settings for the large screen display. Refer to Setting Base Picture. 9. Add the local live view in iVMS platform. Refer to 6.3.6 Playback. 10. Add the playback in iVMS platform. Refer to 6.3.4 Local Live View. Version 2.1.0 Updated features: 1. Save the login password on the Login interface for future use. 2. Support the control of analog matrix (via RS-232 serial port) by keyboard. Refer to 6.2 Control of Analog Matrix. 3. Support the control of analog speed dome (via RS-485 serial port). 4. Access by iVMS platform (iVMS-5000, iVMS-7000, iVMS-8200). Refer to 6.3 Access by iVMS Platform. 5. Configuration by the keyboard configuration tool. Refer to Chapter 8 Keyboard Configuration Tool. Version 2.0.0 Updated features: 121 User Manual of DS-1100KI Network Keyboard 1. Add remote parameters configuration for encoding device. Refer to 4.1 Encoder Settings for details. 2. Add remote parameters configuration for decoding device. Refer to 4.2 Decoder Settings for details. 3. Configure keyboard parameters by WEB Server. Refer to Chapter 7 Keyboard Configuration by WEB Server for details. 4. Support local playback by USB file/ by time / by file. Refer to 4.6 Playback for details. 5. Support the control of MVC system by keyboard. Refer to 7.1 6.1 Control of MVC for details. Version 1.1.0 Updated features: 1. 4-axis joystick, with the top central button used for capturing images. Refer to 2.2 Indicators & Buttons for details. 2. User can switch to the Operator login interface from the Admin User Management interface. Refer to 3.4.2 Setting the Related Device for details. 3. User should input the password for unlocking the keyboard operation. 4. View version information of keyboard. Refer to 3.2.1 Viewing Version Information for details. 5. Configure network transmission performance for local live view. Refer to 4.7.3 Live View & PTZ Speed Settings for details. 6. Configure stream media server. Refer to 4.1.7 Stream Media Settings for details. 0203001031114 122 User Manual of DS-1100KI Network Keyboard 123