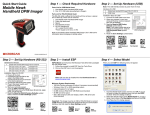
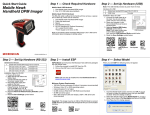
1
Pioneer™ Balances
Instruction Manual
99 Washington Street
Melrose, MA 02176
Phone 781-665-1400
Toll Free 1-800-517-8431
Visit us at www.TestEquipmentDepot.com
EN-1
Pioneer™
1. INTRODUCTION
1.1 Safety Precautions
Please follow these safety precautions:
• Verify that the AC Adapter input voltage matches the local AC power supply.
• Use the balance only in dry locations.
• Do not operate the balance in hostile environments.
• Do not drop loads on the platform.
• Do not place the balance upside down on the platform or platform mounting cone.
• Service should be performed only by authorized personnel.
1.2 Controls
Button:
O/T - On
Off
Yes
Unit
Menu
No
Print
Cal
Functions:
Short Press:
Long Press:
Short press (Menu):
Short Press:
Long Press:
Short press (Menu):
Long press (Menu):
Short Press:
Long Press:
Turns balance on, sets display to zero
Turns balance off
Selects or accepts setting
Steps through active units and modes
Enters Menu
Steps through available settings
Exit menu or abort out of menu item
Sends data
Initiates Span Calibration
2. INSTALLATION
2.1 Package Contents
0.1g and 0.01g Models
Instruction Manual
Power Adapter
Balance
Pan
Pan Support
Wind-Ring (InCal models only)
Warranty Card
0.001g and 0.0001g Models
Instruction Manual
Power Adapter
Balance
Pan
Glass Doors and Panels
Warranty Card
Pioneer™
EN-2
2.2 Install Components
0.1g and 0.01g Models
1) Install Wind-Ring (InCal
only)
2) Install Pan Support
3) Install Pan
0.001g and 0.0001g Models
1) Install Side Doors - Insert fully into Top Frame then down over retainer.
2) Install Panels - Insert bottom edge in groove then press until locked.
3) Install Top Door
4) Install Pan
EN-3
Pioneer™
2.3 Level Balance
Level the balance on a firm, steady surface. Avoid locations with excessive air current, vibrations, heat sources
or rapid temperature changes.
2.4 Connect Power
For use with CSA Certified (or
equivalent approved) power
source, which must have a
limited circuit output.
2.5 Initial Calibration
Without InCal – Power on the balance by pressing 0/T. Press and hold Print/Cal until [CAL] is displayed.
The display flashes the calibration mass needed. To select the alternate calibration weight press No. Put
the calibration mass on the pan. The display flashes [BUSY], then [CLEAr Pan]. Remove the mass. When
calibration is complete, [DONE] is displayed.
InCal – Press and hold Print/Cal until [CAL] is displayed. The display flashes [BUSY], when calibration is
complete, [DONE] is displayed.
Note: Calibrations should be performed after a warm up time of 60 minutes.
3. OPERATION
Count, APW Optimization, Percentage or specific units of measure must be activated in the MODE or UNIT menus
if they are not initially available.
3.1 Weighing Mode
Repeatedly press Unit until the desired unit icon is displayed.
Press 0/T to zero the balance and then place objects to be weighed on the pan.
3.2 Count Mode – Use the Count mode to count parts of uniform weight.
To access Count Mode, press Unit until the display shows [Count].
Establish an Average Piece Weight (APW) – Each time a new type of part is to be counted, the nominal weight of
one piece (APW) must be established using a small quantity of pieces.
With [CLr.APwW] displayed, press No to use the previously saved APW, or press Yes to establish a new APW. The
display indicates the number of pieces to be used to establish the new APW. If a different sample size is preferred,
press No until the desired sample size is displayed (5, 10, 20, 50 or 100). Put the specified number of pieces on the
pan. Press Yes to accept new APW or No to abort.
Count – Place the quantity to be counted on the pan.
APW Optimization – Since the weight of each piece varies slightly, APW Optimization may be used to increase the
Pioneer™
EN-4
accuracy of the count. The balance automatically recalculates the Average Piece Weight when the number of parts
on the pan is less than three times the original sample size. The display shows [APwW.OPT] each time the APW is
optimized.
3.3 Percent Mode – Use this mode to measure the weight of a sample as a percentage of a reference weight.
To access the Percent Mode, press Unit until the display shows [PErCEnt].
Establish a new Reference Weight - With Clear reference [CLr.rEF] displayed, Press No to use the previously
saved Reference Weight. Press Yes to establish a new Reference Weight. Put the reference sample on the pan
and press Yes to accept or No to abort.
Percent – Place the object(s) to be compared to the reference weight on the pan.
3.4 Weigh Below Feature
Remove Weigh Below Cover
Attach wire or string to Hook
Suspend sample
4. SETTINGS
4.1 Menu Navigation
InCal*
AZSM
SPAN
FILTER
LINEAR**
A.TARE
CAL ADJ
GRAD
END.CAL
GBL RST
GRAM
OUT STA
BAUD
CAL
MILLIGRAM
A. PRINT
PARITY
SETUP
PERCENT
KILOGRAM
CONTENT
HAND.SH
MODE
END.MOD
OUNCE
LINE FO
END.R232
UNIT
POUND
END.PRT
COUNT
APWOPT
END.SET
* InCal models only
** Not available in InCal models
NO
YES
PRINT
NOT ALL
UNITS
SHOWN
RS232
END.UNIT
END.LOCK
Enter Menu – When the balance is on, press and hold Unit/Menu until [mMENU] appears.
Release the button and the Calibrate [.CAL.] menu will display.
Menu Navigation – Select menus, menu items and settings through use of the Yes and No buttons.
Solid arrows point to the content displayed when Yes is pressed, Dashed lines when No is pressed.
Changing Settings – To select the displayed Setting, press Yes. To move to the next Setting, press No.
Exit Menu – When [.END.] is displayed, press Yes to exit the menu function, or press No to return to the Cal menu.
Note: Press and hold No at any time to exit quickly.
EN-5
Pioneer™
4.2 Calibration Menu [.CAL.]
InCal or Span calibration should be performed daily and when the room temperature changes.
InCal [InCal] calibrates the balance using an internal mass.
Span Calibration [SpaN] uses two weight values: zero and a weight between 50% and 100% of the capacity of the
balance.
Linearity calibration [LIN] uses three weight values zero, 50% of capacity and full capacity. Generally this
calibration
is not required unless testing shows that the linearity error exceeds the Linearity tolerance in the Specification
table.
(Not available in InCal models)
Calibration Adjust [CAL Adj] allows adjustment to the result of the internal calibration by +/- 99 divisions.
(InCal models only)
4.3 Setup Menu [.setup.]
Automatic Zero-Setting [azsmM] – Environmental changes can cause the display to drift. The Automatic ZeroSetting Mechanism (AZSM) is designed to keep the balance set at zero, despite these slight changes. (OFF,
SET.5d, SET 1d, SET 2d, SET 5d)
Filter [filter] – Use the low setting (SET LO) when environmental disturbances are not present. Use the
medium setting (SET MED) for normal environments. Use the high setting (SET HI) when vibrations or air currents
are present.
Auto Tare [A-tare] – The initial item placed on the balance is assumed to be a container so it is zeroed out. The
next item is then weighed. When the pan is cleared the balance resets, waiting for a container. (SET OFF, SET
ON)
Grad [Grad] – Select the readability displayed. Reducing the readability may be needed for approval. (SET 1d,
SET [1]d, SET 10d)
Global Reset [Gbl rst] – Resets all settings to factory default values. (RESET)
4.4 Mode Menu [.mMode.]
Count Mode [Count] - [SET ON or OFF]
Average Piece Weight (APW) Optimization [aPwW.OPT] - (SET ON, SET OFF)
Percent Mode [PerCent] - (SET ON, SET OFF)
4.5 Unit Menu [.Unit.]
The Unit menu is used to enable or disable a specific unit. (SET ON, SET OFF) The unit is indicated by a small
character next to Unit in the display (g = grams). The default setting is Grams SET ON and all other units SET
OFF.
T-Units – When unit [t] displays; press Yes to show the T-Unit settings; SET OFF, SET TT (Taiwan Tael), SET TH
(Hong Kong Tael), SET TS (Singapore Tael), SET TO (Tola) or SET TI (Tical).
M-Units – When unit [m] is displayed, press Yes to show the M-Unit settings; SET OFF, SET MO (Momme) or SET
ME (Mesghal).
Custom Unit – Custom Unit (C) is used to create a unit of measure not provided with the balance. The Custom Unit
is defined by a factor, a multiplier (E) and a least significant digit (LSD). The balance will use this to convert grams
to a custom unit of measure. (Example: 1 gram = 0.257206 Avoirdupois Dram, using a 4100g x 0.01g balance)
To create a custom unit, press Yes when unit [c] is displayed.
Factor – The Factor (F) is a value from 0.1000000 to 1.999999. When the Factor is displayed, the first digit is
flashing. Press Yes to accept its value and activate the next digit, or No to edit. When editing, press No until the
desired value appears, then press Yes to accept. Repeat until all digits have been accepted. When the Factor
flashes on the display, press Yes to accept or No to re-edit. (Example: F = 0.257206)
Multiplier (E) – The settings are, [E 0] (Fx1), [E 1] (Fx10), [E 2] (Fx100), [E 3] (Fx1000), [E-3] (F/1000),
[E-2] (F/100), and [E-1] (F/10). Press No to display the next setting, Yes to accept. (Example: E = 0).
Note: The multiplier selections are limited when the capacity in grams is exceeded.
Pioneer™
EN-6
LSD – The Least Significant Digit (LSD) is the number of displayed divisions (d) by which the weight is
incremented. The values are 1d, 2d, 5d, 10d, 100d or 0.5d. Press No to go to the next setting, press Yes to accept.
(Example LSD = 1d) Note: LSD options are limited if the readability in grams is exceeded.
The example custom unit will display [0.26 C] when 1g is placed on the pan.
4.6 Print Menu [.Print.]
Output Stable [Out.Stab] – Data will only be sent when the Stable indicator is on. This setting works with manual
button pressing or continuous and interval Auto Print. (SET ON, OFF)
Auto Print [A.Print] – Data will be continuously sent when [Continu] is set. Interval [Inter] sends data every 1
to 3600 seconds. When Stable [Stable] will send data when the balance detects a new stable reading. This can
be a weight value only [LOad] or it can also include a stable zero [L+zero]. [OFF] disables automatic printing.
Content [CONteNt] – The content in the data transmission can be modified. Each of the following settings can be
set on or off. Number Only [numMber] will only send the numeric result. Balance ID [Bal. ID] will add the Balance
serial number for traceability purposes. Reference [refer] will add reference information relevant to the current
mode. GLP [GLP] will send additional items to allow proper documentation of laboratory results.
Line Format [LinE Fo] – Single line format [single] will put all the data in one line separating each output with a
comma (,). Multi line format [mMulti] will put each data output on a new line. Multi +4 [mM-4LF] will add 4 line
spaces between each output.
^^^^^^^^^^^^^^^^^^^^^
User ID: ………………..........
Bal ID: 123456789
Proj ID: ………………………
Time: ……:…….:…….
Date: …../ ….. / …..
120.01 g
Multi Line Format with 4 line feeds
Line Feed-2
Line Feed-3
Line Feed-4
GLP (ON)
Balance ID (ON)
GLP (ON)
GLP (ON)
GLP (ON)
Result
^^^^^^^^^^^^^^^^^^^^^
4.7 RS232 Menu [.rs232.]
Baud [BAUD] – The RS232 baud rate can be set to 600, 1200, 2400, 4800, 9600 and 19200.
Parity [Parity] – Parity can be sent to 7 bits-even parity [7 eveN], 7bits-odd parity [7 odd],
7bits-no parity [7 No] or 8bit-no parity [8 No].
Handshake [Handsh] – Handshake can be set to off [Off], X on – X off [on-off], or hardware [HardwWr].
4.8 Lock Menu [.LOC.]
When a Lock Menu item is SET ON the indicated menu cannot be changed.
[Loc Cal] – Calibration, [Loc SEt] – Setup, [Loc.mMod] – Mode, [Loc.Unit] – Unit,
[Loc Prt] – Print, [Loc 232] – RS232.
4.9 Sealing Access to the Balance Settings
The Menu Lock switch prevents changes to the Lock Menu. The switch can be secured using paper seals, wire
seals or plastic ties.
Un-Locked
Locked with Plastic Tie
EN-7
Pioneer™
5.0 MAINTENANCE
5.1 Troubleshooting
Symptom
Possible Cause
Remedy
Cannot turn on
Poor accuracy
No power to balance
Improper calibration
Unstable environment
Unstable environment
Incorrect calibration masses
Mode not enabled
Units not enabled
Average Piece Weight too small
Time out
Pan has load during power on
Pan was removed prior to power on
Weight on pan exceeds capacity
Pan was removed during weighing
Factory calibration data corrupted
Factory calibration data corrupted
EEPROM Checksum error
Reference Weight is too small
Reference Weight is too low for accurate
parts counting or percent weighing.
Verify connections and voltage.
Perform calibration
Move balance to suitable location
Move the balance to suitable location
Use correct calibration masses
Enter menu and enable mode
Enter menu and enable units
Add additional samples
Cannot calibrate
Cannot access mode
Cannot access unit
Err 5
Err 7.0
Err 8.1
Err 8.2
Err 8.3
Err 8.4
Err 9.5
Err 9.8
Error 53
REF Err
LOWREF
Remove weight from pan and re-zero.
Install pan and re-zero.
Remove weight from the pan
Re-install pan
Contact the authorized dealer
Perform calibration
Contact the authorized dealer
Add additional samples
Add additional samples or continue to weigh
with less accurate results.
5.2 Service Information
If the troubleshooting section does not resolve or describe your problem, contact your authorized Ohaus service
agent. Please visit our web site, www.ohaus.com to locate the Ohaus office nearest you.
5.3 Accessories
Security device
Auxiliary Display
Density Determination Kit
Printer – Thermal
Printer - Impact
Cable Kit – Thermal Printer
Cable Kit - Impact Printer
Data collection Software
76288-01
PAD7
Contact Ohaus
Contact Ohaus
Contact Ohaus
Contact Ohaus
Contact Ohaus
SW12W
(0.1mg and 1mg models only)
Pioneer™
EN-8
6. TECHNICAL DATA
Ambient conditions – The technical data is valid under the following ambient conditions:
Ambient temperature: 10°C to 30°C
Relative humidity: 15 % to 80 % at 31°C non-condensing, decreasing linearly to 50% at 40°C
Height above sea level: Up to 2000 m
Operability is assured at ambient temperatures between 5°C and 40°C
Power – AC adapter, Balance power input 8-14.5 VAC, 50/60Hz 4VA or 8-20 VDC, 4W
Protection – Protected against dust and water, Pollution degree: 2, Installation category: Class II
6.1 Drawings
0.01g and 0.1g Models
0.0001g and 0.001g Models
EN-9
Pioneer™
6.2 Specifications
MODEL
Capacity (g)
Readability (g)
Repeatability (sd)
Linearity (g)
Tare Range
Stabilization
Span cal mass (g)
Lin. cal masses (g)
Pan size (in / cm)
Net Weight (lb/kg)
*C= Internal calibration
PA64* PA114* PA214* PA213* PA413* PA512* PA2102* PA4102* PA4101*
65
110
210
210
410
510
2100
4100
4100
0.0001
0.001
0.01
0.1
0.0001
0.001
0.01
0.1
±0.0002
±0.002
±0.02
±0.1
To capacity by subtraction
3 seconds
50 or 50 or 100 or 100 or
200 or
200 or
1000 or 2000 or 2000 or
60
4000
4000
100
200
200
400
500
2000
20,
50,
100,
100,
200,
200,
1000,
2000,
2000,
2000
4000
4000
50
100
200
200
400
500
3.5 / 9 dia.
4.7 / 12 dia.
7.1 / 18 dia.
10.1 / 4.6 (*11.2 / 5.2)
10 / 4.5 (*11.1 / 5.1)
6.3 Communication
6.3.1 Commands
The RS232 Interface allows a computer to control the balance as well as receiving data such as the
displayed weight. The balance will return “ES” for invalid commands.
Command
IP
P
CP
xP
T
ON
OFF
PSN
PV
PU
x#
P#
x%
P%
Function
Immediate Print of displayed weight.
Print displayed weight (uses Stable ON/OFF menu settings).
Continuous Print.
Interval Print x = Print Interval (1-3600 sec)
Same as pressing Zero Key.
Turns balance ON.
Turns balance OFF.
Show Serial Number.
Version: Print product name, software revision and LFT ON (if LFT is set ON).
Print current mode/unit
Set PC ref wt (x) in grams
Print PC ref wt
Set % ref wt (x) in grams
Print % ref wt
6.3.2 RS232 (DB9) Pin Connections
Pin 2: Balance transmit line (TxD)
Pin 3: Balance receive line (RxD)
Pin 5: Ground signal (GND)
Pin 7: Clear to send (hardware handshake) (CTS)
Pin 8: Request to send (hardware handshake) (RTS)
GND
RxD
TxD
5
1
9
6
CTS
RTS
Pioneer™
EN-10
6.4 Compliance
Compliance to the following standards is indicated by the corresponding mark on the product.
Mark
Standard
This product conforms to the EMC Directive 2004/108/EC, the Low Voltage Directive
2006/95/EC and the Non-Automatic Weighing Directive 90/384/EEC. The complete Declaration
of Conformity is available from Ohaus Corporation.
AS/NZS4251.1 Emission; AS/NZS4252.1 Immunity
CAN/CSA-C22.2 No. 1010.1-92; UL Std. No. 3101-1
ISO 9001 Registration
ISO 9001 Registration In 1994, Ohaus Corporation, USA, was awarded a certificate of registration to ISO 9001 by
Bureau Veritus Quality International (BVQI), confirming that the Ohaus quality management system is compliant
with the ISO 9001 standard’s requirements. On May 15, 2003, Ohaus Corporation, USA, was re-registered to the
ISO 9001:2000 standard.
This equipment has been tested and found to comply with the limits for a Class A digital device, pursuant to Part 15
of the FCC Rules. These limits are designed to provide reasonable protection against harmful interference when
the equipment is operated in a commercial environment. This equipment generates, uses, and can radiate radio
frequency energy and, if not installed and used in accordance with the instruction manual, may cause harmful
interference to radio communications. Operation of this equipment in a residential area is likely to cause harmful
interference in which case the user will be required to correct the interference at his own expense.
This Class A digital apparatus complies with Canadian ICES-003.
LIMITED WARRANTY
Ohaus products are warranted against defects in materials and workmanship from the date of delivery through the
duration of the warranty period. During the warranty period Ohaus will repair, or, at its option, replace any
component(s) that proves to be defective at no charge, provided that the product is returned, freight prepaid, to
Ohaus.
This warranty does not apply if the product has been damaged by accident or misuse, exposed to radioactive or
corrosive materials, has foreign material penetrating to the inside of the product, or as a result of service or
modification by other than Ohaus. In lieu of a properly returned warranty registration card, the warranty period shall
begin on the date of shipment to the authorized dealer. No other express or implied warranty is given by Ohaus
Corporation. Ohaus Corporation shall not be liable for any consequential damages.
As warranty legislation differs from state to state and country to country, please contact Ohaus or your local Ohaus
dealer for further details.
Test Equipment Depot - 800.517.8431 - 99 Washington Street Melrose, MA 02176 - TestEquipmentDepot.com
*80251619*
PN 80251619B © 2010 Ohaus Corporation, all rights reserved / todos los derechos reservados /
tous droits reserves.
Printed in China / Impreso en la China / Imprimé en Chine