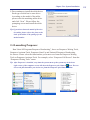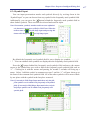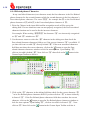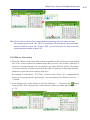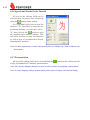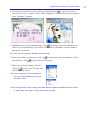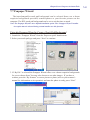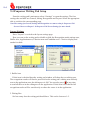
1
Penpower Handwriter
User Manual
Release: October, 2009
Version: 11.1
Edition: 6
Penpower Technology Ltd.
Software User License Agreement
You are licensed to legally use this software program (“the Software”) by Penpower
Technology Ltd (“Penpower”) under this license agreement (“The Agreement”). If you do
not agree with any of the provisions in this Agreement, please do not install, copy or use the
Software. By using the Software, you are deemed to fully understand and accept the provisions of this Agreement.
1. Intellectual Property
All intellectual property rights in the Software, together with all information and documents included in the packaging for the Software (including but not limited to copyrights), are property of Penpower, and are protected by relevant laws and regulations.
2. License to Use
You are authorized to use the Software on one (1) single computer only. You may not use
the Software on any other machines other than the said single computer.
3. Authority to Copy
The Software and all documents included with the Software, and copyright thereof, are
property of Penpower. You are licensed to make one (1) copy of the Software for your
personal backup purposes. All other acts of copying are strictly prohibited.
You may not sell, lease, dissemble, reverse engineer, copy, translate, adapt or derive the
Software, or obtain the source code of the Software by any other means. You may not use
the Software for any purposes other than those permitted under this Agreement.
4. Business Users
If you need to install or use the Software on more than one (1) computer, please contact
Penpower or our local distributor to purchase a license for the additional use.
5. Liability
You agree to indemnify Penpower against all losses, costs, debts, settlement payments or
other expenses (including but not limited to attorneys fees) arising from your breach of
this Agreement, and you agree to compensate Penpower for all of the abovementioned
damages.
6. No Warranty
Effectiveness of a packaged software in handling information is closely related to its
software and hardware environment. The Software is published following careful development and product testing by Penpower, but Penpower is not able to conduct tests
based on all possible combinations of software and hardware environment. Therefore,
Penpower is unable to promise nor warrant that there will be absolutely no risk of loss or
damage of information, or any other kind of loss, during installation and/or execution of
the Software. You must be fully aware of your risks in using the Software.
Penpower will provide you with the Software and support services in respect of the Software to the maximum extent permitted by law. However, Penpower does not warrant that
the Software and information included in the package of the Software contain no defects
or errors. Penpower is not liable for any indirect, special or incidental loss arising from
the Software, including but not limited to loss of profits, damage to business reputation,
cessation of work, hardware malfunction or damage, or any other commercial damage or
loss arising from commercial use of the Software.
7. Limitation of Liability and Damages
The maximum amount of compensation payable by Penpower, in respect of any damage
incurred by you for any reason under this Agreement, is limited to the amount you have
already paid to Penpower in respect of the Software.
Under no circumstances will Penpower be held liable for the possibility of loss, notwithstanding Penpower may be aware of the possibility of such loss.
8. Prohibition Against Sublicense
You are prohibited to assign the license in respect of the Software granted to you under
this Agreement, or to grant a sublicense to another person.
9. Jurisdiction
With regards to any disputes arising from this Agreement, Penpower and you agree that
the court having jurisdiction over the business location of Penpower will be the court in
the first instance.
10. Miscellaneous
In the event that any provision of this Agreement is found to be invalid at law, such
invalidity will not affect the validity of any other provisions, or the legal enforceability of
such other provisions.
In the event that the Software cannot be executed under conditions of normal use, due to
any damage to the original disk/s, Penpower will replace the disk/s free of charge.
Contents
Chapter One: Product Features............................................................. 1-1
Chapter Two: System Installation.......................................................... 2-1
2.1 System Requirements:............................................................................... 2-1
2.2 Hardware Installation................................................................................ 2-1
2.3 Software Installation................................................................................. 2-2
2.4 Launching Penpower................................................................................. 2-5
2.5 Registration............................................................................................... 2-6
Chapter Three: Penpower Full Screen................................................... 3-1
3.1 Relationships among the Pen, Pad, and Screen........................................ 3-1
3.2 Penpower Full Screen Execution.............................................................. 3-1
3.3 Balloon Interface....................................................................................... 3-2
3.4 Viewing Window Interface....................................................................... 3-2
3.5 How to write Chinese characters.............................................................. 3-3
3.6 Input Method............................................................................................. 3-3
3.6.1 Homophone....................................................................................... 3-3
3.6.2 Duplicator.......................................................................................... 3-4
3.6.3 Character-To-Phrase Inputting ......................................................... 3-4
3.6.4 Punctuation Symbol ......................................................................... 3-6
3.6.5 Editing Symbols................................................................................ 3-7
3.6.6 Handwriting Checking....................................................................... 3-7
3.6.7 Tutor in Phonic and Stroke Order...................................................... 3-7
3.6.8 Auto Phrase Correction...................................................................... 3-8
3.7 Recognition Result Correction.................................................................. 3-9
3.7.1 Penpower Artificial Intelligence........................................................ 3-9
3.7.2 Use by Related Character................................................................ 3-10
3.7.3 Merge................................................................................................3-11
3.7.4 Split...................................................................................................3-11
3.7.5 Phrase Correction............................................................................ 3-12
3.8 Signature................................................................................................. 3-13
3.9 On-Line Translator.................................................................................. 3-15
3.10 Penpower Full Screen Setup................................................................. 3-16
3.10.1 General Setting.............................................................................. 3-16
3.10.2 Inking Setting................................................................................ 3-17
3.10.3 Recognition Setting....................................................................... 3-18
3.11 Pause Handwriting Function................................................................. 3-19
3.12 Exit Penpower Full Screen.................................................................... 3-19
Chapter Four: Penpower Intelligent Writing Pad................................ 4-1
4.1 Launching the Penpower Intelligent Writing Pad..................................... 4-1
4.2 Introduction to the Intelligent Writing Pad Interface................................ 4-1
4.3 Input Methods........................................................................................... 4-4
4.3.1 Basic Input Method........................................................................... 4-4
4.3.2 Using the Related Phrase to Input Chinese....................................... 4-4
4.3.3 Using Homophone to Input Chinese................................................. 4-6
4.3.4 Symbol Input..................................................................................... 4-7
4.4 Editing Text in the Editing Area................................................................ 4-8
4.4.1 Using the Gesture Input Tool............................................................. 4-8
4.4.2 Overwrite/Insert Text......................................................................... 4-8
4.4.3 Candidate Characters and Penpower AI............................................ 4-9
4.4.4 Related phrase Character................................................................. 4-10
4.4.5 Phrase Correction.............................................................................4-11
4.4.6 Speech and Stroke Order Tutorial................................................... 4-12
4.4.7 Pronunciation................................................................................... 4-12
4.5 Habitual Data.......................................................................................... 4-13
4.5.1 Inputting Habitual Data................................................................... 4-13
4.5.2 Editing Habitual Data Information.................................................. 4-13
4.6 Signing a Document................................................................................ 4-17
4.7 Online Translator..................................................................................... 4-17
4.8 Penpower Intelligent Writing Pad Setup................................................. 4-17
4.8.1 General Setting................................................................................ 4-18
4.8.2 Inking Setting.................................................................................. 4-18
4.8.3 Recognition Setting......................................................................... 4-19
4.8.4 Layout Setting................................................................................. 4-20
Chapter Five: Penpower Learning Tool................................................. 5-1
Chapter Six: Penpower Input Tool......................................................... 6-1
Chapter Seven: Penpower Assistant Tools . .......................................... 7-1
7.1 Penpower Notes........................................................................................ 7-1
7.1.1 Open Penpower Notes....................................................................... 7-1
7.1.2 Note’s Three Features........................................................................ 7-1
7.1.3 Alarm Setting..................................................................................... 7-2
7.1.4 Send Notes by E-Mail ...................................................................... 7-2
7.1.5 Delete Notes...................................................................................... 7-2
7.1.6 Notes Manager................................................................................... 7-2
7.2 Penpower Voice Reader ........................................................................... 7-3
7.2.1 Open Penpower Voice Reader........................................................... 7-3
7.2.2 Voice Reader Setting.......................................................................... 7-4
7.2.3 Exit Penpower Voice Reader ........................................................... 7-4
7.3 Penpower Voice Navigator........................................................................ 7-5
7.3.1 Open VoiceNavigator......................................................................... 7-5
7.3.2 Voice Command Window.................................................................. 7-6
7.3.3 Surf Websites with Voice Commands................................................ 7-8
7.3.4 Exit Penpower VoiceNavigator........................................................ 7-10
7.3.5 VoiceNavigator Lists........................................................................7-11
7.4 Penpower Translator .............................................................................. 7-13
7.4.1 English Words.................................................................................. 7-13
7.4.2 Chinese Characters.......................................................................... 7-13
7.4.3 English Chinese Article Translator.................................................. 7-14
7.4.4 Chinese English Article Translator.................................................. 7-14
7.4.5 Button Functions............................................................................. 7-15
7.5 Penpower Artist....................................................................................... 7-16
7.5.1 Card or Letter Design...................................................................... 7-16
7.5.2 Setting.............................................................................................. 7-18
7.6 Penpower User Setting............................................................................ 7-19
7.6.1 Multi-user........................................................................................ 7-19
7.6.2 Pan-Asian All-In-One Package........................................................ 7-20
7.6.3 Button Options................................................................................. 7-20
7.7 Penpaper Wizard..................................................................................... 7-21
7.8 Using Penpower Jr. in MSN Messenger................................................. 7-23
7.9 Office 2003 Trace Mark.......................................................................... 7-24
Chapter Eight: Penpower for Net Handwriter..................................... 8-1
8.1 Open Penpower for Net Handwriter......................................................... 8-1
8.2 Introduction to the Net HandWriter Interface........................................... 8-2
8.3 Setting ...................................................................................................... 8-3
8.4 Tablet predetermined function areas......................................................... 8-4
8.5 Usual Data Setting.................................................................................... 8-5
Chapter Nine: Penpower Writing Pad................................................... 9-1
9.1 Open Penpower Writing Pad..................................................................... 9-1
9.2 Introduction to the Writing Pad Interface.................................................. 9-2
9.3 Input Method............................................................................................. 9-3
9.4 Penpower Writing Pad Setup.................................................................... 9-4
FAQ..................................................................................................... FAQ-1
The software application may have a newer version at the time when this product was being
manufactured and/or packaged. If the content on your application screen differs from your
User Manual, please follow the latest application screen upon installation.
Chapter One: Product Features
Chapter One: Product Features
Pan-Asia all-in-one package:
Recognizes over 23,000 traditional and simplified Chinese characters, 4,818 special Hong
Kong Chinese characters(HKSCS2001), English letters, symbols and numbers, Japanese
Kanji, Katakana and Hiragana, Korean Chinese characters and Korean.
Supporting Unicode:
Its recognition kernel is based on Unicode; you can input any traditional and simplified
characters.
Tablet Short Cut:
Allows users to self-define functions on the writing tablet for launching signature,
frequently used word and phrases, website browse with one touch on the tablet.
Cursive writing Recognition:
Capable of recognizing extremely cursive handwriting accurately.
Intelligent Recognition Learning Function:
Adapts to your handwriting styles and thus becomes your highly personalized
handwriting recognition system.
No Particular Writing Order:
No particular stroke order is required for accurate character recognition.
Automatic Correction Function:
With the built-in vocabulary and phrases database for proof reading, the system
automatically corrects the recognition results.
Inputting Frame:
Multiple inputting frames allow continuous inputting of characters, compatible with a
variety of application software.
Full-Screen Inputting:
Allows you to write continuously many characters at a time. It can be used together with
software application such as MS Office series.
1-1
1-2
Transparent Signature:
You can put your signature anywhere in your Word or Excel documents, even overlapping
on top of your documents. Signature can also be inserted into e-mail such as Outlook or
Outlook Express etc. and be sent along with e-mail.
Post-It Notes:
You can create post-it notes with your original handwriting, drawings, text, and voice
message. Notes can be sent via e-mail.
Character-To-Phrase by Extension:
Speeds up inputting with the powerful word/phrase by extension so that inputting of one
character can lead to proverbs or phrases starting with that character.
Homophone Inputting:
Allows you to input Chinese characters of homophonic in Chuying, Pinyin and Cantonese
Pinyin.
Displaying Phrases Pre and Post Character:
Displays related phrases with current character as either pre or post character.
Learning Pronunciation and Stroke Order:
Pronounces each recognized character in either Mandarin or Cantonese, and displays the
correct order of stokes.
Full-text Reading:
Reads out the whole Chinese text in either Cantonese or Mandarin.
Pen Style, Stroke Color and Sound Effects:
Provides several pen styles, such as brush and fountain pen, as well as single or multicolor strokes. It also provides 23 writing sound effects to make writing more fun.
Dictionary and Inputting Tools:
Provides dictionary by radical or number of strokes for checking Chinese characters. Also
included in the system are Chuying, Pinyin and Cantonese Pinyin inputting methods.
Translation:
Builds in with cursor-point dictionary for English and Chinese two-way word translation.
Chapter One: Product Features
Multiple Inputting Interface:
Provides multiple inputting interfaces for you to choose from, including bubble interface
that displays recognition candidates at the cursor point as soon as a character is written.
Penpower Artist:
Provides over a hundred of letter and post card templates for you to make personalized
letters and postcards in their own handwriting with great graphics.
Voice Command: (Supports Windows XP Only)
Controls the operation of Windows, as well as browsing web pages in IE with voice
commands.
MSN Messenger Pen Tracing Function
If you have MSN Messenger 6.1 or above installed, you will be able to transmit
handwriting and hand-drawn graphics through MSN Messenger for that extra personal
touch.
1-3
1-4
Chapter Two: System Installation
Chapter Two: System Installation
2.1 System Requirements:
1. Intel Pentium processor or compatible
2. 64MB RAM
3. 180MB disk space
4. Windows 7/Vista/XP
5. USB port
2.2 Hardware Installation
USB tablet installation
Directly plugs into USB slot.
Handwriting Pen Button Functions
The button of the pen acts as
the right-click of the mouse.
The tip of the pen acts as
the left-click of the mouse.
Note: Handwriting’s styles should be based on the real product. You may go to “Penpower User
Setting” to active the button function. Please refer to “7.6.3 Button Options” for details.
2-1
2-2
2.3 Software Installation
1.Insert Penpower handwriter CD into CD-ROM, execute setup.exe if it doesn’t autostart, then choose “Install Handwriting”.
Note: The installation items above is for LLC 403 version, other versions will be different.
2. Please select the language version to install then press “OK”. At this point the system
will remind you to close all Penpower applications. When all Penpower applications
are closed, press “OK”. This will open the welcome screen of the installation process.
Press “Next” to continue.
Chapter Two: System Installation
3. Please check that you have connected the tablet to the computer, then tick and select
“Yes, my tablet is connected”. Press “Next” to continue.
Note: If you do not tick and select “Yes, my tablet is connected”, you would not be able to continue
the installation.
4. Select installation folder. Click “Next”.
5. Select installation type: Typical, Compact or custom. Click “Next”.
Note: If you chose to perform a custom install you will be able to select the functionalities that
you wish to install. The Penpower for Net, Penpower Writing Pad and Penpaper Wizard will
only be available if selected through a custom install.
2-3
2-4
6. Select program folder, then click “Next”.
7. Select Language. Click “Next”.
8. Click “Finish” to complete the wizard.
Chapter Two: System Installation
9.Then continue to install the tablet driver.
Each type of table has its own driver.
According to the model of the tablet,
please select the matching tablet driver
and click “Next”. Please follow the
prompting screen and install the tablet
driver.
Tip: If you do not know the model of the wireless tablet, please refer to the front or the
back of the tablet or the package for the
model number.
2.4 Launching Penpower
Run “Start/All Programs/Penpower Handwriting”, there are Penpower Writing Tools,
Penpower Assistant Tools, Penpower Start-Up and Uninstall Penpower Handwriting
for choose. Please select the function that you want to use from the Penpower Writing
Tools or Penpower Assistant Tools. For example, select “Penpower Full Screen” from the
“Penpower Writing Tools” menu.
Tip: After Penpower is installed, every time the system starts up the system tray in the lower
right corner of the computer screen will show the Penpower quick launch
icon. You can
choose the functionalities you wish to use from the Penpower quick launch toolbar.
2-5
2-6
2.5 Registration
When running the Penpower full screen first time, a register reminder window will pop
up to remind you registering your product at www.penpower.net/reg.html for ensuring the
warranty service. Click “Register now” to register. If you click “Register later”, you may
go to “About/Register” when you need.
Chapter Three: Penpower Full Screen
Chapter Three: Penpower Full Screen
Penpower is an environment of full screen continuous handwriting. It can be used
together with software application such as Office 2000/XP, and you can write anywhere
on the screen. The recognized characters are sent to the cursor location. There are three
user interfaces: popup interface and viewing window interface. In this manual, we focus
on popup interface.
3.1 Relationships among the Pen, Pad, and Screen
The rectangle area on the tablet is directly matched to the screen. The top left corner
of match the left corner of computer screen.
When you move your pen close to the tablet without touching it, the pen works as a
mouse. When you press the pen against the tablet, it serves as pressing the left button on
a mouse.
“Writing on the Screen” means writing on the tablet, and the handwriting displays on
the screen. It is not physically using the pen to write on the screen.
3.2 Penpower Full Screen Execution
1. Open Penpower shortcut function, and select
“Penpower Full Screen”. Or you can execute it
from “Start/All Programs/Penpower Handwriting/
Penpower Writing Tools/Penpower Full Screen”.
2. Then, if it is in inline or popup interface, Penpower
full screen’s illustration displays in job list on
the lower right corner; if it is in viewing window
interface, it displays handwriting edit window on the
screen.
4. You can switch back and forth among popup, or viewing window interface.
Tip: In the viewing window interface, you may directly click on
interface.
button, switch to human
3-1
3-2
3.3 Balloon Interface
Penpower employs a unique popup interface. After character recognition, the result
will be directly outputted to the cursor position. You can edit, insert, or delete any
character. The visual user interface is completely hidden so that only when you need to
use the function window, the visual interface will automatically show up.
When you want to correct one character, place cursor on the
character, wait for a couple of seconds, the balloon interface will
display a list of candidate characters window next to the character
for your convenience.
Tip: You only need to move cursor on the character without click any
mouse buttons.
After the candidate character window is opened, you can select a character directly, or
use artificial intelligent
button, homophonic character
button, previous character
button, post-related character
button or phrase correction
button to correct
character, you may click on
button to look up the phonetic character and click on
button to see the character order teachng. Click on
button to input ordinary
punctuation. Click on
button to split one character into two.Click on
button to
combine two characters into one. Click on
button to look up a character’s translation.
Note: Balloon Interface can be used in Office, IE, WordPad, but on 64 bit systerm, it can not be
used in some software, ext. note.
3.4 Viewing Window Interface
During multi-character writing, the character buffer area only saves the last recognized
character. If there’s a mistake, you have to correct it immediately. Then press
to send out the replaced character to the cursor point.
button
Tip: The viewing window interface is the only interface where you can toggle writing state, limit
handwriting pen as pen-mouse state
, writing state only
, or mouse state
.
Chapter Three: Penpower Full Screen
3.5 How to write Chinese characters
When you write several Chinese characters, please leave certain spacing between
characters; place all the strokes of a single character comfortably close together. When
you write a Chinese character in cursive style, it is imperative to write in correct stroke
order and finish all strokes.
Proper Writing
For example, write these three
characters “明日月”.
Incorrect Display One
Notice there is no spacing between
those two characters. All the strokes are
considered as in one character.
Incorrect Display Two
The two parts of one character “明”
are written too far away from each other.
Instead of recognized as “明”, they are
recognized as “日” and “月”.
3.6 Input Method
3.6.1 Homophone
If you forget how to write some Chinese characters, or they are too complicated to
write, you can write simpler homophone to find the character that you would like to input.
For example, you want to input 『豫』:
1.Write any homophone of 『豫』such as『玉』.
2.Move the mouse cursor to『玉』 for a couple of seconds for
the function tool bar.
3.Move the cursor on the homophone
homophones.
button to list all the
4.Click
/
/
button to switch into other phonetic
notation /Cantonese Pinyin /Chinese Pinyin characters.
5.Select『豫』 to replace『玉』.
3-3
3-4
3.6.2 Duplicator
In continuous writing mode, Penpower
handwriter will treat
as the previous
character. If you want to input 『謝謝』,
you may writing them as:
Note: The “Symbol” mode must be enabled to use the radicals input duplicator method. See the
<<3.10.1 Standard Settings>> section for more details on its setup.
3.6.3 Character-To-Phrase Inputting
1. Open Penpower full screen menu; select “Related Phrase”,
the phrase window will show up on the screen.
2.When using full screen handwriting, you only need to input
the first character of the phrase. For example, if you want
to input『一面之詞』, you only need to write the first
character『一』. The phrase window will show all the
phrases starting with『一』in the top half of the window.
3.The bottom half of the phrase window lists the related
characters you wrote before after character『一』. For
example, you once wrote『一面』, the character『面』 is
『一』’s related character.
4.Select a phrase or a memory character and send it to the
cursor position.
Tip: After you select one phrase, this phrase will be adjusted to the first place on the list. This
way it’s easier for you to find your most often used phrases.
Update Phrase Database
Although Penpower provides several hundred thousands default phrases for your use,
you can open phrase dialogue box to customize the phrase database to meet your need,
such as adding new ones, or looking up and revising customized phrases. We suggest you
check it periodically to delete those unnecessary phrases.
1.Open phrase menu, and select “Phrase” to open the dialogue box.
Chapter Three: Penpower Full Screen
Tip: If you do not want to use the related characters in the phrase database. Please do not click
“related characters” in the database menu.
2.Click on “Insert” button to open database input dialogue box to add a new phrase. For
example, you want to add our company’s full name into the phrase database, input
『蒙恬科技股份有限公司』. The right side of the box will list each Chinese build-in
Chinese and Cantonese Pinyin of this phrase. Please choose the correct Pinyin of each
character by clicking /
button and listen to it.
Note: The maximum number of characters for each phrase is 200 Chinese characters. Since the
phrase dictionary and text-to-speech shares the same dictionary, the pinyin input will influence the correct pronunciation in “Penpower VoiceReader”. If it is not important to you,
you can ignore it.
After inputting, press “Ok” button to add the new phrase. When you write『蒙』,
『蒙恬科技股份有限公司』displays in the viewing window. You may select output
directly.
3. Press “Modify” to revise this phrase’s Pinyin from the dictionary; Press “Delete”
button to delete the phrase from the dictionary.
4.In “Search string” subject, input the part of the searching string, and the whole string
displays.
3-5
3-6
5. You may use “New”, “Open”, “Save” and “Save As” functions to create different
database files and classify them into different categories.
Note: Although you may create many files, but each times you can only choose one file.
6. Speedy Phrase Creation:
You may use “Import” function to choose a file, and merge the data file into the phrase
database.
The data file’s format is that one phrase per line; you may use any text editor to edit it.
Note: When you use data file to import phrases, the system will automatically add pinyin to the
phrases. One drawback is pronunciation may not be totally right. You may use phrase dialogue box’s editing function to proofread.
3.6.4 Punctuation Symbol
1.Write a few characters.
2.Move the cursor over the character you want to look
up for a couple of seconds for the menu “Candidate
Characters Menu” to show up.
3.Press
button to open the symbol menu and select
and input ordinary punctuation in full or half shape.
4. If you feel these punctuation marks are not enough,
Penpower also provides Penpower Basic Symbol
function so that you can select and input what you
need directly.
Penpower Basic Symbol function divided into single
page and pair page. Please “單/雙” button to switch.
* 單: Select the punctuation button which you want
directly.
* 雙: If selecting left brace in the punctuation list, a pair
of braces will send. For example, select “【” button, “
【”and “】” two punctuations will be sent.
Open Penpower Basic Symbol function to set the
display as horizontal or vertical window and to change
the contents and tabulate.
Chapter Three: Penpower Full Screen
3.6.5 Editing Symbols
Penpower provides four standard editing symbols: delete, backspace, enter and space
bar. These are as follows:
1. Delete: Delete the character after the cursor.
2. Backspace: Delete the character before the cursor.
3. Enter: Change line in the cursor point.
4. Space: Insert a blank in the cursor.
Or
3.6.6 Handwriting Checking
1. Write a few characters.
2. Move the cursor over the character you
want to look up for a couple of seconds
for the menu “Candidate Characters
Menu” to show up.
3. Press
button to look up you own
writing.
3.6.7 Tutor in Phonic and Stroke Order
1. Write some characters.
2. Move the mouse cursor over the character you want to look up, waiting for a couple of
seconds, “Candidate Characters Menu” will be opened.
3.Press
button to display the tutor dialogue. If you want to go into active character
order tutor, press
button.
3-7
3-8
Press
button to hear the Mandarin tone pronunciation while the homophonic
characters display on the right, in Chuying.
Press
button to hear the Cantonese ton pronunciation while the Cantonese
homophonic characters display on the right, in Cantonese pinyin.
Press
button to hear the Mandarin ton pronunciation while the Mandarin
homophonic characters display on the right, in Pinyin.
3.6.8 Auto Phrase Correction
The system automatically proofreads on your writing content to improve the
recognition rate.
For example, when you continuously write『天下太平』 (peace on the earth) four
characters, but the character『天』is incorrectly written as『夫』, so they become 『
夫下太平』. Penpower uses its internal phrase dictionary to correctly recognize your
intended result『天下太平』.
Chapter Three: Penpower Full Screen
3.7 Recognition Result Correction
After you use the candidate character list or artificial intelligent button corrections,
Penpower will automatically learn your handwriting style to improve the recognition rate.
3.7.1 Penpower Artificial Intelligence
1.The recognized character is sent to the
cursor position.
2.See the illustration for example.『恬』
is wrongly recognized as『恰』.
3.Move the cursor to『恰』, wait for
a couple of seconds for the candidate
characters to show up.
4.If the correct character is in the
candidate list, select it to make the
correction.
5.If the correct character is not in the
candidate list, click on artificial
intelligence
button to open artificial
dialogue box.
6.Input the right character『恬』, and
press “Input Complete” to close the box.
7.Finally you’ll see the correct character
at the cursor position. Since the system
has learnt your handwriting style, next
time the same handwriting of yours will
be correctly recognized.
3-9
3-10
3.7.2 Use by Related Character
For any two character phrase, the first character is the second character’s “Pre-Related
character”, and the second character is the first character’s “Post-Related character”, such
as『科技』 (science technology), 『科』 (science) is『技』 (technology)’s pre-related
character, and『技』 (technology) is『科』 (science)’s post-related character.
1.Write a few characters.
2.See illustration.『恬』is wrongly recognized as『恰』;『科』(science)is wrongly
recognized to as『料』(material).
3.Move the cursor on the character『恰』, and wait for a couple of seconds to the
function tool bar to pop up.
4.Click the pre-related phrase
button, and all the two character phrases will be listed.
If the correct phrase in the list, select it to make the correction.
5.Move the cursor to『料』; wait for a couple of seconds for the function tool bar to pop
up.
6.Move the cursor to post-related phrase
button, and all the two character phrases
will be listed. If the correct two character phrase『科技』is in the list, select it to make
the correction.
7. Finally, you see the corrected result of
『蒙恬科技』.
Chapter Three: Penpower Full Screen
3.7.3 Merge
If you write the left and right parts of a character too far apart, they might be
recognized as two characters. You can use the merge function to unite them into one
character.
1. Write『棟樑』, see illustration.
2.If『木』and『東』are written too far away
from each other, you may wrongly get three
characters『木東樑』.
3.Move the cursor on the first character『木
』and wait for a couple of second for the
function tool bar. Click merge
button,
to combine『木』(wood) and『東』(east)
together as『棟』(beam).
3.7.4 Split
When two characters are written too closely, they may be treated as one character. You
can use split function to separate it into two characters.
1.Write『日月星辰』 (the Sun, the Moon,
Stars and Galaxies), see illustration.
2. The first two characters are too close to
each other; they will be treated as one
character. The recognized result is『明
星辰』(Bright, Stars and Galaxies) three
characters
3.Move the cursor on the character『明』
for a couple of seconds for the function tool
bar. Click on split
button to separate the
character,『明』, into two characters『日
』and『月』.
3-11
3-12
3.7.5 Phrase Correction
In Full Screen mode if you wish to enter a common phrase such as an idiom, if you
aren’t sure of how to write one of the characters you can substitute a similar sounding
character instead. If you are not sure of the character’s pronunciation either, choose any
at random. When you have finished writing the phrase, select the uncertain character with
the mouse then click on the phrase correction
button. The system will examine the
four characters before or after this particular character to guess what you meant and make
the change.
1.When entering an idiom in Full-Screen
mode such as『拔苗助長』, if you are not
sure of how to write the character『拔』,
you can enter the character『一』instead to
input『一苗助長』.
2.Move the mouse over the character『一
』and pause for a moment to bring up the
“Candidate Characters Window”. Click the
phrase correction
button and the『一』
character will be changed to『拔』.
3.If the phrase correction function came up
with multiple candidate words, these will
be shown in the candidate words window
for you to choose from. For example, if
the input was『股份一限公司』when you
pause the mouse cursor over the『一』
character, this will bring up the “Candidate
Characters Window”. Pressing the phrase
correction
button will bring up a list of
all phrase correction candidate words for
you to choose and make the correction with.
Chapter Three: Penpower Full Screen
3.8 Signature
1.Move the cursor to the place you want to sign in your document.
2.Press “Signature” to enter the signature mode.
Note: Only applications with image and characters capabilities have the signature function, such
as Word, WordPad or Excel.
3.Draw or sign your name any place in the screen.
Set ink color:
Set ink width:
Set pen style:
Delete all of the writings, and re-sign:
Restore one signature:
Delete restored signature:
4.Press
button to delete the signature.
5.Press
button to finish the sign and insert the signature next to the cursor.
Usually, a signature also may insert a letter in IE, Netscape, or Eudora, and send to
others through e-mail.
3-13
3-14
6.Press
button to finish transparent signature so that your signature is overlapping
on the document.
Note: You can use the transparent signature in the latest Word and Excel, but Office 2007 not
support this function. You may make notes and commentary by using transparent signature
function.
Chapter Three: Penpower Full Screen
3.9 On-Line Translator
Open Penpower full screen main menu,
and select “On-Line Translator” to open
online translation function. Select it again
to close the function.
When reading English or Chinese
articles, if you encounter unknown
characters or phrases, move the cursor
over the characters, and a translation
window pops up to explain them for you.
English Translation
When you move the cursor outside
the interactive scope, the window will
disappear. In the window, you can press
the play
button or character
/ or
phrase explanation buttons.
The online translation is used in the
balloon interface. When you want to look
up a character’s translation, select
button from the candidate window.
Chinese Translation
3-15
3-16
3.10 Penpower Full Screen Setup
Open Penpower full screen menu and select “Penpower
Full Screen Setting...” to open the setting dialogue. You can
configure the recognition mode, writing speed, writing inking
and output format here.
3.10.1 General Setting
Recognition Mode Setting
Penpower provides Chinese, English,
Numeral, Symbol, and Japanese five
recognition modes. Select the only those
recognition modes you want to improve
the recognition rate.
Note: In Japanese recognition, there are only
hiragana and katakana. You must switch
to Japanese edition to input Japanese
kanji. Please refer to 7.6 section to see
the details.
Multi-Words Writing/ One word Writing
Please select and open “Multi-Words” option, you can write up to 45 characters at
a time. If you are new to handwriter, or not yet used to handwriting, you may turn this
option off. Your writing will be deemed as one character to recognize to avoid mistakes
in character segmentation.
Writing Speed Adjustment
Penpower provides ten speed scales (1~10), the small the number, the shorter the time
for the recognition engine to kick in. Use bigger number if your handwriting is slow.
Full shape /Half shape
Set recognition result of English, number and symbol and output in full or half code.
English appliciation
Press backspace one time in Chinese software, it will automatically delete backward
two bytes (one character in Chinese) while it will only delete one byte (half Chinese) in
some English software. Please select this option when you use English software to avoid
mistakes of candidate character correction.
Chapter Three: Penpower Full Screen
Add black Next to Chinese
If the lines do not aligned well with English software, please check this selection, so
that it will automatically add a space to align up.
Open Balloon help
When you move the cursor to any button for about two or three seconds, a concise
explanation pops up. If you do not want it, you can turn this function off.
Sound
Pronounce the character in Mandarin or Cantonese immediately after recognition.
3.10.2 Inking Setting
Switch to “Inking” title page.
Ink Color:
Set font color. In “Multiple” selection,
adjust color change smoothness.
Ink Width:
Set the line’s levels of thickness..
Pen Sound:
Set sound effect as you write.
Pen Style:
Choose from one of the eight pen styles
such as Mark pen, Chalk and Writing
brush. You can also set pictures as the
texture for your pen style.
In Pen Style select “Texture mapping”,
then press the “Browse” button to bring up
the “Open” dialogue. The system offers 10
default graphics but you can also choose
other pictures you like on the computer.
Press “Open” to set the selected picture as
the texture map for your pen style.
Note: Only *.bmp format pictures supported for pasting.
3-17
3-18
3.10.3 Recognition Setting
Switch to “Recognition” title page.
You can choose the output characters,
either in Traditional Chinese, Simplified
Chinese or Traditional+Simplified, no
matter how you write them and how the
recognition kernel setting is set.
Traditional Character:
No matter whether you write traditional or simplified characters, the recognition result
is displayed as traditional characters.
Simplified Character:
No matter whether you write traditional or simplified characters, the recognition result
is displayed as simplified characters
Traditional+Simplified :
When you write traditional characters, they show up as traditional characters; When
you write simplified characters, they show up as simplified characters. Penpower allows
you to use traditional or simplified writing method to input any Chinese character, or
mixed them. For example, you may input 『書寫』as belowe.
Unusual Character:
This recognition mode is only available when the Penpower is set to the Simplified
Chinese version. Check this option to recognize other extremely rare Chinese characters.
Runnig hand:
Check this option to have the software recognize run-on cursive.
Chapter Three: Penpower Full Screen
Hongkong character:
This recognition mode is only available
when the Penpower is set to the Traditional
Chinese or Traditional Chinese (Hong
Kong) version. You can connect to http://
www.microsoft.com/hk/hkscs/default.aspx
to check the Hong Kong characters list.
3.11 Pause Handwriting Function
If you want to close the handwriting
function temporarily and use the pen
as a mouse, please open Penpower full
screen main menu and select “Suspend”
. Penpower full screen on the lower right
corner’s illustration will turn into
state
to tell you the handwriting function is
closed. Select “Suspend” one more time,
the handwriting function will be restored.
3.12 Exit Penpower Full Screen
1.Open Penpower full screen main menu.
2. Select “Exit”.
3-19
3-20
Chapter Four: Penpower Intelligent Writing Pad
Chapter Four: Penpower Intelligent Writing Pad
The Penpower Intelligent Writing Pad is a handwriting input tool based on writing
cells. With a comprehensive set of editing function buttons integrated into the interface,
the user can edit their text with ease. The user can also customize and quickly insert
symbols, common words and their signature file.
4.1 Launching the Penpower Intelligent Writing Pad
From the PenPower quick launch
toolbar select “Penpower Intelligent
Writing Pad” and it will appear on the
desktop.
Tip: When the cursor is moved away from the
Penpower Intelligent Writing Pad it will
automatically minimize into an
icon
to save space on the screen. The Intelligent Writing Pad status will pop up when
the cursor moves over this icon.
4.2 Introduction to the Intelligent Writing Pad Interface
Shortcut
Editing Tool
Hide/Show Editing
Field Buttons
General Input Area
English
input in
lower
case
Number
input
Symbol
input
General Input Area: Text input can be written here. The area can be set to contain 1~5
cells, with 1 cell being for single character input and 2~5 fields for
multiple characters. See the chapter on Settings for further details on
setup.
Hide/Show Window Button
Toolbar
Editing Area
Gesture Input Tool
Editing Area
English
input in
upper
case
4-1
4-2
English inputin upper case: All text sent from here appears as alphabetical uppercase.
English input in lower case: All text sent from here appears as alphabetical lowercase.
Numerical Input: All text from here appears as Arabic numerals.
Symbolic Input: All text sent from here appears as symbols.
Hide/Show Window Button: Pressing this button hides or shows the alphabetical,
numerical and symbolic input fields.
Editing Area: All text inputs will be temporarily stored here. The editing tools can be
used to change the text here before they are sent.
Editing Area Gesture Input Tool
: From left to right these are:
Send or Revert character(s) to the target apllication, Delete key in the
buffer, Backspace key in the buffer, Space key in the buffer and Enter key
in the buffer.
Note: Pressing the send
button sends the text in the editing area to the application and
changes the send button to revert
.
Shortcut Editing Tool: Allows the quick input of symbols, candidate characters,
homonyms, quick correcting of previous/next associated character or
even entire text strings based on associated terms. Press the
show more information.
Candidate Characters Field
Homophone Field
Pre-Related phrase Field
Post-related phrase Field
Phrase Field
Expanded to show
more information
Frequently Used Symbols Field
button to
Hide/Show Editing Area Button: There is no limit to the length of text that the editing
field can hold so pressing this button hides or shows the editing field.
In edit mode, the user can check and make basic edits to the input text
before pressing the button again to hide the editing field. The edit cache
field will then only show the last row of text entered.
Text Cache Field Status
Toolbar: The function buttons in this area will open the corresponding function window
or perform the corresponding action.
4-3
Chapter Four: Penpower Intelligent Writing Pad
Overwrite/Insert Mode
Full/Half shape
Setting
Usual Data
Edit phrase
Add the selected phrase into the Userdefined phrase Database Library
Signature
Symbol
Phrase
ON-Line Translator
Speak
Standard inking tutor
Phrase Correction
Artificial Intelligence Function
4-4
4.3 Input Methods
4.3.1 Basic Input Method
After Chinese is entered into the General Input Area or English characters/symbols
are entered into the English, numerical or symbolic input fields, the recognition results
will be displayed in the editing area. Pressing
at this time will then send the
text to applications such as Word/Excel. Once the text in the editing area has been sent
the
button will change to
been sent to the application, press the
Intelligent Writing Pad’s editing field.
. If you wish to revise text that has already
button to revert the sent text back to the
Note: Punctuation, symbols, numbers and lowercase alphabetical characters can appear as Half
or Full Form. When the toolbar status is
will change it to
for half shape input.
it is full shape input and pressing this button
4.3.2 Using the Related Phrase to Input Chinese
Using the Related Phrase to Input Chinese.
When you input a character the phrase field will display a series of phrase terms that
start with this character. You can also press the
button behind the phrase field to look
up for phrases. If the term that you want appears in the window, click on it to enter the
entire term without having to enter all of the other characters.
If you wish to input “一視同仁”, simply input “一” and then choose from the phrase
terms window “一視同仁” to finish inputting the entire phrase.
Hint: When you use a suggested term it will be moved to the front of the list the next time the
same situation arises so you can easily access your frequently used terms.
Chapter Four: Penpower Intelligent Writing Pad
Editing Phrase
Press the “Edit Phrase”
button in the toolbar to open the Phrase window.
Note: The methods for editing and changing the dictionary are identical to that for Penpower Full
Screen mode. Please see Chapter 3 3.6 for further details.
Apart from using the “Insert” method described above to add new associations to the
dictionary it is also possible to select the desired text in the editing area and press the
toolbar button
.
If you wish to input “一不做二不休” and add it to the phrase dictionary, use the
mouse to highlight the text then press the
button to open the “Phrase Input” dialogue.
First correct the heteronyms then press “OK” to add this term to the dictionary. The next
time that you write the character “一” the term will appear among the suggested phrase.
4-5
4-6
4.3.3 Using Homophone to Input Chinese
Sometimes how a Chinese character is written is forgotten or is complicated to write.
When this happens an easier to write character that sounds the same can be substituted
with the homophone function used to find the desired character.
For example, if the desired character was “豫”, enter any homophone such as “玉”
and the recognition result will be sent to the editing area. Now check in the homophone
field for the character “豫”. If it does not appear, press the homophone field’s
to show the homophone window. Now select “豫” to change “玉” to “豫”.
button
Tip: If the character that you entered has multiple pronunciations , the homonym field will by
default show the homonyms for the most frequently used pronunciation. Clicking on this
character in the editing field will refresh the homonym field area to display this character’s
homonyms for other pronunciations, with each click changing to another pronunciation.
For example, the input “大” has two possible pronunciations. By default the homonyms for “dà”
are displayed. Clicking on the character “大” will change the display to show the homonyms
for “dài” instead.
Chapter Four: Penpower Intelligent Writing Pad
4.3.4 Symbol Input
You can input punctuation marks and symbols directly by writing them in the
“Symbol Input” or you can choose from any symbol in the frequently used symbols field.
Additionally, you can press the
button behind the frequently used symbols field to
show further symbols. These can then be selected and used for input.
Note: Punctuation, symbols, numbers and lowercase alphabetical characters can appear as Half or Full Form. When the
toolbar status is
it is full shape input and pressing this
button will change it to
for half shape input.
By default the frequently used symbols field is set to display six symbols: ,。、;
:!. You can redefine what symbols are displayed in the frequently used symbols field.
Press the
button behind the frequently used symbols field and move the mouse
cursor to the symbol that you wish to add to the frequently used symbols field such as
“√”. Clicking on it with the mouse and pausing for around 3 seconds will bring up a
menu. Select “Add this symbol to common user area” and the “√” will now show up at
the front of the common used symbols field. All of the other symbols will be moved back
by one place with the symbol in the last place removed.
Note: If currently in Full Shape Input mode then only the fullform symbols can be added to the frequently used symbols
field. If currently in Half Shape Input mode then only the
half shape symbols can be added to the frequently used
symbols field.
4-7
4-8
4.4 Editing Text in the Editing Area
4.4.1 Using the Gesture Input Tool
1.Write the Chinese in the input field and the recognition results will appear in the editing
field.
2.Select the text to edit. To select multiple characters click and drag with the mouse
button. Press the
button to delete the selected text.
3.Press the
button to delete the character before the selected text.
4.Press the
button insert a space behind the selected text.
5.Press the
button to add a new line behind the selected text.
6.Press the
button to send the text in the editing field to where the cursor
is located within the application. After the text is sent it will change to the revert
button. Press the
to revert the previously sent text to the editing
field.
4.4.2 Overwrite/Insert Text
The toolbar will show the current editing field text mode. When the button is
it is
in overwrite mode. Pressing the button will change it to insert
mode. Pressing
button again will change it back to the overwrite
mode.
1.Write the Chinese in the input field and the recognition result will be sent to the editing
field.
2.If the text was not recognized correctly, select the text to edit (click and drag to select
multiple characters) and enter the new text in overwrite mode. This will replace the
selected character or text with the new input.
3.To insert text, set the status to insert mode then select the character located before
the point you wish to insert the new text at. Enter the new text to insert it behind the
selected character.
Note: To insert text in front of the first character in the editing field, please click to the left of this
character by about one-thirds of the character’s width. This allows you to input new text in
front of the first character.
Chapter Four: Penpower Intelligent Writing Pad
4.4.3 Candidate Characters and Penpower AI
1.Write the Chinese in the input field and the recognition result will be sent to the editing
area. If the recognition was faulty the candidate characters function can be used to fix
characters that are wrong.
For example: When writing “蒙恬科技” the “科” was mistakenly recognized as “料”.
Click on the “料” character in the editing field then check if the candidate characters field
contains the correct “科”. If yes, select it to make the correction.
Note: The candidate characters field will display at most 6 candidates. Any character you select
will then be moved to the front.
2.If the candidate characters field does
not show the correct word for use, click
on the “Artificial Intelligence function
”
button in the toolbar to bring up
the Artificial Intelligence window. Enter
the correct character “科” then click “
OK” to close the Artificial Intelligence
window. You will now find the incorrect
character “料” changed to “科”. The
software will also learn from the trace
of how you wrote the character so it will
recognize it properly next time.
4-9
4-10
4.4.4 Related phrase Character
In any two linked characters (two-character term) the first character is the Pre-Related
phrase character for the second character while the second character is the first character’s
Post-related phrase character. The term “科技” for example has 科 as the Pre-Related
phrase character of 技 while 技 is the Post-related phrase character of 科。
1.Write the Chinese in the input field and the recognition result will be sent to the
editing field. If a two-character term was not properly recognized, the Pre/Post-related
character function can be used to fix the incorrect character.
For example: When writing “蒙恬科技” the character “恬” was incorrectly recognized
as “恰” and “科” mistaken as “料”.
2.Use the mouse cursor to select the “蒙” character in the editing area then check the
Post-related character characters field to see if the correct character “恬” is available. If
yes then click on it to add “恬” directly behind “蒙”. If the next associated characters
field does not show the correct character, click on the
button to open the Postrelated character characters window to look for more options. Upon finding “恬”,
click on it to add it behind “蒙”. Now click on “恰” then click on the
button in the
Gesture Input Toolbar to delete it.
3.Click on the “技” character in the editing field then check for the correct character “科
” in its Pre-Related phrase characters field. If yes then click on “科” to insert it directly
in front of “技”. If the Pre-Related phrase characters field does not show the correct
character, click on the
button to open the Pre-Related phrase characters window to
look for more options. Upon finding “科”, click on it to add it in front of “技”. Now
click on “料” then click on the
button in the Gesture Input Toolbar to delete it.
Chapter Four: Penpower Intelligent Writing Pad
Hint: You can also use the Pre/Post-related character function to enter two-character terms.
For example, if you wish to enter “蒙恬” you can input “蒙” first then use the Post-related
characters window to input “恬”. To enter “科技”, you can enter just “技” then use the Prerelated characters window to input “科”.
4.4.5 Phrase Correction
1.Write the Chinese in the input field and the recognition result will be sent to the editing
area. If it’s a term or phrase in common usage but you aren’t sure of how a character is
written or even pronounced, you can substitute any other character instead. The Phrase
Correction function can then be used with the other 4 characters in front and after this
character to guess the correct answer then fix it.
For example: For the phrase “天下為公” you aren’t sure of how “為” is supposed to be
written or even pronounced. At this point, you can substitute any character such as “一
” instead.
2.In the editing area, use the mouse to select the character “一” then press the
button
on the toolbar. This will guess the correct character and at the same time change “一”
to “為”.
4-11
4-12
4.4.6 Speech and Stroke Order Tutorial
All text in the editing field can be
selected then its proper trace looked up
using the
button on the toolbar.
So if you didn’t know how to write the
character “為” then fixed it using the text
prediction function, you can now select “
為” then click on the
button to open
the standard trace tutorial window. This
will show you how to write the character
as well as how it’s pronounced in Pinyin,
Hanping and Cantonese.
Note: For more information on stroke order tutorial please see Chapter 3.6.7 Tutor in Phonic and
Stroke Order.
4.4.7 Pronunciation
All text in the editing field can be selected then the
to play its Mandarin or Cantonese pronunciation.
button on the toolbar pressed
Note: You can select multiple characters to have an entire sentence or paragraph read out aloud.
Note: To set the language used for pronunciation, please refer to Chapter 4.8.1 General Setting.
Chapter Four: Penpower Intelligent Writing Pad
4.5 Habitual Data
4.5.1 Inputting Habitual Data
*Inputting Pharse
Press the “Phrase”
it in the editing field.
button to open the Phrase list. Select the term to input to place
*Inputting Symbols
Press the “Symbol”
button to open the symbols list. Select the symbol to input to
place it directly in the application at the cursor’s location.
Note: The symbol will be inserted directly to the application and not cached in the editing field.
*Inserting Signature
Press the “Signature”
button to open the signature files list. Select “Signature
File” and open the frequently used signature files list to select the signature you wish to
insert. The signature will be inserted directly in the application at the cursor’s location.
Note: The symbol will be inserted directly to the application and not cached in the editing field.
Note: If the “Sending the first one directly” option is checked when editing the signature file,
pressing “Signature File” will directly send the first signature file set. For more details see
Chapter 4.5.2.
Phrase
Symbol
Signature
4.5.2 Editing Habitual Data Information
The edit Habitual Data information function can be used by the user to edit/add
Phrase, symbols and signature files. Including them in the Usual Data items allows them
to be quickly added to the document being edited.
Press the “Phrase”
button to open the Habitual Data information window. Three
tabs are available: “Symbol”, “Phrases” and “Signature”.
4-13
4-14
* Emoticons:
1.Select item on the right and press the
button to add it to the “Habitual Items”
category and it will be available from the “Symbols” list.
Note: The maximum number of Habitual items is 10.
2.Press the “New” button to open the Add New Symbol window. You can choose to
insert a symbol or input it directly with the keyboard. Press “OK” to add a new Symbol
to “All Items”.
Note: The Symbol must be less than 10 characters in length.
3.Select a symbol and press the “Edit” button to open the edit emoticon window. The
selected symbol can be changed then saved by pressing “OK”.
4.Press the “Export” button to export the current database.
5.When the “Import” button is pressed the
user can import a symbol definition file
on the computer to the software. When
importing, choose whether to import
a text or symbol file. If importing a
custom text file, please ensure that it’
s in the format specified in the import
window.
Chapter Four: Penpower Intelligent Writing Pad
* Phrases:
1.Select item on the right and press the
button to add it to the “Habitual Items”
category and it will be available from the “Habitual Items” list.
Note: The maximum of number of Habitual items is 10.
2.Press the “New” button to open the Add New Phrase window. You can choose to insert
a symbol or write it directly. Press “OK” to add a new phrase.
Note: Phrases must be less than 20 characters in length.
3.Select a Phrase then press the “Edit” button to open the edit phrases window. The
selected content can be edited then saved by pressing “OK”.
4.Press the “Export” button to export the current database.
5.When the “Import” button is pressed the
user can import a phrases definition file
on the computer to the software. When
importing, choose whether to import
a text or phrases file. If importing a
custom text file, please ensure that it’
s in the format specified in the import
window.
4-15
4-16
* Signature:
1.You can press the “New” button to create your own custom signature file then press the
button to add it to the “Habitual Items” category. When adding a new signature,
please provide the signature name (maximum length 10 characters) and the signature
content (maximum 10 lines with up to 40 characters per line).
Note: If the “Sending the first one directly” option is checked when you press the signature file
button
on the Intelligent Writing Pad toolbar and open the “Signature” menu, the
frequently used signature files list will not be shown. Instead, the first signature file in the
Habitual data category is sent to the application and inserted where the cursor is. You can
therefore move your most Habitual data signature to the front like the “簽名范例” shown
above then check the “Sending the first one directly”. Now when you press the
and select “Signature” the “簽名范例” will be inserted directly in the application.
2.To import a signature using a custom
text file, please ensure that it’s in the
format specified in the import window.
For example:
[begin]
My Business Card
WANG Tzu-ming
[end]
button
Chapter Four: Penpower Intelligent Writing Pad
4.6 Signing a Document
Move the cursor to the location in the document where the signature is to be added.
Press the “Signature”
button on the Penpower Intelligent Writing Pad toolbar to open
the signature files list. Select “Write Signature” to switch to the signature mode. Now you
can draw a picture or sign your name anywhere on the screen.
For more details on how to use the write signature function please see Chapter 3.8
Signing.
4.7 Online Translator
Press the
button on the toolbar to enable the online translation function. When
enabled, the button changes to
. Press this button again to disable the online translation
function.
When the online translation function is enabled if you see a character or phrase you
don’t recognize when reading an English or Chinese article, move the cursor over the
section to get a real-time translation and explanation without having to flip through a
dictionary.
For more details on how to use the online translation function please see Chapter 3.9
On-Line Translator.
4.8 Penpower Intelligent Writing Pad Setup
Press the “Setting” button
on the Penpower Intelligent Writing Pad toolbar to open
the setting screen. There are four tabs and you can click on the tab titles to switch to the
pages for each type of settings.
4-17
4-18
4.8.1 General Setting
Recognition Mode:
Recognition is provided for Chinese, English, Numeral, Symbol and Japanese. The
modes can be selected as necessary though selecting fewer modes improves recognition
accuracy.
Speed:
Set the writing delay. The smaller the delay means the shorter the wait before
recognition begins after user stops writing. If your writing speed is slower, you can set
the “Speed” value higher.
Full/Half Shape:
Set whether recognized alphabets, numbers or symbols should be output as full shape
or half shape encoding.
Auto Hideen:
With this option selected when the cursor moves away from the Intelligent Writing
Pad it will temporarily be minimized to an
icon. When the cursor moves over the
icon it will automatically display the Intelligent Writing Pad status.
Enable Help Wizard:
With this option enabled when the cursor is paused over any button for 2~3 seconds a
brief description will pop up. To prevent this from being shown turn off this function.
Homophone:
Choose whether to display homophone using Pinyin, Hanping or Cantonese
pronunciation.
Sound in edit area:
Set whether text in the editing field should be pronounced using Mandarin or
Cantonese.
Sound after recognition:
Set whether a character should be pronounced in Mandarin or Cantonese after
recognition.
4.8.2 Inking Setting
Ink Color:
Set the color to use for the writing trace. In the “Multiple” option the color change
gradient can also be adjusted.
Chapter Four: Penpower Intelligent Writing Pad
Ink Width:
Set how thick the writing trace should
be.
Pen Sound:
Set the sound effect to use when
writing.
Pen Type:
There are 8 types of pen types available
including Mark pen, Chalk and Writing
brush.Your favorite pictures can also be
used as the texture map for the writing
trace.
Note: For details on setting up the pen texture map please see Chapter 3.10.2 Inking Setting.
4.8.3 Recognition Setting
Simplified Character:
Always output Simplified Chinese whether
written as Traditional or Simplified. If
Penpower is currently set up for Simplified
Chinese then a [Traditional to Simplified] suboption is also available to disable handwriting
recognition for Traditional Chinese. If you do
not know how to write Traditional Chinese, do
not check the “Traditional to Simplified” suboption for improved recognition accuracy with
Simplified characters.
Traditional Character:
Always output Traditional Chinese whether written as Traditional or Simplified.
Traditional+ Simplified:
When written as Traditional Chinese the output will be Traditional Chinese; when
written as Simplified Chinese the output will be Simplified Chinese.
Unusual Character:
Allows recognition of very rarely used Chinese characters. This option should not be
used if possible as it may affect the recognition of standard Chinese characters.
4-19
4-20
Runnig hand:
Check this option to have the software recognize run-on cursive.
Hongkong Character:
When the [Hongkong Character]
option is checked the recognition engine
will include 4941 characters specific to
Hongkong (HKSCS 2001). If you do not
need to input Hongkong characters do
not check this option. To download the
Hongkong character set visit http://www.
microsoft.com/hk/hkscs/default.aspx.
4.8.4 Layout Setting
Writing box:
Configure the interface to use 1~5 cells for handwriting recognition. 1 box allows only
1 character to be written each time. 2~5 box allow multiple characters to be written each
time.
Skin:
Allows the choosing of a color theme. The four colors available are Green, Pink,
Silver and Blue.
Chapter Five: Penpower Learning Tool
Chapter Five: Penpower Learning Tool
Use a simple symbol to represent a string of characters to speed up inputting speed.
1.Open Penpower shortcut function, and select “Penpower Learning Tool”. Open the
Learning Tool page. Then click on “Learning string” to open the “Learning Tool”
dialogue box.
2.Input the phrase you want to study. Then click on “Start” button to switch next page,
and write a symbol twice to finish the studying.
5-1
5-2
3. Click on “Manage DB” on the “Learnig Tool” page to look up or revise the learned
material.
Chapter Six: Penpower Input Tool
Chapter Six: Penpower Input Tool
Penpower inputting tools are very powerful supplemental tools with handwriting
pad, pinyin, keyboard, dictionary, and symbol. It makes life much easier to enter those
extremely difficult or rare characters.
1. Open Penpower Menu, and select “Penpower Input Tool”.
2. Penpower input tool contains five inputting methods of handwriting, pinyin, keyboard,
dictionary, and symbol.
Tip: When you move the cursor away from Penpower handwriting pad, the pad will automatically
shrink into
to save your screen space. When you move your cursor on , the pad will
automatically reappear.
Handwriting Input Tool
Pinyin Input Tool
Keyboard Input Tool
Tip: You may select zhuyin, Cantonese pinyin, or hanyu pinyin methods.
Dictionary Input Tool
Symbol Input Tool
3. Select “Setting” from the Penpower Input Tool menu to open the Setting dialogue, then
you can setting the recognition. Please refer 3.10.3 to see the details.
6-1
6-2
Chapter Seven: Penpower Assistant Tools
Chapter Seven: Penpower Assistant Tools
7.1 Penpower Notes
Penpower Notes is an electronic Post-It.You use Note to make notes whenever you
want. In addition to text and drawings, you may even record audio in the notes and then
send them to others through e-mail.
7.1.1 Open Penpower Notes
1.Go to Penpower main menu; select “
Penpower Notes”. Then the Notes
manager icon
will be shown at the
right bottom corner of your computer.
2.Right click
to open the Notes menu,
then choose Add Note and choose one
of the five colors to create a new note.
3.You can write, draw, or record audio on
the new note. Resize it if necessary.
4. Choose Setting from the Note menu to
open the Setup window, then you can
select the meaning of Double Click.
7.1.2 Note’s Three Features
There are three features for each note. Click the tack
on the top of the note to
open its menus. Then select all the available tools or functions.
Tip: You can only access these three features one at a time.
7-1
7-2
“Graph Wizard” provides the main drawing functions including pencil, fluorescent pen,
and so forth, and drawing tools including drawing circle, square and so forth.
“Ink Wizard” lets you to write on the note with your handwriting or key in your notes.
“Record Wizard” lets you to record audio.
7.1.3 Alarm Setting
Click the tack
on the top of the note and select “Set Alarm”.
7.1.4 Send Notes by E-Mail
If your default mail client is Outlook, you can easily send your notes to your contacts.
Click the tack
on the top of the note and select “Sent mail”.
Note: Your recipients do not have to install Penpower software. All the default mail clients should
be able to open them.
Note: If using Windows Vista system, you must set Windows Mail as the default mail client to send
e-mail. For setup, run “Start/Control Panel” “Internet” to open the Internet Settings page.
Switch to the “Applications” tab then select under “Internet Applications” the “Application
Settings” button. Bring up the “Set Your Default Applications” screen and select “Windows
Mail”. Now press the “Set this as Default” button in the lower right.
7.1.5 Delete Notes
Click the tack
on the top of the note and select “Delete” to delete the note.
7.1.6 Notes Manager
Right click
to open the Notes menu, You can show/hide all your notes or show/
hide all notes client.
Chapter Seven: Penpower Assistant Tools
7.2 Penpower Voice Reader
Penpower VoiceReader utilizes a state of the art text-to-speech technology, it will
read in fluent Mandarin or Cantonese of any articles. You can use it as a tool for fast
proofreading or in teaching the correct Mandarin/Cantonese pronunciation.
7.2.1 Open Penpower Voice Reader
1.Open Penpower menu and select “Penpower Voice Reader”.
2.When it starts up, there will be an icon on/off
button on the top right corner of your
application, such as Word. You can select Mandarin or Cantonese.
3.If you choose a paragraph, click
and select “Start/Stop Text to Speech”, the selected
paragraph will be read out. Check your speaker if there’s no sound.
4.Without highlighting any paragraphs, click
it will read from the cursor point.
, and select “Start/Stop Text to Speech”,
Note: The Windows Vista 64bit edition does not support the direct text-to-speech function. You
must select a section of text before you can use the text-to-speech function.
5.During reading, click
reading.
, and selecting “Start/Stop Text to Speech” , it will stop
7-3
7-4
7.2.2 Voice Reader Setting
Click , select “Setting” , the Setting window will appear.
Speech Speed: Adjust speech speed.
Speech Pitch: Adjust speech pitch level.
Speech Volume: Adjust speech volume.
7.2.3 Exit Penpower Voice Reader
1.Click , select “Exit”.
2.When you see the following image, the Penpower VoiceReader is turned off and the
icon
on the upper right corner disappears.
Chapter Seven: Penpower Assistant Tools
7.3 Penpower Voice Navigator
Penpower VoiceNavigator is a tool to dictate commands into the PC, which then
execute those commands accordingly. For example, you can open an application; open
menus; click on buttons; or simulate mouse movements or keyboard strokes.
Note: The Penpower VoiceNavigator is not a default installation option. It must be selected during
the installation as a custom installation. It only supports Windows XP OS.
7.3.1 Open VoiceNavigator
1.Go to Penpower menu list; select “
Penpower VoiceNavigator”. You will
find a new icon to appear in the system
tray.
2.Click on the button
of Voice
Navigator to begin, the button will
change int
“Start VoiceNavigator
”, and you will be prompted to start
issuing commands.
3. Speak clearly and continuously in your normal tone. The voice commands include
Chinese selections, Chinese buttons, keyboard strokes, open or close applications, and
Penpower’s built-in commands.
Note: You may issue one command at a time. Issue another command after the previous one is
done.
For example, first you issue the
command to go to the “File” menu in
Word. The VoiceNavigator will list the
submenu in the “File”.
7-5
7-6
Note: The Voice Navigator works in the current active window. So the voice commands is only for
the active window.
When you speak “Open” again, the VoiceNavigator will open it quickly.
Tip: You may open “Voice Command Window” to check out all the commands that you can use in
the VoiceNavigator. Refer “VoiceNavigator Window” section for more information.
When you speak “Cancel” , the window of “Open the old file” will be closed, and
back to the last window.
4.When you are done issuing commands, just click on button
. The button will into
, and you will hear “Finish”. If you did not issue any commands for more than two
minutes, VoiceNavigator will automatically be closed.
Tip: You may say “語音導航停止” or “停止語音導航” to close the VoiceNavigator.
7.3.2 Voice Command Window
The Voice Command window has three tabs to list all of the available voice
commands. You may open it and check available commands at any time.
Open Voice Command Window
Press the right mouse button on VoiceNavigator to open its main
menu and select “Voice Command Window”.
Note: The voice command window is for you to see all the available commands in any active window. You don’t have to open it in order to use
VoiceNavigator.
Chapter Seven: Penpower Assistant Tools
Active Window
It lists all the available voice commands for the active
window. The list dynamically changes as you move to
other active windows. The microphone sign on the left
indicates executable commands, which you may issue voice
commands. If there’s no microphone sign, it means that
voice is not available.
Default Command
It lists all built-in voice commands, such as “Go to the
beginning of a sentence”, “Previous Line”, “Next Line”
and so on. There are also other commands such as “Control
Panel”, “Close”, “Minimize” and so on.
Applications
It lists all the software programs or web sites that you
can open with voice commands. For example, you can say
to the microphone “Open XXX”, where XXX is a software
program or a web site, the VoiceNavigator will execute that
program or open that website in IE browser.
Tip: Voice Navigator already builds in twenty popular websites.
You may edit them as you see fit.
1.Select an application name and press “Del” to delete it.
2. Select an application name and press “Edit” to
edit it.
a.Enter the application’s path or URL address in
the command box. You may also select from
the “Browse” list.
b.In the “Read as” list, enter a Chinese name.
On the right hand side, make sure you have
the correct pinyin for the Chinese name you
just entered. Press “OK”.
Note: You may use up to 10 Chinese characters in the
application name.
3. Press “Add” to new add an application name
to be used by the VoiceNavigator.
7-7
7-8
7.3.3 Surf Websites with Voice Commands
When you browse websites with IE or Netscape browsers, you can use voice
commands to go to various pages. For example, when you say “Home page”, it will move
to the home page of the site you are browsing; “Previous page” or “Next page” will lead
you to the previous or next page. Refer to the full list in the end of this chapter for other
browser commands.
It is worth to note that when you say “Bookmarks”, the current browser bookmarks
will be displayed. All the bookmarked pages will be denoted with a number, which goes
from 1 to 200. If you want to go to bookmark N, just say “Connect to N”, the browser
will go to that bookmark numbered N.
As shown on the picture right, when you say “Connect to 1”, the “Customize Links”
page will be displayed.
On any page in the web, just say “Add to Bookmarks”, the page will be added to your
bookmarks.
If you are using IE5 or above, there is a special feature. If the page or URL address
has words or images associated, then it will be indexed with a number similar to “My
Bookmarks”. You may say “Connect to N” to reach that web address.
Chapter Seven: Penpower Assistant Tools
If you cannot use the VoiceNavigator,
check your microphone connection first.
Open the VoiceNavigator menu and select
“Setup Microphone”.
1.Click “Play”. When music starts, you
can move the buttons to adjust volumes.
Then click “Next”.
2. Click “Test”, and say “Testing
Microphone” to test microphone’s
recording. You can move the button to
the right to adjust the volume. If you
adjust it to maximum, but the volume is
still to low, please make a check mark
on the selection of “AGC”.
3.Click “Start”, it will record the
background noise level.
7-9
7-10
4.Click “Start” to read the four sentences
in order.
5. Click “OK” to finish the microphone’s
setting.
7.3.4 Exit Penpower VoiceNavigator
Open the VoiceNavigator’s menu, and
select “Exit”.
Chapter Seven: Penpower Assistant Tools
7.3.5 VoiceNavigator Lists
Dictation + Command
Selection Command
Penpower Handwriting Pad
Penpower Input Tools
Penpower General Symbols
Penpower Artists
Penpower All Purpose Keyboard
Penpower Conversation Study Box
Penpower Notes
Penpower Legend Word Library
Penpower Signature
Penpower Voice Reader
Penpower Translator
To Know Wang General Manager
Selection
Select the Row
Select All
Select Line Head
Select Line End
Select File Start
File End
Leftward Select <1 to 25> Words
Rightward Select <1 to 25> Words
Upward Select <1 to 25> Lines
Downward Select <1 to 25> Lines
Word Command
End Phonetic Navigation
Phonetic Navigation Termination
System Command
Start Function List
Documentation General Management
Control Panel
Patterns
Minimization
Maximization
Restore
Close
Recycle Bin
Network Neighborhood
My Computer
Previous pattern
Next pattern
Into pattern <1 to 25>
Delete Command
Backspace
Backspace <1 to 25> Times
Delete
Delete the Line
Delete to Line Head
Delete to Line End
Delete to File Start
Delete to File End
Delete <1 to 25> Words
Delete <1 to 25> Lines
Edit Command
Copy
Past
Cut
Restore
Clear
Italic Word
Bold Word
Underline
Short Cut List
7-11
7-12
Move Command
Keyboard Command
Line Head
Line End
File Start
File End
Previous Word
Next Word
Previous Line
Next Line
Previous Page
Next Page
Previous Item
Next Item
Left<1 to 25> Words
Right <1 to 25> Words
Up <1 to 25> Lines
Down <1 to 25> Lines
Forward <1 to 25> Pages
Backward <1 to 25> Pages
Forward <1 to 25> Items
Change Line
Space
Locate
Locate Backward
Change Lines <1 to 25> Times
Space <1 to 25> Times
Locate <1 to 25> Times
Locate Backward <1 to 25> Times
Confirm
Cancel
Browse Command
Halt Connection
Restore Connection
Connect <1 to 200>
Previous Page
Next Page
Stop
Rearrange
Reload
First Page
My Favorites
Search
Record
Full Screen
My Bookmark
Add to my Bookmark
Chapter Seven: Penpower Assistant Tools
7.4 Penpower Translator
This Penpower Translator includes
Chinese to English and English to Chinese
electr on ic dictio nar y and s en ten ce
translation.
Open Handwriter menu and select
“Penpower Translator”
7.4.1 English Words
1.Click the button “En. -> Ch.” on the left.
2.In the input frame on the upper left corner, enter an English word, hit Enter to see all
the Chinese explanation.
3.Choose different tabs to look up English word Define, Variation, Idiom and Analysis.
7.4.2 Chinese Characters
1. Click the button “Simplified Ch. -> En.” on the left.
2. In the input frame on the upper left corner, input a Chinese character or phrase, and
then hit Enter to see the English explanation.
Tip: If the Chinese word you wish to look up is Traditional Chinese, please select the “ Traditional
Ch. -> En.” translation option.
7-13
7-14
7.4.3 English Chinese Article Translator
1.Click the button “Sentence En. -> Ch.” translation on the left.
2.In the top input frame, input an English article, click the
The translation result is shown in the lower input frame.
button to start translation.
Tip: When you translate a whole article, make sure there’s a period mark at the end of each sentence. It will increase the accuracy of translation.
7.4.4 Chinese English Article Translator
1.Click the button “Sentence Simplified Ch. -> En.” translation on the left.
2.In the top input frame, input an Chinese article, click the
The translation result is shown in the lower input frame.
button to start translation.
Chapter Seven: Penpower Assistant Tools
Tip: If the Chinese sentence you wish to look up is Traditional Chinese, please select the “ Sentence Traditional Ch. -> En.” translation option.
7.4.5 Button Functions
: Speech - if looking up a single character or word, press the Speech button to hear its
Chinese or English pronunciation. If translating the entire text, press the Speech button
to hear all of the content in the current input window.
/
: Previous/Next - look up the definitions for nearby words.
: Cut - cut the selected content. (Only available when translating an entire sentence)
: Copy - copy the selected content.
: Paste - paste the cut or copied content. (Only available when translating an entire
sentence)
: Delete - delete all input and translation content. (Only available when translating an
entire sentence)
: Save - press this button to open the “Save as…” dialogue window. This will save all
of the input and translated content into a new *.txt format file. (Only available when
translating an entire sentence.)
When looking up a single word you do
not need to enter the entire text string. If
the word you wish to look up shows up in
the list, use the direction keys to select that
word as the input then press Enter to look
up that word.
7-15
7-16
7.5 Penpower Artist
Penpower Artist provides hundreds of templates to create handwritten letters and
beautiful cards for all occasions.
7.5.1 Card or Letter Design
1.Open Penpower main menu; select “Penpower Artist”. Select “Letter” or “Card”, then
click “Next”.
2.If you want to create a card, you must select a type of cards, and then click “Next”.
3. Select a template of letters or cards from the list on the left. On the right hand side,
you will see a rectangular box whose size you can adjust. The boxed area is the area
where you put your writing or design. Click “Next”.
Chapter Seven: Penpower Assistant Tools
4.You can write anywhere in side of the box, and then press
to sign your letter or
card. If you want to re-sign it, select “Delete Signature” to delete the previous signature
from “Signature” function.
5.Highlight an area of your handwriting; click
will change them into printed text or
restore to your handwriting. The toolbar will list all the candidates of each character
during the conversion.
Tip: Text keyed-in cannot be changed into handwriting.
6.Select more than one characters, click on
to merge them into one character. Select
one character; click
to split it into two characters.
7.When you are done editing, you may
click on
to print it out. You may also
send it out with e-mail.
Note: Your recipients do not need Penpower
Pen. Any client should be able to open
the letter or card.
Note: If using Windows Vista system, please make Windows Mail the default mail client in order
to send e-mail. See Chapter 7.1.4 for more details on setup.
7-17
7-18
7.5.2 Setting
General Setting
Click “Ink” button to select “Setup”. The setting window is open at tab “General”.
1. Recognition Mode Setting
The recognition kernels for handwriting are Chinese, English, Numeral, Symbol and
Japanese. You have to select the correct kernels to get the correct recognition.
2. Speed Setting
There are 10 speed settings, the smaller the number the fast the recognition engine. If
you can’t write very fast, use a bigger number
3. Ink Color and Ink Width Setting
Select your favorite handwriting color and handwriting line size.
Grid Tab
Go to the grid tab. You can adjust the
grid size. All strokes inside one grid will
be considered as one-character strokes.
If you do not want to be confined by the
grids, do not check off “Show Grid”.
Chapter Seven: Penpower Assistant Tools
7.6 Penpower User Setting
7.6.1 Multi-user
Multiple users can use Penpower handwriter. Each user has his/her own personal
handwriting artificial intelligent learning file and setting file.
Open Penpower shortcut function, select “Penpower User Setting”, choose a user
name from the list, and press “Ok” button to switch users.
You may press “Add” or “Delete” button, add or delete users from the list. You may
choose a user first, press “Backup” button, and save the handwriting as a file. And then
use “Restore” function to restore the reserve on the other computer.
7-19
7-20
7.6.2 Pan-Asian All-In-One Package
Penpower is the 5-in-1 Asian edition with support for Traditional Chinese, Simplified
Chinese, Hong Kong, Japanese and Korean. You can use the version settings to select the
version and interface language to use.
1.Open Penpower shortcut function, select “Penpower User Setting”, switch to the Select
version page.
2.Select Traditional, Hong Kong, Simplified, Japanese, or Korean editions. If one of
them is not showing, it indicates that your Windows doesn’t support that language.
Note: Current Japanese and Korean editions do not support Unicode.
3.Select “Use English Message”, the entire interface will be in English.
4. After finishing setting, press “Ok” button.
Chapter Seven: Penpower Assistant Tools
7.7 Penpaper Wizard
The interchangeable touch pad background can be selected from over a dozen
exquisite backgrounds provided, scanned photos or your favorite pictures on the
computer. The DIY touch pad background can be set to suit the time or mood.
Note: The Penpaper Wizard is not a default installation option. The “Penpaper Wizard” installation option must be selected during custom install to use this function.
Using the Penpaper Wizard to Create a Touch Pad Background
1.Launch the “Penpaper Wizard” from the Penpower quick launch menu.
2.Select your touch pad type and press “Next” to continue.
3.If “By File” is selected the Penpaper Wizard offers over a dozen exquisite backgrounds
for you to choose from. You may also choose to use other images. If you have a
scanner, press the “By Scanner” to scan a picture or photo (refer to your scanner’s
manual for information on its operation) and once the photo is ready, press “Next”.
7-21
7-22
Note: If your system has more than one scanner driver installed please press the “Select Scanner”
button before scanning the picture and select the scanner currently in use.
Tip: If you wish to use only a part of the picture to make your touch pad background, do not
check the “Select all” box. This will allow you to use your mouse to select the desired area
on the picture.
4.Check the “Calendar” option then select the background calendar year and month.
Also set your preferred calendar format and font. The picture will be automatically
resized depending on the selected format to fit. If you wish to preserve the picture’s
original size, please check the “Constrain Proportions” option.
5.Press the “Print” button to print the background that you have created.
Chapter Seven: Penpower Assistant Tools
7.8 Using Penpower Jr. in MSN Messenger
Note: You have to install MSN Messenger version 6.1 or higher.
After you have signed in to the MSN
Messenger, double click on the person’s
name to begin the conversation box.
Below this conversation box, there are
two modes for you to select, including
[Handwrite]
and [Type]
. You can
switch between the input modes as you
like.
In the Handwrite mode, you can select the font size and font color from the scroll bar
menu provided. After the setting has been done, you can write on the tablet and the words
will appear as what you have previously set.
If you want to clear the words you have written, you can select and use the eraser
shown in the scroll bar.
After you have input your message, you can click on [send] to send your handwritten
message.
set ink
width set ink color
set the rubber
7-23
7-24
7.9 Office 2003 Trace Mark
When using Penpower with Office 2003 the toolbar will show a “Insert Trace
Mark”
. Using this function allows markings and remarks to be inserted into the
document.
In Word: Press
and from the pull-down menu select “Trace Mark” to open the
trace toolbar. The brush style, color and size can be set here. The eraser can also be used
to remove undesired writing.
Show/Hide Brush
Marking
Brush Size
Brush Color
Select
Eraser
Select brush style
You can insert written marks into the
document directly or from the
pulldown menu select “Trace Annotation” to
annotate the document.
In Outlook 2003 this
function is
called “Fountain Pen” but it operates just
like Word’s.
Chapter Eight: Penpower for Net Handwriter
Chapter Eight: Penpower for Net Handwriter
8.1 Open Penpower for Net Handwriter
Note: The Penpower for Net Handwriter is not a default installation option. It must be selected
during the installation as a custom installation.
1. Open the main menu. Select “Penpower for Net”. The Penpower for Net Manager
shows up in the system tray, the writing pad is shown on the screen.
2. You need to calibrate the tablet when executing Penpower for Net for the first time, use
the pen to click the dark dot on the top-right of the handwriting board.
Note: You have to correctly complete the calibration in order to use the predetermined functions
on the tablet.
8-1
8-2
8.2 Introduction to the Net HandWriter Interface
Punctuations Tools Panel
English input
in upper case
English input
in lower case
Number input
Symbol input
General input area
General input area: You may choose one writing box or two writing boxes.
Punctuations Tools Panel: Select input symbol directly.
English input in upper case: The output is capital alphabets.
English input in lower case: The output is lower case alphabets.
Number input: The output is numerals.
Symbol input: The output is symbols.
Tablet Tools Panel
: Toolbar Layout
Tablet Tools Panel
: Open Website list
: Open Signature selection
: Open Symbol selection
: Open Phrase selection
: Turn on/off ON-Line Translation function
: Open Usual Data setting
: Open Penpower for Net setting
: Open/Exit Layout
Note: After opening tool list, the predetermined function areas are disabled.
Chapter Eight: Penpower for Net Handwriter
8.3 Setting
Open Penpower for Net Handwriter Manager and select “PP for Net Setting”. The four
setting tabs available are General, Inking, Recognition and Layout. Select the appropriate
title to switch to the corresponding page.
Note: The settings for General, Inking, Recognition are same as that for Penpower Full Screen.
Please see Chapter 3.10 Penpower Full Screen Settings for more details.
Writing Pad Setting
[Double Input]: Set to write in single or double boxes.
[C/S Input]: Select writing areas for uppercase English, lowercase English, numeric, and/
or symbols.
[Tool Bar]: Select this option to open
tool list. Select the functions you need
directly from the tool list while the
predetermined functions on the tablet
are disabled.
[Translucent Setting]: Set transparency of
the viewing window. The function only
works with Windows 2000 or above.
8-3
8-4
8.4 Tablet predetermined function areas
You may directly execute various functions on the tablet.
Websites
Signatures
Symbols
Phrases
On-Line
Translation
Usual Data
Orientation Point
Setting
Layout
Note: This function couldn’t support the USB Wireless Mercury.
Operation Methods (with the pen):
[Click Orientation Point]: Tablet calibration.
[Click Websites]: Open website list to select any website directly.
[Click Signatures]: Open build-in signature list, select and send it to the application.
[Click Symbols]: Open build-in symbol list, click to select any symbol.
[Click Frequently Used Phrases]: Open the phrase database, click to select any phrase.
Website
Signature
Symbol
Phrase
[Click On-Line Translator]: Open online translation function. Click again to close it.
[Click Usual Data]: Open general resource setting plane to set build-in Expression
symbol, ordinary phrase and signature record.
[Click Setting]: Open Penpower for Net Handwriter Setting.
[Click Layout]: Select /Open /Close handwriting input viewing window.
Chapter Eight: Penpower for Net Handwriter
8.5 Usual Data Setting
Click “Usual Data” on the tablet, you can toggle among three tabs of “Symbol”,
“Phrase”, or “Signature”.
Note: Usual Datas are edited in the same way as that for Penpower Intelligent Writing Pad.
Please see Chapter 4 4.5.2 for more details.
The only difference is that when the Net Handwriter input window is open an input field will
be shown. Apart from allowing symbols to be inserted or the keyboard input of symbols, the
user can also directly write the input text into the field.
8-5
8-6
Chapter Nine: Penpower Writing Pad
Chapter Nine: Penpower Writing Pad
Penpower Writing Pad tool is a handwriting input tool. There are two boxes on the
screen, one for each character. You can write inside those boxes.
Note: The Penpower Writing Pad is not a default installation option. It must be selected during
the installation as a custom installation.
9.1 Open Penpower Writing Pad
Open Penpower menu, and choose “Penpower Writing Pad”.
Tip: When you move the cursor away from Penpower handwriting pad, the pad will automatically shrink into
to save your screen space. When you move your cursor on , the pad
will automatically reappear.
9-1
9-2
9.2 Introduction to the Writing Pad Interface
Recognition Mode Setting
Character Editing Area
tool list
Numeral keys /Other ctional keys
Character Candidates
Recognition Mode Setting
/
/
/
/
/
:Chinese /English /Math /Symbol /Japanese Recognition Mode
: Set character editing area in insert/replace mode.
/
: Set recognition result of English alphabets, math, and symbol by two bytes or
one byte.
: The smaller the number, the faster the handwriting, and the shorter the waiting
time.
: Delete the selected text.
: Delete the character before the selected text.
: Insert a space behind the selected text.
: Add a new line behind the selected text.
Chapter Nine: Penpower Writing Pad
9.3 Input Method
Once text is written into the input field and recognized it will be shown in the text edit
area. Press the
button to send the result to applications such as Word/Excel. Once the
text has been sent, the
will change to . If you wish to revise text already sent to an
application, press the
button to revert the sent text back to the writing pad’s edit field.
To use the Related Phrase Input
From the writing pad menu select “
Related Phrase” to open the Related
Phrase dictionary. When you enter the
first character of a word or phrase in the
writing pad, the Phrase dictionary window
will list all terms that begin with this
character. Its usage is same as that for the
Penpower Full Screen mode. See Chapter
3.6.3 for more details.
Input Punctuation
Press the frequently used symbols button on the writing pad to open the Basic
Symbols list. Alternatively, at the writing pad main option select “Penpower Basic
Symbols” to open the Basic Symbols list and then select the desired symbol.
Other Functions
Press the
button to check that word’s pronunciation or stroke order tutorial. Press
to launch the Penpower AI and train it to recognize words properly. For a detailed
introduction to these two functions please see the sections Chapter 3.6.7 & 3.7.1.
9-3
9-4
9.4 Penpower Writing Pad Setup
From the writing pad’s main menu select “Settings” to open the settings. The four
setting tabs available are General, Inking, Recognition and Layout. Select the appropriate
title to switch to the corresponding page.
Note:The settings for General, Inking and Recognition are same as that for Penpower Full
Screen. Please see Chapter 3.10 Penpower Full Screen Settings for more details.
Layout Settings
Press “Layout” to switch to the layout settings page.
Here you can set the writing pad to disable or hide the Recognition mode settings area,
Buffer area, Application area, Function area and Candidate area. Check to display and
uncheck to hide.
1.Buffer Area
If this item is checked then the writing pad window will show the text editing area.
The recognition results will first be preserved in the writing pad’s editing area and only
sent to the application once the editing area is full. You can also press
at any time
to send all the text in the editing area to the application. If this item is not checked all
recognition results will be sent directly to where the cursor is in the application.
2.Writing Box
Set how many box the writing pad should have. This can be between 1~5.
FAQ
FAQ
1. Unable to activate “Penpower Full Screen” and after restarting the computer, the
following error message appear “Unable to find Penpower hardware, Penpower
Handwriting cannot be used, please check the connection of the tablet …”
A.If the WACOM tablet is used, the solution is shown below:
Step 1:
Go to “Start” / “Setting” / “Control Panel” / “Add / Remove Program” and search for
USB Tablet Driver, Tablet Driver, Tablet, wired tablet driver or WACOM tablet driver.
If you find any of them, please remove each of them.
In addition, if you have installed any other tablet previously, please remove them as
well. Next restart the computer. Otherwise please proceed to Step 2.
Step 2:
Please click “My Computer” icon on the desktop. Right click the CD-ROM drive icon
and click “Explore”. Search for and enter the “WACOM” folder to find and execute
the “Setup.exe” file.
B.If you are not using WACOM tablet, please refer to the website: http://www.penpower.
net/tech/faq.htm for the solution.
2. Can the Penpower Handwriting be installed under English environment?
A.If the installation is done using Window XP under English environment, please follow
the steps below to set the Regional and Language Option first, then do the Penpower
Handwriting installation.
a. Execute “Start /Setting /Control Panel/
Regional and Language Options
/Advanced”.Follow the screen shown
on the right and do the Setting: set the
language to be “Chinese (Taiwan)”
. Please tick and select only “10000
(MAC-ROMAN)” and “10002(MACTraditional Chinese Big5)”. Next tick
and select “Apply all settings to the
current user account and to the default
user account.
FAQ-1
FAQ-2
b. lease switch to “Language” menu
bar, then tick and tick and select
“Install Files for East Asian
Languages.”
c. Please switch to “Regional Option
” menu bar, then tick and tick and
select “Chinese (Taiwan)” and
“Taiwan”, as shown on the screen
on the right.
FAQ
3. Able to open “Penpower Full Screen” function but every time after restarting
the computer, the following error message appears “Fail to find Penpower
tablet, Penpower Handwriting cannot be used, please check whether the tablet is
connected properly …?
A. Please execute “Start” / “All Program” / “Penpower Handwriting” / “Penpower
Writing Tools” / “Penpower Handwriting Full Screen”:
a. If the Penpower Full Screen is presented as shown in the following diagram, please
click on the small icon at the top left corner and select “Penpower Handwriting
Full Screen Setting”.
b. If the icon
is shown at the bottom right corner after Penpower Full Screen is
activated, please click the icon and select “Penpower Full Screen Setting”.
c. Please refer to the following setting shown below. Do not tick or uncheck the box
for “Auto Load”.
FAQ-3
FAQ-4
4. I use TOOYA PRO tablet in Vista OS, after setting the tablet to [Ink Mode], I
cannot find the cursor in the Full Screen Mode.
A. When using TOOYA PRO tablet in the Full Screen Mode, the tablet must be set in
“Graphic Mode”. Otherwise it cannot work properly. The setting method is following:
Run “Start/All Programs/Tablet/TOOYA PRO”. Find “Tablet Mode” in the “About”
tab, and choose “Graphic Mode”.
If you want to know in greater details the product FAQ, please go to the Penpower
website – Product FAQ: http://www.penpower.net/tech/faq.htm to browse the content.
Penpower Handwriter V11.1 User Manual
Publisher: Penpower Technology Ltd.,
Release: October, 2009
Version 11.1
Edition: 6