1
The printer should do the following:
•
•
•
•
Calibrate label pitch.
Print a check pattern so that you may look for missing pixels and observe general print quality.
Print internal settings and values (see below).
Enter 'dump' mode and print code which mostly is of little interest to the non specialised user.
The internal settings printed are as follows:
•
•
•
•
•
•
•
•
•
•
•
•
•
•
Model & firmware version.
Mileage.
Flash times.
Check sum.
Serial port setting.
Code page setting.
Country code setting.
Print speed setting.
Print density setting.
Label size setting.
Gap/Bline (Black line) width and offset setting.
Backing paper transparency.
File list.
Memory available.
Q. Pro 200/Pro 300 printer: How do I interrogate the printer for internal information?
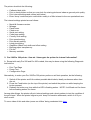
A. Except with early Pro 200 and Pro 300 models, this may be done using the following Diagnostic
tool buttons:
•
•
•
Print Test Page
Dump Text
Configuration Page
Alternatively, to make your Pro 200/Pro 300 printer perform a self test operation, do the following:
1. Switch off the printer and fit the widest possible blank labels, ideally continuous rather than
die-cut.
2. Press the Feed button (on the top of the printer) and switch the printer on while keeping the
button pressed.
3. Release the button any time while the LED is flashing amber. NOTE: It will flash red five times
before flashing amber five times.
Among other things, the printer will print internal settings and a check pattern to test the condition of
the print head. When the printer begins to print ‘dump’ information afterwards, switch it off if you
don’t need it.
To see a video of this and other ‘power-on utilities’ being conducted click here.