1
Installation & User’s Manual for Predator
Whole Building UV Water Supply
DWS-POE
INSTALLATION PROCEDURES
We recommend a professional plumber install this system. Please READ ALL DIRECTIONS THOROUGHLY AND
REVIEW ALL PHOTOS BEFORE INSTALLING. This system is designed to filter a large volume of water for
approximately one year between filter cartridge changes. The DWS-POE should be mounted near the entry of
the water main inside of the building or near a drain in a NO-FREEZE area. If mounted outside in an ENCLOSED
BOX, be sure that the temperature will not reach freezing or below. Allow sufficient space below the unit
(approx. 24”) so that the filter sumps can be screwed on and off easily. It’s important to ensure that there is
at least 19” of clearance above the UV chamber for annual replacement of the UV bulb.
MOUNT THE DWS-POE
First find the mounting template inside of the Install Documentation folder, and choose the location
for wall-mounting the DWS-POE unit. Mark and drill the three mounting holes.
NOTE- For ease during mounting, you can reduce the weight of the system by removing the sumps and
filters prior to installing the mounting bracket. DO NOT INSTALL QUARTZ SLEEVE UNTIL UNIT HAS BEEN
MOUNTED TO WALL. Once unit has been mounted, reinstall filters and filter sumps onto unit.
INSTALLING COPPER BYPASS SUBASSEMBLY & TRANSFORMER
BOX (if this option was ordered)
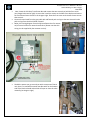
Locate: the copper bypass subassembly with solenoid
attached, and the copper ‘cane’.
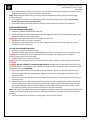
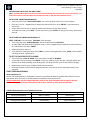
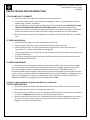
Install the copper ‘cane’ to the POE’s OUTPUT (i.e. righthand) SIDE as shown in photo at right.
Next, install the copper bypass subassembly to the POE’s
INPUT (i.e. left-hand) SIDE and to the OUTPUT of the cane
as shown in photo below.