1
Safety & Warnings
Operation
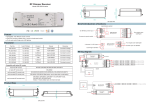
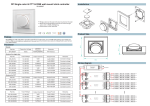
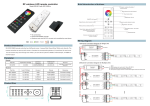
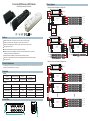
After you have wired all the receivers according to Figure illustration you need to do the following:
1. Pull off the plastic film cover of the battery at the back of remote.
2. If you use multiple receivers, you have 2 choices:
Have all receivers in the same zone like Zone 1 for example or
Have each receiver in a different zone, like Zone 1, 2, 3 and so on
3. In order for each receiver to know what Zone it belongs to, you will need to “pair” it to the zone you wish to
use: short press the Learning Key on the receiver, then immediately short press the
or
from the zone
you wish to use (for example ON/Off from zone 1). Once you do that, the LED lights will blink once. Now your
remote and receiver are paired!
4. Do the same for the other receivers if you use them.
This wireless receiver can work in any of the 5 zones. It has a special “Learning Key” that is in the unit that will
enable you to pair it to any of the 5 zones in the wireless remote control. You can add as many optional
receivers as you wish, to create up to 5 different control zones. Each zone can have an endless number of
receivers, which will let you escalate any installation from small to super-size.
Memory Reset:
In case you want to reset the memory of the receiver, press the learning function button for 10 seconds while
the unit is being powered. The unit will then reset to factory defaults.
Re-Assign Zone:
Re assigning the receiver to a different zone is easy, just repeat Step 3 as above.
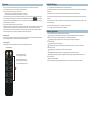
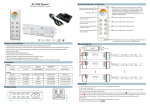
5 ZONE REMOTE
A
B
A. short press ON button to
turn on, long press to dim up
B. short press OFF button to
turn off, long press to dim down
C. 5 zone independently control
C
1) The product shall be installed and serviced by a qualified person.
2) IP20.Please avoid the sun and rain. When installed outdoors, please ensure it is mounted in a water proof
enclosure.
3) Always be sure to mount this unit in an area with proper ventilation to avoid overheating.
4) Please check if the output voltage of any LED power supplies used comply with the working voltage of the
product.
5) Never connect any cables while power is on and always assure correct connections to avoid short circuits
before switching on.
6) Please ensure that the cable is secured tightly in the connector
7) For update information please consult your supplier.
Warranty Agreement
1) We provide lifelong technical assistance with this product:
3-year warranty. We print date on every products, for example :1125 means year 2011,week 25.The
warranty is for free repair or replacement and covers manufacturing faults only.
For faults beyond the 3-year warranty we reserve the right to charge for time and parts.
2) Limited Warrenty
Any defects caused by wrong operation.
Any damages caused by unauthorized removal, maintenance, modifying, incorrect connection and
replacement of chips.
Any damages due to transportation, vibration etc. after purchase.
Any damages caused by earthquake, fire, lightning, pollution and abnormal voltage.
Any damages caused by negligence, inappropriate storing at high temperatures and humidity or near
harmful chemicals.
Product has been updated
3) Repair or replacement as provided under this warranty is the exclusive remedy to the customer.