1
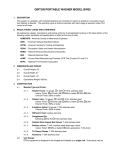
User Manual
HS SAM
High Speed Stand Alone Module for ARINC 818
March 7, 2013
GREAT RIVER TECHNOLOGY est distribué par TechwaY - [email protected] - 01 64 53 37 90 - www.techway.fr
Revision history
Date
03/07/2013
Section(s)
Description
Approval
Initial release
M Zimmerman
__________________________________________________________________________
HS SAM Gen II: User Manual
Great River Technology
2 of 16
Contents
1
2
3
Overview ............................................................................................................................. 4
1.1
Included with Your HS SAM Gen II .............................................................................. 4
1.2
Configurations.............................................................................................................. 4
1.3
HS SAMView2 software ............................................................................................... 4
Using HS SAM in stand-alone operation ............................................................................. 5
2.1
Rocker switch functions ............................................................................................... 5
2.2
Status LEDs ................................................................................................................. 6
Using HS SAM with HS SAMView2 Software ...................................................................... 6
3.1
Connecting to the HS SAM via USB ............................................................................ 7
3.2
Status Indicators .......................................................................................................... 7
3.3
ARINC 818 Transmission............................................................................................. 8
3.3.1
Transmit radio button controls ............................................................................... 8
3.3.2
Transmit test patterns ........................................................................................... 9
3.3.3
Loading custom images into the HS SAM ............................................................. 9
3.3.4
Loading Object 0 data into the HS SAM ...............................................................10
3.3.5
Setting the default Object 0 data for the HS SAM ................................................11
3.4
ARINC 818/DVI Receive .............................................................................................12
3.4.1
Retrieving captured images from the HS SAM .....................................................12
3.4.2
Retrieving Object 0 data from the HS SAM ..........................................................12
3.5
Multiple HS SAMs connected to the same PC ............................................................14
3.6
Changing the Object 0 data view format .....................................................................14
__________________________________________________________________________
HS SAM Gen II: User Manual
Great River Technology
3 of 16
1
Overview
1.1 Included with Your HS SAM Gen II
•
•
•
•
Wall adapter: 100‒250VAC @ 50‒60Hz to 24VDC
USB cable for direct connection from your computer (PC or laptop) to the HS SAM
LC fiber-optic cable
HS SAMView2 software installation on CD-ROM
1.2 Configurations
A SAM comes configured either for Fiber-to-DVI or for DVI-to-fiber:
Figure 1.2a. Fiber-to-DVI (F2DVI).
Figure 1.2b. DVI-to-fiber (DVI2F).
1.3 HS SAMView2 software
The HS SAMView2 software offers a graphical user interface (GUI) to access the
following features of the HS SAM Gen II:
•
•
•
loading and retrieval of ARINC 818 images and data to and from the unit
header management
remote unit status monitoring
__________________________________________________________________________
HS SAM Gen II: User Manual
Great River Technology
4 of 16
•
•
video source manipulation (test pattern, DVI in, static image)
multiple SAM control points
Figure 1.3. HS SAMView2 (main screen).
2
Using HS SAM in stand-alone operation
The HS SAM unit is completely operational without connecting to USB. That is, the DVIto-fiber versions of the SAM will convert DVI to ARINC 818 video and will generate test
patterns. Similarly, the Fiber-to-DVI versions of the SAM will convert ARINC 818 video to
standard DVI video.
The USB connection, along with HS SAMView2 software will allow users to perform
additional functions, such as:
• Loading and retrieving *.bmp images into the SAM
• Loading and retrieving Object 0 data into the unit
• Changing the default Object 0 frame values loaded from power up
The HS SAM can be
2.1 Rocker switch functions
The rocker switch (Fig. 2.1) has three positions:
• Reset—Resets internal electronics and returns all ARINC 818 outputs to idle
• Run—Accommodates normal operation
__________________________________________________________________________
HS SAM Gen II: User Manual
Great River Technology
5 of 16
• Test Pattern—Transmits canned test-pattern video instead of source video to
ARINC 818 or DVI output (only in units with test-pattern capability)
Figure 2.1. Settings and status.
2.2 Status LEDs
There are six LED status lights:
•
•
•
•
•
Power—The unit is currently powered and ready.
RX Preset—The unit has detected a DVI or ARINC 818 video output.
RX Valid—The input video source is valid.
TX Valid—The DVI or ARINC 818 output is enabled.
Test Pattern—For units with test-pattern capability, test patterns are being
transmitted on the ARINC 818 or DVI output.
• Fault—An input error has been detected.
3
Using HS SAM with HS SAMView2 Software
Once installed, the HS SAMView2 software can be run from the start menu as follows:
Figure 3. HS SAMView2 from start menu.
__________________________________________________________________________
HS SAM Gen II: User Manual
Great River Technology
6 of 16
3.1 Connecting to the HS SAM via USB
Figure 3.1. Selecting an HS SAM.
When the application launches, it will detect all HS SAM units that are connected by USB.
These units will be displayed in the HS SAM configuration window in the order they were
connected, newest at bottom, as shown above. Simply click on a unit in the list to connect
to it by USB.
3.2 Status Indicators
Once connected, the HS SAMView2 Status LEDs will become active as shown below:
Figure 3.2. Status LEDs in SAMView2 (shown in a fiber receiver configuration).
There are six HS SAMView2 status lights:
• Ready —The USB connection has been made and is operational.
__________________________________________________________________________
HS SAM Gen II: User Manual
Great River Technology
7 of 16
•
•
•
•
RX Preset —The unit has detected a DVI or ARINC 818 video output.
RX Valid —The input video source (either DVI or ARINC 818) is valid.
TX Valid —The DVI or ARINC 818 output is valid.
Test Pattern — For units with test-pattern capability, test patterns are being
transmitted on the ARINC 818 or DVI output.
• Fault—An input error has been detected.
For Fiber-to-DVI versions of the HS SAM, the Link Status indicators are interpreted as
follows:
• Sync loss — After the link is established, green indicates a synchronous link to the
ARINC 818 source. Red indicates that the unit can't establish synchronization with
an ARINC 818 input. This may be due to the fiber being unplugged or the ARINC
818 source being of the wrong link rate (e.g., 1.0625 Gbps vs. 3.1875 Gbps).
• SOFi Detect — Green indicates that valid start-of-packet indicators have been
detected in the ARINC 818 input. Red indicates valid start-of-frame indicators have
been lost for several frames in a row. Return to green requires 250 milliseconds of
persistence.
• Idle OS Detect — Green indicates valid Idle OS indicators have been detected in
the ARINC 818 input. Red indicates Idle OS indicators have been lost during
packet and frame. Return to green requires 250 milliseconds of persistence.
3.3 ARINC 818 Transmission
3.3.1
Transmit radio button controls
Figure 3.3.1. TX Source choices.
The TX Source radio buttons allow users to transmit static images loaded into the HS
SAM internal memory or to transmit video from an external live video source (e.g., DVIto-fiber or Fiber-to-DVI).
The flow control radio buttons allow users to turn of the transmitter. In the case of DVIto-fiber units, this will cause the unit to transmit Idle OS on the ARINC 818, and in the
case of Fiber-to-DVI units to transmit a blue screen on DVI.
__________________________________________________________________________
HS SAM Gen II: User Manual
Great River Technology
8 of 16
3.3.2
Transmit test patterns
Most firmware versions of the HS SAM have built-in test patterns that can be turned on
from the HS SAMView2 software radio buttons or from the rocker switch on the HS SAM
unit.
Figure 3.3.2a. Test
Pattern radio button.
The typical test pattern is gray scale with scrolling lines as shown below.
Figure 3.3.2b. Gray scale test pattern.
3.3.3
Loading custom images into the HS SAM
The Load Image button can be used to load any bitmap image into the internal memory
of the HS SAM. This bitmap image will be automatically resized for the resolution of the
ARINC 818 interface. Once loaded, the image can be transmitted on ARINC 818.
__________________________________________________________________________
HS SAM Gen II: User Manual
Great River Technology
9 of 16
Figure 3.3.3. Load Image button.
A thumbnail of the loaded image can be viewed in the HS SAMView2 GUI and enlarged
to full size in a separate pop-up window.
3.3.4
Loading Object 0 data into the HS SAM
Figure 3.3.4a. Header Management
button.
The header management button on the main GUI will produce a pop-up window that can
be used for loading and retrieving Object 0 frame data.
For Fiber-to-DVI versions of the HS SAM, the pop-up will appear as follows:
__________________________________________________________________________
HS SAM Gen II: User Manual
Great River Technology
10 of 16
Figure 3.3.4b. Header Management data displayed.
Header data is contained in simple text data files accessible using the Open button.
Once opened, the data will populate the form. The data can then be written into the HS
SAM using the Write button. Once written to the HS SAM, the data will be transmitted on
the outgoing ARINC 818 stream.
3.3.5
Setting the default Object 0 data for the HS SAM
Default Object 0 data is stored in non-volatile memory on the HS SAM. This data is
loaded after each power-up and will be transmitted on the ARINC 818 until modified by
USB. This default data can be changed and stored to reflect user A818 video
specification requirements.
Figure 3.3.5. Power-up Defaults choices.
__________________________________________________________________________
HS SAM Gen II: User Manual
Great River Technology
11 of 16
The Commit User Defaults will store the header data currently streaming the A818
output into the non-volatile RAM. This data will be used for the Object 0 data frame after
each subsequent power-up.
The contents of non-volatile RAM can also be restored using the HS SAMView2
software by clicking the Restore User Defaults button. In addition, factory default data
can be restored using the Restore Factory Defaults button.
3.4 ARINC 818/DVI Receive
3.4.1
Retrieving captured images from the HS SAM
The Get Image button can be used to retrieve images captured from the ARINC 818
input. When using the Get Image feature, ARINC 818 flow is temporarily halted during
the image transfer over USB. Therefore, the images represent snapshots of the ARINC
818 video.
Figure 3.4.1. Get Image button.
A thumbnail of the loaded image can be viewed in the HS SAMView2 GUI and enlarged
to full size in a separate pop-up window. Once the image is retrieved, it can be saved to
a bitmap file.
Retrieving captured images from the HS SAM DVI Image Receive process follows
exactly the same procedure.
3.4.2
Retrieving Object 0 data from the HS SAM
The header management button on the main GUI will produce a pop-up window that can
be used for loading and retrieving Object 0 frame data.
__________________________________________________________________________
HS SAM Gen II: User Manual
Great River Technology
12 of 16
Figure 3.4.2a. Header Management
button.
For Fiber-to-DVI versions of the HS SAM, the pop-up will appear as follows:
Figure 3.4.2b. Recovered header data.
Header data recovered from the incoming ARINC 818 stream can be read from the HS
SAM using the Read button. The retrieved data will populate the form as shown above.
This data can then be saved in a simple text data file using the Save button.
__________________________________________________________________________
HS SAM Gen II: User Manual
Great River Technology
13 of 16
3.5 Multiple HS SAMs connected to the same PC
When multiple HS SAMs are connected to a single PC, the HS SAMView2 software will
list each of them in the Configuration box.
User can click on one of the units listed to connect to that HS SAM.
Figure 3.5. Multiple SAMs listed in the HS SAM Configuration box.
All status indicators, radio button controls, image and data transfers will target the
particular unit that is selected in this window.
3.6 Changing the Object 0 data view format
The HS SAMView2 software provides a way to customize the view of the Object 0 frame
data so that data can be more easily interpreted. This is accomplished using *.hfd files.
The HS SAMView2 will automatically use the default.hfd file to define the fields and labels
for the header form. The typical default.hfd view appears as follows:
__________________________________________________________________________
HS SAM Gen II: User Manual
Great River Technology
14 of 16
Figure 3.6a. Typical default.hfd view
Under Format File, the Open button will allow you to choose a new format file for the
data (*.hfd)
Figure 3.6b. The Open button under File Format.
__________________________________________________________________________
HS SAM Gen II: User Manual
Great River Technology
15 of 16
Figure 3.6c. Creating a default format.
Any number of format files can be created and used with HS SAMView2. To make one
of these format files the default file for the HS SAM View software, simply change the
name of the desired file to default.hfd
__________________________________________________________________________
HS SAM Gen II: User Manual
Great River Technology
16 of 16