1
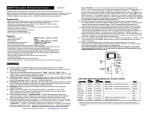
CONTENTS
1. Introduction………………………………….……………………………………………….. 1
2. Precautions…………………………………….…………………………………………….. 1
3. Before Using the Product
3-1 Unpacking and Checking………………………………………………………………………. 1
3-2 Installing Components ………………………………………..……………………………….. 1
3-3 Leveling the Scale………………………………………………..…………………………….. 1
4. Product Introduction
4-1 Specifications & General Features …………………………………...................................
2
4-2 Front Panel …….……………………………………………………………………………….
3
4-2-1 LCD display…………………………………………………………………………………… 3
4-2-2 Keyboard………………………………………………………………………………………
4
4-3 Power Supply……………………………………………………………………………………
5
5. Function Setting and Description of Parameter Values
5-1 Function Setting ………………………………………………………………………………..
5
5-2 Description of Parameter Values……………………………………………………………..
5
6. Calibration……………………………………………………………………………………
8
7. Operation
7-1 weighing ………………………………………………………………………………………… 9
7-2 manual tare &preset tare…………………………………………………………………........ 9
7-3 check weighing………………………………………………………………………………….
10
7-4 Simple Counting………………………………………………………………………………… 10
7-5 Accumulation, Accumulation Display and Accumulation Clearing………………………… 11
7-6 Printer initialization by the indicator operation……………………………………………….. 12
7-7 Input commands………………………………………………………………………………..
12
8. Serial Interface
8-1 Diagram………………………………………………………………………………………….. 12
9. Troubleshooting and Error Message………………………………………………
Appendix 1: printing format (Optional)
Appendix 2:Exporting data to PC in the form of EXCEL
Appendix 3:U.KEY Connector
0
13
1. Introduction
This manual contains installation and operation instructions for the CYD-W8+ Series
weighing scale. Please read the manual completely before installation and operation.
2. Precautions
◎ Place the scale on a flat and stable surface.
◎ Verify that the input voltage and the plug type matches the local AC power supply (Refer to
Section 4-3).
◎ Warm up the scale for 15 minutes before using it for the first time.
◎ Make sure power cord won’t cause a potential obstacle or tripping hazard.
◎ Keep the scale away from EMI noise, strong wind and vibration, which might cause
incorrect reading.
◎ Avoid sudden temperature changes (suitable operating temperature is between 0℃~ 40
℃.)
◎ Do not drop loads on the platform.
◎ Disconnect the power supply while cleaning the scale.
◎ Do not immerse the scale in water or other liquids.
◎ Service should be performed by authorized personnel only.
3. Before Using the Product
3-1 Unpacking and Checking
Open the package and check the instrument for transport damage. Immediately inform your
dealer if you have complaints or if parts are missing. The package should contain:
● Scale body
● Weighing pan
● Adaptor
● User manual
3-2 Installing Components
1) Before using the scale, remove the delivery protection screw (rotate counterclockwise),
which located underneath the scale, and cork the plug buckle.
Note: the JWN-30K model is shipped without the shipping protection screw.
2) Cover the weighing pans on the scale body properly.
3-3 Leveling the Scale
To compensate for small irregularities or inclinations at the location, the scale can be leveled.
The scale is equipped with a level indicator at the front panel .Adjust the leveling feet until the
air bubble in the indicator is centered as shown.
Note: The scale should be leveled each time once its location is changed.
1
4. Product Introduction
①
②
③
④
Leveler
Keypad
Adjusting feet
Plastic weighing pan
⑤
⑥
⑦
⑧
Stainless Steel weighing pan
On/Off switch
Transport protection screws
Power socket
4-1 Specifications & General Features
Specifications
Model
CYD-W8+-3K
CYD-W8+-6K
CYD-W8+-15K
CYD-W8+-30K
Capacity (Kg)
3
6
15
30
Display
LCD(liquid crystal display), digits 31mm high, with back lighting
Pan size
294 x 228 x 13.5mm
Scale Dimensions
330 x 289 x 104mm
Power Supply
DC9V/400mA or built-in rechargeable battery(6V/4A)
General Features
z
z
z
z
z
z
z
Built-in rechargeable batteries or DC alternative
Multiple functions: tare, preset tare, simple counting, check weighing, accumulation and
display for every deal.
Large bright backlit LCD with prominent 31mm high digits and LED backlight
Software filtering design and adjustable weighing displaying speed according to different
environments.
Easy operation with big keys and high weighing resolution
Single point calibration and linear calibration available
RS-232 serial communication interface and Relay port optional (PC, printer, relay)
2
4-2 Display
4-2-1 LCD Display
Low battery indication
Tare or Preset Tare Indication
Center of Zero Indication.The zeroing range is ±2﹪of weighing capacity.
Auxiliary display (parameter, accumulated number of weighments)
TARE
Symbol “ ” points at “TARE” when manual Tare action is done.
PRESET TARE Symbol “ ” points at “Preset Tare” when preset tare value is set.
“NET”
Net weight--Gross weight minus Tare. Symbol “ ” points at “NET” when manual
Tare or preset are actions are done.
“UW”
Under simple counting mode, Symbol “ ” points at “UW” when unit weight is lower
than 4/5 of scale division. Unit weight is too small for ensuring accurate quantity
calculations.
Charge Lamp
Red--- battery is charging
Green---battery is fully charged
HI LAMP ON The weight on the weighing pan is greater than the upper limit.
OK LAMP ON
LOW LAMP ON
The weight on the weighing pan is between upper and lower limits.
The weight on the weighing pan is smaller than lower limit.
Units of measure
Stable indication
3
4-2-2 Keyboard
Short press steps through activated weighing units, release on desired one.
Displays gross and net weight by turns
1. Tares the weight of the container or accepts the keypad tare entries
2. Preset Tare and Cancel the tare
3. Select the later parameter in the same level
4. Select the later record when checking the accumulation record
5. Shift keys rightwards
1. Zeros the display (within 2% of max.capacity)
2. Exits from certain operation without save
1. Long press to enter function setting
2. Deletes accumulation records
3. Delete the present accumulation record for the sake of wrong accumulation
operation under the accumulation mode.
1. Adds the indicated weight into accumulation memory
2. During editing, save and return to the higher option
1. Select the former parameter in the same level
2. Select the former record when checking the accumulation record
3. Shift keys leftwards
1. During setting value, add 1 to the current value
2. Set the upper limit of the check weighing
3. Print
4
1. During setting value, deduct 1 to the current value
2. Set the lower limit of the check weighing
3. Hold function
4-3 Power supply
Please verify the local power source before plugging into the power outlet, and use the
individual power socket and original adaptor.
Alternative power supply
1) (9V/400mA)adaptor
2) (6V/4A) Internal Rechargeable Battery
Power Consumption
About 300 mW without backlight
About 380 mW with backlight
Low Battery Warning
When
appears in the upper left corner of the weight window, the battery requires
recharging. The charge lamp turns green from red when the recharging is completed (which
takes about 8 hours). Disconnect the scale from power supply when it is fully charged.
5 Function Setting and Description of Parameter Values
5-1 Function Setting
1. Press and hold M-/SET while powering on or long press M-/SET under normal weighing
mode to enter function setting. The window displays “check”. Setting item “P00” displays
momentarily at the left bottom
2. Press
/MR or TARE/
to shift between the functions
3. Press M-/SET to enter the parameter setting.
4. Press
/MR or TARE/
to shift between the function parameters
5. Press M+/SAVE to save and return.
6. Press ZERO/ESC to exit without saving and return to the normal weighing model.
5-2 Description of Parameter Values
1. P00:
Offset value
Displays the offset value and the keypad testing can be conducted
2. P01:
Backlight mode
Off :No backlight
Auto: Auto on once get a stable weigh data or any key is pressed. But auto off after N
5
seconds (N=2s, 5s, 10s, 20s, ever) with no action. Ever= It is always on when the weights
over 9e
On:
Backlight on
3. P02:
current using units setting
Init : Press key Unit to select the default unit when powering on the scale: pcs, 斤, lb. oz,
g, kg, final .(final=keep the final being used unit when power off )
Use: Press key Unit to select the weighing unit. on: Enable the unit
off: Disable the
unit
4. P03:
zero range setting: d0, d1, d2, d3, d4, d5.
d0 (one division) , d1 (2 divisions), d2 (3 divisions), d3 (4 divisions), d4 (5 divisions) and d5
(6 divisions)
5. P04:
Hold function
HoLd 0: no hold function
HoLd 1: Peak hold. Press any key to release
HoLd 2: Hold after stable. Press any key to release
HoLd 3: Hold after stable. Release after moving away the article. The hold value is based
on the current value and its range could be set in sub menu. Accumulation hold function is
available, that is you could add article after hold the first value.
HoLd 4: Press key HOLD/LO/- to hold. Press any key to release
Sub menu for Hold 3:
INF (default: infinity) /10 /20 /50 /100 /200 /500 /1000 2000 /5000
/10000 /20000 /50000
H=current hold value, R=hold value range, d= division, W= actual weight
Keep to hold the value when |W-H|<=R*d, or the scale will exit the hold function. The scale
will cancel the hold function when empty the weighing pan, if choose INF setting.
6. P05:
whether to save the upper & lower limit of quantity checking: on, off
OFF = previously set quantity checking values are not retained when the unit is turned on.
ON
7. P06:
= previously set quantity checking values are retained when the unit is turned on.
Check weighing function
on: Check weighing under the condition that the weight is within the limits and the stable
indication appears
off: Check weighing under the condition that the weight is within the limits
8. P07:
Check Weighing buzzer beep
Hi: There will be a warning sound when the weight of articles exceeds the upper limit, and
6
the weight is equal or more than 20d
LO: There will be a warning sound when the weight of articles exceeds the lower limit, and
the weight is equal or more than 20d
ok:There will be a warning sound when the weight of articles is between the upper and
lower limit (including the upper and lower limits), and the weight is equal or more than 20d
out:There will be a warning sound when the weight of articles is beyond the upper or
lower limit, and the weight is equal or more than 20d
no.beep: no beep
9. P08:
External device
= Birch printer(BP545,TDP643)
= Godex printer
= Zebra printer
GP =
Adhesive sticker label printer (paper size 5cmx3cm)
= Dot matrix printer(SH-24)
=Large LED display
=Computer
=Connecting the weighing managing system
= CX large screen display (version 0.02)
= Thermal printer (Chinese available)
=the output format is compatible with Toledo Continuous Mode
Note: Special setting is needed by distributor if you want to print in Chinese.
= Work with the function of “Use Serial Keys” in Windows in outputting the data to
Excel or others.
U.KEY: U.KEY connector works with PC to send the weighing data to computer
(WinXP/Win7) in form of Excel and so on.
10. P09:
RS-232 Serial Transmission Rate
9600,4800,2400
11. P10:
Print mode
contin:Continuous print
stable:Printing automatically when get a stable weight (more than 20d)
key:Manual print by pressing the key PRINT
12. P11:
printing format setting: prt01~prt03
Use the numeric key to set the format directly.
7
13. P12:
Filtering setting: 1,2,3,4
Set the filtering level in which the stable indication turns on. The higher the setting, the
slower stabilization time
14. P13:
Precondition for zeroing or taring setting: stable, auto, always
stable :Taring or zeroing can be not action without stable indication after pressing the key
TARE or ZERO
always:Taring or zeroing can be action without stable indication after pressing the key
TARE or ZERO
auto:
Press key TARE or ZERO, but it works only when get the stable indication.
15. P14:
ON
Zero-Offset function.
display the previous weight when powering on again
OFF not display the previous weight when powering on again
16. P15:
Initialization
Press M-/SET then press M+/SAVE to start initialization and the window display
RESET.
6.Calibration
Note: Before calibration, please set the unit first. The unit used in calibration must be the one
). During the calibration procedure, press ZERO/ESC
that has been set before (P02:
to return to normal weighing mode without saving.
Here we take 3kg/1g as an example
1. Press and hold TARE while powering on. Do not release it till the window displays “CAL”.
2. With no load on the weighing pan, press TARE to start zero point calibration. “
”is
blanking at the left bottom.
3. Wait till the window displays the first calibration value. “
”appears at the left bottom.
Note: The first calibration value is default. With the same capacity, the last first calibration
point value can be recorded. If the capacity has been changed, the default value is 1/3 of
full load. If you need to change the value, do as the following: Press M-/SETto enter the
value setting. Press
/MR or TARE/
to move leftwards or rightwards.
Press+/PRINT/HI or HOLD/LO/- to change the value. Press M+/SAVE to save.
4. Put the corresponding weight on the weighing pan, and then press TARE to complete the
first point calibration. “
”appears at the left bottom.
Note: After the first point calibration, the window can display the weight value. If no need
8
for the other point calibration, move to step 6 to finish the calibration procedure.
5. Add another mass to the current weight. The window will show the total weight. Press
TARE to complete. “
”appears at the left bottom.
6. Press M+/SAVE to save. After the window displays “
”, it will return to normal
weighing mode.
7. Operation
7-1 Weighing
Begin with no load on the scale, the display reads zero. Place item(s) to be weighed on the
scale. The display shown is 1000.0g, gross weight.(The desired weighing unit should be
selected before weighing, refer to section 7-5.)
→
7-2 Manual Tare & Preset Tare
When weighing a sample that must be held in a container, tare and store the container weight
into memory.
Manual Tare
1) Under the weighing mode, place the container on the weighing pan, wait till stable
symbol appears, and press the key TARE. The container is tared.
→
2) Place the item(s) to be weighed into the container. The weight displayed is the net weight.
3) Remove all items from the weighing pan; the screen displays the tare value.
4) To clear tare with an empty pan, Press down key TARE or key ZERO/ESC.
Preset Tare
1) Long press key TARE for 3 seconds. The scale is now in Digital inputting mode with the
left-most digit blinking.
2) Press
/MR or TARE/
to move leftwards or rightwards. Press+/PRINT/HI or
HOLD/LO/- to change the value. Press M+/SAVE to save and return to weighing
mode.
3) Put the load on the container, the scale will automatically deduct the value of the
container from the total value.
NOTE: Press Key G/N to display gross and net weight by turns.
4) Clear the load on the container, and press TARE/
or ZERO/ESC to cancel the
9
pre-tare.
7-3 Check Weighing
Lower limit setting
1. Begin by pressing down key HOLD/LO/-. The scale is now in digital inputting mode with
the right-most digit blinking.
2. To set the value of lower limit, press key
/MR to shift leftwards, key TARE/
to shift
rightwards, key +/PRINT/HI to increase setting values and key HOLD/LO/- to
decrease setting value. Key M-/SET to enable or disable the weighing checking
function.
3. To save the Lower limit and return to weighing mode, Press key M+/SAVE
Upper limit setting
1. Begin by pressing down key +/PRINT/HI. The scale is now in digital inputting mode with
the right-most digit blinking.
2. To set the value of upper limit, press key
/MR to shift leftwards, key TARE/
to shift
rightwards, key +/PRINT/HI to increase setting values and key HOLD/LO/- to
decrease setting value.
3. To save the upper limit and return to weighing mode, press key M+/SAVE
Note:
Place the sample on the weighing pan, if the sample weight is under the lower weight range
while over or equal 20d, the LOW lamp will light up. If the sample is within the lower and upper
weight range while over or equal 20d, the OK lamp will light up. If the sample is over the upper
weight range while over or equal 20d, the HI lamp will light up.
When changing the Hi-Lo value, the scale will activate the weighing checking function
automatically. If the Lo value is higher than Hi value, then the Hi value will become the
same value as Lo data.
7-4 Simple Counting
1. Press key UNIT to select the unit “PCS”.
Note: Ensure to activate the unit “pcs” before operating, see the setting of P02:
2. Long press key G/N, the ex-factory default sample quantity (10 pcs) is displayed.
10
3. Use key +/PRINT/HI or HOLD/LO/- to choose the sampling amount. Available options
are10、20、50、100、200、500、1000( pieces) .
4. Put the corresponding samples on the weighing pan, and then press key TARE/ .
” is displayed momentarily before the display reverts to the sample quantity.
“
→
5. Remove the samples and put the load on, the scale calculates the amount of the load.
6. To go back to the normal weighing mode, remove the load and press key UNIT to select
the proper weighing unit.
Note:
1. The larger the sample size, the more accurate unit weight.
2. Symbol “ ” points at “UW” when calculated unit weight is lower than 4 / 5 of scale division.
7-5 Accumulation, Accumulation Display and Accumulation clear
Accumulation
Under the weighing mode, put the item on the weighing pan. Press key M+/SAVE at the
appearance of “
”. “
” is displayed momentarily before the display reverts to the
weight of the item.
Remove the item and the display goes back to zero before the next accumulation can register.
(The maximum is 99 pieces, display the latest 10 accumulation events in details )
Accumulation Display
Press key
Press key
/MR to display the accumulation data.
/MR or TARE/
to check a total accumulation event and each accumulation
event in detail.
The number of accumulated weight is indicated at the left bottom.
XX= total accumulation event; XX= the single accumulation
Accumulation Clear
To clear accumulation data (total accumulation data or one of the latest 10 accumulation
events), press key
/MR
to display the accumulation data needed and press key
M-/SET to clear data chosen. When clear total accumulation data, the accumulation signal
“
” will disappear and back to normal weighing mode. If need to exit without clearing data
11
and return to normal weighing mode , press key ZERO/ESC.
7-6 Printer initialization by the indicator operation
1. Press M-/SET while powering on to enter parameter setting. Use key
/MR
or
TARE/
to shift to P09
2. Press M-/SET to enter the external device setting. Press
/MR
or
TARE/
to choose
the printer model
3. After choosing one printer model, press M-/SET and the window will show “UNSUP” or
“INIT?”
z “UNSUP” means the printer can’t be initialized by scale. Press ZERO/ESC to return.
z “init?” means the printer is should be initialized. Press
MR/SAVE to initialize the printer.
When the initialization is finished, the window will show “ok”. And then displays the
printer model. Press ZERO/ESC to return.
7-7 Input commands
Connect the scale to computer. Run serial port debugging program on the computer. Input the
capital number “Z”, “T”, “R” ,“C”,“P” in the sending area, and the indicator can conduct the
corresponding actions.
Z=zero
T=tare
C=cancel tare
R/P=reading / print
8. Serial Interface
If external interface is needed, please select the proper RS 232 board or Relay port firstly, and
only when this board is adopted, the functions can be enabled.
Note: RTC is unavailable.
8-1 RS-232 Diagram
12
9. Troubleshooting and Error Message
Error Message
ERR0
ERR2
ERR3
ERR4
ERR5
ERR6
ERR7
Problem
Exceed the zero range
shootings
The item should be within 2% of full load
1. Check whether there are other alien
articles on the scale pan, remove those
Exceed the initial zero point
articles.
2. LOAD CELL failure, which requires to be
changed or to contact our Service.
1. Check whether it is A/D failure, if yes,
Exceed the A/D resolution please replace AD.
range
2. LOAD CELL failure, replacement
is
required or contact our Service.
EEPROM failure
Re-sold EEPROM or contact our Service.
Remove weight that is greater than the scale
Overload condition
capacity from the pan.
Exceeds the display range
-------------------------------------------Accumulated number of weights Delete the exceeding weights
exceeds the display range
Weight limit value is higher than
Reset the weight limit value.
the full load value
The tare value should be over zero and less
Exceed tare or pre-tare range
than or equal to full load.
Place the right weights( the calibration value
Wrong calibration weights
≤ full load)
ERR8
ERR9
ERR10
Appendix 1: Printing format (Optional)
Printing Device
Format
Sample
PC
prt-01
1. 000 kg
prt-02
prt-03
G.W.:
T.W.:
N.W.:
1. 500 kg
0. 500 kg
1. 000 kg
1. 000 kg
13
ST GW + 100.00 kg
UT GW + 100.00 kg
prt-04
UT NW - 200.00 kg
ST NW - 200.00 kg
ST: stable; UT: unstable;
NW: net weight;
GW: gross weight
ST,GS,+ 100.00kg
US,GS,+ 100.00kg
prt-05
US,NT,- 200.00kg
ST,NT,- 200.00kg
ST: stable; UT: unstable;
NW: net weight;
GW: gross weight
ST,+ 100.00kg
prt-06
k
ST,- 100.00kg
"ST," is the prefix
BIRCH/GODEX/ZEBRA/GP
/CK
1. 000 kg
prt-01
prt-02
G.W.:
T.W.:
N.W.:
1. 500 kg
0. 500 kg
1. 000 kg
G.W.:
CK
prt-02
1.48 kg
T.W.:
0.00 kg
N.W.:
1.48 kg
DMP
prt-01
k
1. 000 kg
14
prt-02
When
appear under
display of accumulation,
press key PRINT to the print
out.
G.W.:
100.00 kg
T.W.:
0.00 kg
N.W.:
100.00 kg
(01)
1.765 kg
(02)
1.760 kg
(03)
1.760 kg
---------------(03)
5.285 kg
NOTE:
The printing sample could be of different kinds of formats. When there is specific demand
about the format, conduct as follows
1) As for BRICH/GODEX/ZEBRA/GP printers, the factory designs the format as planned and
email to the user. Add the format into the previous format file via computer. Then it is
successful to add the new format and able to print the new format.
2) As for DMP/CK printer, it needs to change the scale design
Appendix 2:Exporting data to PC in the form of EXCEL
Introduction:
Connect the scale with PC and set the parameter of external device as “EXCEL” on the scale,
then you could export the weighing data to PC in the form of EXCEL. With this function, you
could record/accumulate/average/data statistical analysis the testing data, which we could call
it as scale-computer data management function.
Note: pls enable “Use Serial Keys” function in the computer.
Hardware connection and settings
1. Use transmitting serial wire or USB wire to connect scale and pc.
Note: pls install usb driver first, if you use usb wire.
2. Parameter settings in scale:
"PERI" = "EXCEL"
"BAUD" = "2400"/"4800"/"9600"
"PRT.M" = "KEY"/"STABLE"
"PRT.F" = "PRT.F01"
(external device)
(baud rate)
(printing model)
(printing format)
15
Enable the function of “Use Serial Keys” in the computer
Set Windows XP as a example:
1. Press “Start” ->"Run", and enter “access.cpl” ->”OK”.
2. In the dialog box ”Accessibility Options”, enter General option, choose “Use Serial Keys”
and press “Settings”.
In the dialog box ”Settings for SerialKeys” , set the corresponding Serial port and Baud rate,
which should be same as Baud rate in scale.
3. Test if Serial Keys works well.
Open a Text Document, and press the Print buotton on the scale. The Serial Keys works
well, if pc exports the weighing data to Text.
16
Export weighing data to Excel
1. Open Excel.
2. Press [Print], then Excel will show Weighing data.
3. Use “Format Cells” to beautify Excel:
Troubleshooting
1. Enable “Fast User Switching” function will disable “Use Serial Keys” in the computer.
Note: Start->"Control Panel "->"User Account"-> “Fast User Switching” function.
2. The data export requires only “GND+RX+TX” three lines, while some wire include nine
lines (including usb 9-25pin adapter), which may cause abnormal function.
Note: cut other useless line to check if these three lines work well.
17
Appendix 3:U.KEY Connector
一、Introduction
Connect the scale with PC and set the parameter of external device as “U.KEY” on the scale, then
you could export the weighing data to PC in the form of EXCEL. With this function, you could
record/accumulate/average/data statistical analysis the testing data, which we could call it as
scale-computer data management function.
Most importantly, you don’t need any setup in computer, but only use U.KEY connector to link
computer system directly, such as EXCEL, Express System, ERP system and so on. This connector is
compatible with windows2000/xp/Vista/win7/win8/Linux/Android system, and the weighing data will
show on the position where the mouse cursor in.
With one USB port, you could connect scale to computer easily.
二、Precaution
1.Close the input method program before connecting.
2.Ensure the decimal point digit is same as the parameter setting of scale, if use EXCEL file in
computer.
For Example:
Scale shows:
Total Weight: 1.000KG 、Unit Weight: 0.001g、Total: 1000PCS
EXCEL Setting: the decimal point digit should be 3 for total weight and unit weight column, and the
decimal point digit should be 0 for total column.
三、Setting
1.Prepare one computer with windows2000/xp/Vista/win7/win8/Linux system or Android pad.
2. Scale setting:
"PERI" = "U.KEY"
(External devices)
"BAUD" = "9600"
(Baud)
"PRT.M" = "KEY"/"STABLE"
(Print Mode)
"RTC" ="ON"/"OFF"
(Time)
3. Open the receiving port such as EXCEL or ECR system, and the weighing data will show on the
position where the mouse cursor in
四、Example:
1. EXCEL:
18
2.ERP System:
19