1
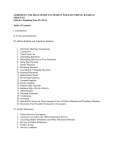
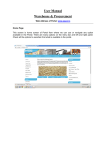
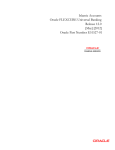
2010
Flora Limited
[USER MANUAL FOR THE
OUTWARD CHEQUE
PROCESSING OPERATORS]
This document describes how to use Flora Cheque Processing and Archiving for the Branch Operation
Introduction:
The outward cheque processing includes scanning, data entry, checking and then sending to PBM. Thus
this document is divided into 4 sections:
1.
2.
3.
4.
Scanning
Data Entry
Checking
Sending to PBM (Will be Done by the Central Admin)
This document describes the functionalities of the Branch Operators who perform their duties during
outward process. Thus the first 3 parts among 4 are described in this document in details. For the 4th
step which is Sending to PBM look at the “User Manual for Central Admin” Document.
Section1: Scanning
Responsibilities of a Scanman:
For Outward Cheques Flora Cheque Processing and Archiving System scans and extract MICR
information using the MICR cheque scanners. The responsibility of the scanman is to scan cheques using
the MICR cheque scanner and ensuring images and MICR data extracted properly. Scanman has the
capability to discard a cheque if the image quality is not acceptable and can rescan that particular
cheque. If any MICR data is not extracted properly scanman has the capability to repair MICR data.
After verification of all extracted cheque images and MICR data scan man passes the cheques to the
Data Entry Operator. Data Entry Operator expects acceptable image quality and accurate MICR data
from the Scanman.
Scanman operates in Batches. He/She creates batches using the Batch Control Voucher (BCV) and then
scans cheques for that batch. It is also the responsibility of the scan operator to match scan cheque
quantity with that of Batch Control Voucher. When sending cheques to Data Entry Operator he sends by
batches also.
Create Batch
Scan
Checks and Fix
MICR
Figure: 1.0 (Stages of the Scanman’s responsibility)
Scanman’s Interface:
On the very top of the Scanman screen there are 4 tabs:
Send to Data Entry
Operator
1. Batch
2. Scan
3. Repair
4. Save and Send
These 4 tabs represent the stages of the scan man’s responsibilities as in figure 1.0
Clicking each tab will bring different sets of buttons.
1. Buttons of Batch Tab:
a. Create.
b. Load.
c. Edit.
d. Delete.
2. Buttons of Scan Tab:
a. Connect.
b. Setting.
c. Start.
d. Pause.
e. Stop.
3. Buttons of Repair Tab:
a. View All.
b. Bad MICR.
c. IQA Fail.
d. Edit.
4. Buttons of Save and Send Tab:
a. Save.
b. Discard Update.
c. Send.
WorkFlow:
Step 1 > At first scanman receives a set of cheques with a BCV.
Figure 1.3 Batch Control Voucher
After clicking the Short Cut for FCPA a Login Screen will appear.
Figure 1.4 : Login Screen
Please type the desired user name and password and login as a scanner operator.
After logging in the following screen will appear.
Step 2 >
Create A Batch for the checks Following a Batch Control Voucher (BCV):
To create a batch for the checks click on Batch Tab. (There are 4 tabs: Batch, Scan, Repair, save and
Send; the default tab is Batch).
Click on Create Button to open the window for creating a Batch.
This screen inputs information gathered from the BCV.
Fill up the necessary information from BCV and then click OK.
To Load a previously created Batch please Click Load.
To Edit the Batch after creating (in case of any mistake while creating the batch you can edit the batch)
it please click Edit Batch.
To Delete a Batch please Click Delete Batch.
Step 3>
Scan the checks.
To scan the check click on the Scan tab.
Click Connect Button to connect the scanner with your PC. Click on Start to scan the checks.
After scanning if any of the following colors occur you have to repair the data before sending it to
maker.
For example the following error in one of the checks has occurred because of wrong MICR which needs
to be repaired.
Step 4 >
Repair Data
To repair the Data click on the Repair Tab.
Then click on the check that needs to be fixed. You can identify the error check by the background color.
Now fix the field with error color and then press ENTER to save the change. Then after fixing all the
errors send the data to maker.
Step 5 >
Send the checks.
To repair the Data click on the save and send Tab and then click the Send Button. After sending the
data click Logoff to abort from the software.
Section2: Data Entry (Maker)
Responsibilities of a Maker:
For Outward Cheques Flora Cheque Processing and Archiving System allows user to enter data manually
which cannot be extracted from MICR information. The responsibility of the maker is to enter none
MICR data into the system.
For that to happen first the Maker has to load the scanned batches and then enter Amount
(Mandatory), Depositors account number (Mandatory) and Check Date (not required always) for all the
checks. After entering the data maker has to send the amount entered checks to Checker for
verification.
Load Batch
Data Entry
Send to Checker
Figure: 2.0 (Stages of the Maker’s responsibility)
(Maker’s Interface)
On the very top of the Maker’s screen there are 3 tabs:
1. Batch
2. Data Entry
3. Save and Send
These 3 tabs represent the stages of the maker’s responsibilities as in figure 2.0
The job of a data entry operator will be
1. Load a batch to enter Data for
2. Enter Data
3. Send them to checker for Approval.
After clicking the Short Cut for FCPA a Login Screen will appear. Type username and password to log in
the software as Maker.
1. Load a batch to enter Data for
To load a Batch first click on Batch tab and then click on Load Button.
Then select the Batch to be loaded.
2. Enter Data
To start entering the data click on the Data Entry Tab and put you cursor in the amount field. Enter the
amount. Then click Enter. Then the cursor will move to the Dep. Acc. No. Field. Enter the account no.
Then press Enter. Then the data entry fields for next check will appear. Or you can move to enter data
for next check by clicking Next Button below.
3. Send Data to Checker
To send amount entered data to checker click on the Save and Send tab first and then click on the Send
Button.
Section3: Checker
Responsibilities of a Checker:
For Outward Cheques Flora Cheque Processing and Archiving System allows user to verify the data
entered by the maker before sending it to the Central admin. The responsibility of the checker is to
verify the correctness of the Data entered by Maker, Approve the correct checks and disapproving the
incorrect checks and send the checks to the Central Admin.
For that to happen first the Checker has to load the amount entered batches by maker and then verify
the checks one by one and then approve or disapprove it. After verifying the entered the data checker
has to send the checks to the central admin.
Load Batch
Verify
Send to Central
Admin
Figure: 3.0 (Stages of the Checker’s responsibility)
The job of a checker operator will be
1. Load a batch to approve for
2. Approve checks
3. Send them to central admin.
1. Load a batch to approve for
To load a Batch first click on Batch tab and then click on Load Button.
Then select the Batch to be loaded.
2. Approve checks
To approve checks first click on the Approve tab. Then click on Approve Button to approve the checks
one by one. Click on Approve All button to approve all the checks together.
3. Send Data to ADMIN
To send approved data to central admin click on the Save and Send tab first and then click on the Send
Button.