1
User Manual
Warehouse & Procurement
Web Address of Portal: www.pswc.in
Home Page
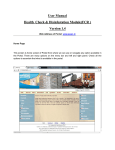
This screen is home screen of Portal from where we can use or navigate any option
available in the Portal. There are many options on the menu bar and left and right panel.
Check all the options to ascertain that what is available in the portal.
Click on the procurement link under "E-Operations".
Procurement Link
Login Screen
The following screen appears after applying actions, discussed in the previous screen. Now,
user has to enter the valid username and password, already allotted by the Head Office, as
depicted in the following screen. Click on “Go” command button to proceed further.
Mandi Configuration
In the beginning of every season, user is required to configure all the mandis from where
procurement to be made. For this purpose, user will click on the “Mandi Configuration” option
appearing on the left panel. A dialogue box will appear in the middle of the screen showing
attributes of the crop. User should verify the details and click on “GO” command button to
proceed.
Mandi Configuration Screen
User will select all the mandis where procurement is to be made and de-select remaining
mandis. User will also enter the expected purchase against each select mandi. Click on
“Save” command button to permanently save the entry.
Daily Entry of Progressive Procurement and Lifting
User will click on “Data Entry Forms” option appearing on the left panel and sub-option under
it will be listed. The first sub-option is “Daily data entry of Progressive Procurement and
Lifting” uses for entering daily purchase made and lifting done in the respective mandies of
the District.
Here user should remember to set the proper date and verify other details relates to the
commodity and crop year. This option remains activated till 11.00 am on the following day.
User is advised to enter this data on daily basis i.e. by every evening during procurement
season.
Statement showing daily purchase and lifting
User needs to click on “Tentative Reports” option appearing on the left panel and suboptions under it will be listed. Click on sub-option “Statement Showing Purchase/Despatch/
Balance” and the following screen will appear. User should carefully choose date from the
calendar appearing on the right side of Date label. After, entering the correct date, user
should click on “Go” command button and next screen will appear.
Printing of Report of Daily Temporary Purchase
Every user is required to print this reports after entering information of Daily Purchase, Lifting
and Payment. This report shows daily Procurement Position, Lifting & Storage Position and
Payment Position of all the mandis of the district and can be taken out of any date.
Click on “BACK” button to reach back in the previous screen.
IForm Data Entry
For the purpose to enter Iform of Arthya against purchase of the commodity, user is required
to select “IForm Data Entry” option available at the left panel under “Data Entry Forms”. The
following input screen will appear. User shall choose the name of the mandi from the list
against “Select Mandi” Label. Then Click on the “Add” command button appearing at the
bottom of the screen which allows user enter all the attributes available in the screen.
The following is the brief description of all the labels :
Label
Brief Description and validation or check, if any.
Select Mandi
IForm No.
User is required to select the respective mandi of Arthiya, from the drop
down list.
Add command button is appearing at the bottom of the screen, allows the
user to enter all the information of the IForm.
User enters the correct IForm No. appearing on the IForm.
Date
User enters here the date of purchase mentioned in IForm.
Arthiya Name
User will choose/select the name of the concerned Arthiya.
Variety
User set the variety of the commodity.
Packing
User choose the type of bags used from the drop down list.
Bags
User shall enter here number of bags purchased from Arthiya.
Weight
Based on number of bags entered, system will calculate and display the
weight of the commodity. Further, based on the MSP, Amount of purchase
Add
will also display.
Save
Cancel
User click on this command button to save the above said entry
permanently.
User can click on this button to abort/cancel/refresh above said entry.
The following is the view of filled screen.
Comparative Report Purchase/Despatch/Balance
This report shows mandi wise comparison of purchase/Lifting with previous year.
Statement Showing District, Date Wise Lifting and Procurement
Statement showing figure of Procurement and Lifting of District(s) till required date.
Statement Showing District/Mandi/Date Wise Lifting and Procurement
Statement shows figure of Procurement and Lifting of District(s)/Mandi and Date wise till
required date.
ACTUAL REPORTS
Mandi Wise Procurement Summary
Mandi Wise Daily Procurement Summary
Statement Shows Mandi Wise Procurement details based on the entry of IForm entered for a
district, along with other details.
Mandi Wise Daily Procurement Details
Statement shows date wise procurement details of each Arthiya based on the IForm entered
as on date.
Date Wise Arthiya Purchase
Statement shows Arthiya Wise daily purchase based on the IForm entered as on required
date.
Mandi Wise Lifting Report
Statement Shows Mandi Wise Lifting and its storage in the respective Warehouse(s) of
required districts(s).
Mandi Wise Procurement and Lifting Comparison Report
Statement shows district/mandi wise comparison of Procurement, Lifting & Balance lifting in
each Mandi.
Arthiya Wise Procurement and Lifting (Date Wise)
Statement shows district/mandi and Arthiya wise comparison of Procurement, Lifting &
Balance lifting in each Mandi.
Arthiya Wise Procurement and Lifting (Summary)
Statement shows summary on District/Mandi/Arthiya Wise for required period.
Data Entry Progressive – Actual Vs Tentative Data (Mandi Wise)
Statement shows Mandi Wise (In District) Procurement and Lifting summary.
MODULE : WAREHOUSING
Warehousing
In order to make entry in the Warehousing for the purpose of storage and despatch of
commodity, user is required follow the following path after use www.pswc.in portal. User will
bring the cursor over “Application” option and its sub-options shall be listed under it and user
should click on “Warehouse” sub-option as depicted in the following screen.
Login Screen
In this screen, user is required choose and select Login type and then required District,
concerned Centre and based on Centre, all the related warehouses will appear, select the
required warehouse/complex. User now required enter the valid password against user
name appearing in the text box or change the username and enter its valid password. User
Clicks on “Log In” Command Button and next screen will appear.
Note : User should use Tab key from key board to move to next text box or option.
Label
Description
Login
Using drop down arrow, user should choose the required login type. In case
of using Warehouse Module, user should select “Warehouse”.
List of all the District shall appear in the drop down list and user should
choose the required district from the list.
Based on the selection of the district, concerned centres will be available in
the drop down list. Use should choose and select the required centre and
press Tab key to move to next text box.
Based on the selection of the Centre, concerned warehouses/Complexes
under select Centre, will appear in the drop down list. User should choose
and select the required warehouse/complex from the list and press Tab key to
move to next text box.
User name configured for that warehouse/complex will appear in the list, user
may change the username but appearing in the list only.
User enter here valid password of the UserName.
District
Centre
Warehouse
UserName
Password
Log In
After selecting the above mentioned correct parameters, system will verify the
username and password on clicking this command button.
Options Screen
After validating password and other parameters, the following screen will appear on the
screen. For the purpose to make data entry, user needs to click on option “New Menu for
Data Entry Forms” and its sub-options will be listed below as depicted in the following
screen. Now, user should click on sub-option “Entry for Removal Chit (Except Rice)” for data
entry of Removal Chits.
Entry for Removal Chit (Except Rice)
The following entry screen will appear on the screen. Now, user need to select/enter data
starting from district. Step wise selection/entry of each label appearing the screen, has been
mentioned below :
Note : User should use Tab key on key board for moving to next text box.
Label
Description/Role
District
By default, district selected at the time of Warehouse Login, appears.
User should avoid to change district here.
Name of Mandi
Based on the selected district, all the mandis appear in the list of that
district only. User needs to choose the correct mandi.
Depositor Name
There are number of depositors are available in the drop down box, use
should choose carefully name of depositor.
Removal Chit No. User will enter Removal Chit No. available in the Input Form for Removal
Chit of Arthiya.
Removal
Chit User enters here the Removal Chit Date mentioned on document.
Date
Name of Arthiya
Name of all the Arthiyas, of the selected mandi, will appear in the drop
box and user should select the correct name of Arthiya only.
Truck No.
User enters here correct no.of Truck.
Driver Name
User enters here name of the Driver.
Storage Date
Commodity
User enter here correct date of storage because based on this date,
WHR will be generated and submitted in the system.
User should choose and select the correct commodity only from the list.
Variety
User should select the correct variety from the list.
Packing
User should choose and select correct packing of bags as mentioned in
the document. Making wrong selection here, date shall not be accepted
thereafter.
User should choose and select the correct crop year here.
Crop Year
Number of Bags
User enters here total bags loaded in the truck as per the removal chit.
Weight
System shall calculate its weight in Qtls.
Godown No.
Based on the data entered, as mentioned above, List of Godowns and
Plinths will appear in the list. If required godown or plinth is not available,
please contact to the concerned co-ordinator for generating the same.
Stack No.
List of stacks selected godown/plinth with appear in the list. Here, stacks
will appears those were formed by the co-ordinator other wise no stack
will appear here. Moreover, the stacks are directly linked with
Godown/Plinth, Commodity, Crop Year, Type of Bags and if any of them
is not correct, stacks will not be available. For this, help may be sought
from the co-ordinator.
Actual No. of User enters here actual number of bags un-loaded from the truck after
Bags
counting.
Actual Wt. (In Qtl) Actual weight in Qtls shall be calculated by the system only and user can
change it, if required.
Spillage (Bags)
User can enter here number of spillage bag(s).
Moisture %
User can enter here moisture %age mentioned in the input form.
Quality of Stock
User can enter here quality of Stock.
Save Detail
By clicking on this command button, system shall save the above
mentioned details and if one truck is un-loaded in more than one stack
then user required to make further entry starting from Godown.
This button shall permanently save the entry in the system.
Save
Cancel
This command button refresh all the data entry in the form and ready for
accepting fresh entry.
Delete
This command button remove the saved entry of Removal Chit. This
required when old entry needs to be removed after searching the same.
Search Removal This option is used to search saved removal chit for the purpose to view
Chit No.
and remove the same.
Search
This command button searches the desired removal chit.
Entry for Removal Chit for Rice
The following entry screen will appear on the screen. Now, user need to select/enter data
starting from district. Step wise selection/entry of each label appearing the screen, has been
mentioned below :
Note : User should use Tab key on key board for moving to next text box.
Label
Description/Role
Depositor/Agency
Name
Miller Name
User should choose the correct name of the depositor/agency from the
drop down list.
Name of Millers will be listed in the drop down box. User selects the
concerned miller from this list.
User enter here correct Contract No.
Contract No.
Contract
Date
Truck No.
No. User enters here the date of Contract.
User enters here correct no.of Truck.
Driver Name
User enters here name of the Driver.
Commodity
User should choose and select the correct commodity only from the list.
Variety
User should select the correct variety from the list.
Packing
Crop Year
User should choose and select correct packing of bags as mentioned in
the document. Making wrong selection here, date shall not be accepted
thereafter.
User should choose and select the correct crop year here.
Number of Bags
User enters here total bags loaded in the truck as per the removal chit.
Weight
System shall calculate its weight in Qtls.
Godown No.
Based on the data entered, as mentioned above, List of Godowns and
Plinths will appear in the list. If required godown or plinth is not available,
please contact to the concerned co-ordinator for generating the same.
Stack No.
List of stacks selected godown/plinth with appear in the list. Here, stacks
will appears those were formed by the co-ordinator other wise no stack
will appear here. Moreover, the stacks are directly linked with
Godown/Plinth, Commodity, Crop Year, Type of Bags and if any of them
is not correct, stacks will not be available. For this, help may be sought
from the co-ordinator.
Actual No. of User enters here actual number of bags un-loaded from the truck after
Bags
counting.
Actual Wt. (In Qtl) Actual weight in Qtls shall be calculated by the system only and user can
change it, if required.
Spillage (Bags)
User can enter here number of spillage bag(s).
Moisture %
User can enter here moisture %age mentioned in the input form.
Quality of Stock
User can enter here quality of Stock.
Save Detail
By clicking on this command button, system shall save the above
mentioned details and if one truck is un-loaded in more than one stack
then user required to make further entry starting from Godown.
This button shall permanently save the entry in the system.
Save
Cancel
This command button refresh all the data entry in the form and ready for
accepting fresh entry.
Delete
This command button remove the saved entry of Removal Chit. This
required when old entry needs to be removed after searching the same.
Search Removal This option is used to search saved removal chit for the purpose to view
Chit No.
and remove the same.
Search
This command button searches the desired removal chit.
Receipt from Removal Chit (WHR)
Based on Storage date entered during entry of Removal Chit, all removal chits of that date
appears in the list with selection. If so desired, user can deselect and removal chit. Other
information, relates to WHER, is required to be enter by the User and entry will be saved on
clicking the “Save” command button.
Label
Description/Role
Date
Storage
District
of User enter here date of storage which was entered during entry of Removal
Chit. WHR will be created based on this date only.
User checks here the name of the district. By default selected district
appears.
Depositor
User chooses and select the right name of the depositor from the drop down
list.
Commodity
Based on the above said parameters, all the removal chits appear below the
screen with selection and list of receipts, already entered, also appears. If
so desires, user can de-select any of the removal chit other wise all
selected removal chits shall be integral part of the WHR being created.
Variety
It will be displayed as entered in the removal chits.
Grade
It will be displayed as entered in the removal chits
Packing
Crop Year
It will be displayed as entered in the removal chits. But, user can still
change packing type.
Crop year will also gather from the selected removal chits.
Storage Type
User will choose and select storage type here from the drop down list.
Receipt No.
User enters here Receipt No. of manual prepared WHR.
WHR Date
User enters here WHR date. Storage date and WHR date should be same.
Manager Lic.
No.
License
Validity Date
Condition
of
Goods
Private Mark
of Depositor
Total Bags
Total Weight
Weigher
Name
License No.
Rate
Storing
Whether
Insured
Company
Name
Amount
Good
Acceptance
From
To Date
User must enter here License No. of Warehouse Manager.
User must enter here validity of License No.
User chooses and select the correct condition of commodity.
If available, user should enter the private mark of depositor (on Bags)
System calculates the total no. of bags of all the selected removal chits and
display against this label.
System calculates the total weight in (Qtls) from total no. of bags of all the
selected removal chits and display against this label.
If available, user can enter the name of weigher.
If available, user can enter License no. of Weigher.
of User can enter here rate of storing.
If commodity insured, user can choose “Yes” otherwise select “No.”
If commodity insured, user can enter the name of the Insurance Company.
If insured, user can enter amount in INR here.
User must enter here first date of storage and based on this date, storage
charges and related calculations is done.
User must enter the last date of storage.
Market value User can enter here MSP of the commodity
of time deposit
Valuation
User can also enter here valuation if required.
Save
Cancel
This button shall permanently save the entry in the system.
This command button refresh all the data entry in the form and ready for
accepting fresh entry.
Delete
This command button remove the saved entry of WHR. This required when
old entry needs to be removed after searching the same.
Enter Receipt This option is used to search saved WHR for the purpose to view and
No.
remove the same.
Search
This command button searches the desired WHR.
Despatch Gate Pass
Label
Outward
Pass No.
Date
Description/Role
Gate User must enter correct Outward Gate Pass No. here.
Warehouse
User must enter correct date of outward gate pass.
Name
User must select the correct name of warehouse from which despatch is
being done.
User must enter Truck No. in which bags of commodity being
despatched.
User should select correct name of the depositor from the drop down list.
Commodity
User should choose and select the correct commodity only from the list.
Variety
User should select the correct variety from the list.
Packing
User should choose and select correct packing of bags as mentioned in
the document.
User should choose and select the correct crop year here.
Truck No.
Crop Year
Godown No.
No. of Bags
Based on the data entered, as mentioned above, List of Godowns and
Plinths will appear in the list. If required godown or plinth is not available,
please contact to the concerned co-ordinator for the same.
List of stacks of selected godown/plinth with appear in the list. Here,
stacks will appears those in which stock is available.
User should enter number of bags being despatched.
Book Wt. (In Qtl)
System auto calculate book weight from above mentioned bags.
Stack No.
Dharam
Kanda Actual weight in Qtls shall be entered by the user after weighment on
Actual Weight
kanda.
Spillage (Bags)
User can enter here number of spillage bag(s), if any. Other wise user
must enter 0.
Moisture %
User can enter here moisture %age of commodity being despatched.
Save Detail
Total Bags
By clicking on this command button, system shall save the above
mentioned details temporarily.
System auto calculates to number of bags being despatched.
Total
Weight System auto calculates weight based on bags being despatched.
Delivered
Save
This button shall permanently save the entry in the system.
Cancel
Delete
This command button refresh all the data entry in the form and ready for
accepting fresh entry.
This command button remove the saved entry of Despatch Gate Pass.
This required when old entry needs to be removed after searching the
same.
Despatch Order
Label
Description/Role
Receipt No.
User must enter Receipt No. here.
Dispatch Date
D.O. No.
User must enter dispatch date and based on this date all the outward gate
passes will get displayed.
User should enter here DO No.
Book No.
User should enter here Book No.
District
It will be displayed as entered in the Outward Gate Pass Entry
Consignee
Variety
Name of the Consignee will be displayed as selected in the outward gate
passes.
It will be displayed as entered in the Dispatch Gate Pass.
Packing
It will be displayed as entered in the outward gate passes.
Crop Year
Crop year will also gather from the selected from Outward Gate Passes.
Total Bags
System calculates the total no. of bags of all the selected outward gate
passes and display against this label.
Total Weight System calculates the total weight in (Qtls) from total no. of bags of all the
Dispatch
selected outward gate passes and display against this label.
Save
This button shall permanently save the entry in the system.
Cancel
This command button refresh all the data entry in the form and ready for
accepting fresh entry.
Delete
This command button remove the saved entry of Receipt. This required
when old entry needs to be removed after searching the same.
Enter Receipt This option is used to search saved Receipt for the purpose to view and
No.
remove the same.
Search
This command button searches the desired Receipt.
User Management
Change of Password
User needs to login in respective Warehouse and click on “User Management” appearing on
Left Panel and under this option, sub-option “Change Password” appears. Click on this suboption and screen appears with user name password using which user had logged in. Click
on “Edit” command button appearing left side in the grid. Now, user can change the
password appearing in the right side of row. After changing password, user needs to click on
“Update” command button, appearing on the left side, password will be changed
permanently. Press “Cancel” to abort the changes. This procedure is used to change the
password of particular centre only.
Label
Description/Role
Edit
To select the user name for which password needs to be changed.
Update
Update/saved the changed password permanently.
Cancel
Abort the changes made.
User Name
System shows the name of the user.
Password
Systems shows the current password in use and user can change this
password accordingly.
Configure
Stack Formation
For the purpose to enter the commodity in stacks, it is required that stacks in the respective
Godown/ Plinth have to be created properly. If a single column is not formed properly,
stack(s) will not be appear during data entry in the entry screen. User should click on the
“Configure” option on the left panel and under this option, “Stack Formation” appears, click
on this sub-option and the following screen will appear. User should first click on the “Add”
button appears on the bottom of the screen and screen will able to accept formation of stack.
Label
Description/Role
Add
Chamber
Before entering formation for stacks in godown/plinth, user first click on the
command button and screen will able to accept the formation details.
Name of the centre will automatically appears against it in which the user
has already logged in.
User should carefully choose and select the correct godown/plinth from the
drop down list.
User should select the correct chamber no.
Commodity
User must choose the correct commodity from the drop down list.
Variety
User chooses the variety of the commodity.
Grade
User chooses the correct grade of commodity, if required.
Crop Year
Capacity
By Default, current crop will appear in the box, user needs to check the
same, if required, user may set the required crop year here.
According to commodity selected, type of bags will appear here and user
should carefully select bags here. Wrong selection here, fails to accept
stacks during entry of removal chits.
User must enter here total capacity of stack in MT.
Stack No.
List of stack numbers of the related godown/plinth appear here
Warehouse
Godown
Packing
automatically.
Creation Date
Bags
Weight
Depositor
Name
Save
Cancel
Date
Search
User must enter here valid date for formation e.g. 01/04/2013 (dd/mm/yyyy)
for Commodity Wheat and Crop Year Rabi-2013.
In some cases “Not Allowed” displays here and user needs not to care but
if this text box is empty, user must enter here 0 (zero)
In some cases “Not Allowed” displays here and user needs not to care but
if this text box is empty, user must enter here 0 (zero)
User must choose and select correct name of depositor here from the drop
down list.
User must verify the data enter in the screen format pressing on this “Save”
button. This command button saves data permanently.
This command button refresh the screen and all the input data/information
becomes empty.
Date is used to search entries of stacks formed on specific date.
Search command button uses to fetch all the entries of date entered in the
Date label.
Stack Killing
Stack killing is required before stack formation of every stack for storage of commodity.
Stack kills using last date of the period or when complete stack becomes empty after
dispatching commodity placed in it. On left panel, user needs to click on sub-option “Stack
Killing” under “Configure” option. After opening the screen, user needs to click on command
button appearing below the screen “Click here to add Stack Killing Information”. Now, screen
will accept all the input requires for stack killing.
Label
Description/Role
Click here to add User must click on this command button in order to get information
Stack
Killing regarding stacks for killing.
Information
Warehouse
By default displays the name of logged in Centre/Warehouse.
Godown
User must choose and select the correct name of Godown/Plinth.
Chamber
User must choose and select correct number of chamber.
Tick
After selecting the right parameters, as mentioned above. List of stacks
those were formed earlier, appears and user must tick against stack
number(s) the required for killing. After ticking, user must enter the
valid date of killing.
User must enter this date which indicates the stack is required to be
killed so that same could be formed when required.
After carefully verifying the information/date input by the user, user
must click on “Save” button to save information of stacks marked for
killed.
This button ignores/refresh the selection or data input by the user.
Disposal Date
Save
Cancel
Godown
User enter godown/plinth no. here when user needs to search required
stacks.
Chamber
Stack
Search
User enters here chamber no. following godown/plinth no. here when
user needs to search required stacks.
User must enter here stack number to be searched.
This command button fetches the data based on above mentioned
search criteria.
Stock Wise Reports
Centre Wise Stock Position (Stack Wise)
This option shows Centre wise stock position in stacks as on user input date.
Centre Wise Stock Position (Receipt-Despatch Wse)
Reports shows commodity and crop year wise stock position in the warehouse selected.
Transactional Reports
Receipt-Dispatch Register
This report shows receipt number wise storage of commodity in various stacks of godown/
plinth. It also shows commodity, crop year date of receipt total bags including weight
received. It also shows commodity dispatched against receipt number.
Stack Wise Stock Position
This reports shows, in a warehouse, godown/ plinth wise stock lying in each stack including
bags and weight of stock. As per requirement, user can ask for any commodity. Further, user
can filter for all stacks or those stacks having stock.
Date Wise Stack Wise Stock Comparison
This reports shows summary of total godowns, chambers, stacks, stock as on beginning of
date and closing stock as requested by the user. It also shows each stack wise position as
stated above.
Stock Register
Stock Register maintains the complete information of stock in the godowns/plinths. It
comprises the information date of deposit of commodity, depositor, WHR no. commodity, no.
of bags and weight received. Further, it also shows the details of goods delivered on date
wise and balance the remaining stock on date wise.
Godown Register
This register shows details of each godown which includes Date, opening balance of stock,
particulars of stock received. Particulars of stock issued and closing balance of stock lying in
the godown for a particular day.
Warehouse Receipt Checklist
This reports shows receipt wise total bags of commodity with crop year received on certain
date and its detail on stack wise in the concerned godowsn. It also shows name of the
depositor and type bags used for commodity.
Warehouse Receipt Checklist (Having Stock)
This reports shows receipt wise total bags of commodity with crop year received on certain
date and its detail on stack wise in the concerned godown. It also shows name of the
depositor and type bags used for commodity. It will show only those WHR having
outstanding stock in it
Pending Removal Chit Report
This report shows the list of all those removal chits pending for generating Warehouse
Receipt. Based on this, it comes know the pendency of removal chits for WHR.
Removal Check List Report
This report generates from entry of removal chits of each mandi. This report shows the
complete information of lifting from mandi and its storage in the stacks of godowns. Entry is
made from the input performa duly filled by the Warehouse staff of each truck received. It
includes the date of storage also and based on this storage, WHR is generated in the
system itself by calling all the removal chits of the date.
Lifting Report (Based on Removal Chit)
This report shows Warehouse wise (Each District) commodity lifting summary which
includes number of bags lifted with weight.
Warehouse Receipt (WHR) Detail
This report shows the details all WHRs lying with in the period mentioned by the user and
belongs to district and centre also requested by the user. It shows the complete details of all
WHRs such as depositor, commodity, WHR date, crop year, Godown/ Plinth no. bags &
weight received.
Paddy Reports
Date Wise A-Note Report
This report shows the details of Rice milled from the paddy including moisture and moisture
cut. It includes information such as date, lot no., Name of the Miller, Crop year of paddy,
variety of paddy, packing weight, Number of Rice bags, Rice Weight, Number of Paddy
bags etc.
TRAINING MATERIAL FOR DISTRICT MANAGER
District Manager will login in the Warehousing Module using his/her proper user id and valid
password. Specific rights has been given to DM for the purpose to view/print reports of the
district for each centre. All such reports have been discussed as under :
Capacity at Glance
This report shows centre wise capacity in details. It shows owned & hired capacity as under :
1. Total Storage Capacity
2. Utilization
3. Vacant Capacity
Godown Wise Capacity Utilization
This report shows Capacity as under :
1. Total Storage Capacity
2. Capacity Offered on Lease/Reservation
3. Stocks other than Reservation
4. Owned Utilization
5. Hired Utilization
Stock Wise Reports
Stock at a Glance
This report is available on the Portal on the left panel under “Stock Wise Reports” option.
On clicking this report, user is required to enter date upto which report needs to be
generated. The required output is as under :
Crop Wise-Centre Wise Stock Report (Centre/State Pool)
This report has the option print centre wise stock for Centre as well as State Pool Stock for
each District.
Centre Wise-Godown Type Wise Storage (Open/Cover)
This report shows Centre wise, Covered/Opened (Godown) including Type of bag used for
stock for each district.
Centre/Agency/Crop Wise Stock Report
This report shows centre wise, Depositor Wise, Crop Year Wise Stock position for each
district.
Month Wise Stock Report (Receipt/Despatch)
This report may be filtered on Commodity, Crop Year and Depositor as per the choice of the
user. Output shows in report in the following order :
1. District
2. Centre
3. Year
4. Month
5. Opening
6. Receipt & Dispatch during the period
7. Closing Balance as on date
District Stock Summary
This report shows district wise summary of all type of stocks of all commodity. It shows
Opening Balance, Receipt and Dispatch during the period and Closing Balance of each
commodity.
Centre Wise Stock Position (Stack Wise)
This report shows centre wise, Complex/Warehouse wise, Crop year wise stock position
including the type of bags used.
Centre Wise Stock Position (Receipt/ Dispatch Wise)
Transactional Reports
District Wise Warehouse Master Summary
It shows the complete information of Warehouse configured in the system. User can check
all properties of any Warehouse in the district.
Stack Wise Stock Position
This report shows centre wise, Stack wise, Godown/plinth wise commodity stored in bags
and shows its weight also. This report is important during entry of storage & dispatch of
commodity.
Date Wise Stack Wise Stock Comparison
This report shows comparison of Stack Wise Comparison of Stock available.
Stock Register
Stock Register maintains the complete information of stock in the godowns/plinths. It
comprises the information date of deposit of commodity, depositor, WHR no. commodity, no.
of bags and weight received. Further, it also shows the details of goods delivered on date
wise and balance the remaining stock on date wise.
Godown Register
This register shows details of each godown which includes Date, opening balance of stock,
particulars of stock received. Particulars of stock issued and closing balance of stock lying in
the godown for a particular day.
Centre Wise Receipt Check List