1
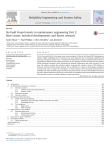
Introducing
810 Vibration Tester
Get AnswersIntroducing
Now. 810 Vibration Tester
©2010 Fluke Corporation
1
Before We Begin…
• Ask questions at any time!
• Please turn your cell phone to vibrate.
• If you must take a call, please feel free but we ask
that you take it outside the seminar room.
©2010 Fluke Corporation
Introducing 810 Vibration Tester
2
Agenda
•
•
•
•
•
•
•
Maintenance practices
What is mechanical vibration?
What are the benefits of vibration testing?
How a vibration meter works
Vibration basics
Introduction to the Fluke 810 Vibration Tester
Vibration Testing in 3 Easy Steps
– Setting up the machine
– Taking a proper measurement
– Interpreting the diagnosis
• Viewer PC software
• How to start testing vibration in your facility
©2010 Fluke Corporation
Introducing 810 Vibration Tester
3
Maintenance Practices
•
Reactive Maintenance: Often called “run to failure.” No repair or maintenance actions are taken on machinery until the designed life span is reached…or other variables cause the machinery to fail. – Upside:
•
•
Lower upfront maintenance costs
Lower maintenance staff costs
– Downside:
•
•
•
•
•
Unplanned, sometimes catastrophic, downtime and overtime hours
Secondary damage to machines impacted by the failed machine
Potentially higher capital costs as entire components may need to be replaced
Machines control maintenance department
Preventive Maintenance (Proactive – Calendar Based ): Also called “Historical or calendar‐based maintenance”
– Upside:
• Increased equipment life
• Reduced equipment or process failure
• Flexibility with maintenance scheduling
– Downside:
•
•
•
Fault free machines maintained unnecessarily – could lead to incidental problems with components
Overhaul reduces reliability of the machine (see the bathtub curve)
More labor intensive than Reactive Maintenance
©2010 Fluke Corporation
Introducing 810 Vibration Tester
4
Maintenance Practices
•
Predictive Maintenance (Proactive – Condition Based): Use of different testing (vibration, thermography, oil analysis, ultrasound are the most common) to understand machine condition and prevent failure
– Upside
•
•
•
•
•
•
Allows preemptive action to increase equipment life
Increased equipment life
Reduced equipment or process failure
Reduced repair parts and labor costs
Increased safety
Reduced likelihood of catastrophic failures
– Downside
•
•
•
•
Increased investment in diagnostic / test equipment
Increased investment in training and staff
Cost benefits not readily seen by management
May require top‐down cultural change in maintenance approach
• How is maintenance performed in your facility?
• How often do mechanical breakdowns occur?
• What do you do to keep mechanical breakdowns from recurring?
©2010 Fluke Corporation
Introducing 810 Vibration Tester
5
Early Indicators of Machine Health
• In the world of mechanical maintenance, vibration remains one of the earliest indicators of a machine’s health.
Point where
failure starts to
occur
P
P = Potential Failure
Wear Debris in Oil P-F Interval 1-6 mos
P
1
P
2
P
3
Quantitative PM P-F Interval 5-8 wks
P
4
P
5
Heat By Touch P-F Interval 1-5 days
P6
F
F = Failure
The P-F Curve, Adapted from John Moubray’s book “Reliability Centered Maintenance II”
• With over half of unplanned downtime attributed to mechanical failures, why aren’t more companies investing in vibration analysis?
©2010 Fluke Corporation
Introducing 810 Vibration Tester
6
Current Solutions Not for Everyone
•
•
•
•
©2010 Fluke Corporation
Current vibration analysis tools require a commitment…
– Upfront investment
– Full time resources to learn and perform vibration analysis
Many facilities cannot make the necessary investment, yet struggle daily with mechanical breakdowns.
The only options available to these facilities have included:
– Changing parts regularly before they wear out
– Outsourcing vibration analysis to consultants
– Using subjective techniques
– Simply “firefighting” or running to failure
Maintenance teams need help getting answers to their mechanical problems NOW.
Introducing 810 Vibration Tester
7
A Vibration Program Pays for Itself
Cost of Downtime / Repair
Cost (RTF)
1. Net income per hour of output for production line or other critical process
$20,000/hr (critical & non‐critical machine failures)
2. Calculate the average downtime (due to mechanical failures) for each equipment failure and number of events per year.
8 hrs down, 5 motors, 1x/yr
3. Multiply the results of step 1 by both values in step 2.
($20,000 * 8) * 5 = $800,000
4. Estimate labor (overtime) and equipment parts cost per downtime incident
$30/hr * 8 hrs * 2 techs = $480 + $5000/motor = $5480
5. Add step 3 and step 4. This is the annual cost in lost revenue plus repair costs
$805,480 (due to critical/non‐critical failures)
Cost of Program Implementation
Cost
1. Average cost of current test equipment (hardware and software)
$30,000
2. Average cost of dedicated, experienced vibration technician (FTE)(Assume 1 man hour/motor/month)
1 hr/mo/motor * 150 motors * 12 mos/yr * $35/man hr = $63000
3. Average upfront equipment training costs + “maintenance training”
$6000
4. Add steps 1 through step 3. This is the total first year cost of program startup
$102,000
Vibration Testing Payback
Cost
1. Assume 50% of unplanned downtime and repair costs savings
$805,480 * 50% = $402,740
2. Return on Investment & Payback of vibration testing program (total cost per year / total savings per year)
$102,000 / $402,740 = 0.25 yrs or 3 mos
• Basic vibration testing programs pay for themselves…but current solutions are designed for experienced vibration analysts within a predictive maintenance context
• Upfront costs (hardware, software, training, headcount) can still be high
©2010 Fluke Corporation
Introducing 810 Vibration Tester
8
Benefits of Vibration Testing
•
Vibration provides the earliest
indicator of machine condition
•
Vibration addresses all the
moving parts of rotating
equipment – and can identify
root cause
•
Saves time by addressing
problems earlier
•
Saves money by reducing spare
parts inventories
©2010 Fluke Corporation
Introducing 810 Vibration Tester
9
What is Mechanical Vibration?
Vibration is the oscillation of a point, an object, or a part of an object around a fixed reference, or rest, position. • Some types of vibration are by design…most types are symptoms of other problems such as bearing condition, shaft misalignment, looseness or out‐of‐balance conditions.
•
©2010 Fluke Corporation
Introducing 810 Vibration Tester
10
Mechanics of Vibration Testing
Transducer picks up vibration signals from bearing locations and transmits them to a data collection device
Example of a time waveform
• All rotating equipment generate a unique vibration signal or “signature”
• These unique signals are usually captured in series, with the signal’s amplitude (y‐axis) depicted over time (x‐axis). This is called a time waveform.
©2010 Fluke Corporation
Introducing 810 Vibration Tester
11
Making Vibration Data Easier to Interpret…Kind Of
•
The wave form contains all the information about the vibration of the machine at the point where it was measured
•
But the individual patterns of vibration caused by different events in the machine are all overlapped and jumbled together. FFT
Example of a time waveform
•
A frequency analysis performed in the data collector or software clarifies and simplifies the time waveform data. The result is called a vibration spectrum (or “vibration signature”,”FFT”, or “spectral plot.”)
•
Spectrum is the plot of the vibration signal’s amplitude (y –axis) against frequency (x‐axis)
Example of a vibration spectrum
• Most vibration data collectors, analyzers and software get you this far…but a trained technician is still required to interpret the data into something meaningful and actionable
©2010 Fluke Corporation
Introducing 810 Vibration Tester
12
Common Machine Faults & Spectrum Analysis
•
Every machinery fault produces a unique type of vibration signal.
•
Signals displayed in the vibration spectrum often form characteristic patterns.
•
Pattern recognition is a key part of vibration analysis…but significant training and experience are necessary to read the patterns.
•
In this seminar we will analyze 4 different type of failures:
• Imbalance
• Misalignment
• Looseness
• Bearing Failures
©2010 Fluke Corporation
Introducing 810 Vibration Tester
13
What is Imbalance?
•
Imbalance is a condition of a rotating part where the center of mass does not lie on the axis of rotation. In other words, there is a “heavy spot” somewhere on the rotor.
The large peak of 124 VdB at 1X running speed is caused by the imbalance.
140
VdB
The other peaks are caused by different phenomena in the machine
130
120
110
100
90
80
70
60
0
1
2
3
4
5
6
ORDERS
©2010 Fluke Corporation
Introducing 810 Vibration Tester
14
Sources of Imbalance
•
Various machine conditions can result in imbalance:
• Dirt accumulation or missing balance weights
• Lack of homogeneity in materials, especially in castings (e.g. porous sections, blow‐holes)
• Difference in dimension of mating parts (e.g. shaft, bore…)
• Roller deflection (e.g. paper mill rolls) or machining errors
• Uneven mass distribution in electrical windings
• Uneven corrosion, eccentric rotor or erosion of rotors
Imbalance typically manifests itself at 1X running speed in any direction
©2010 Fluke Corporation
Introducing 810 Vibration Tester
15
What is Misalignment?
•
•
In machines, perfect alignment occurs when the centerline of two coupled shafts coincide. When they do not coincide, misalignment exists. Three types of misalignment are possible:
• Angular – the centerline of the two shafts intersect but are not parallel. Angular Misalignment
•
Parallel – the centerline of the two shafts are parallel but not concentric. Parallel Misalignment
•
Parallel and Angular (Common) – most misalignment is a combination of angular and parallel
©2010 Fluke Corporation
Introducing 810 Vibration Tester
16
Sources of Misalignment
•
Misalignment can be caused by several sources, including:
• Poor assembly or shifting after assembly
• Distortion due to pipe strain
• Distortion due to torque combined with flexible support
• Temperature induced growth of the machine structure
• Poorly machined coupling
• Inadequate coupling lubrication
•
©2010 Fluke Corporation
Introducing 810 Vibration Tester
Misalignment will manifest itself in two ways:
•
At 2X running speed in the Radial & Tangential directions (parallel)
•
At 1X running speed in the Axial direction (angular)
17
What is Looseness?
•
Mechanical looseness can be either of two types:
• Rotating Looseness: A rotating looseness is caused by excessive clearance between rotating and stationary elements of the machine such as in a bearing.
•
Non‐rotating Looseness: Non‐rotating looseness is a looseness between two normally stationary parts, such as a foot and a foundation, or a bearing housing and a machine.
©2010 Fluke Corporation
Introducing 810 Vibration Tester
18
Looseness in the Spectrum Rotating Looseness
•
Excessive clearance in sleeve and rolling element bearings (bearing looseness) will produce harmonics of 1X that can extend in some cases above 10X
• Excessive journal bearing clearance can produce harmonics of 0.5X as shown. They are called half order components or sub harmonics. They can be produced by rubs and severe impacting.
1X
2X
3X
1X
4X
.5X
1.5X
3X
2.5X
4.5X
5.5X
4X
Non‐rotating Looseness
• Most types of non‐rotating looseness also produce harmonics of run speed, but they
usually do not produce as many, nor do they produce sub harmonics. Non‐rotating looseness can generate random noise as well as harmonics, and this produces a continuous spectrum rather than definite peaks.
©2010 Fluke Corporation
Introducing 810 Vibration Tester
19
Bearing Tones in Spectra
•
•
The most important fact about bearing tones is that they are non‐synchronous ‐ ‐
i.e., they are not at the same frequency as any of the harmonics of the RPM. The illustration shows bearing tones at about 3.2 and 6.4 orders:
120
VdB
110
100
90
80
70
60
0
1
2
3
4
5
6
Orders
©2010 Fluke Corporation
Introducing 810 Vibration Tester
20
Causes of Bearing Failure
•
Bearing condition degrades for a number of reasons:
• Heavier than anticipated loading
• Inadequate or incorrect lubrication
• Ineffective sealing
• Shaft misalignment
• Incorrect fit
©2010 Fluke Corporation
Introducing 810 Vibration Tester
21
Typical Bearing Wear Progression
120
VdB
Machine Without Bearing Problems
110
100
90
80
70
60
1
0
120
2
3
4
5
6
VdB
Machine With Late Stage Bearing Problems
110
100
90
80
70
60
0
1
2
3
Orders
©2010 Fluke Corporation
4
5
6
Random noise introduced (“haystack”) as wear progresses
Introducing 810 Vibration Tester
• Broadband noise level increases as bearing fails to carry load
• Excessive bearing temps
• Lubrication loss
22
Let’s Review
• Vibration provides the earliest indicator of machine condition
• Vibration addresses all the moving parts of rotating equipment – and can identify root cause
• Saves time by addressing problems earlier
• Saves money by reducing spare parts inventories BUT…
• Upfront startup costs (equipment, training, human resources) can be significant
• Spectra analysis and machine diagnosis still complex
• Cultural change often necessary for PdM
©2010 Fluke Corporation
Introducing 810 Vibration Tester
23
Let’s Review
• What if there was a way to understand machine
condition
– With little training
– With existing maintenance resources
– With minimal upfront cost
– At a glance?
©2010 Fluke Corporation
Introducing 810 Vibration Tester
24
Fluke redefines mechanical troubleshooting with 810 Vibration Tester
Click on screen to start or pause video
©2010 Fluke Corporation
Introducing 810 Vibration Tester
25
Vibration Testing in 3 Simple Steps
Vibration testing has never been easier
The 810 asks for basic machine information customers already know. Its onboard Info feature gives field tips for setting up and taking measurements like a pro
Fluke 810 fits easily into customers’ maintenance routine
Use it to quickly troubleshoot problems or monitor machine conditions
Fix it right the first time
With the press of a button, the Fluke 810 identifies the root cause, its location, and how severe the problem is
©2010 Fluke Corporation
Introducing 810 Vibration Tester
26
Fluke 810 Uses Available Data
• Fluke 810 requires the same information a vibration analyst needs
– Component types (motors, pumps, etc)
– Rotating shaft speed
• It automatically sets up the measurements necessary to perform its diagnosis
©2010 Fluke Corporation
Introducing 810 Vibration Tester
27
Diagnoses Four Most Common Faults
Covers ~80% of mechanical failures
Bearing Condition
Misalignment
Unbalance
Looseness
• Use on the most common industrial machinery
• Motors (AC/DC, ¼ HP+)
• Fans
• Blowers
• Belts and Chain Drives • Gearboxes • Couplings • Pumps (Centrifugal, Piston, Sliding Vane, Propeller, Screw, Rotary Thread/Gear/Lobe )
• Compressors (Piston, Centrifugal, Screw) • Closed Coupled Machines
• Spindles
• 810 cannot be used on
• Turbines
• Centrifuges (Purifiers)
• Diesel/gas engines and generators
• Beveled gearboxes
©2010 Fluke Corporation
Most common faults
Most common equipment types
Optimized for everyday troubleshooting
Introducing 810 Vibration Tester
28
810 Vibration Tester Features
Features
•
On‐board diagnosis and location of the four most common standard mechanical faults: bearings, looseness, misalignment, unbalance and other (nonstandard faults)
•
Fault severity scale with four severity levels: Slight, Moderate, Serious, and Extreme
•
Prioritized repair recommendations
•
Diagnostic details include cited peaks and vibration spectra
•
Context Sensitive Help
•
2 GB expandable on‐board memory
•
Data export (via USB connection) for more detailed Analysis
•
Laser tachometer for accurate machine running speed
•
100 mV/g TEDS tri‐axial accelerometer
•
Data storage and tracking with included VIEWER Software
•
Languages: English, French, German, Italian, Portuguese, Spanish, Japanese, Simplified Chinese
©2010 Fluke Corporation
Introducing 810 Vibration Tester
29
810 Vibration Tester – Product Overview
Supports single and tri‐axial accelerometer inputs
General Specifications:
• Multilingual interface Mini‐USB PC Connection
Laser Tachometer input
Onboard Context‐Sensitive Help
•2GB memory, expandable with additional SD Card
• 8 hr battery life, rechargeable
• ¼ VGA Color TFT Display
Viewer PC Software
• Machine Setups
• Import/Export/Track Data
• Store Thermal Images
©2010 Fluke Corporation
Introducing 810 Vibration Tester
30
Fluke 810’s Diagnostic Engine – How does it work?
• Traditional vibration analysis takes a long‐term view, where a baseline condition is established and a machine’s condition is compared over time to the original baseline.
• Fluke 810 feeds the setup and measurement data into a set of powerful algorithms to identify a machine’s mechanical faults
• Fluke 810 uses an innovative “synthetic baseline” to determine fault severity
Diagnostic Engine marks abnormal peaks
©2010 Fluke Corporation
Introducing 810 Vibration Tester
31
First Step – Setting up a Machine
• Machine setups are easy to build, save and recall
• A Setup Wizard guides the user through the process
• Garbage In, Garbage Out: Good machine setups promote better diagnoses
©2010 Fluke Corporation
Introducing 810 Vibration Tester
32
Machine Setup
•
•
•
The Fluke 810 will ask for basic machine information you already know, like RPM and horsepower.
The Tester will ask questions regarding the drive train in the following order:
1. Driver (Motor) 2. Transmission/Coupling
3. Driven Component As you enter the parameters, the Tester will create an iconic image of the drive train at the top of the screen.
©2010 Fluke Corporation
Introducing 810 Vibration Tester
33
Laser Tachometer
•
For accurate running speed, the 810 Vibration Tester ships with a laser tachometer.
•
Accurate running speed is a key input to the 810 diagnostic system
©2010 Fluke Corporation
Introducing 810 Vibration Tester
34
An Example Machine Setup Here is an example of the list of questions that the Tester will
ask for a typical pump coupled to an AC Motor:
•Machine Name: Pump 1
•AC Motor
•No Variable Frequency Drive
•RPM: 1800 (Minimum 200 RPM)
•HP: 40
•Motor Mounting: Horizontal
•Motor Bearing Type: Roller Bearing
•Next Component: Flexible Coupling
•Driven Component: Centrifugal Pump
•Impeller is supported by: Two Bearings
•Number of Vanes [optional]: 5
©2010 Fluke Corporation
Introducing 810 Vibration Tester
35
Review – Setting Up a Machine
Click on screen to start or pause video
©2010 Fluke Corporation
Introducing 810 Vibration Tester
36
Step 2 – Taking a proper measurement 1
2
3
•
•
Fluke 810 ships with a tri‐axial Fluke sensor which can collect vibration signals from three axes simultaneously. 810’s icon based, visual measurement screens are designed to make the sensor placement and sensor orientation screens easy and convenient for the user. Taking vibration readings is fast and easy with the Fluke 810’s tri‐axial sensor and user friendly interface.
©2010 Fluke Corporation
Introducing 810 Vibration Tester
37
Sensor Placement
Hold the sensor firmly and carefully roll it on the top of the drive train to minimize the potential impact damaging the sensor.
©2010 Fluke Corporation
Introducing 810 Vibration Tester
38
Sensor Placement
•
•
The numbers at the top of the drive train image indicate measurement locations. Location numbering follows the flow of energy. Measurement Tips for measurement location:
– For consistent diagnoses over time, you must place the triaxial sensor at the exact same location on a machine and with the same orientation.
– Do not take bearing measurements from a foundation or fabricated base.
– Do not mistake seal locations for a bearing measurement location on pumps.
– Attach the Sensor to a clean, flat, bare metal surface if possible. Thick layers of paint, grease, oil, or other matter reduce both the holding force of the magnet and the high frequency response of the sensor.
– Avoid mounting the sensor on thin surface areas, such as fan shrouds and cooling fins.
©2010 Fluke Corporation
Introducing 810 Vibration Tester
39
Sensor Orientation
Sensor cable PERPENDICULAR to SHAFT
Sensor cable ALIGNED with the SHAFT
• The orientation setup helps the Tester properly correlate vibration signals to each of the three directional axes.
• Simply follow the graphical prompts to properly locate and orient the sensor to the bearing location
©2010 Fluke Corporation
Introducing 810 Vibration Tester
40
Mounting Options
Advantages: Highest frequency response, very repeatable data over time.
Disadvantages: Less practical for “walk‐around”
troubleshooting due to time needed to screw/unscrew the Sensor from machinery, often difficult to tap a hole in the desired measurement location.
Advantages: High frequency response approaching that of a stud mount without having to tap a hole, very repeatable data over time.
Disadvantages: Less practical for “walkaround”
troubleshooting due to time needed to screw/unscrew the Sensor from mounting pad.
Advantages: Fastest, most convenient method for “walkaround” troubleshooting.
Disadvantages: While typically adequate for troubleshooting, the magnetic mount does not have as high a frequency range as options that are more permanent. • Fluke 810 ships with a magnetic mount and 10 mounting pads with adhesive
• Additional mounting pad packs are available as accessories
©2010 Fluke Corporation
Introducing 810 Vibration Tester
41
Review ‐ Taking a proper measurement
Click on screen to start or pause video
©2010 Fluke Corporation
Introducing 810 Vibration Tester
42
Dissecting the Diagnosis
WHAT IS THE PROBLEM?
WHERE IS THE PROBLEM?
HOW BAD IS THE PROBLEM?
©2010 Fluke Corporation
Introducing 810 Vibration Tester
The Fluke 810 Vibration Tester will provide you actionable answers NOW.
43
Diagnosis Details – Cited Peaks
• CITED PEAKS: Mechanical faults are detected at certain running speeds or frequencies in the spectra. “Cited Peak”
©2010 Fluke Corporation
Introducing 810 Vibration Tester
44
Diagnosis Details – Spectra
• Viewing the spectra is simple on the 810
• Export the data to the Viewer software and view spectra in greater detail ©2010 Fluke Corporation
Introducing 810 Vibration Tester
45
Review – Interpreting the Diagnosis
Click on screen to start or pause video
©2010 Fluke Corporation
Introducing 810 Vibration Tester
46
Viewer PC Software
VIEWER Software enables the users to upload their machine data (machine setups and diagnostic data) to store, keep track and view in greater detail. Also users can use the PC to set up machinery fast and easy.
• Transfer machine data to and from the Tester
• Export machine data for additional expert analysis
• Create, edit, delete machine setups easily with the keyboard
• Review full machine diagnosis,
• View spectra in full detail
• Modify application settings (e.g. language, date/time, units, sub units, etc.
©2010 Fluke Corporation
Introducing 810 Vibration Tester
47
Transfer: Import /Export Machine Setup
• Import Machine Setups created in the Tester to the Viewer software
• Export Machine Setups created in the PC to the Tester
©2010 Fluke Corporation
Introducing 810 Vibration Tester
48
Transfer: Import Diagnostic Data Machine Setup
• Import measurement data from the 810 to the PC for further analysis
©2010 Fluke Corporation
Introducing 810 Vibration Tester
49
Transfer: Export Diagnostic Data
• Want a second opinion? Export diagnostic information to a metafile for independent analysis
©2010 Fluke Corporation
Introducing 810 Vibration Tester
50
Transfer: Export Fault Data to .pdf
• Export your diagnostic data to a .PDF‐format report
©2010 Fluke Corporation
Introducing 810 Vibration Tester
51
Machine Setup
• Create and manage your machine setups in the Viewer software, then sync it up with the 810 Vibration Tester
©2010 Fluke Corporation
Introducing 810 Vibration Tester
52
View Diagnosis
©2010 Fluke Corporation
Introducing 810 Vibration Tester
53
View Diagnosis View diagnostic data (Cited peaks, Spectra, Time Waveforms if captured) by Tester Name, by Specific Measurement Record, by Location
Upload and view Thermal Images
View Details of Cited Peaks
©2010 Fluke Corporation
Introducing 810 Vibration Tester
54
View Diagnosis ‐ Spectra • View spectra across the three different dimensions (axial, radial, tangential) and over high and low Ranges
©2010 Fluke Corporation
Introducing 810 Vibration Tester
55
Everything you need… out of the box
Fluke 810 includes everything you need to get started:
• Vibration Tester
• Laser tachometer with pouch
• Triaxial‐TEDS accelerometer (sensor)
• Quick disconnect cable
• Sensor mounting pad kit with adhesive
• USB cable
• Viewer PC software
• Shoulder and hand straps
• Hard carrying case
• Quick Reference Guide
• Getting Started Guide
• User Manual CD
• FREE Product/Application Training DVD (available separately)
List Price: $7,999
©2010 Fluke Corporation
Introducing 810 Vibration Tester
56
Fluke 810 and Your Maintenance Routine
Use the Fluke 810 Vibration Tester to:
• Troubleshoot and identify the root cause
•Confirm repairs pre and post maintenance
•Commission new equipment •Check equipment after installation
•Provide quantifiable proof
•Make the right decision ‐ repair or replacement?
•Prioritize and plan repair activities
•Anticipate equipment failures
•Take control of your spare parts inventory
•Train new or less‐experienced technicians
©2010 Fluke Corporation
Introducing 810 Vibration Tester
57
Fluke 810 Pays for Itself…And Then Some
Cost of Downtime / Repair
Cost (RTF)
1. Net income per hour of output for production line or other critical process
$20,000/hr (critical & non‐critical machine failures)
2. Calculate the average downtime (due to mechanical failures) for each equipment failure and number of events per year.
8 hrs down, 5 motors, 1x/yr
3. Multiply the results of step 1 by both values in step 2.
($20,000 * 8) * 5 = $800,000
4. Estimate labor (overtime) and equipment parts cost per downtime incident
$30/hr * 8 hrs * 2 techs = $480 + $5000/motor = $5480
5. Add step 3 and step 4. This is the annual cost in lost revenue plus repair costs
$805,480 (due to critical/non‐critical failures)
Cost of Program Implementation
Cost
1. Cost of Fluke 810
$7,999
2. Average cost of dedicated, experienced vibration technician (FTE)(Assume 1 man hour/motor/month)
$0 (Use existing technician resources – no incremental cost)
3. Average upfront equipment training costs + “maintenance training”
$0 (Training DVD included – no incremental training costs)
4. Add steps 1 through step 3. This is the total first year cost of program startup
$7,999
Vibration Testing Payback
Cost
1. Assume 50% of unplanned downtime and repair costs savings
$805,480 * 50% = $402,740
2. Return on Investment & Payback of Fluke 810 (total cost per year / total savings per year)
$7,999 / $402,740 = 1 wk
• Fluke 810 makes vibration testing easy for maintenance teams – no additional training costs, software and support fees, fits into existing preventive maintenance routines
©2010 Fluke Corporation
Introducing 810 Vibration Tester
58
Fluke Makes Vibration Testing Easier
• With the Fluke 810, vibration testing is within reach
– It’s easy to use
– It gives you answers when you need them
– It includes everything you need to get started immediately
• You will understand
– Root cause of faults and fix it right the first time
– Severity of failures and prioritize your repairs
– Location of faults and focus your repair work
• It requires minimal upfront investment…but the ROI is significant
©2010 Fluke Corporation
Introducing 810 Vibration Tester
59
Fluke 810 Vibration Tester
Get Answers Now.
Visit www.fluke.com/machinehealth for more information
©2010 Fluke Corporation
Introducing 810 Vibration Tester
60