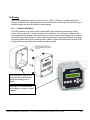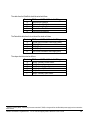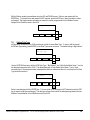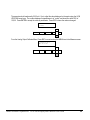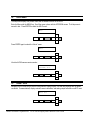
1
Thermo Scientific AquaSensors™
AV38 Local Display
and Controller
User Guide
ROSS and the COIL trade dress are trademarks of Thermo Fisher Scientific Inc. U.S. patent 6,793,787.
AQUAfast, Cahn, ionplus, KNIpHE, No Cal, ORION, perpHect, PerpHecT, PerpHecTion, pHISA, pHuture, Pure Water, Sage, Sensing the Future, SensorLink,
ROSS, ROSS Ultra, Sure-Flow, Titrator PLUS and TURBO2 are registered trademarks of Thermo Fisher.
1-888-pHAX-ION, A+, All in One, Aplus, AQUAsnap, AssuredAccuracy, AUTO-BAR, AUTO-CAL, AUTO DISPENSER, Auto-ID, AUTO-LOG, AUTO-READ,
AUTO-STIR, Auto-Test, BOD AutoEZ, Cable-Free, CERTI-CAL, CISA, DataCOLLECT, DataPLUS, digital LogR, DirectCal, DuraProbe, Environmental Product
Authority, Extra Easy/Extra Value, FAST QC, GAP, GLPcal, GLPcheck, GLPdoc, ISEasy, KAP, LabConnect, LogR, Low Maintenance Triode, Minimum Stir
Requirement, MSR, NISS, One-Touch, One-Touch Calibration, One-Touch Measurement, Optimum Results, Orion Star, Pentrode, pHuture MMS, pHuture
Pentrode, pHuture Quatrode, pHuture Triode, Quatrode, QuiKcheK, rf link, ROSS Resolution, SAOB, SMART AVERAGING, Smart CheK, SMART STABILITY,
Stacked, Star Navigator 21, Stat Face, The Enhanced Lab, ThermaSense, Triode, TRIUMpH, Unbreakable pH, Universal Access are trademarks of
Thermo Fisher.
Guaranteed Success and The Technical Edge are service marks of Thermo Fisher.
PerpHecT meters are protected by U.S. patent 6,168,707.
PerpHecT ROSS electrodes are protected by U.S. patent 6,168,707.
ORION Series A meters and 900A printer are protected by U.S. patents 5,198,093, D334,208 and D346,753.
ionplus electrodes and Optimum Results solutions are protected by U.S. patent 5,830,338.
ROSS Ultra electrodes are protected by U.S. patent 6,793,787.
ORP standard is protected by U.S. patent 6,350,367.
No Cal electrodes are protected by U.S. patent 7,276,142.
© 2009 Thermo Fisher Scientific Inc. All rights reserved. All trademarks are the property of Thermo Fisher Scientific Inc. and its subsidiaries.
The specifications, descriptions, drawings, ordering information and part numbers within this document are subject to change without notice.
This publication supersedes all previous publications on this subject.
Preface
This instruction manual serves to explain the use of the Thermo Scientific AquaSensors AV38 Local Display
and is written to cover as many applications as possible. Please do not hesitate to contact Thermo Fisher
Scientific or an authorized representative with questions or concerns.
The information presented in this instruction manual is subject to change without notice as improvements are
made, and does not represent any commitment whatsoever on the part of Thermo Fisher Scientific.
Thermo Fisher Scientific cannot accept any responsibility for damage or malfunction of the product due to
improper use.
Contact Information
To contact Thermo Scientific AquaSensors Technical Support:
Within the United States call 1.800.225.1480 or fax 978-232-6015.
Outside the United States call 978.232.6000 or fax 978.232.6031.
In Europe, the Middle East and Africa, contact your local authorized dealer.
Visit us on the web at www.thermo.com/processwater
Thermo Scientific AquaSensors™ AV38 Local Display and Controller User Guide
1
Safety Information
The Thermo Scientific AquaSensors AV38 Local Display shall be
installed and operated only in the manner specified. Only a skilled,
trained or authorized person should carry out installation, setup and
operation of the sensor system.
Before using the display, make sure that the sensor cable is
connected as specified. Failure to do so may result in permanent
damage to the system of its components.
Protection against electric shock will be achieved only by observance
of the corresponding installation rules.
Thermo Scientific AquaSensors™ AV38 Local Display and Controller User Guide
2
TABLE OF CONTENTS
1.
INTRODUCTION............................................................................................................................... 6
1.1.
1.2.
2.
GENERAL INFORMATION .................................................................................................................................6
INTENDED USE .................................................................................................................................................7
PRODUCT DESCRIPTION .............................................................................................................. 8
2.1.
2.2.
2.3.
2.4.
2.5.
2.6.
SYSTEM OVERVIEW .........................................................................................................................................8
BASE PART NUMBERS......................................................................................................................................9
SENSOR MAPPING ............................................................................................................................................9
MOUNTING.....................................................................................................................................................10
WIRING ..........................................................................................................................................................13
MEASURE SCREEN OVERVIEW ......................................................................................................................18
3.
MENU STRUCTURE AND NAVIGATION.................................................................................. 21
4.
CALIBRATE MENUS ..................................................................................................................... 26
4.1.
1-POINT BUFFER CALIBRATION (SENSOR TYPE: PH) ...................................................................................28
4.2.
2-POINT BUFFER CALIBRATION (SENSOR TYPE: PH) ...................................................................................30
4.3.
ABORTED CALIBRATION (SENSOR TYPE: ALL) ............................................................................................33
4.4.
1-POINT SAMPLE CALIBRATION (SENSOR TYPE: ALL) ................................................................................34
4.5.
2-POINT SAMPLE CALIBRATE (SENSOR TYPE: PH).......................................................................................36
4.6.
ZERO CALIBRATE (SENSOR TYPE: CONDUCTIVITY, DO, OZONE, DRINKING WATER TURBIDITY, RAW
WATER TURBIDITY, SUSPENDED SOLIDS)..................................................................................................................39
4.7.
AIR CALIBRATION (SENSOR TYPE: DISSOLVED OXYGEN) ...........................................................................41
4.8.
TEMPERATURE 1-POINT SAMPLE CALIBRATION ...........................................................................................43
5.
CONFIGURE MENU ....................................................................................................................... 46
5.1.
5.2.
5.3.
MAIN CONFIGURE MENUS .............................................................................................................................47
NAVIGATING SENSOR FILTER CONFIGURATION ............................................................................................48
NAVIGATING THE USER-ENTERED CONCENTRATION TABLE SCREENS ........................................................50
6.
HOST COMMUNICATIONS ......................................................................................................... 56
7.
DATASTICK COMMUNICATIONS SETUP............................................................................... 57
7.1.
7.2.
7.3.
7.4.
SETTING DATASTICK STATION NUMBER ......................................................................................................57
SETTING DATA TYPE .....................................................................................................................................58
SETTING DATASTICK BAUD RATE ................................................................................................................59
SETTING DATASTICK PARITY ........................................................................................................................59
8.
CHLORINE CONFIGURATION MENU...................................................................................... 60
9.
HOLD OUTPUTS SCREEN............................................................................................................ 62
10.
ANALOG OUTPUTS ....................................................................................................................... 63
10.1.
10.2.
11.
ASSIGNING 4 MA AND 20 MA PARAMETER VALUES ......................................................................................63
CALIBRATING ANALOG OUTPUT CURRENT...................................................................................................65
PID CONTROLLER MENU ........................................................................................................... 67
Thermo Scientific AquaSensors™ AV38 Local Display and Controller User Guide
3
12.
12.1.
12.2.
12.3.
RELAYS ............................................................................................................................................ 69
CONTROL RELAY ACTIVATION......................................................................................................................70
ALARM RELAY ACTIVATION .........................................................................................................................71
WASH RELAY ACTIVATION ...........................................................................................................................72
13.
DIAGNOSE MENU .......................................................................................................................... 74
14.
HELP MENU .................................................................................................................................... 75
15.
RESET AV38..................................................................................................................................... 75
16.
LIMITED WARRANTY.................................................................................................................. 76
17.
TERMS AND CONDITIONS.......................................................................................................... 77
Thermo Scientific AquaSensors™ AV38 Local Display and Controller User Guide
4
TABLE OF FIGURES
Figure 1: The elements of the AV38 user interface. .............................................................................................. 18
Figure 2: The "H" indicates that hold mode is active. ............................................................................................ 19
Figure 3: The initial measure screen when the DataStick is absent. ....................................................................... 20
Figure 4: The initial measure screen when the Sensor Head is absent. .................................................................. 20
Figure 5: The complete calibrate menu for pH sensors. ........................................................................................ 27
Figure 6: The complete calibrate menu for D.O sensors........................................................................................ 27
Figure 7: The complete calibrate menu for conductivity and turbidity sensors.......................................................... 27
Figure 8: The pH sensor value is dynamically updated during a 1-point buffer calibration......................................... 28
Figure 9: The pH sensor value is dynamically updated during a 2-point buffer calibration......................................... 30
Figure 10: Dynamic display of the conductivity value during calibration. ................................................................. 35
Figure 11: The conductivity calibration edit screen................................................................................................ 35
Figure 12: Entering the conductivity calibration value............................................................................................ 35
Figure 13: Dynamic display of the pH value during calibration. .............................................................................. 37
Figure 14: The pH calibration edit screen............................................................................................................. 37
Figure 15: Entering the pH calibration value......................................................................................................... 38
Figure 16: The complete calibrate menu for conductivity. ...................................................................................... 39
Figure 17: Zero is Calibrating…. ......................................................................................................................... 40
Figure 18: The user is prompted to place the sensor in air. ................................................................................... 41
Figure 19: The temperature calibration value is presented for editing. .................................................................... 43
Figure 20: The complete configure menu for conductivity...................................................................................... 47
Figure 21: The complete configure menu for pH................................................................................................... 47
Figure 22: The complete configure menu for D.O., Ozone and Chlorine. ................................................................ 47
Figure 23: The complete configure menu for turbidity............................................................................................ 47
Figure 24: The complete DataStick Comms menu. ............................................................................................... 57
Figure 25 The wash cycle showing when the relay is activated and the outputs are held.......................................... 72
TABLE OF TABLES
Table 1: AV38 base part numbers......................................................................................................................... 9
Table 2: Main menu items. ................................................................................................................................. 21
Table 3: Calibration methods.............................................................................................................................. 26
Table 4: The Configure menu. ............................................................................................................................ 46
Table 5: A typical concentration table with four points. .......................................................................................... 50
Table 6: Record the table values here before entering them.................................................................................. 51
Table 7: Summary of key actions. ....................................................................................................................... 55
Table 8: The default concentration table. ............................................................................................................. 55
Table 9: Host protocol vs. user's manual. ............................................................................................................ 56
Table 10: PID Controller functions for pH............................................................................................................. 67
Table 11: PID Controller functions for conductivity................................................................................................ 68
Table 12: Control relay functions......................................................................................................................... 70
Table 13: Alarm relay functions........................................................................................................................... 71
Table 14: Wash relay functions........................................................................................................................... 72
Thermo Scientific AquaSensors™ AV38 Local Display and Controller User Guide
5
1. INTRODUCTION
1.1. General Information
Thank you for purchasing the Thermo Scientific AquaSensors AV38 Local Display.
The product is designed for continuous use in industrial process applications and complies with safety
regulations currently in force. Improper use could lead to hazards for the user or a third-party, and/or adverse
effects to the plant or other equipment.
Thermo Fisher Scientific does not accept any liability for damage that may arise if information in this
manual is not followed. Therefore, the operating instructions and specifications must be read and
understood by all persons involved in installation and operation of this equipment.
This manual identifies safety instructions and additional information by means of the following symbols:
This symbol draws attention to safety instructions and warnings of potential danger,
which if neglected, could result in injury to persons and/or damage to property.
This symbol identifies additional information and instructions, which if neglected, could
lead to inefficient operation and possible loss of production.
It is recommended that this manual be made accessible to everyone who may need it as a reference.
Please contact Thermo Fisher Scientific or an authorized representative with any questions.
Thermo Scientific AquaSensors™ AV38 Local Display and Controller User Guide
6
1.2. Intended use
The Thermo Scientific AquaSensors AV38 Local Display is used to monitor, configure, calibrate and diagnose
any DataStick measurement system configured with a Modbus communications adapter in accordance with
the technical product specifications in Section 2 of this manual.
Data is reported through a scalable 4-20 milliamp analog output or through one of several digital protocols.
Options include a second analog output and up to 2 relays. PID control is a standard function when pH or
conductivity measurements are connected. Hypochlorous acid (HOCl) and free chlorine concentrations are
automatically available when a chlorine sensor is connected.
Any other use, or use not mentioned here, that is incompatible with the technical specifications is deemed
inappropriate. The operator is solely responsible for any damage arising from such use.
Other prerequisites for appropriate use include:
•
Observing the instructions, notes and requirements set out in this instruction manual.
•
Observing all local safety regulations.
•
Observing all warnings and cautions in the documentation regarding all products used in this
measurement system, including the sensor, mounting hardware, AV38 electronics and cabling.
•
Observing the prescribed environmental and operational conditions.
•
Observing chemical compatibility with all wetted materials.
1.3. Safety Instructions
The AV38 Local Display should be installed and operated only by personnel familiar
with the sensor and qualified for such work.
A defective AV38 should be returned to Thermo Fisher Scientific for repair or
replacement. Contact Thermo Fisher Scientific to obtain a Return Material
Authorization (RMA) number.
No modifications to the AV38 are allowed. The manufacturer/supplier accepts no
responsibility for damage caused by unauthorized modifications. The risk is borne
entirely by the user.
1.4. Removal from Service / Correct Disposal of the AV38 Local Display
Removal from Service
•
Disconnect the cable wiring from the controller terminal block.
•
Remove the AV38 from the mounting hardware.
Correct Disposal of Unit
When the AV38 is taken out of service, observe the local environmental regulations for correct disposal.
Thermo Scientific AquaSensors™ AV38 Local Display and Controller User Guide
7
2. PRODUCT DESCRIPTION
2.1. System Overview
The AV38 is a universal display interface for DataStick measurement systems. The enclosure has ¼-DIN
dimensions for easy mounting and is rated NEMA 4X for outdoor use. It uses a liquid crystal display (LCD) with
a high-contrast backlight for best readability and is powered with 24
volts DC. A line-powered version is also available.
Up to 247 DataStick measurement systems can be connected to a
single AV38 on a Modbus RTU communications network. Up to two of
the DataSticks connected can be mapped to “Channel 1” or “Channel
2” for direct local display, calibration, configuration and diagnosis. All
DataSticks can be accessed remotely when the host communications
hardware is present.
The AV38 automatically recognizes the type of DataStick connected to
it and provides the appropriate calibration, configuration and diagnostic
menus. A 10-point user-entered concentration table in the DataStick
can be edited and used to convert measured conductivity into %
concentration. PID control is a standard function when pH or
conductivity DataSticks are connected. Hypochlorous acid (HOCl) and
free chlorine concentrations are automatically available when a
chlorine sensor is connected. The AV38 supports up to two 4-20 analog outputs, two alarm/control/wash relays
and network communications to a host computer.
The AV38 can operate in two different modes:
1. Analyzer Mode: Map up to two DataSticks to the display, analog outputs and relays. Switch the
display between the two DataSticks using the RIGHT and LEFT arrow keys. Access all DataSticks on
the network for local calibration, configuration or diagnostics using the menu system. When host
communications hardware is present, a host computer can simultaneously be used to acquire data or
remotely calibrate, configure or diagnose the DataStick that is locally selected for display. This mode is
primarily used when analog output, PID and relay functions are needed with a small network of
DataSticks.
2. Gateway Mode: The host computer has access to all measure, configure, calibrate and diagnose
commands for all connected DataSticks. In this mode the AV38 suspends all local functions including
menu access, data display, analog outputs and relays. This mode is primarily used when the host
computer collects digital data and analog outputs and relays are not needed. The AV38 allows local
configuration and calibration of DataSticks when the application requires it. Gateway mode is switched
to Measure Mode with a RIGHT arrow or LEFT arrow key press. It is not possible to enter Gateway
mode using the RIGHT or LEFT arrow keys when the Measurement is ppmFCL2 (free chlorine
concentration). This is because the AV38 needs to continuously acquire data from the chlorine
DataStick and, if necessary, the pH DataStick, in order to perform the free chlorine concentration
calculation.
Thermo Scientific AquaSensors™ AV38 Local Display and Controller User Guide
8
When there is no DataStick present at the selected station address, the measure screen will indicate that the
DataStick is absent. When the sensor head is removed from the DataStick, the measure screen will indicate
that the sensor head is absent.
Host communication options include, Modbus, DeviceNet, and others. The host protocol is independent of the
Modbus RTU protocol used by the AV38 to communicate with the DataSticks.
There are seven keys for menu navigation. The MENU key is used to toggle between the menu and the
measure screen. Pressing the MENU key provides options for calibration, configuration, communications,
analog outputs and relays.
2.2. Base Part Numbers
Part numbers can be easily decoded to give descriptive information about included functions. The part number
is printed on the AV38 terminal block overlay where detailed information is provided on the host
communications protocols. The base part number and firmware version are displayed at power-up and in the
HELP menu. For example, if the display shows “AV38-CBYC, V4.00”, the AV38 has two analog outputs, two
relays and host communications, and is operating with version 4.00 firmware.
Base part numbers are decoded as follows:
Table 1: AV38 base part numbers.
Base Part
Number
AV38BB0A
AV38BB-Y-A
Analog
Output(s)
1
1
Relays
PID
0
0
Yes
Yes
AV38CB0C
AV38CB-Y-C
2
2
2
2
Yes
Yes
Host Comms
Indicated by second to last character in base part number
None
(Y=1) RS-232 ASCII
(Y=4) Modbus RTU
(Y=5) DeviceNet
(Y=7) EtherNet/IP, Modbus TCP, PCCC
None
(Y=1) RS-232 ASCII
(Y=4) Modbus RTU
(Y=5) DeviceNet
(Y=7) EtherNet/IP, Modbus TCP, PCCC
Profibus DPV0/V1 Host communications can be obtained using an AV38 with Modbus RTU Host
communications (Y=4) connected to a Profibus-to-DataStick Communications Adapter (CA26R).
2.3. Sensor Mapping
Multiple DataStick sensors can be connected to a single AV38 and any number of them can be accessed
directly via digital host communications. To simplify local operation only two sensors can be mapped to the
display, the analog outputs and the relays at any one time. This is done by selecting the appropriate station
number for DataStick 1 (DS1) and DataStick 2 (DS2).
Thermo Scientific AquaSensors™ AV38 Local Display and Controller User Guide
9
2.4. Mounting
The AV38 can be mounted on a wall or panel mounted in ¼-DIN or ½-DIN forms. A gasket is built into the
display for a NEMA 4X seal. Mounting instructions must be followed to maintain seals. The AV38 can be pipe
mounted and panel mounted with optional mounting hardware.
2.4.1. Conduit Box Wall Mount
The AV38 conduit box is mounted to a wall or plate with #8 or M4 screws through the mounting holes as
shown. There are seven Pg11 and Pg16 knockouts in the conduit box. Two cord grips are supplied and it is
recommended that they be used in the conduit holes on the bottom side of the box to prevent rain or moisture
from settling at the conduit interface. It is also possible to mount the box using interior breakouts. Four plastic
caps are provided to seal the interior mounting screws. NEMA 4X ratings will be maintained only when the #8
mounting screws are used in the holes outside the conduit box gasket.
AV38 conduit box is mounted to a
wall or plate with #8 or M4 screws
through the mounting holes as
shown.
Seven Pg11/16 Conduit breakouts
are available for cord grips or conduit
hardware.
Thermo Scientific AquaSensors™ AV38 Local Display and Controller User Guide
10
2.4.2. ½-DIN Panel Mount (PN: AV38-1/2DIN)
A ½-DIN panel-mount bezel and gasket can be ordered to fit the AV38 as shown. The AV38 display is
tightened down to the bezel using the four captured screws in the AV38. The bezel is then mounted to a ½-DIN
square opening with the hardware shown in the figure below.
Thermo Scientific AquaSensors™ AV38 Local Display and Controller User Guide
11
2.4.3. ¼-DIN Panel Mount (PN: AV38-1/4DIN)
The AV38 Display can be mounted directly to a ¼-DIN panel opening using the captive mounting screws in the
AV38 and the ¼-DIN supports as illustrated in the figure below. A ¼-DIN bezel gasket can be provided to
ensure a NEMA 4X seal on the panel.
Thermo Scientific AquaSensors™ AV38 Local Display and Controller User Guide
12
2.5. Wiring
DC-Powered Version (AV38-XBXXX1)
The DC-powered AV38 Display comes with two terminal blocks when ordered with one or two 4-20mA analog
outputs and/or host communications. If relays are ordered, a third terminal block is present. The figure below
shows an AV38 with the DeviceNet host communications option present.
DC-powered AV38 with DeviceNet host comms
wiring
The current loops (analog outputs) should be wired as follows:
Terminal
1
2
3
DC-Powered AV38 Current Loop Wiring
Current Loop 1 (+) (Power provided by AV38)
Current Loop 1 (–)
Current Loop 2 (–)
Current Loop 2 (+) (Power provided by AV38)
Thermo Scientific AquaSensors™ AV38 Local Display and Controller User Guide
13
The cable from the DataStick should be wired as follows:
Terminal
8
9
10
11
12
DC-Powered AV38 with DeviceNet Wiring
Red wire from DataStick
Black wire from DataStick
White wire from DataStick
Blue wire from DataStick
Clear wire from DataStick
The DeviceNet cable from the host should be wired as follows:
Terminal
4
5
6
7
Q
DC-Powered AV38 with DeviceNet Wiring
Ground from DeviceNet Power Supply (Black) 1
CAN_H (White)
CAN_L (Blue)
Shield (Clear)
24VDC from DeviceNet Power Supply (Red)
The relays should be wired as follows:
Terminal
A
B
C
D
E
F
DC-Powered AV38 with DeviceNet Wiring
Relay B: Normally Closed Contact
Relay B: Common
Relay B: Normally Open Contact
Relay A: Normally Closed Contact
Relay A: Common
Relay A: Normally Open Contact
Terminal 4, Ground (Black), is electrically the same as terminal P, GND, so the ground from the DeviceNet power supply can be connected to
either terminal.
1
Thermo Scientific AquaSensors™ AV38 Local Display and Controller User Guide
14
DC-Powered Legacy Version (AV38-XBXXX)
The DC-powered legacy version of the AV38 Display comes with a single terminal block when ordered with one
4-20mA analog output and/or host communications. If a second analog output or relays are ordered, a second
terminal block is present.
AV38 Terminals: 1 Output and Host Comms
AV38 Terminals: 2 Outputs and Relays
Figure 2.1: AV38 Wiring
One or Two Terminal Blocks Depending on Features
In either configuration:
1. 24 VDC Power is wired to Pins 1 and 2 as shown above. The power supply should be rated
to deliver 0.25 amps when the AV38 is used with one DataStick.
2. The DataStick(s) are wired to Pins 6 through 10.
3. Analog Output 1 is wired to Pins 11 and 12.
4. When Host Comms are used they are wired to Pins 3, 4 and 5. Be sure that the
communications ground is at the same potential as the 24 VDC power ground.
Thermo Scientific AquaSensors™ AV38 Local Display and Controller User Guide
15
The DC-powered AV38 wiring will vary depending on the options provided.
Model AV38-BB0A1: One 4-20mA Analog Output, No Relays and No Host Comms
Terminal
1
2
3
4
5
6
7
8
9
10
11
12
DC-Powered AV38 Wiring
24 VDC from Power Supply
Ground from Power Supply
No connect
No connect
Earth Ground from Power Supply
Red wire from DataStick
Black wire from DataStick
White wire from DataStick
Blue wire from DataStick
Shield wire from DataStick
Current Loop + (Power provided by AV38)
Current Loop –
Model AV38-CB5C1: DC-Powered, DeviceNet Host, Two Relays and Two 4-20mA Analog Outputs
Terminal
1
2
3
4
5
6
7
8
9
10
11
12
A
B
C
D
E
F
G
H
Wiring
24VDC from Power Supply
Ground from Power Supply and Network
DeviceNet Network CAN_HI: White Wire
DeviceNet Network CAN_LO: Blue Wire
Shield wire from Host Network
Red wire from DataStick cable
Black wire from DataStick cable
White wire from DataStick cable
Blue wire from DataStick cable
Shield wire from DataStick cable
Current Loop 1 (+)
Current Loop 1 (–)
Relay A: Normally Open Contact
Relay A: Common
Relay A: Normally Closed Contact
Current Loop 2 (+)
Current Loop 2 (–)
Relay B: Normally Open Contact
Relay B: Common
Relay B: Normally Closed Contact
Thermo Scientific AquaSensors™ AV38 Local Display and Controller User Guide
16
AC-Powered (AV38-XBXXX2)
The AC-powered AV38 Display comes with two terminal blocks when ordered with one or two 4-20 mA analog
outputs and/or host communications. If relays are ordered, a third terminal block is present.
AC-powered AV38 wiring:
1. Analog Outputs 1 and 2 are wired to Pins 1, 2 and 3 as shown above.
2. The DataStick(s) are wired to Pins 8 through 12.
3. Relays A and B are wired to Pins A-F.
4. 100-240 VAC, 50/60 Hz power is wired to the wider-spaced Pins G, H and J.
Thermo Scientific AquaSensors™ AV38 Local Display and Controller User Guide
17
The AC-powered AV38 wiring will vary depending on the options provided.
Model AV38-CB0C2: Two 4-20mA Analog Outputs, two Relays and No Host Comms
Terminal
1
2
3
8
9
10
11
12
A
B
C
D
E
F
G
H
J
AC-Powered AV38 Wiring
Current Loop 1 + (Power provided by AV38)
Current Loop –
Current Loop 2 + (Power provided by AV38)
Red wire from DataStick
Black wire from DataStick
White wire from DataStick
Blue wire from DataStick
Shield wire from DataStick
Relay B, Normally Closed
Relay B, Common
Relay B, Normally Open
Relay A, Normally Closed
Relay A, Common
Relay A, Normally Open
100-240 VAC, 50/60 Hz
Neutral
Earth Ground
2.6. Measure Screen Overview
The AV38 user interface is shown in Figure 1. It consists of an LCD module that contains two lines of 16
alphanumeric characters and seven keys to navigate the menu. The contrast of the LCD module can be
adjusted by simultaneously pressing the ESC and UP-arrow keys (for more contrast) or the ESC and DOWNarrow keys (for less contrast).
991.3 µS/cm
30.8 °C
DS1:
AB
6
▲
MENU
ESC
ENTER
◄
►
▼
Figure 1: The elements of the AV38 user interface.
For illustration of menu navigation in this manual, a pressed key is identified by a gray background, e.g., ESC
When the AV38 is equipped with host communications hardware, the measure screens will toggle between
channel 1, channel 2 and Gateway Mode using RIGHT and LEFT arrow keys.
991.3 µS/cm
30.8 °C
DS1:
AB
6
7.57 pH
30.8 °C
DS2:
AB
7
Gateway Mode
<> to exit
Thermo Scientific AquaSensors™ AV38 Local Display and Controller User Guide
[
1]
18
The sensor measurement is displayed on the top line and the temperature measurement is displayed on the
bottom line. The “AB” indicators on the top right indicate activation of relays A and B. An underscore indicates
that the corresponding relay is not activated. The “DS1: 6” indicates that Channel 1 is connected to the
DataStick with a Modbus address of 6. The “DS2: 7” indicates that Channel 2 is connected to the DataStick
with a Modbus address of 7. Calibration and configuration functions are accessed by pressing the MENU key
from the appropriate measure screen. For example, the DataStick with a Modbus address of 6 can be
calibrated and configured if the MENU key is pressed while the screen shows “DS1: 6”. Correspondingly, the
DataStick with a Modbus address of 7 can be calibrated and configured if the MENU key is pressed while the
screen shows “DS2: 7”. The Gateway Mode screen shows a bracketed number in the lower right corner to
indicate which DataStick is being accessed by the host. The MENU key does not present menu functions while
in the Gateway mode.
When the AV38 is not equipped with host communications hardware, the Gateway mode is not available. The
two measure screens are accessed with the RIGHT and LEFT arrow keys.
991.3 µS/cm
30.8 °C
DS1:
AB
1
7.57 pH
30.8 °C
DS2:
AB
3
When a sensor head of the same type is replaced in a DataStick, analog output and relay settings are
maintained. If a sensor head of a new type is installed, analog output and relay settings are automatically set to
default conditions.
The example in Figure 2 illustrates HOLD MODE as indicated in the measure screen. The “H” in front of the
“DS1: 6” in the lower right corner of the display indicates that outputs and relays are on hold.
991.3 µS/cm
AB
30.8 °C
HDS1: 6
▲
MENU
ESC
ENTER
◄
►
▼
Figure 2: The "H" indicates that hold mode is active.
Figure 2, the measure screen, also shows the sensor value, sensor units, temperature value, and temperature
units. Relays A and B are activated. The measurements are on hold and the Modbus station address for the
DataStick is 6.
Thermo Scientific AquaSensors™ AV38 Local Display and Controller User Guide
19
When the DataStick is absent the display will read “DataStick Absent” as shown in Figure 3. If the sensor is
wired correctly and the “DataStick Absent” message appears, be sure that the DataStick Sensor has the correct
station number as indicated by the number in the lower right corner of the measure screen. If that is correct,
also check that baud rate and parity are set up correctly in the DataStick.
DataStick
Absent
DS1:
__
6
▲
MENU
ESC
ENTER
◄
►
▼
Figure 3: The initial measure screen when the DataStick is absent.
When the sensor head is absent, the condition will be indicated by “Sensor Head Absent” on the measure
screen as shown in Figure 4.
Sensor Head
Absent
DS1:
__
6
▲
MENU
ESC
ENTER
◄
►
▼
Figure 4: The initial measure screen when the Sensor Head is absent.
Thermo Scientific AquaSensors™ AV38 Local Display and Controller User Guide
20
3. MENU STRUCTURE AND NAVIGATION
The Main Menu is accessed by pressing the MENU key when the AV38 is in Analyzer Mode (measure screen).
The menu structure is navigated using ENTER, UP/DOWN arrows, and ESC keys.
¾ Use the UP/DOWN arrow keys to scroll through the list of Menu options.
¾ Use the ENTER key to select an option.
¾ Use the ESC key to move up in the structure.
The end of the list of menu options is always the EXIT function. Pressing ENTER on the EXIT screen will bring
up the MEASURE screen.
The (≡) symbol is used to indicate that the user is in the menu structure. At the leaf of each branch of the menu
structure, the user is able to enter a value or make a choice. The value to be entered or the choice to be made
will be surrounded by parentheses (( )). The name of the value being entered or choice being made will appear
on the upper line of the screen and be appended with a question mark (?) to indicate that the user is to provide
input.
The RIGHT arrow symbol (>) on the screen indicates that downward navigation through the menu structure is
possible. The LEFT arrow symbol (<) on the screen indicates that upward navigation through the menu
structure is possible.
Calibration and configuration of a specific sensor is accessed by pressing the MENU key from the measure
screen for that sensor. Main menu items are listed as follows:
Table 2: Main menu items.
Main Menu Item
Function
Calibrate
(Station Number)
Configure
(Station Number)
DataStick Comms
Sensor calibration choices are automatically available for installed sensor head.
Enter the MENU from the measure display of interest – station in lower right.
Configuration choices are automatically available for the installed sensor head.
Enter the MENU from the measure display of interest – station in lower right.
Set the station address, baud rate and parity for the Modbus DataStick of interest.
Select free chlorine or HOCL concentration for output. Select pH compensation – fixed
or active. (Only when Chlorine DataStick Present).
Holds the 4-20 mA and Relay outputs
Set 4 mA and 20 mA values. Calibrate and test the analog output with a milliammeter.
Set 4 mA and 20 mA values. Calibrate and test the current output with a milliammeter.
Set up PID control functions for analog outputs. Available with pH or Conductivity.
Set timer, alarm, or control functions. (Optional)
Set timer, alarm, or control functions. (Optional)
Indicates the pH Sensor Head slope
Indicates AV38 firmware version
Resets AV38 configuration to default analog output, relay and PID settings.
Returns to the measure screen
Chlorine Configure
Hold Outputs
Analog Output 1
Analog Output 2 (option)
PID Controller
Relay A (option)
Relay B (option)
Diagnose (pH DataStick only)
Help
Reset AV38
Exit
Thermo Scientific AquaSensors™ AV38 Local Display and Controller User Guide
21
MAIN MENU NAVIGATION
¾ Enter the Main Menu by pressing the MENU key.
¾ Scroll the listing with the UP/DOWN arrow keys.
¾ To select an item, press the ENTER key.
If there is no keypad activity for 15 minutes and the display is left on a menu screen, the measure screen will
automatically re-appear. The exception to this rule is when the manual mode screen in the PID controller is
displayed. In this case, there will be no function time-out. The AV38 remembers the last menu option used and
will return to that menu option when re-entering the main menu from the measure screen. The list order is
always the same, so, if pressing MENU displays analog output and the desired operation is calibration; the UP
arrow will be used to move to the Calibrate menu.
≡Main Menu
►Calibrate
Select CALIBRATE with the ENTER key
¾ To calibrate the main parameter or temperature of
the sensor previously displayed in the measure
screen. In this example, the “1” in the lower right of
the display indicates the sensor at Modbus Station 1.
1
▲
MENU
ESC
ENTER
◄
►
Press the DOWN ARROW for next selection.
▼
≡Main Menu
►Configure
1
▲
MENU
ESC
ENTER
◄
►
▼
Select DATASTICK COMMS with the ENTER key
≡Main Menu
► DataStick Comms
¾ To set up station address for the DataStick that is to
be displayed in the AV38 measure screen.
▲
MENU
ESC
ENTER
Select CONFIGURE with the ENTER key
¾ To display or change filters, units of measure,
constants, tables and buffer standards of the sensor
previously displayed in the measure screen. In this
example, the “1” in the lower right of the display
indicates the sensor at Modbus Station 1.
Press the DOWN ARROW for next selection.
◄
►
Press the DOWN ARROW for next selection.
▼
Thermo Scientific AquaSensors™ AV38 Local Display and Controller User Guide
22
Select Chlorine Config with the ENTER Key
≡Main Menu
►Chlorine Config
E
MENU
ESC
ENTER
◄
►
Press the DOWN Arrow for next selection.
▼
Select Hold Outputs with the ENTER key
≡Main Menu
►Hold Outputs
¾ Put outputs and relays on hold. There is no
timeout with this function.
▲
MENU
ESC
▲
¾ Set Measurement: Free chlorine or HOCL
¾ Set pH Source: Fixed or active
¾ Set Fixed pH Value
◄
►
Press the DOWN ARROW for next selection.
▼
Select ANALOG OUTPUT 1 with the ENTER key
≡Main Menu
►Analog Output 1
¾ To set up 4 to 20 mA Analog Output for sensor,
temperature or PID.
▲
MENU
ESC
ENTER
◄
►
Press the DOWN ARROW for next selection.
▼
Select ANALOG OUTPUT 2 with the ENTER key
≡Main Menu
► Analog Output 2
¾ To set up 4 to 20 mA Analog Output for sensor,
temperature or PID.
▲
MENU
ESC
ENTER
◄
►
Press the DOWN ARROW for next selection.
▼
Thermo Scientific AquaSensors™ AV38 Local Display and Controller User Guide
23
Select PID CONTROLLER with the ENTER key
≡Main Menu
► PID Controller
▲
MENU
ESC
ENTER
◄
►
▼
¾ To set up ISA or Velocity Algorithm, Full-Scale,
Zero-Scale, Setpoint, Proportion Gain, Integral
Gain, Derivative Gain, Transit time, manual reset
and manual mode.
(Standard function with pH or conductivity sensors)
Press the DOWN ARROW for next selection.
Select RELAY A with the ENTER key
≡Main Menu
► Relay A
¾ To set up Relay A for Alarm, Control or
Wash functions.
(Available when relays hardware installed)
▲
MENU
ESC
ENTER
◄
►
▼
Select RELAY B with the ENTER key
≡Main Menu
►Relay B
▲
MENU
ESC
ENTER
◄
►
Select DIAGNOSE with the ENTER key
≡Main Menu
►Diagnose
▲
ESC
ENTER
¾ To set up Relay B for Alarm, Control or
Wash functions.
(Available when relays hardware installed)
Press the DOWN ARROW for next selection.
▼
MENU
Press the DOWN ARROW for next selection.
◄
►
▼
¾ To read the slope of the pH sensor head.
This option appears only when a pH sensor
head is installed in the DataStick body.
Press the DOWN ARROW for next selection.
Thermo Scientific AquaSensors™ AV38 Local Display and Controller User Guide
24
Select HELP with the ENTER key
≡Main Menu
►Help
¾ To read the AV38 firmware version.
▲
MENU
ESC
ENTER
◄
►
Press the DOWN ARROW for next selection.
▼
Select Reset AV38 with the ENTER key
≡Main Menu
►Reset AV38
¾ Set output, PID and relay functions to
default values.
▲
MENU
ESC
ENTER
◄
►
▼
Press an UP ARROW to review the menu.
Press ESC for Measure (alternate method).
Select EXIT with the ENTER key
≡Main Menu
◄Exit
¾ Return to the measure screen.
▲
MENU
ESC
ENTER
◄
►
Press an UP ARROW to review the menu.
Press ESC for Measure (alternate method).
▼
Measure Screen
991.3 µS/cm
AB
30.8 °C
HDS1: 6
▲
MENU
ESC
ENTER
◄
►
▼
Note: Station Address in lower right. The relay
activity indicators “AB” show that both Relay A and
Relay B are activated.
The “H” in front of “DS1: 6” indicate that outputs
and relays are on HOLD.
Thermo Scientific AquaSensors™ AV38 Local Display and Controller User Guide
25
4. CALIBRATE MENUS
Calibration methods supported in the AV38 are automatically available depending on the sensor head
connected to the DataStick. The supported calibration methods are listed below:
Table 3: Calibration methods.
Calibration Method
1-Point Sample
2-Point Sample
1-Point Buffer
2-Point Buffer
Zero
Description
Set measured reading to desired reading.
Changes offset. Best done at high end of range.
Sets measured reading to desired reading for two
points separated by more than 2 pH units.
Changes span and offset.
Automatically sets measured pH reading to closest
buffer standard point. Buffer standards are
selected in the configuration menu. Changes
offset.
Automatically sets measured readings to closest
buffer standard. Two points separated by more
than 2 pH units. Buffer standards are selected in
the configuration menu. Changes span and offset.
Set measured reading to zero. Measured reading
must be close to zero.
Sensors Supported
All
pH
pH
pH
Conductivity, Drinking Water
Turbidity, Raw Water
Turbidity, Dissolved Oxygen,
Ozone, Suspended Solids.
Air
Adjust measured reading to calculated reading of Dissolved Oxygen
oxygen in air with pressure and salinity
configuration settings as well as temperature
reading. Assumes sensor head is placed in air.
Temperature 1-Point Set measured reading to desired reading. All
Changes offset. Best done at high end of range.
Exit
Returns to the measure screen
Calibration methods vary depending on which sensor head is connected to the DataStick.
Thermo Scientific AquaSensors™ AV38 Local Display and Controller User Guide
26
For pH sensors, calibration methods are: 1-point Buffer, 2-Point Buffer, 1-Point Sample, 2-Point Sample and
Temperature as shown in Figure 5.
MENU
≡Calibrate
►1-Point Buffer
►2-Point Buffer
►1-Point Sample
►2-Point Sample
►Temperature
◄Exit
ESC
ENTER
▲
◄
►
▼
Figure 5: The complete calibrate menu for pH sensors.
For Dissolved Oxygen Sensors, calibration methods are: Air, 1-Point Sample and Temperature as
shown in Figure 6. For Chlorine and Ozone sensors, calibration methods are: 1-Point Sample and
Temperature.
≡Calibrate
►Air
►1-Point Sample
►Temperature
◄Exit
MENU
ESC
ENTER
▲
◄
►
▼
Figure 6: The complete calibrate menu for D.O sensors.
For Conductivity and Turbidity sensors, calibration methods are: 1-Point Sample, Zero and
Temperature as shown in Figure 7.
≡Calibrate
►1-Point Sample
►Zero
►Temperature
◄Exit
MENU
ESC
ENTER
▲
◄
►
▼
Figure 7: The complete calibrate menu for conductivity and turbidity sensors.
ORP sensors have only the 1-Point Sample calibration method and Temperature calibration.
Thermo Scientific AquaSensors™ AV38 Local Display and Controller User Guide
27
4.1. 1-Point Buffer Calibration (Sensor Type: pH)
Find the 1-Point Buffer calibration in the CALIBRATE menu using the UP/DOWN arrows. Press ENTER to
initiate this calibration process. Once the calibration has been initiated it can be aborted by pressing the
escape key before the process is completed.
≡Calibrate
►1-Point Buffer
▲
MENU
ESC
ENTER
◄
►
▼
The sensor should be rinsed in DI water and wiped clean to remove any process solution that would otherwise
contaminate the buffer solution. When the 1-point buffer calibration procedure is started, the analog output is
placed into hold mode and the user is prompted to place the sensor in the buffer solution. The sensor value is
dynamically updated during this step as shown in Figure 8.
7.02 pH
In solution?
▲
MENU
ESC
ENTER
◄
►
▼
Figure 8: The pH sensor value is dynamically updated during a 1-point buffer calibration.
It is best to let the sensor value stabilize in the buffer solution before initiating the calibration. If the temperature
of the sensor is very different from the temperature of the buffer sample, allow some time for the temperature to
equilibrate before initiating the calibration. After the sensor is placed in the buffer, the ENTER key is pressed to
start the calibration.
1-Point Buffer
Calibrating...
▲
MENU
ESC
ENTER
◄
►
▼
It takes between 5 seconds and two minutes depending on sensor and temperature measurement stability.
Once the calibration has been initiated it can be aborted by pressing the escape key before the process is
completed. See Section 4.3 for an example of an aborted calibration procedure.
Thermo Scientific AquaSensors™ AV38 Local Display and Controller User Guide
28
After the calibration point has been stored, the user is prompted to confirm a successful calibration procedure.
1-Point Buffer
Confirm cal OK
▲
MENU
ESC
ENTER
◄
►
▼
When the enter key is pressed to acknowledge that the calibration was successful, the analog output is placed
into active mode and the monitoring of sensor and temperature values is resumed. This successfully
completes the 1-point buffer calibration procedure.
7.01 pH
25.2 °C
DS1:
AB
6
▲
MENU
ESC
ENTER
◄
►
▼
If an error occurs during calibration that causes the procedure to fail, the reason for the failure is shown on the
screen.
1-Point Buffer
Calibrating...
▲
MENU
ESC
ENTER
◄
►
▼
2-Point Buffer
Buffer not found
MENU
ESC
ENTER
◄
►
▼
Thermo Scientific AquaSensors™ AV38 Local Display and Controller User Guide
29
When the enter key is pressed, the calibrate menu is displayed. The analog output remains in hold mode. This
ends the 1-Point Buffer calibration procedure. The user has the option of repeating the procedure if desired.
≡Calibrate
►1-Point Buffer
▲
MENU
ESC
ENTER
◄
►
▼
4.2. 2-Point Buffer Calibration (Sensor Type: pH)
Find the 2-Point Buffer calibration in the CALIBRATE menu using the UP/DOWN arrows. Press ENTER to
initiate this calibration process. Once the calibration has been initiated it can be aborted by pressing the
escape key before the process is completed.
≡Calibrate
►2-Point Buffer
▲
MENU
ESC
ENTER
◄
►
▼
The sensor should be rinsed in DI water and wiped clean to remove any process solution that would otherwise
contaminate the buffer solution. When the 2-point buffer calibration procedure is started, the analog output is
placed into hold mode and the user is prompted to place the sensor in the first buffer solution. The sensor
value is dynamically updated during this step as shown in .
7.02 pH
In 1st solution?
▲
MENU
ESC
ENTER
◄
►
▼
Figure 9: The pH sensor value is dynamically updated during a 2-point buffer calibration.
It is best to let the sensor value stabilize in the buffer solution before initiating the calibration. If the temperature
of the sensor is very different from the temperature of the buffer sample, allow some time for the temperature to
equilibrate before initiating the calibration. After the sensor is placed in the first buffer, the ENTER key is
pressed to start the calibration of the first point.
Thermo Scientific AquaSensors™ AV38 Local Display and Controller User Guide
30
2-Point Buffer
Calibrating...
▲
MENU
ESC
ENTER
◄
►
▼
It takes between 5 seconds and two minutes depending on sensor and temperature measurement stability.
Once the calibration has been initiated it can be aborted by pressing the escape key before the process is
completed. See Section 4.3 for an example of an aborted calibration procedure.
After the first calibration point has been stored, the user is prompted to place the sensor in the second buffer.
The sensor should be rinsed in DI water and wiped clean before it is placed in the second solution.
10.01 pH
In 2nd solution?
▲
MENU
ESC
ENTER
◄
►
▼
After the sensor is placed in the second buffer, the ENTER key is pressed to start the calibration of the second
point.
2-Point Buffer
Calibrating...
▲
MENU
ESC
ENTER
◄
►
▼
After the second calibration point has been stored, the user is prompted to confirm a successful calibration
procedure.
2-Point Buffer
Confirm cal OK
▲
MENU
ESC
ENTER
◄
►
▼
Thermo Scientific AquaSensors™ AV38 Local Display and Controller User Guide
31
When the enter key is pressed to acknowledge that the calibration was successful, the analog output is placed
into active mode and the monitoring of sensor and temperature values is resumed. This successfully
completes the 2-point buffer calibration procedure.
7.01 pH
25.2 °C
DS1:
AB
6
▲
MENU
ESC
ENTER
◄
►
▼
If an error occurs during calibration that causes the procedure to fail, the reason for the failure is shown on the
screen.
2-Point Buffer
Calibrating...
▲
MENU
ESC
ENTER
◄
►
▼
2-Point Buffer
Buffer not found
▲
MENU
ESC
ENTER
◄
►
▼
When the enter key is pressed, the calibrate menu is displayed. The analog output remains in hold mode. This
ends the 2-point buffer calibration procedure. The user has the option of repeating the procedure if desired.
≡Calibrate
►2-Point Buffer
▲
MENU
ESC
ENTER
◄
►
▼
Thermo Scientific AquaSensors™ AV38 Local Display and Controller User Guide
32
4.3. Aborted Calibration (Sensor Type: All)
If the ESC key is pressed while calibration is in progress, the procedure is aborted. A calibration cannot be
aborted if the calibration process has completed.
2-Point Buffer
Calibrating...
▲
MENU
ESC
ENTER
◄
►
▼
2-Point Buffer
Aborting...
▲
MENU
ESC
ENTER
◄
►
▼
After the calibration procedure has been aborted, the user is prompted to confirm the abort.
2-Point Buffer
Confirm abort
▲
MENU
ESC
ENTER
◄
►
▼
When the enter key is pressed, the analog output is placed into the active mode and the monitoring of sensor
and temperature values is resumed. This ends the 2-point buffer calibration procedure.
7.01 pH
25.2 °C
DS1:
AB
6
▲
MENU
ESC
ENTER
◄
►
▼
Thermo Scientific AquaSensors™ AV38 Local Display and Controller User Guide
33
4.4. 1-Point Sample Calibration (Sensor Type: All)
The screen-by-screen example for a 1-point sample calibration is given for a conductivity sensor in this section.
The same sequence is followed for any sensor type. Only the units of measure and range of acceptable values
will change. When a 1-point sample calibration is applied to chlorine, the calibration value being adjusted will
be for free chlorine even if HOCL is selected for measurement and outputs.
Press MENU from the Measure Screen:
991.3 µS/cm
30.8 °C
DS1:
AB
6
▲
MENU
ESC
ENTER
◄
►
▼
Scroll to CALIBRATE with the UP/DOWN Arrows and press ENTER:
≡Main Menu
►Calibrate
▲
MENU
ESC
ENTER
◄
►
▼
Scroll the list of CALIBRATE options with the UP/DOWN arrows and press ENTER to select 1-POINT
SAMPLE.
≡Calibrate
►1-Point Sample
►Zero
►Temperature
◄Exit
▲
MENU
ESC
ENTER
◄
►
▼
Be sure the sensor has been properly cleaned before calibration. Initiate the 1-point sample process by
pressing ENTER.
Thermo Scientific AquaSensors™ AV38 Local Display and Controller User Guide
34
The sensor value is dynamically displayed at this point in the calibration procedure as shown in Figure 10.
When the reading has stabilized, press ENTER to initiate the calibration.
991.3 µS/cm
Sensor ready?
▲
MENU
ESC
ENTER
◄
►
▼
Figure 10: Dynamic display of the conductivity value during calibration.
When the user presses enter, the current sensor value is captured and shown in the edit field of the next screen
as shown in Figure 11.
1-Point Sample?
(
991.3) µS/cm
▲
MENU
ESC
ENTER
◄
►
▼
Figure 11: The conductivity calibration edit screen.
The calibration value can be adjusted with the UP and DOWN arrow keys. After the calibration value is
adjusted, the enter key is pressed to calibrate the DataStick as shown in Figure 12.
1-Point Sample?
( 1000) µS/cm
▲
MENU
ESC
ENTER
◄
►
▼
Figure 12: Entering the conductivity calibration value.
After the calibration process is complete, the user is asked to confirm the result before releasing the analog
outputs, relays and measure screen.
1-Point Sample
Confirm cal OK?
▲
MENU
ESC
ENTER
◄
►
▼
Thermo Scientific AquaSensors™ AV38 Local Display and Controller User Guide
35
1000 µS/cm
30.8 °C
DS1:
AB
6
▲
MENU
ESC
ENTER
►
◄
▼
If an error occurs during calibration, the reason for the failure is shown.
1-Point Sample
Not stable
▲
MENU
ESC
ENTER
◄
►
▼
4.5. 2-Point Sample Calibrate (Sensor Type: pH)
Press MENU from the Measure Screen:
4.07 pH
30.8 °C
DS1:
AB
6
▲
MENU
ESC
ENTER
◄
►
▼
Scroll to CALIBRATE with the UP/DOWN Arrows and press ENTER:
≡Main Menu
►Calibrate
▲
MENU
ESC
ENTER
◄
►
▼
Thermo Scientific AquaSensors™ AV38 Local Display and Controller User Guide
36
Find the 2-Point Sample calibration in the CALIBRATE menu using the UP/DOWN arrows. Press ENTER to
initiate this calibration process. Once the calibration has been initiated it can be aborted by pressing the
escape key before the process is completed.
≡Calibrate
►2-Point Sample
►Temperature
◄Exit
▲
MENU
ESC
ENTER
◄
►
▼
The sensor should be rinsed in DI water and wiped clean to remove any process solution that would otherwise
contaminate the sample. When the 2-point sample calibration procedure is started, the analog output is placed
into hold mode and the user is prompted to place the sensor in the first sample solution. The sensor value is
dynamically updated during this step as shown in Figure 13.
4.07 pH
Sensor ready?
▲
MENU
ESC
ENTER
◄
►
▼
Figure 13: Dynamic display of the pH value during calibration.
It is best to let the sensor value stabilize in the sample solution before initiating the calibration. If the
temperature of the sensor is very different from the temperature of the sample, allow some time for the
temperature to equilibrate before initiating the calibration. After the sensor is placed in the first sample, the
ENTER key is pressed to start the calibration of the first point.
When the user presses enter, the current sensor value is captured and shown in the edit field of the next screen
as shown in Figure 14.
2-Point Sample?
( 4.07) pH
▲
MENU
ESC
ENTER
◄
►
▼
Figure 14: The pH calibration edit screen.
Thermo Scientific AquaSensors™ AV38 Local Display and Controller User Guide
37
The calibration value can be adjusted with the UP and DOWN arrow keys. After the calibration value is
adjusted, the enter key is pressed to calibrate the DataStick as shown in Figure 15.
1-Point Sample?
( 4.00) pH
▲
MENU
ESC
ENTER
◄
►
▼
Figure 15: Entering the pH calibration value.
After the first calibration point has been stored, the user is prompted to place the sensor in the second sample.
The sensor should be rinsed in DI water and wiped clean before it is placed in the second sample.
7.09 pH
In 2nd solution?
▲
MENU
ESC
ENTER
◄
►
▼
After the sensor is placed in the second sample, the ENTER key is pressed to start the calibration of the
second point.
2-Point Sample
Calibrating...
▲
MENU
ESC
ENTER
◄
►
▼
After the second calibration point has been stored, the user is prompted to confirm a successful calibration
procedure.
2-Point Sample
Confirm cal OK
▲
MENU
ESC
ENTER
◄
►
▼
Thermo Scientific AquaSensors™ AV38 Local Display and Controller User Guide
38
When the enter key is pressed to acknowledge that the calibration was successful, the analog output is placed
into active mode and the monitoring of sensor and temperature values is resumed. This successfully
completes the 2-point sample calibration procedure.
7.00 pH
30.8 °C
DS1:
AB
6
▲
MENU
ESC
ENTER
◄
►
▼
If an error occurs during calibration, the reason for the failure is shown.
2-Point Sample
Not stable
▲
MENU
ESC
ENTER
◄
►
▼
4.6. Zero Calibrate (Sensor Type: Conductivity, DO, Ozone, Drinking Water Turbidity, Raw Water
Turbidity, Suspended Solids)
The complete Calibrate menu for conductivity is shown in Figure 16. The same calibration sequence also
applies to dissolved oxygen, ozone, drinking water turbidity, raw water turbidity, and suspended solids.
From the Calibrate menu, use the UP/DOWN arrows to display ZERO calibration. Press ENTER to select.
≡Calibrate
►Zero
►1-Point Sample
►Temperature
◄Exit
MENU
ESC
ENTER
▲
◄
►
▼
Figure 16: The complete calibrate menu for conductivity.
Be sure conductivity sensors are dry and suspended away from objects that could affect the measurement in
air. Press ENTER to initiate zero calibration.
0.16 µS/cm
Sample in Air?
▲
MENU
ESC
ENTER
◄
►
▼
Thermo Scientific AquaSensors™ AV38 Local Display and Controller User Guide
39
A zero calibration may take some time, as the zero must be calibrated over a wide dynamic range. During this
process the Calibrating… message is shown in Figure 17.
Zero
Calibrating...
▲
MENU
ESC
ENTER
◄
►
▼
Figure 17: Zero is Calibrating….
When the zero calibration is complete the user will be asked to confirm the result with the ENTER key.
Zero
Confirm cal OK?
▲
MENU
ESC
ENTER
◄
►
▼
After pressing ENTER to confirm Calibration is okay, the Measure screen will be displayed.
0.0005 µS/cm
AB
13.1 °C
DS1: 6
▲
MENU
ESC
ENTER
◄
►
▼
If an error occurs during calibration, the reason for the failure is shown.
Zero
Not stable
▲
MENU
ESC
ENTER
◄
►
▼
Thermo Scientific AquaSensors™ AV38 Local Display and Controller User Guide
40
Press ENTER to acknowledge the calibration failure and return to the measure screen.
0.005 µS/cm
13.1 °C
DS1:
AB
6
▲
MENU
ESC
ENTER
◄
►
▼
4.7. Air Calibration (Sensor Type: Dissolved Oxygen)
An AIR CALIBRATION computes the oxygen content measured in air based on the setting for PRESSURE,
SALINITY and the measured temperature. View or change the Pressure and Salinity settings in the
CONFIGURE menu.
Initiate the AIR CALIBRATION process by pressing ENTER.
≡Calibrate
►Air
▲
MENU
ESC
ENTER
◄
►
▼
When the air calibration procedure is initiated, the analog output is placed into hold mode. The user is prompted
to place the sensor in air as shown in the Figure 18.
Air
Sensor in air?
▲
MENU
ESC
ENTER
◄
►
▼
Figure 18: The user is prompted to place the sensor in air.
After the sensor is placed in air, press the ENTER key to start the calibration.
Air
Calibrating...
▲
MENU
ESC
ENTER
◄
►
▼
Thermo Scientific AquaSensors™ AV38 Local Display and Controller User Guide
41
It takes between 5 seconds and two minutes depending on sensor and temperature measurement stability.
During this time, the calibration procedure can be aborted by pressing the escape key. See Section 4.3 for an
example of an aborted calibration procedure.
After the air calibration point has been stored, the user is prompted to confirm a successful calibration
procedure.
Air
Confirm cal OK
▲
MENU
ESC
ENTER
◄
►
▼
When the enter key is pressed, the analog output is placed into active mode and the monitoring of sensor and
temperature values is resumed. This successfully completes the air calibration procedure.
9.01 ppm
25.2 °C
DS1:
AB
6
▲
MENU
ESC
ENTER
◄
►
▼
If an error occurs during calibration that causes the procedure to fail, the reason for the failure is shown on the
screen.
Air
Calibrating...
▲
MENU
ESC
ENTER
◄
►
▼
Air
Not stable
▲
MENU
ESC
ENTER
◄
►
▼
Thermo Scientific AquaSensors™ AV38 Local Display and Controller User Guide
42
When the enter key is pressed, the calibrate menu is displayed. The analog output remains in hold mode. This
ends the air calibration procedure. The user has the option of repeating the procedure if desired.
≡Calibrate
►Air
▲
MENU
ESC
ENTER
◄
►
▼
4.8. Temperature 1-Point Sample Calibration
Press the ENTER key from the TEMPERATURE calibration menu to initiate the calibration process.
≡Calibrate
►Temperature
▲
MENU
ESC
ENTER
◄
►
▼
When the temperature calibration procedure is started, the analog output is placed into hold mode. The
user is prompted to prepare the sensor. The sensor value is dynamically updated during this step as
shown in Figure 4.13.
25.3 °C
Sensor ready?
▲
MENU
ESC
ENTER
◄
►
▼
Figure 4.13: The temperature value is dynamically updated while the user is prompted to prepare the sensor.
When the sensor is ready, the ENTER key is pressed and the user is presented with a calibration value for
editing as shown in Figure 19. Please note that it is best to calibrate temperature with the sensor head in an
aqueous solution. Response time for calibration in air is slower.
Temperature?
( 25.3) °C
▲
MENU
ESC
ENTER
◄
►
▼
Figure 19: The temperature calibration value is presented for editing.
Thermo Scientific AquaSensors™ AV38 Local Display and Controller User Guide
43
When the value has been edited as desired, the enter key is pressed and the calibration of the point is started.
Temperature?
( 25.0) °C
▲
MENU
ESC
ENTER
◄
►
▼
During this time, the calibration procedure can be aborted by pressing the escape key. See Section 4.3 for
examples of an aborted calibration procedure.
Temperature
Calibrating...
▲
MENU
ESC
ENTER
◄
►
▼
After the calibration point has been stored, the user is prompted to confirm a successful calibration procedure.
Temperature
Confirm cal OK
▲
MENU
ESC
ENTER
◄
►
▼
When the enter key is pressed, the analog output is placed into active mode and the monitoring of sensor and
temperature values is resumed. This successfully completes the temperature calibration procedure.
7.01 pH
25.0 °C
DS1:
AB
6
▲
MENU
ESC
ENTER
◄
►
▼
Thermo Scientific AquaSensors™ AV38 Local Display and Controller User Guide
44
If an error occurs during calibration that causes the procedure to fail, the reason for the failure will be shown.
Temperature
Calibrating...
▲
MENU
ESC
ENTER
◄
►
▼
Temperature
Offset too high
▲
MENU
ESC
ENTER
◄
►
▼
When the enter key is pressed, the calibrate menu is displayed. This ends the temperature calibration
procedure. The user has the option of repeating the procedure if desired.
≡Calibrate
►Temperature
▲
MENU
ESC
ENTER
◄
►
▼
Thermo Scientific AquaSensors™ AV38 Local Display and Controller User Guide
45
5.
CONFIGURE MENU
The configuration menu allows viewing and editing of sensor constants and will depend on the type of sensor
head that is installed in the DataStick.
Table 4: The Configure menu.
Configuration Type
Sensor Filter
Sensor Units
Temperature Filter
Temperature Units
Buffer Standard
Cell Constant
Reference Temperature
Compensation Slope
TDS Conversion Factor
Salinity
Pressure
Concentration Table
Exit
Function
Filter main parameter in seconds. Set zero
seconds for no filter. Set up to 100 seconds for
time to reach 90% of final value. 1 to 5 seconds
should be optimal for most applications.
PH: pH or mV
ORP: mV
Conductivity: µS/cm, %, TDS, or MΩ•cm
D.O./Ozone/Chlorine: ppm
Drinking Water Turbidity, Raw Water Turbidity:
NTU
Suspended Solids: mg/l, %, or ppm
Filter temperature in seconds. Set zero seconds
for no filter. Set up to 100 seconds for time to
reach 90% of final value. 1 to 5 seconds should
be optimal for most applications. The
temperature filter value should generally be set to
the same value as the sensor filter.
Select Celsius or Fahrenheit.
Select 4, 7, 10 pH or DIN Standard (1.09, 4.65,
6.79, 9.23 and 12.75).
View or change Cell constant
Conductivity reference temperature is set from
0 °C to 100 °C
Slope is set from 0 to 9.9%/°C
A factor is set from 0.01 to 99.99 ppm/µS/cm to
convert measured conductivity to ppm
Salinity compensation is set from 0 to
999.9 mS/cm
Pressure is set from 539.2 to 792.4 mmHg
A 10-point concentration table is entered to
convert measured conductivity into %
concentration
Returns to the measure screen
Sensors Supported
All
All
All
All
pH
Two-Electrode Conductivity
Conductivity
Conductivity
Conductivity
D.O., Ozone
D.O., Ozone
Conductivity
Thermo Scientific AquaSensors™ AV38 Local Display and Controller User Guide
46
5.1. Main Configure Menus
Configure menus dynamically change depending on the DataStick sensor type connected. Generally, all
configure screens allow viewing and editing values in parentheses. Examples of top-level menus for
conductivity, pH, DO and Turbidity are shown below.
The complete configure menu for Conductivity is shown in Figure 20.
≡Configure
►Sensor Filter
►Sensor Units
►Temp Filter
►Temp Units
►Cell Constant
►Reference Temp
►Comp Slope
►TDS Conv Factor
►Conc Table
◄Exit
Figure 20: The complete configure menu for conductivity.
The complete configure menu for pH is shown in Figure 21.
≡Configure
►Sensor Filter
►Sensor Units
►Temp Filter
►Temp Units
►Buffer Standard
◄Exit
Figure 21: The complete configure menu for pH.
The complete configure menu for D.O., Ozone and Chlorine is shown in Figure 22.
≡Configure
►Sensor Filter
►Sensor Units
►Temp Filter
►Temp Units
►Salinity
►Pressure
◄Exit
Figure 22: The complete configure menu for D.O., Ozone and Chlorine.
The complete configure menu for turbidity is shown in Figure 23.
≡Configure
►Sensor Filter
►Temp Filter
►Temp Units
◄Exit
Figure 23: The complete configure menu for turbidity.
Thermo Scientific AquaSensors™ AV38 Local Display and Controller User Guide
47
5.2. Navigating Sensor Filter Configuration
The following sequence shows how the sensor filter configuration is viewed and set. The gray key is pressed to
move to the next screen. This sequence is an example for all configuration menus.
From the Measure Screen, Press the MENU key:
991.3 µS/cm
30.8 °C
DS1:
AB
6
▲
MENU
ESC
ENTER
◄
►
▼
Scroll to the CONFIGURE Menu with the UP and DOWN arrows:
≡Main Menu
►Calibrate
▲
MENU
ESC
ENTER
◄
►
▼
Select ENTER when CONFIGURE is displayed:
≡Main Menu
►Configure
▲
MENU
ESC
ENTER
◄
►
▼
Scroll to SENSOR FILTER using the UP and DOWN arrows:
≡Configure
►Sensor Filter
▲
MENU
ESC
ENTER
◄
►
▼
Thermo Scientific AquaSensors™ AV38 Local Display and Controller User Guide
48
Select SENSOR FILTER using the ENTER key:
≡Configure
►Sensor Filter
▲
MENU
ESC
ENTER
◄
►
▼
Use the UP and DOWN arrow keys to change the number in parentheses to the desired sensor filter (in
seconds):
Sensor Filter?
( 1) s
▲
MENU
ESC
ENTER
◄
►
▼
Press the ENTER key to keep the filter setting currently in parentheses. Or press the ESC key to leave the
filter setting unchanged.
Sensor Filter?
( 5) s
▲
MENU
ESC
ENTER
◄
►
▼
After editing or viewing the filter setting return to the Main Configure screen with the ESC key.
≡Configure
►Sensor Filter
▲
MENU
ESC
ENTER
◄
►
▼
When finished with MENU functions return to the Main Configure screen with the ESC key.
≡Main Menu
►Configure
▲
MENU
ESC
ENTER
◄
►
▼
Thermo Scientific AquaSensors™ AV38 Local Display and Controller User Guide
49
Observe the response time of the measurement. The temperature filter should also be changed to the same
filter value.
991.3 µS/cm
30.8 °C
DS1:
AB
6
▲
MENU
ESC
ENTER
◄
►
▼
5.3. Navigating the User-Entered Concentration Table Screens
The DataStick can convert measured conductivity into % concentration based on a 10-point user-entered
concentration table. This feature is available for contacting and toroidal conductivity only. To enable this
feature, set the Sensor Units to % in the Configure menu. The measured values will be displayed as shown
below:
6.971 %
30.8 °C
DS1:
1
▲
MENU
ESC
ENTER
◄
►
▼
The table can be accessed using the AV38’s user interface. Each point in the table is composed of two
coordinates, conductivity and concentration. The conductivity coordinate is also known as the X coordinate,
and the concentration coordinate is also known as the Y coordinate.
Concentration Table Requirements
The table can have up to 10 points. If the table has fewer than 10 points, the last point in the table must be set
to 0 µS/cm and 0%. Thus a typical table with four points will have the form shown in Table 5:
Table 5: A typical concentration table with four points.
Point
1
2
3
4
5
6
7
8
9
Conductivity
X Coordinate
(µS/cm)
0
1,000
5,000
10,000
0
0
0
0
0
Concentration
Y Coordinate
(%)
0
10
50
99.99
0
0
0
0
0
Thermo Scientific AquaSensors™ AV38 Local Display and Controller User Guide
50
10
0
0
Note: The coordinate values of 0 µS/cm and 0% in point 5 indicate the end of the table.
Because point 5 is the end of the table, points 6-10 are ignored.
•
The conductivity coordinates must be monotonic 2 over the range of interest and increasing in value and be
between 0 and 2,000,000 µS/cm.
•
The concentration coordinates must also be monotonic2 over the range of interest, but can be either
increasing or decreasing and must be between 0 and 99.99%.
Before entering the concentration table values, use Table 6 to record the values to be entered.
Table 6: Record the table values here before entering them.
Point
Conductivity
X Coordinate
(µS/cm)
Concentration
Y Coordinate
(%)
1
2
3
4
5
6
7
8
9
10
2
Monotonic means consistently increasing and never decreasing or consistently decreasing and never increasing in value.
Thermo Scientific AquaSensors™ AV38 Local Display and Controller User Guide
51
Entering the Concentration Table
The concentration table editing screen can be reached by navigating to the Configure menu, scrolling down to
the Conc Table item, and then pressing Enter.
≡Configure
►Conc Table
▲
MENU
ESC
ENTER
◄
►
▼
When the Conc Table screen is first entered, all ten points in the table are read. While the points are being
read, the screen counts down from 10 to 1.
Conc Table
Please wait... 6
▲
MENU
ESC
ENTER
◄
►
▼
After all ten points have been read, the conductivity coordinate for the first point is shown.
Point 1 X Data >
0.0 µS/cm
▲
MENU
ESC
ENTER
◄
►
▼
To view the corresponding concentration coordinate, press the RIGHT arrow key.
Point 1 Y Data <
0.00%
▲
MENU
ESC
ENTER
◄
►
▼
Thermo Scientific AquaSensors™ AV38 Local Display and Controller User Guide
52
To view the second point in the table, press the DOWN arrow key.
Point 2 Y Data <
99.99%
▲
MENU
ESC
ENTER
◄
►
▼
All of the points in the table can be reviewed by using the UP, DOWN, LEFT, and RIGHT arrow keys.
To edit a coordinate, navigate to the desired coordinate using the UP, DOWN, LEFT, and RIGHT arrow keys
and press ENTER. The present value of the coordinate will appear within parentheses. The parentheses
indicate that the value can be edited.
Point 3 X Value?
(
0.0) µS/cm
▲
MENU
ESC
ENTER
◄
►
▼
Use the UP, DOWN, LEFT, and RIGHT arrow keys to change the coordinate value as desired.
•
The UP and DOWN arrow keys increment and decrement, respectively, the value by a small amount.
Pressing and holding the UP or DOWN key increments and decrements the value by a slightly larger
amount and at a higher rate. These keys provide a fine adjustment.
•
The RIGHT and LEFT arrow keys increment and decrement, respectively, the value by a large amount.
Pressing and holding the RIGHT or LEFT arrow key increments and decrements the value by an even
larger amount and at a higher rate. These keys provide a coarse adjustment.
When the desired points have been entered, press the ESC key. You will be prompted to exit the table.
Conc Table
Exit table?
▲
MENU
ESC
ENTER
◄
►
▼
Thermo Scientific AquaSensors™ AV38 Local Display and Controller User Guide
53
Press ENTER to exit the table or press ESC to return to the table to do more editing. If ENTER is pressed and
one or more points have been changed, you will be prompted to save the changes.
Conc Table
Save changes?
▲
MENU
ESC
ENTER
◄
►
▼
Press ENTER to save the changes or ESC to discard them.
If the changes do not meet the Concentration Table Requirements listed above, you will be informed.
Conc Table
Confirm failure
▲
MENU
ESC
ENTER
◄
►
▼
To abort the changes, press the ESC key and then press the ENTER key to confirm the abort.
Conc Table
Confirm abort
▲
MENU
ESC
ENTER
◄
►
▼
To return to the edit screen and make corrections, press the ENTER key.
Point 2 Y Data <
99.99%
▲
MENU
ESC
ENTER
◄
►
▼
Thermo Scientific AquaSensors™ AV38 Local Display and Controller User Guide
54
A summary of the actions of the various keys for the viewing and editing modes is shown in Table 7.
Table 7: Summary of key actions.
Mode
Action
Scroll X and Y
Scroll point
Viewing Edit coordinate
(enter editing mode)
Leave the table
Change coordinate
value
Save new value and
return to viewing
Editing mode
Leave coordinate
value unchanged
(return to viewing
mode)
Press
LEFT and RIGHT arrow
UP and DOWN arrow
ENTER
ESC
UP and DOWN (fine change)
LEFT and RIGHT (gross change)
ENTER
ESC
Default Concentration Table
The default concentration table is shown in Table 8:
Table 8: The default concentration table.
Point
1
2
3
4
5
6
7
8
9
10
Conductivity
X Coordinate
(µS/cm)
0
20,000
0
0
0
0
0
0
0
0
Concentration
Y Coordinate
(%)
0
99.99
0
0
0
0
0
0
0
0
Using the default table, if the measured conductivity is 10,000 µS/cm, then the concentration will be 50%.
Thermo Scientific AquaSensors™ AV38 Local Display and Controller User Guide
55
6.
HOST COMMUNICATIONS
The AV38 can be set up to communicate with a Host Computer system. The protocol selected is independent
of the Modbus protocol used by the AV38 to communicate with the DataSticks. When using Host
Communications, please refer to the selected communications manual for specific protocol setup and use.
Table 9: Host protocol vs. user's manual.
Host Protocol
Modbus RTU
DeviceNet
RS-232
Profibus
Other
User’s Manual to Set up Address, Baud Rate and Parity
Modbus Communications Adapter Users Manual (MAN021CA)
DeviceNet Communications Adapter Users Manual (MAN022CA)
DataStick Instruction Manual (MAN011DS): 9600 bps, no parity, 8 data bits, 1 stop bit
Profibus-to-DataStick Communications Adapter Instruction Manual (MAN033CA).
Look for addendums on setting up other protocols that may be configured.
When Host Communications hardware is present, a host computer can communicate with the DataSticks
connected to the AV38.
There are two basic host communication modes; Gateway and Analyzer. When using either mode, it is better
to program the host device to respond to events rather than perform desired operations based on elapsed time.
This is because there is a limited bandwidth between the AV38 and the DataSticks connected to it, and any
host commands not handled by the AV38 must be forwarded to a DataStick. If the host makes a request too
often, the system will slow down. Hard-coded timers are rigid, and it is difficult for the programmer to know how
often is too often. If the host waits for a response from the AV38 before sending the next request, slow-downs
can be avoided and the system will be more flexible.
Gateway Mode
Gateway mode is selected by setting the measure screen to Gateway using the LEFT and RIGHT arrow keys.
This disables all output and relay functions and allows the host computer to access all DataSticks connected to
the AV38 for remote measurement, calibration, configuration and diagnostics.
It is not possible to enter Gateway mode using the RIGHT or LEFT arrow keys when the Measurement is
ppmFCL2 (free chlorine concentration). This is because the AV38 needs to continuously acquire data from the
chlorine DataStick and, if necessary, the pH DataStick, in order to perform the free chlorine concentration
calculation. To enter Gateway mode in this case, first set the Chlorine Config | Measurement to ppmHOCL. If
a pH-compensated free chlorine concentration measurement is required, the host will have to perform the
calculation.
Analyzer Mode
It is also possible to communicate digitally with the DataSticks in the Analyzer mode where analog outputs and
relays remain active. In this mode it is possible for the host computer to communicate only with the two
DataSticks being displayed locally, i.e., mapped to the AV38’s two channels.
Thermo Scientific AquaSensors™ AV38 Local Display and Controller User Guide
56
7.
DATASTICK COMMUNICATIONS SETUP
Up to 247 DataSticks can be connected to a single AV38. Any two of them can be selected for local display,
analog output reporting and relay control. The DataStick station number that is selected is displayed in the
lower right corner of the measure screen. If “DataStick Absent” is displayed in the measure screen, it is likely
that the DataStick connected to the AV38 is set up for the wrong station number, Baud rate or parity.
The default communications settings for all Modbus Communications Adapters are:
1. DS1 Station set to Modbus Station 1
2. DS2 Station set to Modbus Station 1
3. Data Type of Little Endian Word Swap, 2
4. Baud rate of 19.2 kbps
5. Parity is ODD
To change the Station Number, Data Type, Baud rate or Parity in a DataStick, refer to the MODBUS
Communications Adapter User’s Manual (PN: MAN021CA-4). Thermo Fisher Scientific will provide custom
settings at the factory on request. This is useful when more than one DataStick is being connected to the
AV38.
The AV38 DataStick Communications menu is used to set the parameters that the AV38 uses to communicate
with the DataStick. The complete DataStick Comms menu is shown in Figure 24.
≡DataStick Comms
►Set DS1 Station
►Set DS2 Station
►SetData Type
►Set Baud
►Set Parity
◄Exit
Figure 24: The complete DataStick Comms menu.
7.1.
Setting DataStick Station Number
The DataStick Station Number used by the AV38 is displayed in the lower right corner of the MEASURE
screen. It can be viewed or changed in the DataStick Comms Menu by selecting “SET DS1 Station ” or “Set
DS2 Station” with the ENTER key. The default Station Number for both measure screens is 1.
≡DataStick Comms
►Set DS1 Station
▲
MENU
ESC
ENTER
◄
►
▼
Thermo Scientific AquaSensors™ AV38 Local Display and Controller User Guide
57
Edit the Station number in parentheses using the UP and DOWN arrows. Select a new number with the
ENTER key. To be sure that a new number is NOT selected, press the ESC key to leave the station number
unchanged. The station number selected must match the number programmed into the Modbus Comms
Adapter of the DataStick wired to the AV38.
DS1 Station?
( 1)
▲
MENU
ESC
ENTER
◄
►
▼
7.2.
Setting Data Type
All DataSticks connected to the AV38 must be set up with the same Data Type. To view or edit the current
AV38 Data Type setting, press ENTER on the Data Type screen as shown. The default setting is Big Endian 2.
≡DataStick Comms
►Set Data Type
1
MENU
ESC
ENTER
◄
►
▼
Use the UP/DOWN arrows to edit the AV38 Data Type. “Big Endian 2” and “Little Endian/Word Swap 1” are the
two data types supported in the AV38. The default data type is “Little Endian Word Swap 1” as it is most
commonly used. If measurement data is displayed but does not make sense then it is very likely that the Data
Type should be switched.
Data Type?
(Big Endian
MENU
ESC
ENTER
2)
◄
►
Select a new data type with the ENTER key. To be sure that a new data type is NOT selected, press the ESC
key to leave the data type unchanged. The data type selected must match the data type programmed into the
Modbus Comms Adapter of the DataStick wired to the AV38.
Thermo Scientific AquaSensors™ AV38 Local Display and Controller User Guide
58
7.3.
Setting DataStick Baud Rate
All DataSticks connected to the AV38 must be set up with the same Baud rate. To view or edit the current
AV38 Baud rate setting, press ENTER on the SET BAUD screen as shown. The default setting is 19.2 kbps.
≡DataStick Comms
►Set Baud
▲
MENU
ESC
ENTER
◄
►
Use the UP/DOWN arrows to edit the AV38 Baud rate. Baud rate options include the following (kbps): 1.2, 2.4,
4.8, 9.6, 14.4, 19.2, 28.8, 38.4, 57.6, 76.8, 115.2 and 230.4. The Baud rate selected in the AV38 must match
the Baud rate programmed in all connected DataSticks. Press ENTER to select a new value. Press ESC to
leave the Baud rate unchanged.
DataStick Baud?
(19.2 kbps
)
▲
MENU
ESC
ENTER
◄
►
▼
7.4.
Setting DataStick Parity
All DataSticks connected to the AV38 must be set up with the same parity. To view or edit the current AV38
parity setting, press ENTER on the SET PARITY screen as shown. The default setting is ODD.
≡DataStick Comms
►Set Parity
▲
MENU
ESC
ENTER
◄
►
▼
Use the UP/DOWN arrows to edit the AV38 parity. Parity options include: ODD, EVEN and NONE. The parity
selected in the AV38 must match the parity programmed in all connected DataSticks. Press ENTER to select a
new value. Press ESC to leave the parity unchanged.
DS Parity?
(Odd
)
▲
MENU
ESC
ENTER
◄
►
▼
Thermo Scientific AquaSensors™ AV38 Local Display and Controller User Guide
59
8.
CHLORINE CONFIGURATION MENU
When configuring an AV38 for Chlorine measurement, the chlorine DataStick can be connected to channel 1
(DS1) or channel 2 (DS2). If a pH DataStick is to be used for compensation, it must be connected to the other
channel. For example, if a chlorine DataStick is connected to channel 1, then the pH DataStick must be
connected to channel 2.
A Chlorine DataStick connected at Station 1, will bring up a Chlorine Configuration selection in the main menu.
It will allow the measurement value to be selected as free chlorine or HOCl concentration. If free chlorine
concentration is selected, then the pH must be known. If the pH value of the process is constant, the Chlorine
Config menu provides a means to enter a fixed value for pH. If the pH value varies, then the pH can be
measured with a second DataStick sensor connected to the AV38. If a pH DataStick is present, then the
derivation of free chlorine concentration can be made by the AV38 using the HOCL concentration and
temperature measurement from the Chlorine DataStick, and the pH measurement from the pH DataStick. This
is done by selecting “pH DataStick” in the pH Source screen (under Chlorine Config). If a pH DataStick is not
detected by the AV38, the only option under pH Source will be Fixed pH, where the value of the pH can entered
manually.
≡Chlorine Config
►Measurement
►pH Source
►Fixed pH Value
◄Exit
▲
MENU
ESC
ENTER
◄
►
▼
The “Measurement” screen provides a selection of Free Chlorine or HOCl concentration.
Measurement?
(ppmFCL2)
(ppmHOCL)
The “pH Source” screen provides a way to select the source of the pH value in the chlorine calculation. If a pH
DataStick is detected by the AV38, this selection becomes available. If a pH DataStick is detected by the
AV38, then “pH DataStick” can also be selected. When this is done, the measured pH value is used to
calculate the free chlorine concentration.
Note: If a pH DataStick is used to calculate the free chlorine concentration, the
sensor units must be pH. If they’re not, then the concentration calculation will be
done using the value entered through the Fixed pH Value screen. If the free chlorine
concentration measured by the AV38 is not as expected, please check to see if this
is the case.
PH Source?
(Fixed pH)
Thermo Scientific AquaSensors™ AV38 Local Display and Controller User Guide
60
The “Fixed pH Value” screen provides a way to set a fixed pH value that can be used to calculate free chlorine
from the HOCl measurement. This single fixed entry can be used when a pH DataStick is not present or when
the process pH is tightly controlled to a known value. The default value is 7.00 pH.
If the sensor units on the pH DataStick are changed from pH to mV, the AV38’s pH Source will automatically be
changed to “Fixed pH”. The same thing will happen if the pH DataStick is exchanged for a DataStick of a
different type, DO, for instance. This is because the calculation of the free chlorine concentration requires a pH
value.
It is not possible to enter Gateway mode using the RIGHT or LEFT arrow keys when the Measurement is
ppmFCL2 (free chlorine concentration). This is because the AV38 needs to continuously acquire data from the
chlorine DataStick and, if necessary, the pH DataStick, in order to perform the free chlorine concentration
calculation.
Thermo Scientific AquaSensors™ AV38 Local Display and Controller User Guide
61
9.
HOLD OUTPUTS SCREEN
The HOLD OUTPUTS function is used when it is desired to hold the present values of the 4-20mA analog
outputs, PID and relays for an extended period of time. This feature can be used during maintenance. There is
no timeout feature for this function; t will stay active until it is removed.
Use the UP/DOWN arrows to select Hold Outputs then press enter.
≡Main Menu
►Hold Outputs
▲
MENU
ESC
ENTER
◄
►
▼
Use the UP/DOWN arrows to select yes or no, then press enter.
Hold Outputs?
(No
)
▲
MENU
ESC
ENTER
◄
►
▼
Press ESC to return to the Measure screen
991.3 µS/cm
AB
30.8 °C
HDS1: 6
▲
MENU
ESC
ENTER
◄
►
▼
Note that an upper-case H will appear between the temperature units and the station address indicating that the
unit is holding the outputs. Outputs will be held until deselected.
Thermo Scientific AquaSensors™ AV38 Local Display and Controller User Guide
62
10.
ANALOG OUTPUTS
Up to two 4 to 20 milliamp analog outputs are provided for traditional data reporting. The selectable features in
the analog output menus are the same regardless of the type of sensor head that is installed in the DataStick.
While the AV38 is being used to calibrate the DataStick, its analog output is held at its present value.
When a sensor head of the same type is replaced in a DataStick, analog output and relay settings are
maintained. If a sensor head of a new type is installed, analog output and relay settings are automatically set to
default values.
The analog output menu is used to scale the analog output in the AV38. The following selections are available
for each output:
¾ PARAMETER is used to select SENSOR 1, SENSOR 2, TEMPERATURE 1, TEMPERATURE 2 or PID
CONTROLLER (if installed with pH sensor) to drive the analog output. Note that if PID is selected,
setting up 4 mA and 20 mA values is not necessary or available. Settings for PID are set up separately
in the PID section of the main menu.
¾ SET 4 mA VALUE is used to edit the lowest sensor or temperature value to be reported. The default
value will be the lowest possible reading for the parameter selected.
¾ SET 20 mA VALUE is used to edit the highest sensor or temperature value to be reported. The default
value will be the highest possible reading for the parameter selected.
¾ The CALIBRATE feature is used to fine-tune the milliamp readings when necessary. An ammeter is
connected in series with the load for adjustment of the 4 mA value and the 20 mA value.
10.1. Assigning 4 mA and 20 mA parameter values
Press MENU from the Measure screen
991.3 µS/cm
30.8 °C
DS1:
AB
6
▲
MENU
ESC
ENTER
◄
►
▼
Use the UP/DOWN arrows to select Analog Output (or Analog Output 1, Analog Output 2 depending on
hardware options).
≡Main Menu
►Calibrate
▲
MENU
ESC
ENTER
◄
►
▼
Thermo Scientific AquaSensors™ AV38 Local Display and Controller User Guide
63
Use the ENTER key to configure the Analog Output of choice. In this example Analog Output 1 is shown.
≡Main Menu
►Analog Output 1
▲
MENU
ESC
ENTER
◄
►
▼
Use the UP/DOWN arrows to scroll through the Analog Output configuration options of Set Parameter, Set 4
mA Value, Set 20 mA Value and Calibrate.
≡Analog Output 1
►Set Parameter
►Set 4mA Value
►Set 20mA Value
►Calibrate
◄Exit
Select SET 4 mA option with the ENTER key. Adjust the parameter value with the UP/DOWN arrow keys.
Press ENTER to accept the value in parentheses. Press ESC to leave the value unchanged.
Set 4mA Value
( 4.00) pH
▲
MENU
ESC
ENTER
◄
►
▼
Select SET 20 mA setting with the ENTER key. Adjust the parameter value with the UP/DOWN arrow keys.
Press ENTER to accept the value in parentheses. Press ESC to leave the value unchanged.
Set 20mA Value
( 8.00) pH
▲
MENU
ESC
ENTER
◄
►
▼
Thermo Scientific AquaSensors™ AV38 Local Display and Controller User Guide
64
10.2. Calibrating Analog Output Current
To calibrate the analog outputs, find the CALIBRATE option with the UP/DOWN arrow keys in the Analog
Output menu and press ENTER to select it.
≡Analog Output 1
►Calibrate
▲
MENU
ESC
ENTER
◄
►
▼
Connect an ammeter in series with the load and Select 4 mA Point with the ENTER key.
≡Calibrate A0 1
►4 mA Point
▲
MENU
ESC
ENTER
◄
►
▼
The ammeter should read exactly 4.00 mA. If not, adjust the value displayed on the meter using the AV38
UP/DOWN arrow keys. The number displayed in parentheses is in “counts” and should be within 20% of 2500.
Press ENTER to accept the value in parentheses. Press ESC to leave the value unchanged.
Cal 4 mA Point?
(2467)
▲
MENU
ESC
ENTER
◄
►
▼
From the Analog Output Calibrate Menu, use the UP/DOWN arrows to display the 20 mA Point. Select with the
ENTER key.
≡Calibrate A0 1
►20 mA Point
▲
MENU
ESC
ENTER
◄
►
▼
Thermo Scientific AquaSensors™ AV38 Local Display and Controller User Guide
65
The ammeter should read exactly 20.00 mA. If not, adjust the value displayed on the meter using the AV38
UP/DOWN arrow keys. The number displayed in parentheses is in “counts” and should be within 20% of
12,500. Press ENTER to accept the value in parenthesis. Press ESC to leave the value unchanged.
Cal 20 mA Point?
(12440)
▲
MENU
ESC
ENTER
◄
►
▼
From the Analog Output Calibrate Menu, Press ESC to move back up the MENU tree to the Measure screen.
≡Calibrate A0 1
►20 mA Point
▲
MENU
ESC
ENTER
◄
►
▼
Thermo Scientific AquaSensors™ AV38 Local Display and Controller User Guide
66
11.
PID CONTROLLER MENU
The PID Controller is present in the Main Menu list when a pH or conductivity DataStick is connected. Press
ENTER to select PID CONTROLLER.
≡Main Menu
►PID Controller
▲
MENU
ESC
ENTER
◄
►
▼
Use the UP/DOWN arrows to scroll the list of PID Controller options for viewing and editing.
≡PID Controller
►Set Algorithm
►Set Input
►Set Full-Scale
►Set Zero-Scale
►Set Setpoint
►Set Prop Gain
►Set Integ Gain
►Set Deriv Gain
►Set Trans Time
►Set Man Reset
►Manual Mode
◄Exit
MENU
ESC
ENTER
▲
◄
►
▼
Each of the PID controller options used to configure and tune the loop is shown below for a sensor type of pH.
Table 10: PID Controller functions for pH.
PID Function
Set Algorithm
Set Input
Set Full-Scale
Set Zero-Scale
Set Setpoint
Set Proportional Gain
Set Integral Gain
Set Derivative Gain
Set Transit Time 3
Set Manual Reset
Manual Mode
3
Edit Range
ISA or Velocity
Sensor 1 or Sensor 2
0 to 14 pH
0 to 14 pH
0 to 14 pH
–99.99 to +99.99
0.00 to 50.00 reps/min
0.00 to 10.00 seconds
0 to 9999 seconds
0.0% to 100%
Control: 0.0% to 100%
Default Setting
ISA
Sensor 1 (DS1)
14 pH (Do not change)
0 pH (Do not change)
7 pH
0.00 (+ is direct action, – is reverse action)
0.00 reps/min
0.00 seconds
0 seconds
0.0%
0.0% (Process value is displayed)
Transit Time is available only when the Algorithm is set to Velocity.
Thermo Scientific AquaSensors™ AV38 Local Display and Controller User Guide
67
Scroll through these configuration and tuning options with UP/DOWN arrows. Press ENTER to select an option
and view or edit the setting. Press ENTER to change setting or ESC to leave a setting unchanged. Note that in
the Manual Mode, the present pH value is displayed in the upper line of the screen and the Control Adjustment
is made in the lower line.
Each of the PID controller options used to configure and tune the loop is shown below for a sensor type of
contacting or electrodeless conductivity.
Table 11: PID Controller functions for conductivity.
PID Function
Set Algorithm
Set Input
Set Full-Scale
Set Zero-Scale
Set Setpoint
Set Proportional Gain
Set Integral Gain
Set Derivative Gain
Set Transit Time3
Set Manual Reset
Manual Mode
Edit Range
ISA or Velocity
Sensor 1 or Sensor 2
0 to 5000 µS/cm
0 to 5000 µS/cm
0 to 5000 µS/cm
–99.99 to +99.99
0.00 to 50.00 reps/min
0.00 to 10.00 seconds
0 to 9999 seconds
0.0% to 100%
Control: 0.0% to 100%
Default Setting
ISA
Sensor 1 (DS1)
2000 µS/cm (Do not change)
0 µS/cm
(Do not change)
1000 µS/cm
0.00 (+ is direct action, – is reverse action)
0.00 reps/min
0.00 seconds
0 seconds
0.0%
0.0% (Process value is displayed)
When the configuration and tuning settings are made, select PID as the Parameter for Analog Output 1 or
Analog Output 2.
Integral gain can be disabled by entering “0.00” to provide only PD controller action.
To quickly get to the PID controller set point for fine tuning, press the ENTER and RIGHT ARROW KEYS at the
same time from a measure screen. This feature is only present with the connected DataStick is configured for
pH, contacting conductivity or toroidal conductivity.
Thermo Scientific AquaSensors™ AV38 Local Display and Controller User Guide
68
12.
RELAYS
Two Form-C relays with normally open and normally closed contacts are available with the AV38. When relay
A is energized or activated, an “A” will appear in the upper right corner of the measure display. If relay B is
energized a “B” will appear as shown:
991.3 µS/cm
30.8 °C
DS1:
AB
6
▲
MENU
ESC
ENTER
◄
►
▼
When a sensor head of the same type is replaced in a DataStick, analog output and relay settings are
maintained. If a sensor head of a new type is installed, analog output and relay settings are automatically set to
default conditions.
The selectable features in the relay menus are the same regardless of the type of sensor head that is installed
in the DataStick. While the AV38 is being used to calibrate the DataStick, the relay is held in its present state.
Use the UP/DOWN arrows to scroll the relay option list. Press ENTER to select. Press ESC to move up a level
in the menu system.
≡Relay A
►Set Function
►Set Parameter
►Set Activation
◄Exit
The SET FUNCTION menu is used to configure a relay for ALARM, CONTROL or WASH functions. When
ALARM is selected, the relay activation is determined by low and high limits of the chosen measured
parameter. When CONTROL is selected, the relay activation is determined by a single set point. WASH is a
timer function and does not depend on the sensor or temperature measurements.
¾ First select the desired relay function: ALARM, CONTROL or WASH.
¾ Next, select the PARAMETER (Sensor 1, Sensor 2, Temperature 1, or Temperature 2) that drives the
relay if either Alarm or Control is selected. If Wash is selected, the relay operates as a timer.
Navigation from the Measure Menu (when this feature is installed):
1. Press MENU to display the Main Menu.
2. Scroll with the UP/DOWN arrows to view RELAY A or RELAY B.
3. Press ENTER to select the desired relay.
4. Scroll with the UP/DOWN arrows to view FUNCTION
5. Press ENTER to select Function and use the UP/DOWN arrows to select Alarm, Control or Wash.
6. Press ENTER to select Alarm, Control or Wash. Press ESC to leave the setting unchanged.
Thermo Scientific AquaSensors™ AV38 Local Display and Controller User Guide
69
7. Scroll with the UP/DOWN arrows to SET PARAMETER (unless Wash was selected).
8. Press ENTER to select SET PARAMETER and use the UP/DOWN arrows to select SENSOR or
TEMPERATURE to drive the relay.
9. Press ENTER to select Sensor or Temperature. Press ESC to leave the setting unchanged.
10. Scroll with the UP/DOWN arrows to SET ACTIVATION.
11. Press ENTER to select SET ACTIVATION and use the UP/DOWN arrows to scroll the list of activation
options. Select an option with the ENTER key. Edit the selected option with the UP/DOWN arrows.
Press ENTER to select the edited option or press ESC to leave the option unchanged.
12.1. Control Relay Activation
Selecting “Control” operates the relay in a control mode. Activation entries specific to a Control relay are:
•
Phase -- “High” sets the relay setpoint to respond to increasing measured value; “Low” assigns the
relay setpoint to respond to decreasing measured value.
•
Setpoint -- Sets the value at which the relay will turn on.
•
Deadband -- Sets the range in which the relay remains activated after the measured value
decreases below the setpoint value (High-phased relay) or increases above the setpoint value
(Low-phased relay).
•
Off-Delay -- Sets a time (0-999 seconds) to delay the relay from normally de-activating.
•
On-Delay -- Sets a time (0-999 seconds) to delay the relay from normally activating.
•
The “On-Delay” and “Off-Delay” settings may be used to help eliminate process “overshoot” when
there are long process pipe runs or delays in mixing.
If CONTROL is selected, the following activation options can be programmed in the ACTIVATION menu.
Table 12: Control relay functions.
CONTROL Function
Set Phase
Set Setpoint
Set Deadband
Set Off-Delay
Set On-Delay
Edit Range
High or Low
Min to Max scale
Min to Max scale
0 to 999 seconds
0 to 999 seconds
Default Setting
High
Max scale
Min scale
0 seconds
0 seconds
Thermo Scientific AquaSensors™ AV38 Local Display and Controller User Guide
70
12.2. Alarm Relay Activation
Selecting “Alarm” operates the relay in an alarm mode. Activation entries specific to an Alarm relay are:
•
Low Alarm -- Sets the value at which the relay will activate in response to decreasing measured value.
•
High Alarm -- Sets the value at which the relay will activate in response to increasing measured value.
•
Low Deadband -- Sets the range in which the relay remains activated after the measured value
increases above the low alarm value.
•
High Deadband -- Sets the range in which the relay remains activated after the measured value
decreases below the high alarm value.
•
Off-Delay -- Sets a time (0-999 seconds) to delay the relay from normally de-activating.
•
On-Delay -- Sets a time (0-999 seconds) to delay the relay from normally activating.
•
The “On-Delay” and “Off-Delay” settings may be used to help eliminate process “overshoot” when there
are long process pipe runs or delays in mixing.
If ALARM is selected, the following activation options can be programmed in the ACTIVATION menu.
Table 13: Alarm relay functions.
ALARM Function
Set Low Alarm
Set High Alarm
Set Low Deadband
Set High Deadband
Set Off-Delay
Set On-Delay
Edit Range
Min to Max scale
Min to Max scale
Min to Max scale
Min to Max scale
0 to 999 seconds
0 to 999 seconds
Default Setting
Min scale
Max scale
0
0
0 seconds
0 seconds
Thermo Scientific AquaSensors™ AV38 Local Display and Controller User Guide
71
12.3. Wash Relay Activation
A wash relay activates periodically for a specified length of time. It is assumed that the wash relay is connected
to some kind of automatic cleaning apparatus attached to a DataStick. While a wash relay is activated, the
analog outputs and relays are held because it is assumed that a DataStick is being washed and the sensor and
temperature values are not valid. A wash relay is controlled by the corresponding Interval, Duration, and Off
Delay. The Wash Cycle is disabled by setting the Interval to 0.
If WASH is selected, the following activation options can be programmed in the ACTIVATION menu.
Table 14: Wash relay functions.
WASH Function
Set Interval
Set Duration
Set Off-Delay
Edit Range
0.0 to 999.9 minutes
0 to 999 seconds
0 to 999 seconds
Default Setting
0.0 minutes (disabled)
10 seconds
5 seconds
The wash cycle is shown in Figure 25.
Time
Activated
Duration
De-activated
Off
Delay
Interval
Outputs held
Outputs active
Power-up
Figure 25 The wash cycle showing when the relay is activated and the outputs are held.
•
At power-up, if the Interval value is greater than zero, the wash cycle is started by placing the outputs
in hold mode, activating the wash relay, and starting the duration counter.
•
When the duration counter expires, the relay is de-activated, and the off-delay counter is started.
•
When the off-delay counter expires, the outputs are returned to the active mode.
•
The wash cycle repeats each time the interval counter expires.
Thermo Scientific AquaSensors™ AV38 Local Display and Controller User Guide
72
•
The wash cycle is started if the Interval value is changed to a value greater than 0.
•
The wash cycle is stopped if the Interval value is changed to 0.
•
If the Duration is longer than the Interval, the wash relay will remain activated.
•
If the Off Delay is longer than the Interval, the outputs will remain in hold mode.
When the menu key is pressed, the state of the wash relays is recorded before they are de-activated, and the
interval, duration and off-delay counters are suspended. When a measure screen is active once again, the
state of the wash relays is restored, and the counters resume counting.
If the Interval is changed, the new value will take effect the next time the interval counter expires.
If the Duration is changed, the new value will take effect the next time the interval counter expires.
If the Off Delay is changed, the new value will take effect the next time the duration counter expires.
If the wash cycle is in the duration portion and the user navigates to the analog output calibration screen, the
analog outputs will be switched to active mode. Upon leaving the analog output calibration screen, the analog
outputs will be returned to hold mode.
Thermo Scientific AquaSensors™ AV38 Local Display and Controller User Guide
73
13.
DIAGNOSE MENU
The diagnose menu displays diagnostic information about the DataStick measurement system.
Enter the Menu with the MENU key. Scroll the menu options with the UP/DOWN arrows. The Diagnose menu
is near the bottom of the list but appears only if a pH sensor head is installed in the DataStick body.
≡Main Menu
►Diagnose
▲
MENU
ESC
ENTER
◄
►
▼
Press ENTER again to select the “Sensor Slope” menu.
≡Diagnose
►Sensor Slope
▲
MENU
ESC
ENTER
◄
►
▼
View the pH DataStick’s sensor slope.
Sensor Slope:
-59.7 mV/pH
▲
MENU
ESC
ENTER
◄
►
▼
Exit the screen by pressing ENTER or ESC.
If the DataStick with which the AV38 is communicating does not support this feature, the AV38 will indicate that
the information is not available.
Sensor Slope:
Not available.
▲
MENU
ESC
ENTER
◄
►
▼
DataSticks with D3.22 or later firmware support this feature.
Thermo Scientific AquaSensors™ AV38 Local Display and Controller User Guide
74
14.
HELP MENU
The help menu displays the product name and the firmware version of the AV38.
Enter the Menu with the MENU key. Scroll the menu options with the UP/DOWN arrows. The Help menu is
second to last. Press ENTER to select the HELP menu.
≡Main Menu
►Help
▲
MENU
ESC
ENTER
◄
►
▼
Press ENTER again to select the “About” menu.
≡Help
►About
▲
MENU
ESC
ENTER
◄
►
▼
View the AV38 firmware version number.
About:
AV38-BB0A, V4.00
▲
MENU
ESC
ENTER
◄
►
▼
15.
RESET AV38
Resetting the AV38 will bring all sensor configurations, analog outputs, PID and relay settings back to default
conditions. Communications, display contrast, sensor calibration, and analog output calibration are NOT reset.
≡Main Menu
►Reset AV38
▲
MENU
ESC
ENTER
◄
►
▼
Thermo Scientific AquaSensors™ AV38 Local Display and Controller User Guide
75
16. LIMITED WARRANTY
AV38 WARRANTY/REPLACEMENT PLAN
Thermo Fisher Scientific warrants its AV38 Local Display against material and workmanship defect for a
period of one year from the date of shipment.
In the event that a defect is discovered during the warranty period, Thermo Fisher Scientific agrees, at
its option, to repair or replace the defective product. Any product repaired or replaced under this
warranty will be warranted only for the remainder of the original product warranty period.
This warranty does not apply to consumable products associated with this product including, but not
limited to, chemical reagents and salt bridges.
Products may not be returned without authorization from Thermo Fisher Scientific. To obtain
authorization, please call Thermo Fisher Scientific for a return material authorization number.
Limitations:
This warranty does not cover:
1. Damage caused by misuse, neglect (lack of appropriate maintenance), alteration, accident or
improper application or installation.
2. Damage caused by any repair or attempted repair not authorized by Thermo Fisher Scientific.
3. Any product not used in accordance with the instructions furnished by Thermo Fisher Scientific.
4. Damage caused by acts of God, natural disaster, acts of war (declared or undeclared), acts of
terrorism, work actions, or acts of any governmental jurisdiction.
5. Freight charges to return merchandise to Thermo Fisher Scientific.
6. Travel fees associated with on-site warranty repair.
This warranty is the sole expressed warranty made by Thermo Fisher Scientific in connection with its
products. All other warranties, whether expressed or implied, including without limitation, the warranties
of merchantability and fitness for a particular purpose, are expressly disclaimed.
The liability of Thermo Fisher Scientific shall be limited to the cost of the item giving rise to the claim. In
no event shall Thermo Fisher Scientific be liable for incidental or consequential damages.
This warranty is the sole and complete warranty for Thermo Fisher Scientific. No person is authorized to
make any warranties or representations on behalf of Thermo Fisher Scientific.
Thermo Fisher Scientific reserves the right to change or modify this warranty at any time.
Thermo Scientific AquaSensors™ AV38 Local Display and Controller User Guide
76
17. TERMS AND CONDITIONS
Terms and Conditions of Sale
The following terms and conditions will be presumed acceptable unless changes are made in writing and
accepted by both parties in a reasonable amount of time.
Any standard or boilerplate terms and conditions supplied with a written purchase order will not be
applicable unless accepted in writing by both parties.
Quotations: All quotations shall be in writing. Written quotations shall be valid for 30 days from the
date issued. Verbal quotations or price lists are not valid.
Pricing: All pricing is in US Dollars. Thermo Fisher Scientific reserves the right to change pricing
without notice.
Terms: Payment terms are net 30 days from the date of invoice with approved credit. Thermo Fisher
Scientific reserves the right to deny credit or revoke previously extended credit. Past due accounts are
subject to interest charges. Other acceptable payment terms are cash, certified check, money order,
credit card or letter of credit confirmed by any United States of America bank. Other payment terms are
not valid unless accepted in writing.
Sales taxes shall be included on the invoice unless a valid tax exemption certificate is supplied.
Return Material Authorization: Contact Thermo Fisher Scientific Customer Service for a Return
Material Authorization (RMA) number. Items returned without an RMA number will be rejected.
All returned merchandise must be in unused, resalable condition, and must not be contaminated with
hazardous materials.
Cancelled orders must be returned within 30 days of the date on the invoice and shall be subject to
expenses incurred that may include, but are not limited to, inspection and restocking fees. Items
returned within 60 days shall be subject to a restocking charge that is equal to 15% of the purchase
price. Items returned after more than 60 days shall be subject to a restocking charge equal to 25% of
the purchase price. Thermo Fisher Scientific reserves the right to reject any return that is not under
warranty after 60 days. Non-stock items are normally not returnable.
Transportation: Orders are shipped FOB Thermo Fisher Scientific, or factory, by the most efficient
means available. Appropriate charges, such as freight and insurance will be added to invoices. All
shipments will be insured. Goods damaged in shipment must be reported by the recipient to the freight
carrier for claims.
Thermo Scientific AquaSensors™ AV38 Local Display and Controller User Guide
77
Thermo Fisher Scientific
Environmental Instruments
Process Water Instruments
North America
166 Cummings Center
Beverly, MA 01915 USA
Toll Free: 1-800-225-1480
Tel: 1-978-232-6000
Dom. Fax: 1-978-232-6015
Int’l Fax: 978-232-6031
Europe
P.O. Box 254, 3860 AG Nijkerk
Wallerstraat 125K, 3862 BN Nijkerk,
Netherlands
Tel: (31) 033-2463887
Fax: (31) 033-2460832
Asia Pacific
Blk 55, Ayer Rajah Crescent
#04-16/24, Singapore 139949
Tel: 65-6778-6876
Fax: 65-6773-0836
www.thermo.com/processwater
© 2009 Thermo Fisher Scientific Inc. All rights reserved.
258479-001 Rev. A 01-09