1
PMX Series Mixer
PMX Series Mixer
This also goes for mixing effects signals with the monitor mix. The main difference is that the mix radio
is adjusted using the FX TO MON control. Of course, a signal has to be fed into the effects processor via
the FX control in the channel strip for both applications.
On the following page, you will find an illustration showing how to connect your foot switch
correctly.
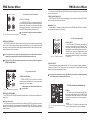
LEVEL
The LED level mater on the effects module should display a sufficiently high level. Take care to ensure
that the clip LED only lights up at peak levels. If it is lit constantly, you are overloading the effects processor
and this could cause unpleasant distortion. The FX control (AUX SEND 2) determines the level that reaches
the effects module.
PROGRAM
You can select the effect preset by turning the PROGRAM control. The display flashes the number of
the current preset. To recall the selected preset, press the button; the flashing stops. You can also recall
the selected preset with the foot switch.
4.INSTALLATION
4.1 Rack mounting
The packing of your mixing console contains two 19 " rack mount wings which can be installed on the
side panels of the console.
Before you can attach the rack mount wings to the mixing console, you need to remove the screws
holding the left and right side panels. Use these screws to fasten the two wings onto the console, being
careful to note that each wing fits a specific side. With the rack mount wing installed. You can mount the
mixing console in a commercially available 19" rack. Be sure to allow for proper air flow around the unit,
and do not place the mixing console close to radiators or power amps. So as to avoid overheating.
Only use the screws holding the mixing console side panels to fasten the 19" rack mounts.
4.2 Cable connections
You will need a larger number of cable for the various connections to and from the console. The
illustrations below show. The wing of these cables. Be sure to use only high-grade cable.
4.2.1 Audio connections
Please use commercial RCA cables to wire the 2-track inputs and outputs.
You can, of course, also connect unbalanced devices to the balanced input/outputs. Use either mono
plugs, or ensure that ring and sleeve are bridged inside the stereo plug (or pins 1 & 3 in the case of XLR
connectors).
Caution! You must never use unbalanced XLR connectors (pin 1 and 3 connected) on the MIC
inputs if you in tend to use the phantom power supply.
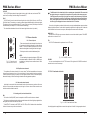
1/4" TS connector for use with foot switch
strain relief clamp
sleeve
sleeve
tip
pole 1/ground
pole 2
14
A mixing console fulfils three main functions:
*Signal processing: Preamplification, level adjustment, mixing of effects. Frequency equalization.
*Signal distribution: Summing of signals to the aux sends for effects processing and monitor mix,
distribution to one or several recording tracks, power amp(s), control room and 2-track outputs.
*Mix: Setting the volume level, frequency distribution and positioning of the individual signals in the
stereo field, level control of the total mix to match the recording devices/crossover/power amplifier(s).
All other mixer functions can be included in this main function.
The interface of LONGERDB mixing consoles is optimized for these tasks enabling you to easily keep
track of the signal path.
1.2 The user’
s manual
The user’s manual is designed to give you both an overview of the controls, as well as detailed information
on how to use them. In order to help you understand the links between the controls, we have arranged
them in groups according to their function.
1.3 Before you get started
1.3.1 Shipment
Your mixing console was carefully packed in the factory to guarantee safe transport. Nevertheless, we
recommend that you careful examine the packing and its contents for any signs of physical damage. Which
may have occurred during transit.
If the unit is damaged, please do NOT return it to us, but notify your dealer and the shipping
company immediately, otherwise claims for damage or replacement may not be granted.
1.3.2 Initial operation
Be sure that there is enough space around the unit for cooling purposes and to avoid over-heating please
do not place your mixing console on high-temperature devices such as radiators or power amps. The
console is connected to the mains via the supplied cable. The console meets the required safety standards.
Blown fuses must only be replaced by fuses of the same type and rating.
Please note that all unit must be properly grounded. For your own safety, you should never
remove any ground connectors from electrical devices or power cables, or render them
inoperative.
Please sure that only qualified people install and operate the mixing console. During installation and operation, the user must have sufficient electrical contact to earth, otherwise
electrostatic discharges might affect the operation of the unit.
2.CONTROL ELEMENTS AND
CONNECTORS
tip
The foot switch connects the two poles momentarily
1.1 general mixing console functions
Fig. 4.1: 1/4" TS connector
for foot switch
This chapter describes the various control elements of your mixing console. All controls, switches and
connectors will be discussed in detail.
3