1
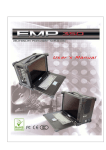
SAX Series User’s Manual
Index
1.0 Introduction-----------------------------1
2.0 Getting started------------------------2
3.0 Features of the SAX----------------3
4.0 Computer Operation-----------------6
5.0 Hardware installation-----------13
6.0 Software installation------------24
7.0 Maintenance----------------------------24
8.0 Problem solving----------------------26
9.0 Standard SKD
Accessory Kits---------27
SAX Series 903 / 906
SAX Series User’s Manual
1
Specification of SAX Series
Model No.
SAX-903
SAX-906
ATX, Extended ATX
Motherboard
Slot
7
Drive Bay
3 x 5.25"(open)
2 x 3.5"(open)
Color
Flash Gray
LCD
Resolution
D/C
Keyboard/Mouse
Case Size
Power Supply
SKD Weight
Speaker
14.1", 15.1", 15.4" (Tillable),
17"(Fixed)
14.1"--15.4" LCD,
17" LCD, 280 nits brightness,
250 nits brightness,
50,000 hrs of backlight life
50,000 hrs of backlight life
1024 x 768, 1280x1024, 1400 x 1050
ATI M3 chipset AGP card with 16MB
ATI M6 chipset AGP card with 64MB
Analog-to-digital conversion board
108 keys, multi-languages/touchpad
17.5" x 13.1" x 9.6" (445mm x 333mm x 245mm)
Full range PS/2 350 Watt with Active PFC
11.5 kgs (25.3 lbs)
Built-in amplified speakers
Amplified board output: 2 x 6 Watt Stereo
Dual Speaker output: 2 Watt
Carrying Case
Card Stabilize
Bars
Padded carrying case with wheels
Cooling Fan
1 x 80mm x 80mm x 25mm (chassis fan)
1 x 120mm x 120mm x 25mm (back cover)
Case
External chassis-flame retardant ABS
Plastic/internal chassis-gold color aluminum alloy
2
Environmental Specification
Oper. Temp.
Relative Lum.
0°C-50°C
20-80% (non-condensing)
Shock
(Operating, all axes)
15g
Vibration
(Operating, all axes)
1.25g @ 10-100Hz
Comply to
&
Class B Compliant
SAX Series User’s Manual
2
1.0 Introduction
Version: 2004.1
SAX Series Portables:
Compact& powerful rugged design portable
Offer 7 slots expansion capability to accommodate a standard
z
ATX size motherboard.
High performance processing power.
z
XGA (1024*768)TFT LCD Screen (from 14.1”-to 15.4”) with
z
adjustable angle, and 17” SXGA+(1400*1050)none adjustable.
z Double cooling system with PS/2 & convection design.
z The new RJ-45 cabling style.
z Unique capacity flexible drive bay.
z
The SAX is a high performance industrial portable computing solution.
And it is highly compatible across a broad range of hardware,
software and operating systems. It has more computing power than
that of most desktops, and traditional portable computers. Its full size
add-in slots, Pentium 4 processing power, and a XGA resolution TFT
color display make it a high performance field solution. The SAX
series portables comply with FCC class B Part 15 and CE Mark. It’s an
unpredictably powerful choice for workstation or server.
You can find SAX in industrial environment serving you with high
performance computer bus analysis & telecommunication testing,
multi-protocol network analysis, PLC programming, real time
automatic industrial application and much more. It is designed to
function with your needs in mind.
SAX Series User’s Manual
3
2.0 Getting Started
2.0 Getting Started
The SAX is a well design compact portable computing machine that
is both nimble as well as rugged. It will serve your needs for both
expansion as well as performance. An important aspect of the SAX is
the concept of standardizations, which means all components that
you can find off the shelf or proprietary designed will fit into the SAX.
If the peripheral is designed according to industry standard for
interconnectivity then it will fit. With that in mind, we will layout and
identify each of the component. In this section you can find each
component of the SAX with respect to its purpose and usage.
SAX 903/906
SAX Series User’s Manual
4
3.0 Feature of the SAX series
Drive Bays:
SAX 903/906 –with 2x 5.25” open bays, 2 x 3.5” open bays
Keyboard:
108-key
keyboard is integrated with the portable allow closing against the
portable for both connivance and protection in transportation.
Keyboard Cable:
The keyboard cable connects to the keyboard internally with cable
jack on other end for insertion into the portable lower right hand
corner; allow easy access and removal of the keyboard.
LED Status Indicator:
The green LED indicates power on, the red LED indicates hard disk
drive access.
SAX Series User’s Manual
5
Display:
Integrated TFT Active Matrix LCD provides XGA color display with
resolution of 1024*768 (for 14” & 15”).
Speaker:
Integrated two speakers built-in allow media audio play back without
having to outsource attachment. Speaker has volume control for
different environment usage.
Drive Bay:
The SAX 903/906 come standard with 2×5.25”size drives bays, and 2×3.5
size drive bays.
Power Switch:
The power switch to turn on the computer is located on the right side.
Fan:
Located inside the chassis, these fans will help draw out and push in
cool air to alleviate excessive heat built-up for components inside the
portable allowing worry free operation.
Expansion Slots:
Opening to provide access to the I/O ports on the installed add-in
cards.
Expansion slot Cover:
The slot cover covers the I/O opening for protection of vital equipment
inside, it serves to detour object from entering as well as cooling (drilled
opening).
Handle:
Large handle provide convenient transportation of the portable with
comfort and ease.
Keyboard Release Buttons:
These buttons when depressed will release the locking mechanism to
detach the keyboard from the main portable chassis.
SAX Series User’s Manual
6
4.0 Computer operation
Features
4.1 Keyboard and Touch pad:
How to release
There are two release buttons
located on the top-left and
top-right of the keyboard.
When
depressed,
the
keyboard is disengage from
the portable and will release
the keyboard structure. There
are also two mounting leg
located at the bottom of the
keyboard that are inserted
into the portable for fitting
and stability, in which case
you can start lifting the
keyboard upward.
The
keyboard now can then be
removed for usage.
How to close keyboard
Closing the keyboard back onto the portable
follows the same procedure as opening, in a
reverse manner. It is noted that the keyboard
cable should be put back into its proper lodging
location. Make sure the two locking mechanism
are properly secure after it is put back.
Press
What to look for
The keyboard cable is located on the
top portion of the keyboard; it is a coil
cable with a RJ45 connector at the
end. The jack should now be attached
to the portable (at the lower right hand
corner) to be operational.
SAX Series User’s Manual
7
K/B usage
Keyboard is the main medium for inputting data into the system.
The keyboard of the SAX series portables contains both a keyboard
and a touch pad. Keyboard is a 108-keys Windows ready keyboard
with power function and shortcut keys.
Keyboard position
You may want to adjust the keyboard angle by folding the top
portion of the keyboard
TOUCHPAD operation
TOUCHPAD surface can be use to
move the cursor in the GUI environment
by placing and moving your finger. The
two buttons located below the touch
pad act as same as the mouse left/right
button. Or you may wish to tap on the
touch pad to indicate a left click.
SAX Series User’s Manual
8
4.2 I /O:
SAX 903/906 : 1x 25pin
Parallel Port, 1x 9pin COM
Ports, 2 x USB Ports, 1 x
Ethernet RJ45.
4.3 LCD Display:
SAX 903/906 has an angle
adjustable monitor. You may
adjust your portable to a
comfortable viewing position by
tilting the LCD.
4.4 Side Panel:
The side panel is located behind the
plastic protection cover that can be
removed
by
pushing
the
clip.
Depending on the system board and
your add-on cards, you may also have
other ports such as Ethernet port, and
Audio ports. When in use, side panel
can also be stored in a slot located on
the back cover
SAX Series User’s Manual
9
4.4 Power switch and plug:
The power receptacle is located on the right side of the machine
near the bottom.
The three-prong power plug is supplied.
Depending on your Power supply type, you may find a main power
switch located next to the power receptacle and the position of the
switch is of the following:
O=Off, I=On. This is the main power, to power up the system, user still
require to power on the machine at the front of the portable, labeled
Power. If your power supply does not have a main switch, user will
control power on/off using the power switch located in the front.
4.45 Power supply(PS/2)
This kind of power supply is supported in
SAX 903/906 series.
It’s also Active PFC Full-Range, 400W
output.
4.5 Hooking up external monitor:
he external CRT monitor / Projector can be hooked up via the side
panel VGA (15pin) port while the system is off. The CRT/Projector will
provide the cable to be inserted into this port. When connected, the
display should come on if the machine is powered on. The signal is
standard with the internal viewing resolution and the default setting is
simultaneous display both on portable’s LCD and CRT. To change the
output mode (Simultaneous/LCD only/CRT only), please refer to your
VGA setting.
SAX Series User’s Manual
10
4.6 Audio:
The audio of the system does require
user to install a sound card. The builtin internal amplified speakers provide
a phono stereo plug that will fit into
the output port of the sound card.
Audio Area
4.65 Volume adjustment:
There are two volume adjustments on the
side panel.
Each volume adjustment may adjust right or
left sound performance by any situation if
possible.
4.7 CD-ROM:
CD-ROM is important in that many of the applications available
today are store on the CD due to their larger storage capacity.
CD is read-only media (a CDR or CDRW are medium that are for
user creation of data on CD medium) and is pre-loaded with
data. You may open the CD-ROM drive door by pushing the
eject button located on the door of the drive. During access to
the CD-ROM, the light on the CD door will light up.
(The position of SAX CD-ROM is the same as side of FDD)
SAX Series User’s Manual
11
4.8 FDD Drive:
Floppy disk drive is essential as they are still an important medium
for transferring data before systems. Floppy disks are available in
all computer stores and are ready for usage in most case if preformatted. You may insert the disk into the drive with the disk
face up. During access to the floppy, the lights on the floppy disk
drive will light up, indicating the disk is currently being read/write;
at this time you should be remove your floppy disk from the drive
as it may cause damage resulting in data loss. Only remove your
floppy disk when the drive light is off.
4.10 VGA
Based on your model you may have either:
1. 16MB ATIM3, 2x AGP
2. 64MB ATIM6, 4x AGP
3. Conversion Board
4. On-board system VGA
Please refer to your VGA user’s manual for details
SAX Series User’s Manual
12
4.11 Unique Cooling System
In SAX 903/906, we support the unique cooling system inside, There
are including duel cooling fans & the 6.5” cooling fan. You may
adjust the wind path to reduce the heat.
SAX Series User’s Manual
13
5.0 Hardware Installation
Before you attempt to open the SAX and do any hardware
installation, make sure you have the proper knowledge of
installation and compatibility feature of any upgrade. And
understand the concept of electrostatic damage that can occur
during handling of sensitive electronic equipments, proper
precaution should be taken before proceeding.
1. Remove the side panel---------
SAX Series User’s Manual
14
2. Open back cover----------------※The screws are well-designed that won’t be departed from
the back cover
Screw
Screw
Screw
Screw
※ Before removing the back cover, please
make sure to unplug the fan wire.
3.Remove stabilizer bars -----Scre
Screw
Scre
Screw
SAX Series User’s Manual
15
4.Remove drive bay housing---Side Screw x 2
※Please take care of the cable while
Removing the drive bay.
Bottom Screw x 4
5.Remove power supply-----------
Side Screw
x 4x 4
Bottom
Screw
Screw x 2
※Be sure removing the hanger before taking
off the Power Supply, there are two more
screws to unscrew.
SAX Series User’s Manual
16
6.Insert system board mounting
standoff-------Standoff
Standoff
Standof
*Please refer to your system board manual for detail references.
7.Install system board
with CPU and RAM------PCI slots
Power
Connectio
RAM
CPU
SAX Series User’s Manual
17
*Please refer to your system board manual for detail references.
8.Connect keyboard and
TOUCHPAD cables-------Cables
Plug
*Please refer to your system board manual for detail references.
9.Connect power, LED, and
speaker wires--------
Power wires
LED wires
Speaker wires
Please refer to
System Board
Manual for
actual
Location.
SAX Series User’s Manual
18
10.Install CD-Rom into
Drive bay housing-----
Side Screw x 2
Side Screw x 2
CD-ROM
11.Install FDD and HDD into drive
bay housing---
Side Screw x 2
Same as Another
Side Screw x 2
SAX Series User’s Manual
19
CD-ROM
12. Install the Drive Bay
into Chassis------
Side Screw x 2
Bottom Screw x 4
※Please take care of the cable while removing
the drive bay.
Bottom Screw x 4
13.Put on the plastic cover-----Plastic Cover
Clip!
SAX Series User’s Manual
20
Then put on the plastic
FDD cover above
the metal cover.
Clip!
14.Change the metal
component if needed to----Standard Component
Option Component
※ If your ATX board will disturb the
Drive bay, you may change the
Option component.
15.Connect IDE and
power cables------
IDE cable
Power cable
Under Drive
Bay
SAX Series User’s Manual
21
Please refer to your model’s removal process for reinstallation
16.Install power supply
Into chassis----*
* Be sure reinsert the hanger before taking
off the Power Supply, there are two more
screws to screw..
18.Install VGA card &
LCD ON/OFF wire--LCD on/off wire
VGA card wire
SAX Series User’s Manual
22
19.Reinsert stabilizer bars---Reinsert
Reinsert
Reinsert
Reinsert
20.Close back cover--------------Reinsert
Screw
Reinsert
Off
Screw
Reinsert
Off
Reinsert
SAX Series User’s Manual
23
※Please remember plug-in the wire of cooling fan before reinsert.
SAX Series User’s Manual
24
6.0 Software Installation
CD-ROM Driver: CD-ROM driver are supplied with most operating
system.
DOS Boot up: DOS boot up require you to have a version of the
DOS installed on hard disk drive or floppy. Depending on the
execution sequence you have set in the batch file, you will
usually get a DOS prompt after loading.
Window Boot up: Windows boot up require you to have Windows
installed in the hard disk drive. During Windows boot up, you will
see a sequence of access to your hard disk drive which will
eventually take you into a graphical user interface environment.
As in the SAX, a copy of the Windows NT 4.0 Workstation is preinstalled in the machine.
Other O/S description: Many other operating systems are
available in the market, such as Linux, Windows, Solaris and DOS.
These operating systems will behave differently and you should
react accordingly.
7.0 Maintenance
7.1 Handling of SAX:
You should always make sure the keyboard assembly is properly
closed onto the SAX before transporting it. This will ensure you do
not loose the keyboard as well as protecting the LCD screen.
You may transport the portable in its carrying case, or you can
carry the SAX on its handle located on top of the machine. The
handle is located securely to the strongest part of the machine,
and distributes the load of the SAX evenly as to allow easy
carriage and proper balance.
7.2 Handling of Cable:
All cable should be treated with care. Do not over extend any
cable and this could result in breakage internally in the cable. It
is essential that cable with its plug be handled in the proper
manner without force.
SAX Series User’s Manual
25
7.3 Handling of LCD:
Do not use any abrasive material to scratch the LCD screen, as
they can leave marks on the surface. Do not apply any pressure
to the surface of the LCD screen either with objects or hands; this
will ensure that the screen do not suffer from internal damage or
cracks.
7.4 Handling of Power:
Always make sure the power cord is in top condition before using
them with the SAX. Make sure your power source is reliable and
of proper standard. The SAX power supply is capable of handling
100-240V and 50-60Hz. Do not use the SAX on an already
overloaded circuit.
7.5 Handling of K/B:
The keyboard is essential in that it helps protect the LCD during
transportation. You should always watch for spill liquid or small
objects from entering the keyboard. And the touch pad surface
should be kept dry and clean for proper usage.
7.6 Cleaning LCD:
1. Do not use cleaner that contain alcohol.
2. Do not use cloth that could be abrasive to the surface of the
LCD
3. Always gently wipe the LCD surface when cleaning.
7.7 Cleaning K/B:
1. Do not spill any liquid on to the keyboard.
2. Do not drop particle into the spacing between keys.
3. Using a compress air cleaner, you can remove the dust built-up
within.
7.8 Cleaning Fan Filter:
1. Remove the filter from its housing.
2. Use a compress air cleaner to blow off the dust from the filter.
3. If necessary, you can wash the filter material, but do
remember to dry it before inserting it back.
SAX Series User’s Manual
26
8.0 Problem Solving
8.1 Installation problem:
1. Normally problem with fail start up are due to installation
problem.
2. Double check with all the peripheral cards or items you have
added to the SAX.
3. Are all the items seated properly?
4. Are all the cable connected back to its original or correct
position?
5. Are the items you have added compatible?
6. Before you check for these turn the computer off and unplug
the power cord.
7. Check for 1 thru 5 and then re-power up the computer.
8. Remove all items that were added and re-try system power up.
9. If the system starts now, try inserting 1 new item in at a time
and try powering up.
10. Repeat this step until you get the desire result.
8.2 BIOS Beep Code:
The BIOS beep code indicates error in system initialization. The
BIOS of the system board will associate with video and memory
error. Please check your video card is properly seated and your
memory is installed properly.
8.3 System Fails to power up:
1. Check you power connection first.
2. Check the main power switch is in the ON position (I).
3. Press the power button located in front of the machine.
8.4 No display (LCD):
1. Check all the proper power up procedure has been taken.
2. Hook up an external CRT to the VGA port check if video is
present.
3. If video is present on external CRT, check the internal LCD
cable connection.
4. Or check your VGA setting using a CRT to make sure LCD
video is enabled.
5. If there is no video on external, check your system makes sure
everything is seated properly.
SAX Series User’s Manual
27
6. If everything is seated properly and still no video, call us for
further assistance.
8.5 External CRT no display:
1. Check to see if you have internal LCD video.
2. Check your CRT is functioning properly.
3. Check your VGA setting to make sure external video is
enabled.
8.6 Keyboard fails:
1. Make sure the keyboard plug is inserted completely into the
portable.
2. Make sure you do not have another keyboard connected to
the side I/O PS/2 port.
8.7 TOUCHPAD fails:
1. Make sure the keyboard plug is inserted completely into the
portable.
2. If you have an external PS/2 mouse hook up on the side I/O
PS/2 port, the touch pad will not function simultaneously.
3.If your operating system requires and does not load the mouse
driver automatically, make sure you have the proper mouse
driver loaded.
8.8 Floppy fails:
1. Make sure the diskette is of the proper specification (1.44MB,
720KB)
2. If floppy fail during POST, check internal cable fit.
8.9 CD-ROM fails:
1. Make sure the CD is readable.
2. If CD-ROM fails to be recognized during POST, check internal
cable fit.
SAX Series User’s Manual
28
9.0 Standard SKD Accessory Kits
SAX Series
Model
SAX
903/906
Accessory Kit SKD
Accessory Kit System
Qty
1
User’s Manual
User’s Manual
1
2
Driver CD
Driver CD
1
3
ESD Bag
ESD Bag
1
4
110 Power Cord
220 Power Card (Option)
110 Power Cord
220 Power Card (Option)
1
5
Screw Pack (stabilizer)
Screw Pack (stabilizer)
1
6
Stabilizer Supports Pack
Stabilizer Supports Pack
1
7
Hardware Pack (system)
1
8
Ports Label Sticker
1
9
ATX I/O plate
1
10
Hardware Pack(System)
1
11
ATX I/O Plate Sticker
1
12
Cooling Fan System Pack
1
13
Plastic Drive bay Cover
1B 1S
14
Metal Drive Bay Cover
1B 1S
15
Option Drive Bay Component
SAX Series User’s Manual
1
29
SAX Series User’s Manual
30