1
Suggestions for Making Your Own
Prepared Microscope Slides
Always begin with clean slides and cover glass. Handle slides
carefully by the edges to avoid fingerprints. Use forceps (tweezers)
to carefully handle cover glass.
! Extreme caution and adult supervision recommended when
using the scalpel blade for cutting specimens. Keep scalpel covered
and store in a safe place when not in use.
Temporary or “Wet” Mounts
Tissue-type specimens such as plant sections:
1. Use the scalpel to carefully cut the specimen as thin as possible.
2. Place the specimen on the slide.
3. Use the plastic dropper to place one drop of water on the
specimen.
4. Carefully place a cover glass over the specimen, allowing the
water to spread under the glass.
5. The cover slip should be flattened against the specimen and
slide as much as possible, avoiding air bubbles. Use caution, the
thin cover glass will break if too much pressure is applied!
6. Blot any excess water carefully with paper tissues.
7. Carefully place slide on the microscope (cover glass side up)
and observe.
8. Use the slide labels to identify your specimens.
You may want to try reversing steps 2 & 3; place a drop of water on
the slide first, then put the specimen on the water before placing the
cover glass. Experiment with each method to find the best results
for each specimen. (Keep in mind these are only temporary
mounts.)
Tip: Slides may be carefully washed and re-used for future
specimens. Cover glass is extremely fragile and not recommended
for re-using. Carefully discard after use.
With the new My First LabTM Duo-scope, you finally have the
ability to observe both microscope slides and solid objects, such as
plants, coins and insects. The key is in the dual, cool LED
illumination that provides both sub-stage and overhead lighting.
Battery power eliminates the need for electricity or power cords and
allows for portable use “in the field”. The new My First LabTM
Duo-Scope combines two separate applications into one fantastic
package that promises hours of fun and learning.
Magnifications
Total magnification is calculated by multiplying the eyepiece
magnification (always 10X) by the objective lens.
Objectives
4X
10X
40X
“Compound” use
(lower lighting)
40X
100X
400X
Note: the 40X lens is not suitable for use with the upper lighting due to
the focusing distance required. The lens must be too close to the
specimen and does not allow enough light to reach the specimen.
Specifications
• 10X Eyepiece
• Rotatable Head
• 4X, 10X, 40X Objectives
• Dual LED illumination
• Dual focusing knobs
• Disc Diaphragm
• Real optical glass lenses
Dimensions: 4½" x 6½" x 11½" high
Net Weight: 1.95 lbs.
*Instrument is powered by 3 AA Batteries, (not included)
1
8
“Stereo” use
(upper lighting)
40X
100X
N/A
Components of My First LabTM Duo-Scope
Some Ideas For Observation
Children: get adult’s permission before trying any experiments!
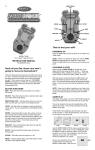
Study the picture below to become familiar with the different parts
of your microscope.
10X
Eyepiece
Eyepiece tube
Head
Nosepiece
Overhead
Illumination
Objectives
Stage
Clips
Focusing Knob
Illuminator
Disc Diaphragm
2
1. Crystals: Place a few grains of dry salt or sugar on a slide to
observe. Mix salt with a spoonful of warm water in the test
tube and then use the plastic dropper to place a couple drops
on a slide. Let it dry and observe the re-crystallized salt/sugar.
2. Shake some grains of pollen from a flower onto a blank slide.
3. Hairs, including pet hair, or pieces of feathers, can be observed.
Try comparing hairs from various animals. You can use a small
piece of tape at each end of the hair to hold it on the slide.
4. Observe fibers in different kinds of paper, printing from a
newspaper or typewriter. Look at the color in comics. Threads
or fibers from different types of fabric. Compare natural fibers
such as cotton and wool to synthetics like polyester.
5. Stagnant water from a pond will contain live organisms. Place a
drop into the well of a concavity slide for observation.
6. Very small insects may be seen completely under low power, or
try looking at parts such as legs or wings of larger bugs. The
teasing needle is useful for positioning or probing the
specimen. Always handle insects with tweezers and wash hands
thoroughly after working with your specimens.
7. Observe the mold on old bread or other food, or make your own
mold by leaving a small piece of bread in the Petri dish for
several days. A small amount of moisture will encourage the
mold growth. (Again, be sure to wash hands thoroughly after.)
8. Many specimens may look transparent under the microscope.
It’s common to stain them to make the cells show up better.
Iodine is a common stain. Or try soaking your tissue specimens
in a solution of ordinary food color (included-add water to thin)
for a couple of minutes to stain them. Use the tweezers to pick
up the “stained” specimen. Allow the “stained” specimen to dry
before using glue to mount it. Remember the stain will color
anything else it touches, not just your specimen, so be careful
with furniture and clothing.
7
Preparation
Please read this section completely before using your microscope.
Study page 2 to learn the various parts of the instrument.
Remove the eyepiece from the tube and invert the microscope to
reveal the battery compartment. Open the compartment and insert 3
AA Batteries (not included) as indicated. (Base of battery-negative
end-goes against the spring.) Replace the battery compartment cover
and the eyepiece.
Always set up your microscope on a smooth surface, such as a desk or
table.
Before using the scope, practice slowly turning the focusing knob and
watching the stage move without looking through the eyepiece, so as
to familiarize yourself with the direction you should turn the knob,
when moving the stage closer to the objectives.
The My First LabTM Duo-scope has the capability to illuminate
the specimen from the top or bottom. Notice the power switch, located
at the back of the scope, operates both the top light and the bottom
light (but not at the same time), depending on which way the switch is
flipped. The eyepiece tube and head may be rotated to face the other
side of the microscope if desired. If necessary, you may loosen the
screw at the base of the head SLIGHTLY to allow the head to move
with ease. For best results, only move the head when necessary.
Operation
Compound Microscope Use (for slides)
Begin with the stage platform at its lowest position. To observe
specimens, check the objective lens, and if necessary, rotate the
nosepiece so that the 4X objective lens is in position for viewing. The
lens will “click” when in place. Always start viewing any specimen
with the 4X objective and increase accordingly.
Begin by selecting a prepared slide and placing it carefully on the
stage (labeled side up). Push gently on the back of the clips to lift the
arm enough to slip the slide under and hold it in place. The main part
4
of the specimen should be centered over the opening in the stage.
Turn on the lower illuminator to shine the light up through the stage
and through the tissue specimen on the slide. Look through the
eyepiece and SLOWLY turn the focusing knob until the image of
the specimen becomes clear. Be careful not to let the slide touch
the lens.
Focusing Tips When focusing your microscope turn the knob only
until the stage stops moving. DO NOT FORCE IT.
The disc diaphragm, located directly below the stage, has six
different apertures (openings), which allow various amounts of light
to pass through. Rotating this disc allows you to modify the amount
of light that is transmitted. Try experimenting with various settings
to get the best effective view. (Usually most effective at the 400X
magnification.)
After focusing you can move the slide left or right on the stage to
observe different sections of the same specimen. As you adjust the
slide or the aperture disc, be careful not to put weight against the
stage as this could push it out of focus. If this occurs, simply
readjust the focusing knobs slightly until you again have a clear
view.
After observing with the 4X objective (which shows you the image
magnified 40X), rotate the nosepiece to the 10X objective lens
(leave the slide in place on the stage). SLOWLY turning the
focusing knob will enable you to get a clear view of your specimen
at 100X magnification. Always use caution since the focusing knob
actually moves the stage closer to the objective lens.
Finally, you can turn the nosepiece to the 40X lens, giving you a
400X magnification of your slide. When increasing magnification,
always remember that the higher the magnification, the closer the
objective must be to the specimen being observed.
Focusing Tips The 40X lens will appear to be almost touching the
slide, this is normal. Always move the focusing knobs very slowly
5
to avoid breaking the slide with the objective.
When changing slides, move the stage to its lowest position, lift the
clips to remove and replace slides and begin observing with the 4X
objective again.
Stereo Microscope Use (for solid objects)
Turn on the overhead illuminator to shine light onto the stage.
As with the compound microscope, always begin your observation
with the 4X objective and increase magnification accordingly.
Note: Only the 4X and 10X objectives may be used when viewing
solid specimens. The 40X lens is not suitable for use with the upper
lighting due to the focusing distance required. The lens must be too
close to the specimen and does not allow any light to reach the
specimen.
For contrast, you may find it necessary to place certain specimens
on an index card or small piece of paper before centering them on
the stage. Since you are using the upper light, it is not necessary for
the opening in the stage to be exposed for the lower light to shine
through. Also, you do not want your specimen to fall through the
hole!
This application can allow you to magnify countless everyday
items: for examples, small rocks, leaves, insects, flower petals,
coins, stamps, jewelry and more.
Focusing Tips You will notice that with a three dimensional
specimen, for example, a small insect, you will have different levels
to focus on; therefore the entire image may not seem clear at the
same time. Compare to a flat field, such as a postage stamp, where
the specimen is all at the same level which allows the microscope to
focus on the entire field.
Accessories
This microscope is equipped with the following accessories.
•
•
•
•
•
•
•
•
•
•
•
•
•
•
5 Blank Slides
4 Prepared Slides
1 Concavity Slide
Slide Labels
Cover glass
Plastic Dropper
2 Bottles of non-toxic “stain”
Scalpel
Forceps
Lens Paper
Test Tube
Petri Dish
Straight Teasing Needle
Vinyl dust cover
Note:
Contains glass, food coloring, and sharp instruments.
*Adult supervision required for experiments
and slide preparation.*
With a little practice, you can soon become an expert at observing
all types of specimens with My First Lab TM Duo-scope.
6
3
Simple Semi-Permanent Mounts:
Follow the same basic procedure as above but try using CLEAR
GLUE instead of water to hold the specimen and cover glass to the
slide. Allow the glue to dry before observing the specimen. Use the
slide labels to identify your specimen.
Hint: You may enjoy keeping notes of your various observations or
even sketching the magnified images you see in the scope.
Maintenance
To prolong the life of your batteries, turn off the power immediately
when not in use (be sure both lights are off--switch in the center
position.) Dust the unit with a soft dry cloth or soft brush.
Fingerprints and debris may be removed with a damp cloth. If glass
lenses require cleaning, try a cotton swab very slightly moistened
with alcohol. Dry with a clean swab or lens paper.
Store your microscope in a cool dry place. Always cover with the
vinyl dust cover provided or return to the box when not in use. If
used “in the field” take care to keep the unit upright as the eyepiece
can fall out if tipped. Eyepieces and lenses should remain in place
to avoid dust in the tubes. Keep microscope slides in their proper
storage unit when not in use. Always use care with real glass and
sharp instruments and keep out of reach of young children.
When lights seem dim, replace the batteries with fresh AA batteries.
The LED bulbs have a long life span and should not require
replacing. If either bulb does not work, even after installing fresh
batteries, please call for service.
Proper care and use of this product can result in years of scientific
study and adventure. Enjoy!
9
LIMITED ONE YEAR WARRANTY
The manufacturer warrants this instrument to be free from defects in material and
workmanship under normal use for one year from the date of purchase. It does not
cover damage resulting form abuse or misuse, repairs or alterations performed by
other than authorized repair technicians, or damage occurring in transit.
For warranty service, microscope should be well packed to avoid damage in
transit, preferably in original box and packing. Include your complete return
address and telephone number as well as a description of the difficulty, and ship,
postage prepaid, to the address below. It will be repaired or replaced at no charge
and returned. If misuse, alterations, accident or abnormal conditions of operation
caused failure, an estimate for repairs will be provided for your approval prior to
work being performed.
If you have questions concerning this product or warranty, contact the dealer from
whom it was purchased.
Duo-Scope
Two Microscopes in One!
USER'S MANUAL
Model MFL-06
This microscope is intended for use by ages 9 & older.
Parents are reminded this is a scientific tool and contains glass
microscope slides and sharp instruments. Proper handling and
parental supervision is required. Always follow the appropriate
safety procedures.