1
Preparation
Please read this section completely before using your microscope.
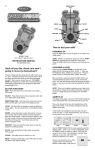
Study page 2 to learn the various parts of the instrument.
Remove the eyepiece from the tube and invert the microscope to
reveal the battery compartment. Open the compartment and insert 3
AA Batteries (not included) as indicated. (Base of battery-negative
end-goes against the spring.) Replace the battery compartment cover
and the eyepiece.
Always set up your microscope on a smooth surface, such as a desk or
table.
Before using the scope, practice slowly turning the focusing knob and
watching the stage move without looking through the eyepiece, so as
to familiarize yourself with the direction you should turn the knob,
when moving the stage closer to the objectives.
The My First LabTM Duo-scope has the capability to illuminate
the specimen from the top or bottom. Notice the power switch, located
at the back of the scope, operates both the top light and the bottom
light (but not at the same time), depending on which way the switch is
flipped. The eyepiece tube and head may be rotated to face the other
side of the microscope if desired. If necessary, you may loosen the
screw at the base of the head SLIGHTLY to allow the head to move
with ease. For best results, only move the head when necessary.
Operation
Compound Microscope Use (for slides)
Begin with the stage platform at its lowest position. To observe
specimens, check the objective lens, and if necessary, rotate the
nosepiece so that the 4X objective lens is in position for viewing. The
lens will “click” when in place. Always start viewing any specimen
with the 4X objective and increase accordingly.
Begin by selecting a prepared slide and placing it carefully on the
stage (labeled side up). Push gently on the back of the clips to lift the
arm enough to slip the slide under and hold it in place. The main part
4
of the specimen should be centered over the opening in the stage.
Turn on the lower illuminator to shine the light up through the stage
and through the tissue specimen on the slide. Look through the
eyepiece and SLOWLY turn the focusing knob until the image of
the specimen becomes clear. Be careful not to let the slide touch
the lens.
Focusing Tips When focusing your microscope turn the knob only
until the stage stops moving. DO NOT FORCE IT.
The disc diaphragm, located directly below the stage, has six
different apertures (openings), which allow various amounts of light
to pass through. Rotating this disc allows you to modify the amount
of light that is transmitted. Try experimenting with various settings
to get the best effective view. (Usually most effective at the 400X
magnification.)
After focusing you can move the slide left or right on the stage to
observe different sections of the same specimen. As you adjust the
slide or the aperture disc, be careful not to put weight against the
stage as this could push it out of focus. If this occurs, simply
readjust the focusing knobs slightly until you again have a clear
view.
After observing with the 4X objective (which shows you the image
magnified 40X), rotate the nosepiece to the 10X objective lens
(leave the slide in place on the stage). SLOWLY turning the
focusing knob will enable you to get a clear view of your specimen
at 100X magnification. Always use caution since the focusing knob
actually moves the stage closer to the objective lens.
Finally, you can turn the nosepiece to the 40X lens, giving you a
400X magnification of your slide. When increasing magnification,
always remember that the higher the magnification, the closer the
objective must be to the specimen being observed.
Focusing Tips The 40X lens will appear to be almost touching the
slide, this is normal. Always move the focusing knobs very slowly
5