Download Owner`s Booklet - Alliance International Co.,Ltd
Transcript
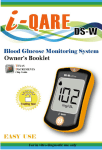
Dear i-QARE Blood Glucose Monitoring System Owner,
Thank you for choosing i-QARE Glucose Monitoring System. The
i-QARE Blood Glucose Monitoring System is easy, comfortable, and
convenient to operate; also it helps you monitor blood sugar every
day.
This Owner’s Booklet will help you understand your i-QARE Blood
Glucose Monitoring System. It also provides you with services,
tools, and information, helping you to manage your monitoring
system and blood sugar.
To start testing quickly, you can also refer to the Quick Start
Guide.
If you have any questions, please contact Alliance International
Co., Ltd. Customer Service Center toll-free at 1-866-400-3336 or
visit www.alliance-intl.com.tw. Assistance is available 24 hours
a day, 7 days a week. You can also contact your local agent for
assistance.
Again, thanks for choosing i-QARE Blood Glucose Monitoring
System.
INTRODUCTION
Welcome to use i-QARE Blood Glucose Monitoring System.
i-QARE Blood Glucose Meter utilizes the latest amperometric
biosensor technology to measure blood glucose level. In order to
keep your meter in good working condition, please follow the
correct operation procedures in the Owner’s Booklet.
Read this Owner’s Booklet carefully and completely before
testing your blood glucose. To verify the accuracy of any glucose
meter or test strip, the control solution can be purchased from
your local distributor.
INDICATION FOR USE
The i-QARE DS-A Blood Glucose Monitoring System is used with
the i-QARE DS-A Draw-In Blood Glucose Test Strips and 2-level
Controls for the measurement of glucose in whole blood. Testing
is done outside the body (in vitro diagnostic use). It is indicated
for use at home (over-the-counter [OTC]) by person with diabetes,
or in clinical setting by health care professionals, as an aid to
monitor the effectiveness of diabetes control. It is not intended for
the diagnosis of or screening for diabetes mellitus, and is not
intended for use on neonates. The frequent monitoring of blood
glucose is an adjunct to the care of persons with diabetes.
WARRANTY
5-Year Warranty
Alliance International Co., Ltd. warrants to the original
purchaser of the meter that your i-QARE Blood Glucose Meter will
be free from defects in materials and workmanship for 5 years
from the date of purchase. If the meter does not work properly
because of the defect in material or workmanship during this
5-year period, Alliance International Co., Ltd. will repair it or
replace it with a new i-QARE Blood Glucose Meter. The warranty of
the repaired or replacement meter will expire on the date of the
original warranty expiration or 90 days after the shipment of a
replacement meter, whichever period is longer.
This warranty applies only to the original purchaser of the meter.
This warranty does not apply to the performance of a Glucose
Meter that has been damaged by accident or has been altered,
misused, tampered with, or abused in any way.
Alliance International Co., Ltd. will handle meters that show
damage or abuse according to its Non-Warranty Service Policy,
described below.
In no event shall Alliance International Co., Ltd. be liable to the
purchaser or any other person for any incidental, consequential, or
punitive damages arising from or in any ways connect with the
purchase, the operation of the glucose meter, or its parts.
Non-Warranty Service Policy
The i-QARE Blood Glucose Meter Non-Warranty Service Policy
applies to meters where the above warranty has not become
effective, has become inapplicable, or has expired. Alliance
International Co., Ltd. will repair or replace at its option meters
returned to it for a service charge. Replacement will be the same
series or similar product. Replacement or repaired meter will be
warranted for a period of 90 days from the shipment under a
limited warranty providing for replacement of parts and labor at
no charge.
Warranty and Service Instructions
All requests for return of the i-QARE Blood Glucose Meter under
the above Warranty or Non-Warranty Service Policy must be
made to the Customer Service Center by calling 1-866-400-3336
(Alliance International Co., Ltd.) or local distributor.
Customer experiencing difficulties of operating meter should
review troubleshooting or Error Message of this manual. For
more information or inquiries, please contact Alliance
International Co., Ltd. or local distributor. Be sure to fill out
your warranty form and return it with your i-QARE Blood Glucose
Meter to Alliance International Co., Ltd. or the local distributor.
Alliance International Co., Ltd. Customer Service:
No. 54 Ying-Tao Rd., Yingge Dist. New Taipei City 239, Taiwan
Customer Service Line: 1-866-400-3336
(Our service is available 24 hours a day, 7 days a week)
E-mail: [email protected]
CONTENT
Contents
Introduction & Indication For Use
2
Warranty
3
Contents
6
Standard Kit Contents, Supplies, and Accessories
8
Specification of i-QARE Blood Glucose Meter
9
Specification of i-QARE Draw-In Test Strip
11
Chapter 1: Understanding Your New System
Introduction of i-QARE Draw-In Test Strip
Symbols Introduction of the LCD Screen
Connecting (or changing) the Battery
Setting Year, Time, and Date
Coding the Meter
13
15
16
17
18
19
Chapter 2 Control Testing
Control Solution
Verifying Strip Accuracy Using Control Solution
Notes
20
20
21
22
Chapter 3 Testing Your Blood Glucose
Running a Blood Glucose Test
Expected Blood Glucose Value
23
25
28
Chapter 4: Using Your Meter Memory
30
Chapter 5: Care, Cleaning and Maintenance
Blood Glucose Meter
Lancing device
Battery
Meter Operational Status Checking
Suggestions
32
32
32
33
33
34
Chapter 6:
35
Safety and Disposal
Chapter 7: Screen Message and Troubleshooting
Message Description and Proceeding Solution
Troubleshooting
36
36
40
Standard Kit Contents, Supplies, and
Accessories
Standard Kit of i-QARE Blood Glucose Meter
1. i-QARE Blood Glucose Meter x 1
2. CR2032 3V Battery x 1
3. Lancing Device x 1
4. Lancet x 10
5. CODE CARD x 1
6. Draw-In Glucose Test Strip x 10
7. Wallet x 1
8. User’s Manual x 1
9. Quick Reference Guide x 1
10. Diary for Self-Monitoring x 1
11. Control Solution (Normal) x 1
Supplies and Accessories (Need to be purchased separately)
1.
2.
3.
4.
5.
Draw-In Glucose Test Strip 50 pcs (25/2vials)
Lancing device
Lancets
Battery (CR2032 3V)
Control Solution (2 levels - Normal and High) 2x2ml
Note
The above supplies and accessories are available in
Alliance International Co., Ltd. or your local
distributor.
Specification of i-QARE Blood Glucose Meter
1. Dimensions: 94.5mm x 56mm x 27.5mm
2. Weight: 56g (with battery)
3. Power Source: CR2032 3V lithium coin battery x 1
4. Battery Life: about 500 times or last 10 months without using
5. Display: Large LCD
6. Memory: 360 results with time and date
7. Automatic power-on: Electrode inserting detection
8. Sample size: 1μL
9. Measuring time: 6 seconds
10. Sleep Mode: Power consumption less than 20uA
11. Automatic power off: After 1 minute without action
12. Temperature warning function
13. Operation Condition: 14℃- 40℃(57.2℉ - 104℉)
14. Storage/Transportation Condition: 4℃-32℃ (39.3℉- 89.6℉),
< 95% R.H.
15. Altitude Limit: under 2610 meters (8562 ft.)
16. Measurement Unit: mg/dL or mmol/L
Applied Standards
This product conforms to the provisions of the FDA 510(K) and
EC directive IVDD (98/79/EC). The following standards apply to
the design and/or manufacturing of the product:
IEC 60601-1
Medical electrical equipment
Part 1: General requirement for safety
IEC60601-1-2
Medical electrical equipment
Part 2: Collateral standard: Electromagnetic
compatibility-requirements and test
IEC 61010-1
Safety requirements for electrical equipment for measurement,
control and laboratory use
Part 1: General requirement
Specification of i-QARE Draw-In Test Strip
1. Strip Size: 35mm x 7mm x 0.35mm
2. Required Blood Sample: 1µL
3. Hematocrit: 30% - 55%
4. Sample Type: Fresh capillary whole blood
5. Test Range: 20 - 600 mg/dL
6. Operation Condition: 14℃- 40℃ (57.2℉ - 104℉)
7. Validity: Can be used within 90 days after opening or within 18
months after the production date
8. Unit of Packaging: 25 strips x 2 vials/box
9. Storage/Transportation Condition: 4℃- 32℃ (39.3℉ - 89.6℉),
< 95% R.H. DO NOT REFRIGERATE
Caution
1. Do not use any expired strips.
2. The strips are only used with i-QARE glucose meter.
3. Do not use any blood that has been preserved (e.g. by
fluoride).
4. It is not recommended to test the blood level to
newborn baby.
5. Taking high dose of vitamin C or having high level of
uric acid may influence the blood glucose level, which
may cause inaccurate test results.
6. Hematocrit above 55% may cause lower blood glucose
level; hematocrit lower than 30% may cause higher
blood glucose.
7. To protect the environment, dispose of the used lancets
and strips in appropriate collection sites according to
national or local regulations. Avoid other people
touching the used lancets or test strips, which may
cause cross infection.
8. Keep the test strip vial away from children; the cap is
a choking hazard. In addition, the cap may contain
drying agents which can harm the body if swallowed
or inhaled. It may cause skin or eye irritation.
Chapter 1: Understanding Your New System
*Items may be sold separately.
Test Strip SlotInsert test strip here
DisplayShows blood glucose
results, messages, and
the results stored in
memory.
Function ButtonPress this button to
enter to the Set Mode,
move between fields
(such as time, date,
etc.)
Power ButtonPress this button to
enter or exit the
Memory mode or
change values in the
Set mode.
Front View
Data SlotTransfer date from the
meter to a computer.
Side View
Battery Cover
Slide out cover to
change battery
Lanyard Hole
Test Strip Vial
Back View
Code Card
Cap with Comfort Dial
Depth Selection
Release Button
Plunger
Ejector
Cover Protective
Reaction
Zone
Test Strip
Lancet
Introduction of Draw-In Test Strip
Reaction Zone
Introduction Zone
Application Zone
1. Reaction Zone
This is located in the middle of the test strip. This area must be
completely filled with blood sample.
2. Application Zone
This is located on the top side of the reaction zone. When a
drop of blood is applied to the reaction zone, it will be rapidly
drawn in.
3. Introduction Zone
On the test strip, black bars are located in the bottom area, and
it must be inserted into the strip slot of the meter with the black
bars facing up.
Caution
1. Blood sample should not be applied to the
Introduction Zone (black bars).
2. Avoid touching the reaction and application zones for
long periods as moisture may affect the reaction and
reading.
Symbols Introduction of the LCD Screen
Display Symbols
The blood glucose meter displays symbols to guide you through
the test and to assist you to determine whether the test strip and
display function are ready or not. To check that all the display
symbols are working, press the power button or insert the test
strip electrodes into the meter. When a test strip or CODE CARD
is inserted, the display will turn on automatically. Each time the
meter is on, all the symbols should appear briefly.
Connecting (or Changing) the battery
1. Use your thumb to slide the
battery cover out of the
meter.
2. Slightly pull back the
buckle to loosen the
battery.
3. Place a new battery in a
45 degree to the tray with
the + side facing up.
4. Push the top of the battery
until it is firmly positioned.
Caution
The battery symbol
on the screen means the
battery is low, and should be changed soon.
Setting Year, Time, and Date
Setting the time and date is important if you use meter’s memory
or connect to your computer.
1. With meter off, press
(Set button), the year will
flash.
3. Press
again, the month
will flash.
2. Press
(power button) to
change the year, until the
desired year is displayed.
4. Press
to change the
month, until the desired
month is displayed.
5. Repeat step 3 and 4 to
change day, hour, minute,
and unit.
6. Press
to finish set-up and the meter will turn off
automatically.
Coding the Meter
1. With the meter off, insert the code card
into the test strip slot. Please make sure
the number on the code card matches the
code on your display.
2. When you insert a test strip
(see Running a Blood Glucose
Test), the meter will turn on
automatically and show the
strip code number. Please
make sure the code number on
the meter screen matches the
code on the test strip vial.
Same
3. Throw away the old code card.
Caution
1. Each box of test strip contains one CODE CARD
designed specially with one code number.
REMEMBER to change the CODE CARD every
time you open a new box of test strip.
2. DO NOT insert different brands or models of
CODE CARD or strip, which cannot turn on and
function the meter.
3.
Chapter 2 Control Testing
Blood Glucose Control Solution (2 Levels)
To ensure that the glucose meter is operating correctly and
obtaining accurate results, it is recommended to test with a
control solution. At room temperature, Control Solution test
results should fall within the expected range printed on the test
strip vial label. If your values are outside of the range, repeat the
quality control by using a new test strip. If the second result is
still outside of the control range, please call the service line or
national distributor. Accurate results also depend upon the
meter being properly coded to match the code number
printed on each test strip vial label. Use of controls for two
levels is also recommended in the following conditions:
For practice purpose: to the first-time users when using a new
glucose meter or a new vial of test strips.
1. All levels of control solution should be run with each new lot
of test strips.
2. Whenever the test strips are exposed to the temperatures
above 40℃ (104℉) or below 14℃ (57.2℉).
3. After inappropriate operating the equipment.
4. When your blood glucose result appears doubtful.
5. When your diabetic therapy is changed.
Caution
Do not use expired control solution. The expiration date
is printed on each container. Upon opening the control
solution, the date of opening should be noted. The
control solution can be used for 3 months after initial
opening, and can be stored at room temperature.
Verifying Strip Accuracy Using Control Solution
Before measuring your blood glucose level, you will need the
following materials:
A.
B.
C.
D.
E.
Your i-QARE Blood Glucose Meter
Fresh i-QARE Draw-In Test Strip
Fresh Control Solution
CODE CARD
Lancing device and Lancets
1. Place the vial of the test strip in an upright position. Take a
new test strip from the vial and close the vial lid immediately.
2. Insert the test strip into the meter strip slot and open the
Control Solution.
.
3
3. Squeeze a drop of control solution on a
clean plastic surface, and close the control
solution vial.
.
4
4. Apply the drop to the application zone of the
test strip. The solution is automatically
drawn in and an audible signal is heard for
confirming that the test strip took in a
sufficient quantity of control solution.
5. The measurement appears within 6 seconds.
Compare it with the range printed on the
strips vial.
Note
If the result of your measurement falls within the range
shown on the strip vial, an accurate blood glucose
reading is ensured. If the test result falls outside the
range, the following may apply:
A. The control solution is no longer fresh or the test
strip is not sufficiently filled.
B. Ensure the glucose meter is used under 14℃-40℃
(57.2℉-104℉), and the test strips and the control
solution are stored under 4℃-32℃ (39.3℉-89.6℉),
< 95% R.H.
C. Ensure the blood sample fully fills the reaction zone
of the test strip, see below:
If the above situations occur, repeat the measurement at
correct temperature, utilizing fresh control solutions or a new
piece of test strip (See Warranty Policy).
Chapter 3 Testing Your Blood Glucose
Preparing lancing device to get blood sample
1. Twist and pull off the cap.
2. Insert a lancet firmly
1. Twist
off the
intoand
the pull
holder.
cap.
3. Twist off the lancet’s
protective cover.
4. Snap the cap back on
and twist the cap back
to the device.
Plunger
5. Twist the cap to set the
lancet depth. (Start at 2
to 3). For tougher skin,
dial to a higher number.
6. Pull the plunger until
it clicks. Set aside
until later in the test.
Caution
1.
2.
1.
To reduce the risk of infection, NEVER share your
lancet with anyone.
When checking the blood glucose level from different
users, remember to disinfect the lancet cap and the
entire surface that has stained with blood after
testing. It is NOT appropriate to disinfect and reuse
the lancet. Please dispose the used strip and lancet
safely and properly.
Running a Blood Glucose Test
Before running your first test, make sure you set up meter
properly.
1. Use warm water to wash your
hands and dry them. Then,
massage your fingertips gently. It
will be easier to get blood sample
with less pain.
2. Take one test strip from the vial
and close the vial cap rapidly and
tightly.
3. Insert a test strip; make sure the
code on the meter matches the
code on the test strip vial.
Notes
1. After taking out the test strip from the vial, close the
cover of the vial rapidly.
2. If the temperature is lower than 14℃ or higher than
40℃, the LCD screen will display “E-t” message.
3. If the code number on the display does not match the
code on the test strip vial, please contact Alliance
International Co., Ltd. or your local distributor.
4. When you see the flashing blood drop, hold the lancing device
against the side of your fingertip and press the release button.
Release Button
5. Gently squeeze your finger to assist
the flow of blood.
6. This helps you get a blood drop.
Touch the drop to the tip of the
yellow application zone of the test
strip. Do not apply blood on top
surface of test strip. When you hear a
“beep” sound, you have enough blood
in the test strip.
7. After finishing the test, please use
the protective cap to cover the
needle, eject the lancet, and discard
it.
Note
1.
Correct Blood Application
The strip has enough blood in the
test strip. Ensure the blood
application zone is fully filled, and
then remove your fingertip from
the test strip.
Incorrect Blood Application
The strip has insufficient blood in
the strip which may result in an
error message or inaccurate result.
Please discard the strip and insert a
new test strip to measure again.
Expected Blood Glucose Level
Expected blood glucose levels for people without diabetes
(referenced from the American Diabetes Association Clinical
Practice Recommendations 2004, Diabetes Care, Vol. 27,
Supplement 1 P. S9)
Time
Range (mg/dL)
Range (mmol/L)
Fasting
70 to 110
3.9 to 6.1
Two hours after meals
Less than 140
Less than 7.8
Note
1. If your blood glucose result is unusually high (over
300mg/dL), the user should check the quality control. If
your blood glucose is under 50mg/dL, contact your
healthcare provider immediately.
2. If your blood result appears doubtful, repeat the test
procedure by using new test strips and running the
quality control to ensure that the strip and meter are
working properly. If the control results are within the
ranges on the vials, retest your glucose level.
3. If you open a new vial of test strips, ensure the code on
the vial matches the code on the meter. If the code does
not match, calibrate with a new CODE CARD. Once
the code number on the meter is displayed, insert the
strip from the new vial into the meter.
Understanding Your Test Result
The Blood Glucose Value is variable and will be affected by
different elements. For example:
1.
2.
3.
4.
Measuring blood glucose level at different times in a day,
Types of food you eat,
Body condition,
Insulin and medicines, etc.
High Blood Glucose Value
If the Blood Glucose Value is too high or you have symptoms
such as thirst, pyuria, regurgitation, vomiting, dystopia,
somnolence, belly ache, please consult with your physician
immediately.
Low Blood Glucose Value
If the Blood Glucose Value is too low or you have the symptoms
such as night sweat, cold to shake, palpitating, headache,
dystopia, dizzy, tachycardia, tinnitus, paralysis of fingertip,
please consult with your physician immediately.
Unusual Test Results
If your blood sugar result doesn’t match the way you feel, follow
these steps:
1. Run a control test
2. Repeat a blood glucose test
If your blood glucose results still don’t reflect the way you feel,
call your doctor immediately.
Chapter 4: Using Your Meter Memory
Storing Test Result
Your meter automatically stores up to 360 test results, and you
can review them at any time. If you have set the time and date on
the meter (see Setting Year, Time, and Date), that information is
also stored and displayed with your test results. Moreover, the
Healthy Life Meter can also check the average value of blood
glucose results for the past 7, 14, 21, and 28 days.
The i-QARE meter will first display 7, 14, 21, and 28 days average
values, as follows:
1. With the meter off, press
2. Press
to turn on the meter.
to display the 7-day average.
Example
3. Press
again to display the 14-day
average. By repeating this step, you can check
the average values of 21 and 28 days.
Example
4. Press
to continue to recall each test result with date and
time. The display will show the result number “01”first, and
then Blood Glucose Result, Measuring Date, and Time. Repeat
this step to check the following test results.
5. To quit the memory recall, keep pressing
glucose meter.
to turn off the
Notes
1. Once the memory is full (360 sets), the latest result will
cover the oldest one.
Chapter 5: Caring, Cleaning and Maintenance
Blood Glucose Meter
Caring and Cleaning of Blood Glucose Meter is very easy.
Follow the instructions below and it will make sure your meter
works properly:
1. DO NOT disassemble the Blood Glucose Meter. If there is any
problem, please contact the Distributor for assistance.
2. Please carry or hold the Blood Glucose Meter carefully to
avoid extreme shock or accidental drop-down.
3. The Blood Glucose meter should work or be used under the
temperature environment between 14℃ - 40℃ (57.2℉-104℉).
4. DO NOT expose the Blood Glucose Meter and Test Trip to
extreme hot temperature, high humidity (Kitchen or bathroom),
or direct sunlight.
5. DO NOT use abrasive cleaners and never submerge the body of
the blood Glucose Meter in water or other liquids. For proper
cleaning, use a soft, dry lint-free cloth to clean the body of the
Meter and lancing device.
Cleaning Your Lancing Device
To clean your lancing device, use a mild dishwashing liquid and a
soft cloth. DO NOT place the entire device under water. At least
once a week, disinfect the cap after cleaning by placing it in 70%
alcohol (isopropyl) for 10 minutes. Rinse with water and allow
the cap to air-dry after disinfecting.
Battery
1. 3V Lithium coin battery can support approximately 500 times
of blood glucose test. When the battery needs to be changed,
please use ONLY CR2032 3V Lithium coin battery or the same
kind of 3V Lithium coin battery.
2. When the LCD screen display the symbol
, please change
the battery immediately in order to avoid wrong test results.
3. Steps of changing the battery, please refer to Connecting or
Changing the Battery.
4. Changing the battery will not affect the test results in the
memory.
5. After changing the battery, you will have to reset time and date.
Please refer to Setting Year, Time, and Date.
Meter Operational Status Checking
1. Insert CODE CARD firmly into the test strip slot, the code
number will display on the screen.
2. After removing the CODE CARD, the upper-left side of
display will show the symbol
. This symbol means the
function of the meter is fully operational.
3. If the display DOES NOT show the symbol
, it means the
blood glucose meter is DEFECTIVE, and may cause wrong
test results. Please contact the Distributor.
Suggestions:
1. Please carefully read this User’s Manual of Blood Glucose
Meter and Test Strip.
2. DO NOT change the diabetic therapy without consulting your
physician.
3. If the test result is extremely different from your usual test
results, please contact your physician.
4. Please DO NOT expose the new test strips to the air for a long
while. DO store the test strip in the vial.
5. The test strips and the control solution should be used before
the expiry date and should be stored in the normal room
temperature. Please DO NOT refrigerate it.
6. If the fresh blood sample has very high density of reducing
substrate (Vitamins C, Uric Acid, etc.), it will affect the value
of test result.
7. The hematocrit of the blood sample is higher than 55%, it will
cause the value of the test result to be lower than the normal
test result value.
8. During the blood glucose test, please ensure that the blood
sample is fully filled all over the Blood Application Zone
(yellow square area) of the test strip. Insufficient blood sample
or blood sample flows over the test strip instead of drawing
will cause incorrect test results.
Chapter 6:
Safety and Disposal
Glucose Meter
1. Please avoid operating Glucose Meter near devices of
generating potential electromagnetic interferences.
2. Do not dispose as household waste. Dispose according to local
regulations.
3. Take out battery before disposing.
4. Please recycle if possible.
Used strip, lancet and pads
1. Used strips, lancets, and alcohol pads may be infectious if users
have been infected with contagious diseases.
2. It is important to treat the used materials as infectious or
biologically hazardous wastes.
3. Do not dispose as household waste. Dispose according to local
regulations.
Battery
1. Before using, please ensure that the battery cover is closed.
2. Use only approved battery type, non-approved battery may
cause damage.
3. Do not dispose as household waste. Dispose according to local
regulations.
4. Do not dispose battery in fire.
5. Please recycle if possible.
Caution
When testing blood from multiple users, disinfect the
lancing device and surfaces in contact with blood after
each use. Dispose the test strips and lancets safely.
Chapter 7: Screen Message and Troubleshooting
Message Description and Proceeding Solution
All the messages will be displayed by symbols or images on the
display. However, when the incorrect operation cause the
incorrect test results, the glucose meter will not display any
messages or symbols for the incorrectness. If you still have
questions, please contact your local Distributor.
Message
Description
Proceeding Solution
Every time after starting
your glucose meter, please
ensure all the symbols show
on the display briefly.
Please compare it with
Symbols Introduction of the
LCD Screen.
If there are any symbols
that do not display
properly, it could cause
incorrect test result. Please
contact local distributor.
After inserting the “CODE
CARD” Chip, display shall
show the code number and
your measuring unit.
Ensure the code number
on the display and the
CODE CARD are the
same.
Message
Description
Proceeding Solution
After pressing the
key, the Screen shall
display the Code Number
and the symbol of waiting
for test strip to be inserted.
Make sure the code number
on the screen and on the label
of test strip vial are the same.
Insert the test strip and draw
in the blood sample till you
hear a beep sound and the
test will start.
After drawing the blood
sample into the test strip,
the 6-second countdown
shall start. After the
countdown is finished, the
rest result will display on
the screen.
NONE
Your blood glucose may be
extremely low. If it is
lower than 20mg/dL.
Ensure the test strip has
drawn in sufficient blood
sample to the blood
application zone and test
again with new strip. If it is
still displaying the “LO”
symbol, please consult with
your physician.
Your blood glucose may be
extremely high. If it is
higher than 600mg/dL.
Make a new test with new
test strip again. If it is still
displaying the “HI” symbol,
please consult with your
physician.
Message
Description
The Test Result will be
stored in the memory.
Proceeding Solution
After entering the Memory
Mode, press
Key
to recall saved Blood
Glucose Results with date
and time. The memory can
record the latest 360 Blood
Glucose Results.
Result for the past 7, 14,
After entering the memory
21, and 28 days.
mode, press
key to
see the average value of
blood glucose result for the
past 7, 14, 21, and 28days
sequentially.
If the temperature is
extremely high or low
during the operation of
the glucose meter
Move to an area between
14。C - 40。C (57.2℉ 104℉), wait 5 minutes and
repeat the test.
The test strip is used or
damaged.
Please DO NOT reuse the
test strip. Please use a new
strip to test again.
Message
Description
Proceeding Solution
The glucose meter does
not insert the CODE
CARD for coding.
Please refer to Coding the
Meter and the use of correct
CODE CARD.
The battery is out of
power.
Please change the battery to
avoid incorrect test results
or else the glucose meter
cannot be operated.
Troubleshooting
After inserting the i-QARE DS-A Draw-In Blood Glucose Test Strip,
if your Glucose Meter does not display any message or start the
test, please check the following possible reasons and solutions. If
you still cannot solve the problem, please call our help line at
1-866-400-3336.
Reasons
Solutions
The battery is weak or no battery is
installed.
Change to a new battery or
install a battery.
The battery is installed in the wrong
direction.
Ensure that the plus (+) sign of
the battery is facing upward.
The test strip is inserted in wrong
direction or is not inserted
completely.
Ensure to insert the introduction
zone of the test strip firmly into
the strip slot which is located on
the top of the meter. Then insert
the test strip to the end of strip
slot.
The glucose meter or the test strip is
not working.
The battery is weak or no
battery is installed.
After inserting the test strip and
turning on the glucose meter, the
glucose meter turns off automatically
and the glucose meter does not
operate for 1 minute.
Remove the test strip and insert
the strip in the strip slot again,
wait until the blood application
symbols are shown on the
display, and draw in the blood
sample for testing.


