Download DS-W Manual - Alliance International Co.,Ltd
Transcript
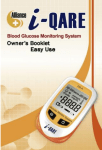
Introduction Thank you for choosing i-QARE DS-W Blood Glucose Monitoring System. The DS-W Glucose Monitoring System is easy, comfortable, and convenient to operate, which helps you monitor your blood glucose levels on a regular basis. Please read this manual thoroughly before testing. This manual provides you and your healthcare provider with important information and step-by-step direction to use the DS-W Blood Glucose Monitoring System. The i-QARE DS-W Blood Glucose Meter utilizes the latest electrochemical biosensor technology to measure blood glucose level by recording a current between two electrodes. The i-QARE DS-W Blood Glucose Meter: • coding free, allowing you to save time and avoid forgetting insert code card; • allows you to perform Alternative Site Testing (AST); If you have any questions about your meter, lancing device, test strips, or controls, please call Alliance International customer service toll-free at 1-866-400-3336 Mon - Fri 9:00 am – 5:00 pm, EST. At all other times, please contact your healthcare provider for assistance. Thanks again for choosing i-QARE DS-W Blood Glucose Monitoring System. -1 - Important Safety Instructions Read this carefully before using. The following basic safety precautions should always be taken: The meter is for single patient use. Do not share it with anyone including other family members! Do not use on multiple patients! All parts of the kits are considered biohazardous and can potentially transmit infectious diseases, even after you have performed cleaning and disinfection. Close supervision is necessary when the device is used near children or persons with disabilities. Use the device only for the intended use described in this manual. Do not use test strip and control solutions, which are not supplied by the manufacturer. Do not use the device if it is not working properly, or if it has suffered any damage. Before testing your blood glucose, read all instructions thoroughly and practices the test first. Do all quality control checks as directed and consult with a diabetes healthcare provider. “FDA Public Health Notification: Use of Fingerstick Devices on More than One Person Poses Risk Transmitting Bloodborne Pathogens: Initial Communication”(2010). http://www.fda.gov/Medicaldevices/safety/Alertsan -2 - dNotices/ucm224025.htm “CDC Clinical Reminder: Use of Fingerstick Devices on More than One Person Poses Risk for Transmitting Bloodborne Pathogens” (2010). http://www.cdc.gov/injectionsafety/Fingerstick-Devi cesBGM.html KEEP THESE INSTRUCTIONS WITH YOU. Warning: Keep the test Strip vial away from children; the vial cap and the test Strip can be a potential choking hazard. Never chew or swallow a test strip. If this occurs, please seek medical assistance immediately. -3 - Indications for Use The i-QARE DS-W Blood Glucose Monitoring System is intended to be used for the quantitative measurement of glucose (sugar) in fresh capillary whole blood samples drawn from the fingertips, forearm or palm. The i-QARE DS-W Blood Glucose Monitoring System is intended to be used by a single person and should not be shared. The i-QARE DS-W Blood Glucose Monitoring System is intended for self testing outside the body (in vitro diagnostic use) by people with diabetes at home as an aid to monitor the effectiveness of diabetes control. The i-QARE DS-W Blood Glucose Monitoring System should not be used for the diagnosis of or screening of diabetes or for neonatal use. Alternative site testing should be done only during steady-state times (when glucose is not changing rapidly). The i-QARE DS-W Draw-in Blood Glucose Test Strip are for us with the i-QARE DS-W Blood Glucose Meter to quantitatively measure glucose (sugar) in fresh capillary whole blood samples drawn from the fingertips, forearm or palm. -4 - Table of Content Important Safety Instructions Indication for Use Signs and Symbols Limitations Standard Accessories Important Information about Your New Meter About Alternative Site testing (AST) Understanding Your Meter & Strip Control Solution Test How to Obtain a Blood Sample Performing Blood Test Understanding Your Test Result Comparing Your Meter with Lab Results Memory Setup and Recall Changing the Battery Cleaning and Disinfecting your Meter Meter Specifications Message Description and Proceeding Solution Troubleshooting Limited Warranty -5 - 2 4 4 6 8 9 10 12 15 18 21 24 25 27 28 29 33 34 37 38 Limitations 1. Apply only capillary whole blood sample to test your blood glucose level. 2. Not for use on patients in shock, hypotensive patients, dehydrated patients or hyper-osmolar patients. 3. If you have followed all instructions described in this user’s manual and you are still getting results that do not agree with how you feel, please contact your healthcare provider. 4. When the result is LO – “Your blood glucose level may be extremely low. Contact your healthcare provider immediately. 5. When the result is <50 mg/dL – “Your blood glucose level may be low. In this situation, follow your healthcare provider’s instructions.” 6. When the result is >300 mg/dL – “Your blood glucose level may be high. In this situation, follow your healthcare provider’s instructions.” 7. When the result is HI – “Your blood glucose level may be extremely high. Test your glucose level again with a new blood sample. If the reading is still HI, contact your healthcare provider immediately.” 8. Please notice the following: • For over-the-counter use • Not for screening or diagnosis of diabetes mellitus -6 - • Alternative site testing (AST) testing should only be done during steady-state times (when glucose us not changing rapidly) • AST should not be used to calibrate continuous glucose monitors (CGMs) • AST should not be used for insulin dose calculations • Not for neonatal use • For single-patient use only • The Blood Glucose Monitoring System is not for use in the critically ill. 9. Elevated levels of Ascorbic Acid (Vitamin C), Dopamine, L-Dopa, Uric Acid, Methyldopa and Triglycerides in the blood sample may cause inaccurate results. 10. The acceptable hematocrit range is 20-60%. If your hematocrit is outside of this range, your blood glucose result may not be accurate. 11. Please read your test strip instructions carefully for additional health-related information. -7 - Standard Accessories Your new DS-W Blood Glucose meter and accessories work together to measure your blood glucose level. The starter meter kit includes: DS-W Blood Glucose Meter × 1 Lancing Device × 1 3V CR2032 Battery × 1 Carrying Case × 1 User’s Manual × 1 DS-W Draw-in Blood Glucose Test Strip × 10* (or 25*) Alliance Blood Glucose Control Solution (Level I) × 1 * Lancets × 10* (or 25*) Strip instruction × 1* Control solution instruction × 1* NOTE: The DS-W meter is available as a meter only or a starter kit. Contents might vary from different packages. For starter kit, products with * mark are excluded. For purchasing accessories, please call customer service if you have questions or need assistance. -8 - Important Information about Your New Meter Use only DS-W Draw-in Blood Glucose Test Strip with DS-W Blood Glucose Meter. Other test Strip will get inaccurate results. Store in a safe place out of direct sunlight at temperatures between 39.2℉ - 89.6℉ (4℃ - 32℃). Altitude up to 8,563 ft. (2,610 meters) above sea level has no effect on readings. DO NOT store the meter and test Strip in a car, bathroom, or refrigerator. Keep the meter, test Strip, lancing device, and lancets away from children and pets. Remove battery if the meter will not be used for 1 month or more. Dispose of all components of your blood glucose monitoring system according to your healthcare provider’s recommendations. -9 - About Alternative Site Testing (AST) Understanding Alternative Site Testing What is AST? Besides the fingertip, you can test your palm or forearm instead. What is the advantage of AST? You have different options of testing other places on your body besides the fingertip. You should perform AST only at the following times: Do AST ONLY in the following intervals: In a pre-meal or fasting state (more than 2 hours from last meal). Two hours or more after taking insulin. Two hours or more after exercising. Do NOT use AST if: You think your blood glucose is low. You often do not notice when your blood glucose level is low (hypoglycemia unawareness). Your AST results do not match the way you feel. Your routine glucose results are often fluctuating. -10- Fingertip test only: If you are sick After exercising Less than 2 hours after exercising Within 2 hours of taking or injecting insulin AST Results If the blood glucose test result from the AST does not match how you feel, DO a fingertip test to check the result again. Do NOT change your treatment because of an alternative site result, do a fingertip test to check the result. NOTE: Talk with your healthcare provider before you test with samples from your forearm or palm. Do NOT ignore symptoms of high or low blood glucose. Fingertip samples are able to show the rapid change of glucose faster than forearm samples. -11- Understanding Your Meter & Strip Test Strip Slot – Insert test strip here. Function & Power Button Display – Shows test results, messages, and memory records Battery Cover – Slide cover off to replace battery -12- Meter Display Blood Application Battery Status Test Result Message Code Message Unit Symbol of Test Meter Checking Status Test Strip Reaction Window Electrode Sample Collection Area -13- 1. Sample Collection Area: Apply a drop of blood here and the blood will be drawn in automatically. 2. Reaction Window: This is where you confirm if enough blood has been drawn into the test strip’s absorbent channel. 3. Electrode: Insert this end of the test strip into the meter until it will go no further. NOTE: Test strip are for single patient use only. DO NOT apply blood to the Electrode. Store the opened/unopened strip vial in a cool, dry place between 39℉ - 90℉ (4℃ - 32℃). Store your test strip in the original vial only. Do not transfer them to a new vial or any other container. Wash and dry your hands before removing a strip from the strip vial. After taking out of the strip from the vial, close the vial cap immediately and tightly and perform the test right away. Avoid exposing the strip for long time; otherwise, the moisture may affect the reading. User must match the code number every time when open a new box of test strips. If user gets different numbers from displayed and vial, please DO NOT use the strip, and contact your healthcare provider. Record the opened date on the vial label when you first open it. The strips may be used for 3 months past the date you first opened the vial. -14- Control Solution Test Why Run a Control Solution Test? To ensure that the glucose meter is operating correctly and obtaining accurate results, it is recommended to test with a control solution. Use of control solution is also recommended in the following conditions: 1. For practice purpose: to the first-time users when using new glucose meter or when using a new vial of test Strip. 2. You think the meter or test Strip may be working incorrectly. 3. You drop the meter. 4. You have repeated a test and the test results are still lower or higher than expected. 5. When test Strip are exposed to extreme environmental conditions. NOTE: Alliance Blood Glucose Control Solution range is printed on the i-QARE DS-W Draw-in Blood Glucose Test Strip vial. Control solution is used to test meter and strip performance. It is not a recommended range for your blood glucose level. If you need any assistance, including how to obtain control materials, please contact us at our toll-free number 1-866-400-3336, Mon – Fri 9:00am – 5:00pm, EST. At all other times, please contact your healthcare provider for assistance. -15- Important Control Solution Information Use only Alliance Blood Glucose Control Solutions. Allow the control solution to come to room temperature before use. Shake the control solution bottle before use, and place the drop of control solution onto a clean nonabsorbent surface before applying the solution to a test strip. Do not use expired control solution, the expiration date is printed on each container. Upon opening the control solution, the date of opening should be noted. The control solution is stable for 3 months after initial opening, and can be stored at room temperature. How to Perform a Control Test? You need to have the following materials available: DS-W Blood Glucose Meter. Fresh Blood Glucose Test Strip. Fresh Control Solution. Nonabsorbent plastic/surface. -16- 1.Take a test strip from the test strip vial and close the cap quickly and tightly. 2.Insert the test strip into the test strip slot, and open 1 level of Control Solution. 3.Squeeze a drop of control solution onto a plain nonabsorbent plastic/surface, and close the control solution vial immediately. 4.Apply the control solution drop to the sample collection area of the test strip. The solution is automatically drawn in and a “beep” sound is heard for confirming. 5.The measurement appears after 6 seconds. Compare it with the range printed on the Strip vial. NOTE: DO NOT APPLY THE CONTROL SOLUTION DIRECTLY TO THE TEST STRIP! To avoid contaminating the control solution with the substance of the test strip. In the case that the control measurements fall outside of the acceptable range, please call customer service for assistance. -17- How to Obtain a Blood Sample Warnings All parts of the kit are considered biohazardous and can potentially transmit infectious diseases, even after you have performed cleaning and disinfection. Users should always wash hands thoroughly with soap and water before/after handling the meter, lancet, or test strips. Precaution If the meter is being operated by a second person who is providing testing assistance to the user, the meter should be disinfected prior to use by the second person. Preparing the lancing device to get blood sample 1. Turn and pull off the cap. 2. Insert the lancet firmly. -18- 3. Twist off the lancet’s protective cover. 4. Snap the cap back on and twist off the cap to the device. IMPORTANT: Lancet is for single use only. Use a new and sterile lancet to perform the test. Keep lancing device and lancets clean. Use caution when removing the used lancet from the device and when disposing the used lancet. -19- 5. Turn the cap to set the lancet depth. (Start at 2 or 3) For tougher skin, dial to a higher number. 6. Pull the plunger until it clicks. Set aside until later in the test. NOTE: The lightest depth setting is the lowest number on the setting. Try different settings to find out which is right for you. Warning: Do not share the lancing device and lancets with other users. Sharing lancing devices and lancets may transmit blood borne pathogens, such as viral hepatitis. -20- Performing Blood Test Running a Blood Glucose Test: Before testing, make sure you do the following: 1. Use warm water to wash your hands and dry them. Then, massage your fingertips gently. It will be easier to get blood sample with less pain. 2. Take one test strip from the vial and recap the vial immediately, taking care that the lid is secure. NOTE: If the temperature is lower than 57.2℉ (14℃) or higher than 104℉ (40℃), the LCD screen will display “E-t” message. -21- 3. When you see the flashing blood drop, hold the lancing device against the side of your fingertip and press the release button. 4. Gently squeeze your finger to assist the flow of blood. The first drop of blood should be discarded, then use the second drop of blood for testing. 5. This helps you get a blood drop. Touch the drop to the tip of the application zone of the test strip. Do not apply blood on top surface of test strip. When you hear a “beep” sound, you have enough blood in the test strip. 6. After finishing the test, please use the protective cap to cover the needle, eject the lancet, and discard it. -22- NOTE: The DS-W meter only requires a tiny sample of blood to perform a test. Choose a different spot each time you test. Repeat puncture in the same spot may cause soreness and calluses. The first drop of blood usually contains tissue and serum, which may affect the test result. It should be discarded. The blood should be completely filled the reaction window before the meter begins to count down. If you find that the reaction window is not filled with blood when the meter is counting, NEVER try to add more blood to the test strip. Discard the test strip and retest with a new one. Correct Blood Application Incorrect Blood Application If you do not apply a blood sample within one (1) minute, the meter will automatically turn off. You must remove the test strip and insert a new strip to start the test procedure. If you have trouble filling the test strip, please call customer service for assistance. -23- Understanding Your Test Result Normal Blood Glucose Range Expected blood glucose levels for people without diabetes: Time Range (mg/dL) Range (mmol/L) Fasting and before meals <100 mg/dL <5.6 mmol/L 2 hours after meals <140 mg/dL < 7.8mmol/L (Referenced from the Diabetes Care January 2014 vol. 37 no. Supplement 1 S14-S80) NOTE: If your glucose result is unexpected or does not match the way you feel, run a control solution to check the performance of your Blood Glucose Monitoring System. If the control solution test result falls outside the range printed on the test strip vial, perform another control test. If the second control measurement still falls outside the range, your meter and test strip may not be working properly. DO NOT use the system to test your blood, and contact us at our toll-free number 1-866-400-3336, Mon. –Fri. 9:00am – 5:00pm, EST. At all other times, please contact your healthcare provider for assistance. If your result appears as “LO” your glucose level may be extremely low (below 20 mg/dL). Contact your healthcare provider immediately. If your result appears as “HI” your glucose level may be extremely high (more than 600 mg/dL). Please repeat your blood glucose test. If the result is still “HI” contact your healthcare provider immediately. -24- Comparing Your Meter with Lab Results The result you obtain from your meter may differ somewhat from your lab result due to normal variation. Meter results can be affected by factors and conditions that do not affect lab results in the same way. To make an accurate comparison between meter and lab results, please follow the steps below: Before you go to the lab 1. 2. 3. Perform a control solution test to make sure that the meter is working properly. You must be fasting for at least 8 hours before doing comparison tests. Take your meter with you to the lab / doctor. While at the lab 1. 2. 3. 4. Wash your hands before obtaining a blood sample. Blood should be drawn for your lab test within 15 minutes of the time you measured your glucose level with your meter. Never use your meter with blood that has been collected in a gray-top test tube. Use fresh capillary blood only for glucose measurements with your meter. -25- You may still have a variation from the result because blood glucose levels can change significantly over short periods of time, especially if you have eaten, exercised, *1 taken medication, or experienced stress . In addition, if you have eaten, the blood glucose level from a finger stick can be up to 70 mg/dL higher than blood drawn *2 from a vein (venous sample) used for a lab test . Therefore, it is best to be fasting for 8 hours before doing comparison tests. Factors such as the amount of red blood cells in the blood (a high or low hematocrit) or the loss of body fluid (severe dehydration) may also cause a meter result to be different from a laboratory result. Please contact your healthcare provider if you have questions. References: *1. Surwit, R.S., and Feinglos, M. N.: Diabetes Forecast (1988), April, 49-51. *2. Sacks, D. B.: ’‘Carbohydrates.’‘ Burtis, C. A., and Ashwood, E.R. (ed.), Tietz Textbook of Clinical Chemistry. Philadelphia: W.B. Saunders Company (1994), 959. -26- Memory Setup and Recall Your meter will automatically store up to 20 test results, and you can review them anytime by press and hold until the meter turns on, the meter will show the test results by the sequence of number 1, 2, 3, 4, 5 up to 20. Steps: 1.With the meter off, press and hold to turn on the meter. After 3 seconds, the test result will show up immediately. (Screen showed when meter is on) 2.Press key again, the screen will show the next test result record. 3.To view all of the 20 test results, please follow and repeat step 2. 4.Meter will turn off once you press for 3 seconds. NOTE: Once the memory is full (20 sets), the latest result will replace the oldest one. Recalled test results will not be identified with the date and time, and control results will not be distinguishable from your blood glucose results. -27- Changing the Battery The DS-W uses with 3V CR2032 alkaline battery. Battery life will vary depending on usage, so always keep a spare battery on hand. The battery should last about 1000 tests. When the battery symbol appears on the meter display, please replace new batteries. 1. Press lightly on the battery cover and slide it in the direction of the arrow. 2. The battery remove buckle is at the back of the battery cover. 3. Use the battery remove buckle to remove the battery. 4. Replace a new battery under the copper hinge make sure it is firmly positioned. -28- Cleaning and Disinfecting your Meter Warning: No liquids, dust, or dirt should be allowed to enter the strip port or the interior of the meter. You should always wash and dry your hands thoroughly with soap and water after handling the meter or test Strip. We recommend that you clean and disinfect your meter once per week. If the meter is being operated by a second person who is providing testing assistance to the user, the meter and lancing device should be disinfected prior to use by the second person. Always perform the cleaning step before the disinfection step. Cleaning Cleaning is the removal of organic material or soil from your meter, but cleaning does not kill microbes. We recommend cleaning your meter once per week with DISPATCH® Hospital Cleaner Disinfectant Towels with Bleach (the active ingredient) by CALTECH (EPA Reg. No. 56392-8), which has been shown to be safe for use with your meter. The DISPATCH Towels can be purchased at amazon.com or Wal-Mart. -29- Cleaning Procedure: Step 1. Dispose of used test strip. Gloves should be worn. Step 2. Remove towel from package or bottle. If towel is very wet, wring towel slightly to discard excess liquid. Step 3. Wipe surface with towel until completely wet. Wipe down meter on front, back, and sides. DO NOT WRAP THE METER IN A WIPE. Take extreme care not to get liquid in the test strip port of the meter. Step 4. Wipe dry or allow to air dry. Dispose of towel. -30- Disinfection Disinfecting your meter kills the microbes that can cause diseases such as hepatitis. We recommend disinfecting your meter once per week with DISPATCH® Hospital Cleaner Disinfectant Towels with Bleach (the active ingredient) by CALTECH (EPA Reg. No. 56392-8), which has been shown to be safe for use with your meter. Step 1. Dispose of used test strip. Gloves should be worn. Step 2. Remove towel from package or bottle. If towel is very wet, wring towel slightly to discard excess liquid. Step 3. Wipe surface with towel until completely wet. Wipe down meter on front, back, and sides. DO NOT WRAP THE METER IN A WIPE. Take extreme care not to get liquid in the test strip port of the meter. -31- Step 4. Let stand for one minute. To kill TB, let stand for 2 minutes at room temperature (20-25℃). Wipe dry or allow to air dry. Dispose of towel. A cleaning and disinfection cycle refers to one cleaning step and one disinfecting step. The meter has been validated for 260 cleaning and disinfection cycles, which is equivalent to cleaning and disinfecting once per week over the 5 year use life of the meter. The meter has been further validated for a cleaning step after each use. If you notice any of signs of deterioration of physical characteristics (e.g., polymer crazing (thin silver streaks appear), cracking, swelling, dissolving, softening, becoming brittle) or performance (e.g., power malfunction, icon illegible, display or number unclear), stop using the meter and contact Alliance International customer service. For technical assistance or questions about cleaning and disinfection including any possible deterioration in the meter appearance or performance, please call customer service for assistance. -32- Meter Specifications Model Name DS-W Assay Method Test Sample Electrochemical biosensor Capillary Whole Blood Alternative Site Testing Fresh blood from fingertip, palm, or forearm Sample Size 0.7µL Measuring Time Measuring Range Hematocrit Range 6 seconds count down 20 – 600 mg/dL 20~60% Operation Condition 57.2℉ - 104℉(14℃ - 40℃) <95% R.H. Storage/Transportation Condition 39.2℉ - 89.6℉ (4℃ - 32℃), <95% R.H. Battery Life 1000+ tests Memory Capacity 20 results Measurement Units mg/dL or mmol/L Power Supply CR2032 3V Lithium coin battery x 1 Sleep Mode Power consumption less than 3μA Auto turn-off 1 minute Temperature Warning Less than 57.2℉(14℃) or above104℉(40℃) Dimension 76 mm x 45 mm x 21.9mm Weight 46g -33- Message Description and Proceeding Solution All the messages will be displayed by symbols or images on the display. However, when the incorrect operation cause the incorrect test results, the glucose meter will not display any messages or symbols for the incorrectness. If you still have questions, please call customer service for assistance. Message Description Proceeding Solution Every time after starting your glucose meter, please make sure all the symbols show on the display briefly. Please compare it with Symbols Introduction of the LCD Screen. If there are any symbols that do not display properly, it could cause incorrect test result. Please contact your healthcare provider. The Test Result will be stored in the memory. After entering the Memory Mode, press Key to recall saved Blood Glucose Results with date and time. The memory can record the latest 20 Blood Glucose Results. -34- Message Description Proceeding Solution After drawing the blood sample into the test strip, the 6-second countdown shall start. After the countdown is finished, the rest result will display on the screen. NONE Your blood glucose may be extremely low. If it is lower than 20mg/dL. Ensure the test strip has drawn in sufficient blood sample to the blood application zone and test again with new strip. If it is still displaying the “LO” symbol, please consult with your healthcare provider. Your blood glucose may be extremely high. If it is higher than 600mg/dL. Make a new test with new test strip again. If it is still displaying the “HI” symbol, please consult with your healthcare provider. -35- Message Description Proceeding Solution The battery is out of power. Please change the battery to avoid incorrect test results or else the glucose meter cannot be operated. If the temperature is extremely high or low during the operation of the glucose meter Move to an area between 14℃ - 40℃ (57.2℉ - 104℉), wait for 5 minutes and do the test. The test strip is used or damaged. Please DO NOT reuse the test strip. Please use a new strip to test again. -36- Troubleshooting After inserting the Test Strip, if the Glucose Meter does not display any message or start the test, please check the following possible reasons and solutions. Reasons Solutions The battery is weak or no battery is Change to a new battery or install a installed. battery. The battery is installed in the wrong Ensure that the plus (+) sign of the direction. battery is facing upward. The test strip is inserted in wrong Ensure to insert the introduction zone direction or is not inserted completely. of the test strip firmly into the strip slot which is located on the top of the meter. Then insert the test strip to the end of strip slot. The glucose meter or the test strip is The battery is weak or no battery is not working. installed. After inserting the test strip and turning on the glucose meter, the glucose meter turns off automatically and the glucose meter does not operate for 1 minute. Remove the test strip and insert the strip in the strip slot again, wait until the blood application symbols are shown on the display, and draw in the blood sample for testing. -37- Limited Warranty Alliance International Co., Ltd. warrants to the original purchaser of the meter that your i-QARE DS-W Blood Glucose Meter will be free from defects in materials and workmanship for 5 years from the date of purchase. If the meter does not work properly because of the defect in material or workmanship during this 5-year period, Alliance International Co., Ltd. will repair it or replace it with a new DS-W Blood Glucose Meter. The warranty of the repaired or replacement meter will expire on the date of the original warranty expiration or 90 days after the shipment of a replacement meter, whichever period is longer. This warranty applies only to the original purchaser of the meter. This warranty does not apply to the performance of a Glucose Meter that has been damaged by accident or has been altered, misused, tampered with, or abused in any way. Alliance International Co., Ltd. will handle meters that show damage or abuse according to its Non-Warranty Service Policy, described below. In no event shall Alliance International Co., Ltd. be liable to the purchaser or any other person for any incidental, consequential, or punitive damages arising from or in any ways connect with the purchase, the operation of the glucose meter, or its parts. -38- Non-Warranty Service Policy The DS-W Blood Glucose Meter Non-Warranty Service Policy applies to meters where the above warranty has not become effective, has become inapplicable, or has expired. Alliance International Co., Ltd. will repair or replace at its option meters returned to it for a service charge. Replacement will be the same series or similar product. Replacement or repaired meter will be warranted for a period of 90 days from the shipment under a limited warranty providing for replacement of parts and labor at no charge. Warranty and Service Instructions All requests for return of the DS-W Blood Glucose Meter under the above Warranty or Non-Warranty Service Policy must be made to the Customer Service Center or your healthcare provider. Customer experiencing difficulties of operating meter should review troubleshooting or Error Message of this manual. Be sure to fill out your warranty form and return it with your DS-W Blood Glucose Meter. For more information or inquiries, please contact us or your healthcare provider. Customer Service Alliance International Co., Ltd. Customer Service: No. 54 Ying-Tao Rd., Yingge Dist., New Taipei City, 239, Taiwan Toll-Free Number: 1-866-400-3336 Mon. –Fri. 9:00am – 5:00pm, EST (At all other times, please contact your healthcare provider for assistance.) E-mail: [email protected] -39- -40-


