1
INSTALLATION INSTRUCTIONS
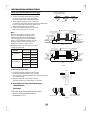
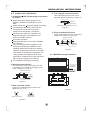
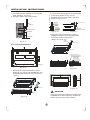
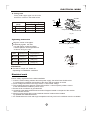
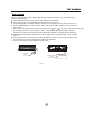
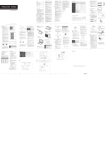
(2) Install the panel
a. Align the swing motor on the panel to the water
receiver of the body properly. (Refer to Fig.23)
b. Hang the four fixed rope of the main body to the
installation cover and the other three covers of
the swing motor: (Refer to Fig.23 )
Drain side
1
Steel rope
2
CAUTIONS:
3
Swing motor installation cover
The installation cover of the swing motor must sink
Cover
into the corresponding water receiver.
c. Install the panel on the main body with bolt (M5 16)
4
and washer. (Refer to Fig.23)
d. Adjust the four panel hook screws to keep the panel
horizontal, and screw them up to the ceiling evenly.
Body
e. Regulate the panel in the direction of the arrow in
Ceiling
Panel foam2
Fig.11 slightly to fit the panel's center to the center
of the ceiling's opening. Guarantee that hooks of
four corners are fixed well.
f. Keep fastening the screws under the panel hooks,
Panel foam
.
. until the thickness of the sponge between the body
Outlet air
and the panel's outlet has been reduced to about
4~6mm(1.578~2.36inch). The edge of the panel should contact with
the ceiling well. (Refer to Fig.24) Malfunction
described in Fig.25 can be caused by inappropriate
tightness the screw. If the gap between the panel
and ceiling still exists after fastening the screws, the
height of the indoor unit should be modified again.
You can modify the height of the indoor unit through
the openings on the panel's four corners, if the lift of
Ceiling Leakage
the indoor unit and the drainpipe is not influenced
(refer to Fig.26-right).
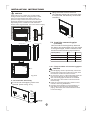
(3) Hang the air-in grid to the panel, then connect
the lead terminator of the swing motor and that
of the control box with corresponding terminators
on the body respectively.
(4) Relocate the air-in grid in the procedure of
reversed order, install the air-in grid.
Swing motor side
Bolt, washer
Fig.23
Inlet air
Air plate
Fig.24
Dew
Fig.25
Hexagon nut
Horizontal adjust ment
Ceiling
Fig.26
11
Panel sealing foam
Panel
Panel foam1