1
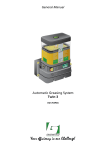
User Manual “Tool support for teaching classroom teacher” Author: Ismael PONCE GORDILLO License Creative Commons 4.0 BYSA Version: 0.5 February 2014 Table of Contents 1.User Manual......................................................................................................................................3 1.1.Introduction................................................................................................................................3 1.2.Installation.................................................................................................................................3 1.3.Entry...........................................................................................................................................3 1.4.Initial data..................................................................................................................................4 1.5.Application.................................................................................................................................7 1.5.1.Enrollment..........................................................................................................................7 1.5.1.1.Teachings....................................................................................................................7 1.5.1.2.Titles...........................................................................................................................7 1.5.1.3.Levels.........................................................................................................................7 1.5.1.4.Classes........................................................................................................................8 1.5.1.5.Students......................................................................................................................8 1.5.1.6.Import students...........................................................................................................8 1.5.1.7.Import subject.............................................................................................................8 1.5.1.8.Import non-school days..............................................................................................8 1.5.1.9.Import events..............................................................................................................8 1.5.1.10.Subjects....................................................................................................................9 1.5.1.11.Enrolled....................................................................................................................9 1.5.2.Maintenance.......................................................................................................................9 1.5.2.1.Assessable item types.................................................................................................9 1.5.2.2.Teachers....................................................................................................................10 1.5.2.3.No school days.........................................................................................................10 1.5.2.4.Partials......................................................................................................................10 1.5.2.5.Actions......................................................................................................................10 1.5.3.Schedule...........................................................................................................................11 1.5.4.Programming....................................................................................................................12 1.5.5.Assessable........................................................................................................................14 1.5.5.1.Assessments..............................................................................................................15 1.5.6.Events...............................................................................................................................16 1.5.7.Calendar...........................................................................................................................16 1.5.8.Class.................................................................................................................................17 1.6.Requirements...........................................................................................................................19 illustrations Illustration 1: Entry window first time.................................................................................................3 Illustration 2: Configuration Window to enter first time......................................................................4 Illustration 3: Entry window to the application....................................................................................4 Illustration 4: Tab "Enrollment"...........................................................................................................7 Illustration 5: Tab "Maintenance".........................................................................................................9 Illustration 6: Tab "Schedule".............................................................................................................11 Illustration 7: Tab "Programming".....................................................................................................12 Illustration 8: Tab "Assessable"..........................................................................................................14 Illustration 9: Tab "Events"................................................................................................................16 Illustration 10: Tab "Calendar"...........................................................................................................17 Illustration 11: Tab "Class".................................................................................................................18 1. User Manual 1.1.Introduction The application is a support tool for the classroom teacher. This application helps the teacher to: manage the marks of assessable item produced in the development of a class, manage events and manage the timing of the daily programming of classes. 1.2.Installation Installation does not require any special action, only that the application file is accessible by the operating system to run it. That is, that copied computer hard disk or a USB memory is connected to the computer, for example. 1.3.Entry Illustration 1: Entry window first time. When you run the application for the first time, this will requests us to be typed a password with which we will access the application from that time. This password is used to actually hide the information managed by the application using a cryptographic method. So that to access the application will use that password to the application tries to access the information. If left empty this key, the information will be not encrypted. It will be written on the database file as plain text (anyone who opens the file database see information directly). And no password is asked when the application is started. This is not recommended for normal use of the application. Then allow us to change the academic course setting. May indicate the starting month of the course, duration in months and starting year. Illustration 2: Configuration Window to enter first time. From this moment, which has already been created database containing the information of the application. To reenter the application only request us the password (if one was entered when you created the database). Illustration 3: Entry window to the application If we forgot the password will not be possible to recover it in any way, all you can do is delete all the files in the folder "PCuaderno_bbdd" (thereby lose all the information) and run the application to start over. We can make backup of information. These backup will also require the key that was used to create database. Because it is very advisable to store the password somewhere safe in case one day be forgotten. As it is also important to choose a secure password, this means that the longer and diverse characters and types of these have, the more secure it is. For example, a good length is 8 (to use uppercase and lowercase letters, numbers and punctuation marks). 1.4.Initial data Before starting to work with the application in the classroom, the user must always enter necessary information on what teaches (no need to enter a subject if he not teaches) as: ● Tutors of the classes to which the user teaches a subject. ● The teachings, titles, levels, classes (with their guardian spirit) and where the user teaches classes. ● Students in a class (with the possibility of importing a CSV text file) and enrollments in the different subjects of the level of its class.. ● The user professor schedule indicating the hours of instruction given in the various classes and subjects. ● Define each partial for different subjects taught. With the date of the first day and last day of the partial. ● Define the nonschool days (full, or only for a specific class. Eg holiday, excursion, not taught class for any other reason). ● Definition of the different types of item assessable (generic for all subjects or any subject specific in particular) that will be used during the course. ● Enter the programming for a subject (with the possibility to import a text file that contains one statement per line and start with a number of tabs characters equal to their level) and estimated timing for each class. Teachers required for the application are those who are tutors of the classes to which user taught a subject. The user can not be deleted just modify your data. Other teachers may be modified or deleted (if not tutor of any kind). The teachings are those in which the user teaches a subject. For example: Primary School, High School, Higher Level Training Course, etc. The titles are those which the user teaches a subject and belongs to teaching. For example: Graduated from Primary School, Senior Technical, etc. The levels will be those in which the user teaches a subject and belong to a particular title. For example, 1, 2, 3, etc. Although not taken into account at the time of naming, it should be clear that the level 1 of Primary School is different to level 1 from High School. The classes will be those in which the user teaches a subject and belong to a particular level. For example: A, B, C, etc. The subjects are those teached by the user and belong to a particular level. For example: Language, Spanish, etc.. Although not taken into account at the time of naming, it should be clear that the firstlevel language is a different subject of secondlevel language. Students (which can be entered individually or through a text file in CSV format) belong to a class and may or may not be enrolled in each of the subjects of the level to which your class. The user's schedule will be managed by each of the time units that form. These units time are defined by a time slot (eg 9:30 to 10:30), a subjectclass (eg 2nd A Language Primary School) and a day of the week (eg Monday). It is important that these units do not overlap time or crushed between them, so the application will allow you to change the time slot will, but if it detects that this change overlaps with another unit times the same day of the week, the time slot will turns red and will not store the change until the situation is corrected by changing the time slot again. The item assessable will be associated with a unit time start and end time unit. So if you delete a unit time will delete all assessable item starting or ending in that unit time and corresponding assessments. So it is more desirable move a unit times before deleting. The partials indicate the days will be considered in each of the partial evaluations carried out during the course. The partials will be associated with a specific subject (eg language and Spanish, they may have the same number and the same partial start and end dates but must be defined for each subject). There may be any number of partial but these can not overlap or tread days and the order is given by the dates of the days containing. To avoid overlapping the application only lets you choose between days after the end of the previous partial and before the start of posterior partial. The partial assigned to each itemassessable will contain the start and end date of each itemassessable. To avoid losing sight of any item assessable actually start date assessable Item must be between the start date of the partial and the start date of the next partial. The nonschool days can be for full days (not will teach any subject for any class that day, for example, holidays, etc.) Or to a particular class (not will teach any subject for a particular class, for example : 2nd A Primary School trip to science Park). These days will be taken by the application as well as nonschool and taken into account when proposing dates for an item evaluable timing when show time information programming, ... The different types of assessable item can be generic (used in all subjects) or specific only to a specific subject. An item is any item that can be evaluated by obtaining a rating and that rating affects the total score obtained by the student for a partial. For example: Exercise 1.3 on page 34 of the book of class, a group working on Internet, exam on topic 3, etc.. With assessable item types have the possibility to assign a weight to each type, so for example we can assign more weight to an exam than an exercise class. Assessable item will be assessed and ranked for all students (eg exam of Topic 2) and others not (eg exercise 5 of topic 3). Thus the not qualified assessable item for a student not affect your overall grade and if are qualified to affect to weight ratio of that item assessable and assessable item type. So each item will weigh in relation to others such assessable item and each type of assessable item will weigh in relative to other types of assessable item. Thus for example there may be a very complex exercise class, which could have a greater weight than other exercise class that is very simple. And class exercises could have a weight up exams. The program consists of a tree of statements which has an order (as representation from top to bottom through the sublevels) and a summary field for each statement where you can enter information about the statement. This programming will be defined for a subject. On the other hand, we have the temporal distribution of such programming of subject matter for a particular class. In this temporal distribution we define the duration of each statement that has no sublevels (the length of the statements with sublevels will be automatically calculated from the length of its sublevels). The duration is the time that the teacher / a user / a estimated it will take to provide the statement for which we are defining the duration. This duration may be modified with the actual duration, as it develops during the course of programming, if it does not match. Thus during the development of programming may be adjusted duration estimates of remaining to teach statements to fit the time that you have until the end of the course. For this the application has two accounts, first available time calculated from schedule, the partial and nonschool days, and Moreover the time required calculated from the duration of the programming statements. After defining these initial data, and we can start using the application in the classroom 1.5.Application 1.5.1. Enrollment This tab manages concerning the student enrollment. 1.5.1.1. Teachings Illustration 4: Tab "Enrollment" This section lists the defined teachings and the ability to create a new or delete an existing one. Each teaching will have a short description that identifies or reference (eg PS, HS ...) and a long description that describes (eg Primary School, Secundary School, ...). If we want to delete an teaching, it must not contain titles, so it must be deleted before the titles if any. 1.5.1.2. Titles This section shows the titles that make up the selected teaching and the ability to create a new or delete an existing one. Each title has a short description or reference that identifies you (for example: ANCS, ...) and a long description that describes (eg Administration Networked Computer Systems). If you want to delete a title, it should not contain levels, so you have to delete before levels if any. 1.5.1.3. Levels This section shows the levels defined for the selected title and the opportunity to create a new or delete an existing one. Each level will have only a short description or reference that identifies you (for example, 1, 2, etc.). If you want to delete a level, it should not contain classes or subjects, so you have to delete before classes and subjects if any. 1.5.1.4. Classes This section shows the classes defined for the selected level and the possibility to create a new or delete an existing one. Each class will have a short description or reference that identifies it (for example: A, B, C, etc.) and a tutor (this should be introduced earlier, or choose one of the teacher's or introduce new and then change the tutor of the new class). If we delete a class, it must not contain students and not be used in the schedule, so you have to delete before students and schedule time units if any. 1.5.1.5. Students In this section shows the students defined for the selected class and the possibility of creating a new one, delete multiple (to select several press down the "Control" key while selecting) existing or to enroll several the selected subject. Each student will have the full name and a field for information about the student. If you delete a student will be deleted all their assessments and appointment of tutor if any. 1.5.1.6. Import students With this button you have the option to import students from a text file in CSV format. This file will have the following fields: surname and first name. May contain quotes to delimit each field or to delimit each line, the file may contain header or not, but the fields must be separated by a comma. 1.5.1.7. Import subject With this button you can import the previous course work. To do this we must specify a backup for which we want to import a subject. Then select a subject. And the application will import everything about this subject we can be useful for the new course. As such subject, subject's partial (estimating your dates for the new course), programming of subject, the duration of the statements in this for the different classes, peer classes that subject, types of assessable, the assessable (with relation to programming statements) for each subjectclass and a unittime to associate these evaluable. The evaluable have a date at the end of the each partial to which they belong, so when they are performing then are assigned the date of completion. You would be no to erase unittime which It have associated all assessable imported, better, move it to the correct position within the new schedule. If you delete unittime then will erase all assessable associated with it. 1.5.1.8. Import nonschool days Use this button to import the nonschool days from a backup (estimating your dates for the new course).In the case of nonschool days specific for a class will seek a teaching title, level and class with the same references as the database from which it is imported. And if found will add the non school day, otherwise it will not be added. 1.5.1.9. Import events Use this button to import the events (all but the meeting with tutors) from a backup (estimating your dates for the new course). In the case of evaluations will seek a teaching title, level and class with the same references as the database from which it is imported. And if found will add the event, otherwise the event will not be added. 1.5.1.10. Subjects This section lists the subjects defined for the selected level and the possibility to create a new or delete an existing one. Each subject will have a short description or reference that identifies it (for example: Lan, Spa, ...) and a long description that describes (eg Language, Spanish, ...). If we delete a subject it should not have students enrolled and not be used in the schedule, so it must be removed before the enrollment of students and time units if any. 1.5.1.11. Enrolled In this section shows the students enrolled for the selected subject and the ability to delete the enrollment of some (to select several press down the "Control" key while selecting). If we delete the enrollment for a student will be deleted all their assessments for that subject. 1.5.2.Maintenance This tab perform maintenance tasks. 1.5.2.1. Assessable item types Illustration 5: Tab "Maintenance" This section is managed assessable item types. The first is to select if the types on which we will work are generic (may be used in all subjects) by selecting "All" or if instead be specific to a specific subject (can only be used in that subject ) selecting to the specific subject. Once selected, this will see the item you are defined and the possibility to create a new or delete an existing type. Each type will have a short description or reference that identifies you (eg Act, Wrk, Exa, ...), a long description that describes (eg Activity, Work group, Exam ...), weight (which is an integer number, for example : 1, 3, 10, etc) for that type of item over other types and a minimum they must take the items of this type to be able to calculate the subtotal of the type (for example, if you define a minimum value of 4, the subtotal will be calculated if all items assessable are qualified for a particular student, with values equal to or greater than 4, if there is any value less not calculated the subtotal for that student and will be represented with a dash character). If you delete a type will delete all items of that type, all evaluations of items of that type if any. 1.5.2.2. Teachers This section to manage the teachers which application will work, ie the user professor (which can not be deleted) and the other teachers who are tutors of some class to the user teaches a subject. Showing defined teachers and giving the possibility of creating a new teacher or delete an existing one. For each teacher will have a the full name and a field with some information on the teacher. To delete a teacher (not the user), this can not be tutor. So we will change the tutor by another teacher before deleting. 1.5.2.3. No school days In this section are managed nonschool days, these days not appear possible dates for items assessable, nor will they be taken into account when calculating the time available for programming, etc.. These days can be "Full Day" so that there will be no teaching hour throughout the day, or for a particular class so that there will be no teaching hours for that class but there may be for the other classes. Each nonschool days contain: if full day or for a specific class, the date and a brief description. 1.5.2.4. Partials This section manage partial of the subjects taught. To work with the partial first thing is to select the subject with which we work. Each subject can be assigned a different number of partial, these may be defined in the dates between the start and the end of course, but can not overlap or tread between them. The order of the same will be given by the chronological order of their dates. To define a partialjust click on "New" and choose your start and end dates between which the application lets us select, these will be chosen within the academic course and behind the last partial defined if any. Having the ability to modify the start and end dates of the defined partial or directly delete the part. 1.5.2.5. Actions In this section you can perform maintenance operations such as: ● "Copy": to make a backup. It will make a copy of the database application with all information in an archive. The database copy is stored with the same key that the application was in the time of backup. The file name of the backup will consist of the application name, the string "bbdd" and the date (one day without time), which is why if you make multiple backups on the same day the last overwrite the previous day. ● "Restore" to restore a backup. Current information is erased by writing the information to restore backup. As mentioned backups are saved with the password that was defined in the time of backup. Thus the password to enter the application, to restore a backup, will be the password that had at the time was that backup to restore. ● "Clean" to delete specific data strictly in an academic year, as students and their assessments of assessable item. Since other data such as the subject, classes, levels, degrees, teaching, programming materials, item evaluable, etc.. It is easy to be repeated course after course modifying some small aspect. If for some reason you need to clean all data files should be deleted from the database directly (they are in a folder called "<nombreDeAplicación> _bbdd"). Is strongly recommended that before performing any of these actions will make a backup. ● "Password" to change the password to the application, remember that if you did a backup before changing the key, so that backup the password will remain the key that was defined at the time of create the backup. 1.5.3.Schedule On this tab are will perform tasks on user's schedule teacher. Illustration 6: Tab "Schedule" This tab contains a graphical representation of the time through a table that displays a column with time units (start and end) and other columns for the days of the week. Thus for each day and time unit in which user professor teaches a subject, will appear subject, class, level, title and teaching. Below the table we have a section where we will have the chance to see all the time units in which the user teaches a subject. Being able to add a new or delete an existing one. For each time unit we can define the subjectclass, day of week and time of start and end. When to change the start time and end the application checks that are valid, ie, the start time is earlier than the end time and does not overlap with another unit or tread times already defined for that day . If the unit is invalid times, characters will glow red and that change will not be stored. This change will continue without be stored until modified again and the new start and end are valid. The itemassessable lead associated with a times unit defined beginning and other the end, so that if you delete a unit time is also deleted the items assessable that have that times unit as start or end, and all assessments for those students assessable item. 1.5.4.Programming This tab will perform tasks on time lines of the subjects taught by the teacher user. Illustration 7: Tab "Programming" This tab contains the programmings, ie the sequencing of statements organized by levels of the subjects taught. And the timing of such programmings, ie duration assigned to each of the statements, for a given class. Each statement may contain a summary or information concerning the development of that statement. The unit of time is the minute. The first thing to do is select the subject on which we will work. Once selected, show the statements that make up the program in that subject. These statements can be managed with the buttons are on the right: ● "Create Son" as the name to create a new statement in a sublevel selected title. If there was no node then creates a statement. ● "Create Brother" that creates a statement at the same level as the selected following this. ● "Delete" will delete the selected statement and all the statements that were in it. ● "Forward" that advance a position selected the statement, ie exchanged with the statement just prior to the same level as the selected statement. ● "Up": that will level up the selected node, if the statement is the last selected level, at upload will be behind the top level statement, but stay ahead. ● "Down": that lower level, the selected node, if the selected statement is the first in its level, lower the first within the following statement sublevel, if not lower the last, in the above statement sublevel. ● "Delay" will delay the statement selected position, ie exchanged with the statement just after the same level as the selected statement. ● "Import" will import statements and sublevels of statements from a file in text format. This file will contain one statement per line and each line should begin with a number of tabs (tab characters and no spaces) for the level to be specified in the statement that same line after the tabs. For the main level the number of tabs is zero. If you want to change the statement selected, pressing the "F2" can edit the text of the selected statement. At the bottom flange of the summary is displayed, or information concerning the statement which can also be modified. Besides programming, in this tab you can manage the timing of such programming for a specific class. For this, the first thing is to select the class, in the central part of the tab. In this way we will display information about the times available and required, and the length will be relative to the selected class. Depending on this information units of time for the class schedule, the partials of the subject and nonschool days (complete and specific to the selected class). These time values are expressed in minutes. As mentioned in this section, the application reports on two aspects that allow us to adjust what we still have to teach programming to the time available. First, we report the time available from today until the last school day of the course and the total available time from the first to the last day of the current school year. On the other hand, from the time already spent or has already happened. calculated by that statement at that time we teach and inform us of the time required by the statements that remain to teach, and all the time in total required for all statements for that class. In a way that when the required total is less than the total available, the data of the minutes required are shown in yellow. When the total required is equal to the total available, the data will show the minutes required green. And when the required total is greater than the total available, the data of the minutes required are displayed in red. For this it is necessary to define the duration of each statement for each class entering in principle an estimate by selecting the specific statement allows us to edit the duration of that statement and inform us of the time when the statement is completed. You can only edit the length of a sentence if it has no sublevels, because if you have sublevels is understood that its duration will depend on the statements of these sublevels and can not be edited. Can introduce an estimate on how long each statement, and as it develops the course, gradually introduce the actual values of the duration of each statement. This will tell us if we are late or advanced at all times in relation to the estimated timing and help us readjust if mismatch. In addition we will have a button "Now" will allow us to adjust the length of the node that currently this teaching, so that it ends just when the shutter button is pressed. And a button "Readjust" allows us to adjust the duration of the statements from the selected to the last, so that the total required is equal to the total available. Such adjustment shall be distributing what remains available until before the selected statement, between the statement there from the selected to the last, taking into account the duration that they already had and distributing proportionally to that length. It will also show the assessable in that class, which have been associated with the selected statement. If an evaluable was associated with a statement which contains statements within assessable also show that for these statements. Each time you select this tab or subject changed, it will automatically select the statement that should be developed at the time. 1.5.5.Assessable This tab tasks performed on the evaluable item. Itemevaluable is, every aspect of the student capable of being qualified and relevant to the evaluation. Illustration 8: Tab "Assessable" The first thing you have to do is select the group or the subjectclass. Then select the partial that want to work on. Then it will be shown all assessable item for that subject, and this partial class. In fact, viewing all itemassessable, defined between the start date of the current partial, and the start date of the next partial. The application lets you move a item to another partial, add a new item, delete or edit. It also allows us to define an assessable element as remedial of other assessable element already defined. Remedial item no may be nested, that is, does not allow that an element which is remedial to another, is itself retaken by another. So if an item is retaken, the option to choose an item to be retaken is disabled. What it allows is that an element is retaken by several elements. If an assessable item is remedial another, have the same type and weight of the item retaken, and the application will allow not change. Furthermore the element which is remedial to another have an date equal or superior to retaken item and the date may be outside of partial of element which is retaken. Taking as limit to the academic course. But always be shown in the same partial of the retaken item although this is out of date or even in another partial. Each itemevaluable shall consist of the following elements: ● "Content": • "Type" is the type of item evaluable, it must be defined previously in the "Maintenance". For example: Exe, Wrk, Exa, etc. • "Ref" is the short reference that identifies the item evaluable. For example, T1.2, 9.4, ... • "Weight" is the weight with which will influence the rating obtained in this item evaluable with regard to other assessable item of the same type. • "Statement": allow to introduce the statement or any assessable item information. ● "When": • A date that ends the itemassessable development. And it should be a date where, is taught the selected class subjects. • "Time" completion: is the unit time at which the item ends assessable development. And it should be a time unit, where taught the selected class subjects. ● "Statements associated": are statements, from programming of selected subject with which it is related, this item assessable. May be more than one. And if it relates to a statement that contains other statements, will be associated with all of them. Just be shown programming statements than by date, will be taught during the part on which you are working. The text "associated Statements" will be black if the assessable element is already associated with some programming statement. This will be dark yellow if the statement is not associated with any statement of programming. And red, if the statement that this associate is outside the current partial. ● "Assessments": which manages information on the assessment of item for students or groups of students. When you create a new item assessable are assigned default values, the weight and the start and end date (this will be the current working date). Positioning the cursor in the field "Ref" for that this information is entered first, then you can change the type and other fields if necessary. When you delete an item assessable, is also deleted the assessments have been made of it. 1.5.5.1. Assessments This section shall be administered assessments of assessable item selected. Evaluations can be individual (only for a particular student) or group (for a group of students, who get all the same rating). In addition to the qualification (numerical value from 0 to 10, with 1 decimal) for each individual or group assessment may have a small observation or information relating to the assessment. To create a group, select a student who will be in that group and click the "New" button in the section "Groups". This will create a new group that will give you a short reference default and introduce the student selected. The application will allow us to create multiple groups, provided we have a student in the group. If you delete a group, you lose the information on the assessment of the group and all students who formed the group back to the group "No Group" without assessment for that item. 1.5.6.Events This tab manages information about events. Illustration 9: Tab "Events" You can add a new event or delete an existing event. Each event will contain information about the type, date, time, preparation, summary and conclusion. Depending on the type, may also contain some other information. The events may be six types: ● "Appointment with tutors": This event defines an appointment with tutors some students (to select multiple press down the "Control" key while selecting) the class from which the user is tutor. This type of event will also contain information about students whose tutor come to the event and information on the relationship of the person who comes as a tutor with students. ● "Assessments": define an assessment of any class that teaches the user. This type of event will also contain information about the class to assess and a description of the assessment (eg Initial, First partial, ...) ● "Cloisters": for cloisters also contain information on whether it is ordinary or extraordinary. ● "ETCP": for technical team meetings pedagogical coordination. ● "School Council" for school boards will also contain information on whether it is ordinary or extraordinary. ● "Other": for any other event for which also have a description of the event. 1.5.7. Calendar This tab provides a calendar view of the academic course, with events, defined by the user. Illustration 10: Tab "Calendar" In this view the calendar appear represented the school months of the course. School days will have black or white background while the nonschool days will have gray background. If no partial defined every school day will have a black background. If partial defined for the working subject (the last used), will have a white background, school days of the working partial (which contains the date the work). School days that do not belong to partial work will have a black background. The current day will have the green background and the day of the work date (last date used) will have a red background. Every day you have defined an event is represented by a color depending on the type of event which contains that day (if you have more than one event, color is the type of the first event of the day). If the day has any event, the information regarding the events of that day will be displayed by positioning the mouse over the day and wait to pops the pop. Keep in mind that nonschool days only for a specific class, representing only if we've been working on that class in the previous tabs from which we come before you select the calendar tab. That is, if we have selected the class in a tab before selecting the calendar tab. If we click on one day event will select the tab "Events" and the first event of the day on which we clicked on the "Calendar". 1.5.8.Class This tab will managed information on the qualifications of the students in a class for a subject in a partial. Illustration 11: Tab "Class" As just mentioned on this tab will work with the marks obtained by students in a class and enrolled in a subject during an partial. Then the subjectclass and partial on which he will work, should be selected. Then it shows a table with students in the first column and subsequent columns marks obtained by each student (one per row) on each of the items assessable, defined in the selected partial. Within these columns about the qualifications, first, the columns appear assessable item (one column per item assessable) sorted by start date, then the subtotals for each item type assessable (one type per column, only the types, of which there is assessable item defined for that partial) and finally a total column subtotals of all types. This last column will be the mark to the partial and will be calculated automatically whenever a grade is changed. If an element has one or more remedial assessable item. Only be used for the calculation of the subtotal for that type of assessable item, the highest mark from the assessable item and all remedial assessable item. The remedial assessable items are shown in the partial where defined the assessable item retaken. The ratings will represent with a decimal and the characters are green for ratings with a value equal to or greater than 5 or red to qualifications with a value less than 5. If some type of assessable item evaluated, has defined a minimum (the student must obtain a minimum value in the qualification to continue calculating the total). Totals for assessable item types, partial and global will be shown, if the scores are all higher than the minimum set for type of assessable item, of assessable items which they depend. It is also possible to choose the view or way of presenting the data. There are three views: • "Normal": the head of each assessable element will be your reference and represents the qualification with decimals. If we click on any qualification of any item assessable (totals are calculated automatically and can not be edited) can edit the value of that qualification. Keep in mind that if you enter an incorrect value or press the escape key, it will not store. And if we are editing the value of a grade of a student who belongs to a group (collectively defined assessment on the "Assessment", this fact is shown in gray characters putting all ratings of students belonging to the group) the entered value will affect the entire student group assessable for that item. • "Reduced": the head of each assessable element will be the first character in the element type reference and the mark assessable only shows the integer without decimals (not rounded). This view is very useful if you want to see lots of assessable item. • "Summary": in this view are hidden assessable elements and qualifications of these, only shown the subtotals for each type of item assessable and the total. This view is useful to calculate the final course qualifications. • "Global": general view of the course. Where shows all the partial, types of assessable for each partial and a subtotal of each partial. And finally an overall mark of ratings that have until this moment. If you want more information about a student, assessable element, qualification, or assessable element type. Without leaving this tab, you can position the mouse over the item you want more information and wait for the popup appears, where we see a more extensive information on which elements are positioned. 1.6.Requirements The requirements order to use this application are: ● This application needs to be executed has been previously installed the runtime environment for Java in the operating system. And the extension "jar" or the file type "jar" is associated with the virtual machine. The latter usually happens automatically when you install the JRE or JDK. ● The operative system can be GNU/LinuxGTK or Windows. ● A free memory for storing at least 50MB. It is recommended for acceptable performance: ● CPU at least 1,4Ghz ● 100MB of RAM free.